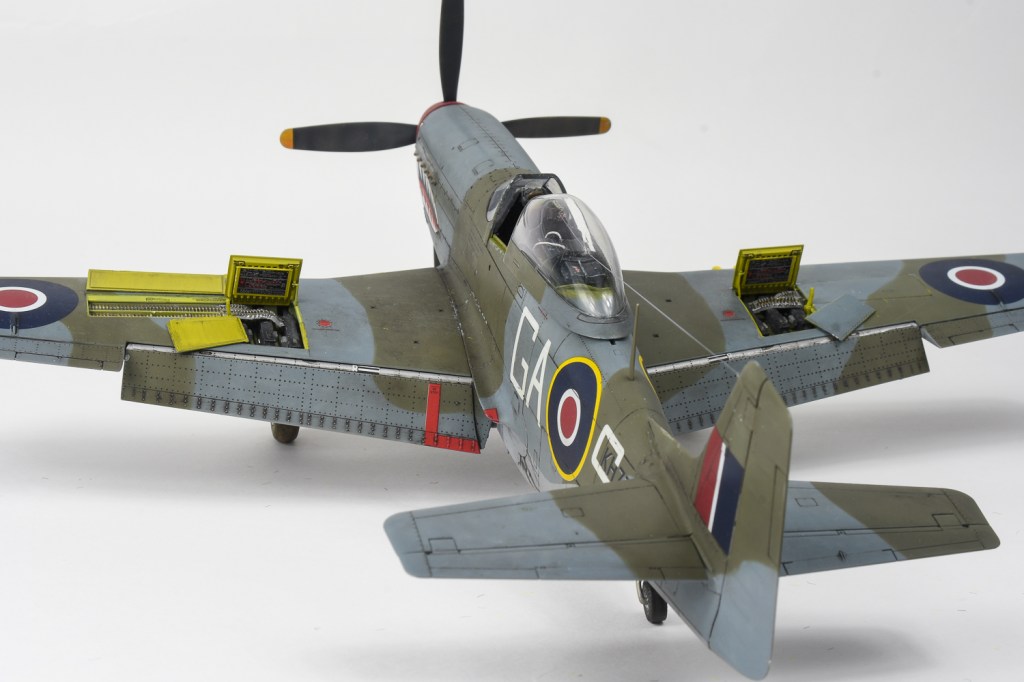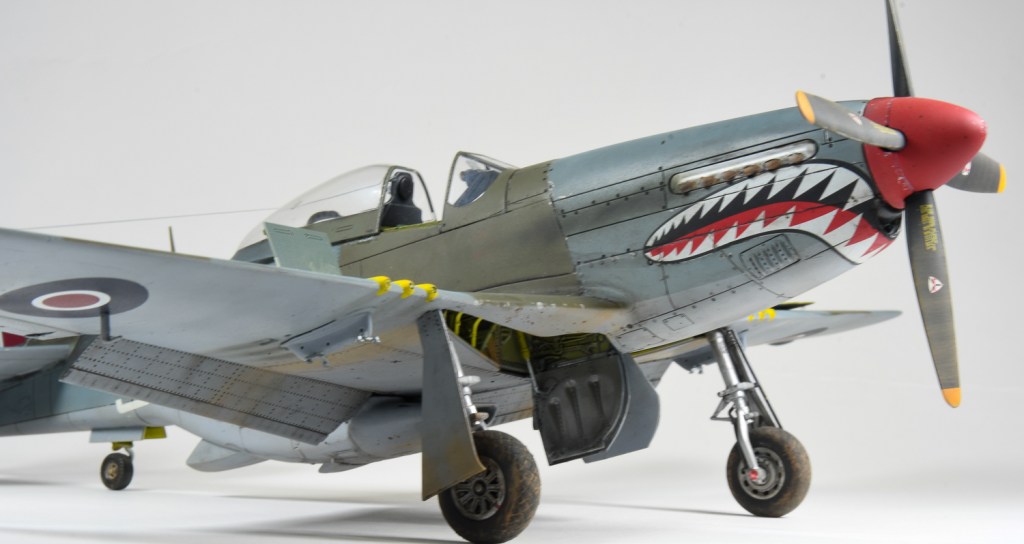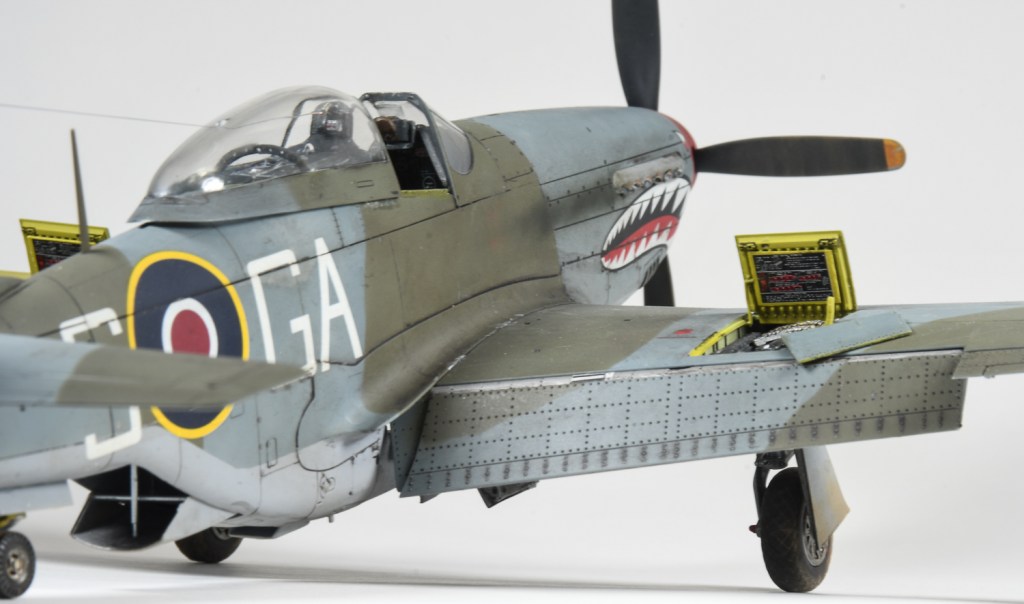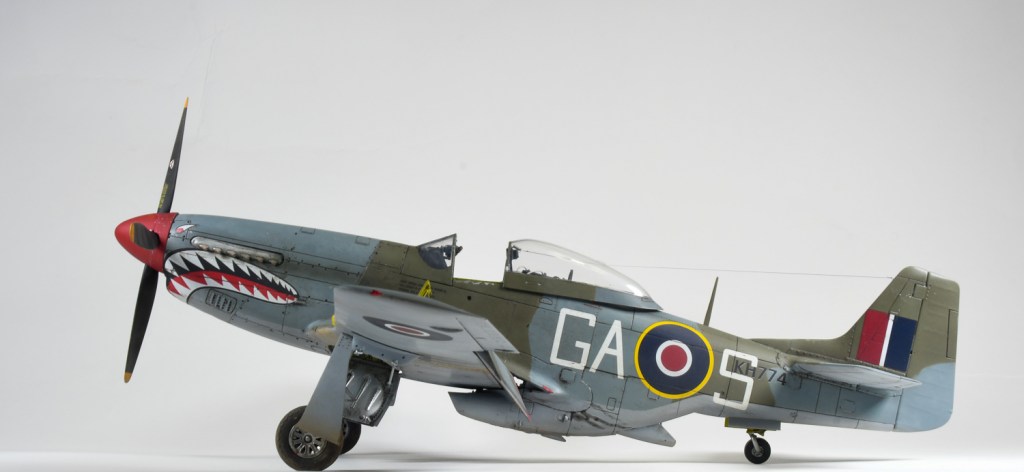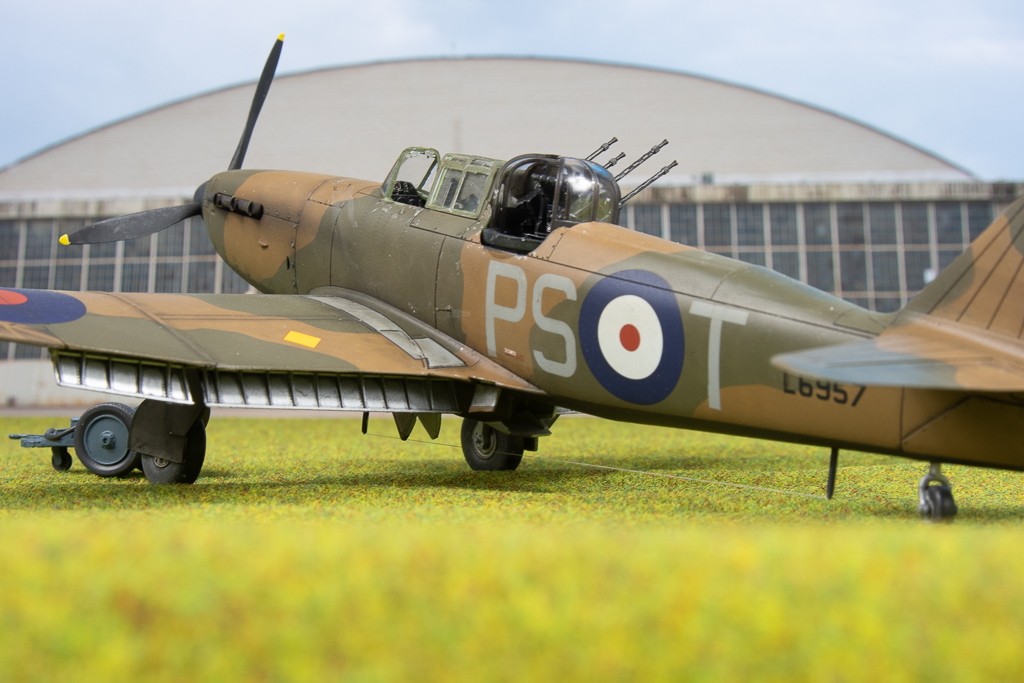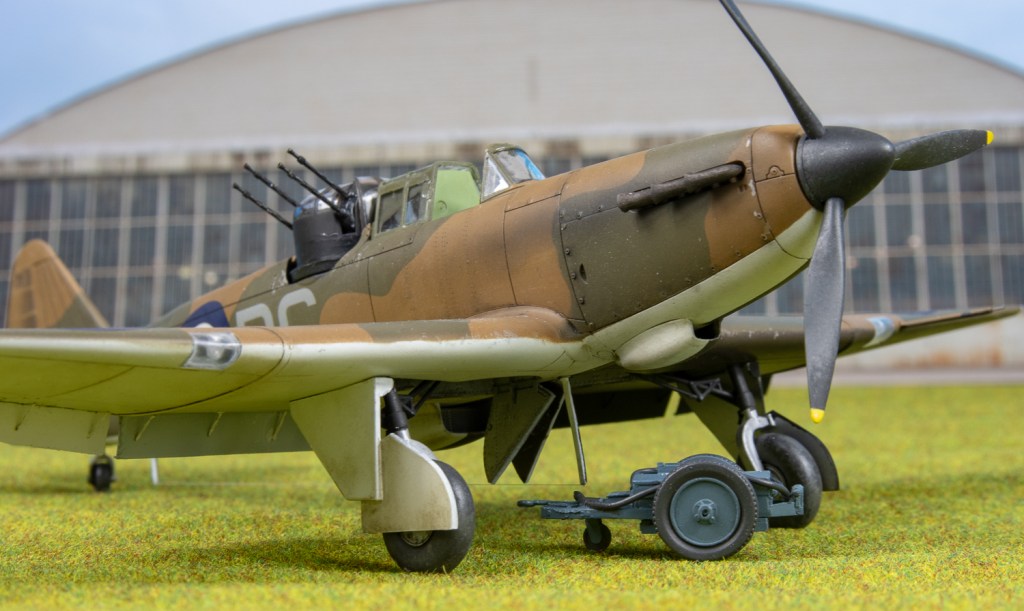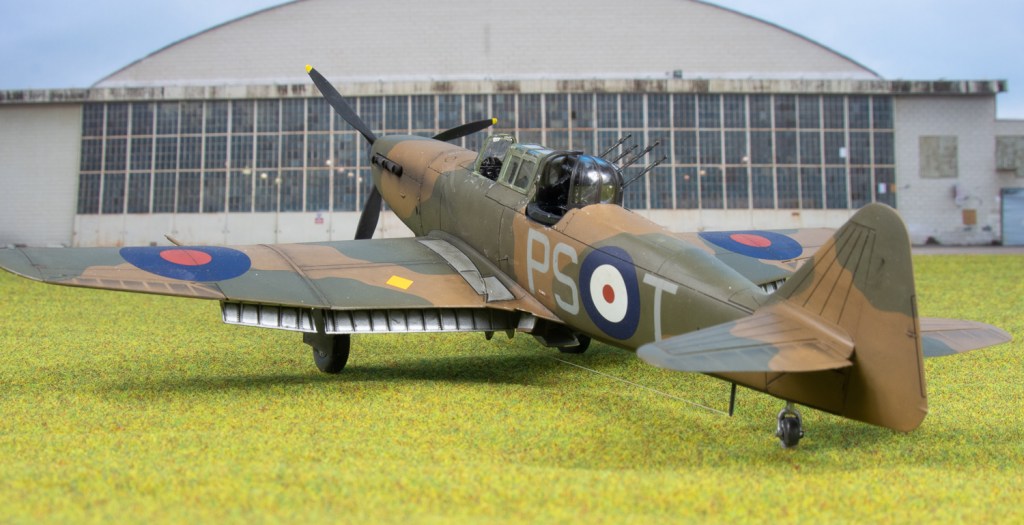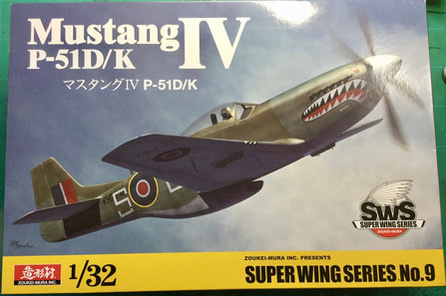
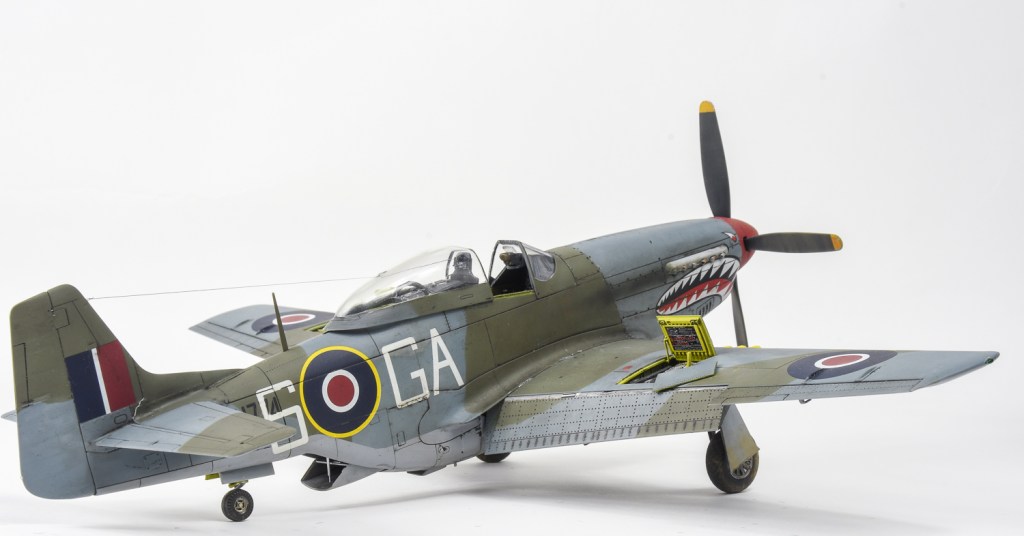
Zukei-Mura 1/32 N.A.A P-51K Mustang IV

  • Purchased   2019
  •      Built             2019
  •  Enhancements:  Seatbelts:  HGW 
  •         Paint   MR Paint
  •         Decals   Kit scheme
Build Notes:
The inspiration for this model came from seeing a 48 scale kit completed in these markings on the Britmodeller.com forum. Instantly, I wanted to build it, however, in 32 scale, rather than 48 scale, as I feel these single engine fighters have more presence in this scale.

I knew Zoukei Mura had produced a boxing of their Mustang in these markings, so the kit was duly purchased, and promptly started, as BM were running a “shark mouth” theme Group build. Talk about the planets aligning
​We all start our impulse purchases right after buying them, Right!  Actually this would be one of the very few kits I have started straight after buying it, strangely all the previous one have been Airfix kits being the Walrus and Defiant
​ The build log can be viewed here although I did not finish the kit by the deadline.


​This was my first ZM kit, and I have to say, I thoroughly enjoyed it.  They do not build up like your usual kit.  The design philosophy being the makers want you to build the model similar to how the real aircraft was assembled.  A very Japanese thing.
Many people dont seem to like the complexity of these kits, but like the trumpeter kits, a lot of the innards that will never be seen can be left out helping speed and uncomplicate the build.  Despite the complex breakdown of the kit, it went together remarkably well, most joins falling on panel lines and  being engineered to look like panel lines.  Interestingly the new Eduard Mustang looks like it may have borrowed some of its breakdown from this ZM kit, the wheelwell for one being engineered the same.

I puttied the wings, a task made easier by ZM only having the panel lines present, saving you having to fill hundreds of rivets like you would have if using  the tamiya kit
Assembly proceeded quickly as I had made the decision to have the cowlings closed in order to show off the shark mouth.  Therefore I only assembled the bare bones of the engine, really just the block in actual fact.
the only fit problems encountered were  a bit of a step on one side between the cowling and the fuselage and a gap around the carburettor scoop.  Im guessing this was down to me.  You really do need to ensure all parts are aligned, otherwise it will have a knock on effect, and I think this is where my step on the cowling crept in.  On my next one (Yes, I intend to make another) I think I would save glueing the rear fuselage bulkhead until I added the empennage to further aid correct alignment
Aside from this, I managed to forget to add the landing light.  Never think you can build one of these kits without always consulting the instruction sheet at each stage.  Speaking of the instructions, I reckon they rival Wingnut Wings sheets for clarity and well thought out construction steps and build tips.

My only disappointment with the kit was, the flaps.  Like a lot of other mustang kit, the  flaps had the scalloped cutout to enable them to fit flush against the wing when added in the up position.  Given the attention to detail ZM have shown in other areas of the kit, I thought they could have given you alternative flaps for the down position like tamiya did with their kit.  Did I say only disappointment?  Irritatingly, some of the decal designs had a registration problem, the sharkmouth, serials and walkway red  L stripe all having a thin white drop shadow.  I painted this out with a thin black sharpie on the mouth, but decided to live with the serials on one side after a bit of a failed attempt at correcting the other side.  Subject to say, I can’t see the R.A.F calling me anytime soon for a job painting serial numbers on their aircraft!  The provided wheels are not weighted, and come in halves necessitating the tread to be reinstalled after eradicating the seam.  ZM do offer AM wheels, as do barracuda.  ZM also offer quite a few figures and photo etch sets to complement the model, so their website is worth looking at.  I will be purchasing their PE gun bay set so as to build the gun bay covers with the locking handles extended.  I did purchase some 500lb bombs, so may well arm her up in future as well

Z.M call out U.S colours for the camouflage, which many RAF mustangs were indeed painted in during manufacture, however, this particular machine was painted at an RAF Maintenance Unit.  I surmised that they would have painted her in RAF colours rather than US colours, so went for the standard RAF day fighter colours instead.  If you look at the build log, you can see in one of the posts a very helpful modeller posts the service history of this machine which shows it came from the factory in NMF and was camouflaged in Italy
​I went for a lightly weathered model, adding some light exhaust staining, oil leaks and grubbiness from foot traffic on the wings using oil paint.  Vallejo silver was used for the chipping with mud splatters underneath from pigments.  Testors Dullcote was used to finish off before the aerial line was added with EZ line.  Talk about a frustrating hour trying to thread it through the canopy.  It doesn’t bode well for that WNW Felixstowe in the stash patiently waiting its turn to be built.
​Im happy with my ZM mustang. I have another in the stash to build, on which I will use all the parts, and I also have a tamiya mustang to build.  It will be interesting to compare the two.

North American Mustang IVA  KH774  112 SQN Royal Air Force. Italy. 1945
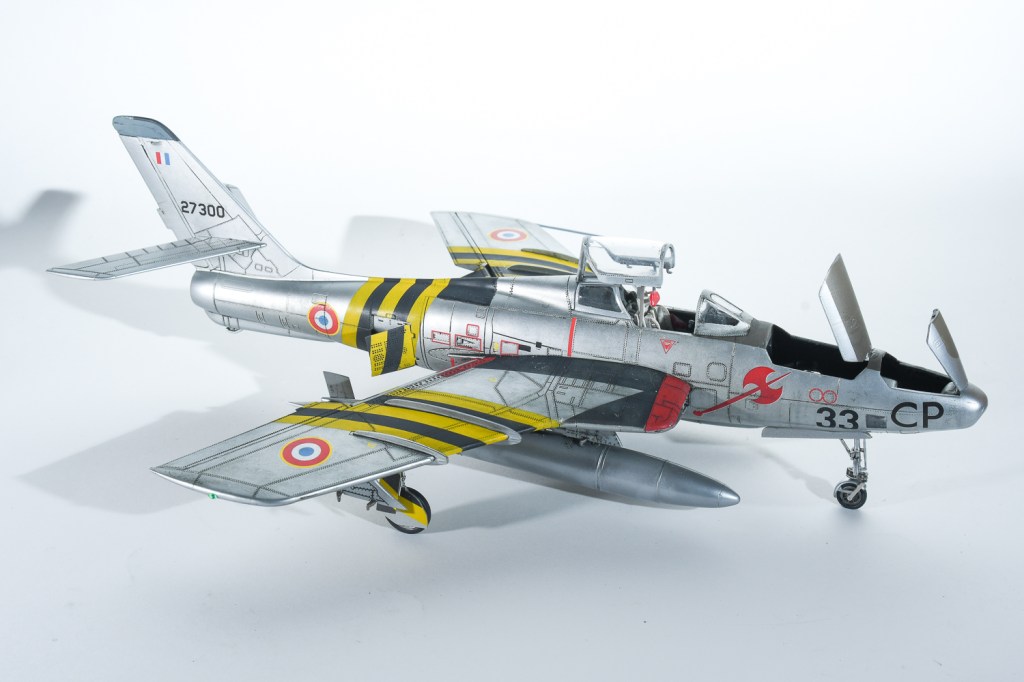
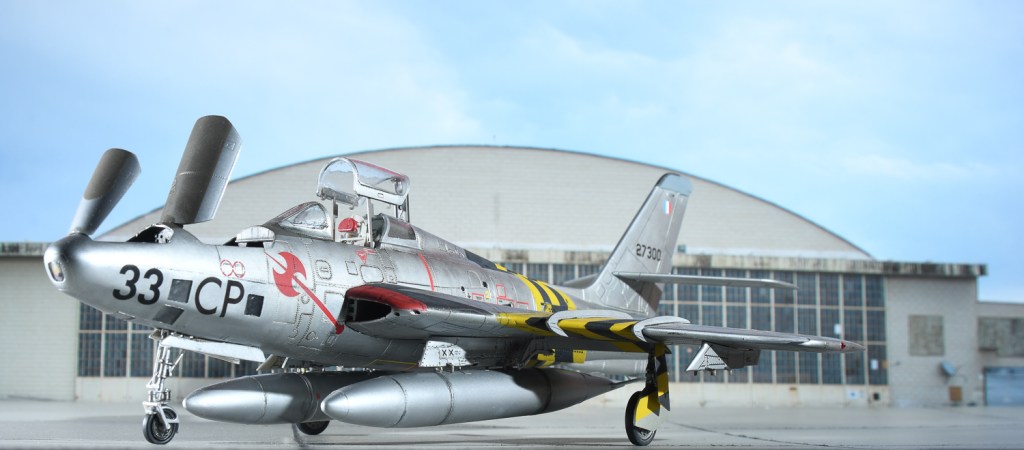
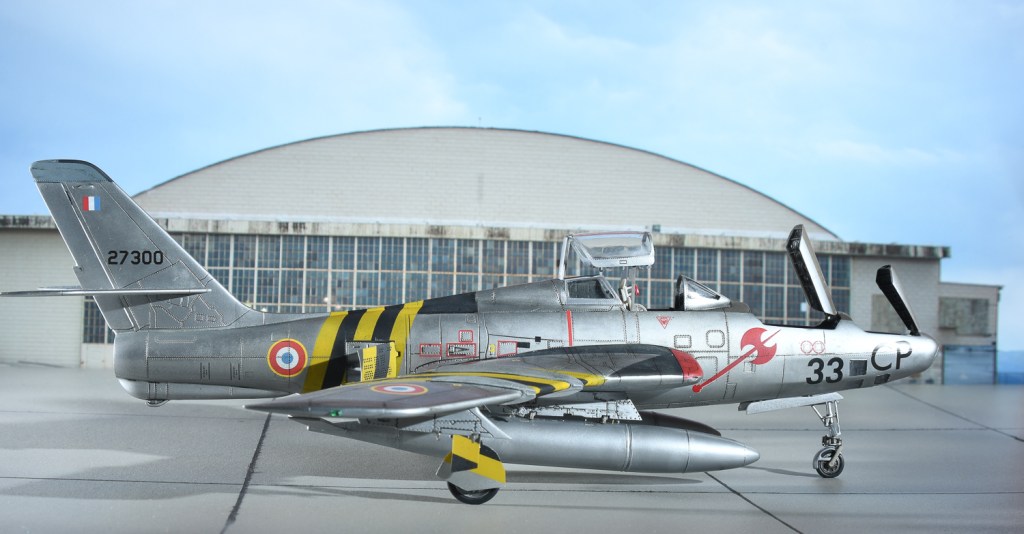
TanModels 1/48 RF-84 Thunderflash

  • Completed:        May 2019
  • Enhancements: Seatbelts ExtraTech
  • Wheelwells, CMK
  • Camera access Doors- CMK
  • Control Surfaces CMK 

After the Trumpeter Thunderbolt, I was looking for something of a quicker build, so when my random stash pick system yielded the tanmodels Thundeflash, I was initially happy as I had been thinking about building this for a while. That initial enthusiasm quickly dissipated during the early stages of construction. Ejector pins marred the interior surfaces, the plastic parts had a pebbly texture that would require lots of polishing if I wanted to do a NMF and the surface detail almost disappeared on the underside of one fuselage half, meaning a rescribe would be in order. Coupled with this, assembling the brackets that hold the cameras proved fiddly with small in scale parts that had minimal glueing area. It fell apart on me a couple of times.  It would have gone back in the box if it were not for the reason I am trying to reduce the number of half built models on my stalled list, not add to them!  So construction carried on. The cockpit reminds me of the old monogram kits with nice relief on the side consoles that responded very well to dry brushing, same with the instrument panel. The seat had some generic US Seat belts added, painted, and was seat aside after a wash of Mig Products Dark Wash.

The kit has the option to cut out the camera access doors, and seeing as TanModels had gone to the trouble of including all the cameras, I thought I should show them off. The doors are demarcated by cut lines on the inside surfaces.  These lines are a little wide, so care is needed in cutting them out.  I used repeated scalpel passes, until they came away.  Separate doors are in the kit, but I decided to use nicer detailed ones from CMK that show the insulation on their interior surfaces. The cameras, save the nose one were left out until final assembly. Suddenly I was up to closing the fuselage halves! They fit together without problem I’m pleased to say, and a scribing tool and riveting tool was used to reinstate and deepen the underside surface detail using dymo tape as a guide. This actually went a lot better than I thought, given rescribing isn’t one of my better skills.  It wasn’t until this stage that I actually started enjoying the build! Dry fits had shown a very nice tight fit of the wing assemblies that slide into recessed areas on the fuselage without any need for filler, however with the intakes added, the fit was nowhere near as nice. I ended up dissembling the wing intake trunking and splitter plates (thanks Tamiya Super Thin Glue) and reassembled the splitter plates and trunking to the wings one piece at a time, constantly checking the fit of the wings to the fuselage.  This worked and led to the initial nice tight fit that the first dry fits had shown. I have no idea what the problem was, but can only guess the splitter plates when added to the assembled fuselage trunking caused the interference. It has to be said the internal trunking does not really fit together seamlessly. Ensure when done, that you sand the openings flush so that there are no steps that will cause the splitter plates to sit proud. Prior to gluing the wing halves together the CMK wheelwells were glued in place.  I found the plastic around the wheel bay opening needed to be thinned slightly.  I used a dremel. If its one measuring tool I have of my increasing skill, it’s the dremel. In years gone by this would have resulted in carnage and unusable wings. These days I can manage quite surgical cuts and thinning.  The CMK nose wheel was also used which is just a direct replacement for the kit part, but with greater detail. I also used CMK ailerons and flaps as I had them in the box for some reason, but there is no discernible difference in detail that I can see. I now had a complete airframe with filler only being used on the underside centre seam and a tiny bit around the windscreen panel.  Overall I found the fit excellent and my initial bad thoughts about the kit had disappeared.  Before any primer could be applied though, that pebbly texture had to go.

Republic RF-84F Thunderflash
27300 ER 4/33  Armee de l’Air RAF Akrotiri. Cyprus 1956

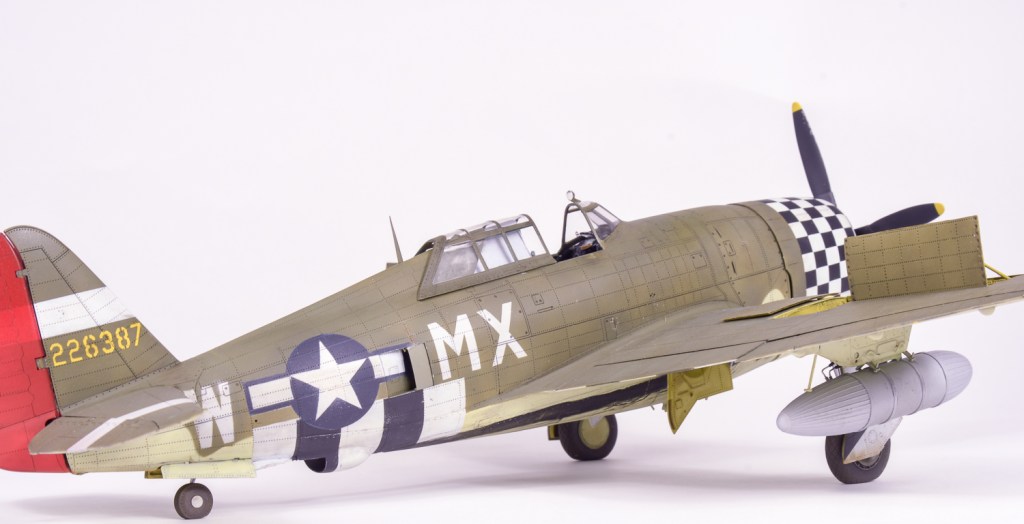
Trumpeter 1/32 P-47D Thunderbolt

Built:  2019
     Enhancements Used: 
Gunbays: Eduard PE. Wheels-Brassin. Seat Belts-HGW. Gun Barrels-Master Barrel

Decals:  Combination of Ad Astra masks and Superscale Cowl checks

One of my New Year resolutions was to tackle some of the stalled builds taking up room in my cupboard. 
Being as the Trumpeter Thunderbolt box was taking up the most room, it was summarily dragged down onto the Cutting Mat.
I’m not sure when or why work on this stalled, but a look in the box revealed all major sub assemblies completed, just needing their seams dressed and then bringing together to be ready for paint.  A nice shortcut to getting Build No.2 done for the year. 

I rate Trumpeter’s Razorback Thunderbolt as  one of their nicer kits. Reasonably accurate, options to allow dropped flaps. open gunbays, open or closed canopy, and plenty of underwing stores options.  It also goes together quite quickly if you don’t use all the unnecessary interior parts. such as the   full ducting for the superchargers.  Contrary to a lot of on line builds and reviews out there, the  cockpit does not require the ducting to sit on, as it is will locate quite solidly  into slots provided on each fuselage half.  The wing spars slot through the openings provided for them as well without needing the ducting added.  Leaving these parts out plus the engine accessory bay greatly simplifies the assembly of the model.

All I added behind the engine was the bulkhead and firewall to provide some rigidity to the fuselage.  Its a big model, and you do not want seams popping open when it is picked up or otherwise handled. Assembly still throws out a few  fit issues.  Steps on the wing undersides when fitted to the fuselage, leading edge gun inserts and windscreen all required attention on mine.  The attention taking the form of filler and plastic shims to even up gaps and steps.  I have heard the gunbay panels can be an troublesome fit, but this would not concern me as I wanted mine open.  If the details there, why not show it off, right?

The only frustration I found, in common with all Trumpeter’s radial engine kits is the poor fit of the engine parts.  The parts certainly do not click together with the result it is quite easy to end up with an engine and propeller out of alignment as I found on my Hellcat build. 
This is then compounded by Trumpeter also not engineering the cowling to be a strong positive fit to either the engine or airframe.  At least in the thunderbolt, the engine is held solidly within the cowling by a frame.
I further reinforced the cowling airframe join by inserting two pieces of plastic tubing into the cooler ducts to provide a more positive fit

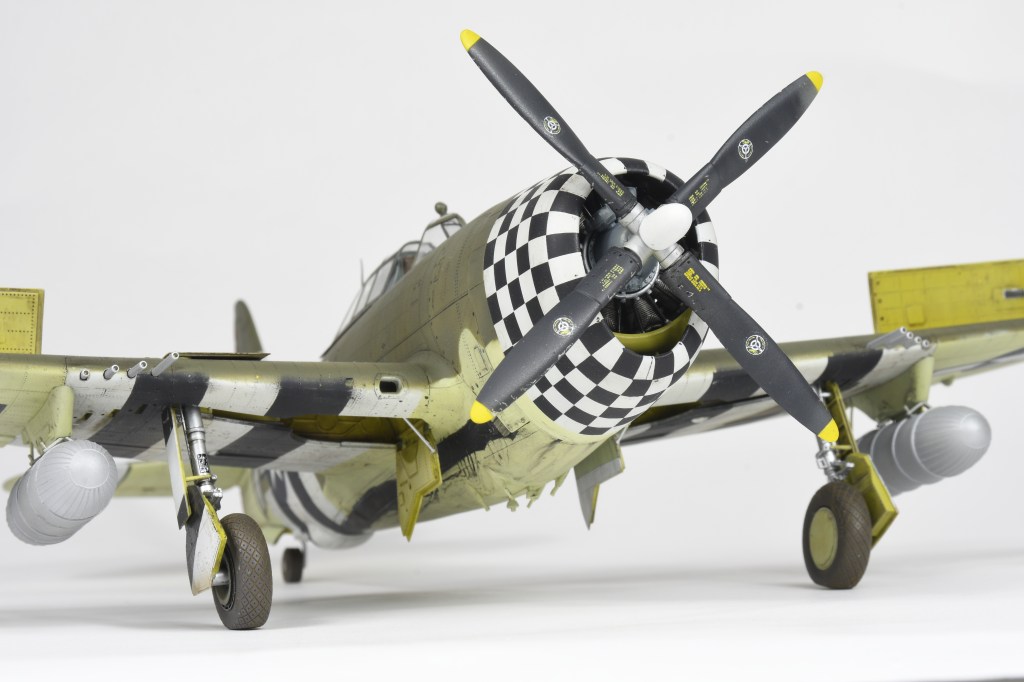
In regards to the chosen scheme, I have always thought the checkered cowling of the 78th FG would stand out in the cabinet, so looked for a suitable machine to model.  I was quite taken by “Miss Behave” with her RAF colours of dark green upper surfaces, and sky undersurfaces.  Invasion stripes, red rudder and the scalloped area under the canopy remaining NMF reinforced my choice. 

With this scheme originally picked when the model was originally started, masks for all markings were ordered from a bloke in Canada that called himself Ad Astra masks.  Now sadly no longer doing them as mask set was excellent to use.  He based the masks on photos of the real aircraft and an aeromaster decal sheet.

This time, the deciasion was made to apply the insignia first, mask and then paint the camouflage.  It was hoped doing this, the masks would be easier to align, and I would avoid that thin white ring of built up paint you can get if painting the markings last
What I learnt from this was the US star and bar markings must be the most complex markings to paint, even more so than RAF type A1 roundels.  There are just so many elements you need to ensure are aligned and straight.  Anyway I got there in the end having to only touch up two stars  Painted markings are the only way to go in 32 scale in my opinion.  Even the “miss Behave” came out nicely, a true testament to the great job Ad Astra did cutting these masks.  Then there was the cowling!
Well, I tried to mask that too using a montex mask set, but it was just an abject failure, so was my attempt at cutting little squares of Tamiya tape.  Buggar it, I thought, this will be decalled, so I dragged out the Barracuda sheet, but I could not get this aligned either despite it being sized for the Trumpeter kit.  It must be me as I imagine Roy would have been meticulous in designing the sheet..  Rapidly running out of options, I found an old Superscale sheet with checks on it for the old Revell kit.   It fit surprisingly well, just needing a couple of black squares filled in with black paint around the cowl opening and underneath where the two halves met.

This just left the final assembly where I discovered I had lost a wingtip light and also one of the landing gear covers.  Despite hunting high and low, no sign of them.  I can only think I accidentally chucked the gear cover out as it was stuck to  the big ball of Tamiya tape that was sitting on my desk.  The jigsaw that are HGW belts were then assembled using wild guesswork as to how they all threaded together!  HGW could really help here by providing step by step instructions rather than just a picture of the completed belts.  

Searches of the various fora hasn’t revealed anyone else knowing how to assemble them either!  The guns also provided a bit of frustration trying to get them all aligned and properly seated.  I really need to either test fit these items and engineer proper fit, or assemble them way before I get to this stage.  I had the same problems with the guns on my hellcat.  To add the brass gun tubes, I simply drilled the holes in the leading edges out slightly and pushed them through into the breechs. 
The 108 gallon drop tanks are from the kit with plumbing added from wire and steadying braces from plastic rod.  If I was being strict to the 84FS’s missions I should have added bombs as after D-Day this squadron switched from long range escort duties to ground attack, but I wanted my aircraft to wear the tanks.

​Adding the ammo bay doors, I also discovered I had the door upside down when I painted the star and bar portion on it.  A modeller worried about perfection would have repainted the star.  I just flipped the door upside down as the model had got to the stage where I just wanted it off the bench so I could move onto something new. 
Does anyone else get like this?

The photo I had of Miss Behave showed no chipping or fading that I could make out, just that very extensive oil streak leading from the oil cooler doors, so this was added with black oil paint, and then the whole model dullcoated .  I should probably go back and gloss the oil streaks at some stage.
It was then time to sit back and enjoy the model, happy that I had reduced by one the small amount of kits on the shelf of doom. (there’s still 6 on the SoD if you must know!)
Overall, not as good as I was hoping it would turn out, but it still looks imposing on the shelf and Im happy I have a 32 razorback in markings not usually seen.  I just love that big checkered cowling.  I really hope that we get a 1/32 P-47D from Tamiya at some stage.

Republic P-47D-22RE Thunderbolt 84FS 78thFG 8th A.F U.S.A.A.F Duxford England. 1944

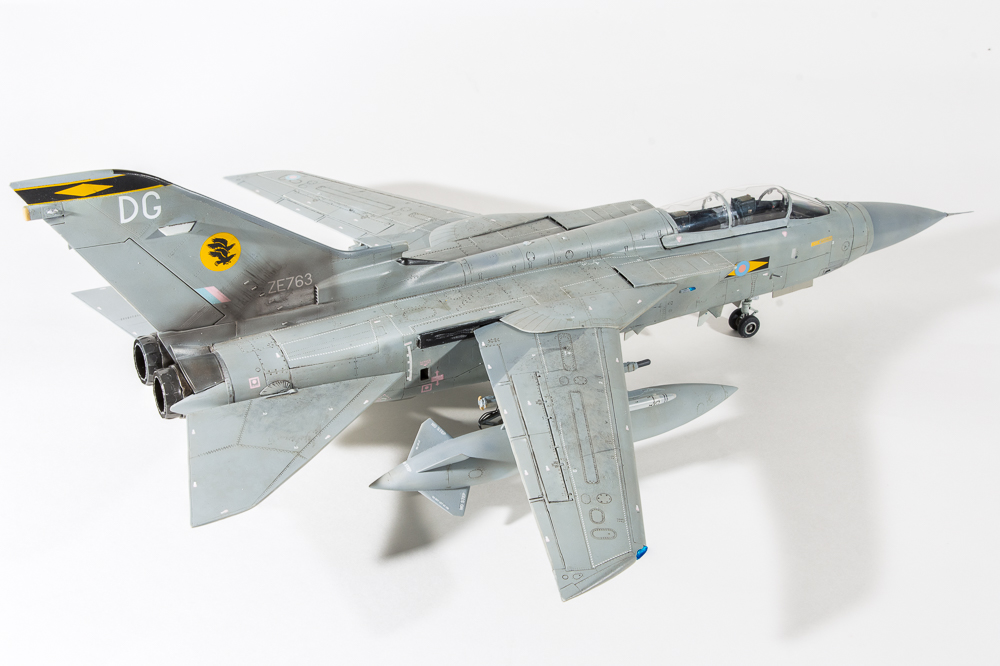
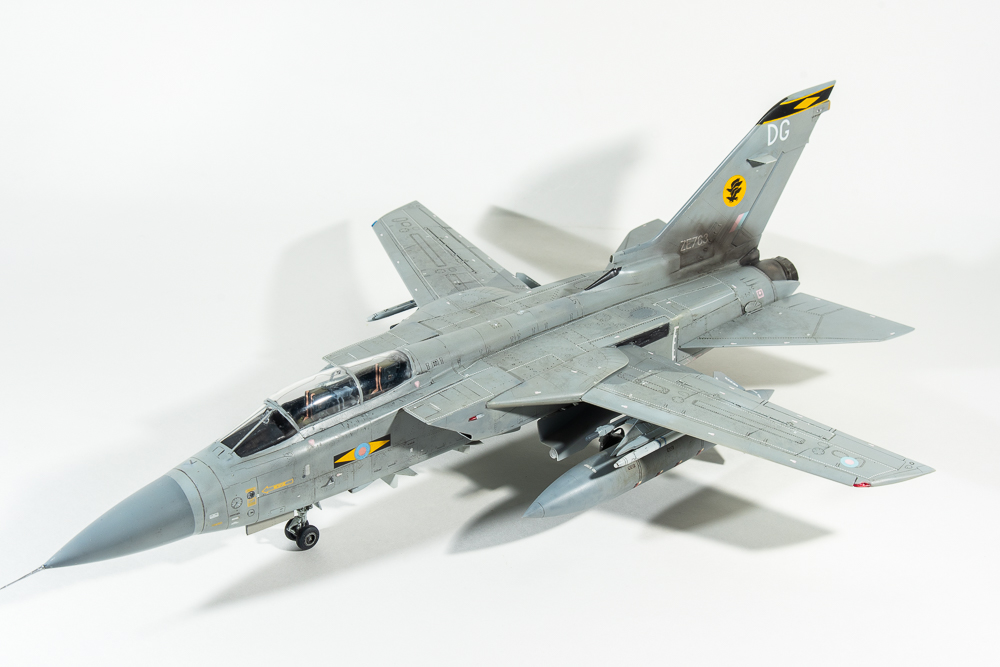
Revell 1/48 ADV Tornado F3

  • Built 2020
  • Enhancements Used 
  • Seatbelts,  Eduard
  • Wheels   Brassin
  • Wheelbays  Eduard
  • Pitot Tubes and AoA sensors  Master Barrel
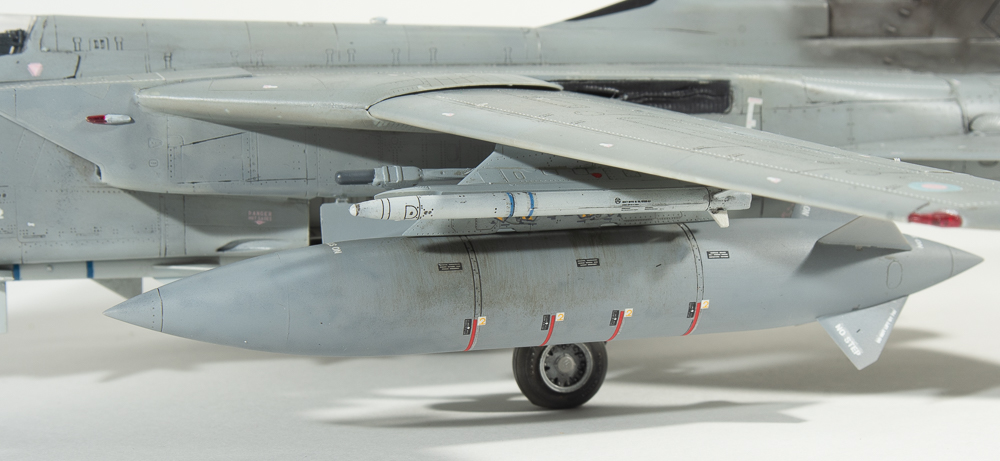
  • Weapons  Brassin ASRAAM   Hasegawa Sparrows (skyflash)  BOL rails  F4Dable Models
  • Decals  Xtradecal Tornado F3 Part 1
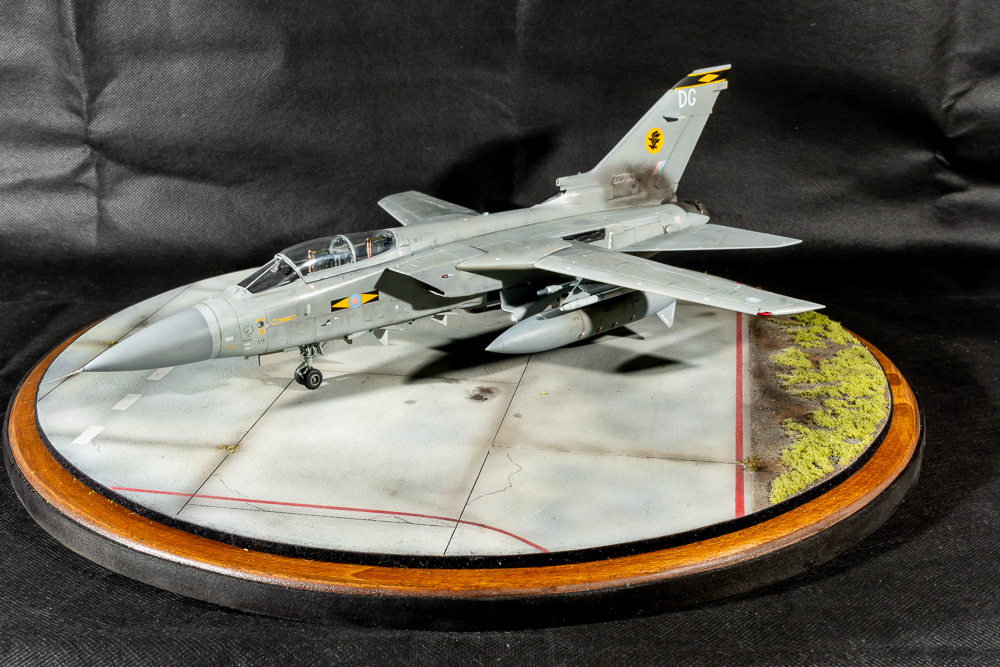
 Like a lot of modellers, I had heard some horror stories about the fit of the Revell Tornadoes.  The consensus seemed to be whilst they were definitely a step up on what was currently available, the fit left something to be desired.  The kit seems to be one of those that polarise modellers world wide.  The truth is, like the Hasegawa Harrier, the ease of build is directly linked to how you build the tornado.
What inspired this particular build was a mate directing me to a series of youtube videos done by a fellow named Nathan Robinson.
Nathan is a member of the IPMS Tornado SIG and admits to having built six of these!  So if anyone will have the build down pat it should be him.
Deciding to take a leaf out of Jon Bryons book, all three revell tonkas – 2 ADVs and a GR4 – were pulled from  the stash to be built as a batch.
Following Nathans build sequence, I found the build progressed fairly quickly. I still needed filler around the intakes and along the fuselage sides,where it meets the bottom plate, but these were all easy joins to clean up and rescribe.
For the cockpit, the kit decals were used which sat down surprisingly well over the moulded detail and certainly looked busy enough through the closed canopy.  Note Revell call out the wrong rear instrument panel, you need part S214

I deviated from Nathans build my cutting off the cogged part of the wing so I could add them later. To be honest, Im not sure this is the best way as you lose a bit of structural integrity. Ive already so modified all three of my kits, but wish Id left one to compare the two different methods.  Maybe on my eduard Desert Babe kit!

I replaced the rather bland wing seals with some moulded by a fellow called Shaun from Britmodeller.com.  I’m not sure if they are still available as he was doing them when the kits first became available.
The decision was also made on this model to have the flaps up, to better show off the lines of the ADV.  The best way to achieve a flush fit with the wings is to cut the bar on parts B111 &113 so you are left with separate flaps.  These can then be glued  individually to the top wing ensuring they sit  flush with the upper wing.

The undercarriage assembles fairly easily, despite being moulded in two halves. Revell have form here, which means you have a seam to clean up. Part C159 and 168 placement is a little vague. Step 69 shows it the best. On gluing the PE facia to the back wall of the wheelwell, I had an alarm bell go off in my head going, “I wonder if this slot the PE covers is important” Well, Yes, it is as this is where the door retraction strut sits.  Didn’t realise this until I added them, so then had to cut the struts, in fact I replaced them with thin rod. I find this annoying on Eduard’s part. They could have easily made the back facia in two parts to be fitted either side of the slot. Its not the first time Eduard have failed to take into account the fitting of kit parts around their etch, and one of the reasons I find myself using less AM these days unless it is drop fit. Some etch placards and brake lines dress up the legs nicely, but on my other F3 I will use wire and decals instead..

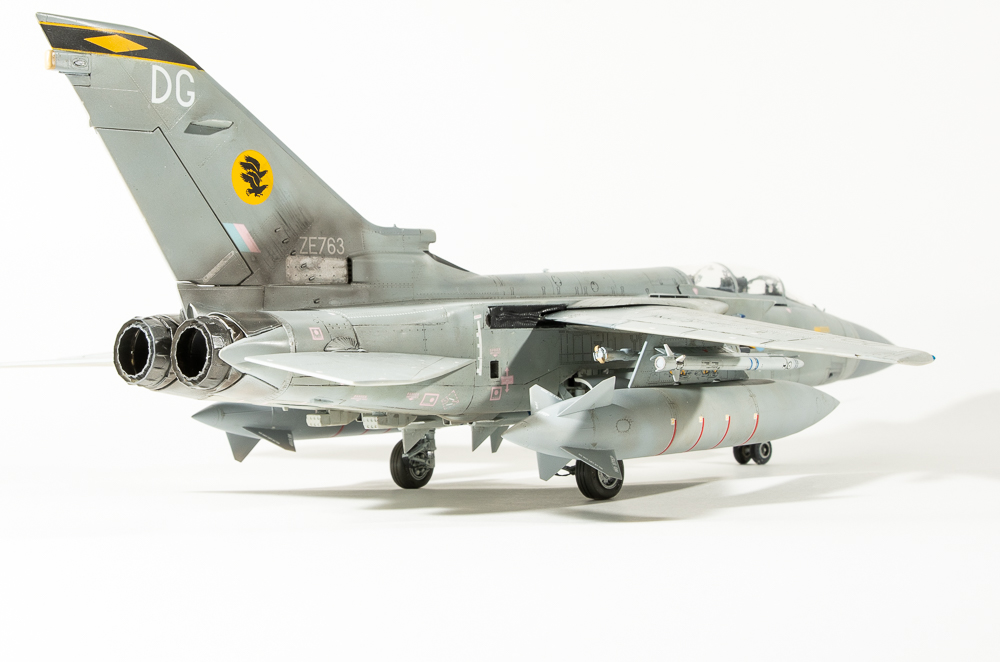
Photos of my chosen jet show it fitted with BOL rails on the inner side of the wing pylon. If like me, you didn’t know what BOL rails are, I can know tell you they are a launch rail with an inbuilt countermeasures pod. They are surprisingly hard to track down as an aftermarket item, considering quite a few jets use them.  A friend offered me his Steel Beach ones, but they looked quite a crude casting. The F4DModels were much better although warped.  Hot water straightened this out.

For the Barley Grey, I used a home grown paint SMS which performed quite well, Its marketed as ready to spray, but I still thinned mine a little. Colour looked good, but I find it strange they do not offer a Light Aircraft Grey in their range to go with the barley grey, so it was back to my go-to paint. Mr Color.
Again on this model, I had problems with the paint and primer peeling off when removing the tape. I have no idea whats causing this. The model was wiped down with tamiya thinner prior to paint, and was primed with Alclad Grey.  The consensus amongst my modelling mates was it could be the primer, which Ive had for a while, so in the bin it went.
The model was gloss coated for decals and in preparation for the wash. These days I apply the wash before the decals, despite this method, the wash failed to pick up a lot of the very fine detail, despite repeated applications, which was annoying in the extreme.
The decalling should have been easy, but again my poor build planning brought things unstuck. Literally!
The decals had all been applied when I realised I had not painted the fintop di electric panel, so as the tape would lay over the decalled fin band I religiously detacked the tamiya tape before laying it over the decal.  Of course, on pulling off the tape, the decal came with it, necessitating me having to  paint the fin band back on.  This in itself needed a lot of touching up as each time I pulled tape off, paint came away too. I really need to get to the bottom of why this is happening.
Surprisingly, my enthusiasm hadn’t waned for the model, so I pressed on, applying a satin sheen, which I then went over with dullcoate. Even with the satin, the model still looked far too glossy.  Annoyingly, all the stencils stood out as too thick as well. I had applied them in little pools of future to stop any silvering. I wont do this on my next one.

This just left final assembly of wheels, aerials, canopy mirrors and nav lights. none of which I managed to lose as is the usual case despite several of them pinging off the tweeezers.
And that was that! One down, two to go
So what do I think of the Revell Tornado? Well I think the main problem is, its Revell!  I have no problems with the breakdown of the kit, but the kit quality is poor indeed, flash, sink marks and ejector pin marks mar the parts, making assembly harder than it should be. These kits, like Airfix, are designed for the mass market, the so called “pocket money brigade” and the tooling shows it. You get what you pay for.
Despite this, if you ever release a new tool Jaguar, Revell, I’d buy it in a heartbeat.
Anything would be better than the horrid kittyhawk kit thats still sitting on my shelf of doom.

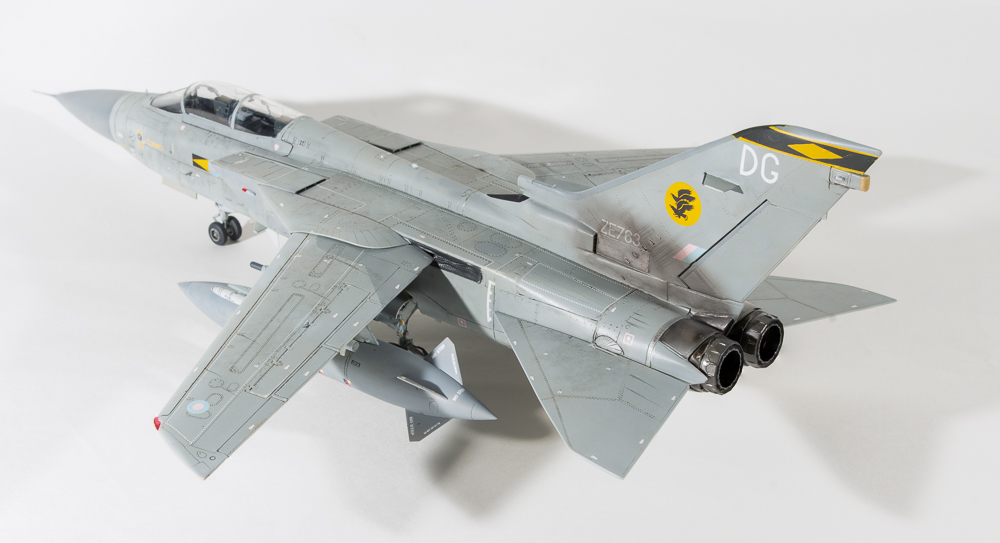
Panavia Tornado F3 ADV ZE763 11 SQN Leuchars Royal Air Force 2006

Airfix 1/48 Boulton Paul Defiant Mk1

  • Built: 2019
         Enhancements :  Eduard Interior and exterior details
  •                                    Landing Flaps: Eduard. 
  •                                    Gun barrels; Master Model
  •                                    Wheels; Barracuda Studios 
  •                                    Exhausts: Quickboost    
  •                                    Paint:  Gunze
    ​                                   Decals: Ropasmodels 
Airfix’s 1/48 Defiant, released in 2016, and purchased by myself soon after is what we have now come to expect from Airfix’s new line of kits.   Evocative box art, soft grey plastic, sharply printed decals and well illustrated  clear instructions outlining the different  ways you can complete your defiant, in flight, or wheels down, separate control surfaces, choice of open or closed canopy, this also extends to the turret, which can be modelled with the doors open, and raised or lowered turtledeck  (why are they called turtle decks?)
Neither the now obsolete Classic Airframes or Trumpeter kit offered that.

I decided that wasn’t enough for me though, so added Eduard’s flap set.  My search of defiant photos revealed a few on the ground with flaps cracked open, certainly not fully open as I have depicted, but that’s how I pictured I wanted the completed model to look.
Construction was fairly painless, fit being almost excellent.  I needed to trim the cockpit floor on one side as the wing assembly did not not quite close up snugly underneath the fuselage on one side.  The cowling also needed a bit of clamping, as again on one side I had a bit of a gap underneath the oil tank cover.  I can only surmise I had the floor slightly out of alignment.  The eduard set added the colour printed instrument panel and some side console detail plus the seat straps for pilot and gunner.  I have read some on line reviews bemoaning the simplified cockpit, to me, what you get in the box is fine, especially when dressed with the eduard PE.  The wheel wells also get a helping of PE around their walls which brings them to life.  The model built up quickly, the smallest amount of filler being needed around the tailplanes and the rear underside join of the power wings to the fuselage.  The PE flaps were folded up without difficulty (surprisingly for me) and offered up to the previously cut out kit flaps.  Some shimming was needed to spread the open areas of the rear wing to ensure the rear wall of the brass flap bay sat at the same level as the underside of the wing.  I should have taken my time a bit more here ensuring a better fit, and cutting out the slots for the flap actuators which I completely missed.
The machine gun barrels were cut off and the breeches drilled to take the sublime master Models barrels. I fit these wherever possible as they really add to the look of the model.  It would be icing on the cake if they came pre blackened!  The kit pitot tube was also replaced with Albion Alloys tubing.  Although there is nothing wrong with the kit wheels, being moulded as they are, weighted and with separate hubs, I had a set of Barracuda wheels in the box, so these were duly added.  Waste not, want not. The landing lights were not the best fit, so were fitted at this time, so they could be faired in prior to painting.

The turret popped into place without all the fuss, some other online and magazine builds report, but I was surprised to have trouble pushing the clear dome down onto the base, thinned white glue being required to fill the resultant small gap.

Painting was made easy using a set of camouflage masks from Mal Mayfield.  From the decal sheet, I had decided on an early war scheme with the black and white undersides and A type fuselage roundel to push home the early war use of this aircraft.  The decal manufacturer was new to me, I ended up using the kit roundels and codes and Ropos’  roundels looked a little bright, whilst the codes looked too pale.  The “T” was sourced from an Extradecal Medium Sea Grey RAF Codes sheet, as  With the multitude of decal sheets on the market, these generic sheets are not as probably as handy as they once were, but to me, they are still a must have in my decal bank for this very reason.  The only decals I used from were the serials and these performed fine, being quite thin.  No stencilling was applied to the underside as they would have all been overpainted when the undersides were done. AK panel line wash for brown/green aircraft was used as  a wash on the top surfaces.  Chipping was added using vallejo silver, whilst highly thinned tamely black was used for the exhaust stains.  Emboldened by watching Plasmo use his dremel to  surgically cut parts out, I set forth with my dremel to open up the kit exhausts.  30 seconds later, I was ordering quickboost  exhausts from BNA Modelworld. Rather than displaying the same skill as Plasmo, my exhausts looked like Dexter, the serial killer had gone to work on them.  You will need to cut off one of the locating tabs  in order to fit them into the airfoil slots.  Whilst you are ordering your exhausts, also order a set of landing gear covers, as the kit ones are overly thick and simplified, and do not portray the real ones very well.

Final assembly involved adding the undercarriage which fitted snugly into their respective sockets.  I was expecting a fight with the flaps and their tiny actuators, but was pleasantly surprised how easy they were to place.  In reality the actuators should fir in their respective slots, but I failed to cut out the ones on the bottom wing and clogged the flap ones with a thick coat of future I had applied to also act as a glue.  Therefore my actuators are a butt fit to wing and flap which is not correct for the real machine.
An  aerial line from EZ line  and a bit of sprue and punched plastic disc to represent the extended gunners footstep bought my first build for 2019 to a close. 

Boulton Paul Defiant Mk.1 264 SQN Royal Air Force. Biggin Hill. February 1940

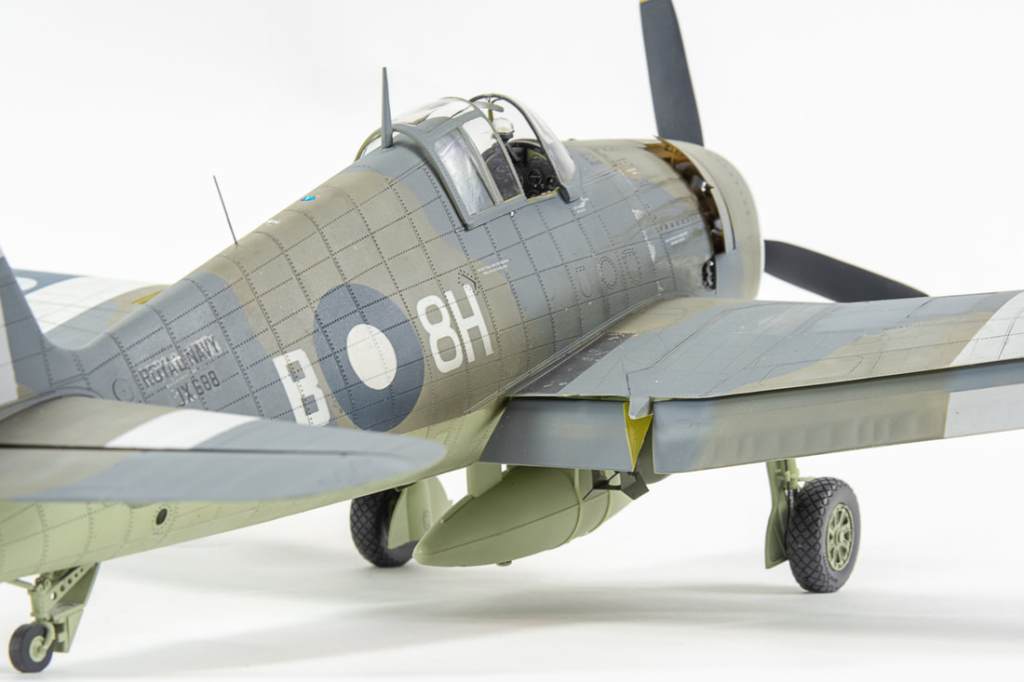
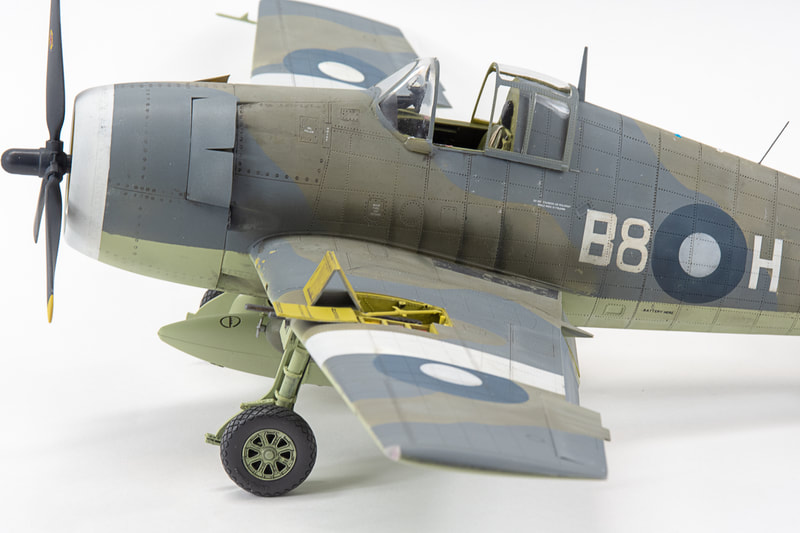
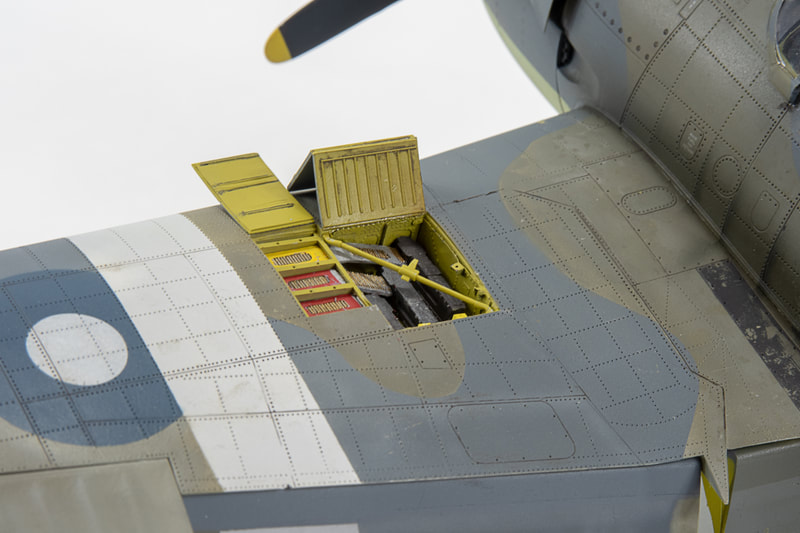
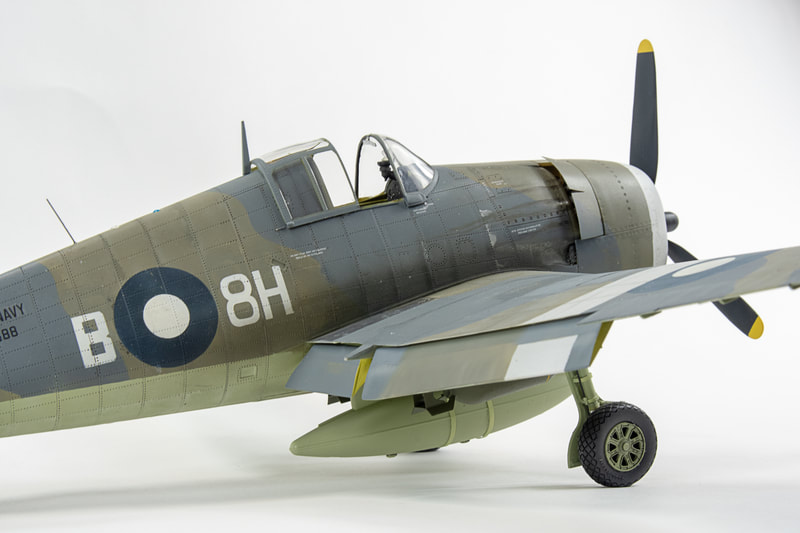
Trumpeter 1/32 Hellcat MkII

  • Built: 2018

    Aftermarket Used:  Cockpit:Eduard Interior. Wheelwells, Eduard PE. Wheels-Barracuda. Seat Belts-HGW. 

Decals:  Home made masks

I first made the trumpeter hellcat in 2007, and finished it as a FAA machine.  I quite liked the build, and the scheme, but unfortunately the model got damaged in a house move.  I bought this model with the idea of making another FAA Hellcat, and initially was quite motivated when the kit made my to do pile for 2018 builds.  That motivation evaporated when it hit my bench and I discovered the wings had sink marks in them over the rear spars.  As I had just completed two involved builds of the HobbyBoss Tomcats, here and here I just didn’t need the grief, so the model went on the “For Sale” pile.  A week later, I decided I wasn’t going to let any minor sink marks beat me, and the kit ended up back on the bench.  A bit of brushed on Mr Surfacer 500 made quick work of the sink marks.  Restoring the rivets wasn’t as hard as I had imagined which is what really led me to put the kit aside in the first place.  A Rosie Riveter tool was used  plus the ubiquitous sewing needle.

The Eduard interior set was used for the cockpit, the pre painted etch certainly giving that busy look to the consoles and circuit breakers that painting just cannot achieve. The Trumpeter hellcat suffers from a few inaccuracies, the main one being the cockpit is far too wide and the rear fuselage does not capture the flat sides of the real machine.  This did not bother me greatly with my first hellcat, but with this one, I cant unsee it.
In an effort to reduce the oval sides, I sanded flat  the curved sides of the interior bulkheads, and when glueing the fuselage halves together, pushed in the fuselage sides aft of the cockpit.  If it made any difference, it was minimal.  The engine accessories, bearers and oil tank were all left out, as was the radio equipment as none of it will be seen, the engine itself pushed into the  firewall, so the bearers are not required to be assembled.
Fit of the major parts was pretty good as it usually is with most trumpeter kits, even the wing halves mating nicely in the extended position, although I managed to introduce a slight step between the port wing sections.
Prior to this, the moulded wheel well ribs had been shaved off so that the eduard parts could be used.  These being fairly easy to place and  superior to  the shallow kit detail.
The completed wing sub assembly nestled in nicely to the fuselage, with again just a smear of Mr Surfacer.  Eduard provide a PE panel that skins the panel adjacent to this seam so that you don not lose any detail through sanding.  Painting the scheme was made easier by using LF Models  camouflage mask but I’m jumping ahead!  As my chosen aircraft was a Hellcat MkII, or F6F-5, and the kit represents a late -3, a few changes had to be made.  The windscreen in particular needed some frames sanding off.  The clarity was restored with various grades of micromesh, and Eduards canopy mask set for the trumpeter -5 used to save me masking some tricky curves.  A rear view mirror was furnished from then plastic card and added to the interior of the screen.  FAA Hellcats also had a round external mirror mounted to the top of the windscreen and this has still to be added to the completed model.  The camouflage was started by first spraying the white areas before masking these off so the sky undersurfaces and  dark slate grey, and extra dark sea grey uppers could be painted.  Extracolour paints were used for this, the final model I will be using enamels on as I finally made the decision to abandon them in favour of acrylics and lacquers.  For the roundels, a friend cut them from an upscaled and scanned aeromaster sheet for FAA Hellcats.  This is the second time I have got a friend to cut masks for me, and I’m wondering whether I should just buy a cutter myself although the learning curve with the software scares me.  Trumpeter also left the supporting straps off the drop tank although they have included the holes in the fuselage underside for them.  I fashioned them from thein strips of plastic card glued to rod which then was pushed into the holes.  Bombs were from the kit, although the tailfins were from the Eduard sheet.  Stippled on Mr Surfacer represented the cast iron bodies before they were painted olive drab with a yellow ring denoting HE.  Around this point my interest in the model started to wane.  I had had to repaint the roundels a couple of times and touch up various parts of the airframe paintwork caused by clumsy handling and poor masking. The serials which were decals had also silvered.
  The model was not reflecting the vision I had started with, and I was keen just to get it finished and off the bench.  I decided to scrimp a lot of the weathering and shading I had planned instead opting for a simple wash and some oil streaks using AK Dark wash.  This is something I really need to beat next year, so that I see each model through to completion with a consistent level of skill and patience. Roy Sutherland’s superb resin wheels were painted and glued to the previously assembled undercarriage legs, which had had wire brake lines added.
 Finally exhaust streaks were added with highly thinned Tamiya NATO black, although I don’t think they are nearly pronounced enough before the whole model was hit with Testors Dullcote, and that signalled the end of 2018 for me modelling wise.  Shame about those silvered decals, and Ive just noticed the prop is off centre too!


Grumman Hellcat MkII. 896 SQN. Royal Navy Fleet Air Arm.  HMS Emperor 1945
 

Eduard 1/48 Supermarine Spitfire HFVIII

  • Date Completed:2018
  •   Aftermarket Used:  None, model built completely from box
  •   Paint Used: Xtracolour Medium Sea Grey and PRU Blue

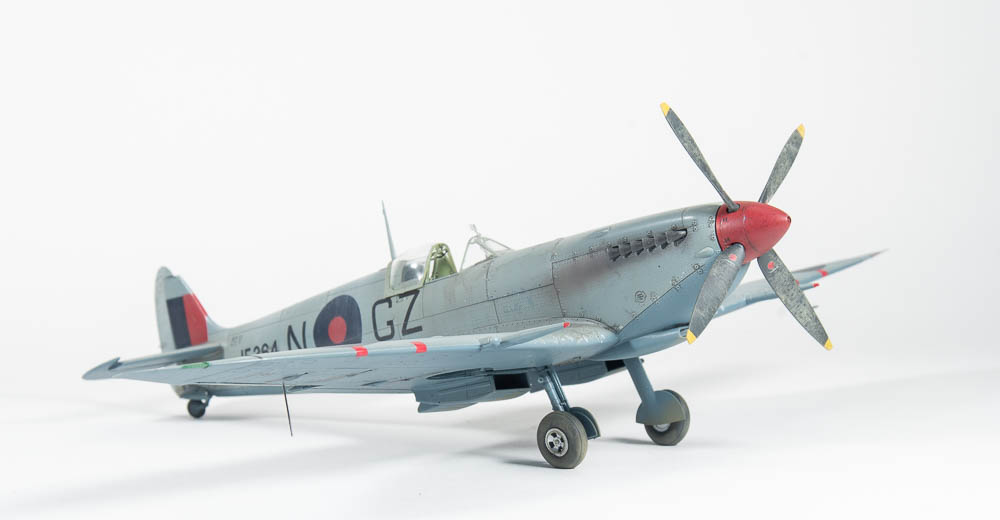
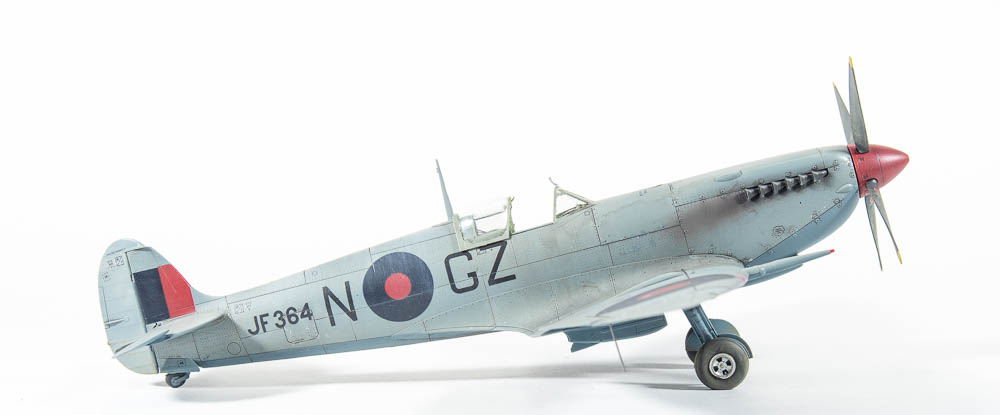
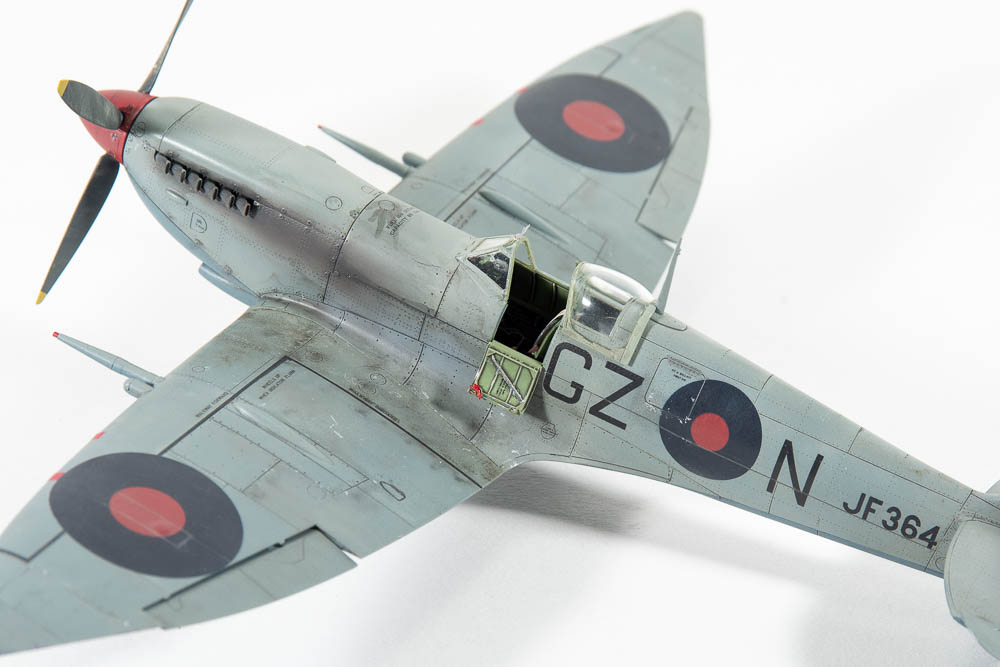
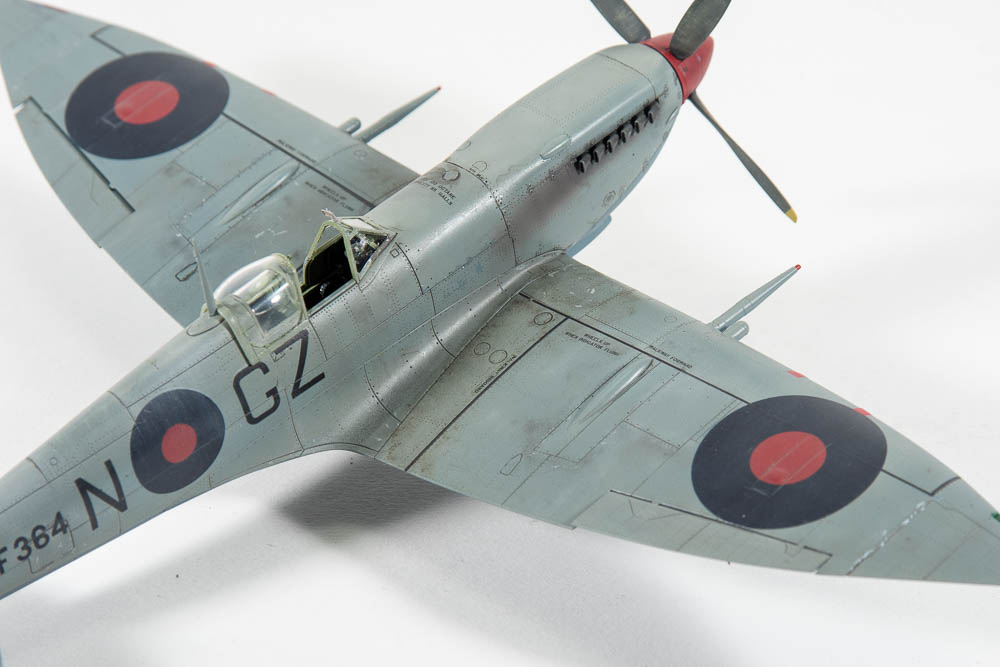
Supermarine Spitfire HF Mk.VIII 32 SQN Foggia. Italy 1944

This model was completed as a review build for The Modelling News, so I will not put a detailed guide here as the article covers the build and finishing in depth.
http://www.themodellingnews.com/2018/08/build-guide-spitfire-mk-hf-viii-in-48th.html
http://www.themodellingnews.com/2018/08/painting-finishing-bruce-tops-off-his.html#more
  Which only leaves me to say, this really was an enjoyable build.  If you have not built one of the Eduard Spitfires, Get On it!!!

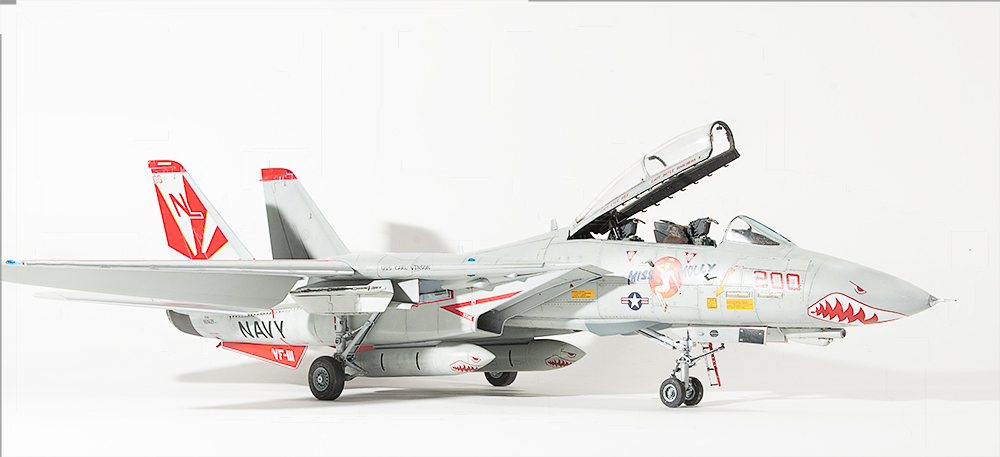
Eduard 1/48 F-14A Tomcat

Date added to stash: 2016
  Date Completed: 2018
  Aftermarket used:
some parts from Eduard Detail set 
  Paint: Mr Color Light Gull Grey
  Decals:  Furball Sundowner Anthology

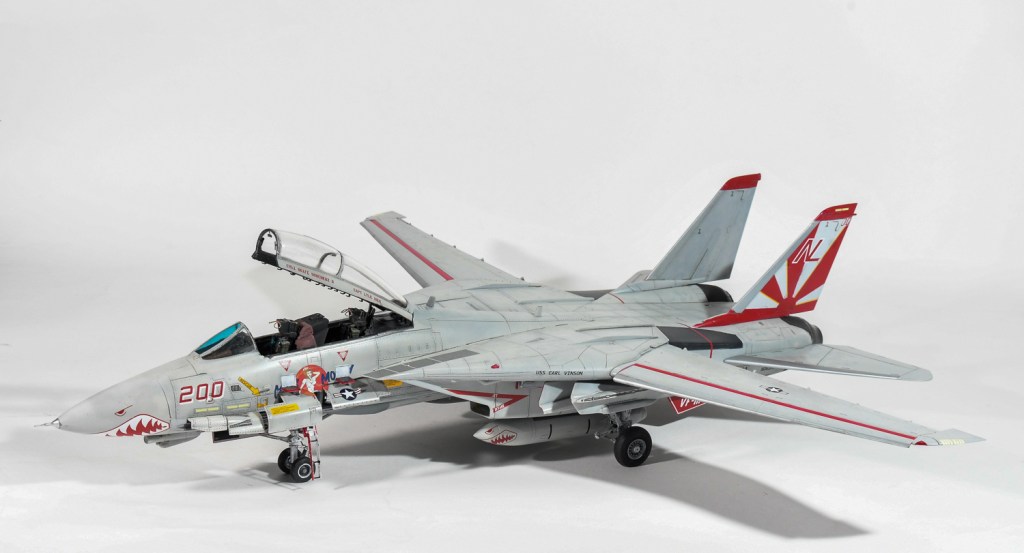
I started this at the same time as lthe other Tomcat I was building for a friend.  At the time, it seemed like a good way to build a kit from my stash as well.  In hindsight, if I had not started this one, I would have sold it, because its position has been ably taken by the Tamiya kit, and building the two HobbyBoss kits was a real grind.  Not that there was anything wrong with the kit, but it was just one HB Tomcat too many. (Although this boxing was done by Eduard, it is the HobbyBoss kit, so I will refer to the kit as HobbyBoss)
The previous article covers the build in detail, although I would add my take home lesson from building Tomcats is mask the intake camouflage demarcation before you add them to the jet I didnt on either build and it was a hell of a job to add them later!
I had high hopes for this build wanting to build it with all panels open.  In the end the build just started annoying me as there ws other stuff I wanted to build and I chose to rush  a lot of things.  Im not really happy with it, but HB Tomcats are a long complicated, involved build as are many modern jets, so to do two in a year is not bad.  I have  three tamiya Tomcats in the stash and look forward to tackling those at a later date.  Just not for a while, as Im all Tomcatted out. 
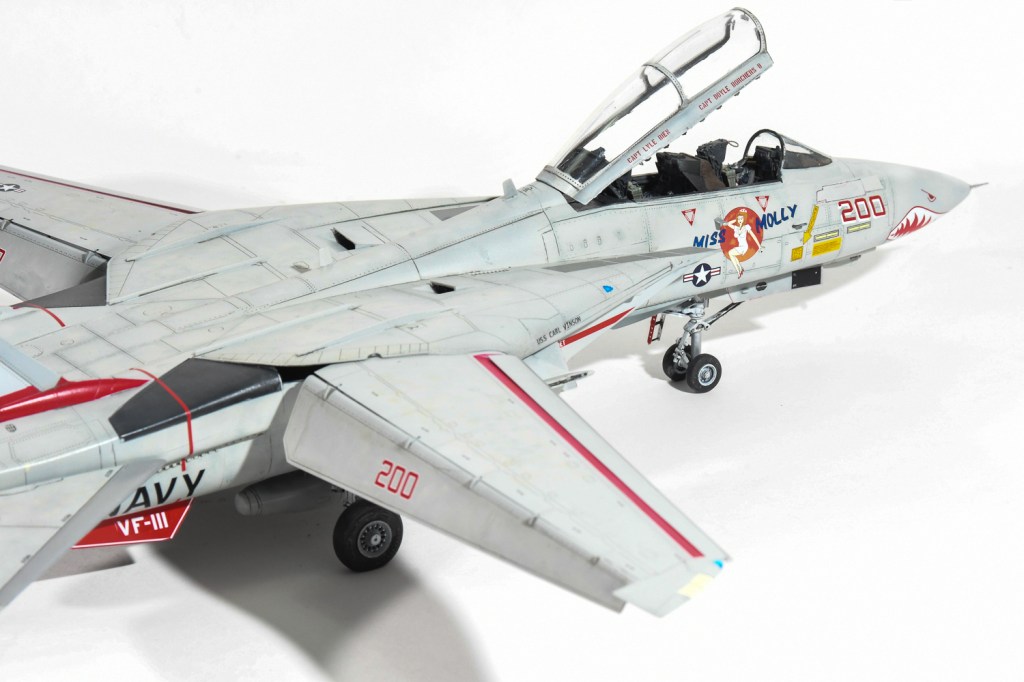
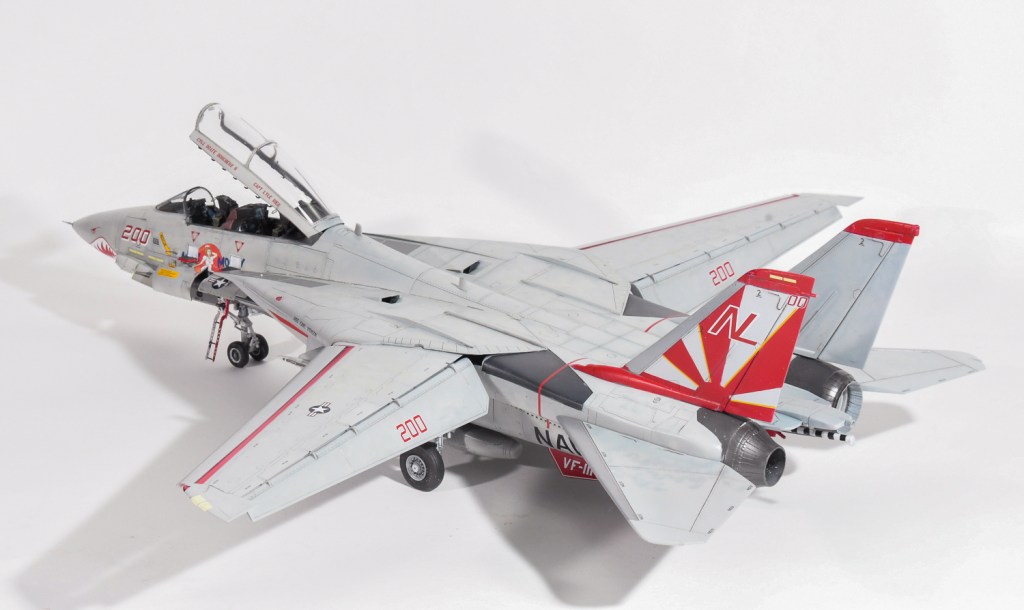
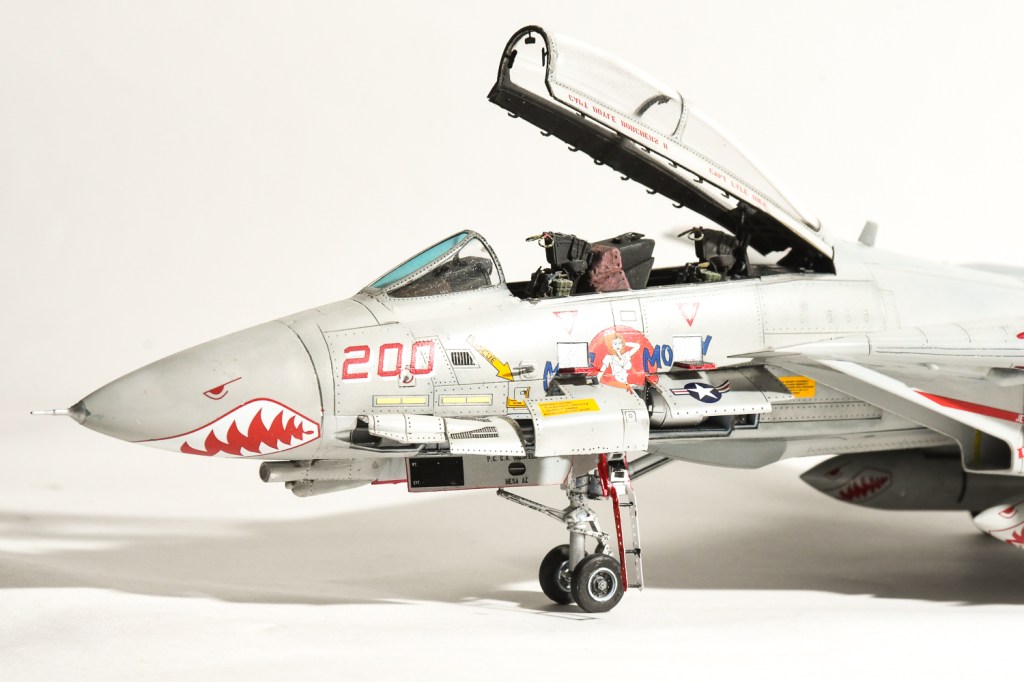
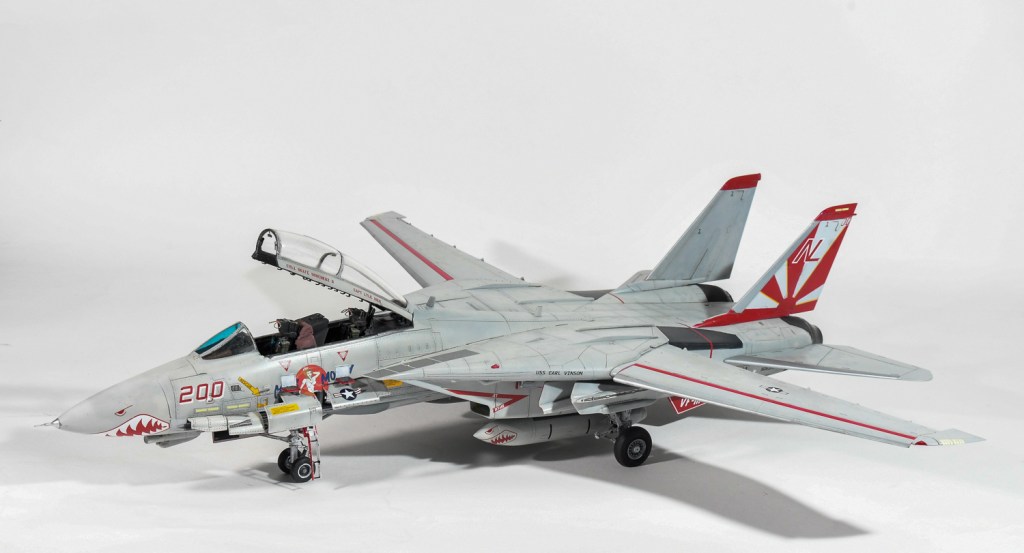
I also think Miss Molly was the wrong jet to pick, as all those open panels do not allow you to see that nose art in its entirety.  Live and Learn, hey.
And wheres that sensor gone from under Miss Molly’s hand on the starboard side?  I definetly  added it LOL
For those who don’t know, Miss Molly was named for Molly Snead, a nurse to Senator Carl  Vinson, yep, the Senator the carrier is named after.
 I visited  the USS Carl Vinson at Fremantle Western Australia in 1994, so like to model aircraft from her.

Grumman F-14A Tomcat VF-111 “Sundowners”  U.S Navy U.S.S Carl Vinson  1989

← Back

Thank you for your response. ✨

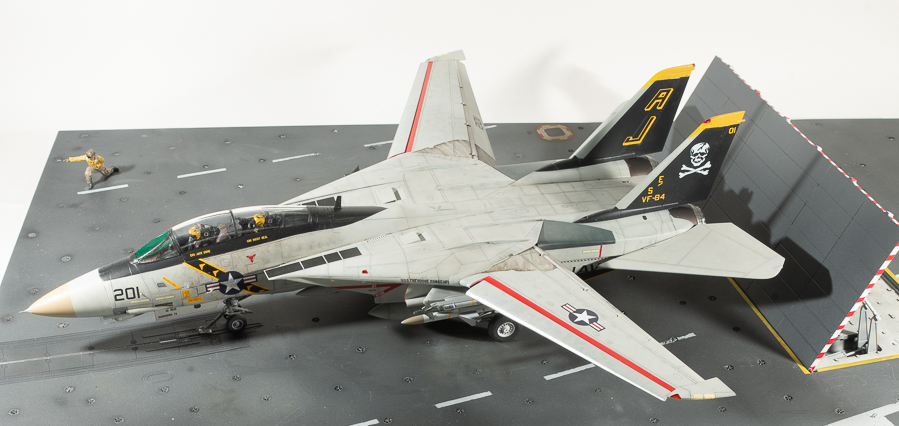
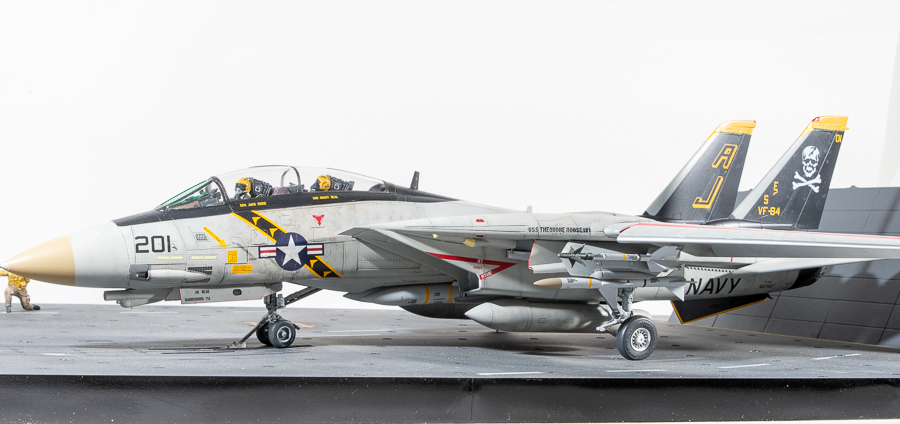
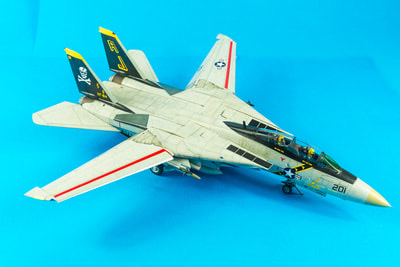
Hobby Boss 1/48 F-14A Tomcat

  • Date Completed: July2018
  • Aftermarket Used: Quickboost Pilots
  • Paint: Gunze Mr Color 
  • Decals: Kit supplied  for airframe, missile stripes from Fightertown Tomcat Data sheet           
This build was borne out of a work colleague’s request for me to build the kit for him.  As I also had the kit in my stash, I thought I would build the two of them alongside each other.  As often happens with my double builds, this one sped ahead and was completed whilst mine sat on the bench falling further and further behind.
The Eduard boxing contains the Hobby Boss plastic, brassin resin burner cans,chin pod, wheels and a PE sheet specific to this kit with a large decal sheet done by Furball Aero Designs
The HB Tomcat is a nice kit, there a few accuracy issues, most noticeably, the bottom edges of the intake openings are not parallel to the top edges as they should be, but this is only noticeable from head on.  Rivets punctuate the flying surfaces which should be smooth, but apart from that, its  a detail packed kit,  allowing you options to open the gun bay, avionics panel, display the radar and extend the wing control surfaces. 

It assembles well and does not really deserve all the wailing and teeth gnashing it gets on the internet.  I put it above the Hasegawa offering, but it has been pushed into the shade a bit with  the release of the tamiya kit.

Jeff had requested his model be finished in Jolly Roger markings as if just about to launch, so I used the compressed nose leg,  extended the wings and dropped the flaps and leading edge slats.  Naturally, all the access hatches were glued in the closed position.

  Of course this meant I also had to crew the jet, so used the aerobonus crew .  Although Aerobonus should be applauded for the idea of releasing seated pilots, I really wish that they would include alternative helmeted heads with visors down and masks in place.  As it is,  their entire range of seated pilots have visors up and masks dangling which means they can not be used for in flight models, which I imagine is what most people want them for.

I sourced correctly helmeted heads, as well as a gloved hand that grips the throttle from an Academy Phantom.  As the canopy would be closed on this particular jet, I didn’t bother using the PE consoles and panels, rather relying on the entirely adequate kit parts.  The canvas coverings over the instrument panel glare shields were beefed up with milliput draped over the kit parts, and then painted a dark leather colour, which according to the DACO book, is the shade the original black covers fade to.
The HB kit includes the short lived glove vanes, (they were wired shut in A models, puttied over in B models and left out altogether in Ds, I believe) requiring you to open up  flashed over slots in the wing gloves. Stupidly, I didn’t, thinking I could just scribe the vanes in later, This would have worked if I was halfway good at scribing, as it was, it just created more problems for me.  My tip. Open up the slots and use the kit vanes as even shut, the openings  are quite prominent on the real jet.

For some reason I had a gap when fitting the bottom plate, not sure why as dry fits had shown a good fit.  Fitting the phoenix pallets hid most of it and a plastic card shim covered the rest.  The forward fuselage fitted to the rear with no gaps or steps as did the tailfins.  I had read about fit problems when glueing the gun bay  and avionics panels in the closed position, but being patient and gluing a side at a time will reward you with reasonable fit, still, I needed a small smear of Mr Surfacer around the ladder door.

Apart from this, the kit assembled quickly.  I left the brass burner rings out after successfully bending one up, only to then  drop the pliers on it.
The WIP shots on the front page outline my painting steps in achieving a bit of tonal variation to the Light Gull Grey

Moving onto the decals, I didn’t apply any of the stencils. as photos of the actual jet showed very few.  The decal instructions call out the red turbine warning stripes to be placed along the jet nacelles whereas they should go around them.  That said, I forgot to add the stripes above the NAVY titles. I was disappointed the yellow border of the VF84 sash showed through the US star, I didn’t want to lay another start and bar over the top so left it as was.  For the other side I cut away the yellow border where from where the star and bar would overlay it.

 The Fightertown data sheet, whilst being quite comprehensive, does not include enough stripes for a full suite of phoenix, so I could only add the stripes which would remain the most visible, and with the stores fitted, the canopy was the only part left to fit.  The fit to the windscreen is not to my liking as there is a step and small gap as you can see, but at the rest of causing cracks to the canopy from forcing it, I decided to leave this too as it was.
The Jolly Rogers scheme is most attractive and I can understand why a lot of modellers choose it to adorn their Tomcats

F-14A Tomcat VF-84 “Jolly Rogers”  U.S.S Theodore Roosevelt  U.S Navy  1989


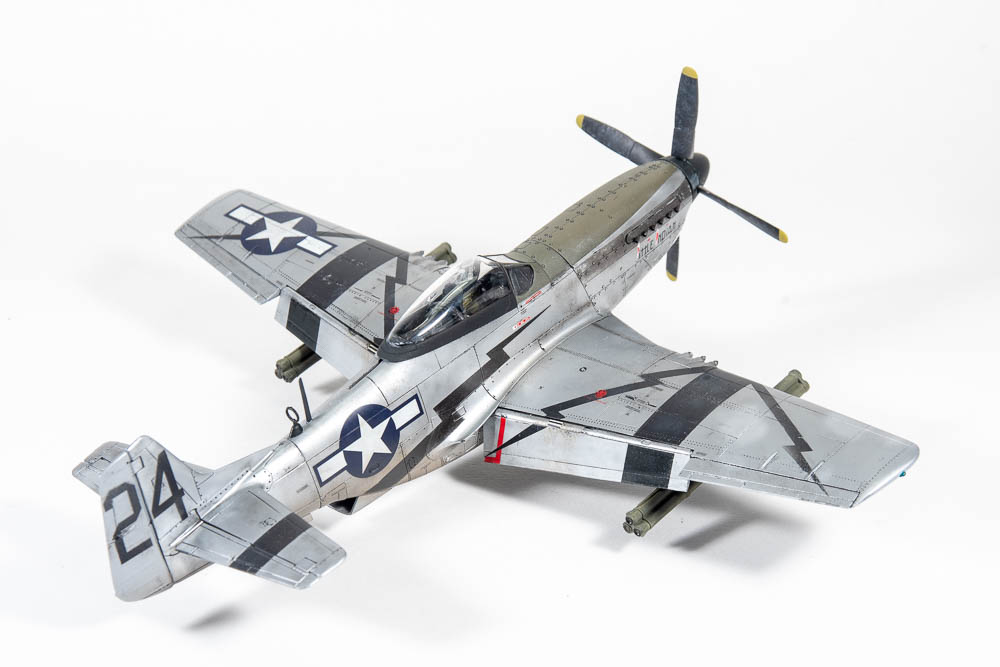
Airfix 1/48 North American P-51D Mustang

Year Purchased: 2018
Date Completed:  April 2018
Aftermarket Used: Eduard Brassin shrouded exhausts
Paint: Floquil Bright silver, Xtracolour Olive Drab, various vallejo and tamiya colours used for detail painting

Construction Notes: Im loving the new Airfix kits.  This is the second Ive built after the walrus.  From the excellent box art to the many options included in each kit, you can tell they are designed with the modeller in mind.
Airfix’s mustang was a very enjoyable build, with excellent engineering, detail and fit.  That there will be other boxings is evident from the options in the kit for different windscreens, canopies and tail units.  A Commonwealth boxing has already been announced.  As good as the kit is, it is let down by a few parts, mainly the cross hatched wheels, where the tread just does not extend to the centre of the tyres.  You will either have to source replacements, or scribe the tread in ( badly) as I did.  Brassin make resin replacements, but inexplicably would have you drill out the hubs rather than use the same mounting as the kit uses.  I would also recommend the Brassin M-10s as the kit ones are a little clunky.

 The propeller has some sink marks on the blade tips, and the gun inserts aren’t the best fit.  Other than these minor quibbles, the kit is a joy. 
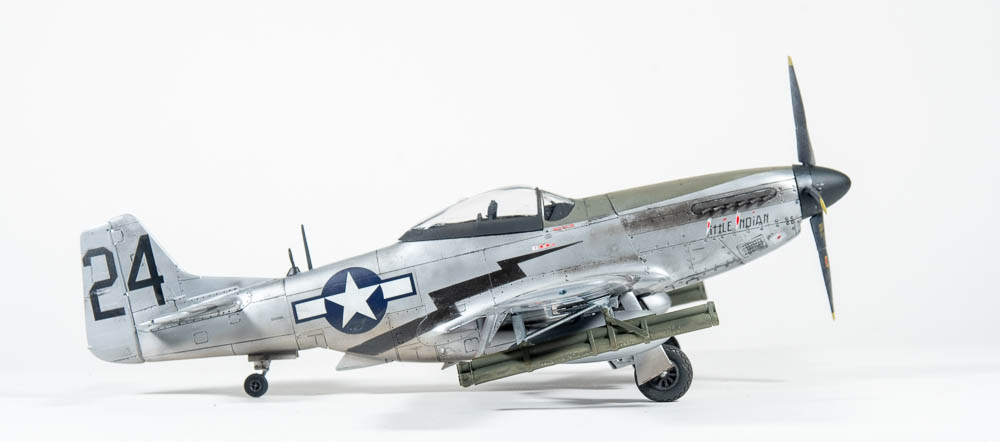
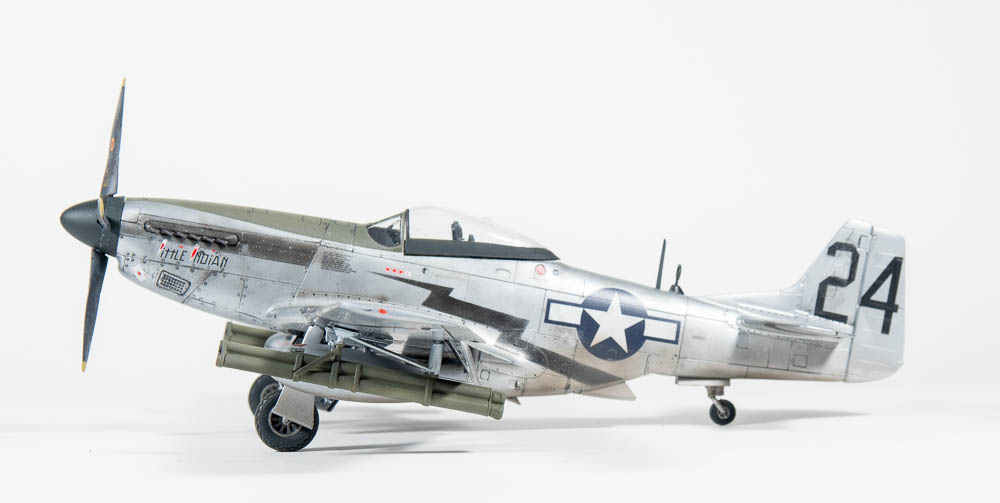
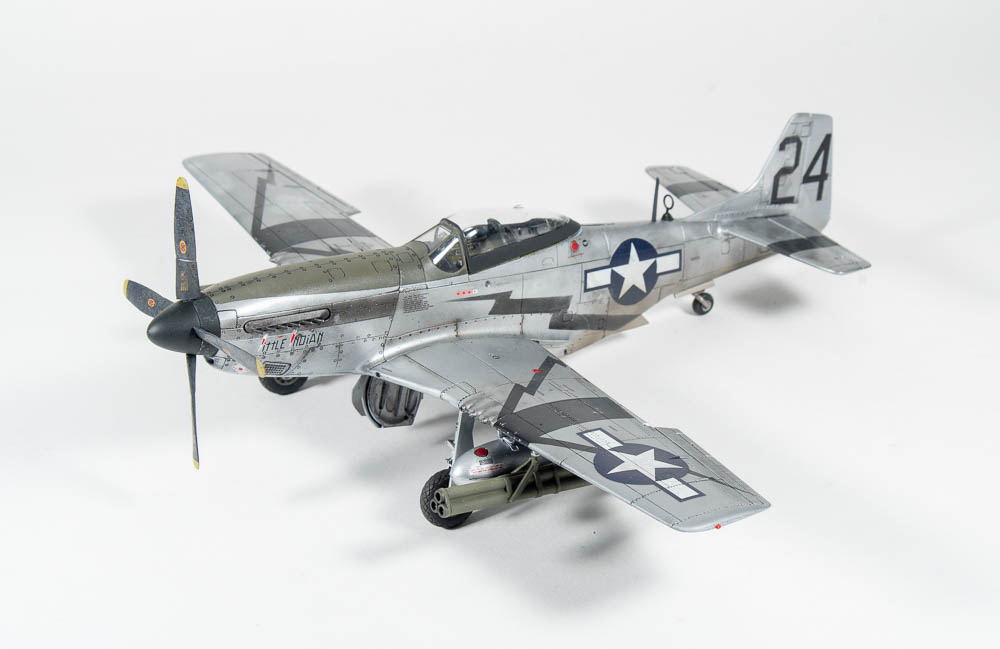
There is some rivet detail on the wings which you will need to fill should you so desire, but the wheel wells are moulded correctly with the straight rear spar. The kit cockpit looks busy enough assembled OOB and even comes with decals for placards.  When choosing a scheme, I could not go past the striking 2ACG machine with its Black Lightning bolts on wings and fuselage, and it meant I could use those M-10 airborne bazooka tubes.
Rather than use the kit decals for the arrows I had a friend cut some masks for me.  Other than the black arrows, the kit decals were used and performed flawlessly.

I used Floquil Bright silver for the finish, with grey and black preshading underneath to try and get a bit of tonal variety. This will bear further experimentation as in certain light, you can see a bit of variation in the silver finish.
 I decided on impulse to build the kit for an upcoming themed competition, so feel I rushed it a little bit. Everything was going fine until I applied one of the Mig Panel line washes over what I thought would be an  impervious base of Future but to my horror, as well as removing the excess wash with an old T shirt, I also removed paint in some areas.  This then began the downward spiral of touchups which never match.  Anyway, its done, but Im annoyed that this is another finish that was going nicely until this stuff up sent it down a different path.  I can only surmise my coat of future was not thick enough.  Another enjoyable build, although these days I would build the Eduard kit.

U.S.A.A.C P-51D Mustang 2nd Air Commando Group India 1945