
- Built 2020
- Enhancements Used
- Seatbelts, Eduard
- Wheels Brassin
- Wheelbays Eduard
- Pitot Tubes and AoA sensors Master Barrel
- Weapons Brassin ASRAAM Hasegawa Sparrows (skyflash) BOL rails F4Dable Models
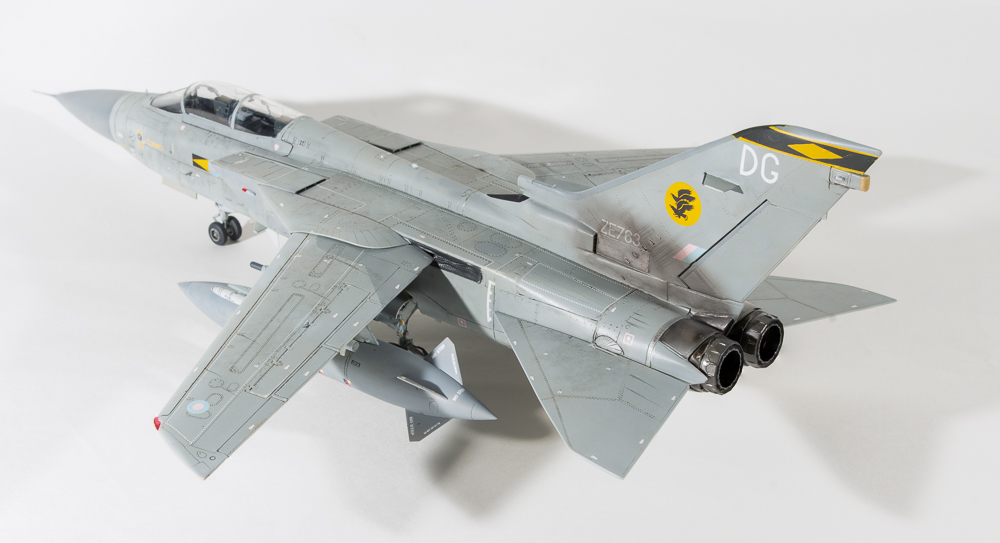
- Decals Xtradecal Tornado F3 Part 1
What inspired this particular build was a mate directing me to a series of youtube videos done by a fellow named Nathan Robinson.
Nathan is a member of the IPMS Tornado SIG and admits to having built six of these! So if anyone will have the build down pat it should be him.
Deciding to take a leaf out of Jon Bryons book, all three revell tonkas – 2 ADVs and a GR4 – were pulled from the stash to be built as a batch.
Following Nathans build sequence, I found the build progressed fairly quickly. I still needed filler around the intakes and along the fuselage sides,where it meets the bottom plate, but these were all easy joins to clean up and rescribe.
For the cockpit, the kit decals were used which sat down surprisingly well over the moulded detail and certainly looked busy enough through the closed canopy. Note Revell call out the wrong rear instrument panel, you need part S214
I deviated from Nathans build my cutting off the cogged part of the wing so I could add them later. To be honest, Im not sure this is the best way as you lose a bit of structural integrity. Ive already so modified all three of my kits, but wish Id left one to compare the two different methods. Maybe on my eduard Desert Babe kit!
I replaced the rather bland wing seals with some moulded by a fellow called Shaun from Britmodeller.com. I’m not sure if they are still available as he was doing them when the kits first became available.
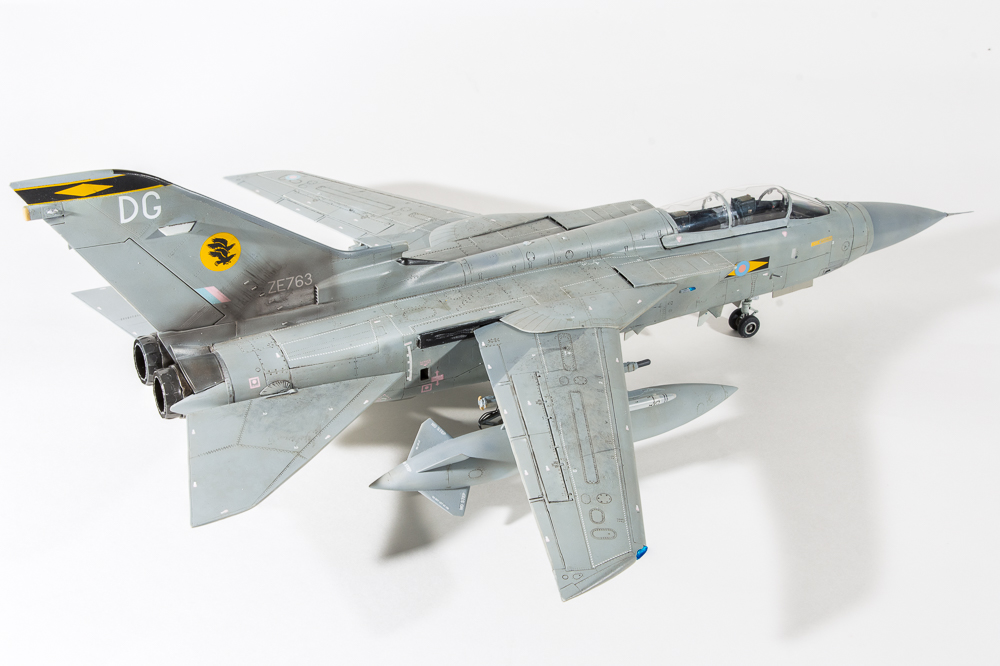
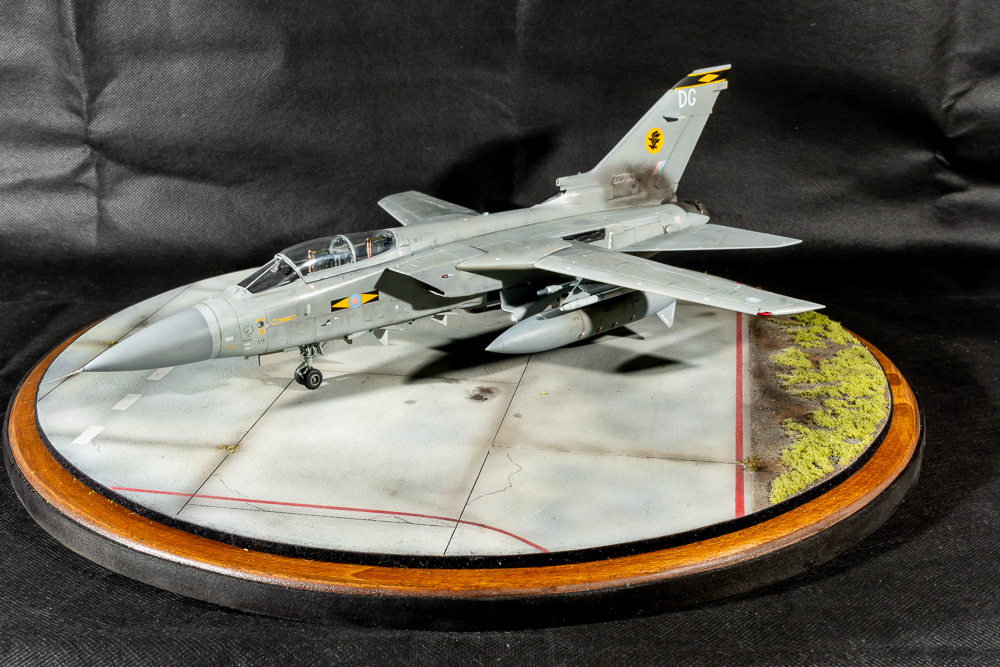
The decision was also made on this model to have the flaps up, to better show off the lines of the ADV. The best way to achieve a flush fit with the wings is to cut the bar on parts B111 &113 so you are left with separate flaps. These can then be glued individually to the top wing ensuring they sit flush with the upper wing.
The undercarriage assembles fairly easily, despite being moulded in two halves. Revell have form here, which means you have a seam to clean up. Part C159 and 168 placement is a little vague. Step 69 shows it the best. On gluing the PE facia to the back wall of the wheelwell, I had an alarm bell go off in my head going, “I wonder if this slot the PE covers is important” Well, Yes, it is as this is where the door retraction strut sits. Didn’t realise this until I added them, so then had to cut the struts, in fact I replaced them with thin rod. I find this annoying on Eduard’s part. They could have easily made the back facia in two parts to be fitted either side of the slot. Its not the first time Eduard have failed to take into account the fitting of kit parts around their etch, and one of the reasons I find myself using less AM these days unless it is drop fit. Some etch placards and brake lines dress up the legs nicely, but on my other F3 I will use wire and decals instead..
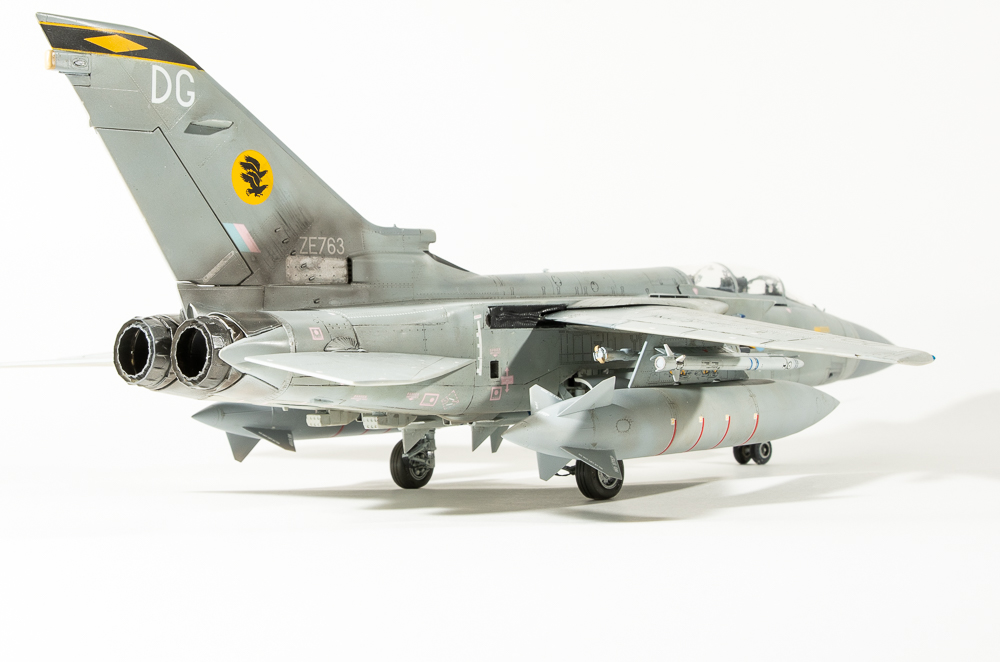
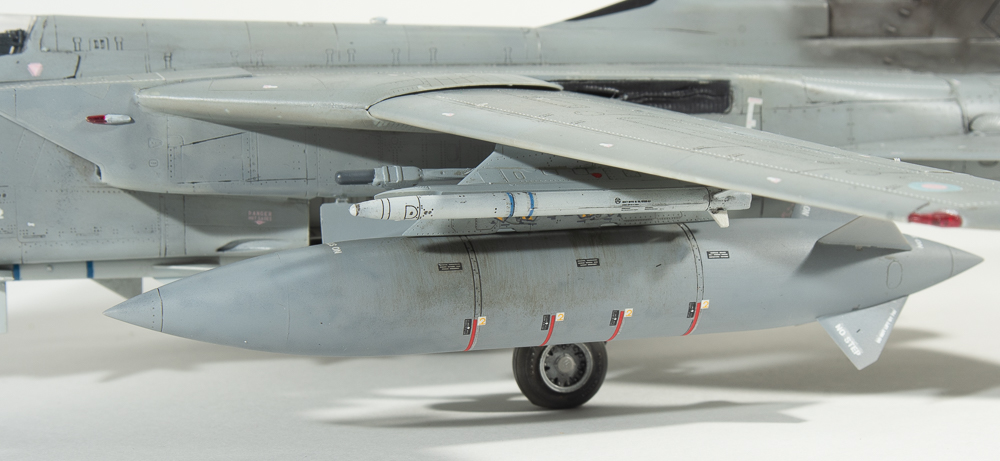
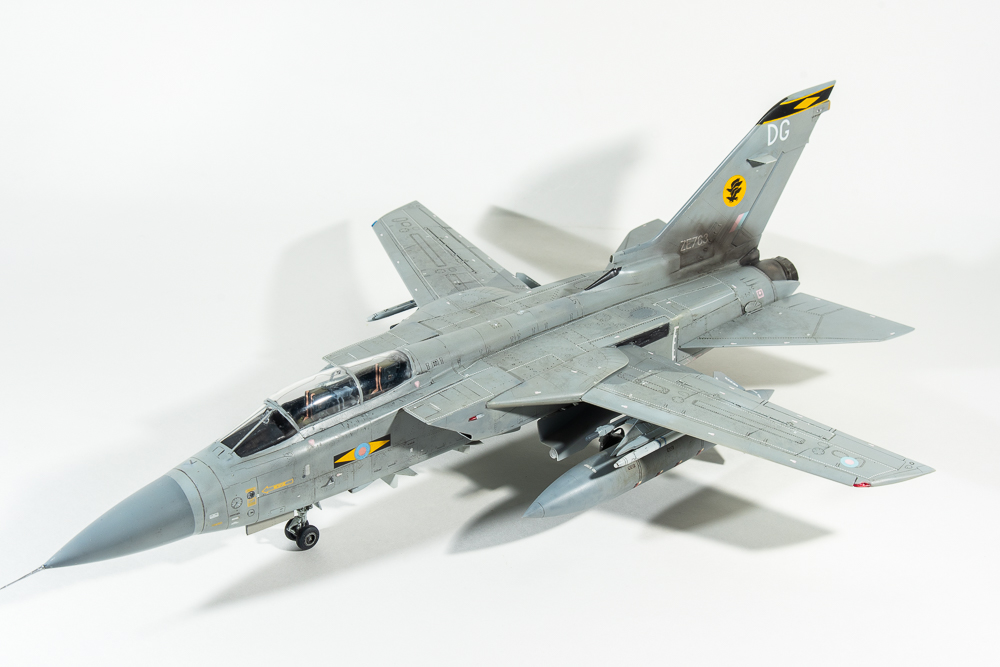
Photos of my chosen jet show it fitted with BOL rails on the inner side of the wing pylon. If like me, you didn’t know what BOL rails are, I can know tell you they are a launch rail with an inbuilt countermeasures pod. They are surprisingly hard to track down as an aftermarket item, considering quite a few jets use them. A friend offered me his Steel Beach ones, but they looked quite a crude casting. The F4DModels were much better although warped. Hot water straightened this out.
For the Barley Grey, I used a home grown paint SMS which performed quite well, Its marketed as ready to spray, but I still thinned mine a little. Colour looked good, but I find it strange they do not offer a Light Aircraft Grey in their range to go with the barley grey, so it was back to my go-to paint. Mr Color.
Again on this model, I had problems with the paint and primer peeling off when removing the tape. I have no idea whats causing this. The model was wiped down with tamiya thinner prior to paint, and was primed with Alclad Grey. The consensus amongst my modelling mates was it could be the primer, which Ive had for a while, so in the bin it went.
The model was gloss coated for decals and in preparation for the wash. These days I apply the wash before the decals, despite this method, the wash failed to pick up a lot of the very fine detail, despite repeated applications, which was annoying in the extreme.
The decalling should have been easy, but again my poor build planning brought things unstuck. Literally!
The decals had all been applied when I realised I had not painted the fintop di electric panel, so as the tape would lay over the decalled fin band I religiously detacked the tamiya tape before laying it over the decal. Of course, on pulling off the tape, the decal came with it, necessitating me having to paint the fin band back on. This in itself needed a lot of touching up as each time I pulled tape off, paint came away too. I really need to get to the bottom of why this is happening.
Surprisingly, my enthusiasm hadn’t waned for the model, so I pressed on, applying a satin sheen, which I then went over with dullcoate. Even with the satin, the model still looked far too glossy. Annoyingly, all the stencils stood out as too thick as well. I had applied them in little pools of future to stop any silvering. I wont do this on my next one.
This just left final assembly of wheels, aerials, canopy mirrors and nav lights. none of which I managed to lose as is the usual case despite several of them pinging off the tweeezers.
And that was that! One down, two to go
So what do I think of the Revell Tornado? Well I think the main problem is, its Revell! I have no problems with the breakdown of the kit, but the kit quality is poor indeed, flash, sink marks and ejector pin marks mar the parts, making assembly harder than it should be. These kits, like Airfix, are designed for the mass market, the so called “pocket money brigade” and the tooling shows it. You get what you pay for.
Despite this, if you ever release a new tool Jaguar, Revell, I’d buy it in a heartbeat.
Anything would be better than the horrid kittyhawk kit thats still sitting on my shelf of doom.