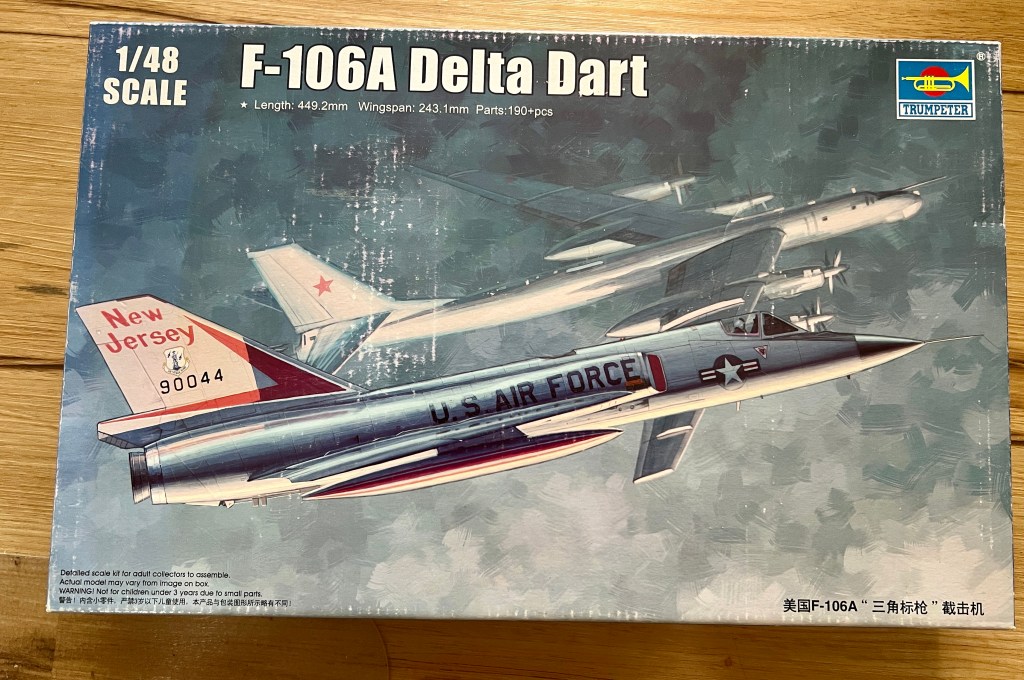
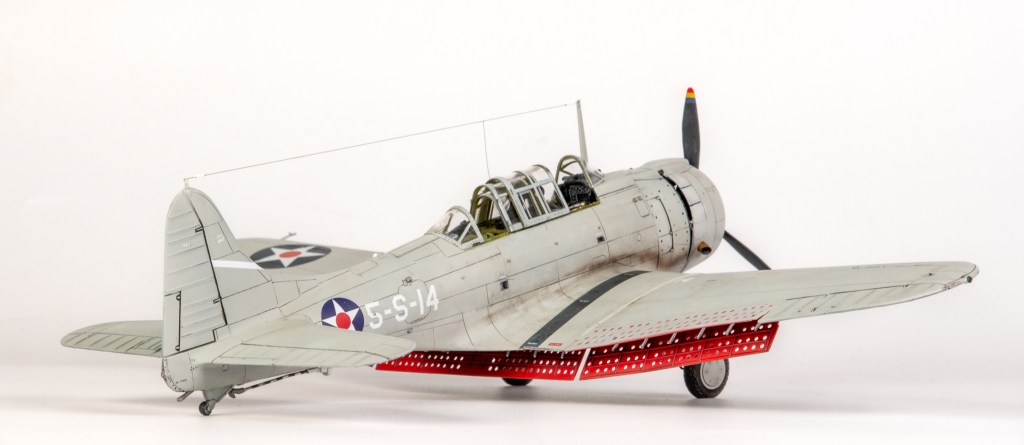
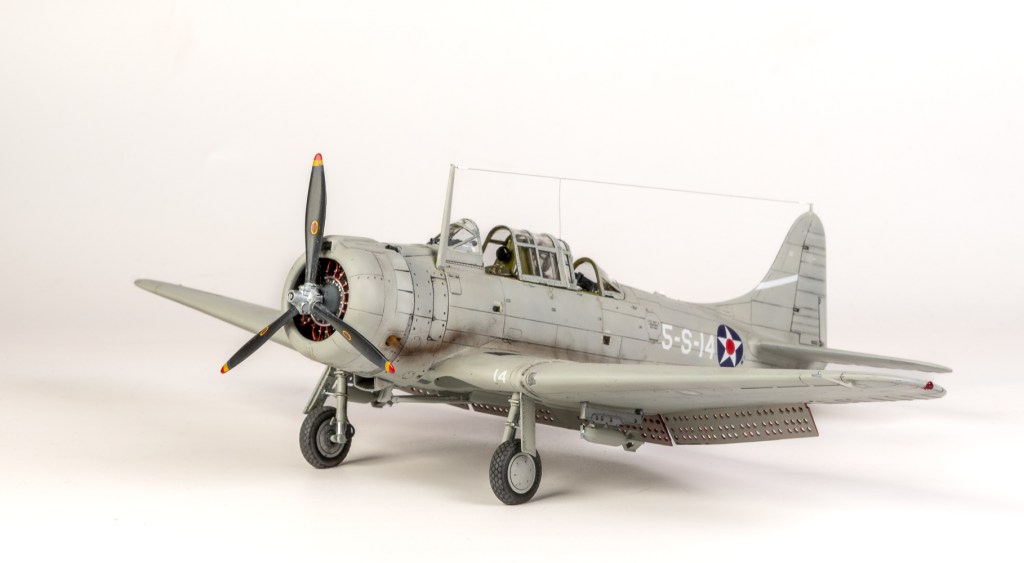
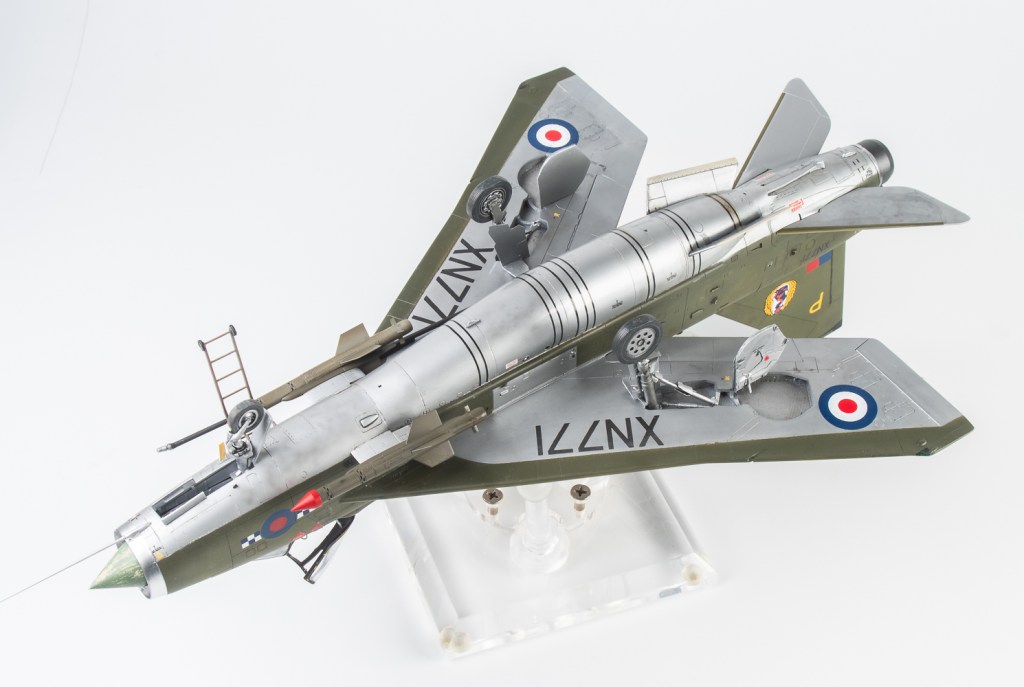
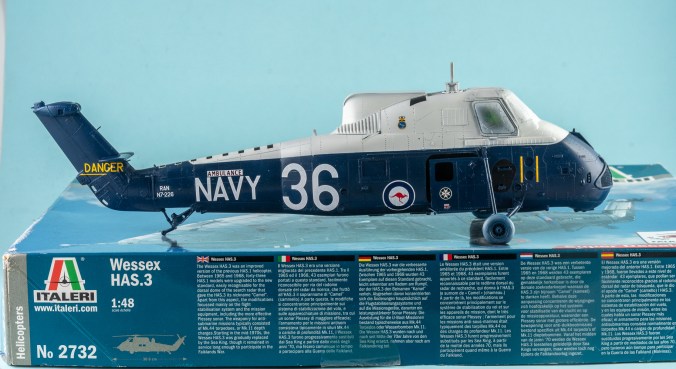
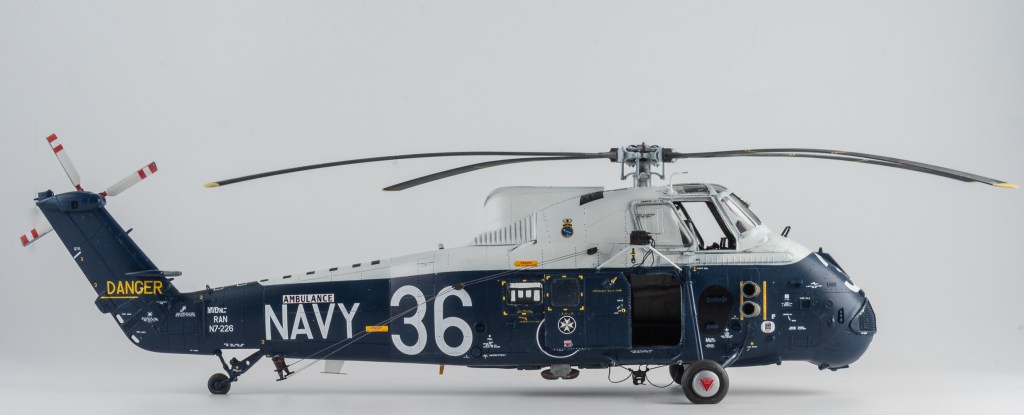
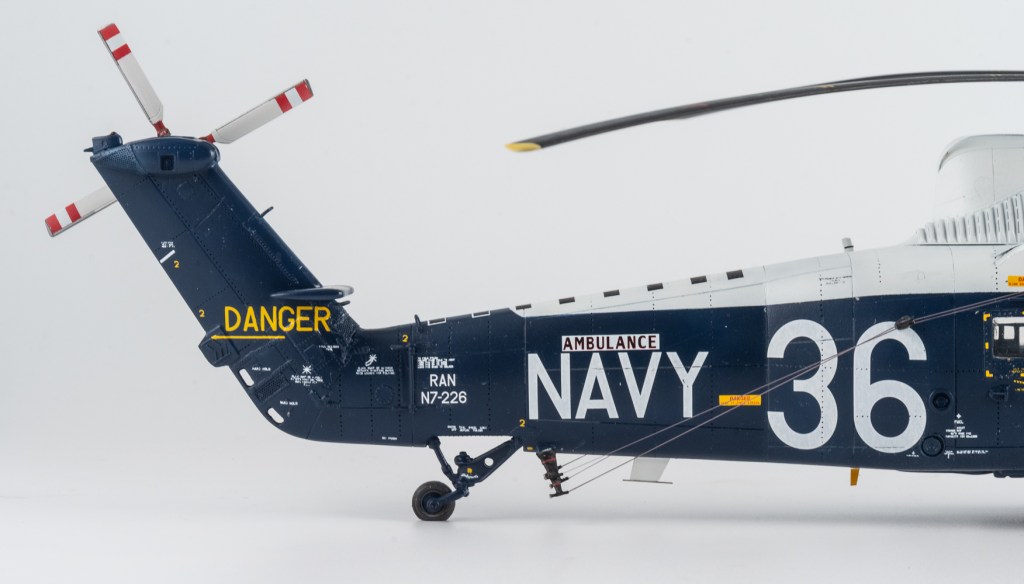
- Purchased: 2014
- Completed: 2026
- Enhancements:
- Seat; Wolfpack
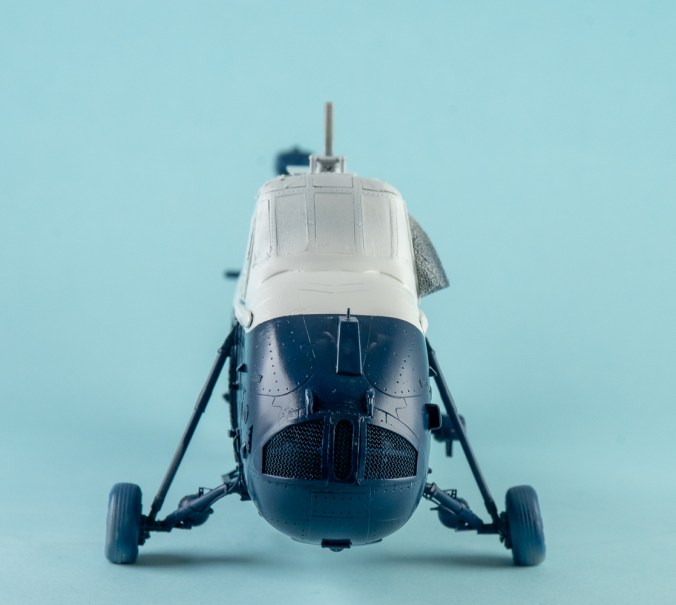
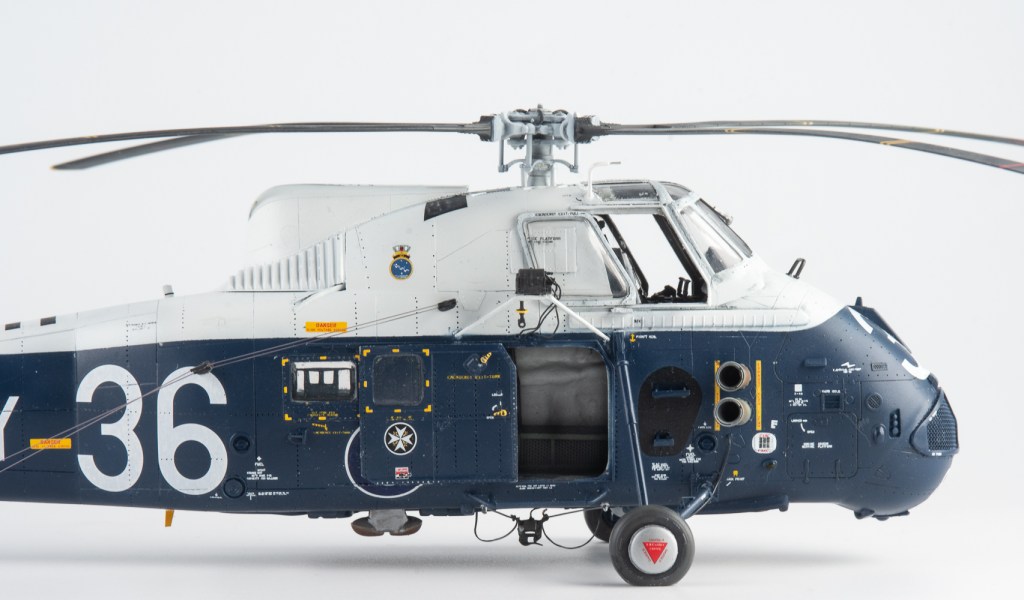
- Wheels; Reskit
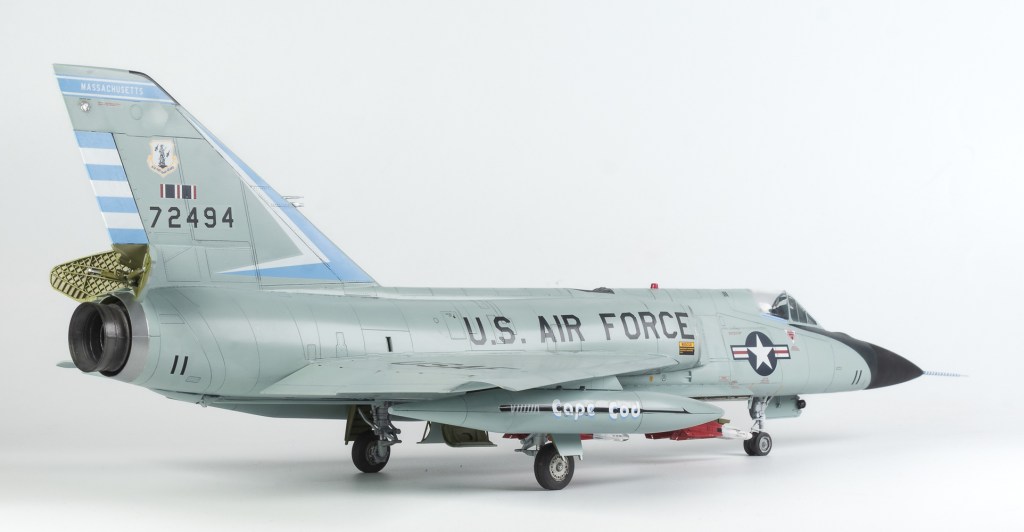
- Exhaust Nozzle; Reskit
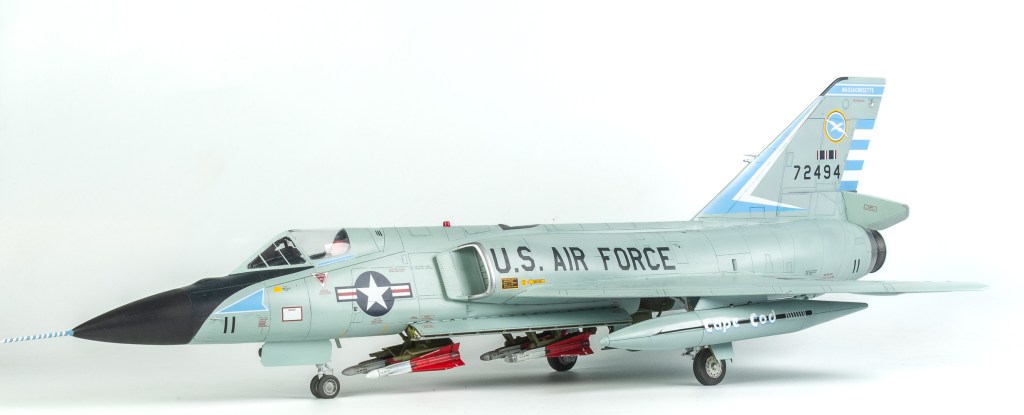
- Missiles; Reskit
- Pitot Tube; Master Details
- Antennas; Quickboost
- Decals: Caracal, Fundekl
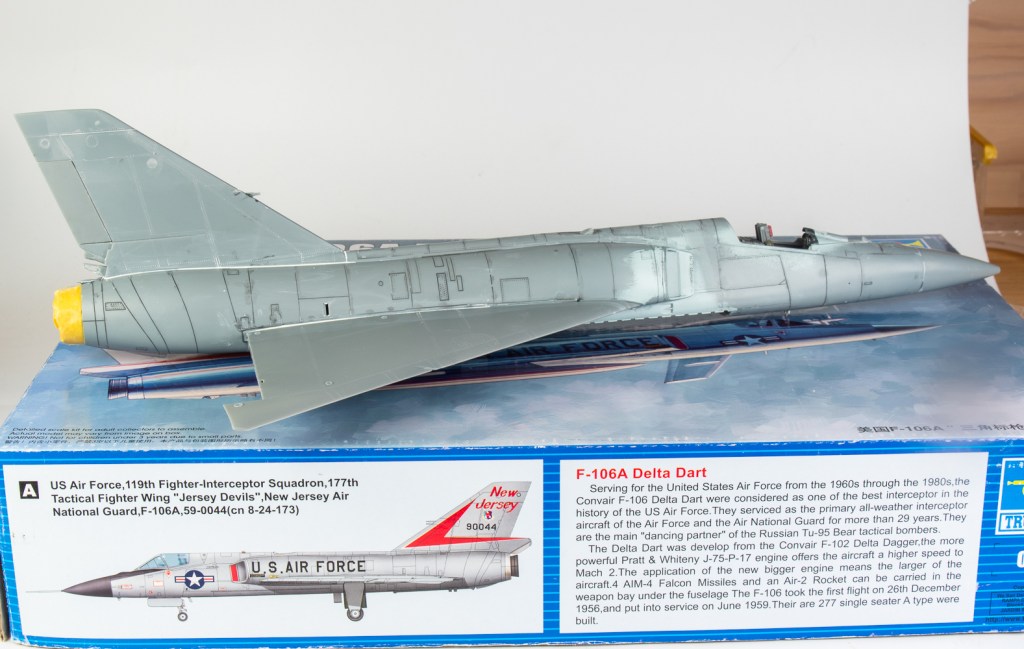
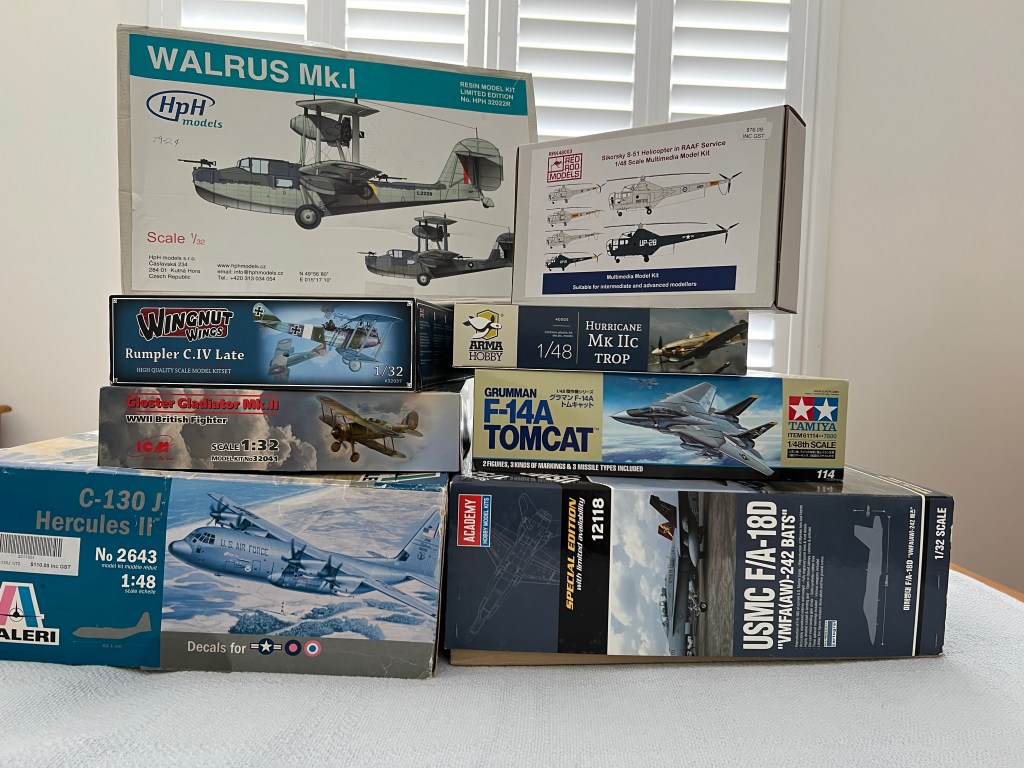
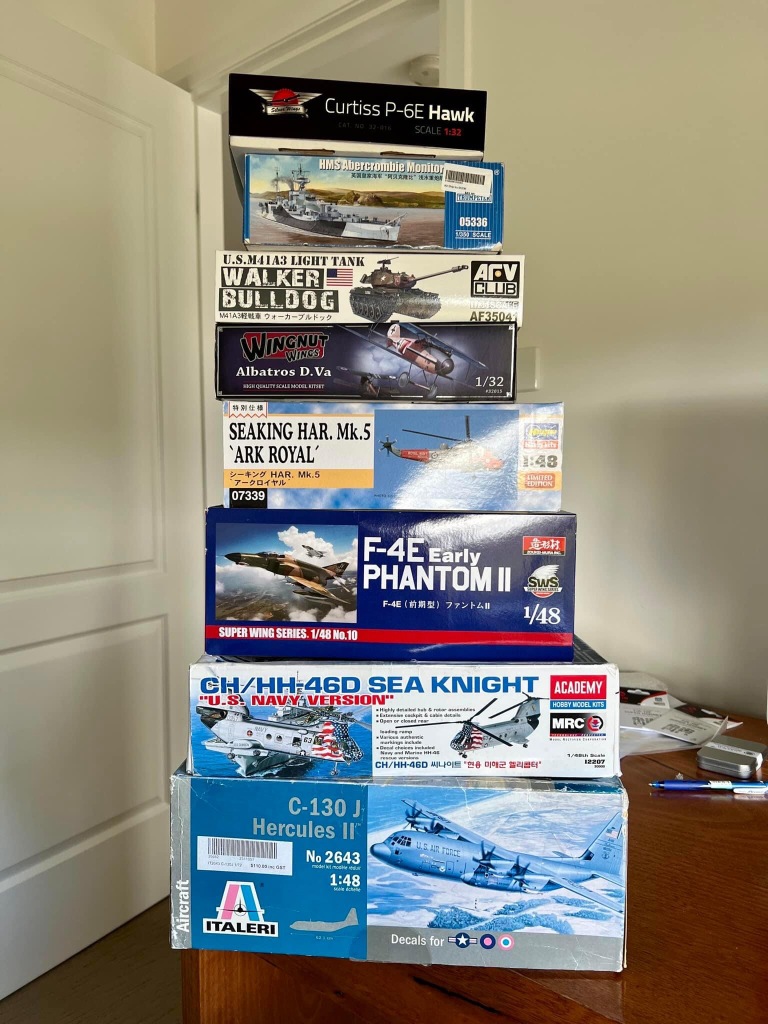
This kit was one of about five kits I bought from various traders at ScaleACT – a model show held in Canberra each year – in 2014. It was probably the last show that I came away from with this number of kits. These days, tools and paints are my main purchases from shows.
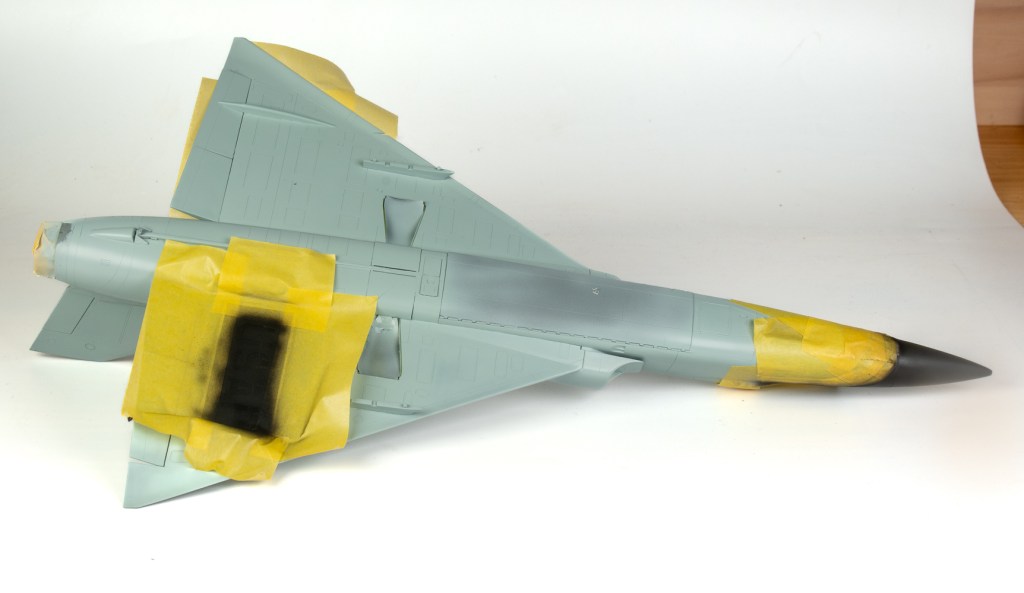
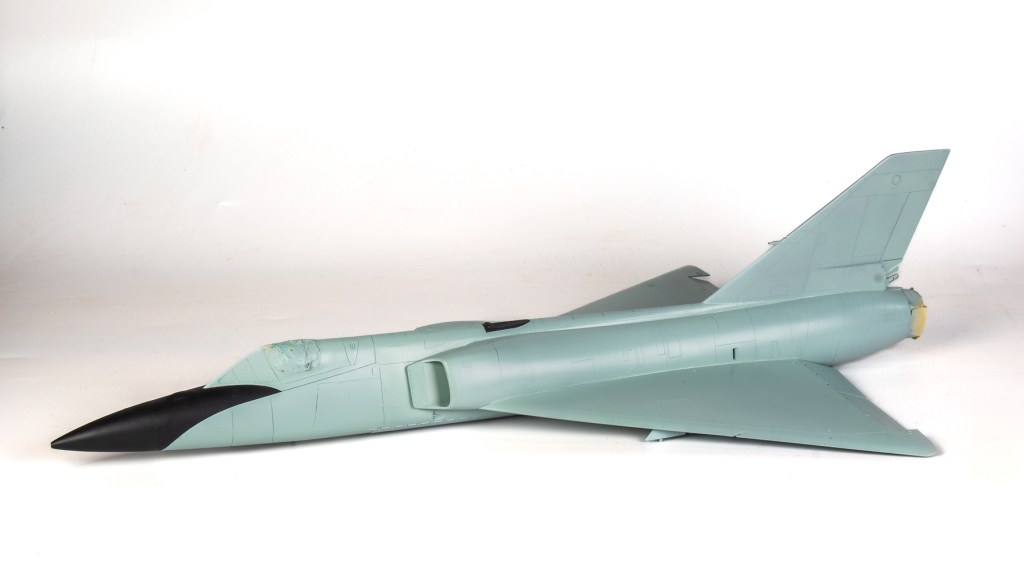
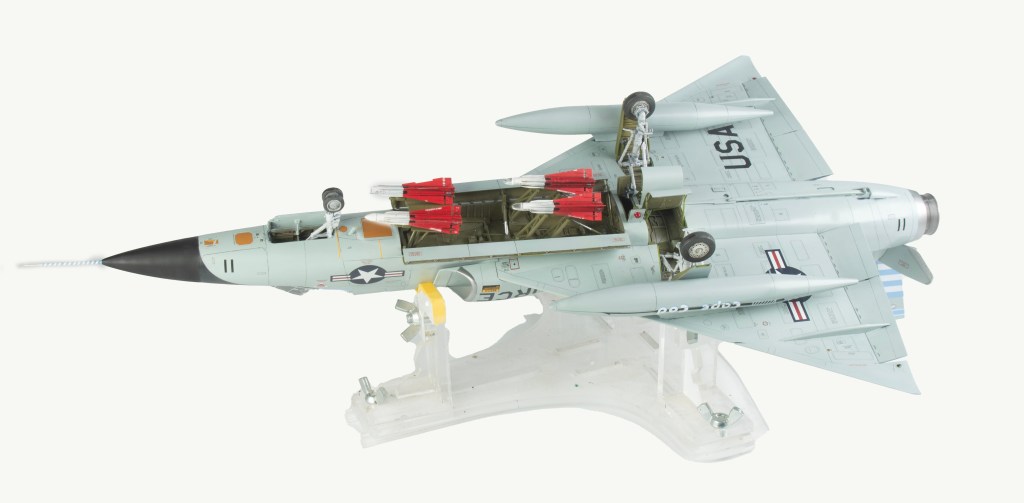
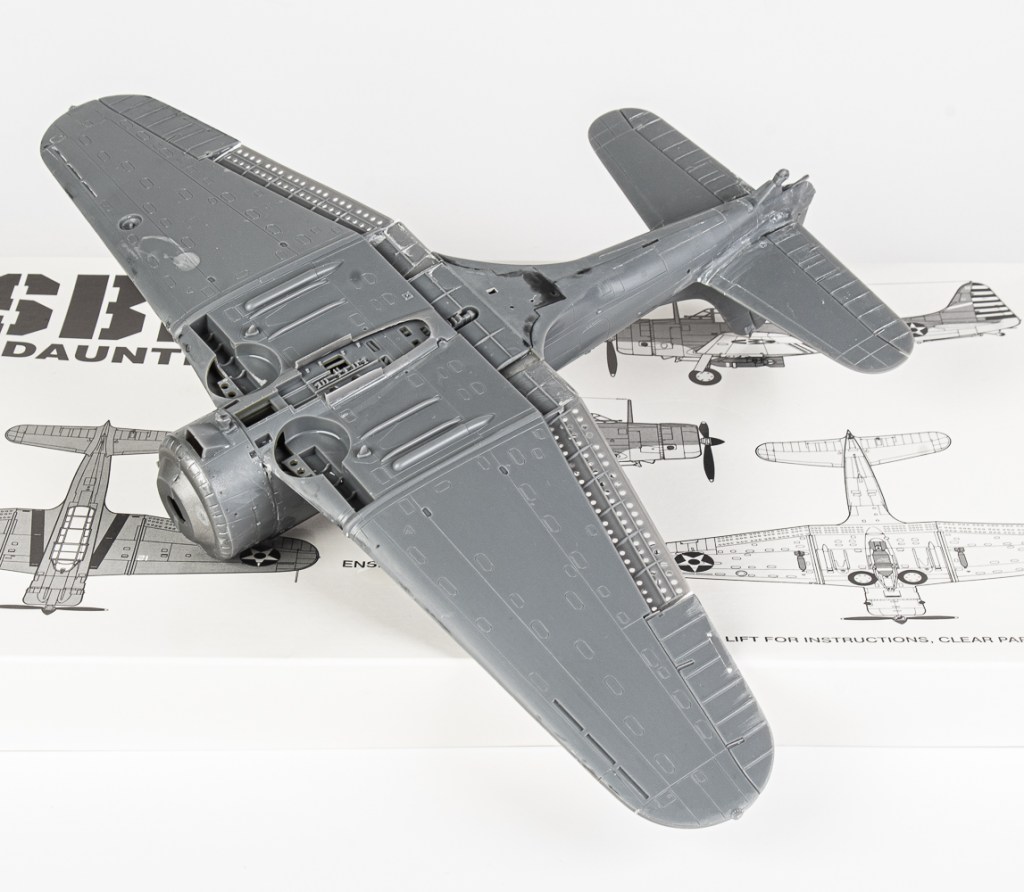
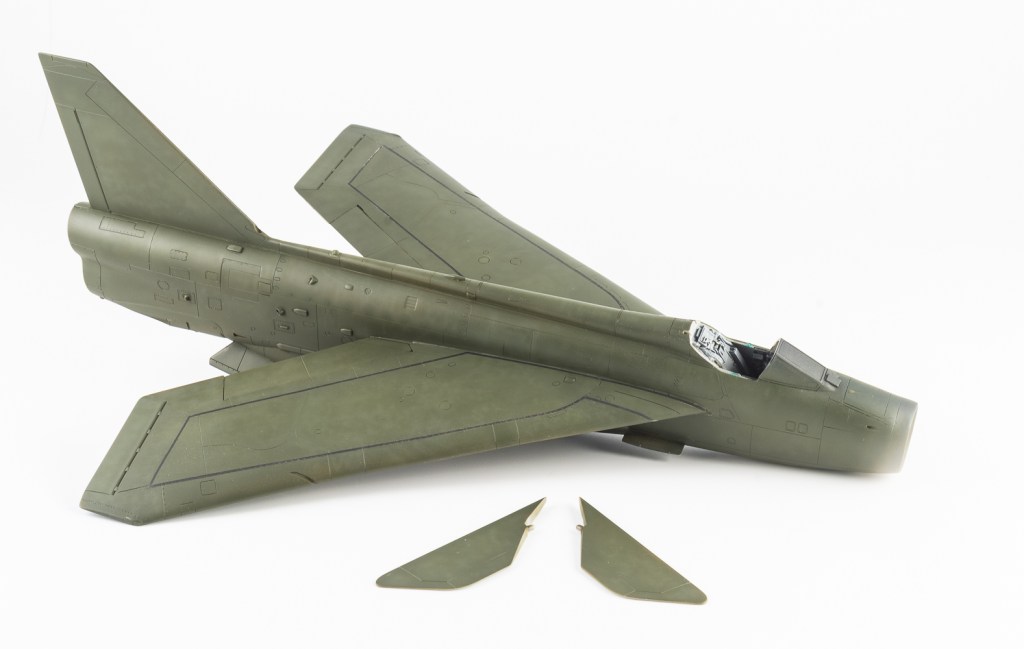
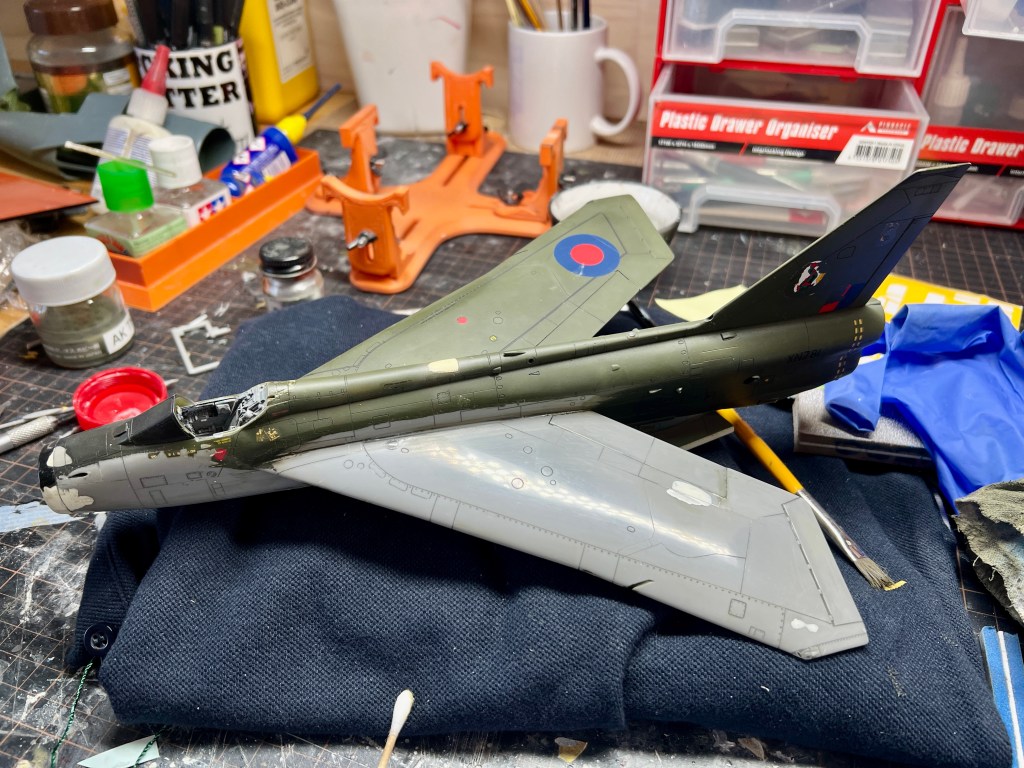
Anyway…….The Trumpeter Delta Dart….reasonably detailed in the box, options to deploy flaps, RAM turbine and missiles. The canopy can also be positioned opened or closed as can the weapons bay. The one-piece door for this came in handy for masking the open bay whilst painting.
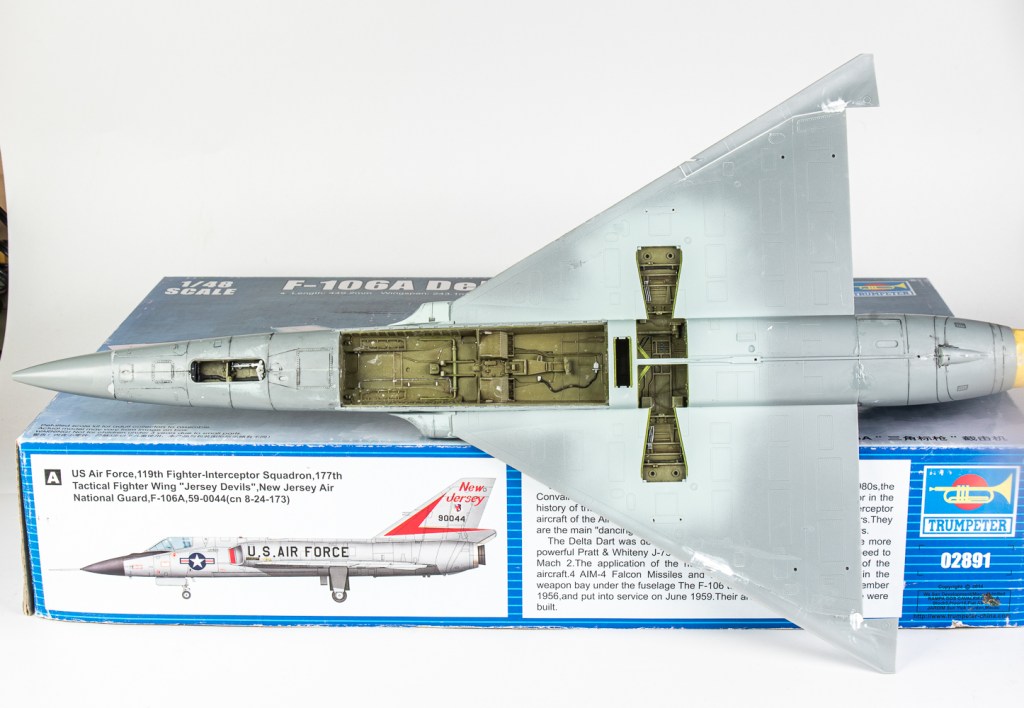
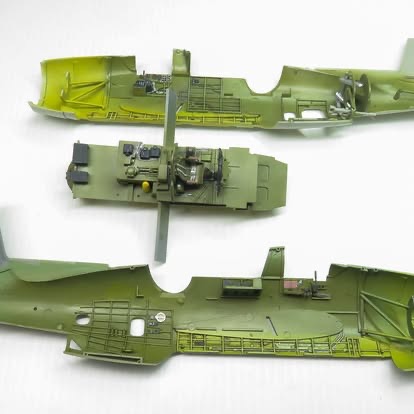
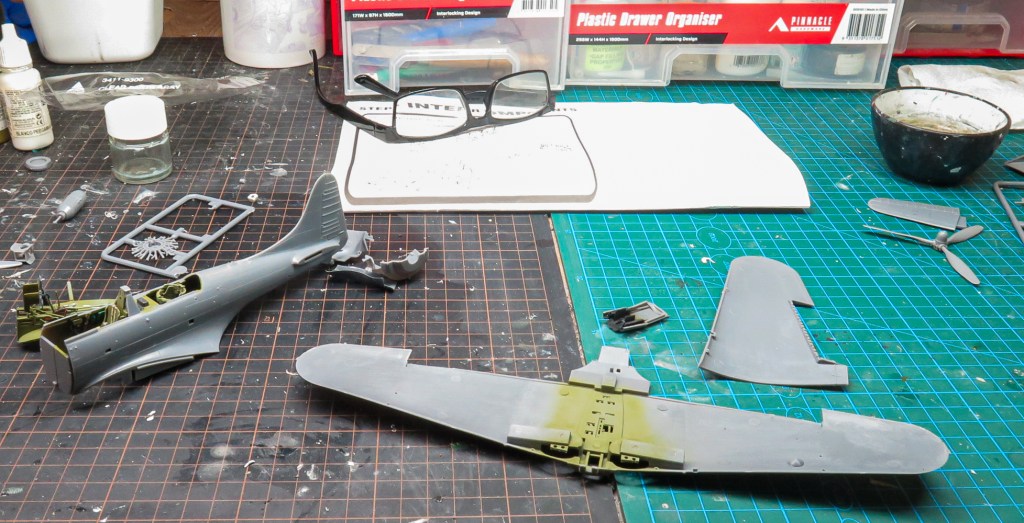
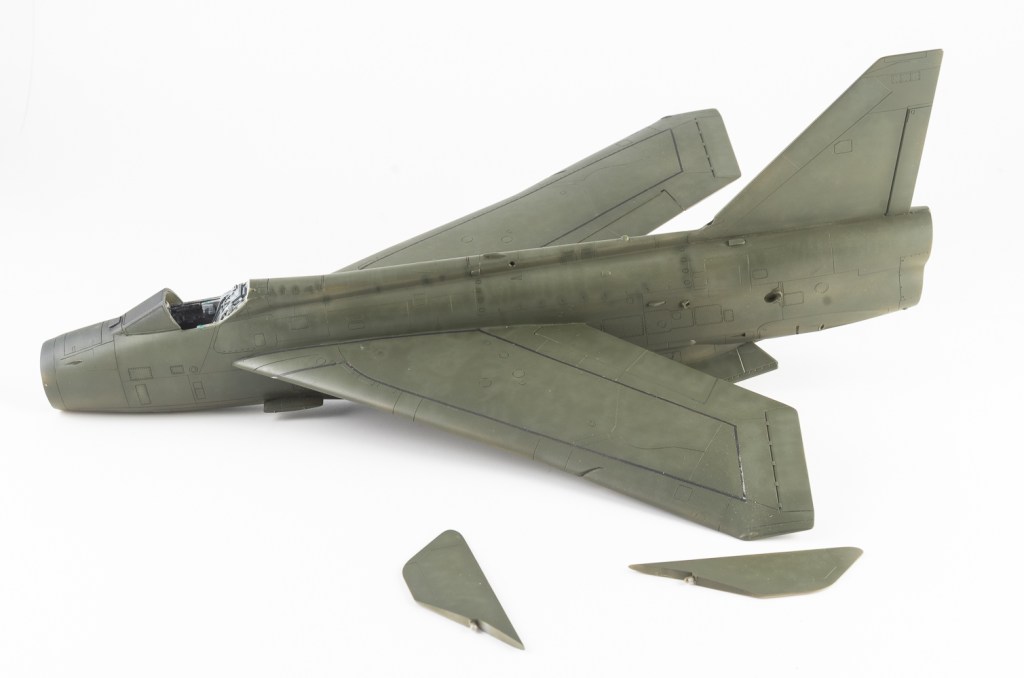
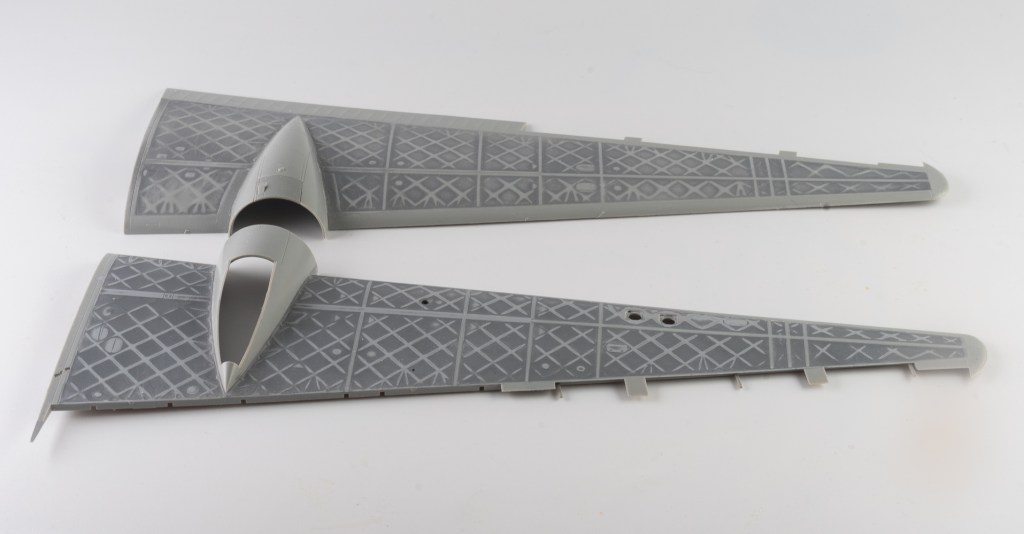
Upon closer inspection, the seat is fairly basic as are the missiles and wheels. All three items were replaced with aftermarket items.. More troubling is the fact the plastic has a very slight texture. I wish I had done more to smooth the parts. They were sanded, primed and resanded, just not enough times to completely smooth out all the textures. The lower wings are where it shows up most. A lot of the rivets and panel lines could also do with rescribing as some of them are quite shallow, whilst others are shallow and wide.
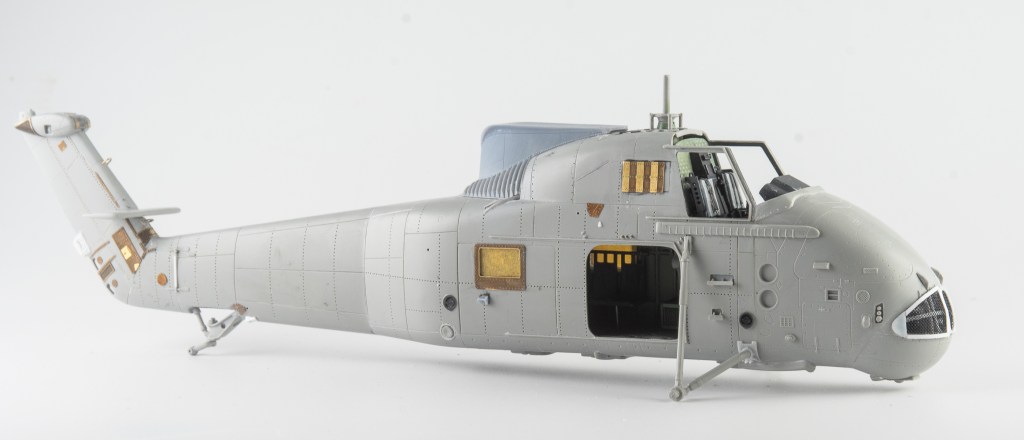
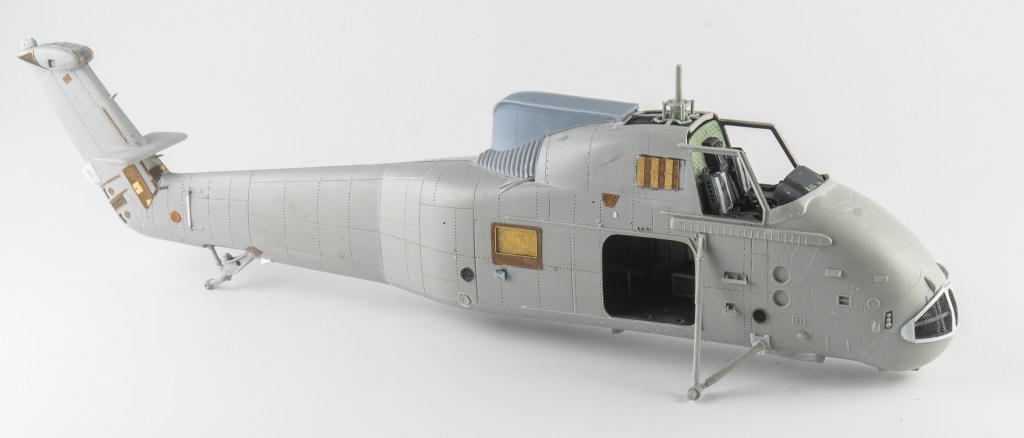
Construction Notes
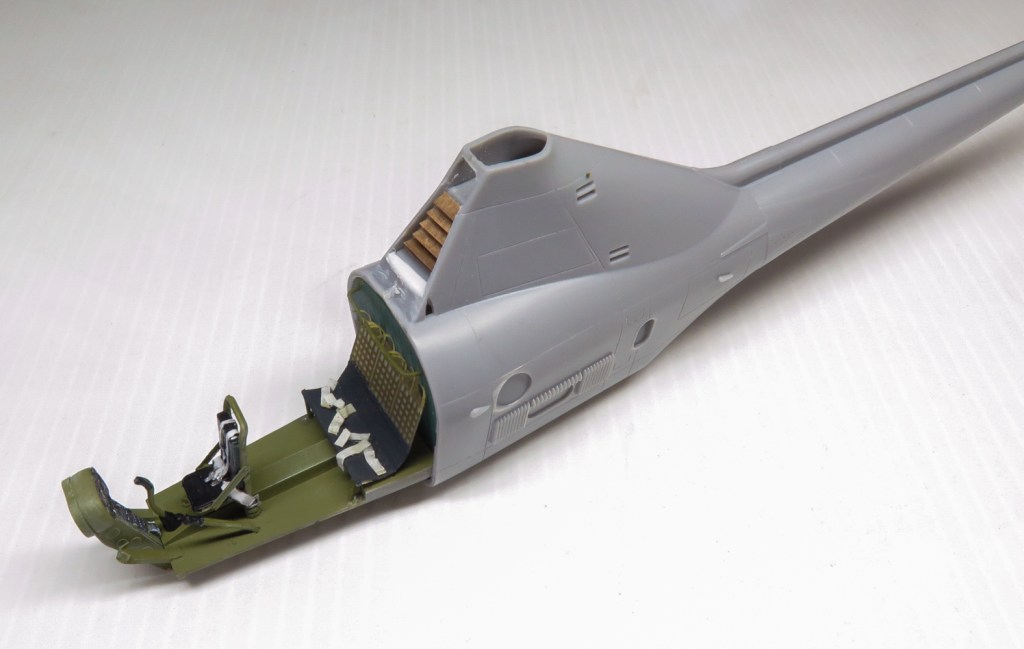
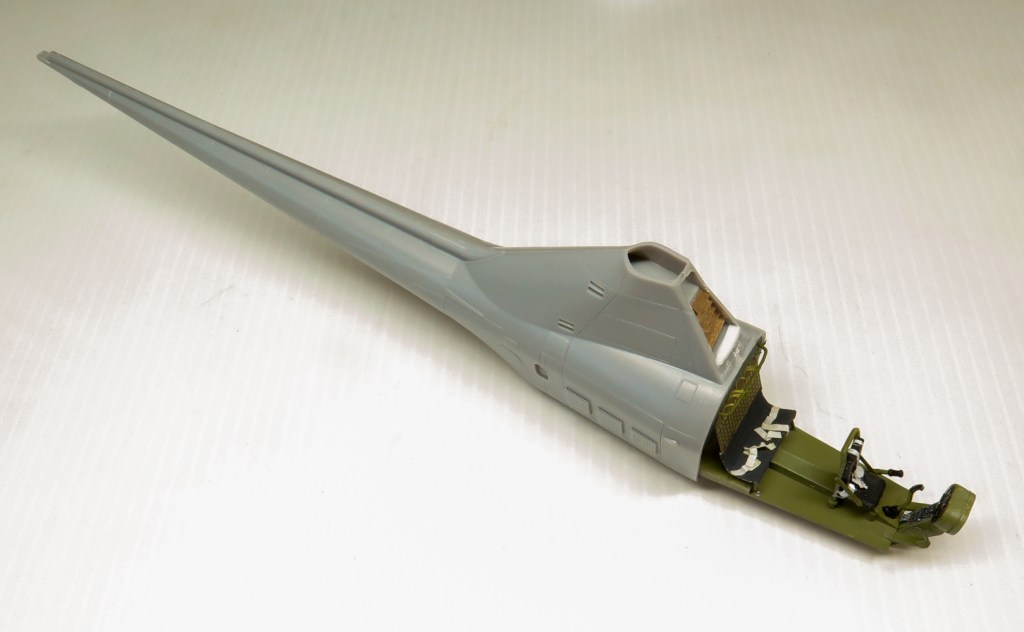
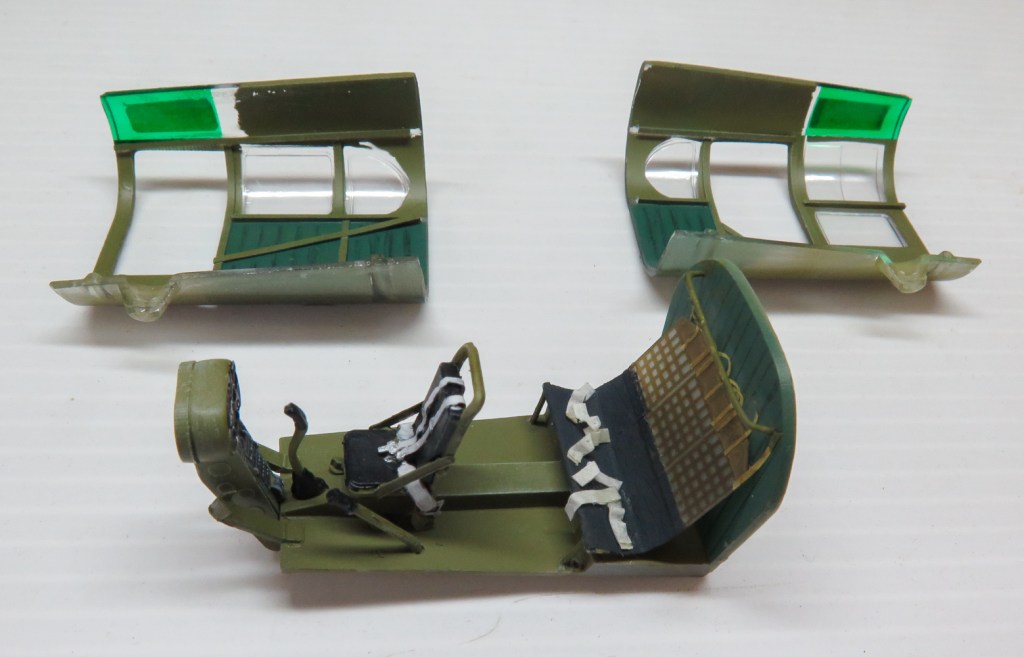
Step 1 The kit seat was replaced with a far more detailed Wolfpack resin item
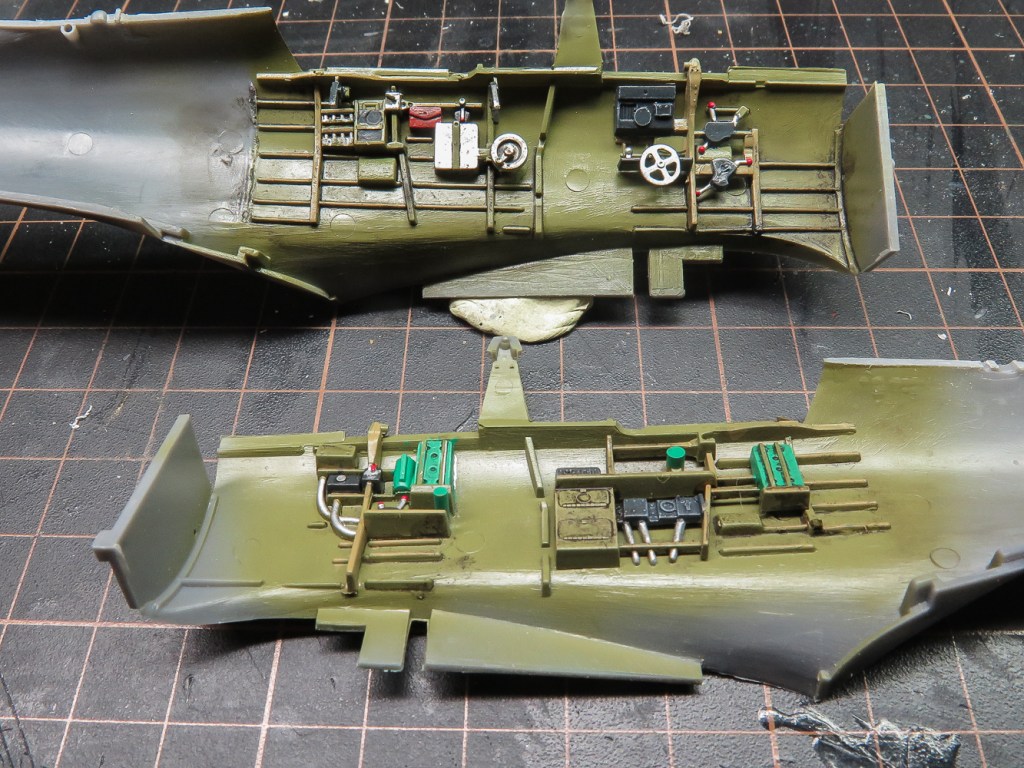
Step 2. Ensure you fit the seat before the control column. If you fit the control column first you won’t be able to slide the seat underneath it. The kit decal was used over the instrument panel as this model was going to have a closed canopy. The side consoles were dry brushed. The cockpit was painted Gunze Dark Gull Grey
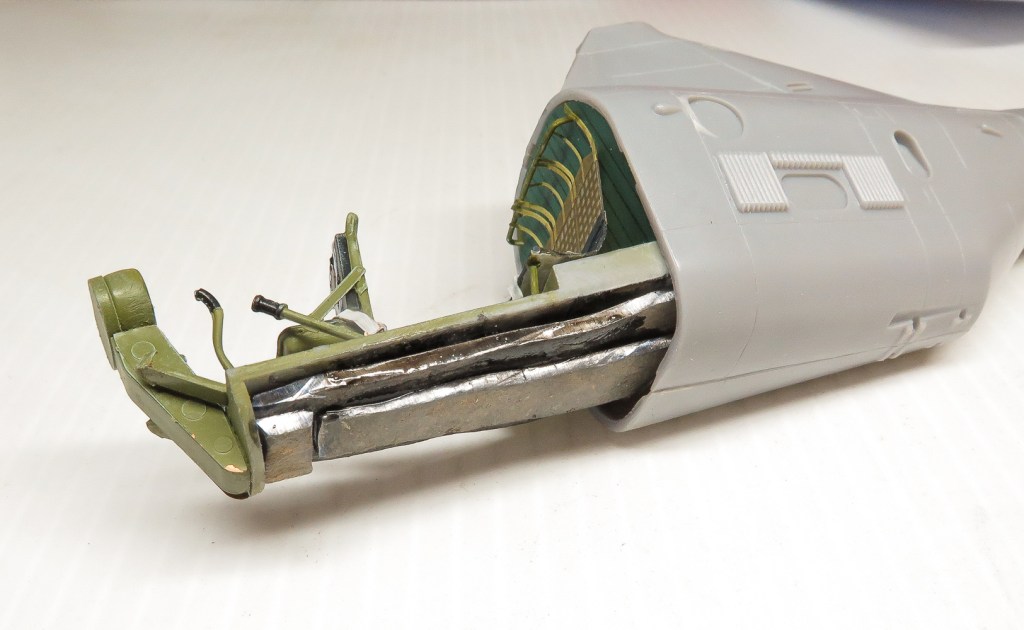
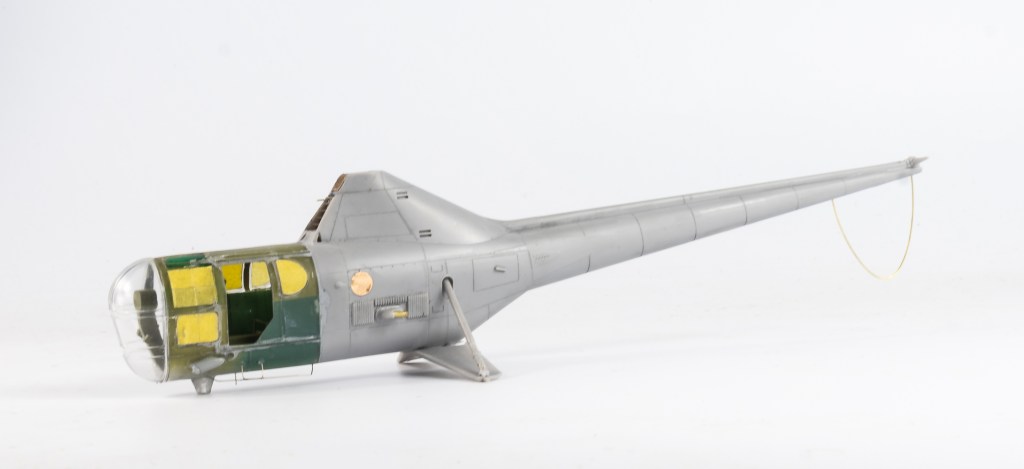
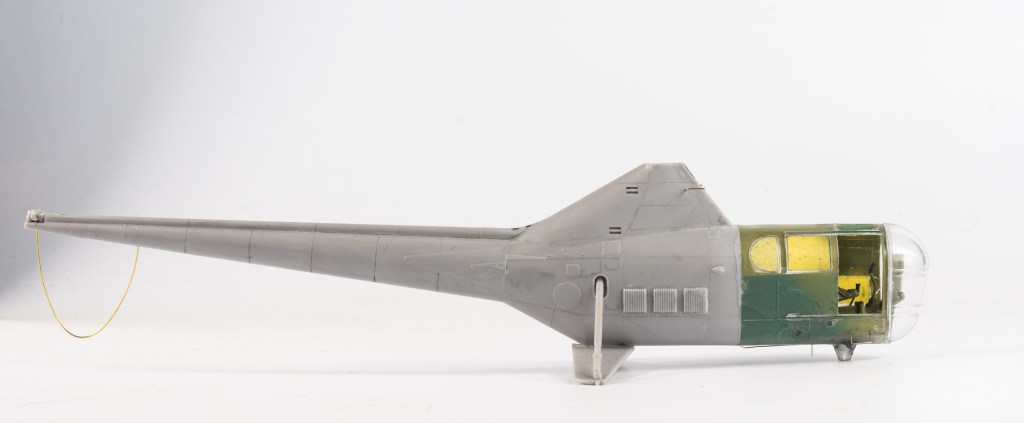
Step 3. I reinforced the upper and lower parts of the nose gear by drilling and fitting a brass pin. At this stage only the upper leg C13 was glued to the bay, the lower strut C28 being fitted at the very end of final assembly.
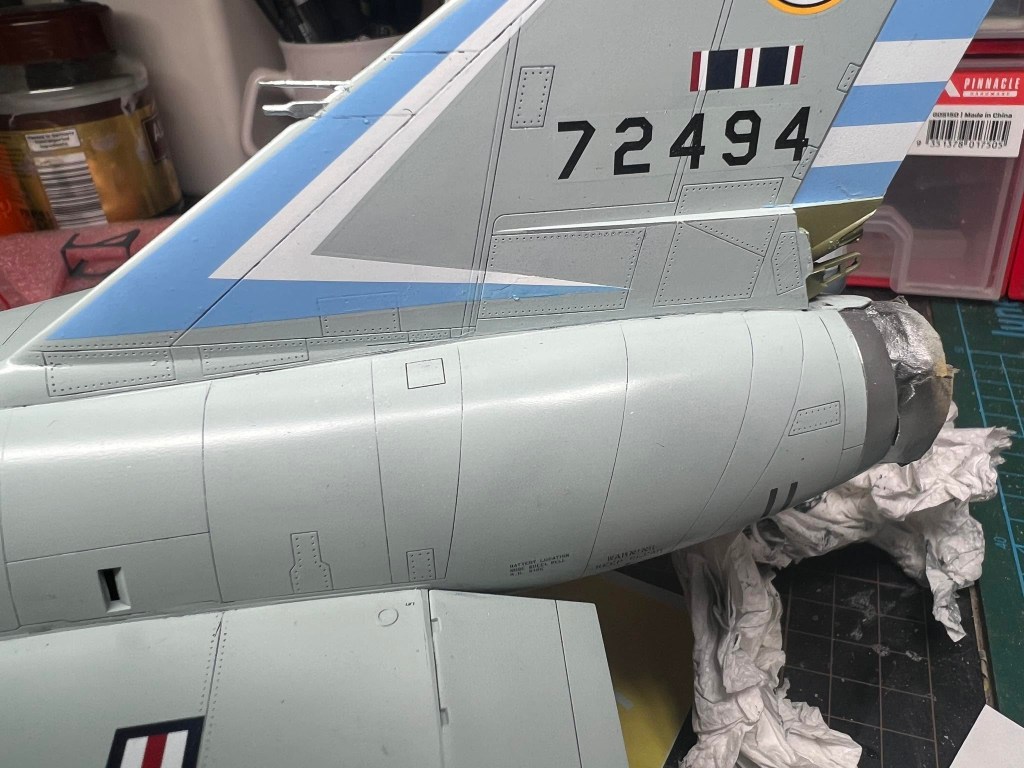
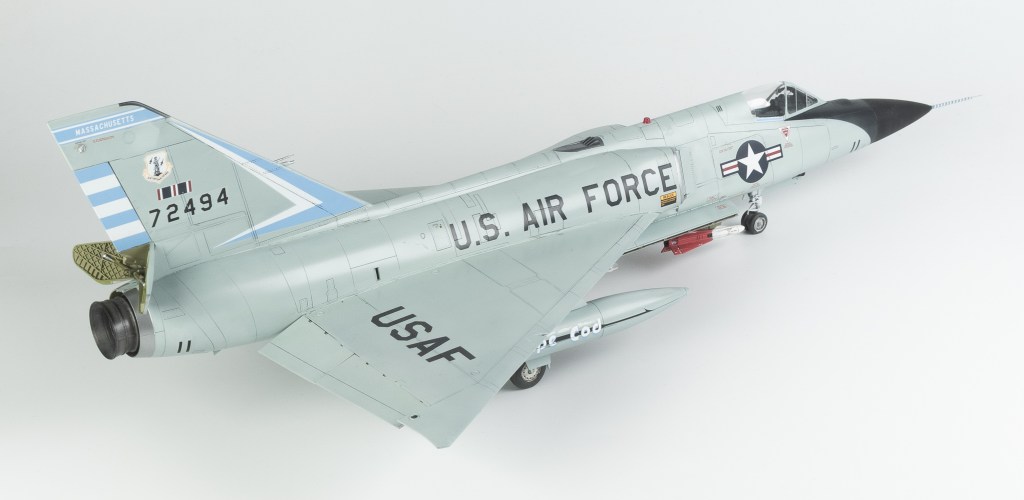
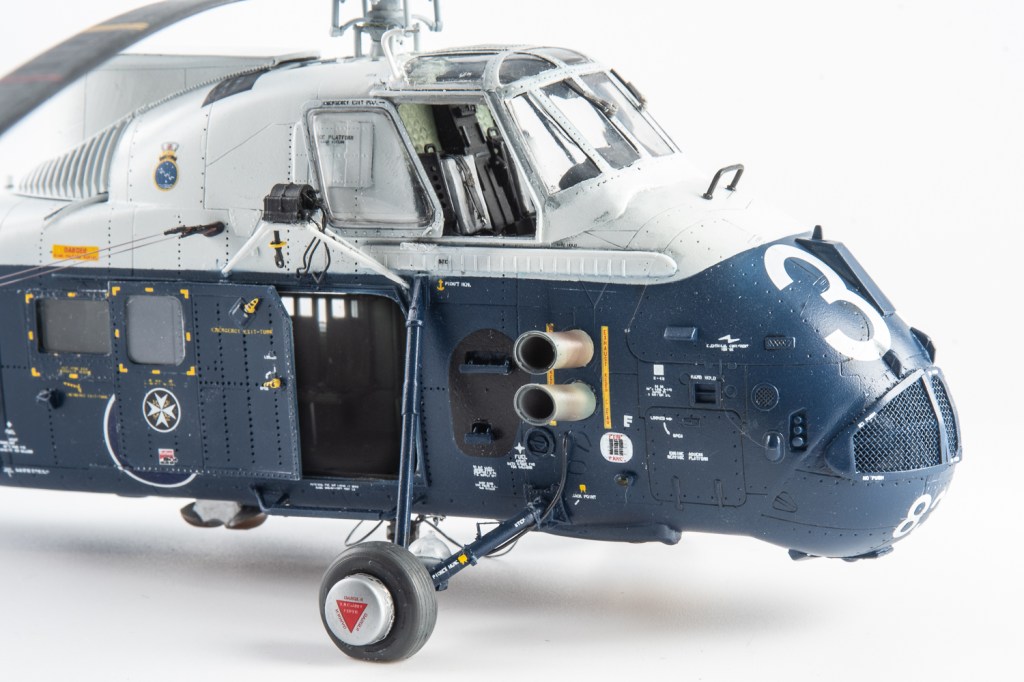
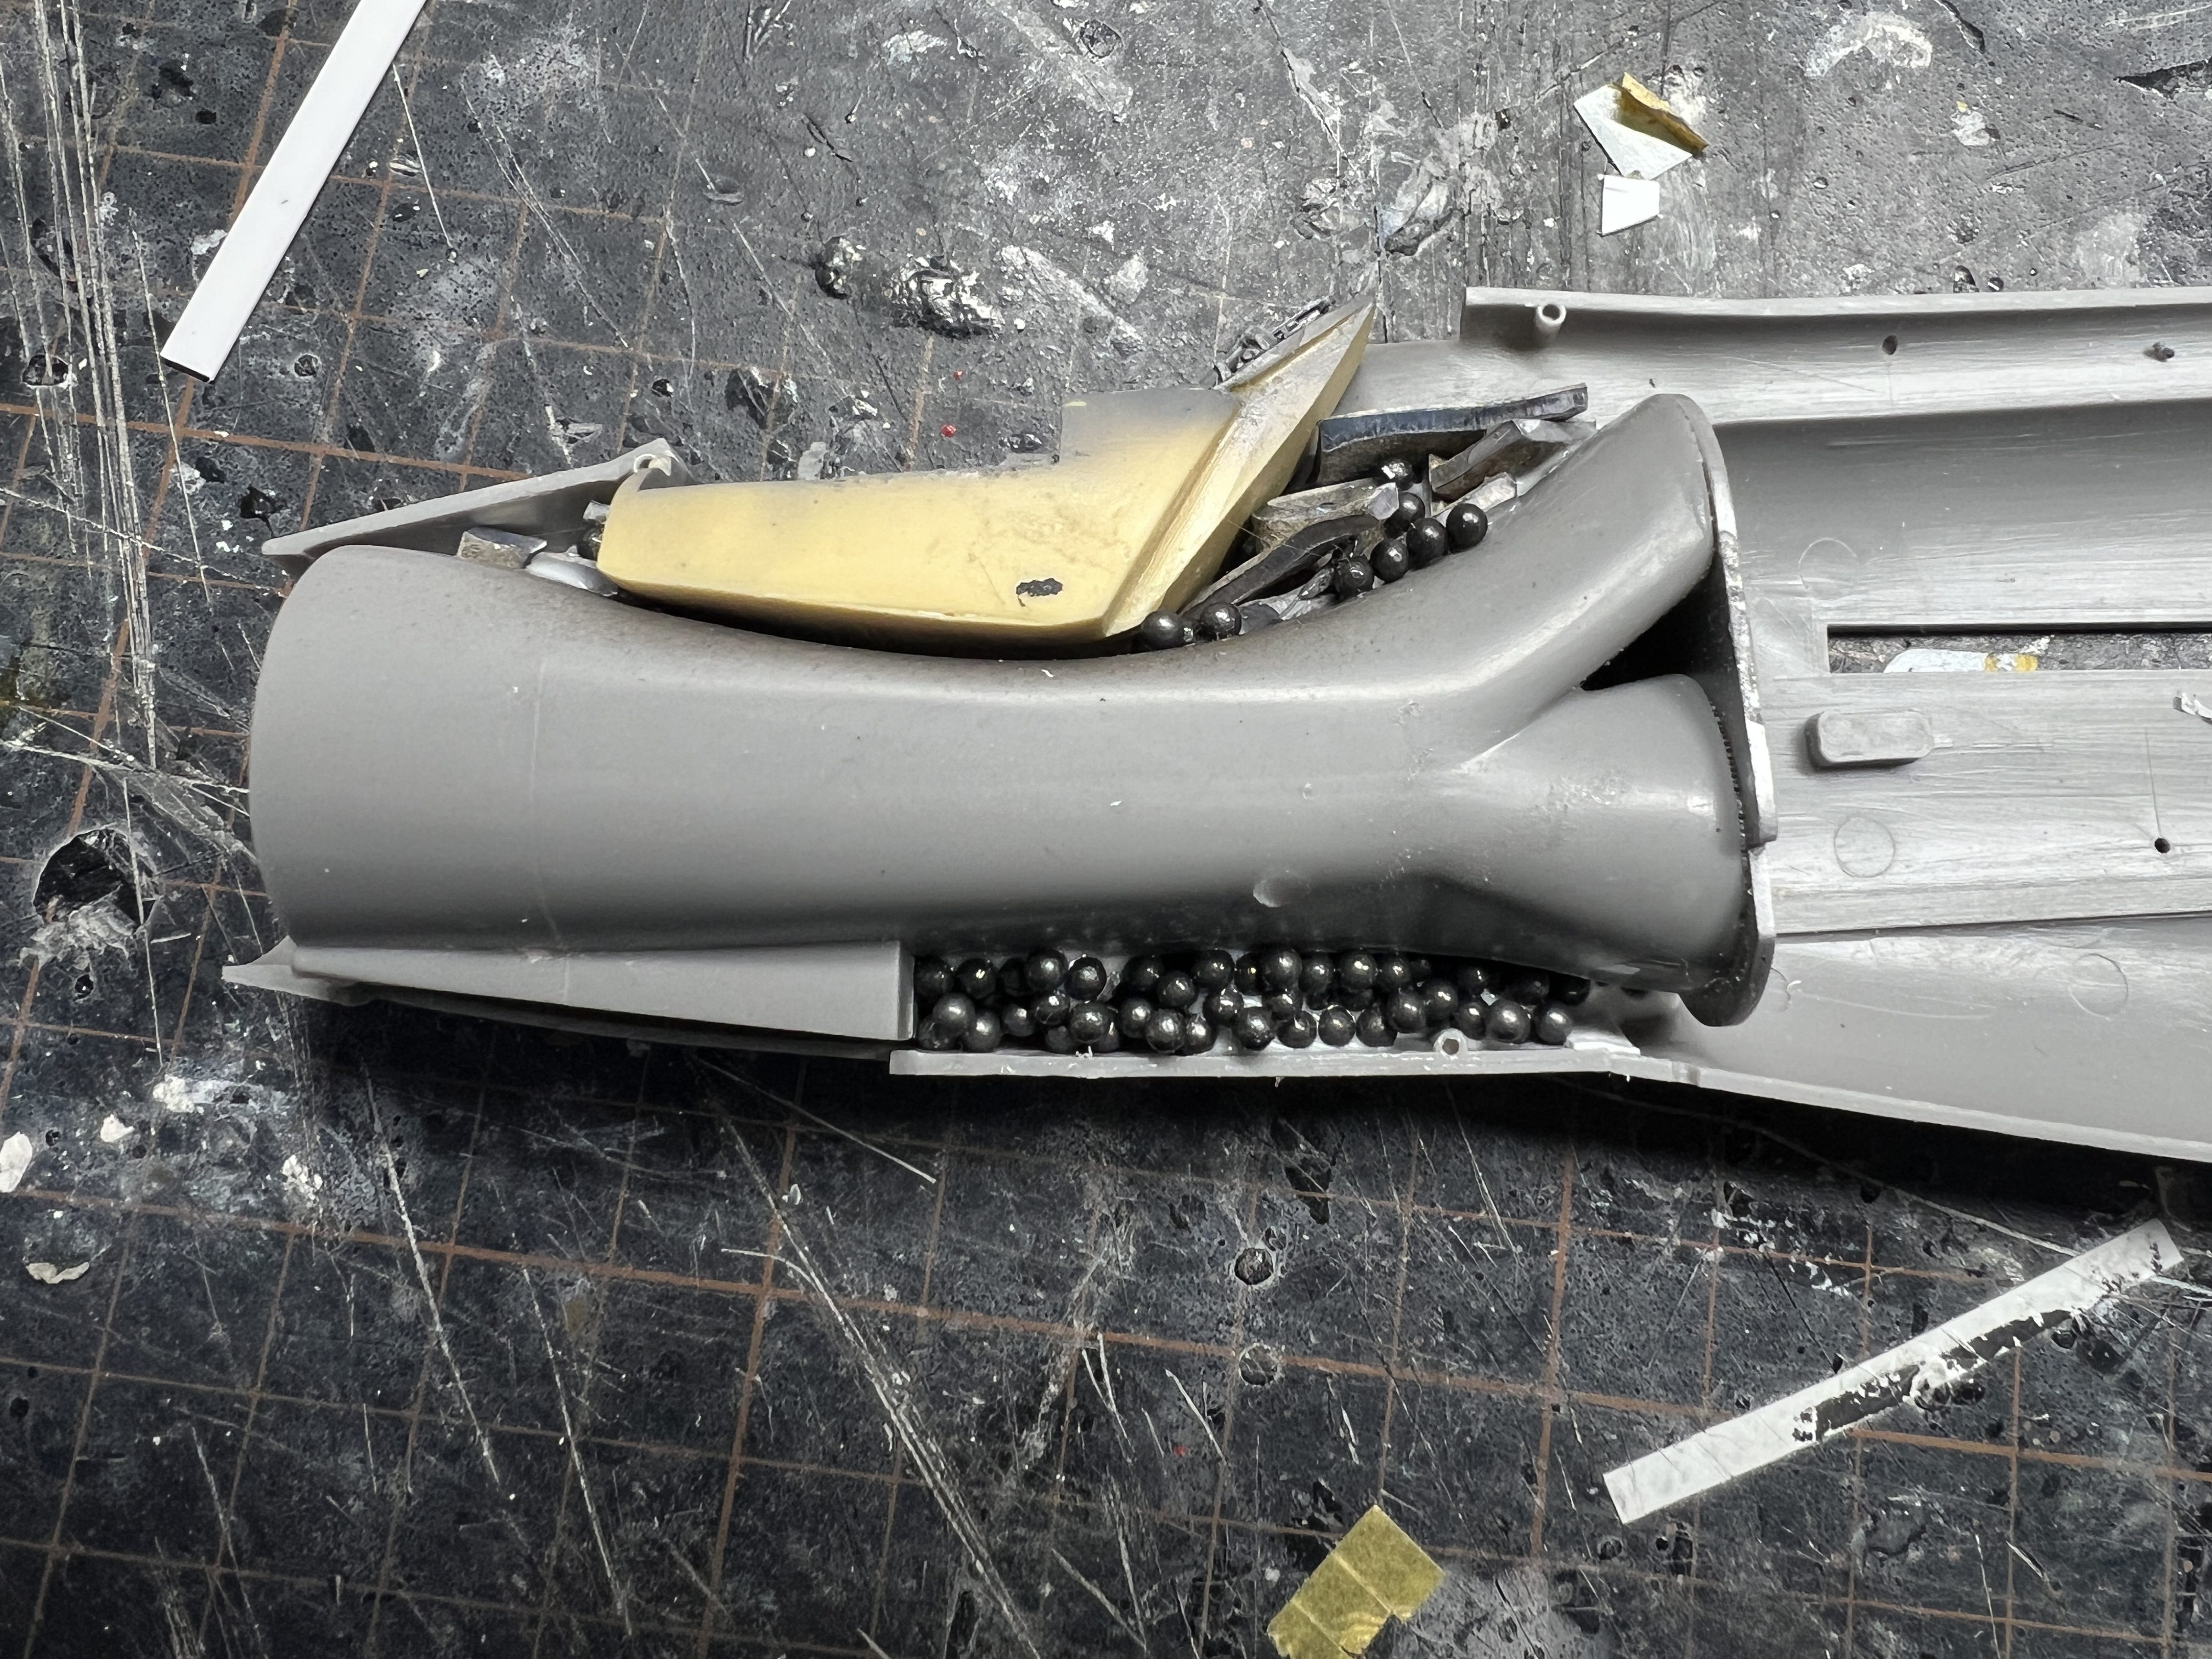
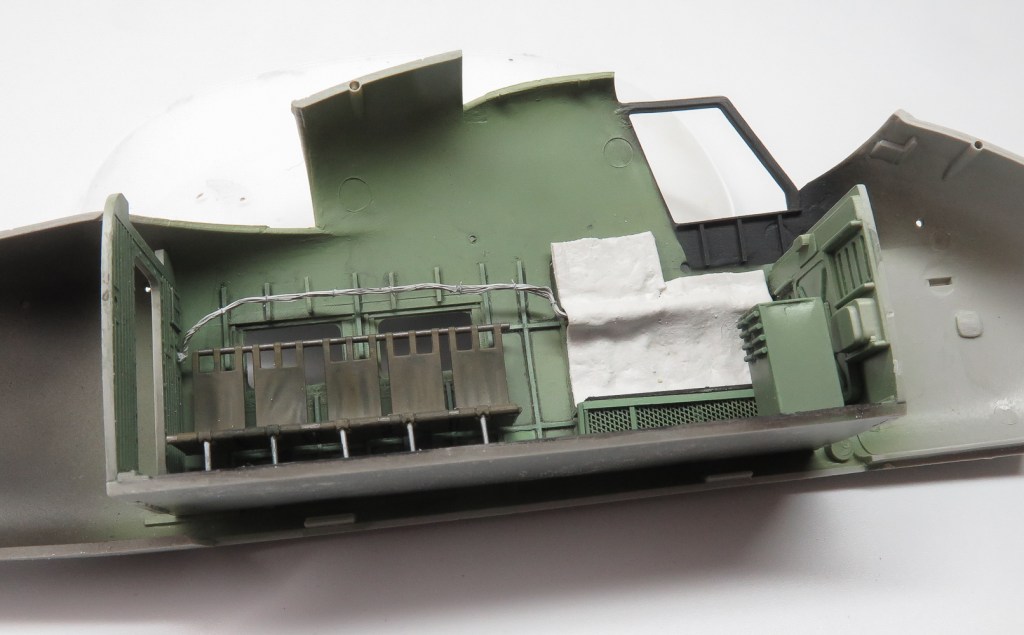
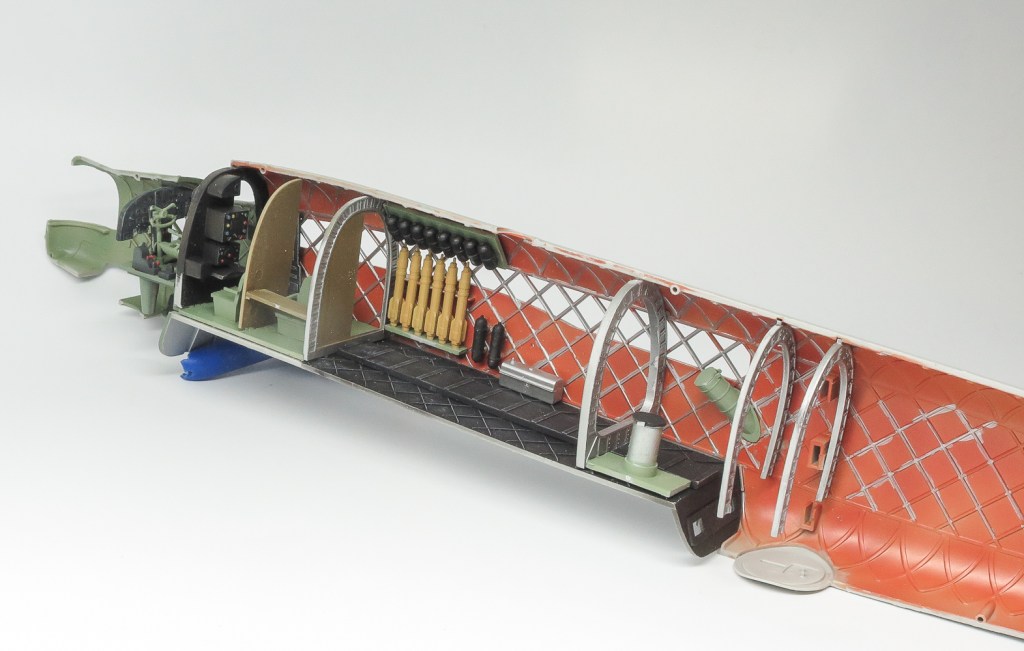
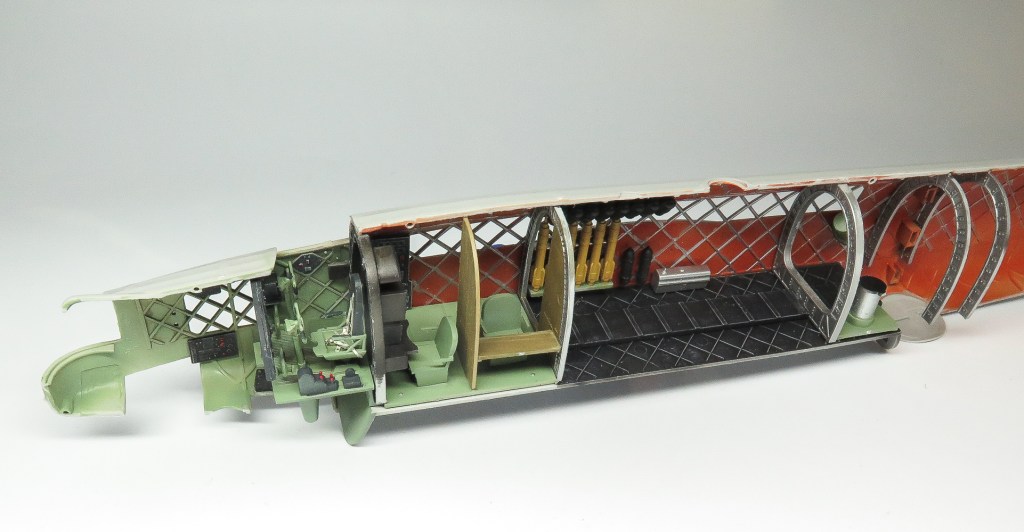
Step 4 . I replaced the kit jet pipe with a Reskit item which is better detailed. SMS Interior Green was used for the wheel wells and weapons bay.
Step 6. If you forget the tiny P.E parts PE10 like I did, don’t worry. They’re not really visible on the finished model. No nose weight is needed as the main legs sit behind the C of G, even with a resin tailpipe. Before glueing the fuselage halves together, drill out all the locating holes to ease fit. I didn’t, and paid the price with more filling and sanding than was necessary had I had taken this simple step in the first place.
Step 7. Don’t forget to drill those holes for the tanks!
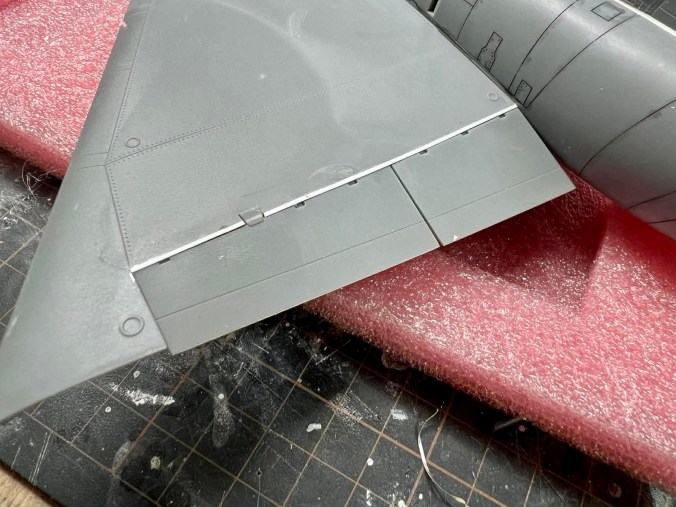
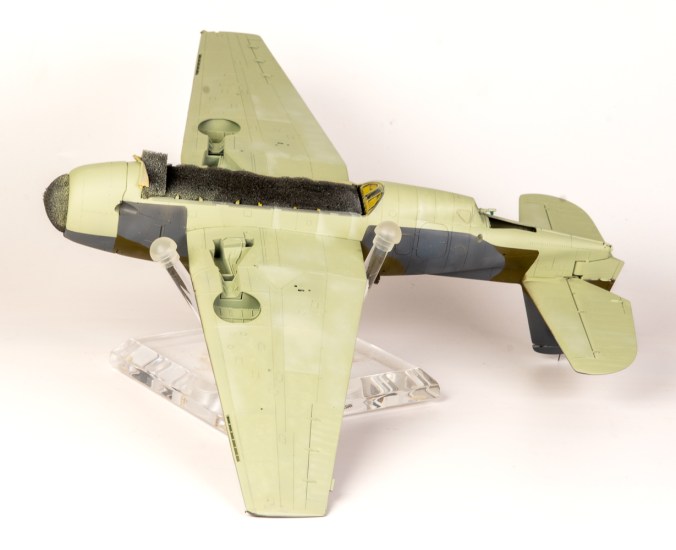
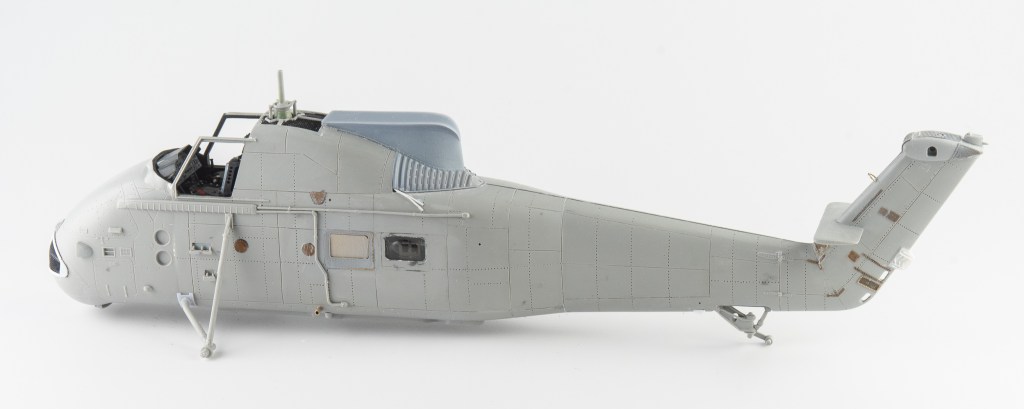
Step 9. The flaps if fitted in the drooped position (plenty of photos of parked jets show this) just butt join to the rear of the wings. They look horrible leaving a nasty gap and don’t look like part of the wing at all. I solved this by adding the flaps, then glueing a strip of thin plastic card to the trailing edge to cover the gap. Looks much better and integrates the flaperons into the wings
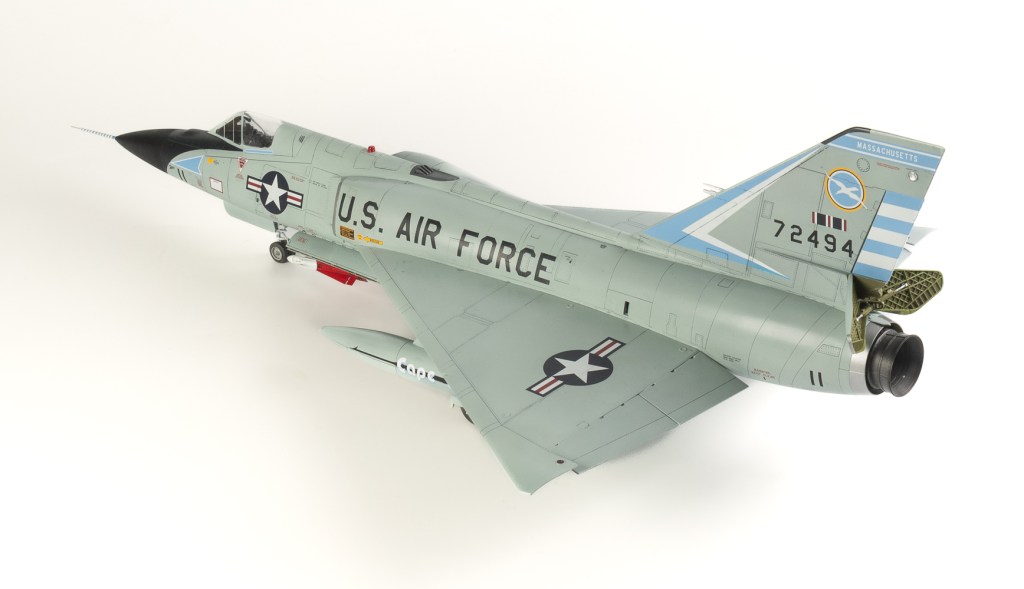
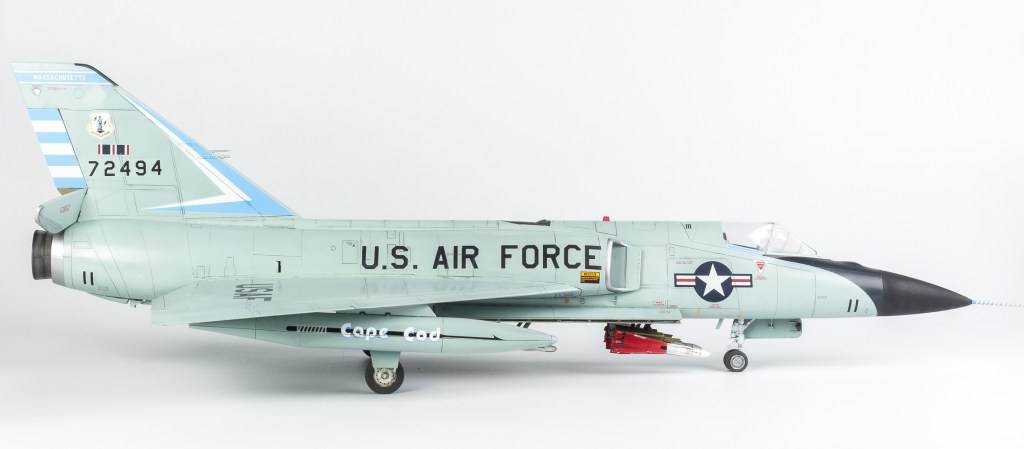
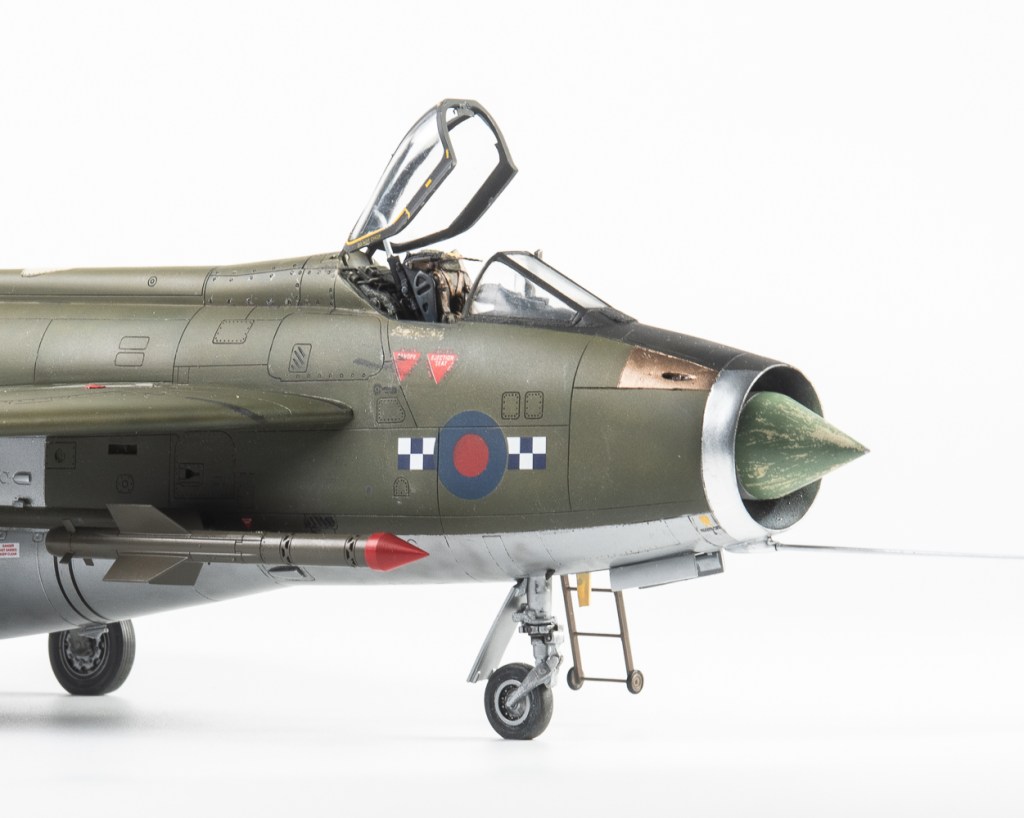
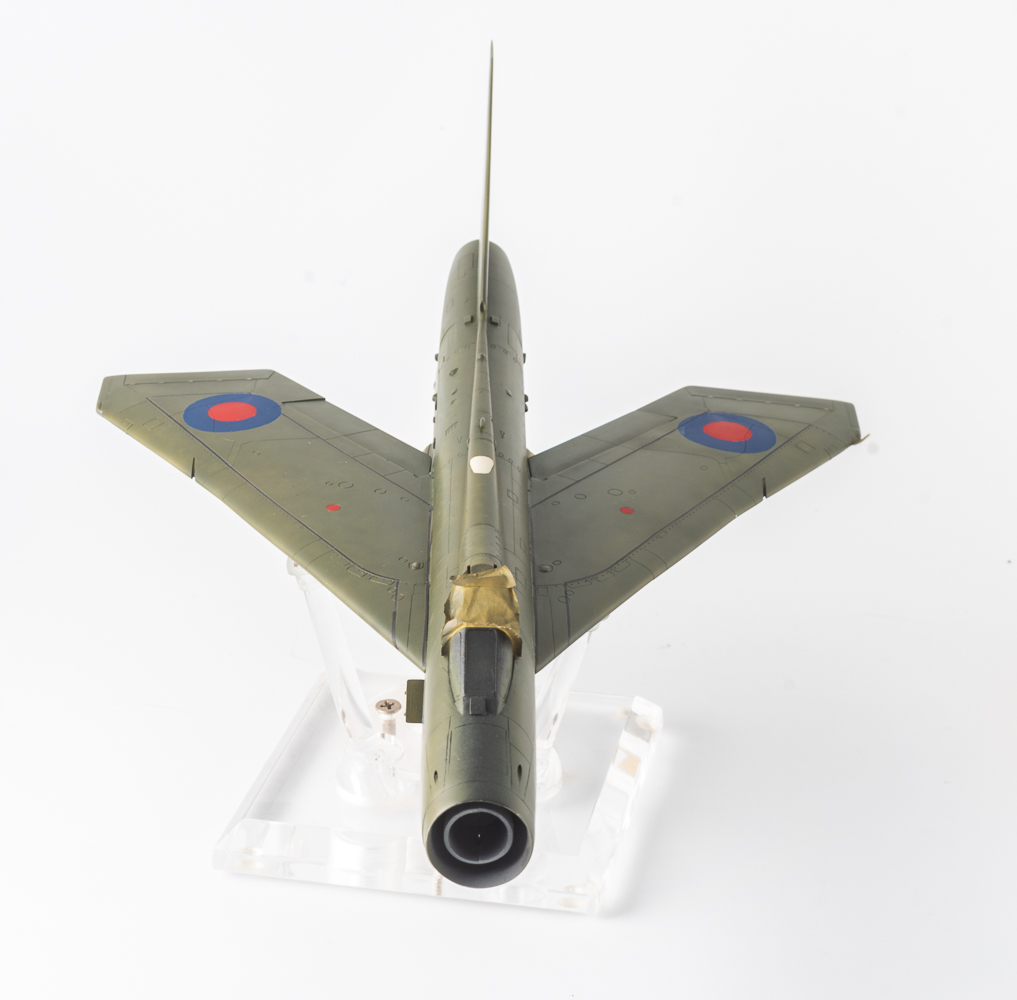
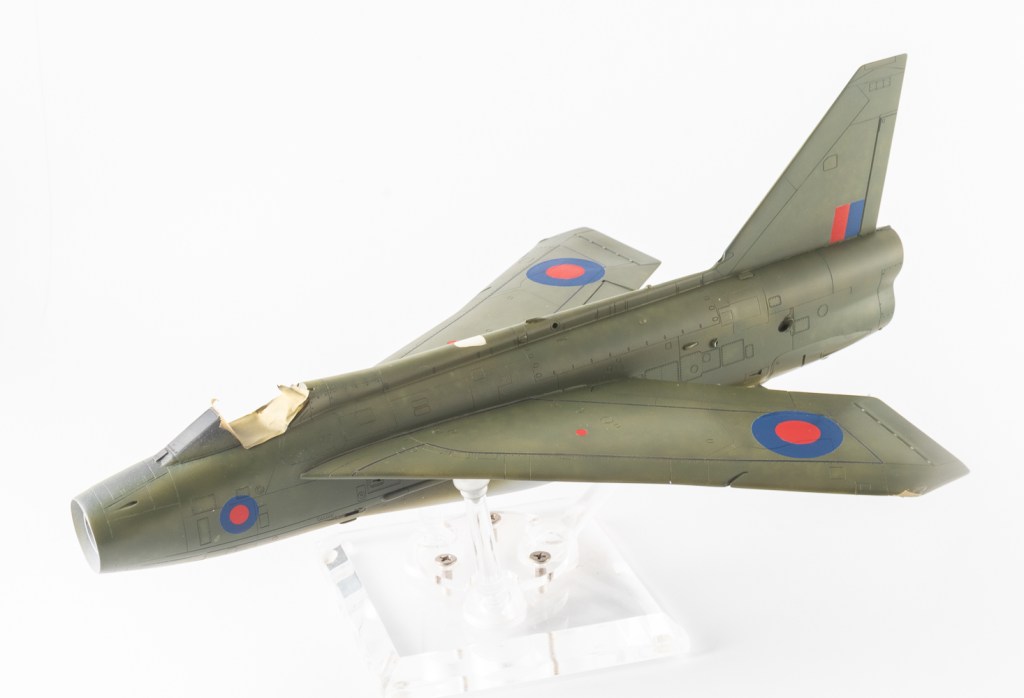
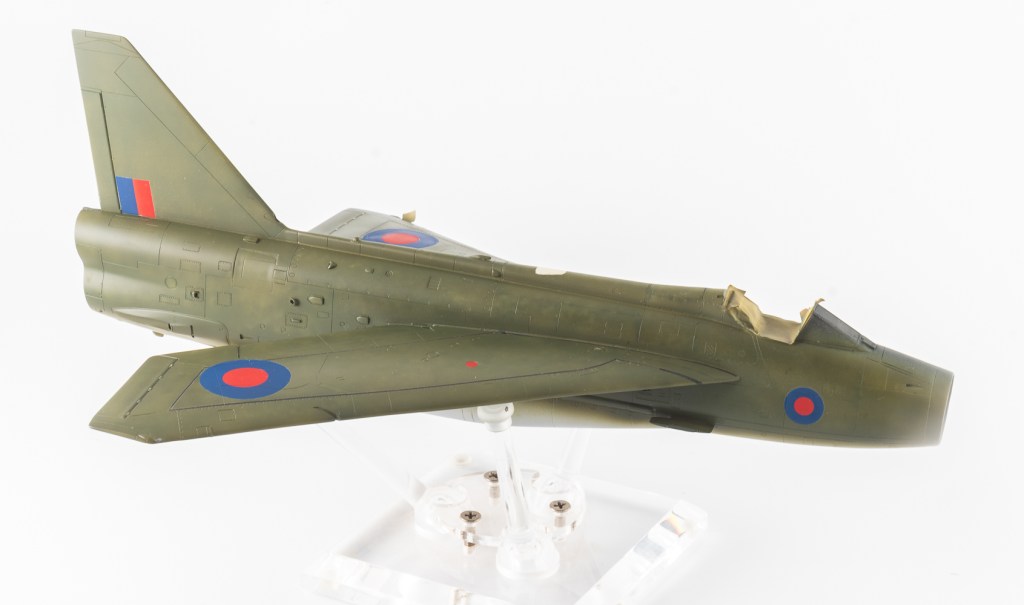
Step 10. I managed to snap my pitot tube off, so replaced it with a Master Details item. The airbrakes were fitted much later in the build. Mine were painted Interior green, but Ive seen photos showing white as per Trumpeter’s call out.
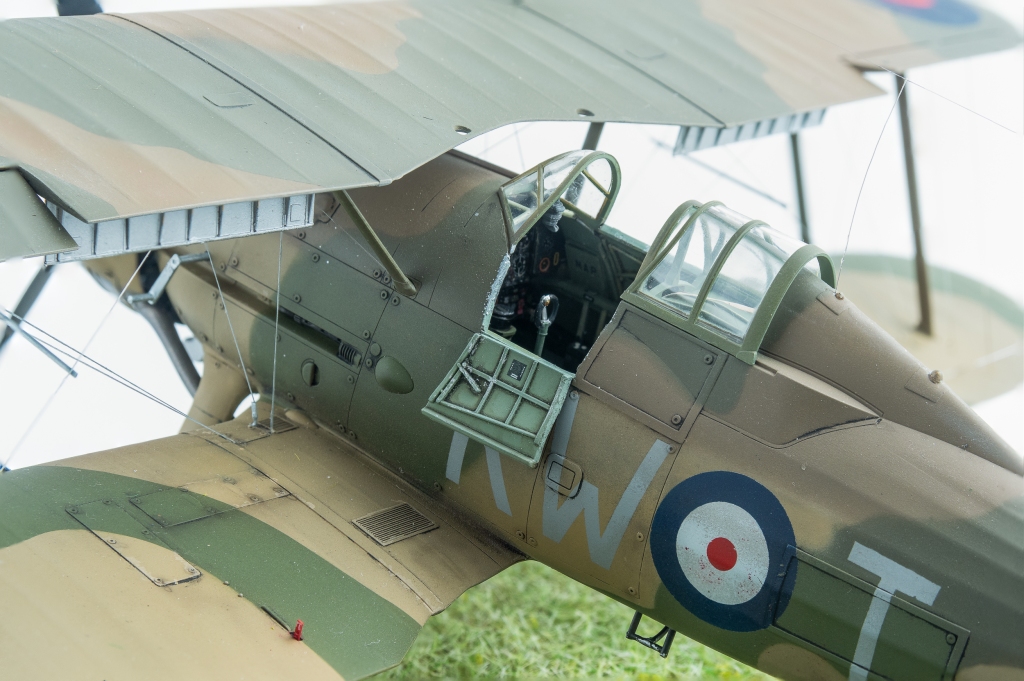
Step 13. Obviously don’t glue the mirrors sticking out as illustrated in the instructions. The canopy actually fits quite well in the closed position. Again I made glueing the canopy to the frame much harder than it needed to be, and ended up doing some heavy duty filling and polishing to get everything looking nice, destroying the frames in the process. The day I seamlessly build a perfect model without unforced errors will be the day I know I have achieved Master Modeller status, and therefore can give up the hobby and rest. Goal Achieved!!
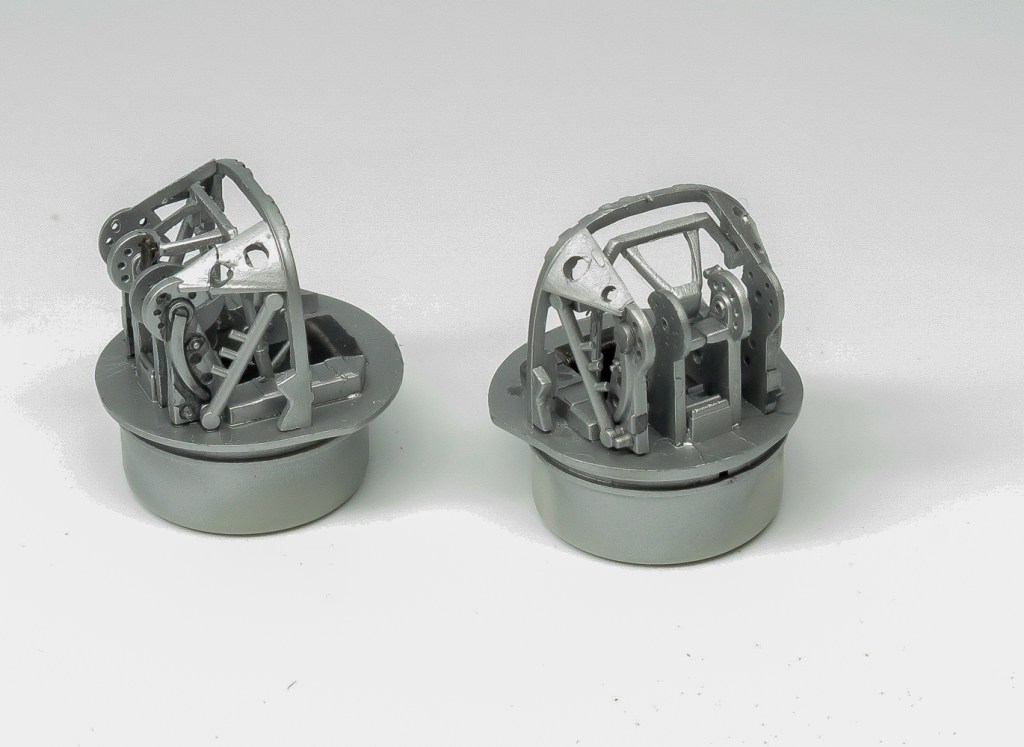
Step 14. The gear legs were dry fitted to the wells to act as a jig before glueing all the actuating struts to the legs. Once dry the entire leg assembly was removed to be painted as a single unit. I’ve used this technique on my last 3 builds and find it makes for a neater stronger assembly each time.
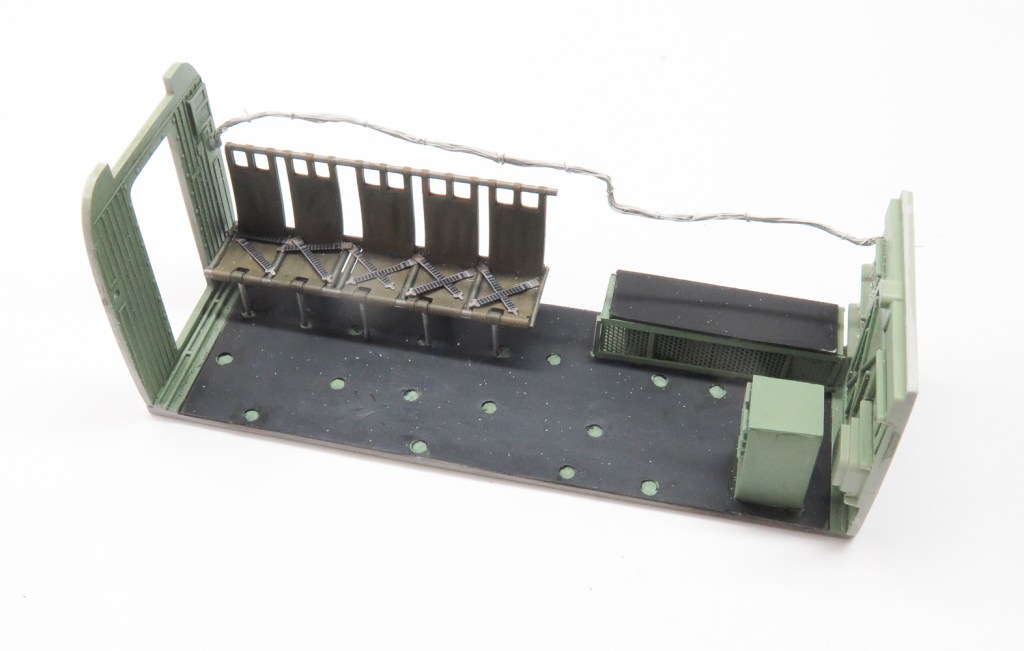
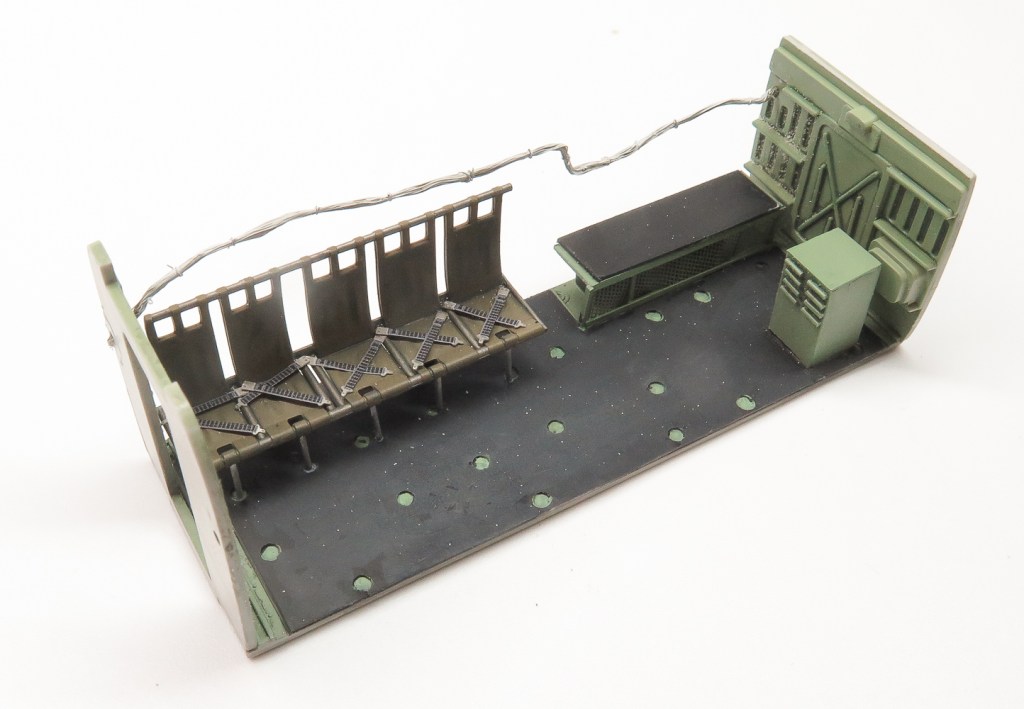
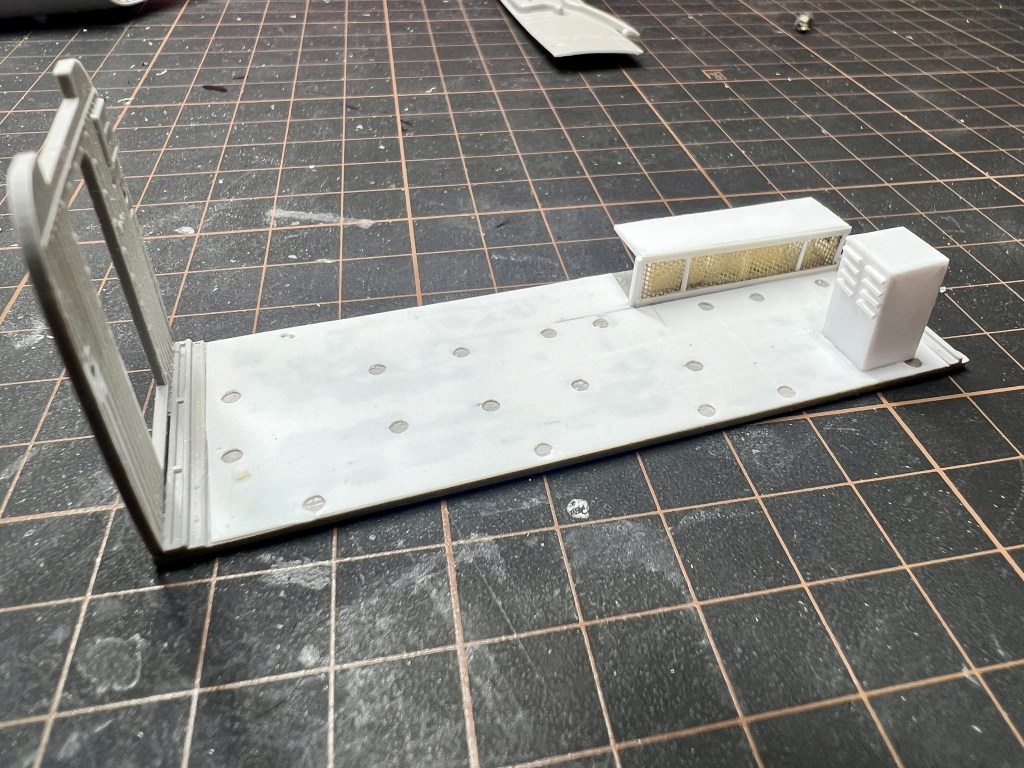
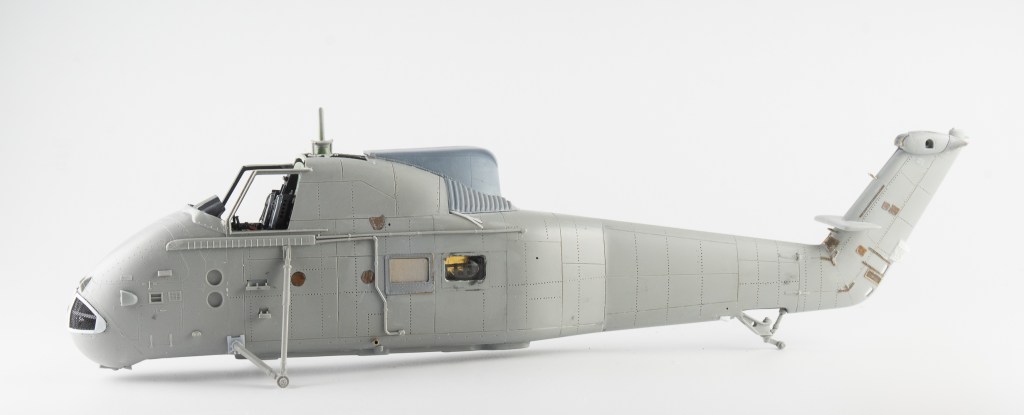
The weapons parts were quite fiddly to get into position, making me wish at times I had 3 hands. Again they were all dry fitted together and to their locations in the bay before glue was added to the trapezes. Likewise the doors were again a tricky assembly. The parts being thin were warped , so the thin super glue got a run in the end. Tiny drops being applied to the hinges to ensure everything stayed solid once glued. Way before these were added though, the model was painted.
Paint and Decalling
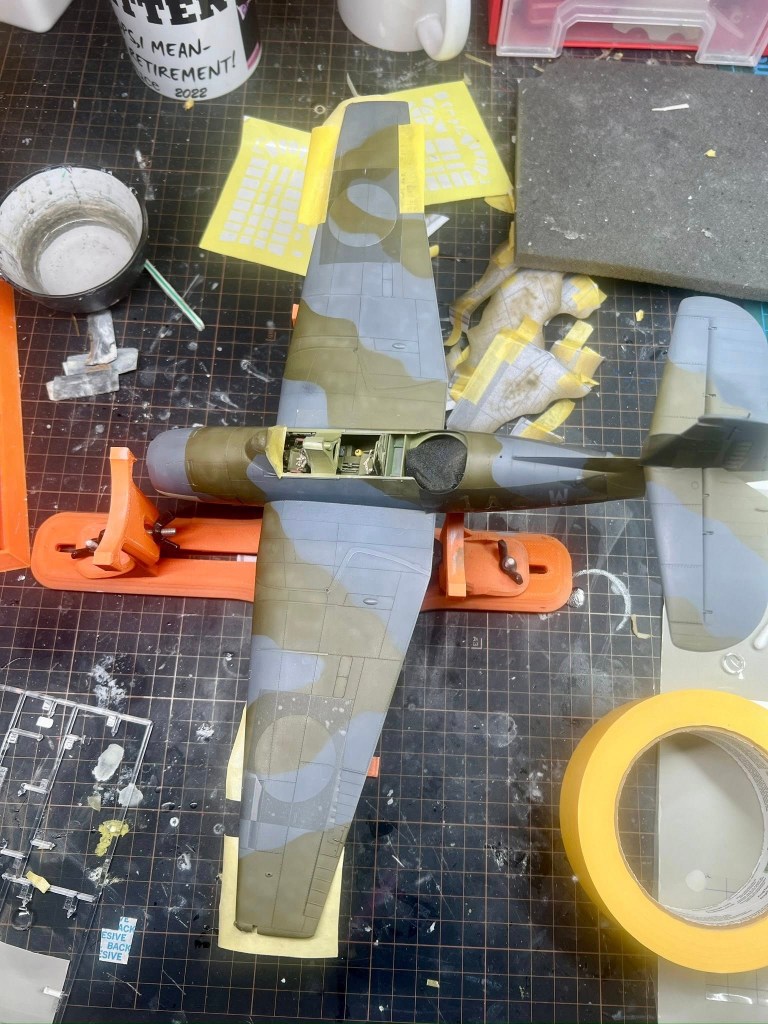
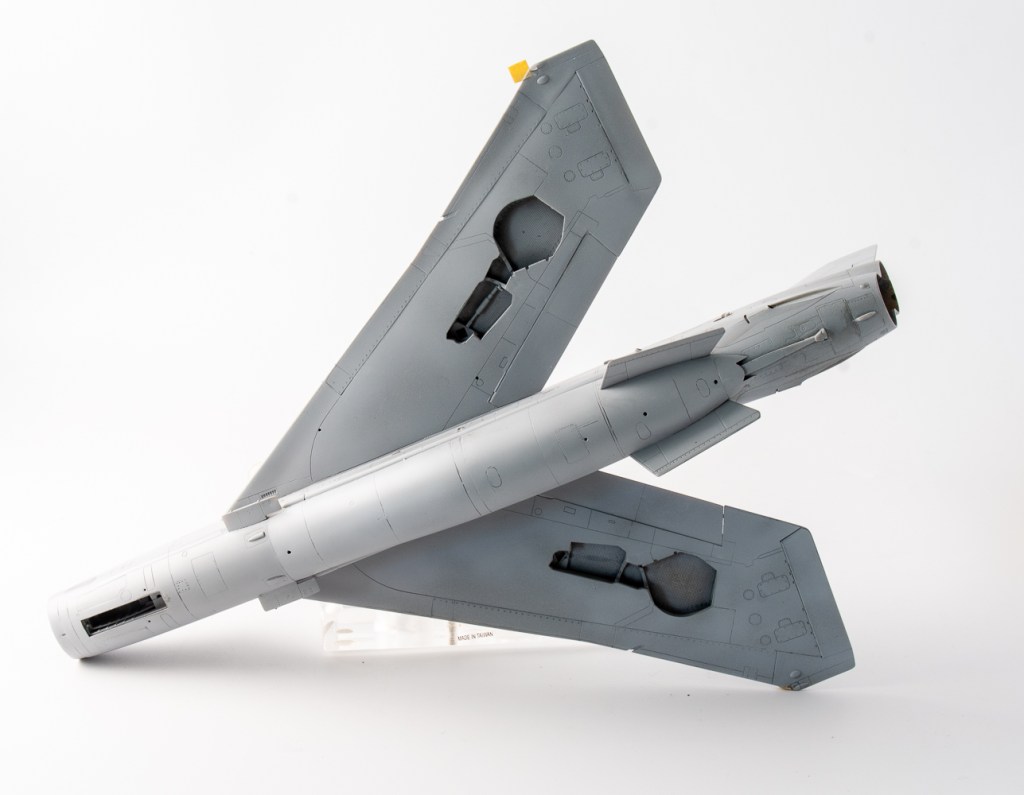
As mentioned in my introduction the plastic had a definite texture, so the first stage before priming was rubbing all this back before polishing the plastic and rescribing some lost detail. I really should have taken a lot more care with these steps as my wonky rescribing and failure to deepen some of the rivets really detracts from the finished model. Oh well, next time!
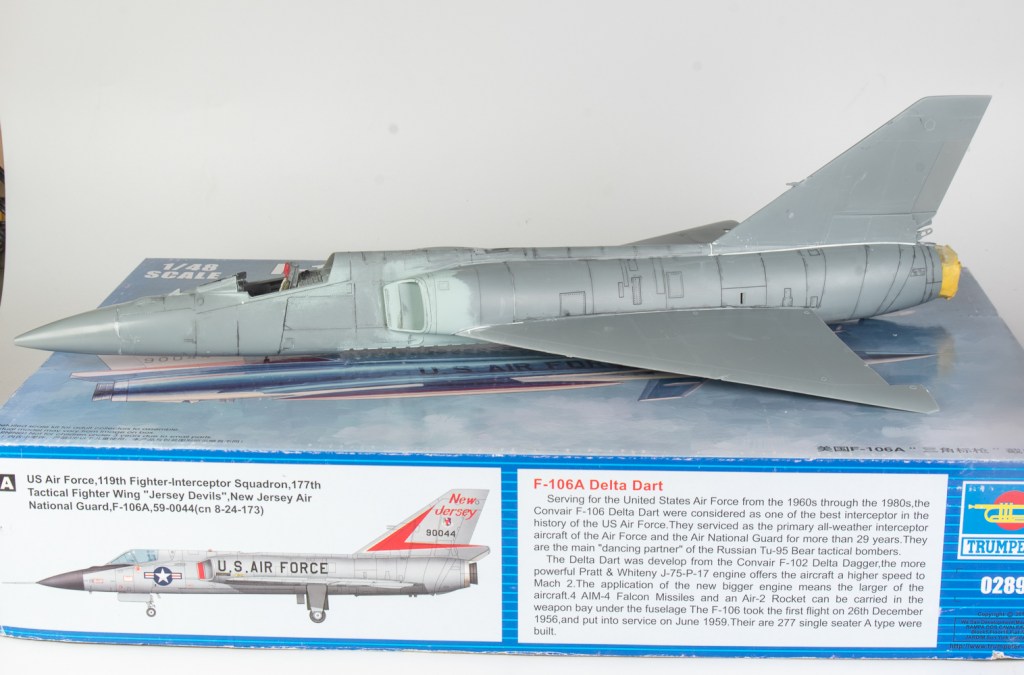
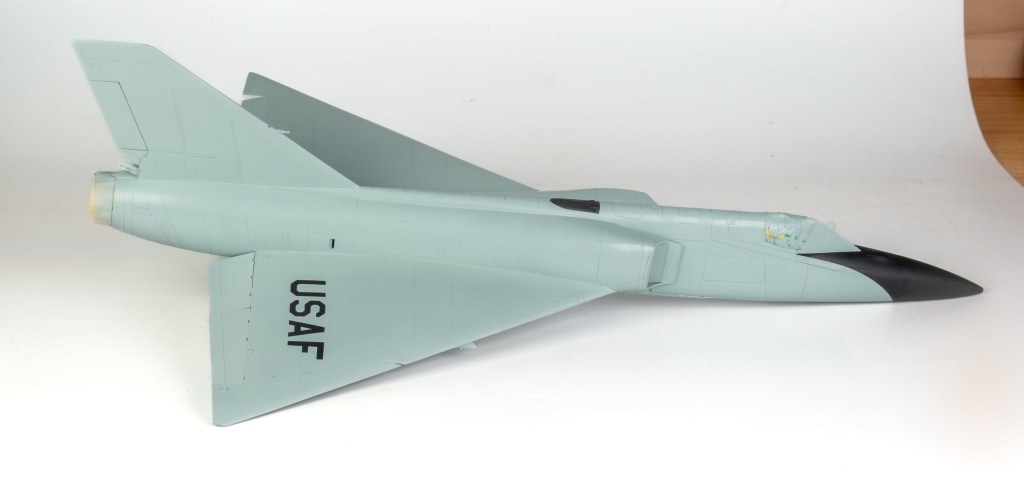
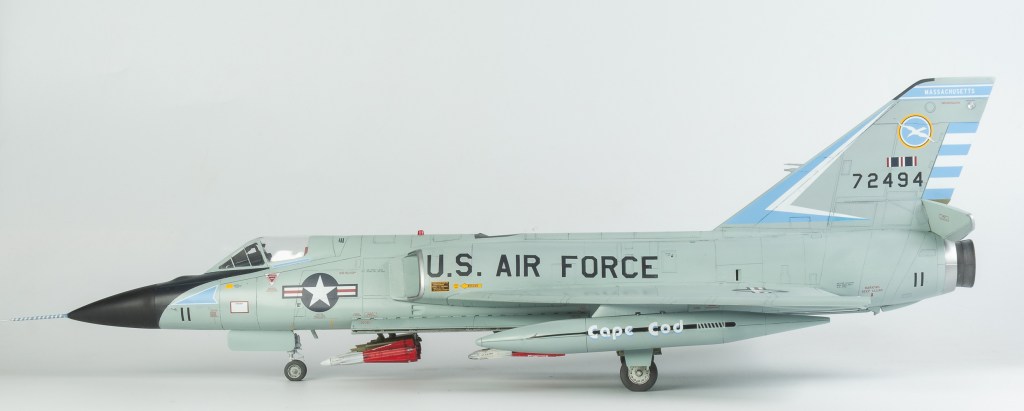
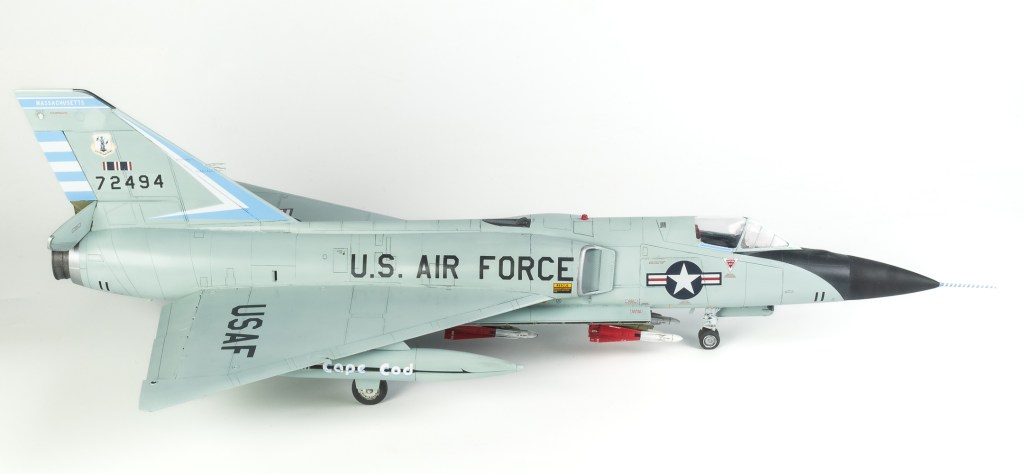
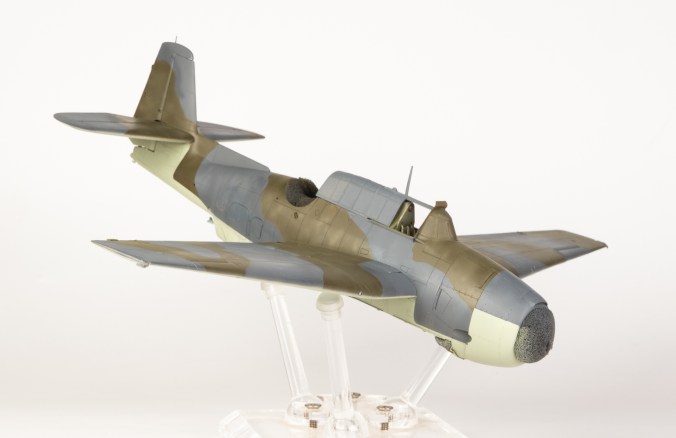
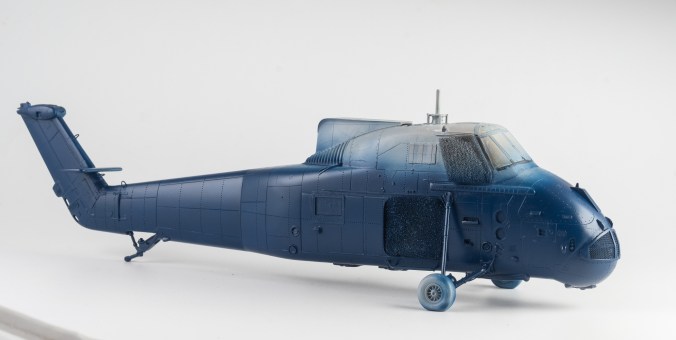
Finding an out of bottle ADC grey proved a lot harder than it should have been. Only AK Real Colours does it. It’s quite a distinctive grey with a bit of a blue tinge to it, so definitely not a case of any old grey will do. The RC paint when first applied looks blue, but this settles down with successive coats. Its a great colour and an overall ADC grey F-4 Phantom is now on my to do list at some stage.. Winsor and Newton Paynes Grey oil paint was used as the wash.
The model was actually looking good pretty good at this stage but as is common with my models, subsequent touch ups through discovering rough patches that needed smoothing degraded the finish a bit. The model is also deceptively big, so suffered numerous areas of scuffed and chipped paint through being accidentally banged against lamps, spray booth and walls. Thus leading to more touch ups.
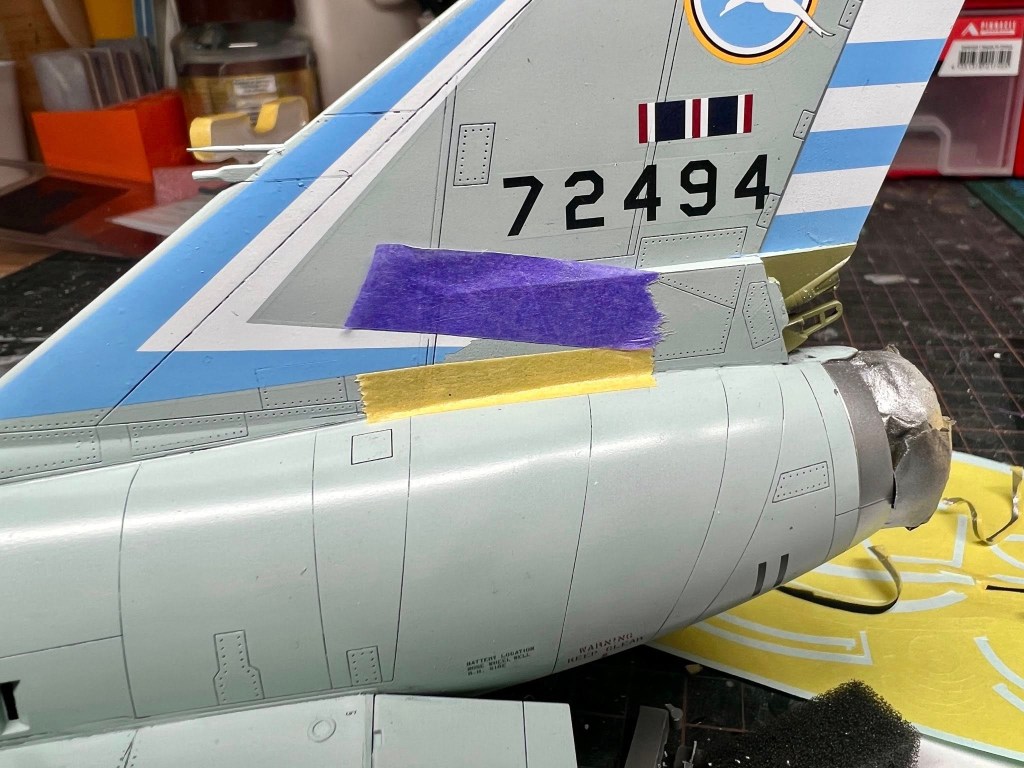
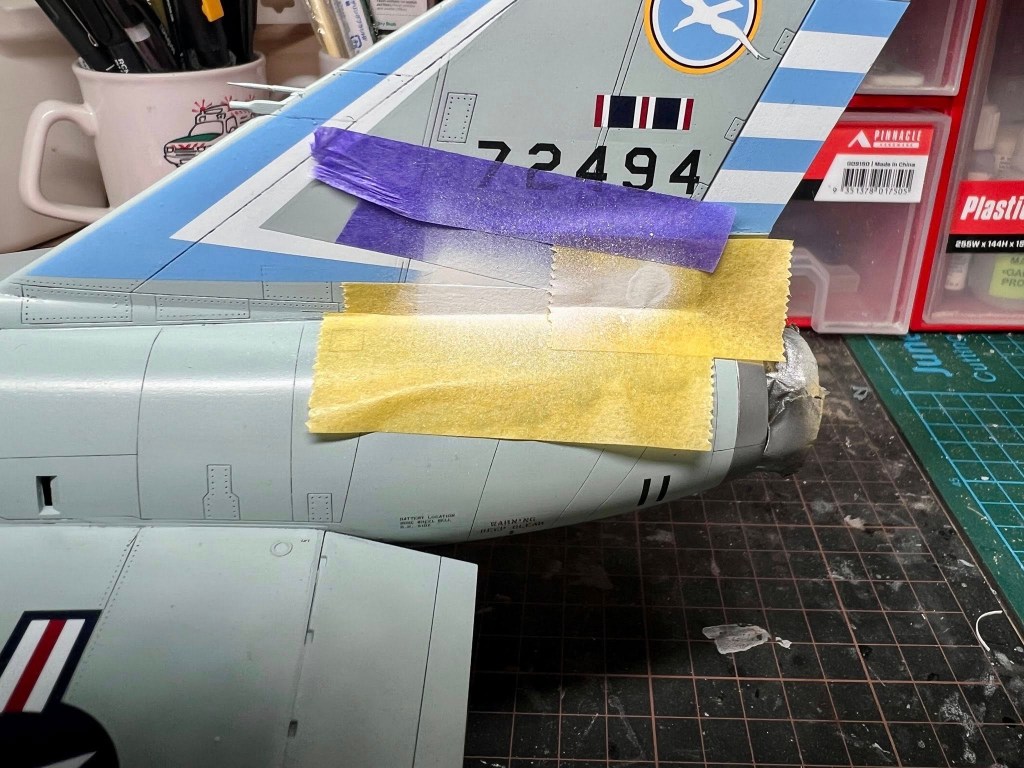
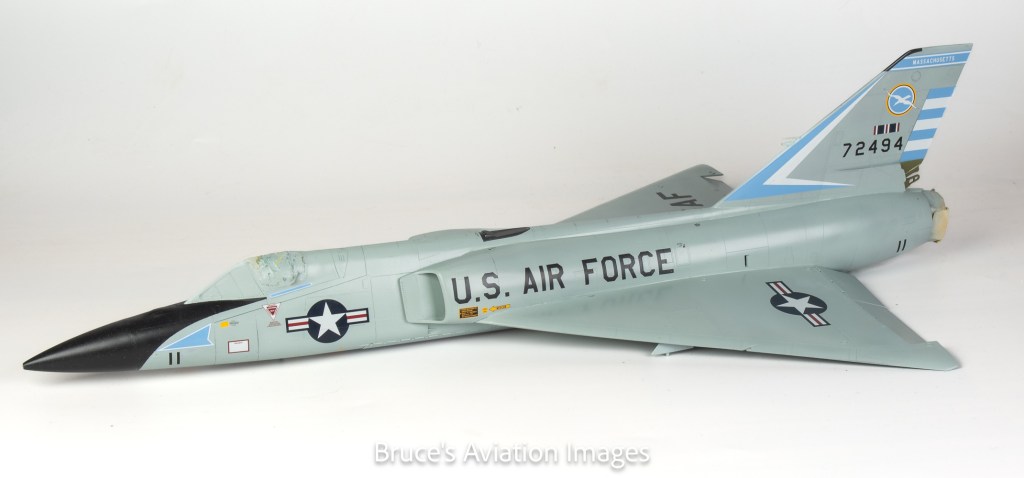
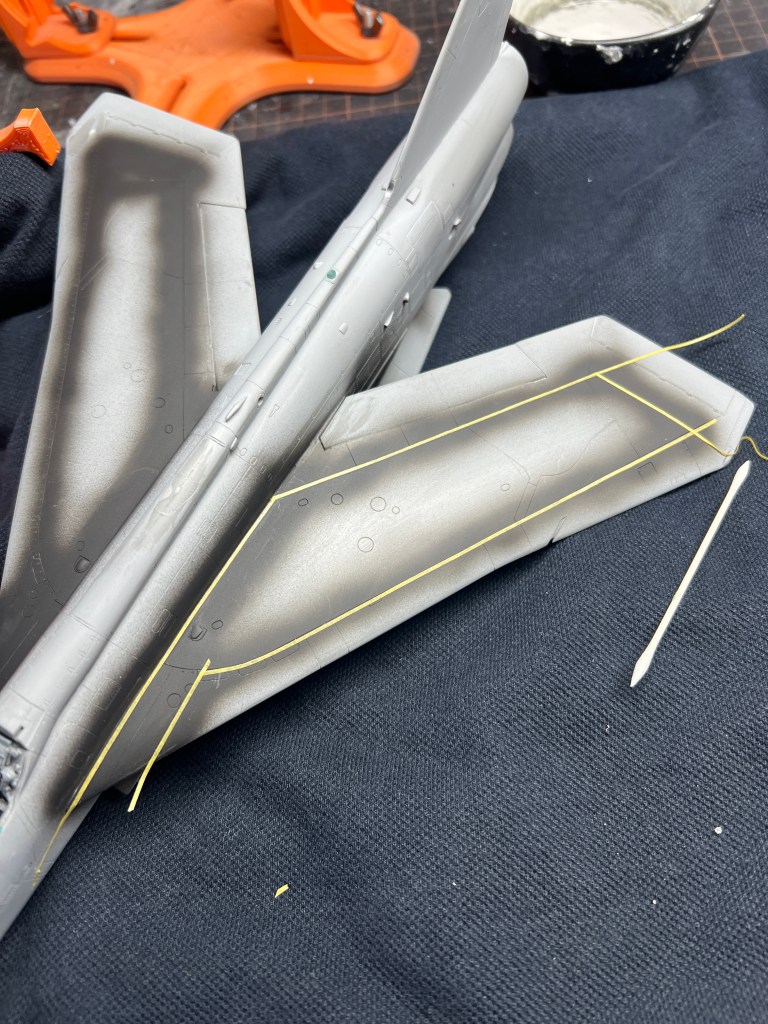
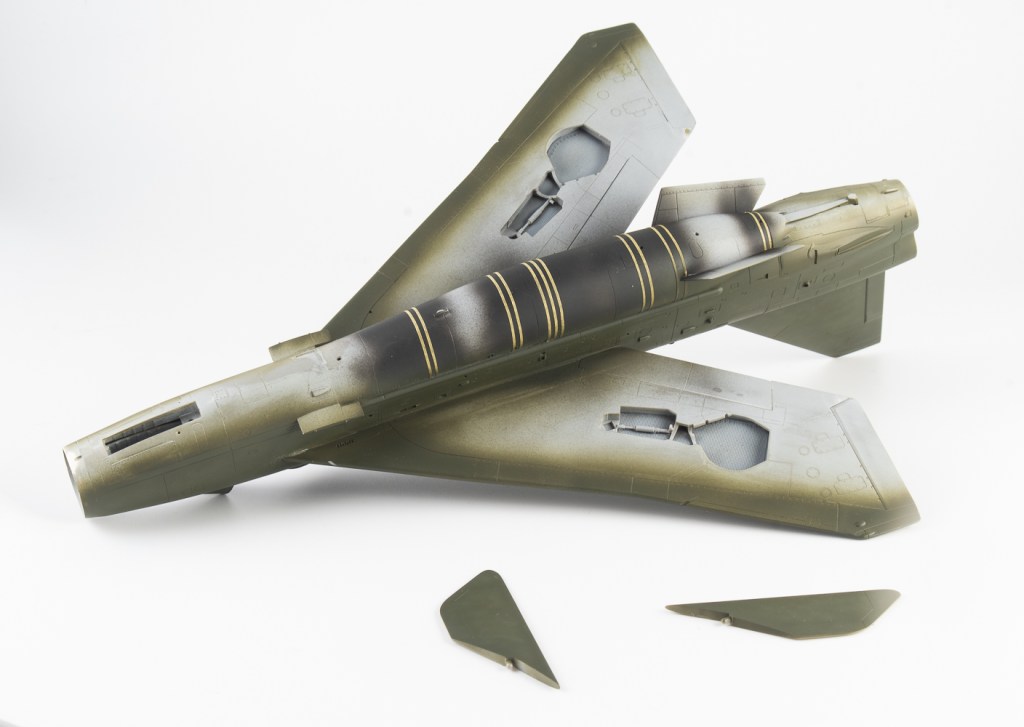
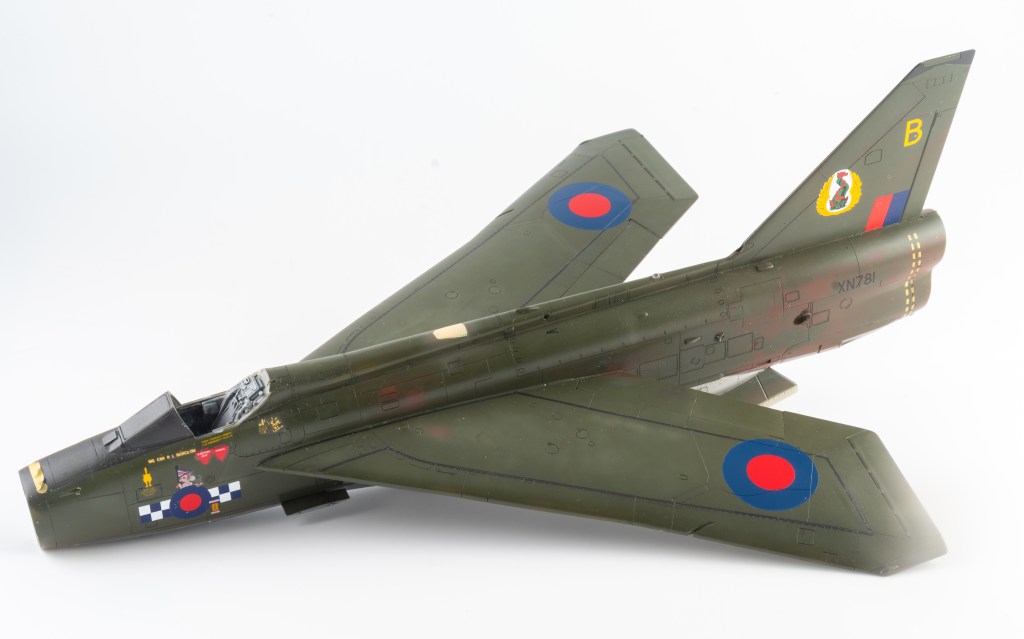
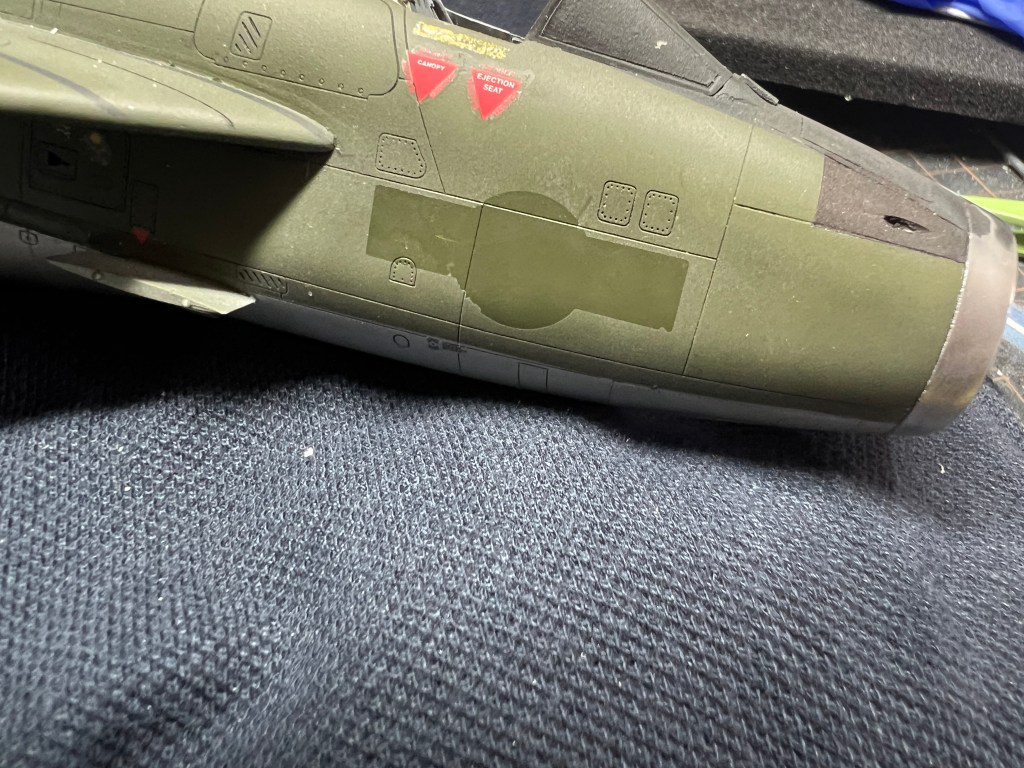
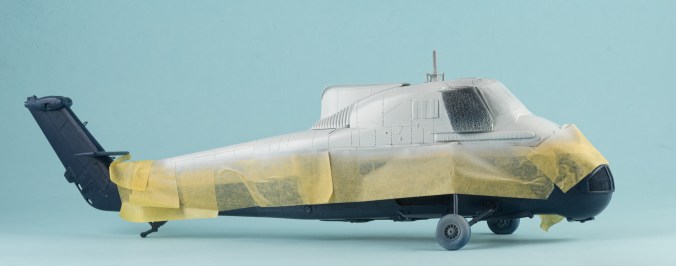
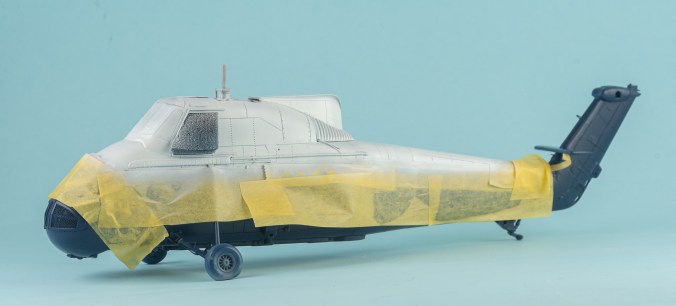
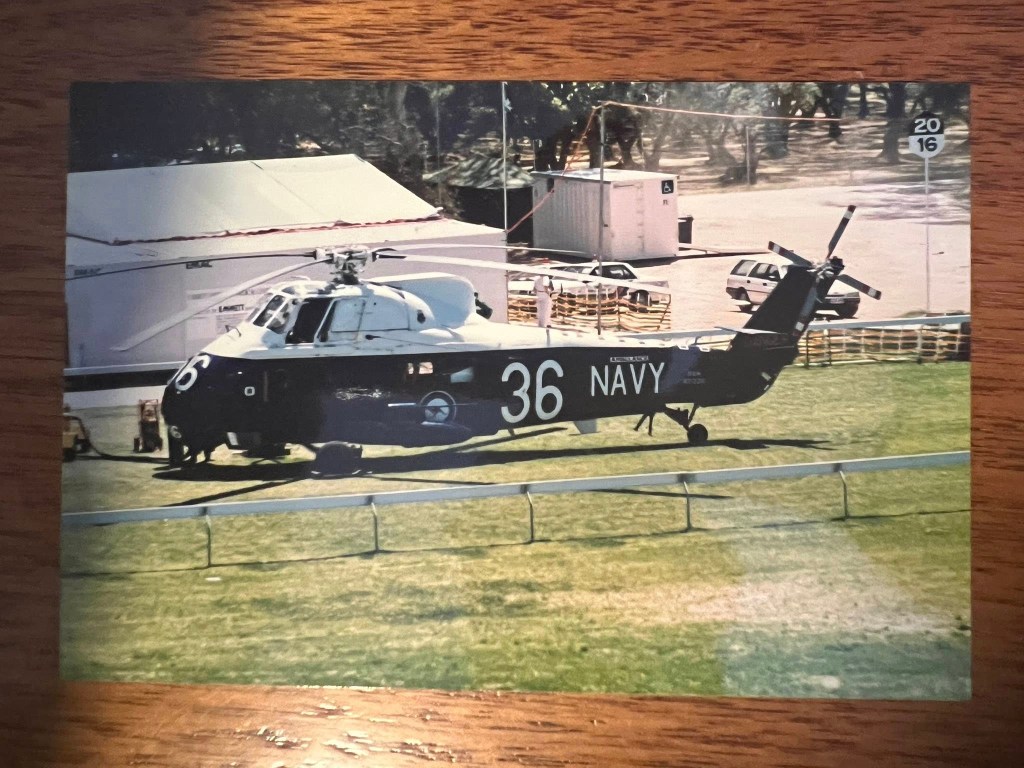
Finally the finish was at a stage acceptable enough to be gloss coated ready for decals. Prior to this the USAF titles had been sprayed on using masks I cut myself. Note on late airframes these titles were black in colour, and not Insignia Blue.
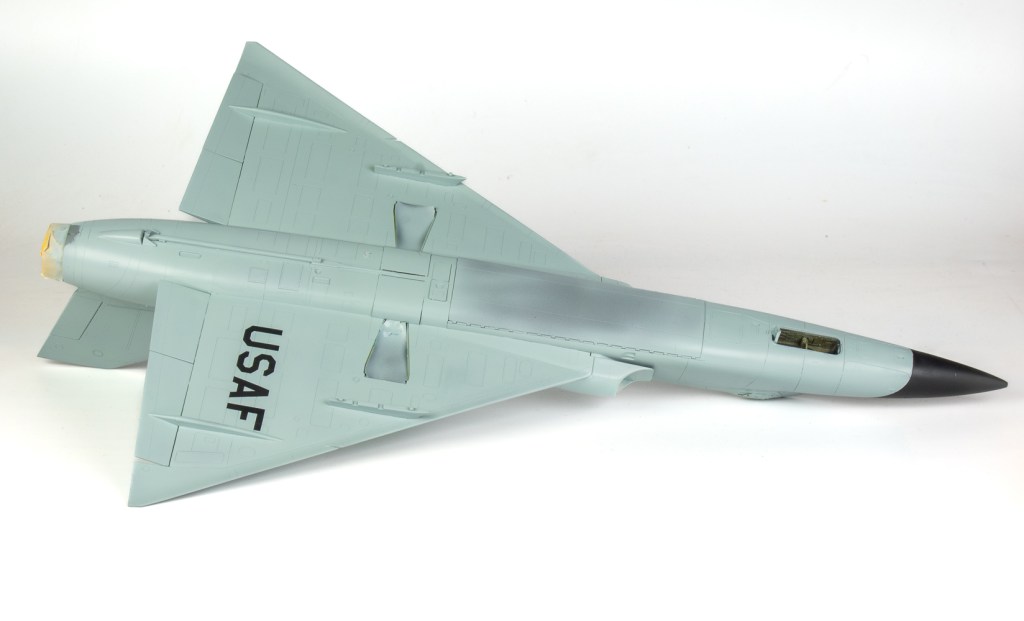
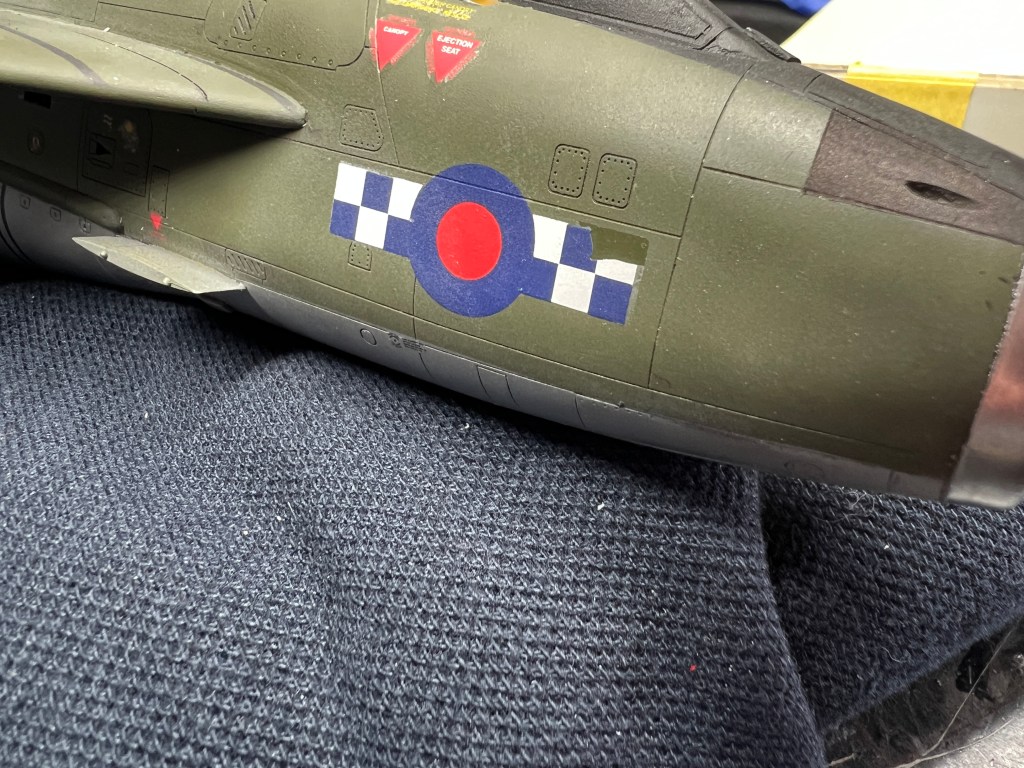
The National and unit markings came from a Caracal sheet and performed just OK, despite being printed by Cartograph. They required multiple coats of solvent to settle into panel lines and rivets.
All was going well until I managed to tear a bit of the tail flash off with a bit of errant tape. It was annoying how easily it came off despite all the solvents used to bed it into the nice smooth surface. Masking off and touching up with a mixed light blue solved this, but was annoying still the same. Because, who doesn’t love doing the same thing over and over again!
\
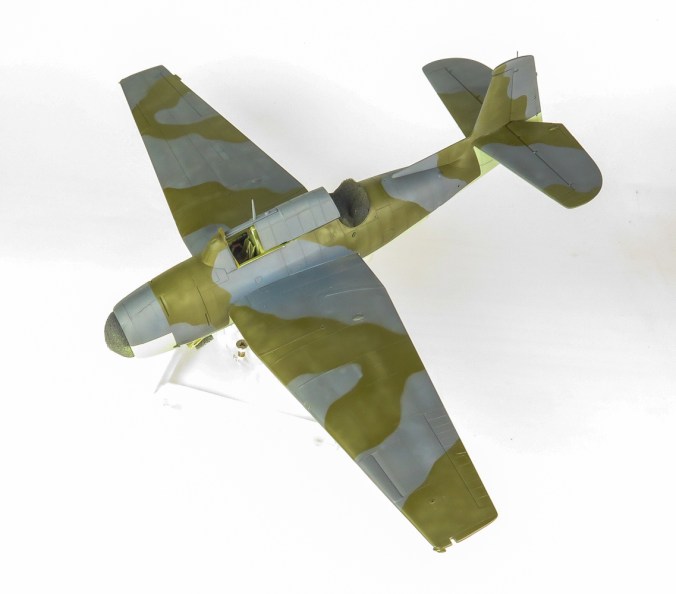
All the stencilling came from the Fundekals sheet, there being a fair bit, not “F-4 Phantom fair bit” but still a lot especially on the undersides. These all performed perfectly. Oh, I forgot to add New Ware masks were used to get the curve of the black trim on the nose. A sealing coat of SMS Flat was then sprayed on, imparting a nice sheen to the jet. It was decided to leave it as a clean jet rather than add staining etc, because , well frankly I was getting over it and wanted to move onto the next project.

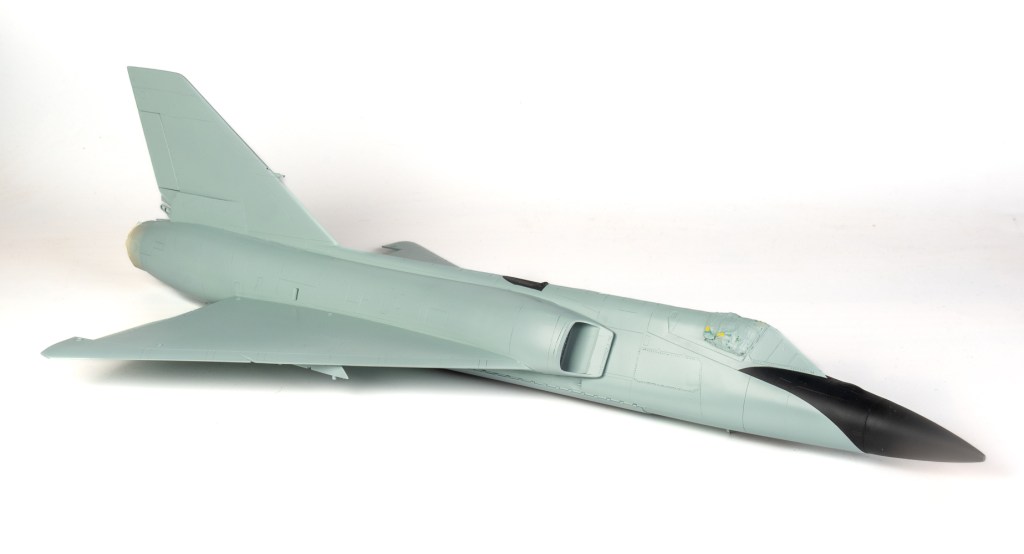
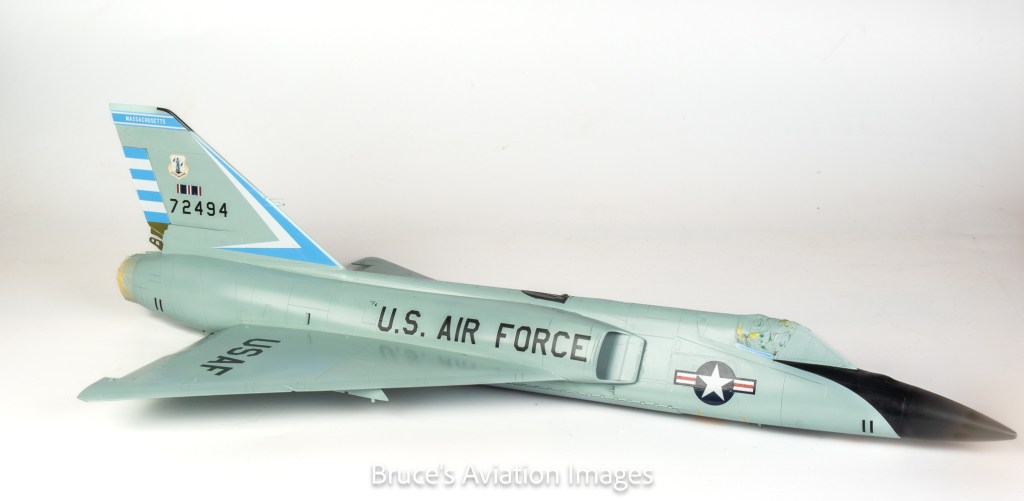
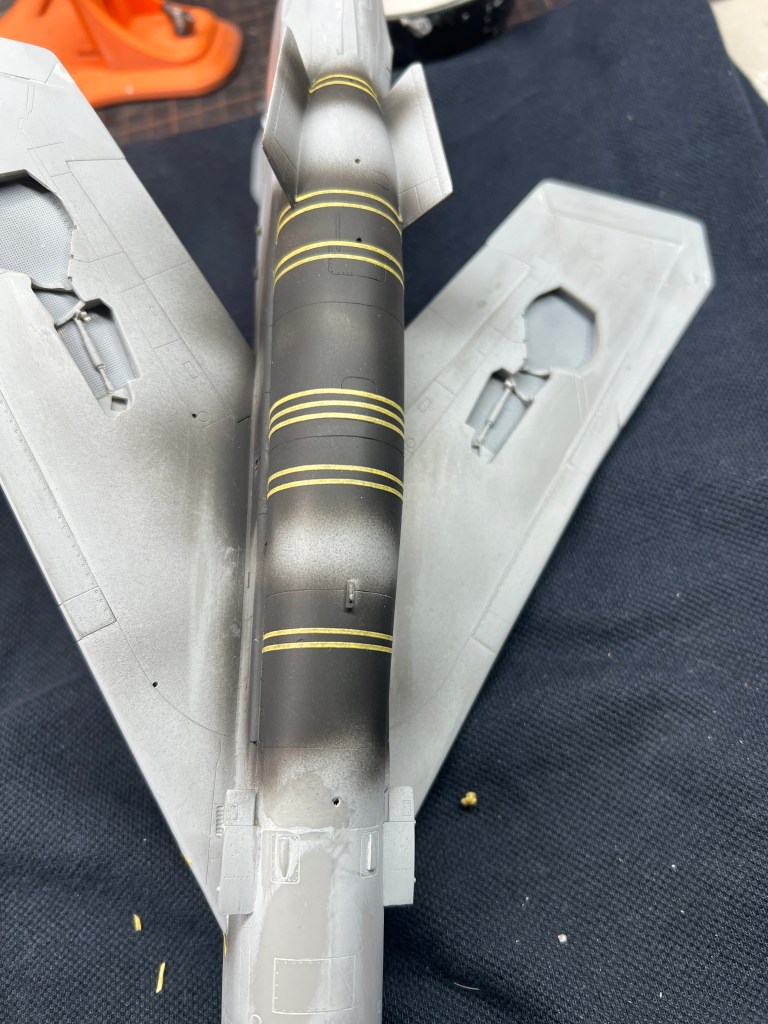
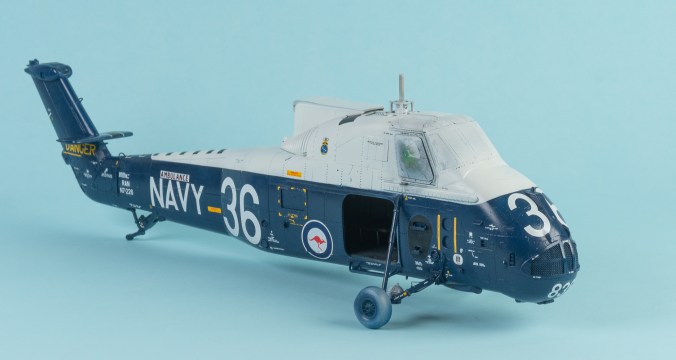
Final assembly involved adding the undercarriage and Reskit wheels. Reskit missiles also replaced the kit items. They come with their own set of stencilling, but these broke up in the water so only about half of them were used.
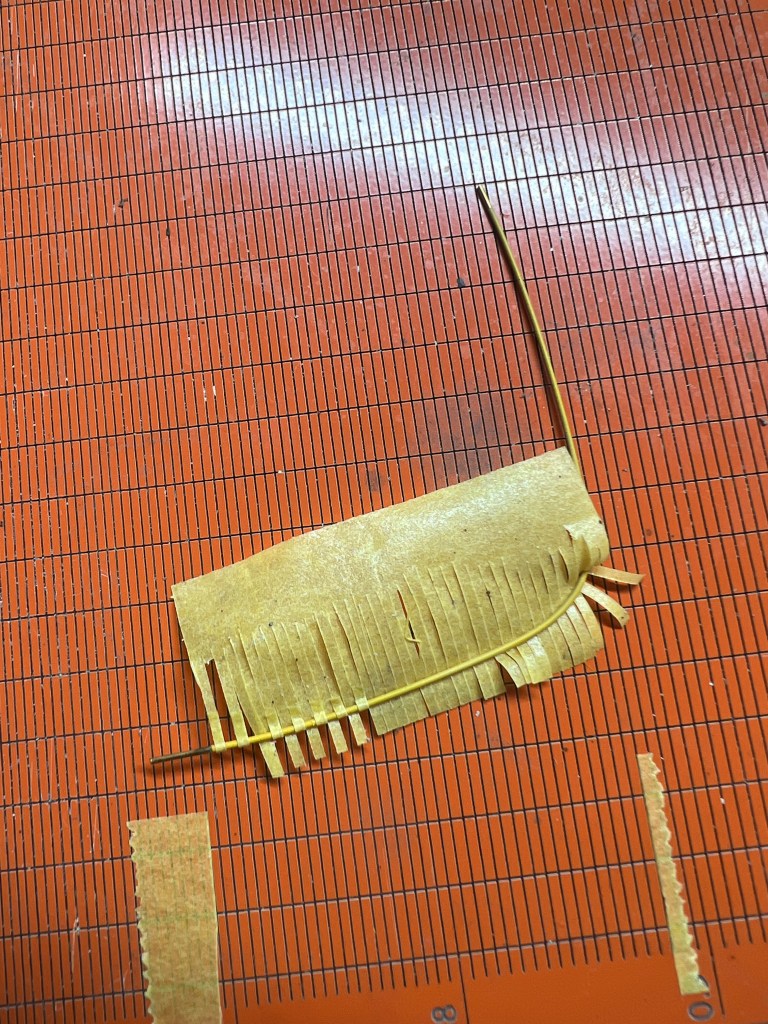
The missiles were then superglued to the afore mentioned tricky to assemble weapon trapezes. When assembling all this, I found it easier to work from the inside out, so the trapezes were assembled first followed by the doors, then finally the missiles. The icing on the cake was adding the pitot tube. This was first painted white then a thin strip of tape wound around it in a spiral before the light blue was sprayed
Final Thoughts
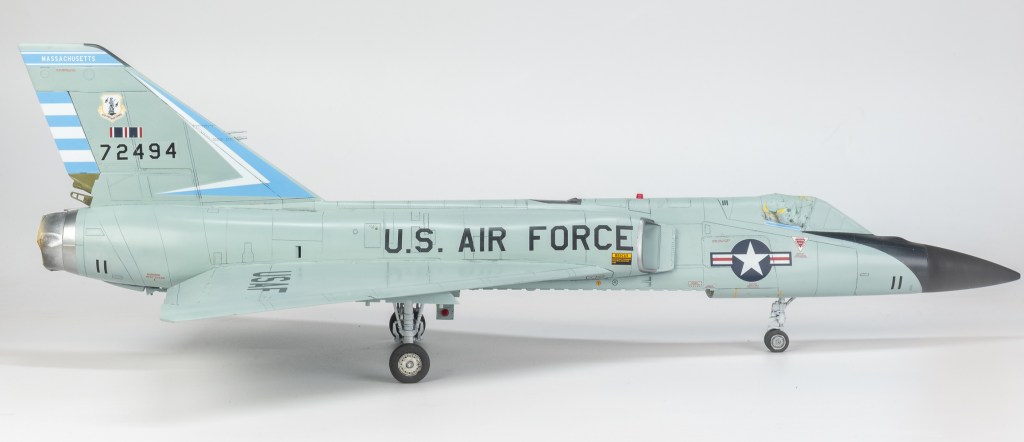
Well, it didn’t turn out as well as my vision, but I’m still pretty happy with it overall. The Trumpeter kit was a reasonably easy and enjoyable build in the end. It’s an imposing graceful jet and looks great in the cabinet. There is also plenty of aftermarket out there if you are that way inclined, although these days I am scaling back my AM purchases to just those items that are easily seen and will enhance the finished model.
The Reskit missiles definetly look more refined than the kit parts as does the jet pipe. Using the Reskit item also eliminates a seam that would be evident if using the kit parts. There are resin wheel wells available, but the added detail from using these would not be visible. I think the Wolfpack seat was also value adding, even with the canopy closed. Its a lovely looking jet from one of my favourite periods of aviation and Im glad to finally have one in the cabinet.
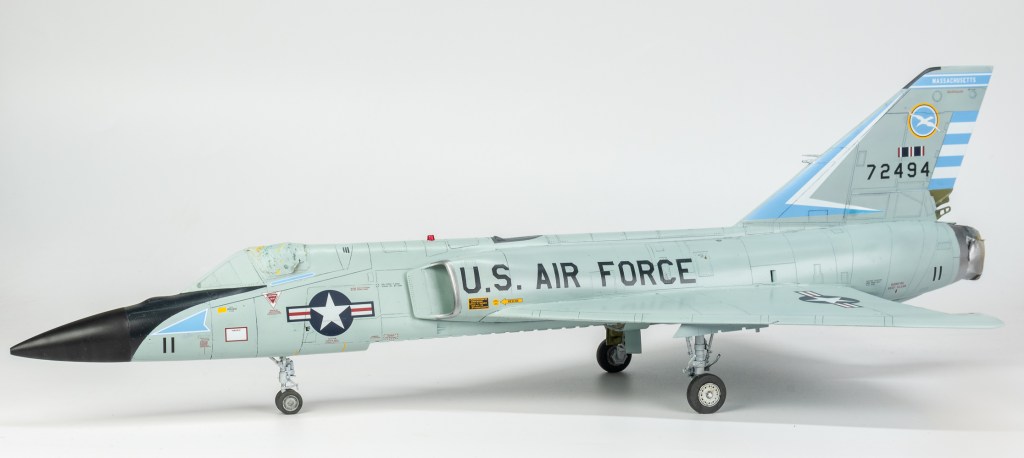
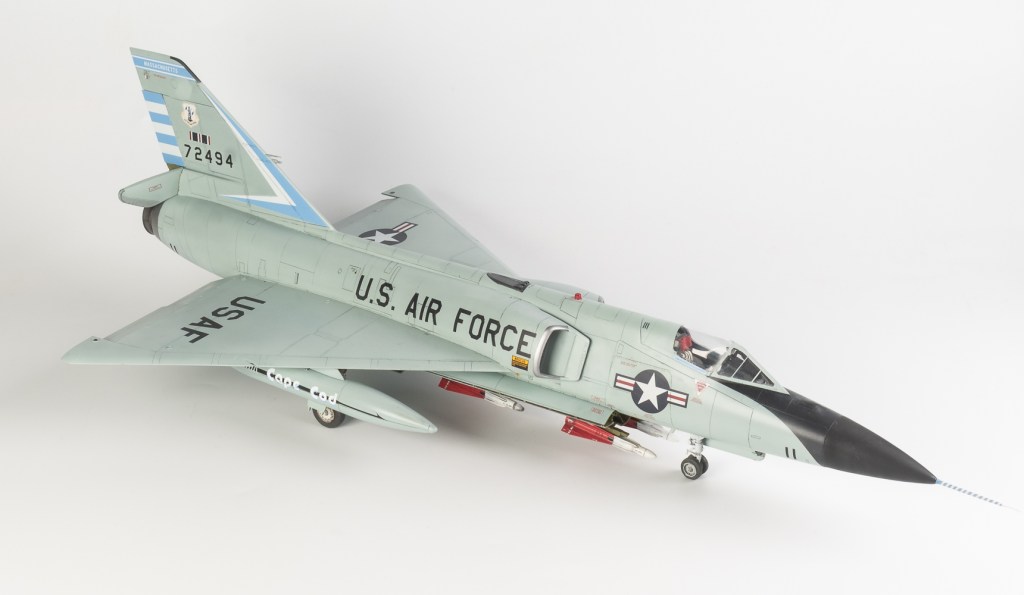
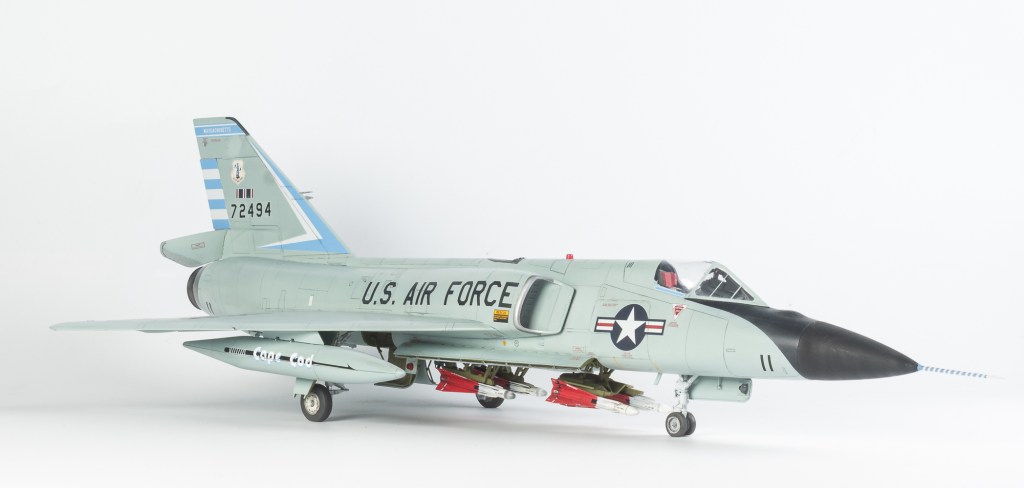
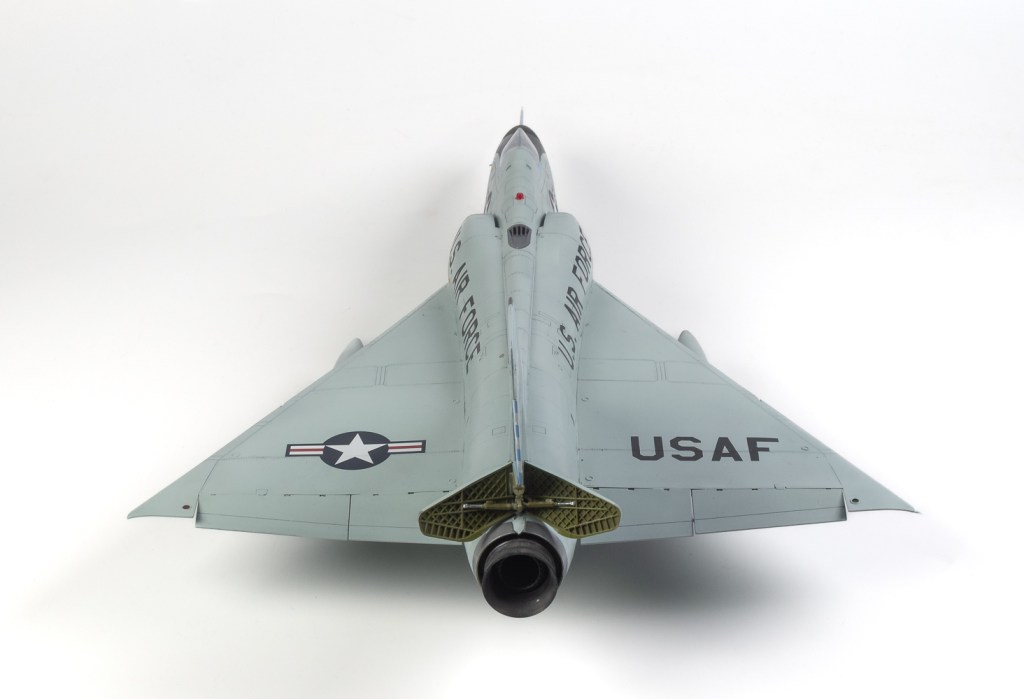
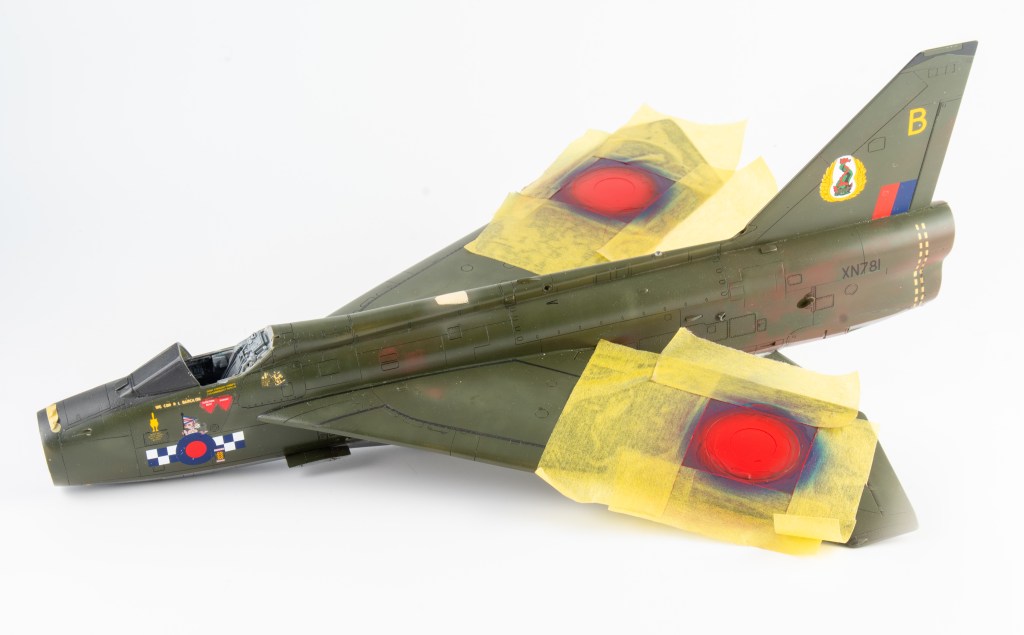
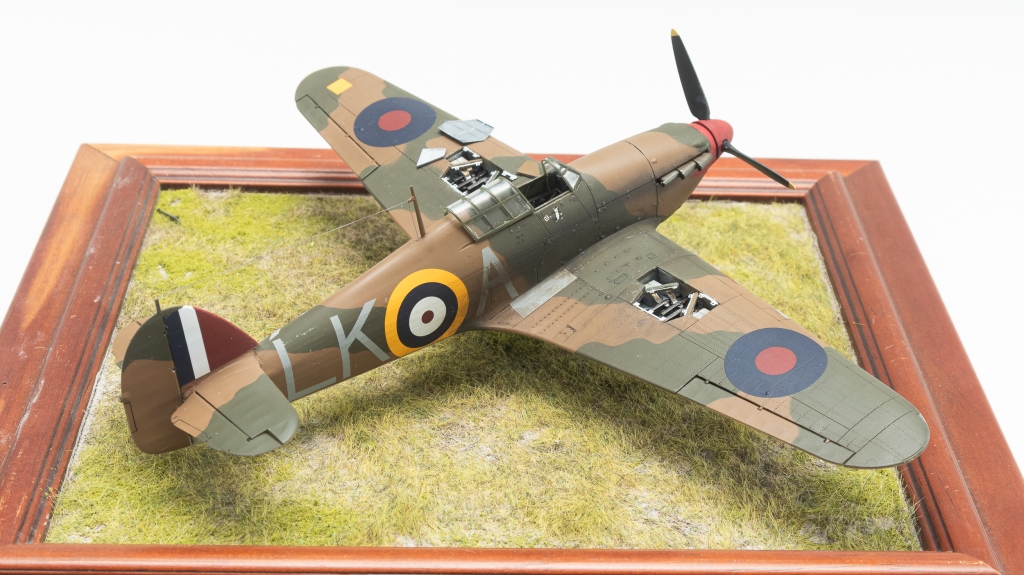
Convair F-106A Delta Dart. 101st FIS. Massachusetts ANG USAF 1986


Leave a comment