- Purchased: 2024
- Completed: 2026
- Enhancements:
- Seats: Eduard
- Instrument Panel; Eduard Look
- Exhaust Pipes; Quickboost
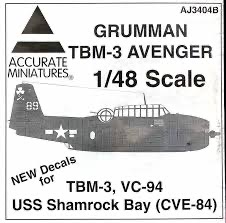
- Decals; Montex Masks
It’s a refrain you often hear from some of the decal producers. “No sooner had we sent the artwork off to the printers, a photo showing a detail we got wrong appeared”
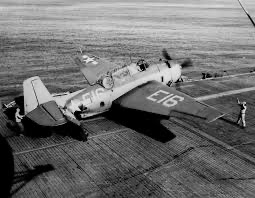
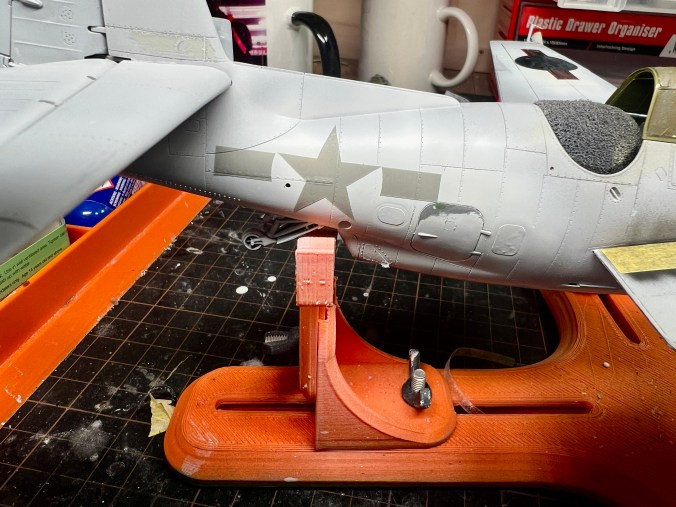
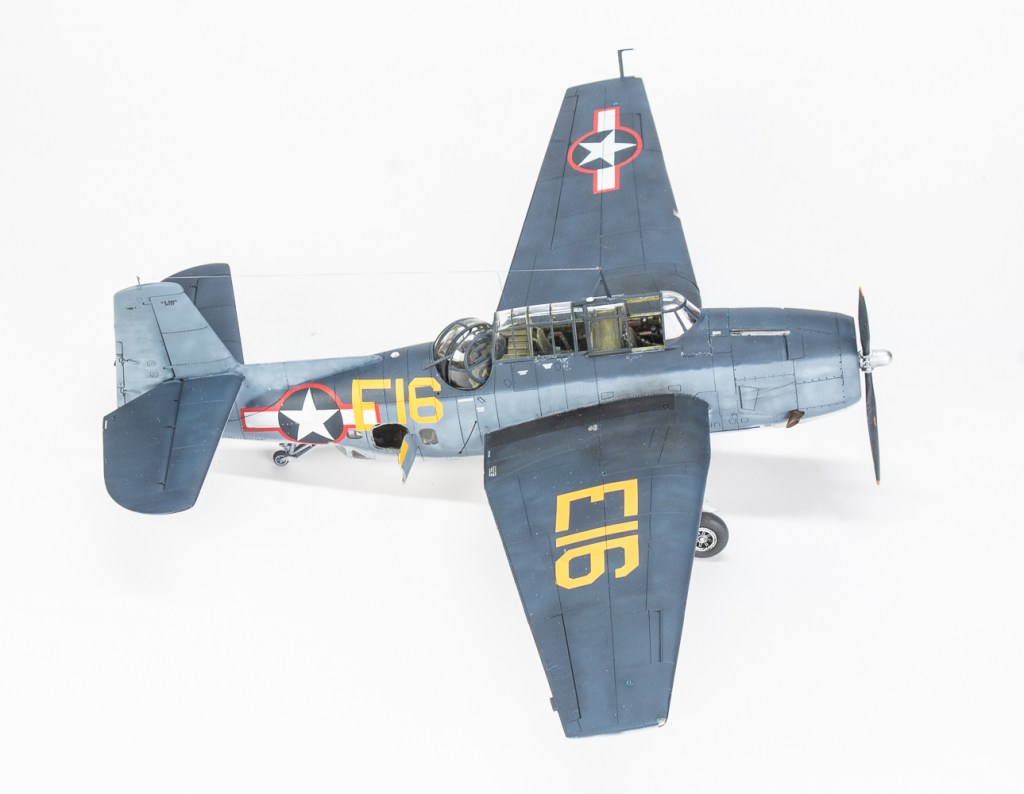
So it was with this build. Not in this case markings but a photo detailing the actual mark of Avenger that wore the scheme that I had chosen to portray. Every kit with this scheme lists it as a 1C but it is actually a -1.
Well, to be fair, the photo had always been there, appearing in several books on Avengers. It was more me not really studying it, at least until I had the model just about ready for paint.
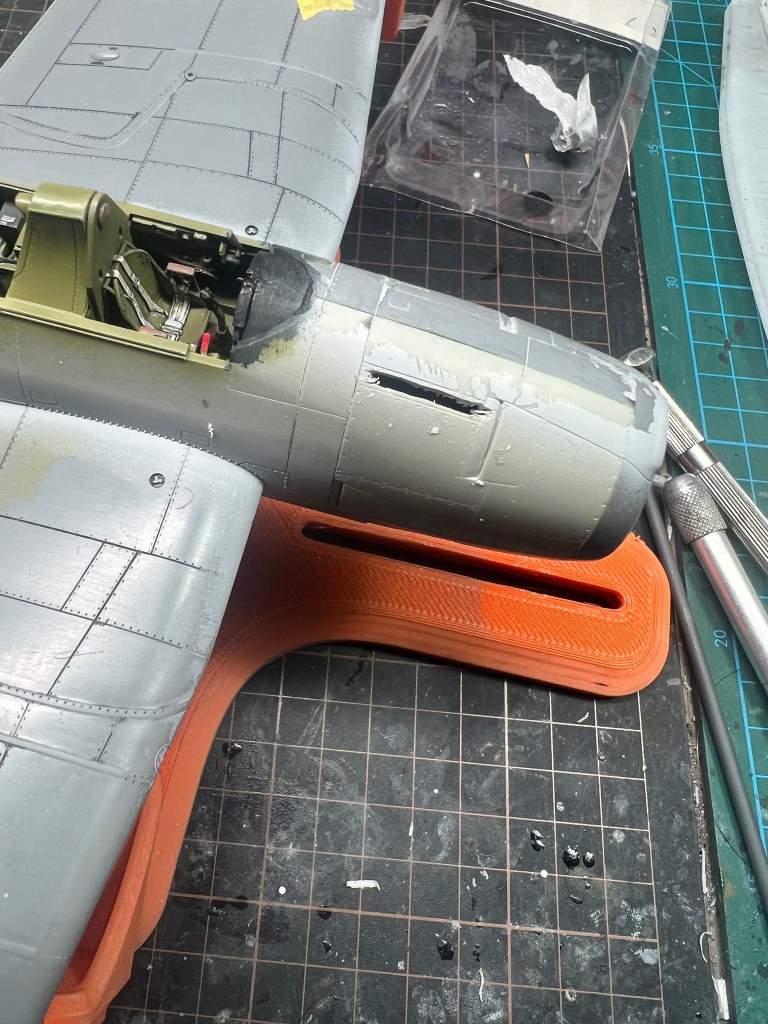
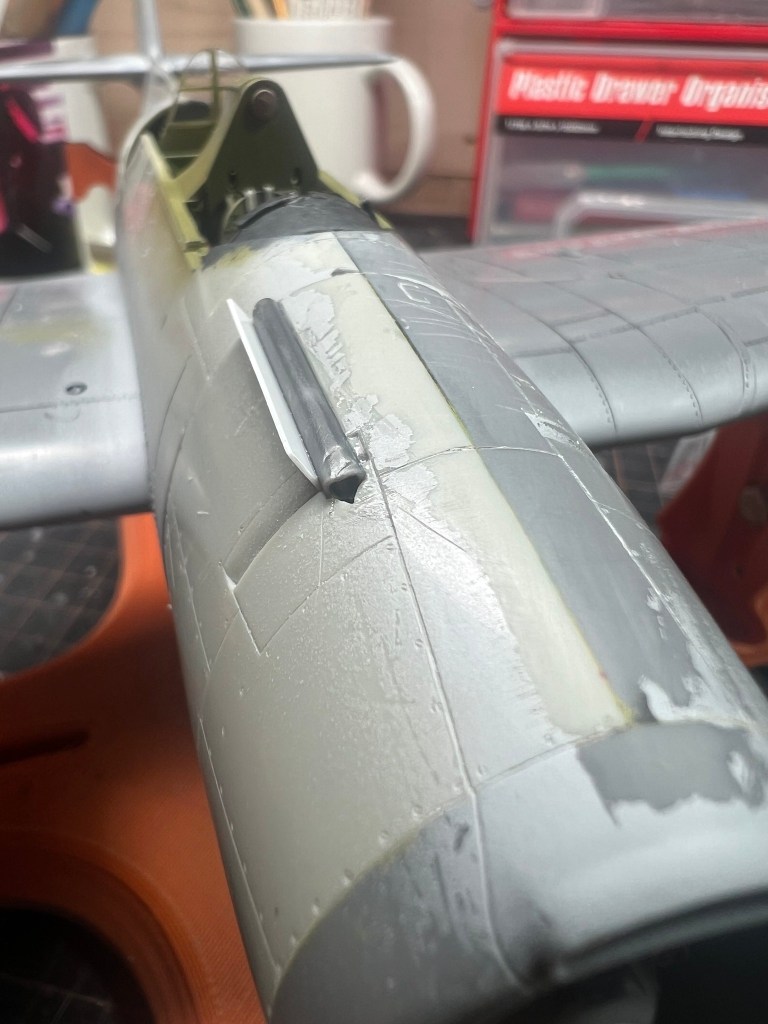
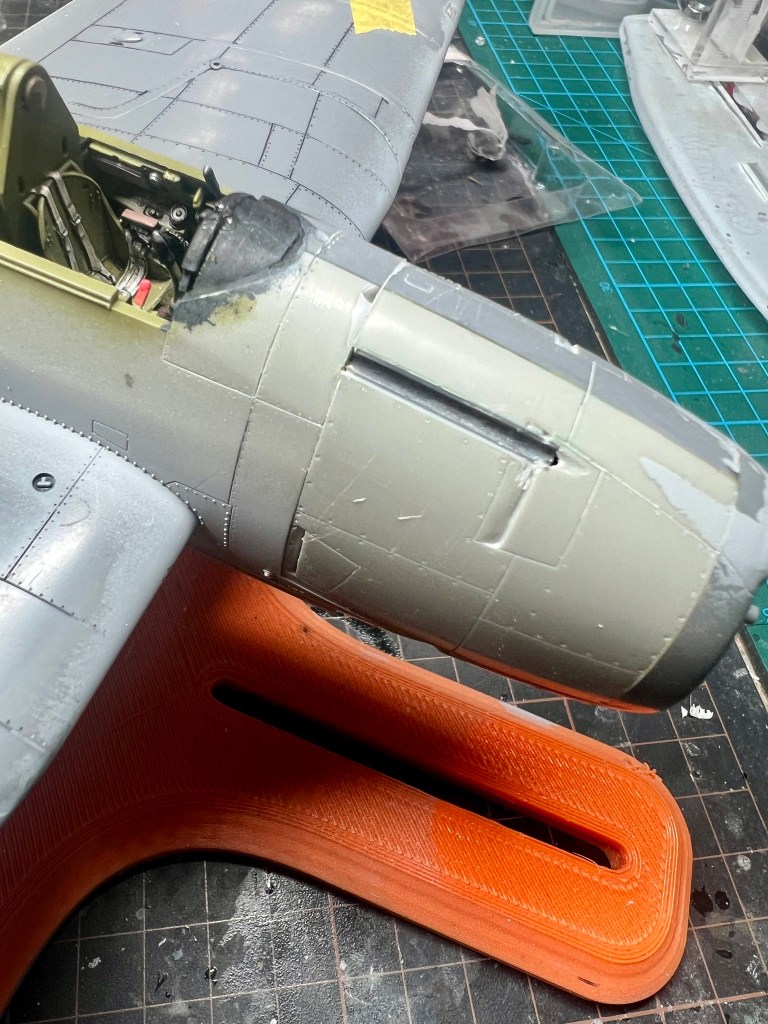
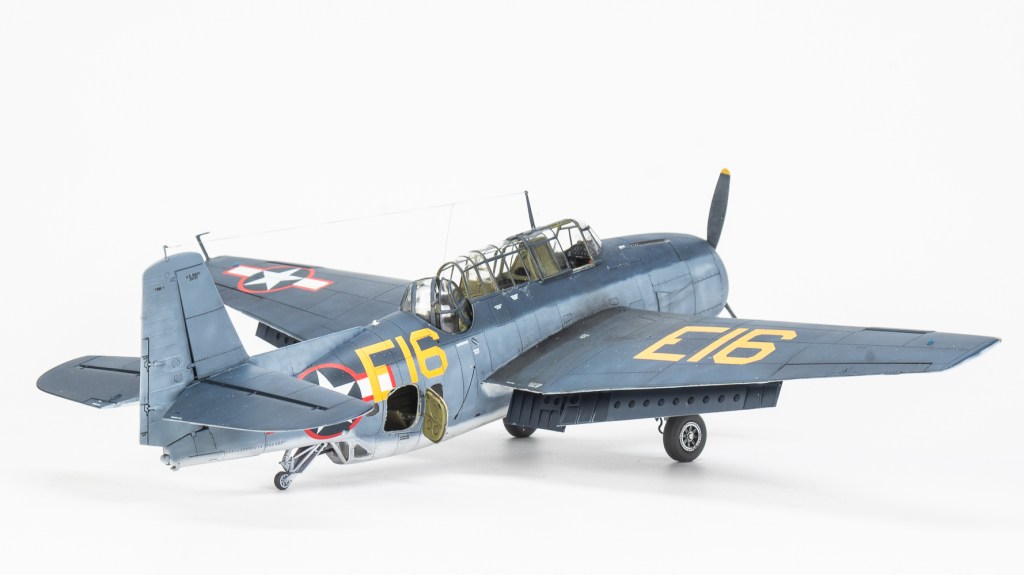
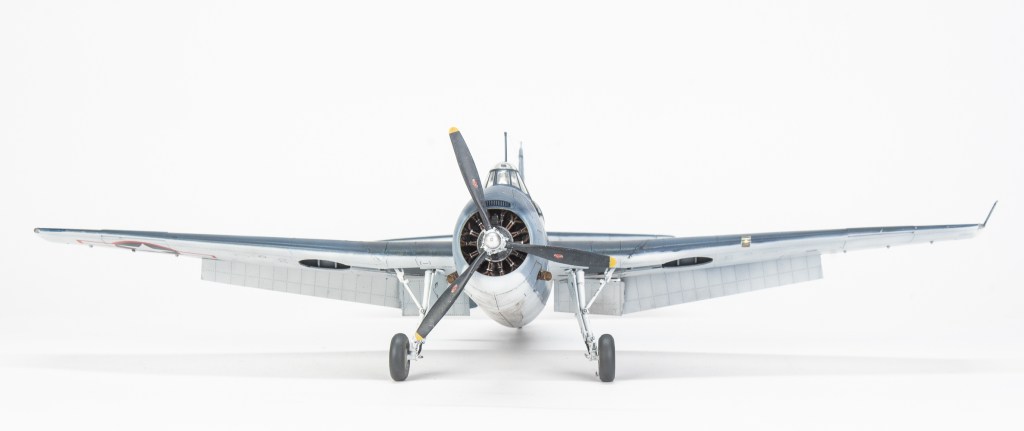
Looking at the photo on my large desktop screen, it became evident my subject aircraft was fitted with a cowl gun, and no wing guns. This made it a TBM-1, not a 1C as first thought.
What to do? Make the requisite changes or leave it as one of our fellow GB builders had done. Well, not me Andrew! I’m all about the accuracy* (*may not apply to all models, LOL)
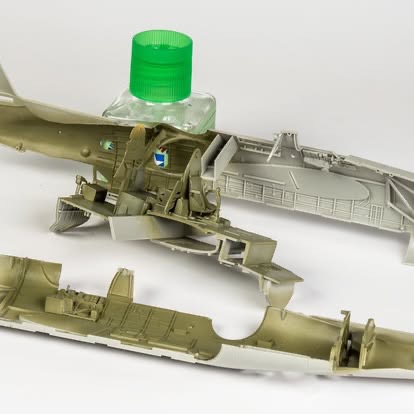
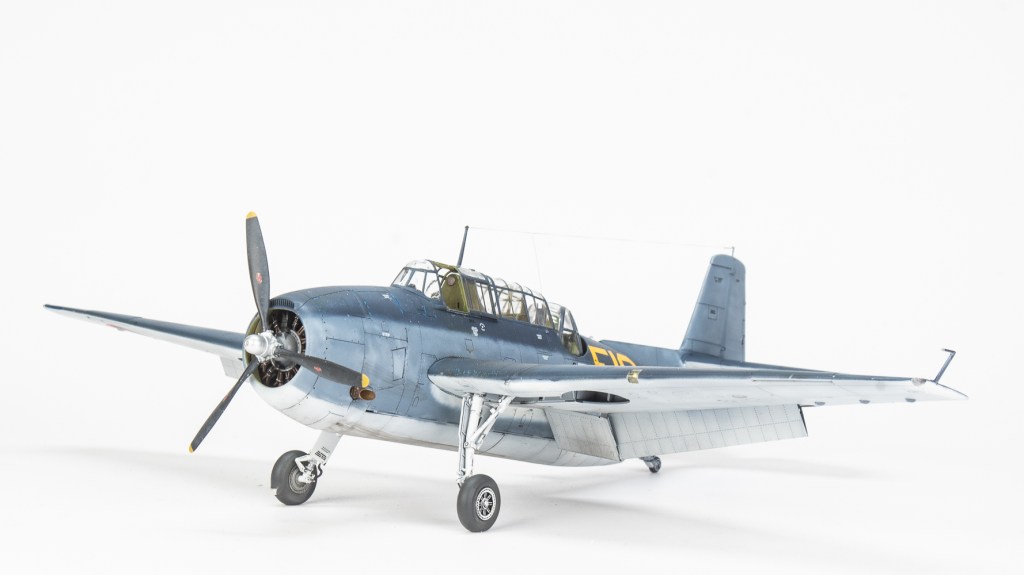
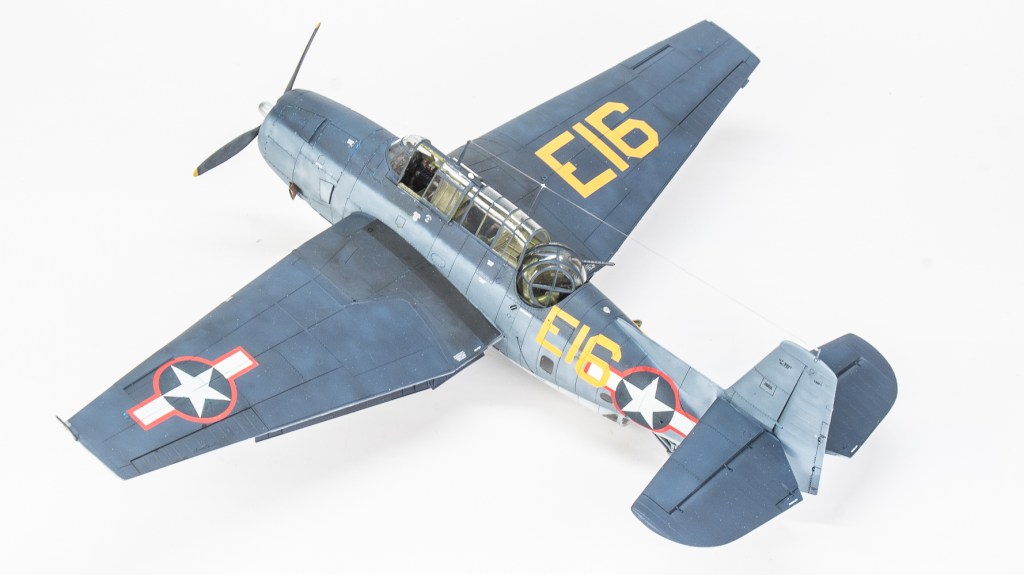
Fitting the gun trough would certainly been easier before the forward fuselage parts were fitted, but in the end wasn’t as difficult as first imagined. A slot was cut where the trough would be located and plastic tube was glued in. This was then cut and sanded to match the fuselage contours. The natural curve of the fuselage forms the teardrop shape of the trough. In hindsight, I should have made the trough a little shallower, but was quite pleased with my results anyway, not being the world’s greatest scratch builder!
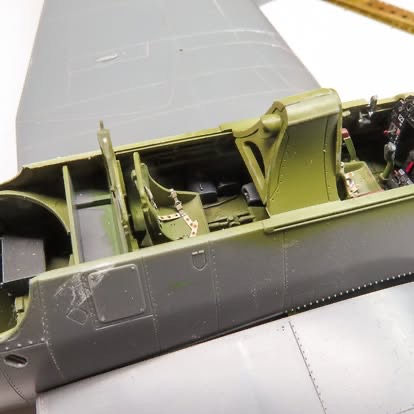
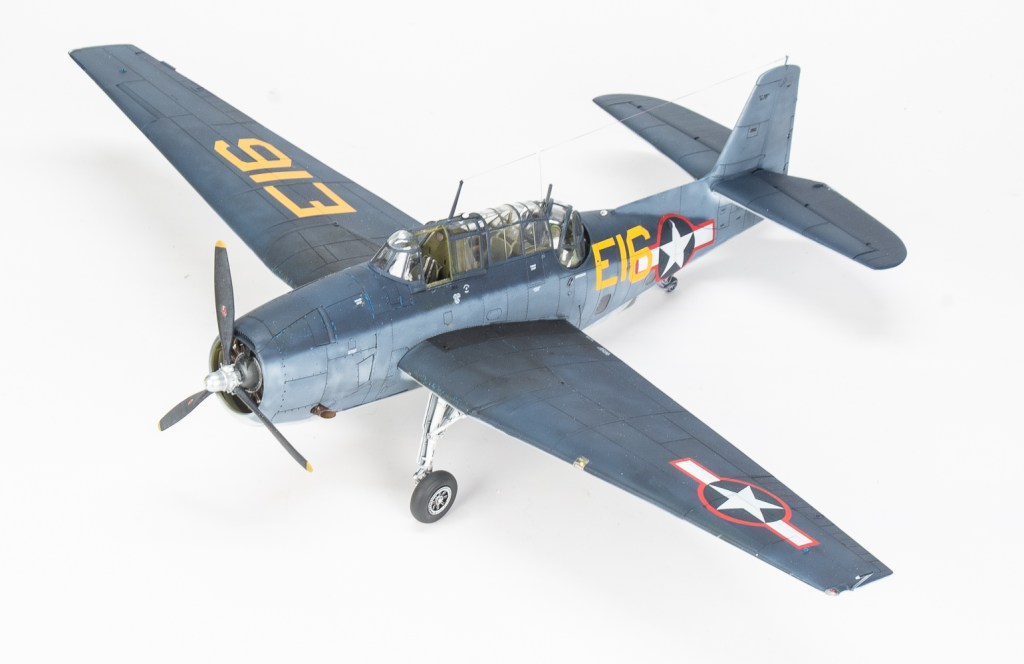
The next modification was to add a second cockpit as per my FAA build as the TBF-1 Avenger also had a second cockpit. The second seat in this case being the spare pilots seat from my other build.
This pretty much bought the fuselage to completion. One thing to note was the rear radio operators seat needs a plastic card base underneath it to widen it to meet the location tabs on the fuselage sides. This was required in both builds. An MV lens was again used to detail the wing leading edge light
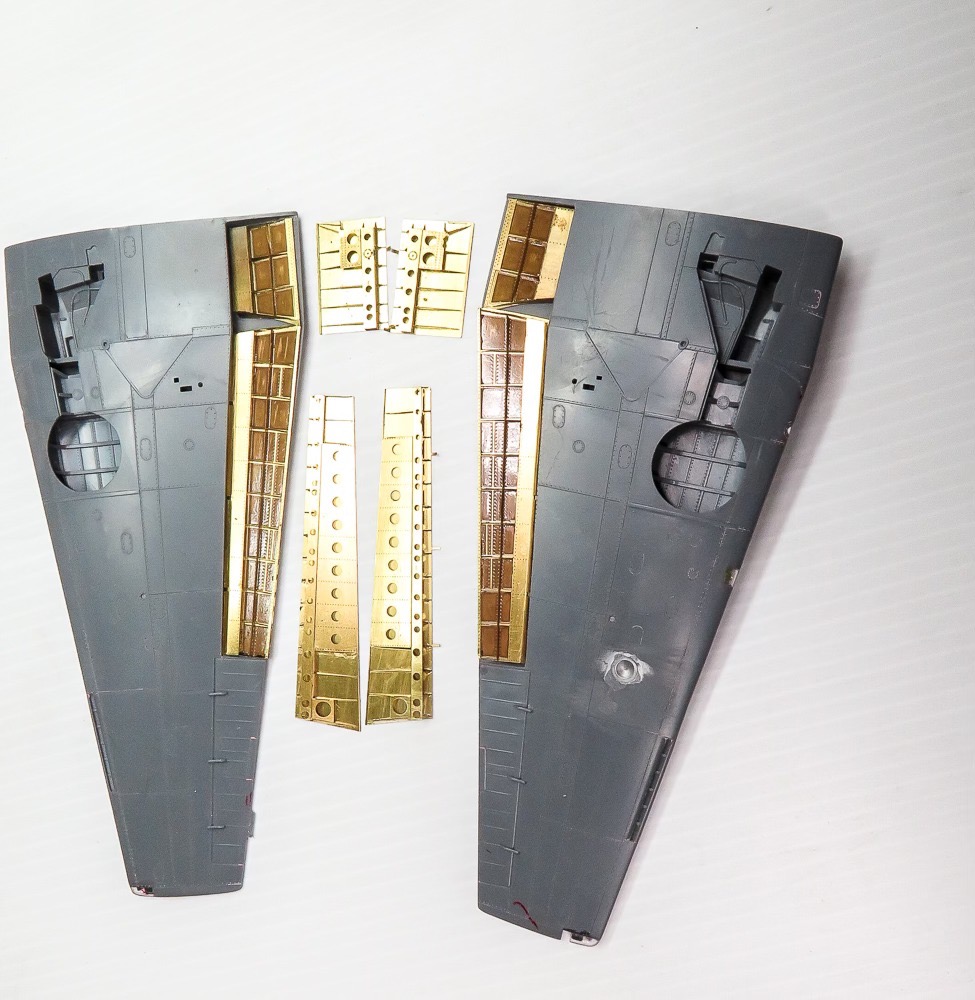
The PE flaps and bays were built up from the Eduard set and matched to the wing cut outs without any great dramas.
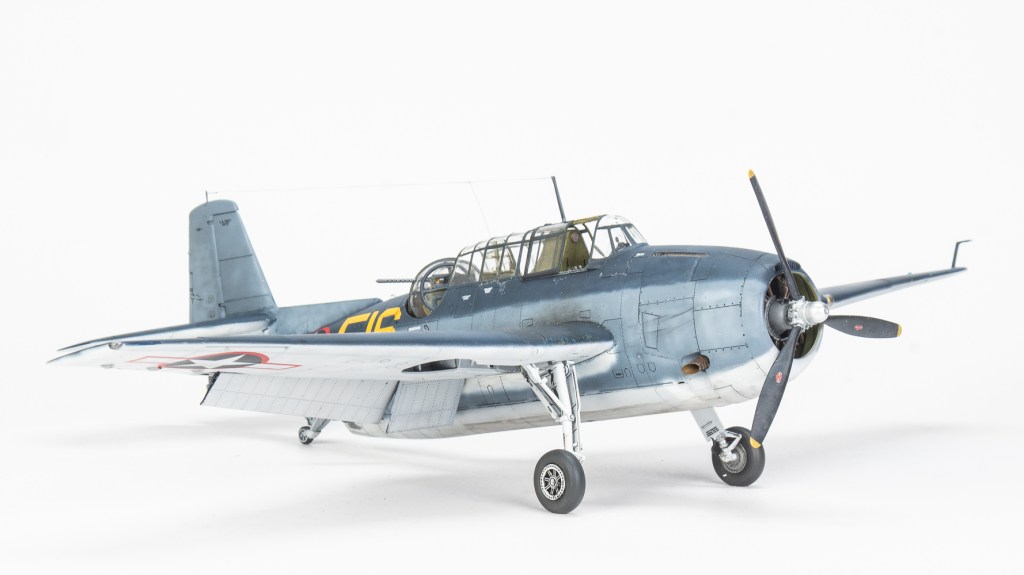
Wings and tailplanes fit neatly into their fuselage recesses, with just a smear of Mr Surfacer needed to tidy the joins. Before adding the wings, all evidence of the wing guns were removed, empty shell chutes filled were with scraps of plastic card, as were the muzzle openings. The wing gun bays were then eradicated with super glue after the bulges were cut off.
Finishing
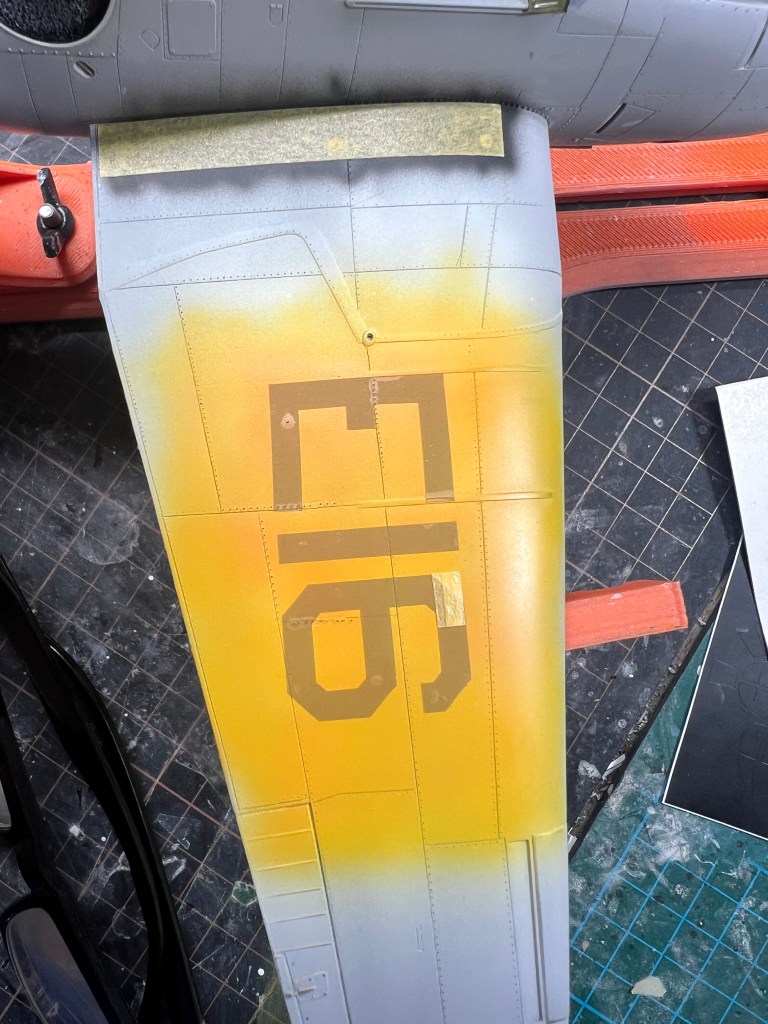
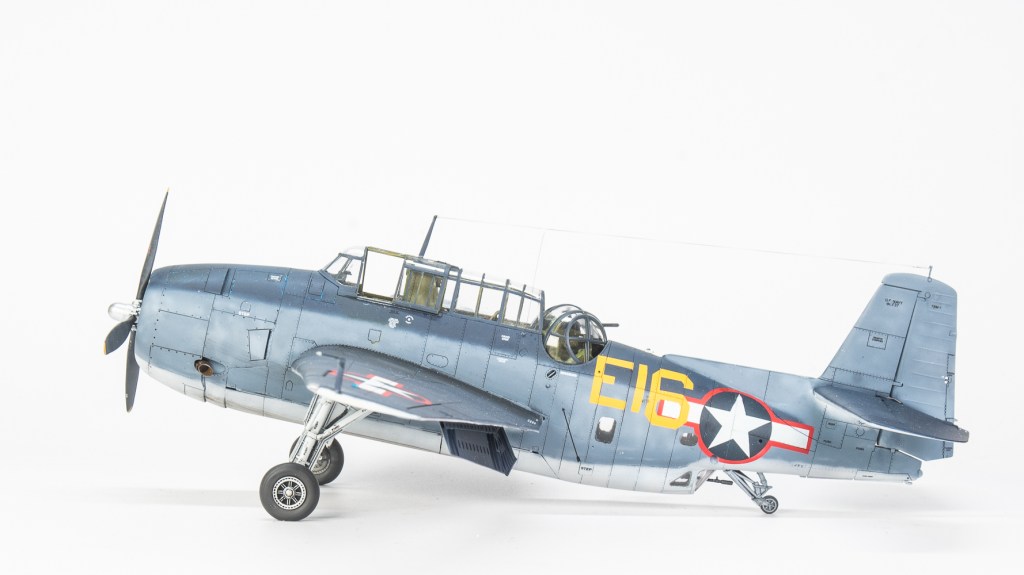
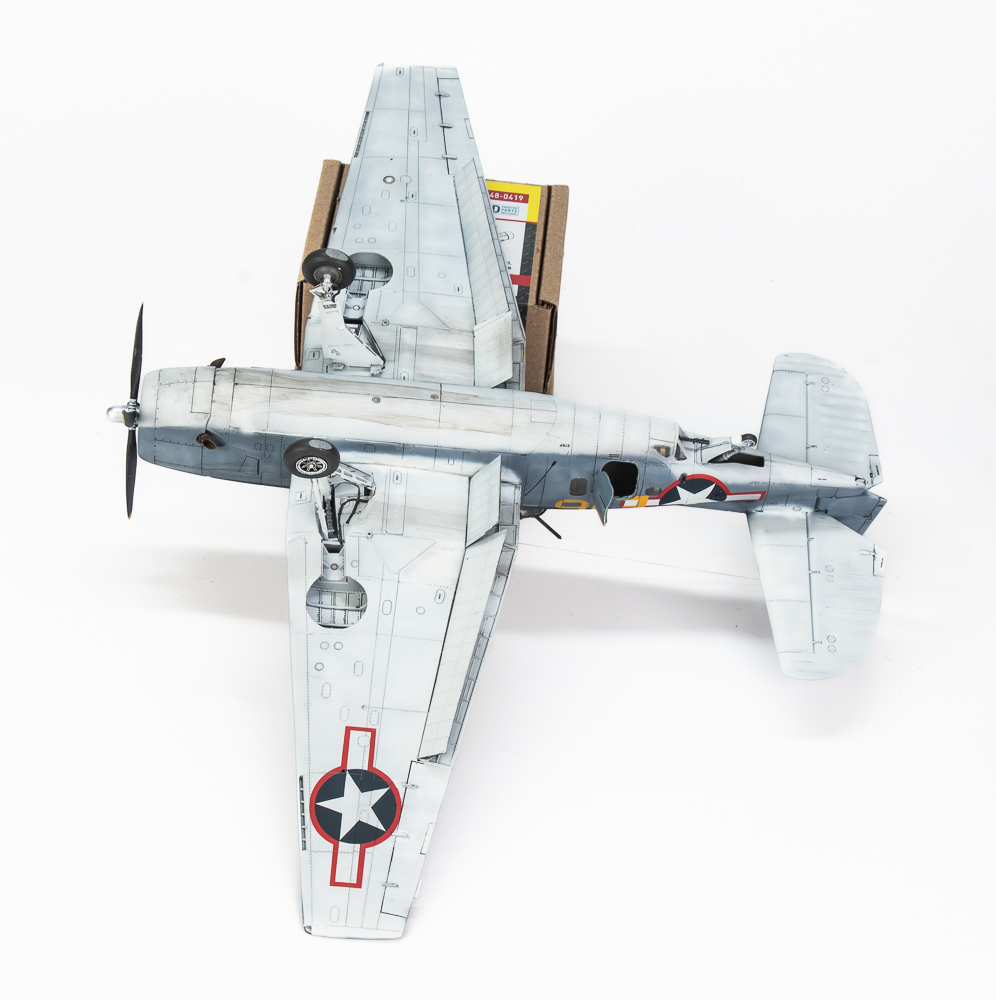
I had an old Aeromaster decal sheet for this scheme in the decal bank, but did not really trust the decals. Then I discovered Montex had a mask set in their range for this aircraft. Those large numbers would look way better painted rather than decals. For this model, it was decided to paint the insignia on first before the camouflage. The below photos detail the process.
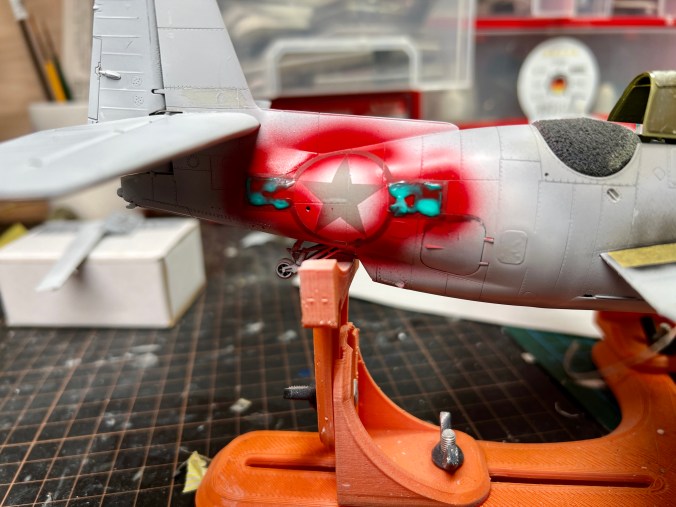
The red is the. sprayed and the mask added to cover this. Note the use of masks to cover the small cuts between the different mask elements 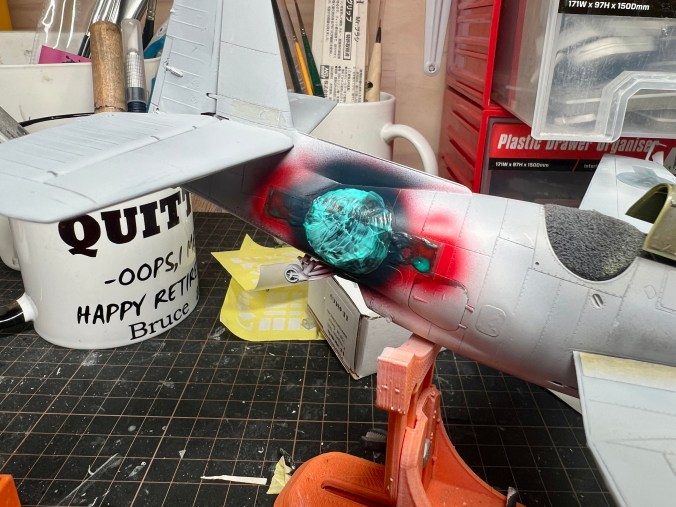
Here the blue has been sprayed over the remaining umasked areas and then the whole marking masked off 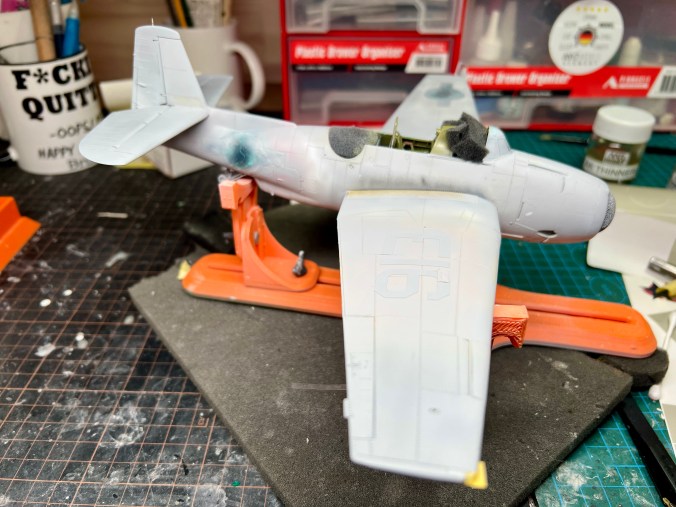
primer applied to cover all the overspray and bring the surface back to a uniform colour 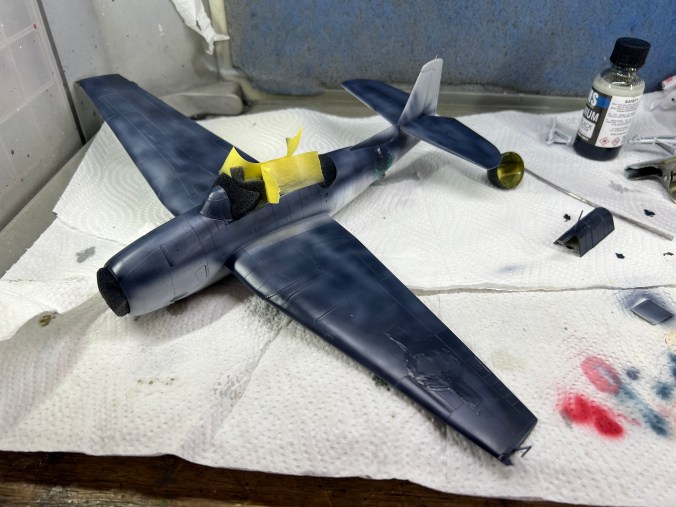
White is first laid down, then masked
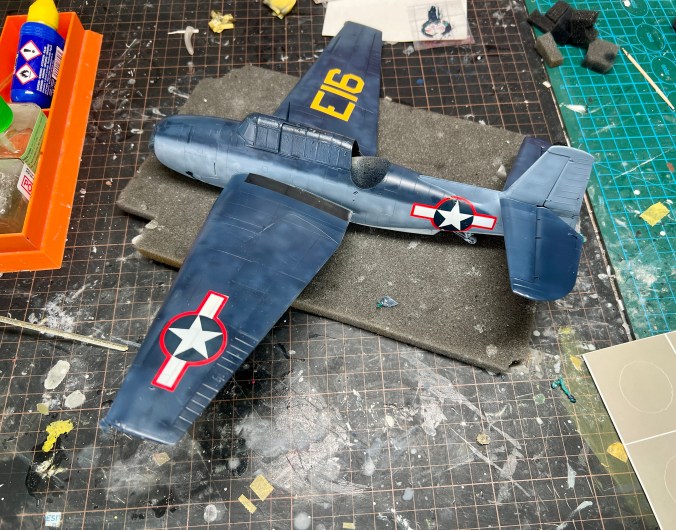
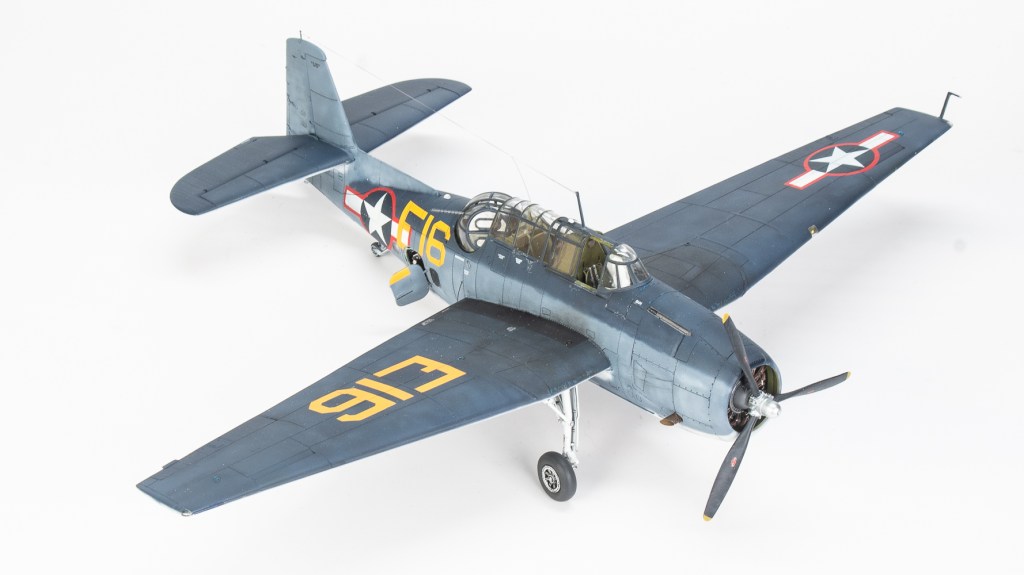
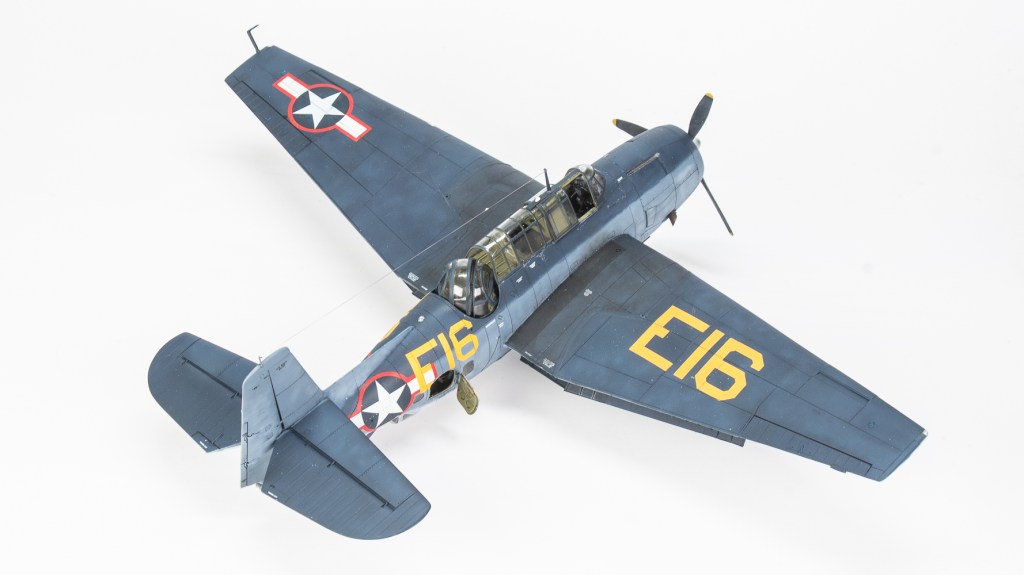
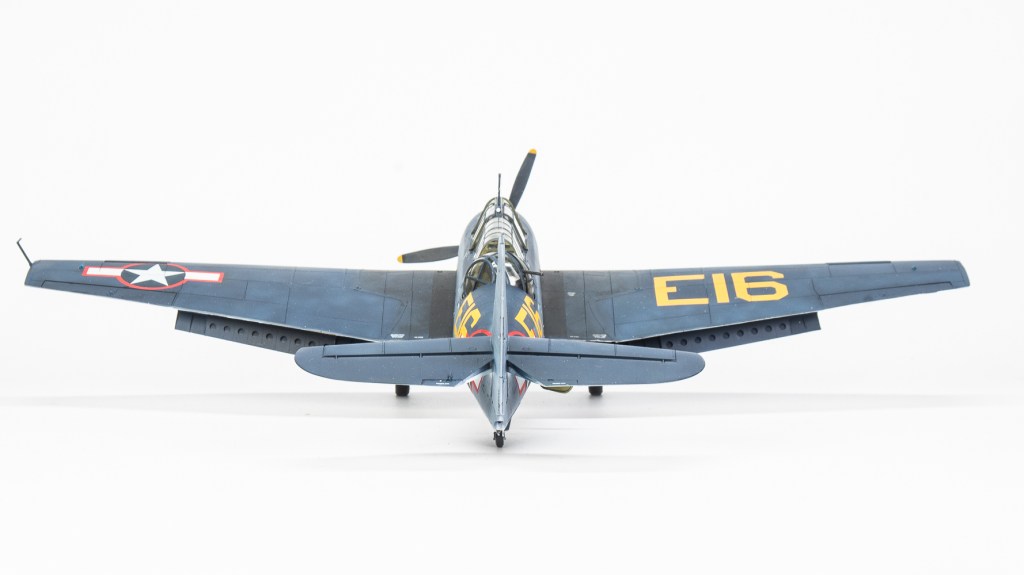
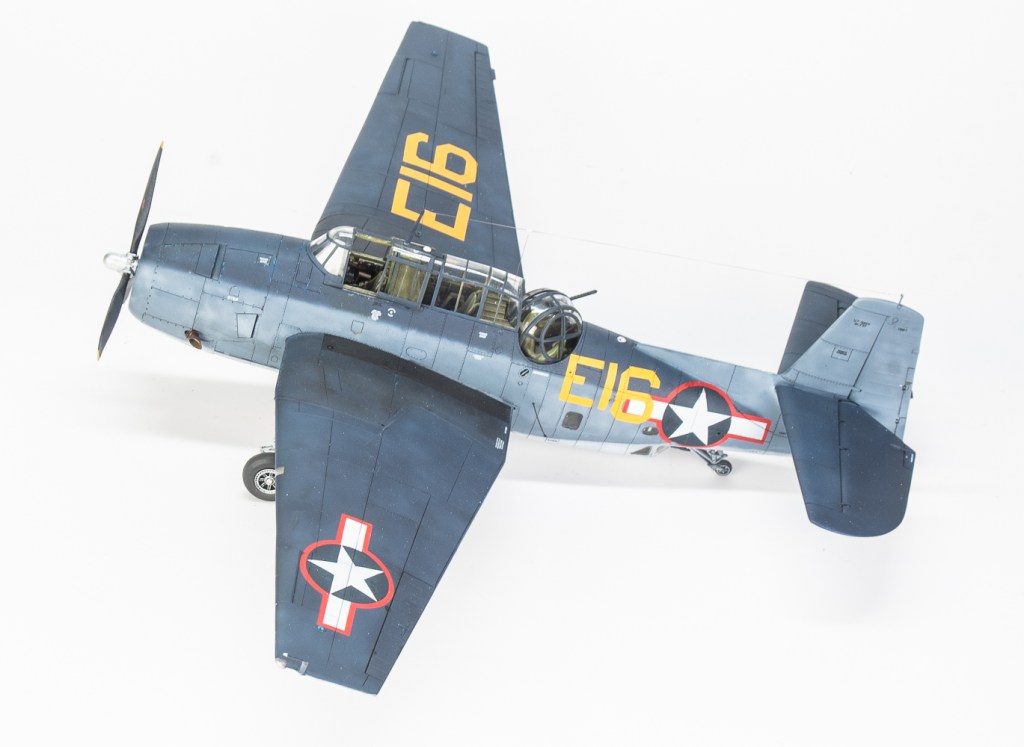
nice all the national insignia had been sprayed, the camouflage was applied. In this instance SMS Insignia white, GSI Intermediate Blue followed by Sea Blue. There should also be graduated mixes of the two colours on the leading edges of the wings and the spine of aircraft finished in this scheme. But the photo showed the top of the wings faded to one overall colour. The final markings to be masked and sprayed were the fuselage yellow call signs as they overlap the national insignia.
Interestingly, Aeromaster decals – who were often called Errormaster for the many mistakes on their decals – seem to be the only manufacturer that carefully studied the extant photo of the real machine. As you can see in the above pic, I had to modify the Montex 6 with tape to properly represent the prototype marking. Aeromaster got this right. Italeri and Montex were a fail. You can see that the wing walkways have also been sprayed and masked rather than using the kit decals.
Final Assembly
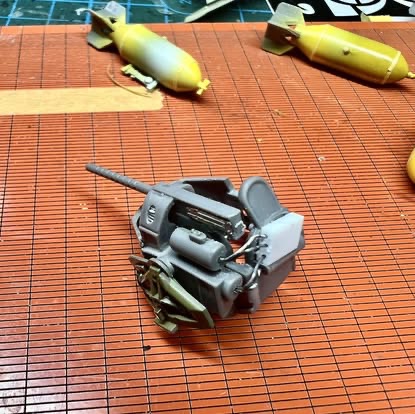
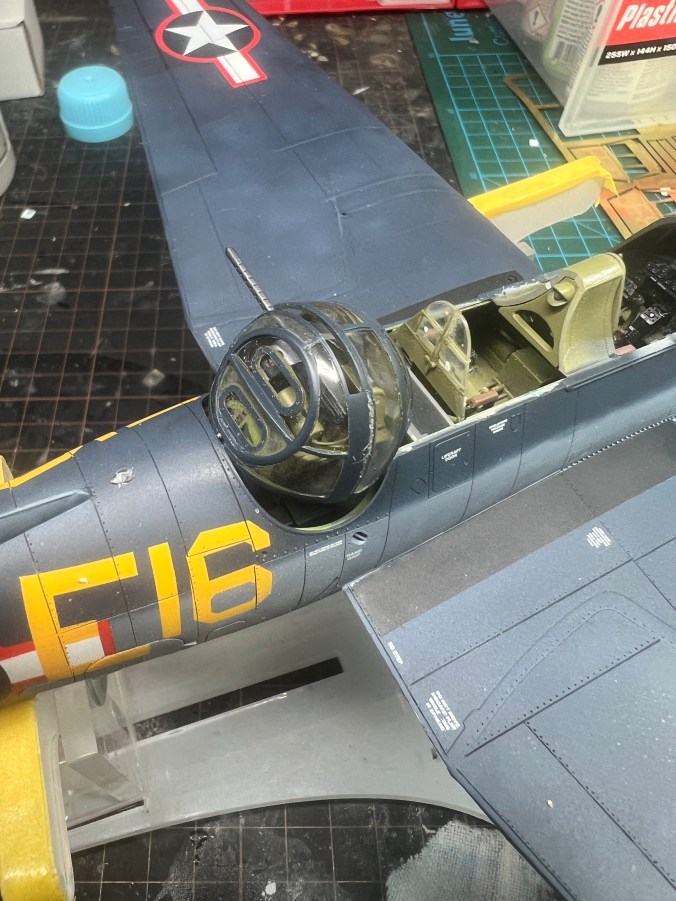
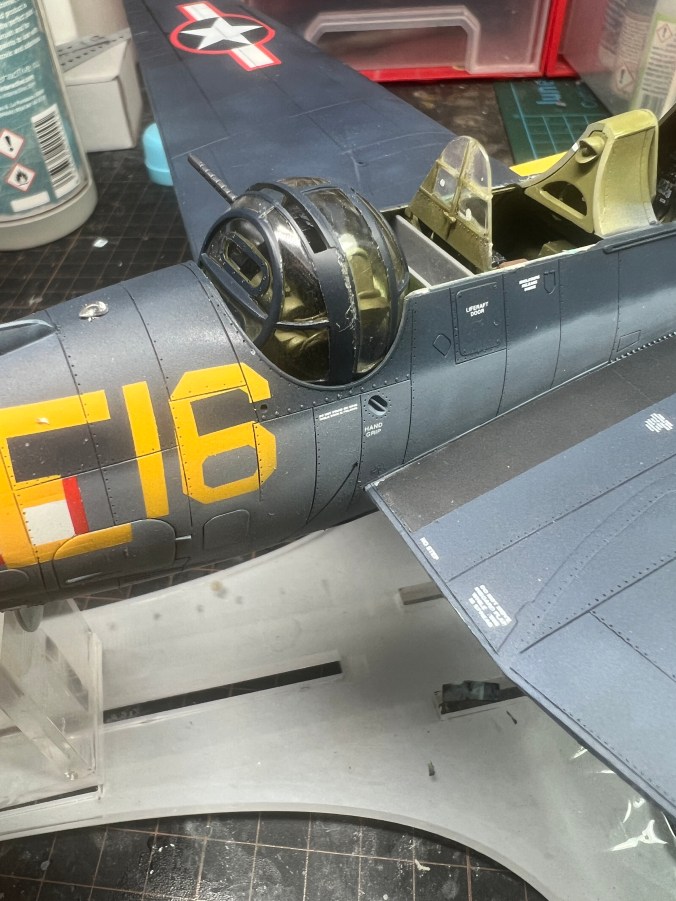
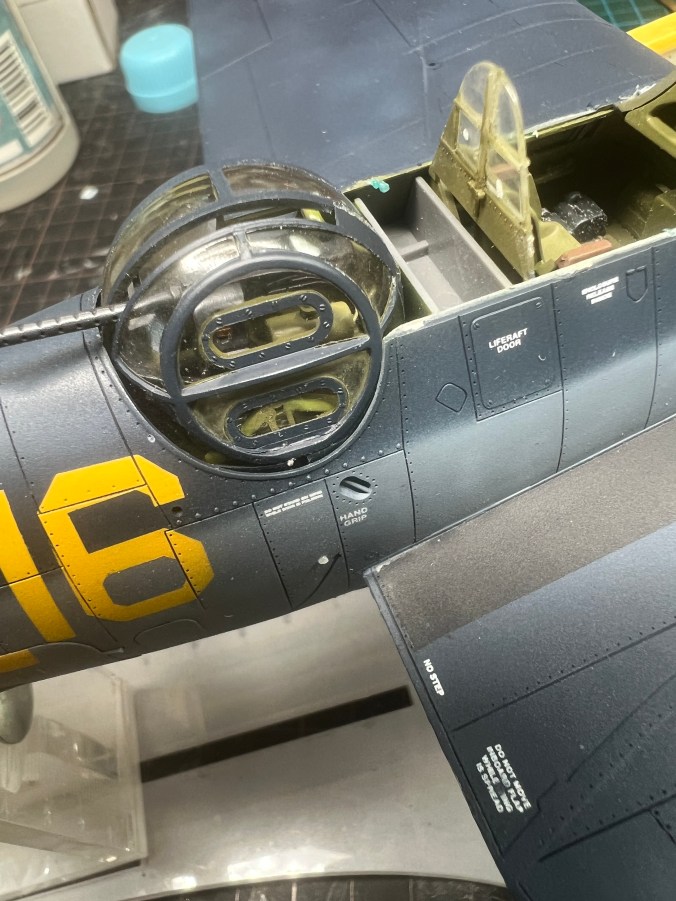
This just left the small details to add. Resin Quickboost exhausts replaced the chunky poorly detailed kit ones. The undercarriage securely locates into position and finally the turret is added. This was met with some trepidation as it is supposed to be notoriously difficult to push into position. In reality, it went in with just a tiny bit of pushing, nowhere near the dramas reported by some other modellers. Hopefully the photos below outline the process. I did cut off the small “feet” on the bottom of the turret ring, which made it a bit easier to rotate into position. It is important though that you start with the turret in the same position as the first photo. This has been ratified by Bill Bosworth himself! The designer of the kit. Note the “shelf” that sits in front of the turret should not be fitted until AFTER the turret, otherwise you will never get the turret in. Italeri do not mention this at all in their completely inadequate instructions.
Final Thoughts
This has been my fourth Accurate Miniatures build. And I have really enjoyed them, well maybe not the Mitchell, although that still turned out as one of my favourite builds. The Dauntless and Avengers were very enjoyable builds with good fit and engineering. The only real fiddly bit with the Avenger was assembling the gun turret interior. The poor instructions not helping at all.
As mentioned in my other AM builds, these kits still stand the test of time. Such a shame the company folded when it did. Who knows what they could have gone onto.
Those big yellow numbers and red outlined stars and bars make this Avenger quite the eye catcher. This will be my last Avenger for a while, although there is a post war example that I wouldn’t mind building somewhere down the track. I’ll keep an eye out at swap meets for the TBM-3 as despite the box my model came in, the contents were the Italeri 1-C kit.
TBM-1 Avenger. USN. Carrier Aircraft Support Unit-22 USS Mission Bay 1943


Leave a comment