
Built: 2019
Enhancements Used: Gunbays: Eduard PE. Wheels-Brassin. Seat Belts-HGW. Gun Barrels-Master Barrel
Decals: Combination of Ad Astra masks and Superscale Cowl checks
Being as the Trumpeter Thunderbolt box was taking up the most room, it was summarily dragged down onto the Cutting Mat.
I’m not sure when or why work on this stalled, but a look in the box revealed all major sub assemblies completed, just needing their seams dressed and then bringing together to be ready for paint. A nice shortcut to getting Build No.2 done for the year.
I rate Trumpeter’s Razorback Thunderbolt as one of their nicer kits. Reasonably accurate, options to allow dropped flaps. open gunbays, open or closed canopy, and plenty of underwing stores options. It also goes together quite quickly if you don’t use all the unnecessary interior parts. such as the full ducting for the superchargers. Contrary to a lot of on line builds and reviews out there, the cockpit does not require the ducting to sit on, as it is will locate quite solidly into slots provided on each fuselage half. The wing spars slot through the openings provided for them as well without needing the ducting added. Leaving these parts out plus the engine accessory bay greatly simplifies the assembly of the model.
All I added behind the engine was the bulkhead and firewall to provide some rigidity to the fuselage. Its a big model, and you do not want seams popping open when it is picked up or otherwise handled. Assembly still throws out a few fit issues. Steps on the wing undersides when fitted to the fuselage, leading edge gun inserts and windscreen all required attention on mine. The attention taking the form of filler and plastic shims to even up gaps and steps. I have heard the gunbay panels can be an troublesome fit, but this would not concern me as I wanted mine open. If the details there, why not show it off, right?
The only frustration I found, in common with all Trumpeter’s radial engine kits is the poor fit of the engine parts. The parts certainly do not click together with the result it is quite easy to end up with an engine and propeller out of alignment as I found on my Hellcat build.
This is then compounded by Trumpeter also not engineering the cowling to be a strong positive fit to either the engine or airframe. At least in the thunderbolt, the engine is held solidly within the cowling by a frame.
I further reinforced the cowling airframe join by inserting two pieces of plastic tubing into the cooler ducts to provide a more positive fit
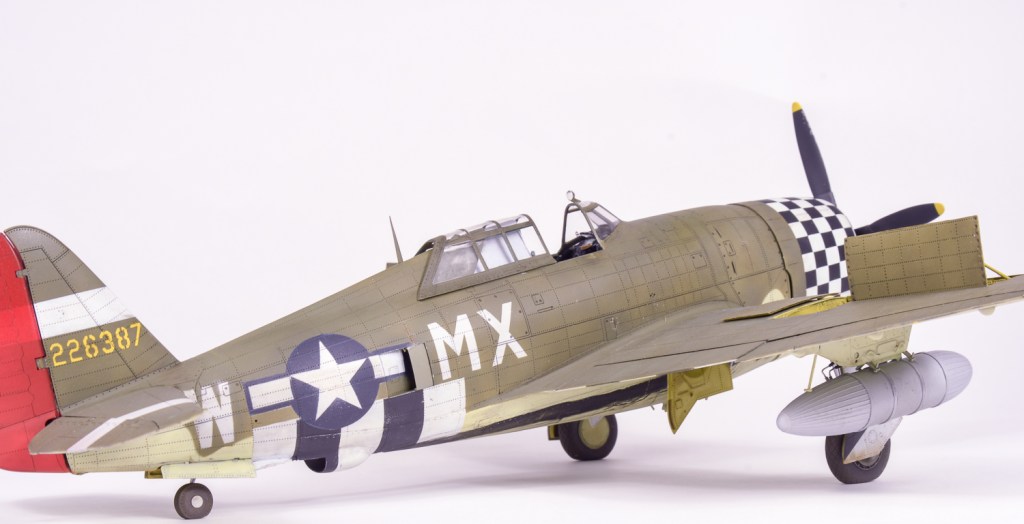
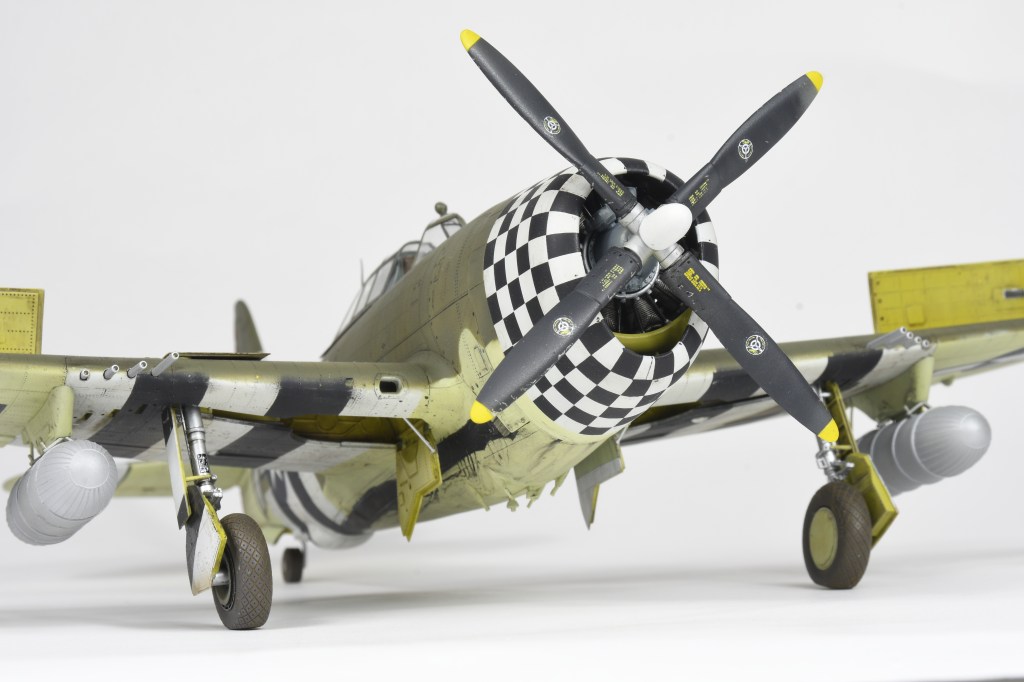
In regards to the chosen scheme, I have always thought the checkered cowling of the 78th FG would stand out in the cabinet, so looked for a suitable machine to model. I was quite taken by “Miss Behave” with her RAF colours of dark green upper surfaces, and sky undersurfaces. Invasion stripes, red rudder and the scalloped area under the canopy remaining NMF reinforced my choice.
With this scheme originally picked when the model was originally started, masks for all markings were ordered from a bloke in Canada that called himself Ad Astra masks. Now sadly no longer doing them as mask set was excellent to use. He based the masks on photos of the real aircraft and an aeromaster decal sheet.
This time, the deciasion was made to apply the insignia first, mask and then paint the camouflage. It was hoped doing this, the masks would be easier to align, and I would avoid that thin white ring of built up paint you can get if painting the markings last
What I learnt from this was the US star and bar markings must be the most complex markings to paint, even more so than RAF type A1 roundels. There are just so many elements you need to ensure are aligned and straight. Anyway I got there in the end having to only touch up two stars Painted markings are the only way to go in 32 scale in my opinion. Even the “miss Behave” came out nicely, a true testament to the great job Ad Astra did cutting these masks. Then there was the cowling!
Well, I tried to mask that too using a montex mask set, but it was just an abject failure, so was my attempt at cutting little squares of Tamiya tape. Buggar it, I thought, this will be decalled, so I dragged out the Barracuda sheet, but I could not get this aligned either despite it being sized for the Trumpeter kit. It must be me as I imagine Roy would have been meticulous in designing the sheet.. Rapidly running out of options, I found an old Superscale sheet with checks on it for the old Revell kit. It fit surprisingly well, just needing a couple of black squares filled in with black paint around the cowl opening and underneath where the two halves met.
This just left the final assembly where I discovered I had lost a wingtip light and also one of the landing gear covers. Despite hunting high and low, no sign of them. I can only think I accidentally chucked the gear cover out as it was stuck to the big ball of Tamiya tape that was sitting on my desk. The jigsaw that are HGW belts were then assembled using wild guesswork as to how they all threaded together! HGW could really help here by providing step by step instructions rather than just a picture of the completed belts.
Searches of the various fora hasn’t revealed anyone else knowing how to assemble them either! The guns also provided a bit of frustration trying to get them all aligned and properly seated. I really need to either test fit these items and engineer proper fit, or assemble them way before I get to this stage. I had the same problems with the guns on my hellcat. To add the brass gun tubes, I simply drilled the holes in the leading edges out slightly and pushed them through into the breechs.
The 108 gallon drop tanks are from the kit with plumbing added from wire and steadying braces from plastic rod. If I was being strict to the 84FS’s missions I should have added bombs as after D-Day this squadron switched from long range escort duties to ground attack, but I wanted my aircraft to wear the tanks.
Adding the ammo bay doors, I also discovered I had the door upside down when I painted the star and bar portion on it. A modeller worried about perfection would have repainted the star. I just flipped the door upside down as the model had got to the stage where I just wanted it off the bench so I could move onto something new.
Does anyone else get like this?
The photo I had of Miss Behave showed no chipping or fading that I could make out, just that very extensive oil streak leading from the oil cooler doors, so this was added with black oil paint, and then the whole model dullcoated . I should probably go back and gloss the oil streaks at some stage.
It was then time to sit back and enjoy the model, happy that I had reduced by one the small amount of kits on the shelf of doom. (there’s still 6 on the SoD if you must know!)
Overall, not as good as I was hoping it would turn out, but it still looks imposing on the shelf and Im happy I have a 32 razorback in markings not usually seen. I just love that big checkered cowling. I really hope that we get a 1/32 P-47D from Tamiya at some stage.
Republic P-47D-22RE Thunderbolt 84FS 78thFG 8th A.F U.S.A.A.F Duxford England. 1944


Pingback: TanModels 1/48 RF-84 Thunderflash | Bruce’s-Scale-Models