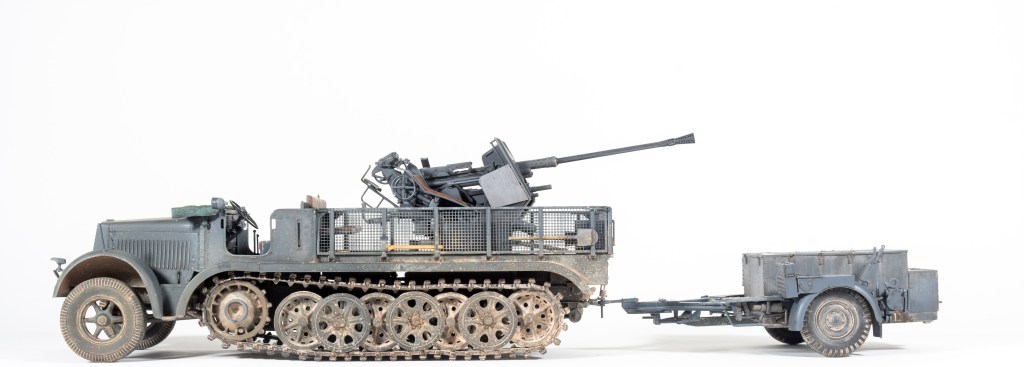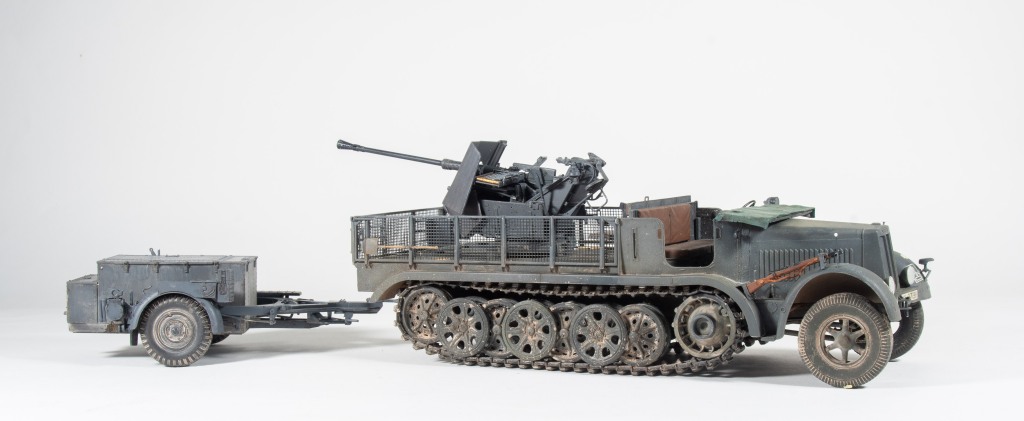
Dragon 1/35 SdKfz 7/2 + Bronco 1/35 Sd.Ah. 52 Ammunition Trailer

  • Purchased; 2019
  • Built; 2021
  • Enhancements;
  • Gun Barrel Voyager.
I have a vague recollection this kit was purchased during an armour buying blitz.  As has happened on far too many previous occasions, I get a bee in my bonnet about building a particular kit, after seeing a completed example or reading a review, and not only do I buy the particular kit, but also a swarth of other AFVs, trucks, ships, whatever, only to sell most off them off when I realise I won’t build half of them!
Anyone else do this?
This kit having survived “The Post Loss of Interest Sale” was plucked from the stash to form part of this years build schedule, which my modelling mates had randomly picked for me.

If you have only ever built tamiya armour, are you in for a treat! but only if you love assembling tens of parts into assemblies that tamiya would mould as maybe three parts.  Then there is the instructions.  small crowded drawings on a fold out page that do not do a good job at all, on illustrating to the builder, what parts are needed for what variant.  

To me this is not a big thing, as I primarily build armour as a bit of a palette cleanser from aircraft.  But if you’re a purist that  cares what  month the Stug III production line started using 8 hole sprockets instead of 6, Dragon ain’t your friend!  The instructions are also littered with misnumbered parts and some parts were difficult to place thanks to  vague placement drawings.
Instructions aside, the Dragon Sd.Kfz7 series kits build up into well detailed examples of the vehicle.  Construction proceeds  quickly thanks to the well fitting parts.  I had a slight gap at the rear of the bonnet, but disguised this with a strip of glue soaked tissue paper as the actual vehicle has a canvas boot cover fitted here. PROTIP.  Cut the tissue AFTER it has been soaked in glue and allowed to dry, not before!

You could leave the bonnet sides and top off if you wanted as the kit does include the engine, but I didn’t want the hassle of the extra detailing this would warrant.  The other thing to watch out for is the axles are a little spindly, coupled with the tight fit of some of the wheels when pushing them on as  I had a couple of axles that snapped.  To make life easier, ensure that you remove all mould seams from the axles so that the wheels will slide on easier.  Dragon surprisingly don’t supply decals for the drivers dials either.  I thought I would be smart and fit the steering column later than the instructions call out, to aid in painting.  Don’t do this.  It needs to be added when called out.

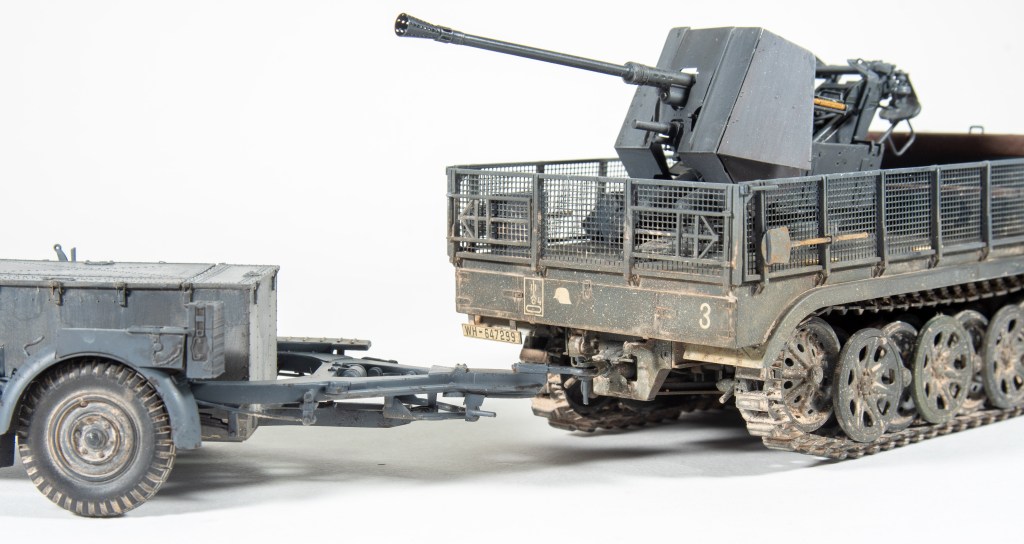
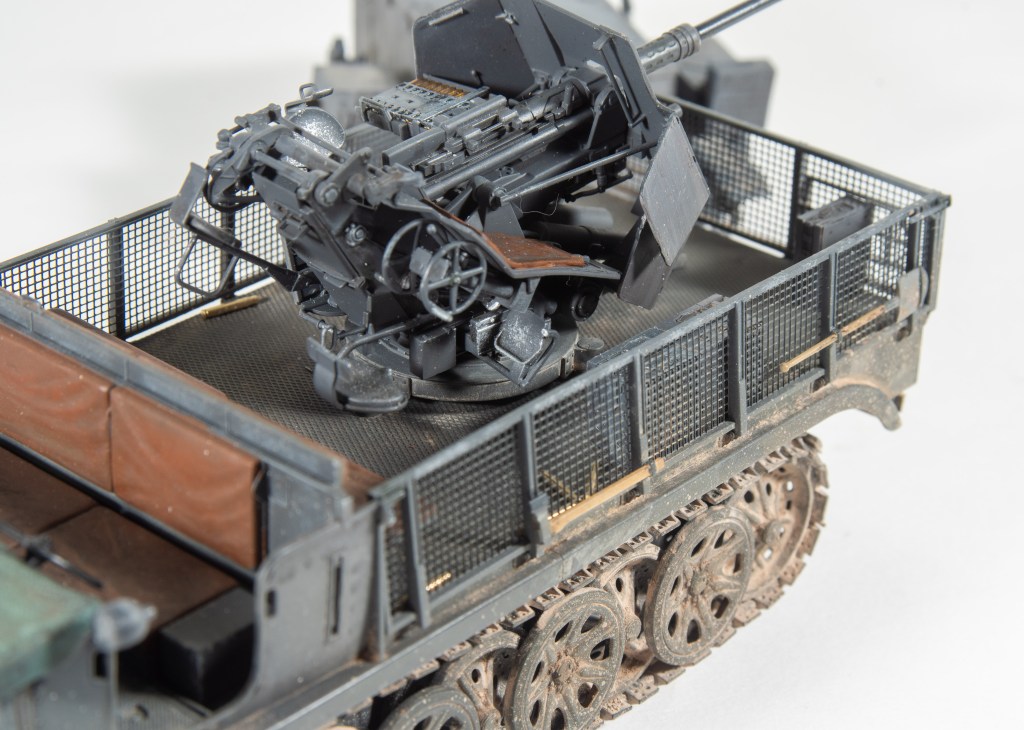
I found assembling the gun quite fiddly, and the instructions certainly did not help here.  I would have liked a lot more detail drawings of where parts fitted.  The dragon flash hider, although moulded quite nicely was replaced by the Voyager part as this had all the holes drilled out.  I have no idea how they mill this parts but they look absolutely superb.  The barrel was also replaced with the brass item.

For the finish, I envisaged an early war grey vehicle used during the dry summer months in Russia coated with a layer of dust.  In reality, well I don’t think I have weathered it very well at all.  Pigments were used to represent the dust, and it again just looks like I have caked it on.  I need to learn a little pigment goes a long way.  More successful were the oil washes I used on the rear deck.  The Grey was tamiya.  I looked at SMS, but there’s is a very dark colour.  I know the actual colour was in real life quite dark, but small vehicles look better when the colour is lightened I think.  Mud spatters were added using Mig products.  I would advise all readers to look at the many  tutorials available on Youtube to see these techniques demonstrated.  Adding the tracks also proved quite fiddly with them breaking a few times.  They are provided as separate links. Im thinking the enamel thinner used to fix the pigment in place may be weakening the glue.  Ill use fruit tracks when I do the SdKfz7.

Well, this model was drawing to a close, but wait!  There’s More!  Looking at the few photos out there of this vehicle, it was quite often seen towing an ammunition trailer behind it. Bronco Models to the rescue.  Their trailer assembled quickly, the only weakness being again, spindly axles.  I ended up replacing one which I again snapped with more substantial brass wire.  Much better.  The trailer was coupled to the half track and then she really was complete, after a few of the voyager brass wheels were littered around the bed.  Not too many as Im sure the crew would just kick them off before moving. The kit could have a lot more accessories added to give it that lived in look, but I was at the stage where I wanted to move onto the next project.

Soft skin vehicles really appeal to me, perhaps its because they don’t have to  be weathered as extremely as tanks.  Armour weathering is still a real learning curve for me.  The Dragon SdKfz7 and 88mm gun are also  in the stash having survived a couple of Stash Slash. (EDIT  They didn’t survive the latest 2023 one!) Im looking forward to building them too, now that I know what to look out for.


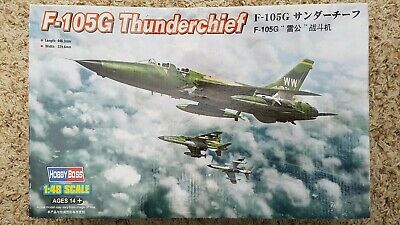
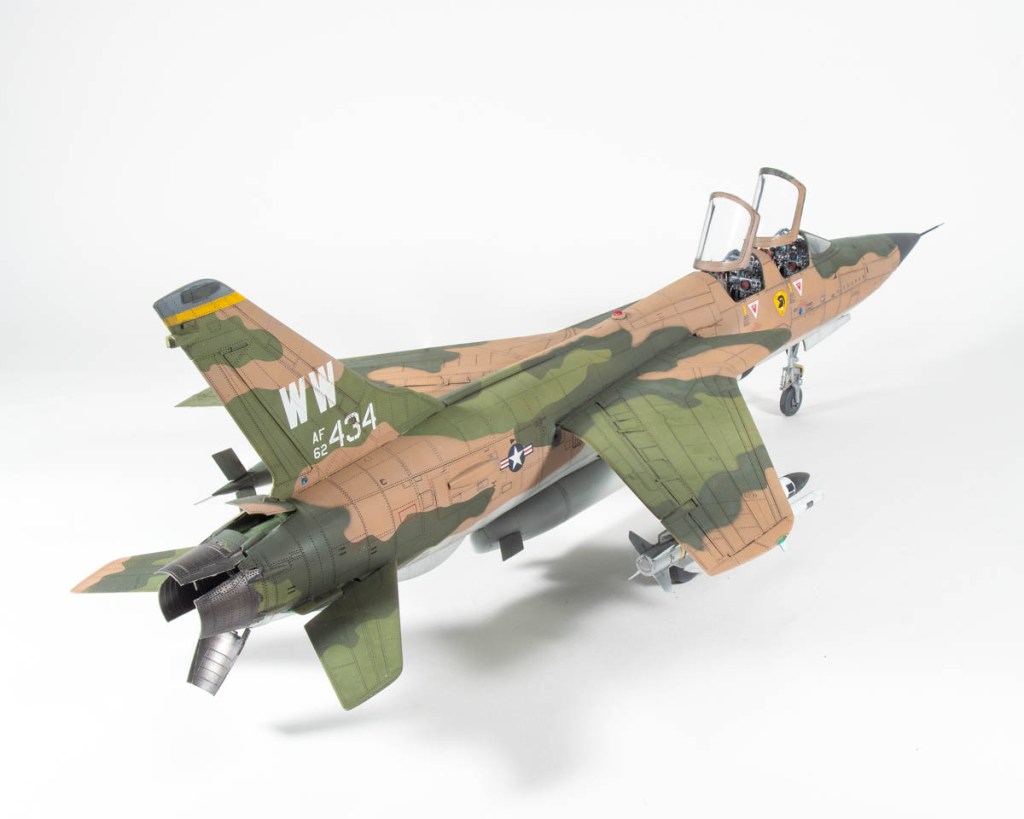
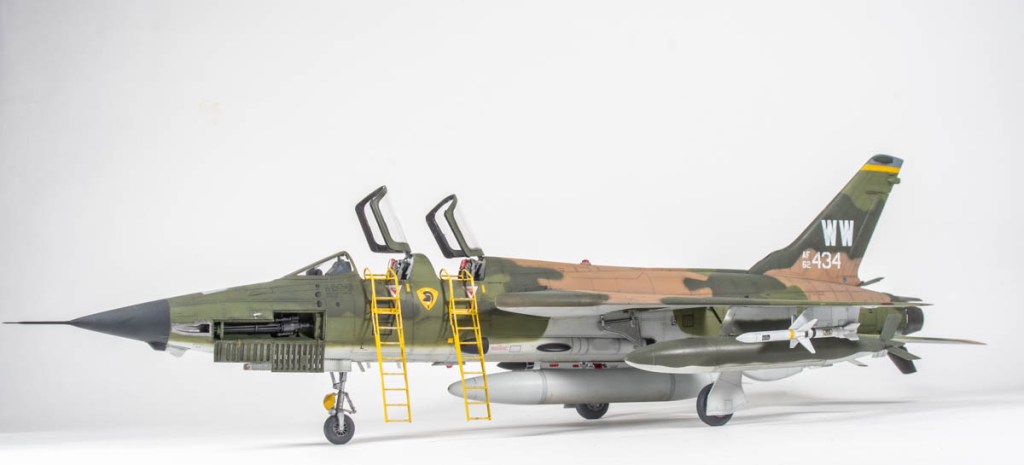
Hobby Boss 1/48 F-105G Thunderchief

Added to stash:  2017
Finished:  2021
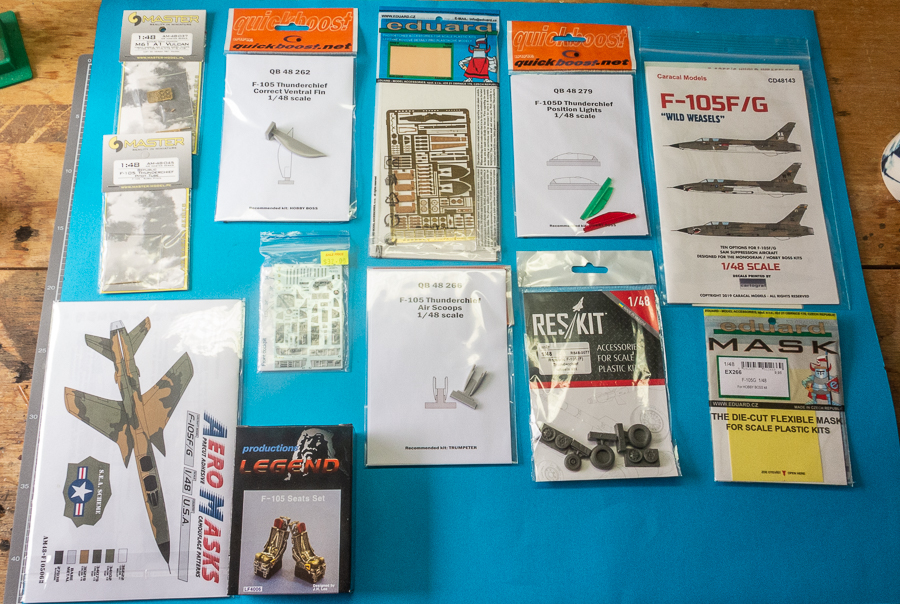
Enhancements

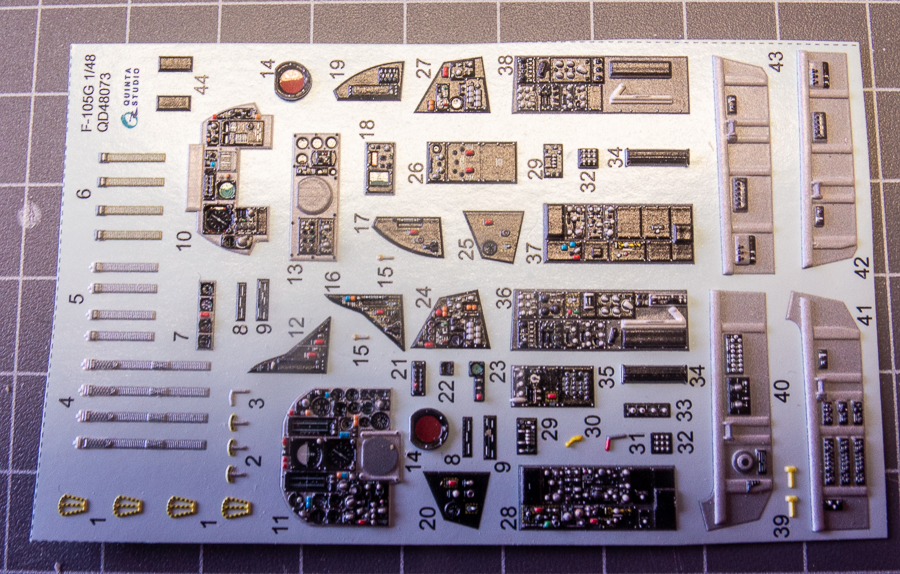
Cockpit Panels:  Quinta 3D decals
Seats:  Legend 
Gun Barrels:  Master Barrels
Pitot Tube:     Master Barrels
Wheels:  Reskit                                                                                External details:  Eduard Exterior set.  Quickboost vents                                                                                       Navigation Lights:  Quickboost                                                                              Decals:  Caracal                                                                          Boarding Ladders:  LF Models

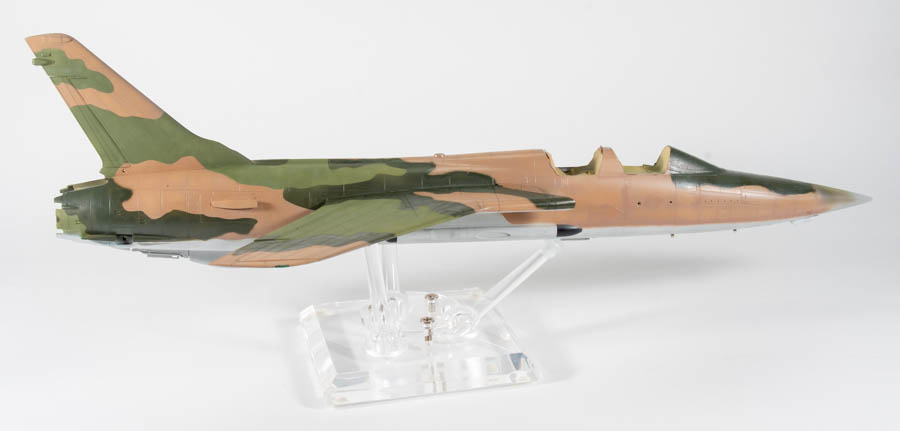
This is not the first time the HobbyBoss Thunderchief has formed part of my stash.  It first joined the stash soon after its release, only to be sold off in the Great Stash Slash of 2013.  However, its funny the effect of looking at the real aeroplane can have on us as modellers.  
 
What had previously been so many disparate grey parts in a box took on form and  large menacing  grace when I stood next to several real Thunderchiefs whilst on an Aviation Odyssey to the USA,


I knew I had to build one upon my return home.  My mate had a similar feeling upon looking at the F-101B Voodoo, a jet he had previously had no love for either.

Consequently the HB two seat Thud rejoined my ever growing stash, and this year was picked out by a mate for my 2021 build schedule.  I should add here, for a kit to only spend 3 years in my stash between being purchased and then built is well above the average!

 As with all my builds, I started out watching related youtube videos and pulling all the reference material I had in my library.  Republic’s Thunderchief had  a very tumultuous start, during which the project was almost cancelled. Republic refined the original design markedly and the Thud went on to deliver sterling service during the Vietnam War before being withdrawn due to crippling losses.  This was due to the jet performing a role it was never designed for.  All this research helps with motivation for the build.

HobbyBoss’ Thud is one of their earlier releases, I believe it’s scaled down from their 32 scale kit, hence the breakdown is far more complicated than it probably needs to be with an engine, open gun bay and even parts for the nose mounted radar.  That said, I do like the display options these details offer the builder.

Ive made a conscious effort lately to plan how I want my finished builds to look.  This helps me with purchasing aftermarket parts that may be needed, and on the flip side, deciding what assembly steps and parts can be skipped due to closed panels etc.  I’m finding planning like this leads to saved time on the build.
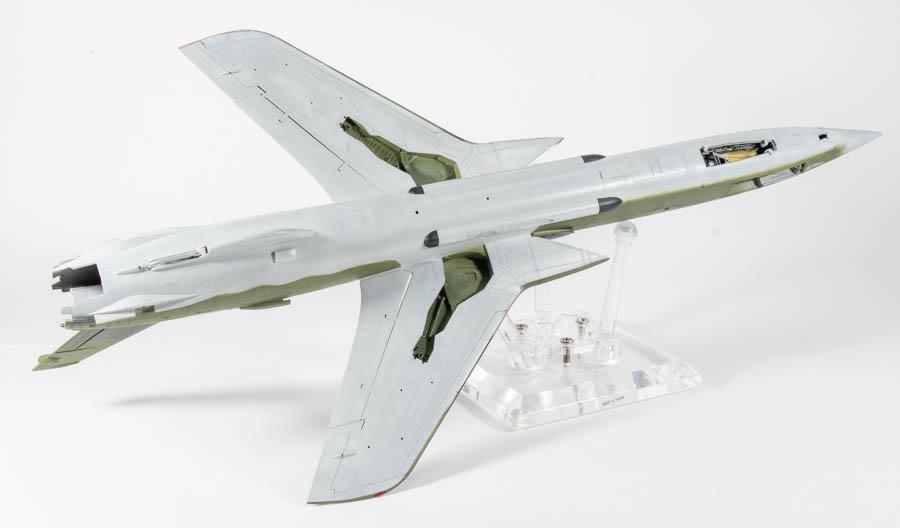
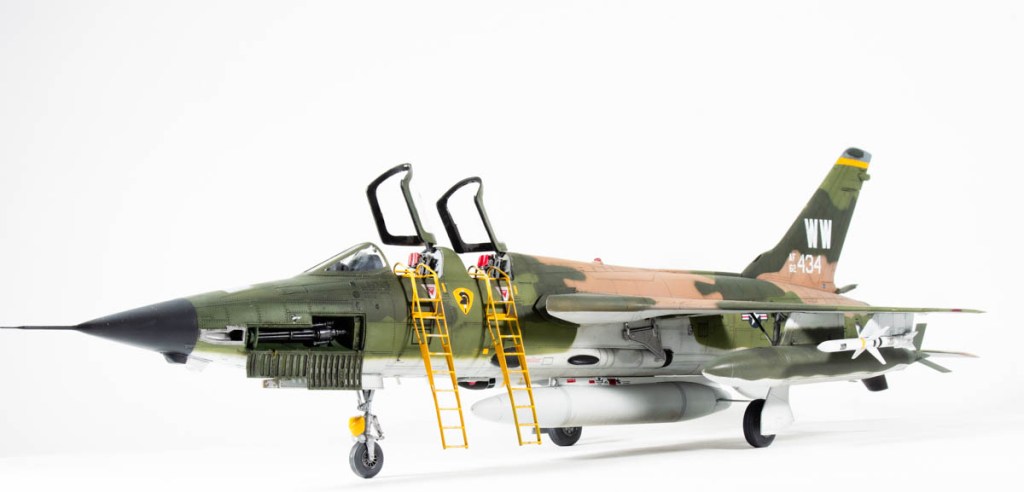
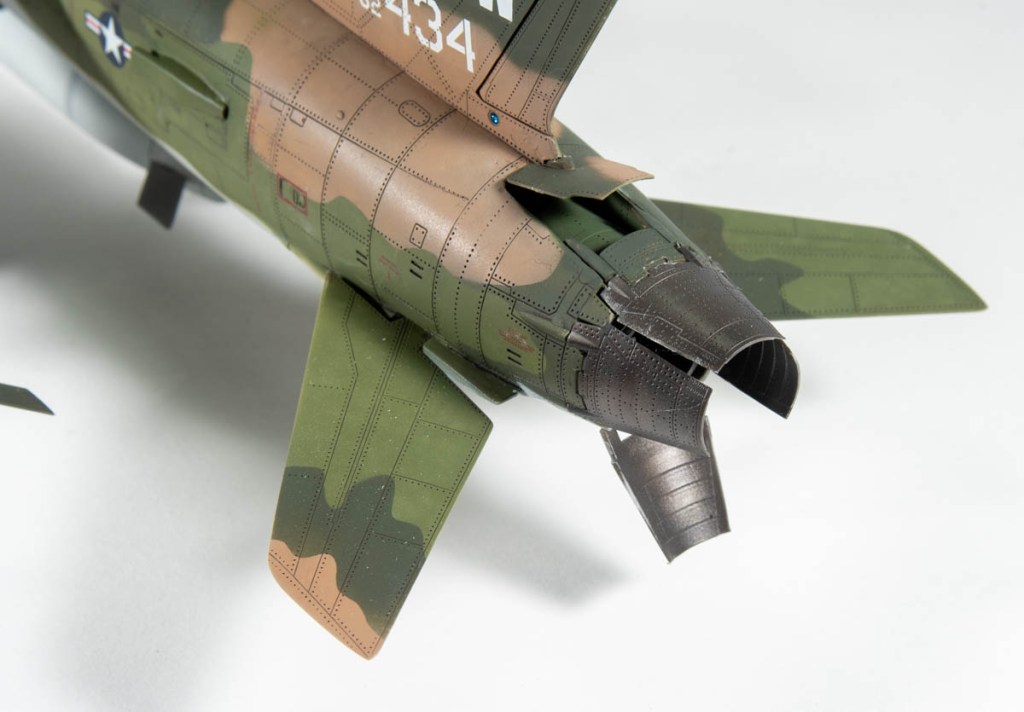
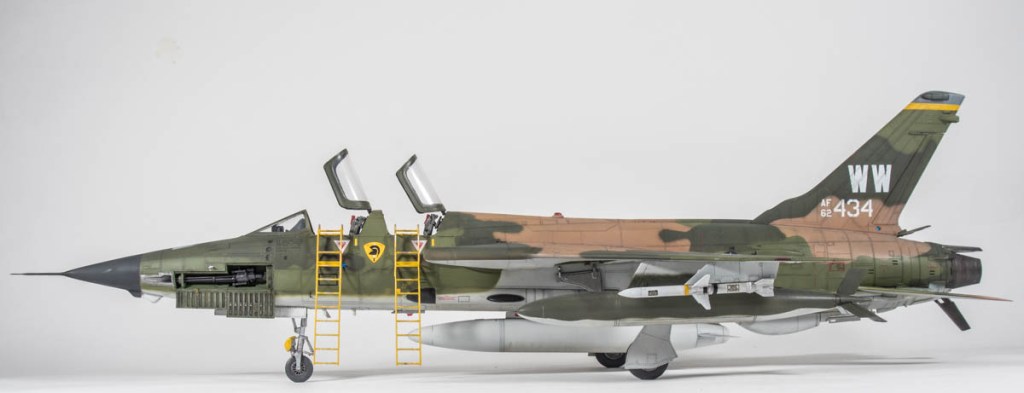
With this jet,  the canopies and gun bay would be opened to show those details of the jet.  The drag chute door behind the fin and the lower speed brake would also be shown open as seen in many period photos.
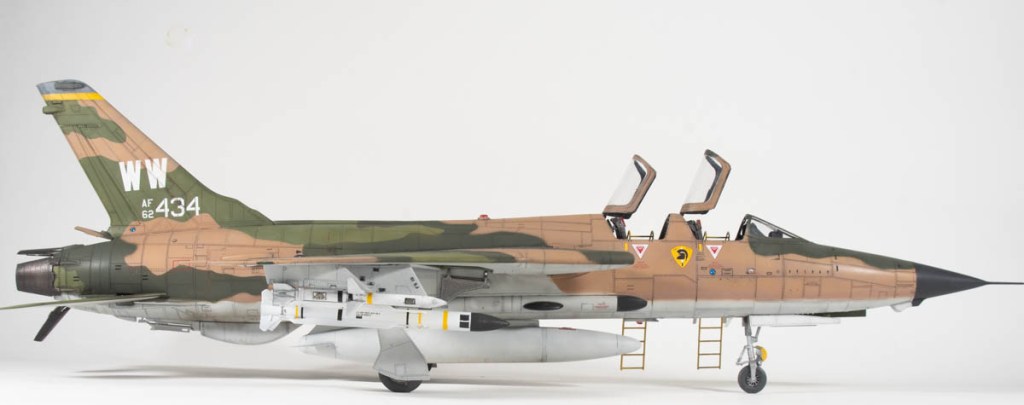
It would also be tooled up  with a typical Wild Weasel asymmetrical load out that would have been carried during the Vietnam war.  Naturally, it would need to wear the WW tail codes for Wild Weasel.

I was surprised to find I had amassed quite a bit pf AM for the Thud!

aftermarket

Construction Notes
I started by making up complete fuselage halves by assembling each fuselage rear to the front half.  Doing it this way ensures a neat gap free join. Plastic strip was glued to the rebate where the engine bulkhead would normally be glued to provide more glueing area.


Cockpit
H
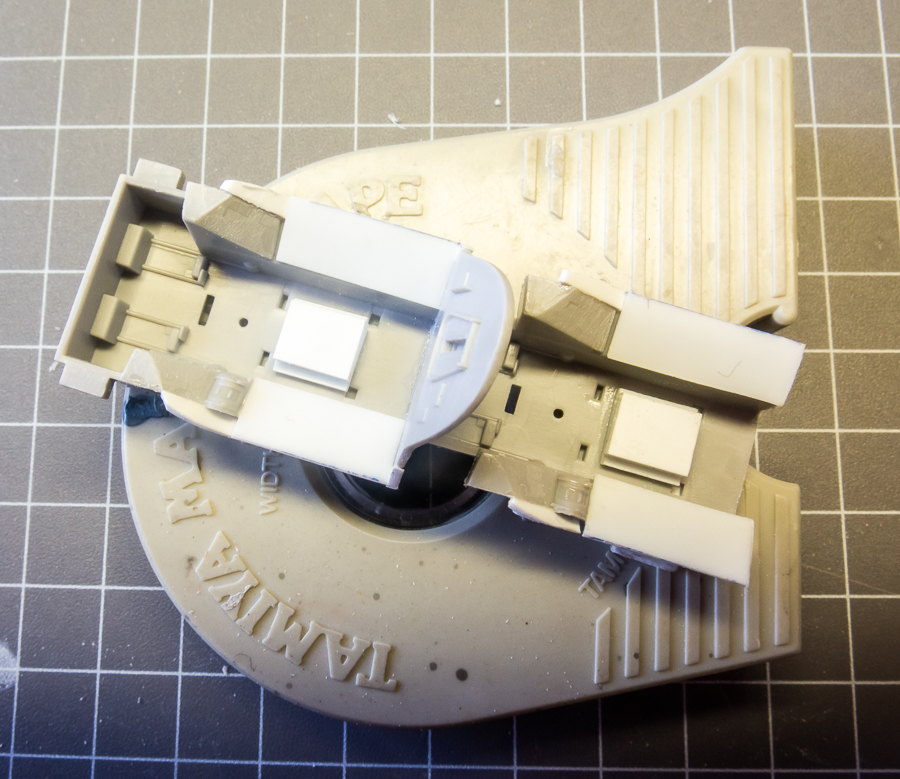
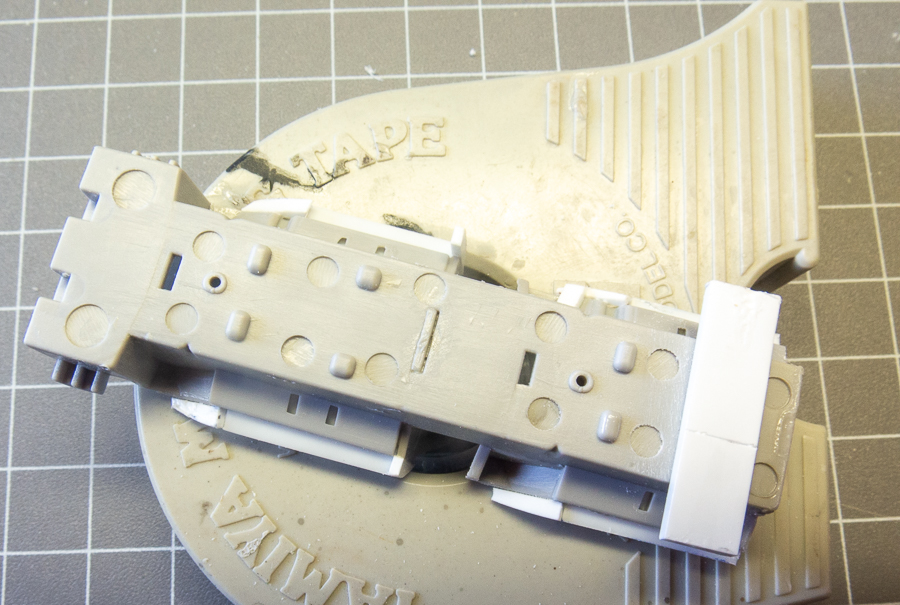
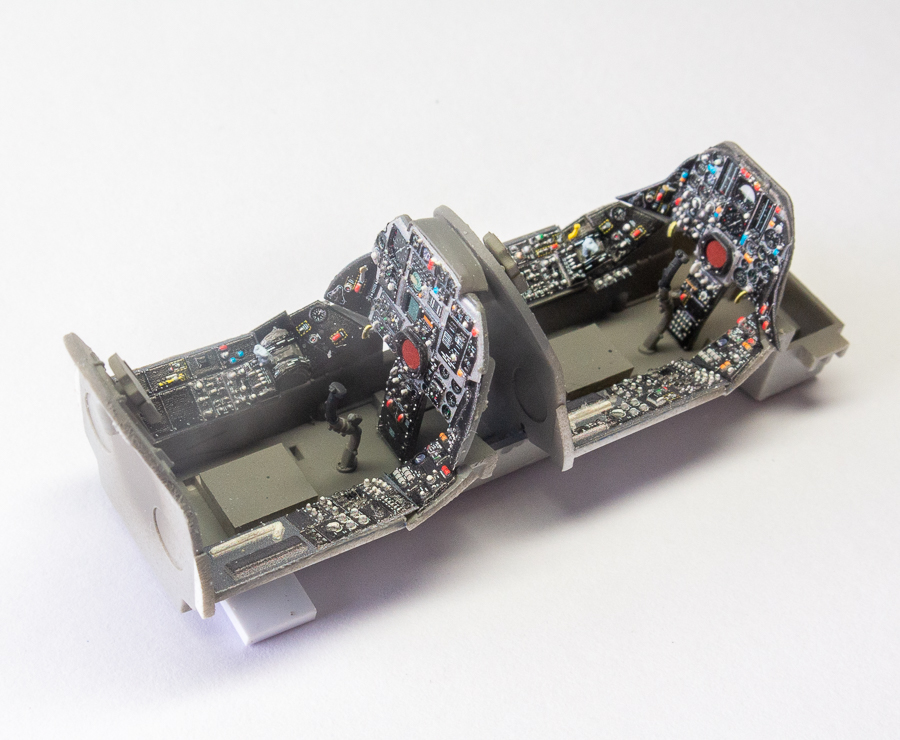
obbyBoss really mucked up here.  The kit cockpit side consoles are way too narrow and do not reach the fuselage walls.  You will need to add plastic sheet to widen them.  What on earth were you thinking HB?
extra width topextra width bottom
 
 
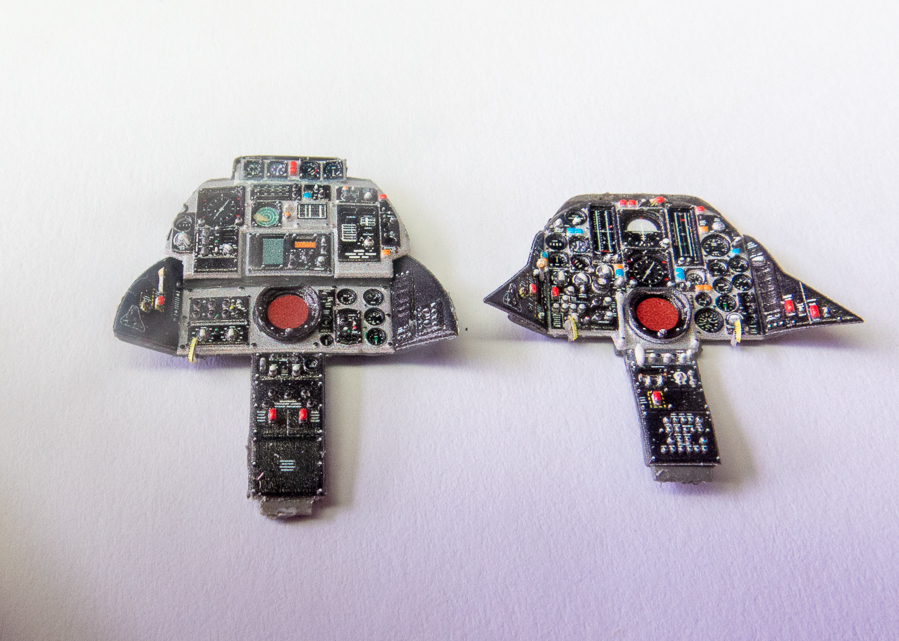
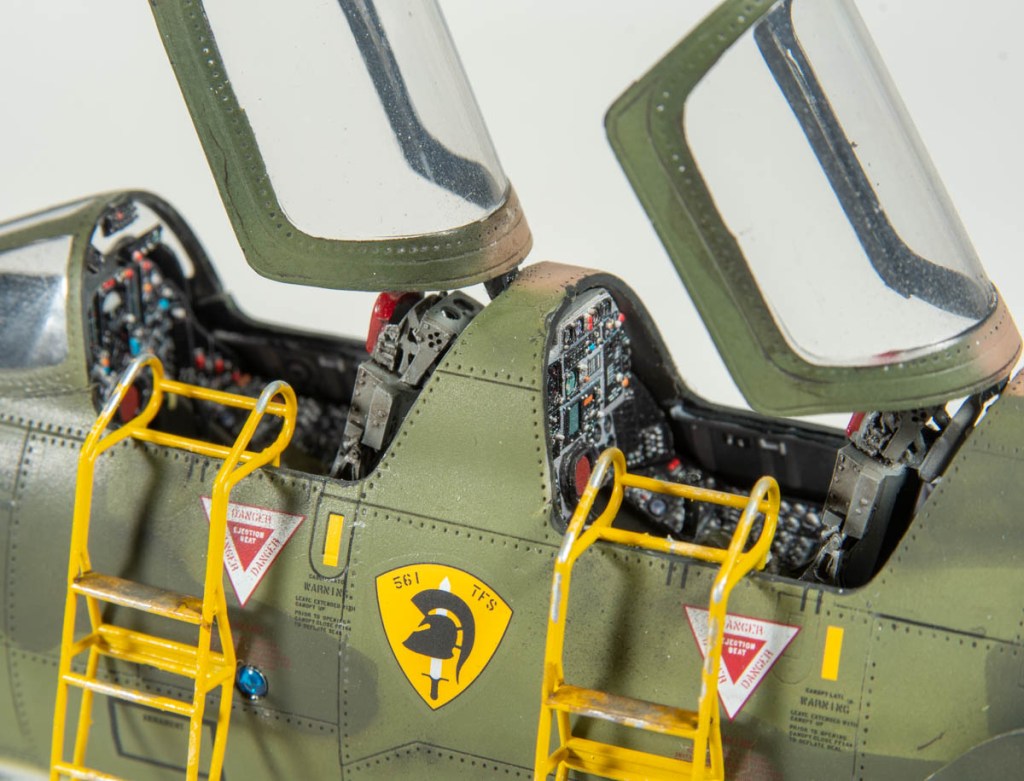
The Thunderchief has a wide very visible cockpit that rewards extra detailing.  I chose to use one of the new Quinta cockpit sets specifically for this kit.  Well, colour me impressed!  This was the first time I had used these sets.  The Thud one fit perfectly, correcting the too narrow kit consoles.  They are easy tao apply once all the moulded detail had been sanded off the panels and look far more realistic than just flat PE panels.  Printed on white vinyl, you may have to touch in the odd visible white edge, but this is nothing hard.  the dials are already gloss coated, although I would probably hit the panel with a matt to dull Quinta’s semi gloss finish.  These will be  my go-to panels for all aircraft that feature highly visible cockpits in future.
quinta sheetquinta panelsquinta panels-2


Construction Continues
For such a complicated looking kit, it went together surprisingly quickly.  The separate spoilers were individually added to the top wing before the halves were glued together.  Doing it this way ensures you get the best possible flush fit as it allows access to  both sides of the wing, which you wouldn’t be able to do if you added the spoilers to the assembled wing halves.  I had the Quickboost navigation lights to hand so also added these.  Strange decision by Quickboost to mould the complete wing tip in red and green plastic when the actual light is quite small.  I can only assume they did it this way so the light is correctly faired in.  Be careful to avoid a step though.  I also added the completed wings to each fuselage half to better ensure  a gap free join.  Hobby boss’ kit has the wing strengthening plates moulded on.  I could not glean a date though when these were added to the real jet, just that the constant tempo of operations in SVN had lead to fatigue issues, hence the reason they were added.  Anyway, I was not going to risk destroying detail by sanding them off.  The Gs were late airframes anyway so hopefully they had them fitted.

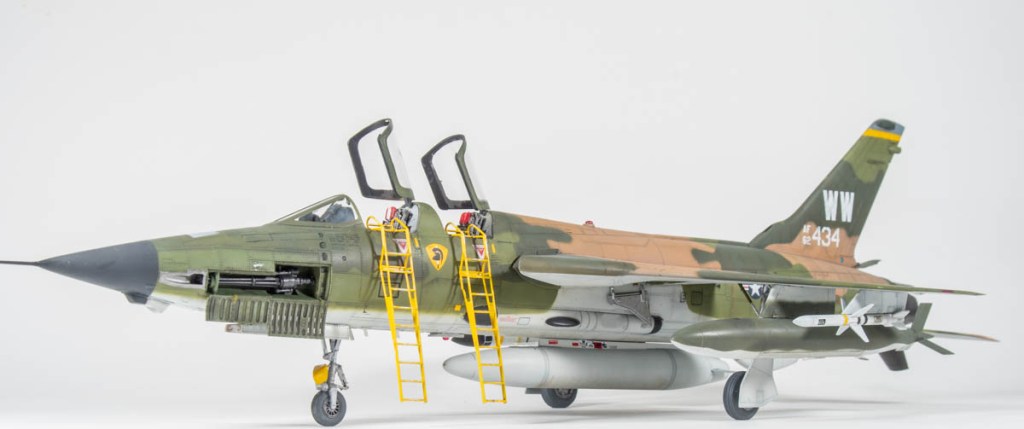
Eduard PE fascias were added to the gun bay and the plastic vulcan barrels replaced by the incredible brass turned Master Barrels ones, You will go crosseyed trying to assemble them.  The Eduard gun bay door with its open gas vents is a massive improvement on the kit part.  Should you be building your Thud with the gun bay open, I’d suggest the Eduard set is a must.

Painting and Decorating
Aeromasks are a manufacturer unknown to me.  I stumbled across them browsing facebook.  They offer a very comprehensive range of camouflage mask sets in all scales.  Seeing they offered a set for the Thud, I promptly ordered one thinking it would really ease painting the S.E.A scheme.

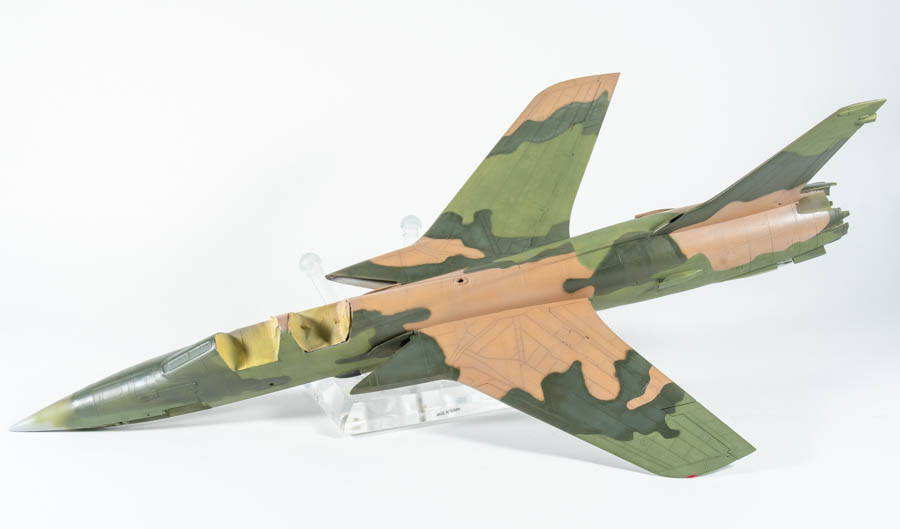
​The sets arrived pretty quickly from America and are indeed fairly comprehensive, even providing masks to paint the demarcation lines on the fuel tanks.  Clear instructions leave you in no doubt how to position the masks and in what order to paint the scheme.  You are well advised to follow these as the painting order is designed to ease the masking process, not necessarily the painting.  Therefore you start with the medium green not the tan as you would imagine.
Being the masks are not designed to fit specific kits, you may find some trimming necessary in order to fit the kit you are using.

The masks were placed on little blobs of white tac so as to leave a soft edge.  This was only marginally successful so I ended up tracing around most colours with the airbrush freehand to soften edges.
Overall, I was happy with the masks and the intricate pattern using them provided, which seemed to match photos.  A lot of the jets had their camo field applied as they entered the theatre still in their silver schemes, so there would have been some minor differences from airframe to airframe.

 The bloke who runs Aeromask used to paint  real Thunderchiefs at Hill AFB, so has access to all the official paint schemes.
My intention was to portray a battered and faded jet, but again looking at photos revealed not a lot of faded paint on the Wild Weasles, so the faded look was held back apart from the upper surfaces.
​The Caracal  decals performed flawlessly as always.  Prior to decalling, an oil wash was applied straight over the lacquer paint.  This was then sealed with a gloss coat ready for decalling.

Thunderchief_initial paintThunderchief_initial paint stb sideThunderchief_initial paint-2


Once decalled a further gloss coat was applied to seal the decals before stains and leaks were added with more oils.  The model was then flat coated before proceeding to final assembly.  This is now my preferred work flow.


Final assembly reveals the achilles heal of the HB kit.  That being the very spindly weak undercarriage legs, upon which the completed model wobbles alarmingly.  Against my better judgement white metal legs were purchased, and ultimately discarded, because they were….well….crap plus the main reason the kit legs are spindly is the insubstantial socket HB have moulded for them to sit into.  The metal legs weren’t going to fix this, nor could I glue in more substantial sockets.  The Thud continues to wobble on its legs.

upongear_Thud_21-03_04

​Weapons were sourced from a hasegawa weapons set.  There was a difference in size between the kit missiles and the hasegawa ones .  My faith went into the Japanese manufacturers product.
A final lack of detail that was not discovered until I went to fit the canopy was that HB had made absolutely no allowances for the modeller to pose them open.  Thus actuators had to be scratch built.  This was achieved with brass wire and rod
The brass pitot tube was push fit into the hole in the nose cone and this mighty Vietnam warrior was finished.

Final Thoughts
The Thunderchief makes for an imposing model in the cabinet.  Its a decent size in 48 scale, and stands out amongst all those grey jets  in its multi hued warpaint.  The lovely LF Models ladders provide a nice splash of colour and draw your eye to the cockpits
I think the Thud is one of my best efforts yet.  the trouble free construction being a bonus I had not expected when first perusing the instructions and parts.  An enjoyable build, although one will do me.

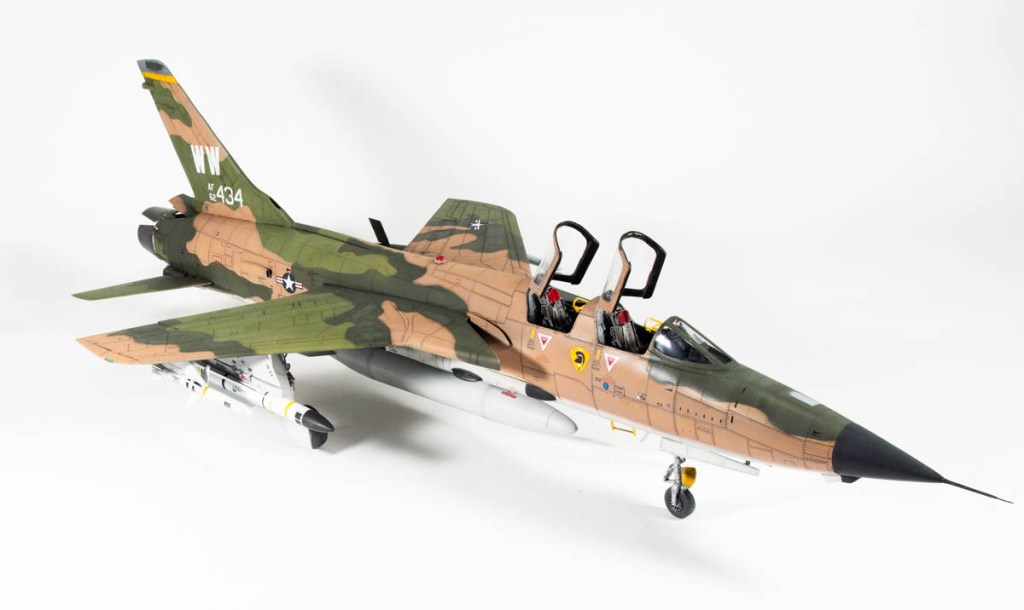
Republic F-105G-1-RE Thunderchief  U.S.A.F  561st TFS Korat Thailand  1972


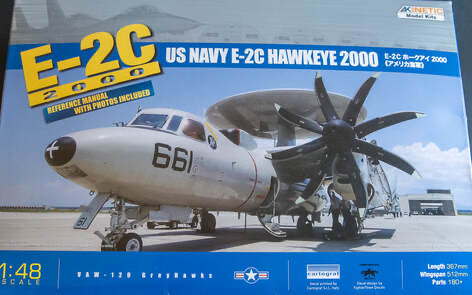
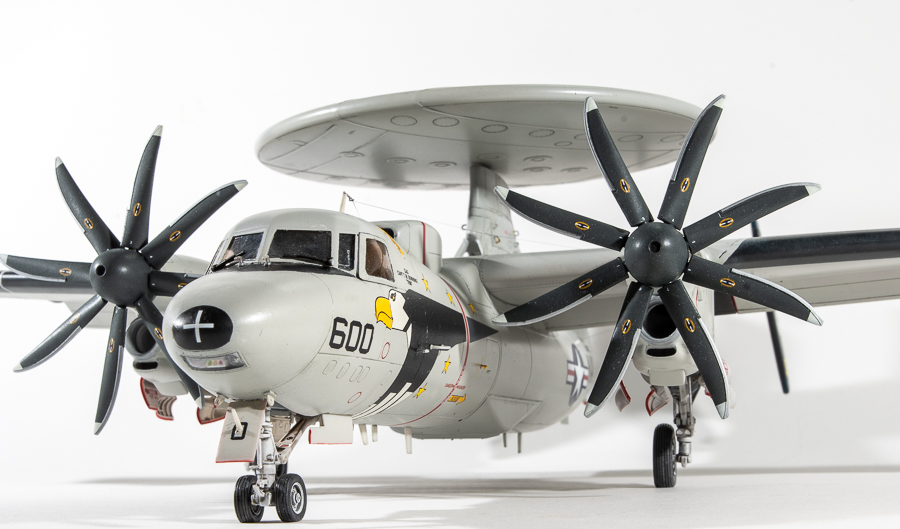
Kinetic 1/48 E-2C Hawkeye 2000

  • Purchased: 2018
  • Completed:2021
  • Enhancements:
  • Wheels  Royale Resin
  • Decals: Authentic Decals
The hawkeye was quite a bold release for the then relatively new Kinetic.  Although I have never seen a built example grace the competition tables here in Australia, there are quite a few builds featured on line.  Perhaps a better indicator of what people are building.  In any case, I hope Kinetics courage in releasing it has been rewarded by good sales.
Being one of Kinetics earlier kits, there are a few sink marks evident on wings, the crew door and the rotordome pylons, easily fixed, as they are quite shallow.
Panel lines are somewhat heavy and ejector pins mar the wheelwells.  Options out of the kit allow the modeller to fold the wings, drop the flaps or model the crew door open
Interior detail is fine for what can be seen and full intake trunking is included for the engine intakes.  Upon its release, the kit seems to have met with good reviews, some commentators remarking that the 4 bladed propellers would need some minor reshaping to better reflect the full sized blades.  All reviewers experienced a nasty step between the upper nacelle and the wing interface. otherwise the kit was found to be well fitting

Kinetic followed up their original boxing with this later boxing that includes parts for upgraded satellite antenna fits, engine cowlings with stiffeners and the 8 bladed propellers.  The four bladed props are still included.  Both boxing s are let down by the very plain markings offered.  Surprising, given the schemes this aircraft has worn and the fact the decals were designed by Fightertown.  Italeri have also reboxed the kit with a far more colourful aircraft sporting markings from “Liberty Belles”


Build Notes
Assembly
2020 was to be the year I built anything from my stash  that saw service with the United States Navy.  It didn’t work out too well!.  Pandemic aside, the start of 2020 turned out to be a modelling disaster that saw about 4 kits started and promptly consigned to the bin before finally managing to complete one.  The Hawkeye was the fifth kit started and was shaping up well, until I discovered the canopy had been short shot.  Kinetic though were very receptive when I requested a replacement, although the part did not reach me until quite some months later due to global airmail almost shutting down.

I had decided early on to build the model with wings extended as to me, wings that fold along the fuselage hide too much of the aircraft. In the Hawkeys case it would also take away from the greyhound look of the aircraft.  Kinetic offer decent spars that go some way towards ensuring the spread wings form a solid join and align with the fixed centre section.  Fit is good, but not exceptional.  I was left with gaps top and bottom that needed filling and rescribing.  Greater care and some fettling on my part would have probably reduced these, as dry fits without the spars revealed tight joints
Sink marks across the wing top surface were dealt with by application of Mr Surfacer 500.  Rather than slather on putty, the nacelle step was dealt with by careful sanding of the nacelle mating surfaces where they met the wing undersides, taking care to maintain the contours.  Serial dry fits were carried out until the step had been eliminated.  The then very minor gaps were filled with Apoxie Sculpt, the excess being removed with a damp finger.  The overscale static discharge wicks were cut off, to be replaced with toothbrush bristles.  Being the lazy Modeller I am, the ejector pins in the wheelwells were ignored.

As a result of having to wait for the canopy, the kit was built up in sub–assemblies, being the wing, comprising the nacelles, the rotordome and supporting pylons, and finally the fuselage, being I did not want to contend with possibly having to fair a badly fitting canopy into a large and unwieldy model.  I carried this method right through to painting and decalling.  Dry fits had shown the wing to fuselage fit could be easily dealt with, when the time came, and this method would also allow unfettered access to the inside faces of the nacelles and the fuselage sides that would otherwise  be underneath the wing.
Fuselage assembly was unremarkable, an average fitting belly panel required some use of Mr surfacer, and  a large amount of lead sheeting was epoxied in behind the cockpit bulkhead with lead shot filling the gaps either side of the nose wheel well to ensure the aircraft sat on all three undercarriage legs.  Fitting the clear nose cone left a step on one side.  The low side of the step was built up with apoxie sculpt and sanded to shape.

Paint and decals

Whilst still in its sub assemblies, the model was painted using Mr Color light gull grey with the tail fins in SMS Insignia Blue.  Black de icer boots were sprayed tamiya rubber black after some very time consuming masking.  The portions of the flaps hidden by the wings and the flap wells got a  coat of Mr Color Flat Red
Not a single chip of paint peeled up on the removal of the tape, unlike most of my Tornado builds.  Looks like that old Alcad grey primer was the culprit!
The cockpit tinting was done using a 50:50 mix of tamiya Metallic brown and smoke, overcoated with several layers of future.
Unless you want to build the very boring kit option, aftermarket decal sheets are a must, even then options are few, with the decal manufacturers seeming to offer nothing post 2008.  This machine has worn some very colourful markings which have not at all been mirrored by the very uninspired decal sheets out there, save for the Fightertown Liberty belles sheet.

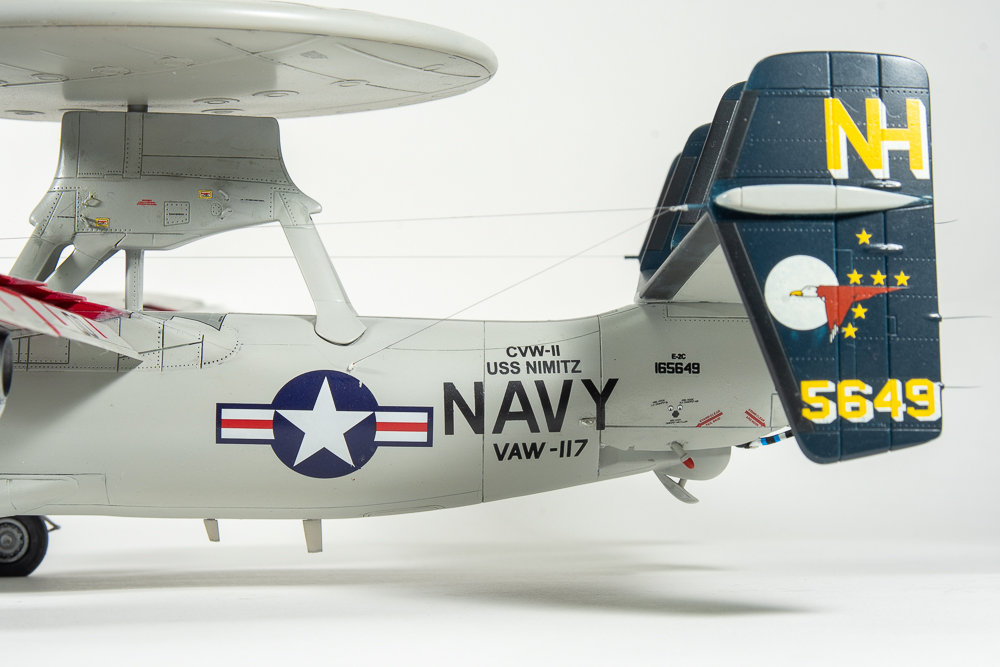
I chose a decal sheet by the-to me- unknown manufacturer, Authentic Decals that included a scheme with a large hawk on the side, and ticked my boxes of having coloured fins and a artwork on the rotordome top surfaces
My concerns about the Authentic decals not performing or breaking apart in the water were unfounded.  Turns out they are printed by Bergemot.  (EDIT, It seems this sheet is also offered under the Bingo Decals brand, I’m not sure which came first, or if one is a knock off of the other, or printed with permission)
They performed flawlessly and reacted very well to the Micro decal solutions settling down into even the rivets with only two applications.  This is more than I can say for the kit decals which had been printed by cartograf. They took multiple applications of setting solution before sinking into the detail, and only after resorting to using Daco strong solution.  All walkway decals and fuselage national insignia were left off until the wing had been mated to the fuselage.  However this then exposed the fact the Authentic Decals NAVY titles were far too big, when compared to photos of the real machine and how the NAVY titles sat in relation to the national markings.  The kit NAVY titles were the correct size, but it was too late as even removing the oversize titles would still leave the ship and squadron designations in the wrong spot in relation to the NAVY titles. There was no choice but to just suck it up, and move on.  I decided to do a clean build as photos I had of the real aircraft showed it very clean indeed, like fresh paint clean, plus I was getting to the stage where I wanted it off the bench

Final details were added and EZ line used for the antenna lines.  Like  all modern aircraft , the model was starting to get hard to pick up, the more you added to it.  Royal Resin wheels replaced the rather bland, and in any case far too weighted kit wheels.  All those pesky red lines on the wheelwell doors were applied with a fine tipped gundam marker, and she was done, ready to almost take up half a shelf in my cabinet.

SO! The two questions I ask myself after each build

HOW DID I GO? 
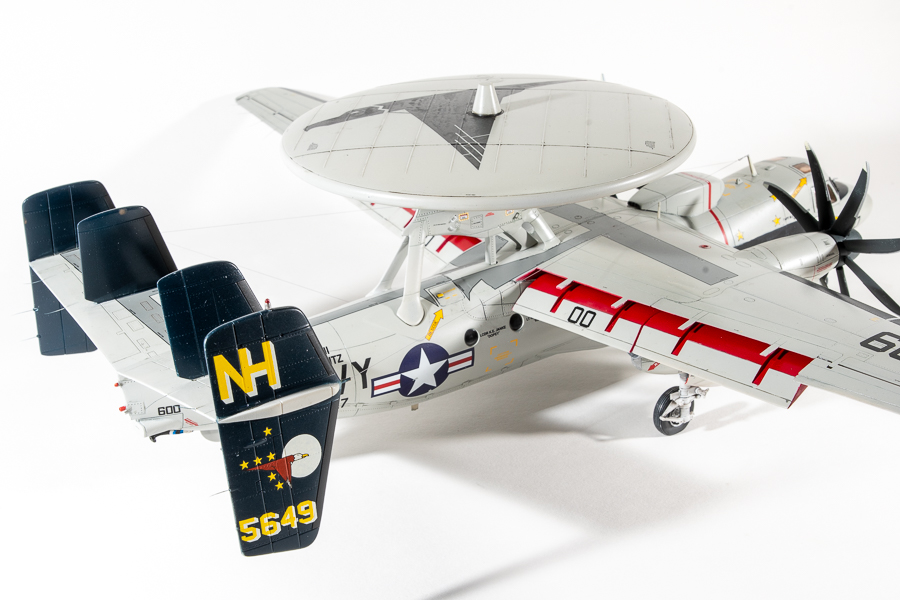
Well, not bad. I think its an incremental improvement over my Tornado builds.  I’m still marring my finish with stupid mistakes, which are only too apparent to the camera lens, damn you macro camera!!There’s some silly construction and finish mistakes as a result of just not taking my time but, overall,  I’m  pretty happy with it, and just love the look of the finished model. It just looks so busy with the aerial wires, the multi bladed props, deployed flaps and that large Hawk on the fuselage and dish.  Its one of my favourite builds.

WOULD I BUILD ANOTHER?
Not another Hawkeye, but if I found the Greyhound at a reasonable price, then possibly!
Thanks for looking in.  See you after the next build
Bruce

 Grumman E-2C Hawkeye 2000 VAW-117 Wallbangers USN.  USS Nimitz Pacific Ocean 2009                                                                                   

← Back

Thank you for your response. ✨

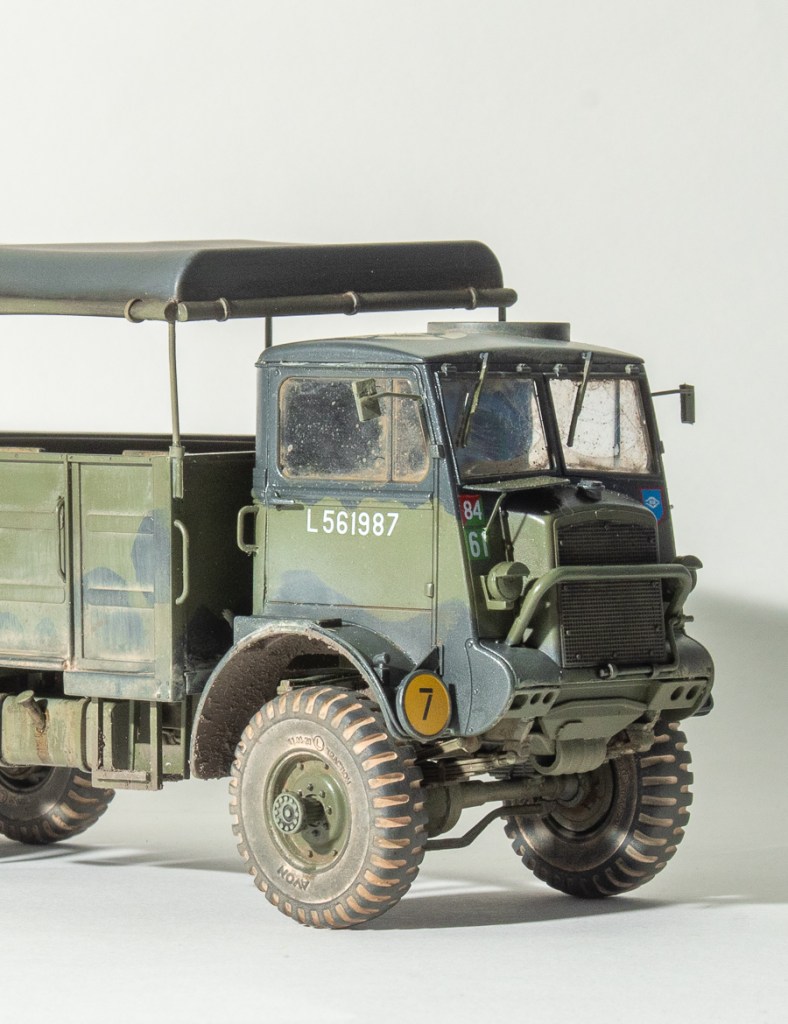
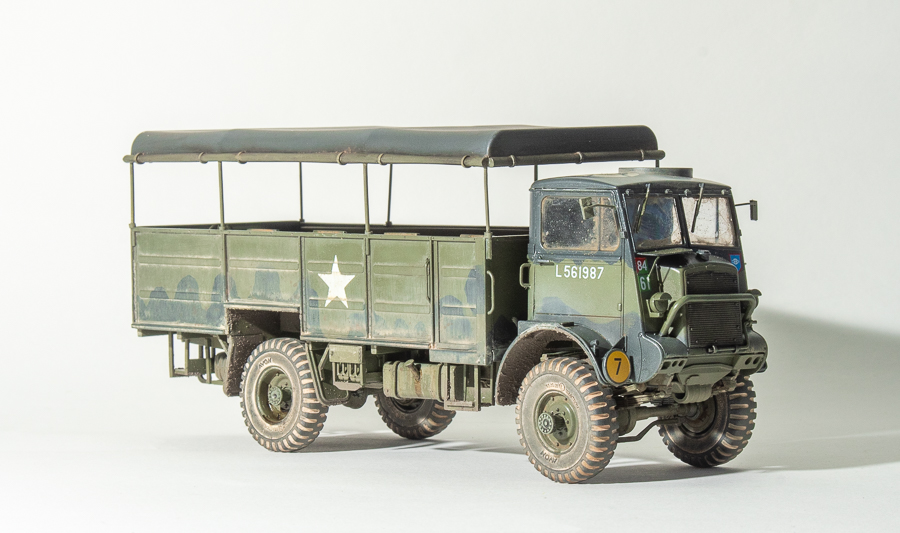
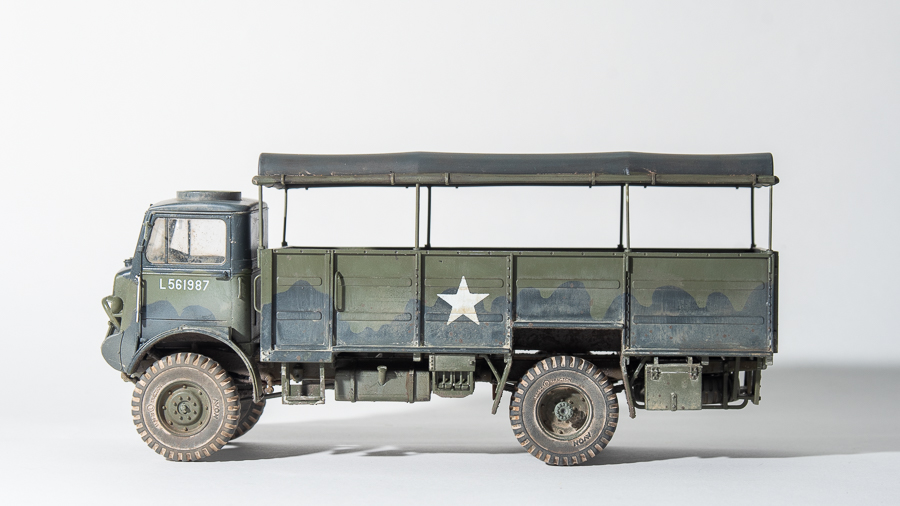
I.B.G Model 1/35 Bedford QLT

Purchased : 2014
Completed: 2020
Enhancements: 
Some added details to cab from card and rod
Jerry Cans: Bronco Commonwealth AFV equipment
Decals:  ​Kit

Construction Notes


This kit was purchased from the much missed late John Xigoladis of Showcase Models Australia fame, who bought us the Bushmaster PMV.  John used to have a small shop in the heart of Melbourne Australia, which,  as well stocking  all the major brands also carried some  obscure brands, well, for Australia anyway.
 I have a bit of an interest in soft skins, especially Commonwealth ones, so was very happy to see this on the shelf and quickly plucked it out from below a stack of other kits to take to the counter and ask John for a peak at the contents.

It all looked quite crisp and nicely moulded in the box, so away with me it came.

Fast forward 6 years- actually quite quick, I have kits that have been in the stash for up to 20 years – and I was looking for an easy uncomplicated build following my Tornado odyssey. This seemed to fit the bill
For anyone else contemplating this build, your first stop should be here .  Terry’s review is an excellent article on building the model, its also about the only review I have seen on the net.
As I pretty much followed Terrys build and suggestions, there is not a lot else I can say about my build.  The plastic was quite soft and marred by several heavy mould seams on parts, the most noticeable being cylindrical parts.  Where I could, I replaced these using rod or brass wire.  Some details like seat backs and steps look a little chunky, and the headlights had sink marks in their centres.

Fit was excellent throughout with the caveat of the mudguards as pointed out in Terry’s review.  Although the plan was to build OOB, I did add some scratchbuilt details to the cab as per the article.  Eduard, Plus Models, Reskit and PART all offer detail sets for this kit if you want.


​The interior was painted with SMS paints SCC15 Olive Drab, and chips added with a sponge and Vallejo German camouflage black brown.  Scuffed paint was added by way of dry brushing silver paint on the floor and pedals.
dial decals were from a 1/32 instrument panel sheet were added to detail the blank instrument cluster provided by IBG. This is probably the only British Army truck fitted with an air speed indicator!
The cargo body is missing handles and locking latches, but I left the model as is.  I should have probably replaced the thick grab handles with in scale wire though.  I did briefly toy with the idea of leaving the rather featureless moulded rear tarp off and scratch building the metal hoops, but in the end carried on with the kit part for a quick build.  I believe there is supposed to be a flap in this towards the front where a Bren gun could be mounted on a pole for AA defence , but could find no photos of this set up. The tarp is one of the weaker parts in the kit I think.

The real truck has a wooden floor in the cargo tray, Thi sounded like a great excuse to break out the chipping fluid and practise my chipping technique  to portray paint worn away by many pairs of hob nailed boots.  Would the SMS paints chip though?  Reading various threads on FB modelling groups seemed to suggest they would, so an underlying generic wood colour was laid down, followed by two coats of AKs “worn effects”  This was allowed to dry and then the SMS green laid down.  Once dry I scrubbed the paint with a wet stiff bristled brush until the green paint started to chip away.  It took a little more effort than using acrylic paint.  A coarse sanding stick was also used to impart some scratches to seats and seat backs and around high traffic areas.
Overall, I was quite happy with the result.


Out of the three paint choices, I decided on the camouflaged version, as I love the so called “Mickey Mouse” pattern.  To paint this, I scanned the very helpful paint diagram up to model size, then simply cut out the pattern to use as a mask.  Speaking of the instructions, apart from the painting guide, I found them rather vague in illustrating part placement and quite dark in print quality .
Stars were painted using masks from Js works, and left me unimpressed. The masks are not sharply cut out and you are left with a bit of a ragged looking star.  In this case, the following weathering steps would go some way towards hiding it.  The kit decals were used for all other markings and performed flawlessly.  They are printed by Techmod, whose decals I have never had a problem with.
Jerry cans from a Bronco set were added to fill the kit provided empty racks. They needed to be thinned down a bit to fit both cans in the racks.
By this stage I had a pretty pristine looking truck, so it was time to impart a bit of dirt and grime.  First step towards this was building up misted coats of Humbrol khaki drill over the trucks undercarriage and a little up the sides to replicate a coating of dust.


My M60 Build had left me feeling a little more confident about the weathering process.  Like most modellers, I have a library of modelling books including the Mig FAQ series and the Tankart books, which a friend describes as “impenetrable”  Im going to agree with him as after several reads of the Rinaldi books, I was only a little the wiser about some processes.  In some respects they are quite dense regarding technique.  By far the most helpful tool I found was a series of YouTube by “Nightshift Modelling”  This bloke really breaks the techniques down with his video demonstrations in a way books just can’t.  I just followed his process for using oils and pigments.  I certainly could have gone further with the weathering on this truck, but decided to stop as I was keen to move on to the next subject. The old impatience kicking in! 

Final assembly found me struggling to get the tarp cover square to everything else.  I ended up replacing the kit poles with plastic rod and think I may have actually cut one side longer than the other, as from the front it definitely does not look square!
There is a friend in my little modelling circuit that we mock for being quite meticulous in his planning of a build.  Here I really should have taken a page out of Andrew’s book, because meticulous planning would have seen me cut away the kit mounted tubes on the sides of the cargo bed that the metal hoops slide into on the real truck, and replace them with brass tubing.  This would have made the tarp assembly far more solid, with the benefit of also being easily removable.  We won’t mock you anymore Andrew! (Who am I kidding, yes we will)
Following the kit instructions here leaves you with an assembly difficult to keep square and adequately mount to the body solidly.

I really enjoyed this build, despite me rushing a few details towards the end.  Looking at the photos, my weathering still looks a little unrefined, but I felt with this model, my confidence  in working with oils and pigments had grown.
​Would I build another?  Id definitely build another British cargo truck, maybe the ICM Models Ford though.  I just think the IBG kit misses a few quite visible details, ie windscereen wipers

Bedford QLT  Irish Guards. Holland 1944


Revell 1/48 Tornado GR4

Completed:2020
Enhancements Used:  
Cockpit: Eduard
Seats: Paragon
Wheels: Brassin
Wheelwells: Eduard
Weapons: Brassin
Pitot: Master Barrel
Wing Seals: Shaun off Britmodeller
                                                                                                  Decals: Model Alliance Op Telic Part 1

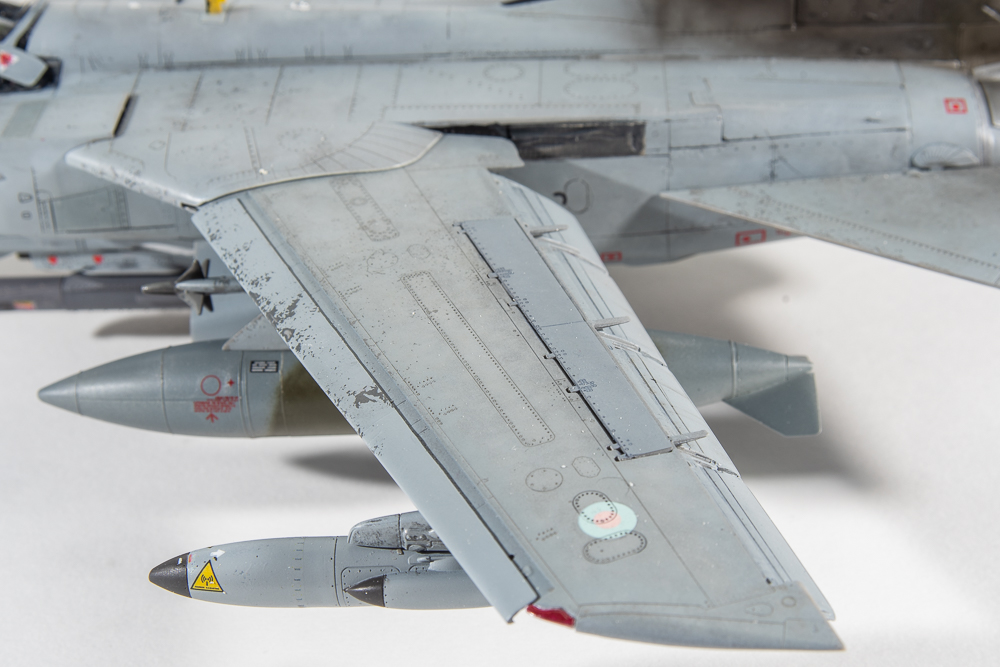
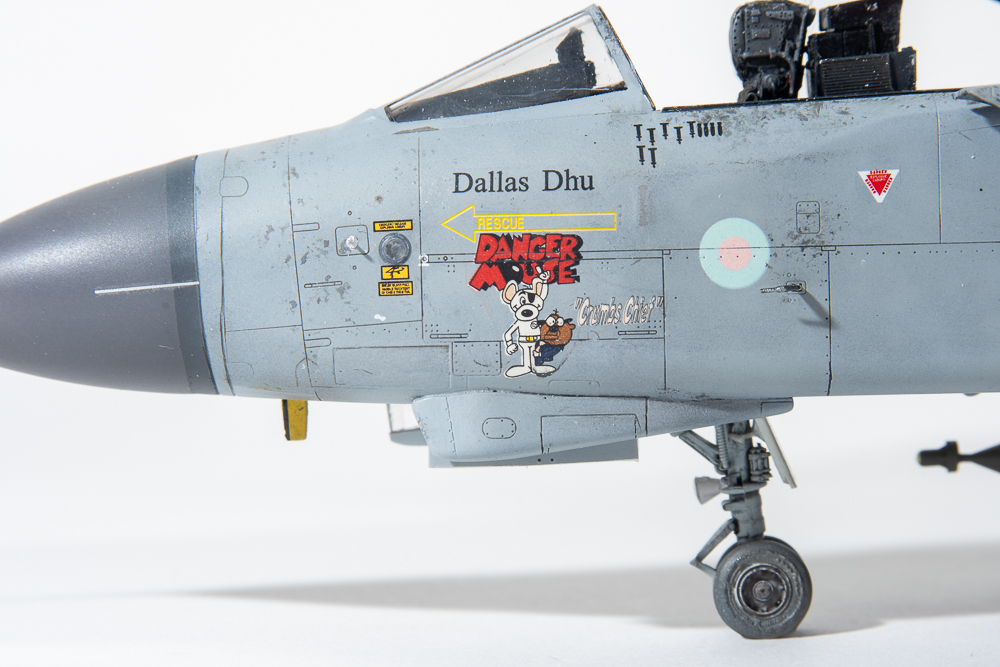
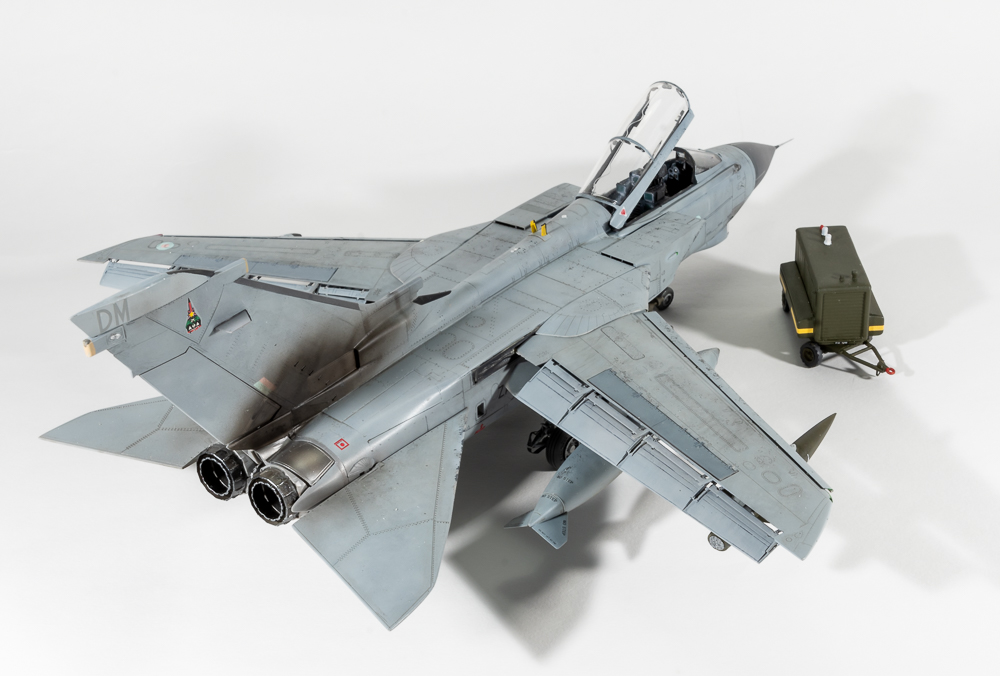
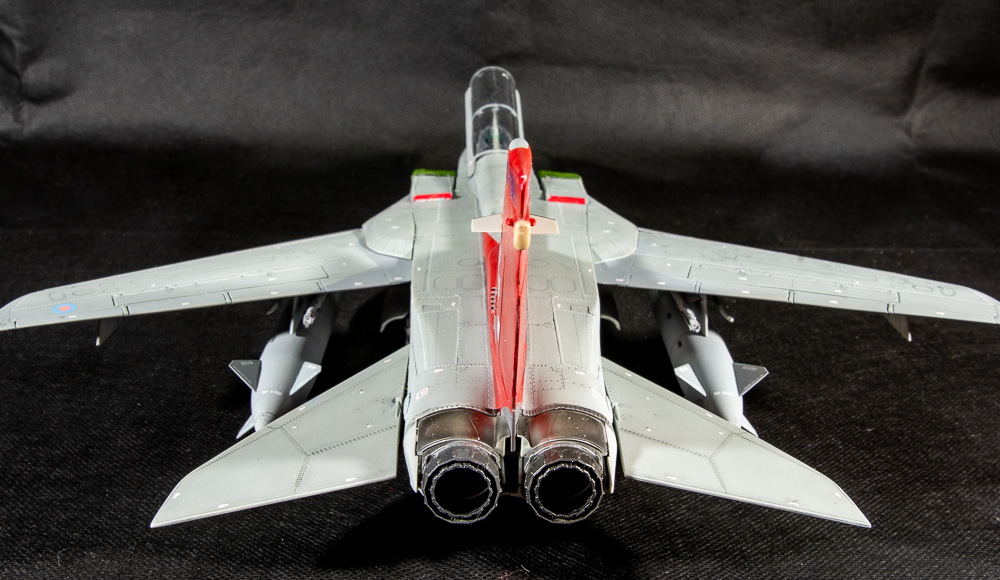
The third and final instalment!  I had wanted to build Danger Mouse from the start.  For some reason I thought it was a ADV though, not a GR4, so then had to keep on  building tornadoes until I got to my GR4.  Well that’s my excuse for building 3 Revell Tornadoes.

I had a load of aftermarket I had planned on using on this build.  Some of it got binned as not value adding to the build though.  
Firmly in this camp, I place the phase Resin Hangar seamless intakes.  For a start, I just don’t think they are needed.  Whilst the kit intakes do have a nasty seam, you can really only see the first couple of mm of the kit intake trunking, ands then only by holding the model up at a weird angle and craning your neck to look down the intakes.  If this bothers you, a bit of filler and sanding will eradicate the seam. Secondly, the case resin intakes are moulded as just the intake tunnels without the bulkheads provided as part of the kit trunking.  These bulkheads form the front and back walls of the wheel wells and provide important structural integrity.  As I was going to be using the aires resin wheels this was not a dealbreaker.  What was the dealbreaker was the resin intakes would not fit over the top of the resin wheel wells without removing a big chunk.  This  was after sanding both the roof of the wells and the outer wall of the intake wafer thin, so, the resin intakes got binned and I reverted to the kit intakes.  To be fair to Phase Resin, Mike is probably not expecting you to use his intakes in congestion with resin wheel wells.  That aside, to not cast the integral bulkheads seems strange..  My opinion. Don’t bother with the intakes.  The wheel wells however do add to the kit, beautifully detailed as are all aires sets, these even fit with a minimum of fuss.  What led to them getting junked along with the intakes was after glueing them I found I just could not get the fuselage parts to line up seamlessly as the other kits had, so they got hit with the debonder and binned as well.  Not going too well so far!  The aires wells do add a lot to the kit though, and I’m sure the fit issues were due to something I did.

The rest of the build proceeded as per the other tornado builds.  Again I cut off the wing cogs to fit them at a later stage.  Again this is another thing I would never do were I to build another tornado ( I won’t be!)

Revell would have you assemble the wing flaps as a three piece assembly whereas in real life they are one piece with only the small aerofoil section being a separate piece.  Make sure you fill and sand the join line.  Hopefully the photos explain this a bit better.  Shaun’s resin wing seals are far better representations of the real things rather than the featureless kits items.  He can be contacted through  Britmodeller.com

Photos I found on the net of Danger Mouse and other Operation relic jets showed a fair bit of wear and tear with scuffing and chipping of the ARTF grey paint exposing the underlying dark camouflage grey paint.  To portray this on the model. I first applied a coat of dark sea grey to the leading edge slats, nose, pylons and one of the drop tanks.  Mr Neo masking fluid was then dabbed on with a torn bit of sponge and the model sprayed with a couple of light coats of Scale Modeller’s Supply Barley Grey.  SMS is a home grown  Australian paint manufacturer.  I have been increasingly using his paints, as Im finding them excellent to spray.  You can spray them straight from the bottle, but I add a drop or two of thinner to make them spray even better.  They are a lacquer paint that has proven to be hard wearing and quick drying.  Once this paint had dried I rubbed my finger over the Neo to remove it from the airframe leaving the model looking chipped and scuffed.  The jet was made to further look worn by painting a few panels in either dark sea grey or lightened shades of the barley grey. One of the fuel tanks was painted in the old wrap around scheme, jets being fitted with different coloured tanks being quite common, even today.

I applied a panel wash with Payne’s grey oil paint straight over the SMS paint, with the excess wiped off and no damage to the underlying paint.  The decals were also placed straight over the paint, which dries with a sheen, the model Alliance decals performing well, although the DM code letters were too light and did not stand out enough when compared to photos of the real jet.  As I could not find any dark grey or black letters of the correct size to replace them, so had to resort to painting the fin top a lighter grey.  I replaced the letters with other codes from the same sheet.  Penfold’s catch cry “Crumbs Chief” should also be far pinker than the pale shade on the sheet, maybe it faded!  Op Telic jets do not seem to have been as well photographed as Op Granby jets, well so it seemed to me with good quality photos being hard to source. In particular I wanted to know if these jets wore the full suite of stencils after they were repainted.  In the end I went with just the major ones figuring only those stencils that dealt with rescue or crash procedures would have been re applied.

With this model I decided to really strengthen the pylon to wing attachment by using epoxy glue.  They ain’t coming apart now, although perhaps I should have ensured they were parallel to the centre line first!

With that Danger Mouse was done.  One of my favourite cartoon characters as a child.  There are still a few build and finish faults, but this is my favourite of the three.  I love the pugnacious look of the short nose coupled with the laser sensors.  The Eduard Brassin weapons are also a must have, being better detailed and more accurate than the kit supplied weapons.  Out of the box, you can arm a Operation Granby or Operation Telic jet.  Even the stenciling is provided.

So with three Revell Tornadoes done, what are my thoughts?  Well, let me start by saying I sold my remaining Revell tornado from the stash, as to build more would be just like beating yourself over the head repeatedly using a hammer.  I think you would really have to love Tornadoes to build multiples of the Revell kit.  Marred by soft detail in a lot of places, sink marks, flash, it can be  a troublesome build in inexperienced hands.  Take the time to research other on line builds and the previously linked youtube videos as fit problems can be mitigated if the builder departs from Revells suggested build sequence.  I really cant see anyone else aside from Airfix releasing a newer tooled Tornado, so Im thinking the revell is going to be the go-to in 48 scale for quite some time.  I might just order that new 32 scale Italeri tornado, as the Tornado itch still needs to be scratched with a wrap around GR1.

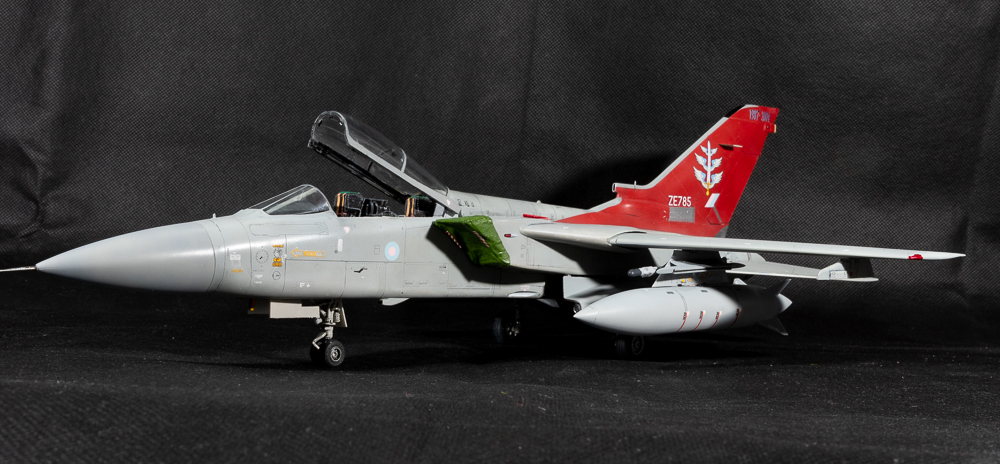
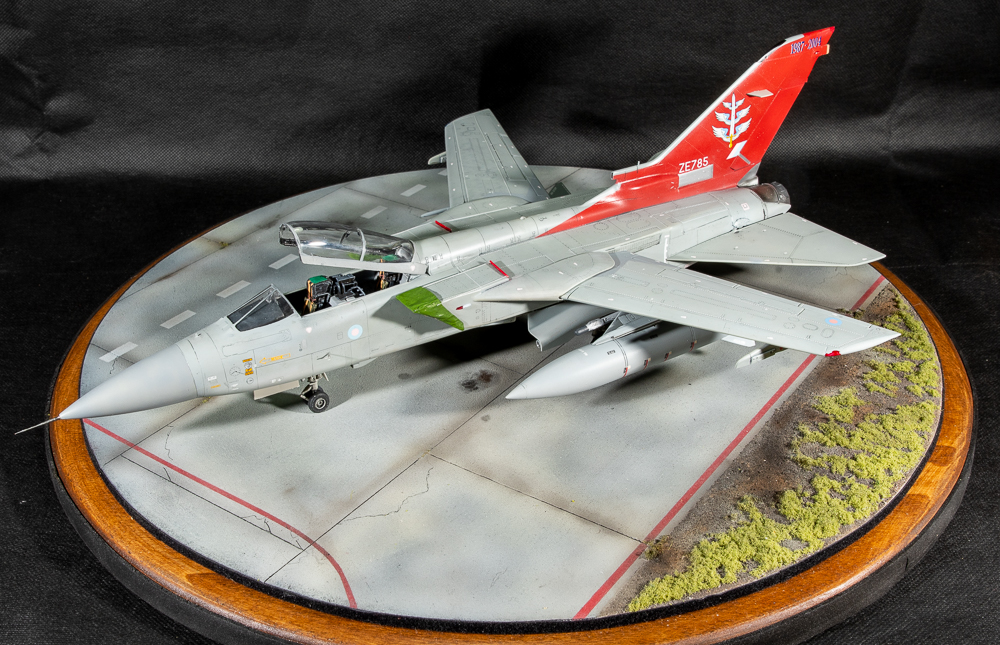
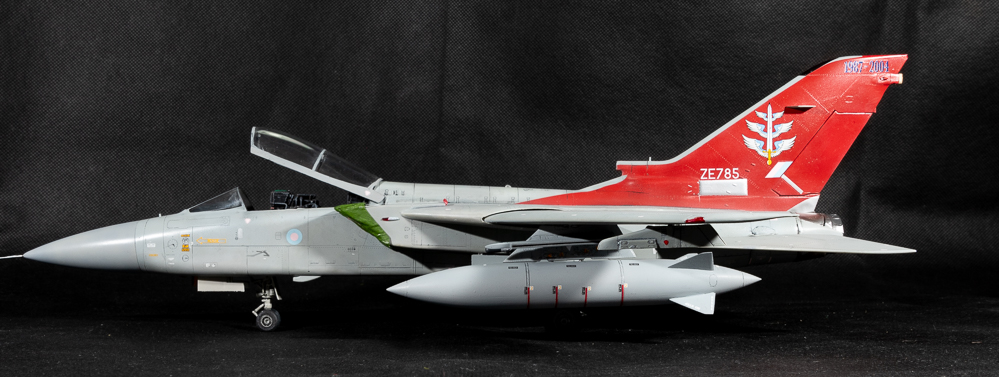
 Tornado GR4 ZA542 31SQN Royal Air Force. Combat Air Wing Ali Al Salem Op. Telic 2003


Revell 1/48 ADV Torando F3

Enhancements Used
Seats: CMK 
Seatbelts: Eduard steel
Wheels: Eduard
Pitot Tube: master barrels
Decals: Xtradecals Tornado F3 part 1
BOL Rails: Phase Resin Hangar

Construction Notes
 Oh God, what was I thinking, building three of these at the one time?.  In last months gripping episode you will recall that I (rashly) decided to build all three of my tornadoes from the stash at the same time.
​Well the plan didn’t quite start out like that.  This tornado was actually the first started, and the original plan was to just build this one,  however, it was not really turning out as I had pictured in my mind, – a common theme with my builds –  so it got shelved, and my other F3 pulled out of the stash, and started with the intent of being a better build (yeah, right!).  It was at this stage the idea to build all the tornadoes in my stash was born.  In actual fact, I thought I would  only be  building the other ADV  and my GR4.  
It  was only when the other ADV was almost finished, this one was revisited, and the decision made to complete it.

​Being the same kit, most of my notes from the first build stand.  My thought process with finishing this kit was to make it a clean build, as, with three builds now underway, getting  Tornadoed out, was a real possibility!   To this end, no stores were added, apart from the large tanks. Photos of the actual jet showed it sans stores anyway, save for tanks and a RAID pod on one of the BOL rails.

 This time the BOL rails came from Phase Resin hangar.  To better reflect RAF pylons, the sway braces were cut off and the “bulges” on both sides of the pylon had their length shortened.  Close enough for Govt. work as the saying goes.  there are plenty of photos available on the internet to aid as reference in this task.
The wings again had their cogged teeth cut off so that they could be painted separately and added later as part of final assembly.  This time I left I bit more of the “spar” with the result the wings attach far more securely, although they don’t have that classic Tornado anhedral

For this model, I wanted to add FOD covers too.  They were formed by covering the intake firstly with  household aluminium foil.  Kleenex tissue was then laid over the foil and coated in diluted white glue.  The thought process being to then slide the hardened tissue off the foil.  In reality, this didn’t work as the glue had worked too well, and stuck the tissue to the foil!
Once dry, the tissue FOD covers were trimmed to shape, and then painted.  Thin strips of tamiya tape formed the ties underneath the jet, whilst white EZline stood in for the bungee cords stretching back to the intake vent FOD guards which were formed from offcuts of red painted plastic card.  RBF flags came from an old Verlinden sheet.

As the Eduard PE wheel well set was not used on this model, the door retraction struts fitted neatly into their slots without the need to shorten them as was required on the other ADV build.
The kit decals were again used for the instruments, but this time the CMK seats were used, dressed with Eduard “steel” seatbelts which are far easier to use than their normal PE belts, being far more malleable, and less prone to the paint flaking off.

Paints used on this completion were Mr Color, another of my favourite brands, This actually being the first of my tornado builds, it was again plagued by large chunks of paint peeling off when the masking tape was removed.  This being one of the things that contributed to the build being abandoned in the first place, the painting process becoming an endless look of touch ups.
​In an effort to allow the wash to enhance more of the surface detail than the first kit, I applied the wash straight over the lacquer paints without first applying a barrier coat of gloss.  The excess was wiped away without removing any of the underlying paint.  Lacquer paints really are bulletproof!  Shock, Horror, the decals were then applied, still without a gloss coat.  No problems with silvering.  It was only after decalling that  a sealing coat of semi matt was applied.  
The Xtradecal decals behaved flawlessly, although again I used the too thick kit decals for the stencilling.  They stand out way too much on close inspection.  If you are building this kit, I would ditch the kit decals completely and use AM sheets, Xtradecal, also doing a stencilling sheet.

Since these photos were taken, I have  divided the four sky flash missiles from the first build between the two ADVs so each jet carries two skyflash.

So, how’d I go?  Well, in some ways I feel I did a better job on this one than the first ADV, although it still has plenty of flaws.  I still feel I can do better.  Anyway, here are the photos so you can judge for yourself.  Next instalment should be the third and final Revell Tornado.
​Thanks again for looking.

Panavia Tornado ADV. F3 OEU Royal Air Force RAF Waddington. May 2003

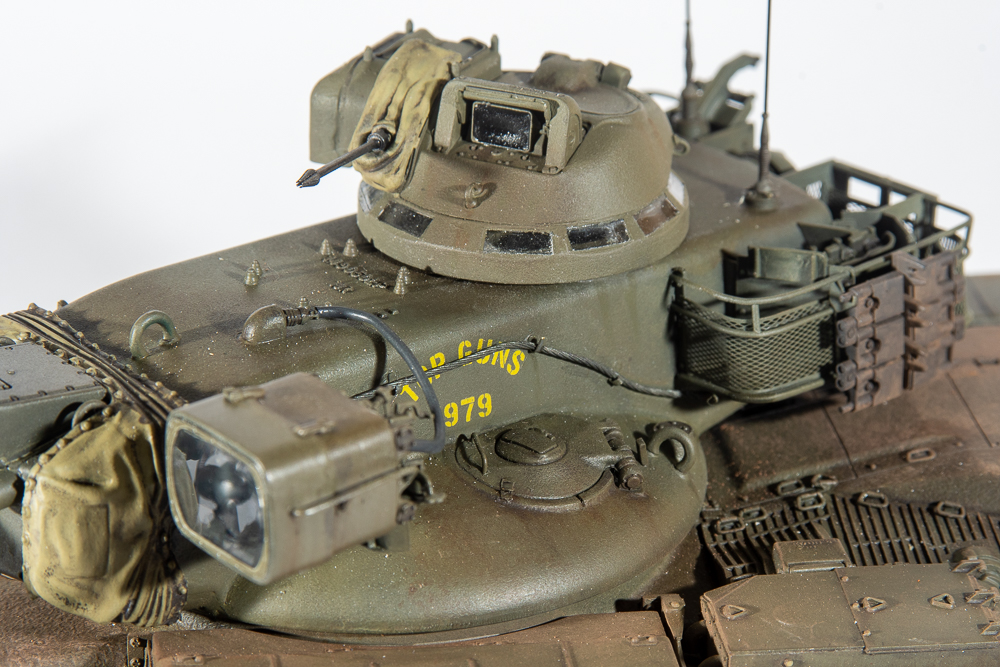
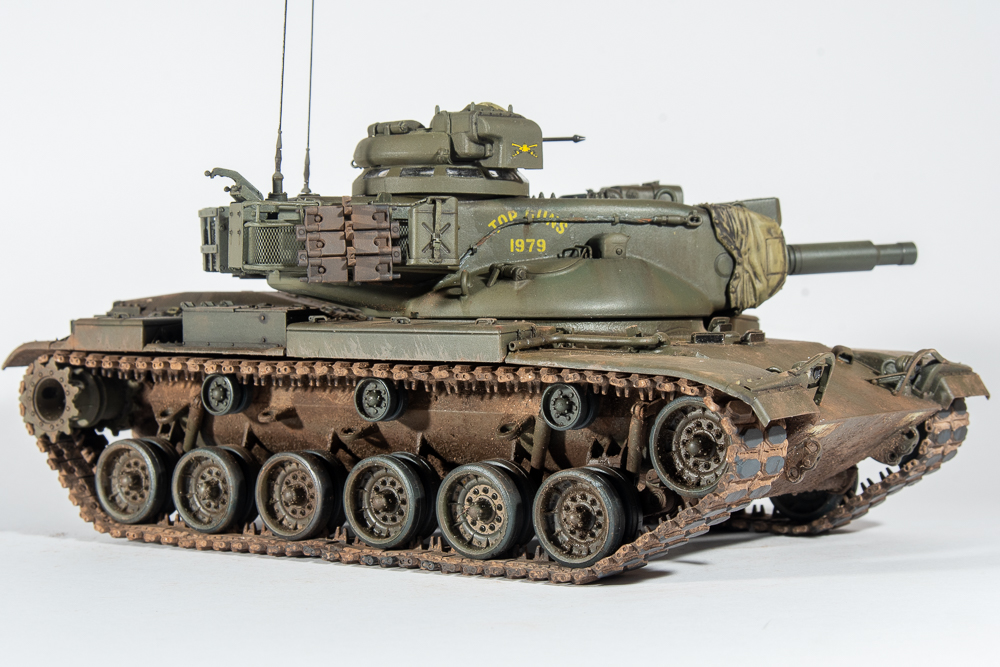
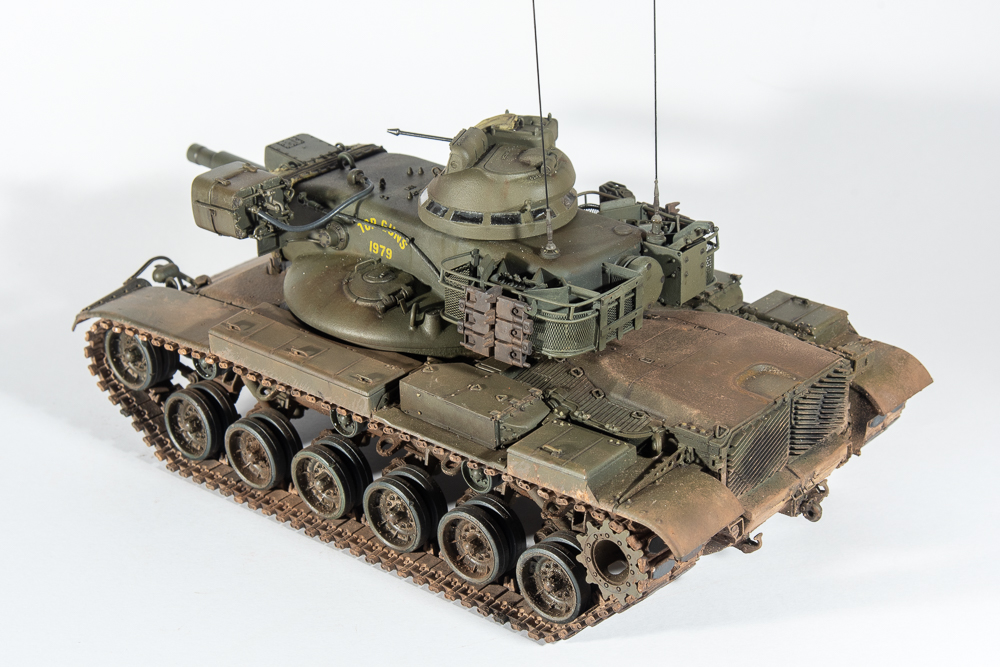
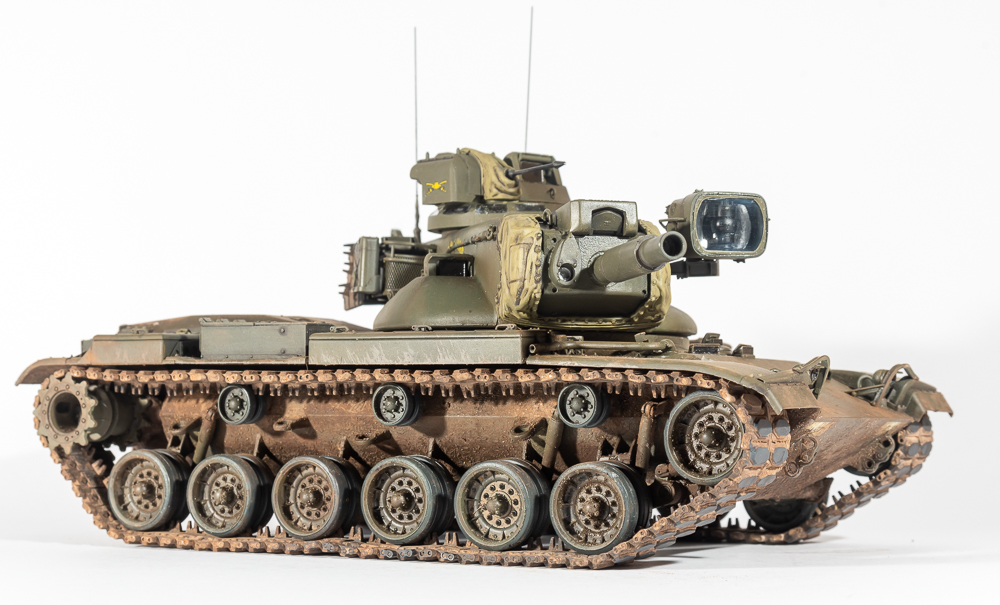
AFV Club 1/35 M60A2

  • Purchased:  2020
    Built:             2020
    Enhancements:  Tracks: AFV Club                              
                                  MG Barrel:    Master barrel                          Headlights: SKP Model                                               
    Antenna bases: Voyager  ​
The AFV Club (AFVC) M60 was one of those kits I didn’t realise I needed until it was offered to me by a friend!  Thanks Norm.
 I’ve always loved these cold war tanks, the M60A2 having a  rather uniquely shaped turret which added to the appeal.
 Reviews on line painted a rather good picture of AFV Club’s kit too, although its not a kit I’ve seen built often.

The AFV Club kit is moulded in an olive drab plastic, the many sprues filling the box to the brim.  An aluminium main gun barrel, PE mesh and detail parts, string tow cables,  clear parts for the periscopes also round out the package.  Tracks are of the rubber band variety, the main gun and machine gun dust covers are  provided in a vinyl type material.  The armour version of an Eduard Profipack kit, although this seems to be a standard of all AFV Club kits.

Once construction is commenced though, you realise a lot of the parts are not needed as they apply to other variants of the M60 family.  Although AFVC also offer a late type M60A2, I imagine you could also build one from this boxing as they include the later type wheels and air intakes.  You might  need different tracks.

The build seemed to go on for ever, mainly due to having to clean up a faint mould seam on all parts, which started to become tedious, especially on the small parts and certainly took away some of the enjoyment.
I ended up breaking some of the turret basket rails whilst doing this so  replaced  the broken parts with brass and plastic rod.  I not sure I got it all square though.
A Master Details brass barrel replaced the plastic M85 barrel provided by AFVC, and I replaced the kit provided tow cables with some copper ones I found in my spares box, and she was  ready for painting.


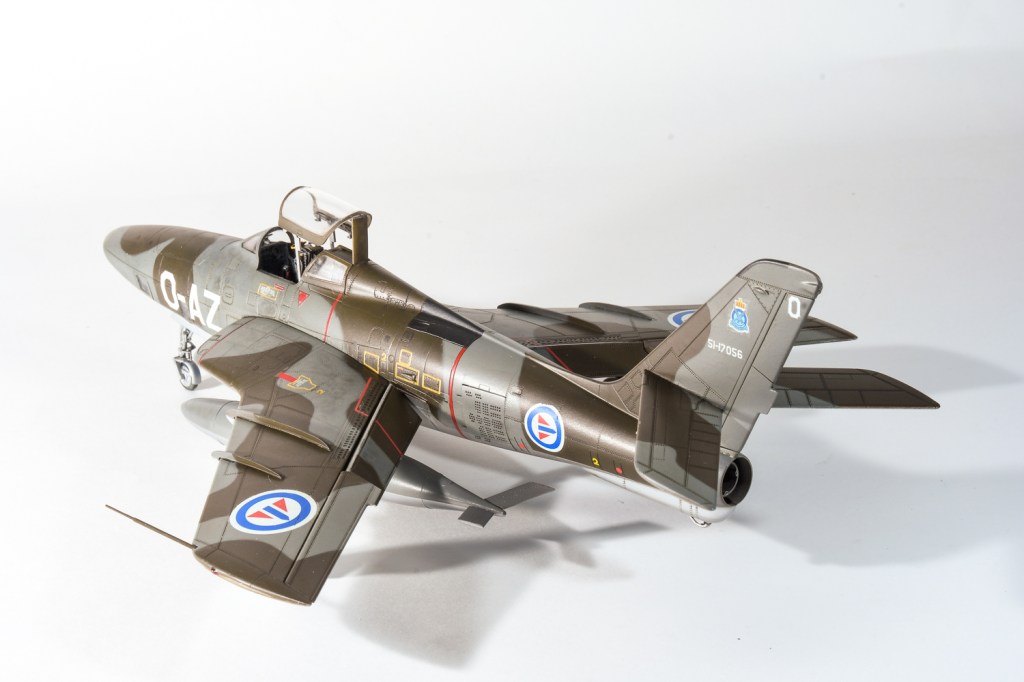
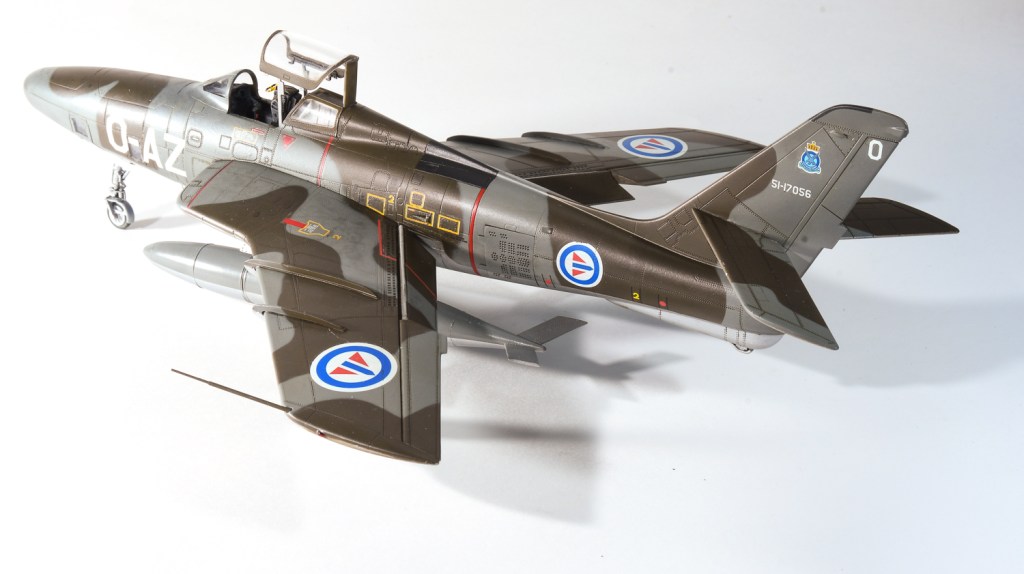
TanModel 1/48 RF-84F ThunderFlash

Built: 2019
Enhancements: CMK MB ejection seat 
Paint: AK Real Colours
Decals: OOB

My second attempt at Tanmodels Thunderflash was borne out of my dissatisfaction at my first attempt, and I have to say, Im not really happy with the second attempt either

This example was built from the first issue of the kit, but using the second release decal sheet, as it is far superior to the initial issue in quality, anyway, although I do think the first sheet had better options. Confused yet?

This first release of the kit had very pebbled plastic, so a NMF finish was out, I decided.

;In any case, I wanted to complete a camouflaged jet so as showcase the aircrafts service life and different operators.

Assembly on this one was streamlined by keeping the nose camera covers closed.You still have to build the camera bodies, which still constitute a finicky assembly due to their near scale racks.

The rest of the jet assembled a little easier than my first attempt as well.

This time, the intakes and wings assembling without any fit issues. Aside from this, all the weak points of the other build were still encountered, the disappearing panel line and rivet detail around the bottom of the fuselage, that required rescribing, the very weak attachment points for the nose landing gear doors and the sloppy fit of the tailplanes.

The model was painted using the RAL shades by AK Real Colours, my first time using these paints.  I thought they sprayed OK, but a few modelling friends have raved about their performance, so maybe I need to revisit them. The camouflage pattern was laid out using blu tac sausages.

A gloss coat was then applied and recalling commenced. The decals on this revised sheet, as stated before are a big improvement over the first sheet, being both in register and a little thinner. Im not sure about the Norwegian roundels though as they look a bit pale when compared to photos on the web.

AKs panel line wash for grey green aircraft was then brushed on and the excess removed after an hour before a final semi matt coat was sprayed all over.

The masking from the canopy was removed and the CMK seat added as these jets, in fact, all the NATO jets – apart from the French ones – were fitted with a Martin Baker seat.

The CMK seat has excellent detail and was a drop fit.

Finally the undercarriage was added, the nose leg still being a less than sound fit and the drop tanks added, although I have failed to push one of them home against the pylon with the result the nose of it droops, and it is out of line with the other one. During the build I managed to lose one of the airbrakes (I seem to lose a part every build) 

An email to Tanmodel resulted in them sending me a replacement part without charge which was very kind of TanModel, seeing as it was my fault.

So, my second TanModel ThunderFlash and the last one I can see myself doing. 

The result, again is a model that Im far from happy with. I have seen some very nicely done examples on the net, so it can be made up into a lovely looking model. As can any kit really!

Again, my lack of satisfaction with the project and how it was progressing led me to rush it towards the finish line. In fact I sold this one off in 2021.

Republic RF-84F Royal Norwegian Air Force 717 SQN. Rygge Air Base. Norway 1956
← Back

Thank you for your response. ✨

Zukei-Mura 1/32 N.A.A P-51K Mustang IV

  • Purchased   2019
  •      Built             2019
  •  Enhancements:  Seatbelts:  HGW 
  •         Paint   MR Paint
  •         Decals   Kit scheme
Build Notes:
The inspiration for this model came from seeing a 48 scale kit completed in these markings on the Britmodeller.com forum. Instantly, I wanted to build it, however, in 32 scale, rather than 48 scale, as I feel these single engine fighters have more presence in this scale.

I knew Zoukei Mura had produced a boxing of their Mustang in these markings, so the kit was duly purchased, and promptly started, as BM were running a “shark mouth” theme Group build. Talk about the planets aligning
​We all start our impulse purchases right after buying them, Right!  Actually this would be one of the very few kits I have started straight after buying it, strangely all the previous one have been Airfix kits being the Walrus and Defiant
​ The build log can be viewed here although I did not finish the kit by the deadline.


​This was my first ZM kit, and I have to say, I thoroughly enjoyed it.  They do not build up like your usual kit.  The design philosophy being the makers want you to build the model similar to how the real aircraft was assembled.  A very Japanese thing.
Many people dont seem to like the complexity of these kits, but like the trumpeter kits, a lot of the innards that will never be seen can be left out helping speed and uncomplicate the build.  Despite the complex breakdown of the kit, it went together remarkably well, most joins falling on panel lines and  being engineered to look like panel lines.  Interestingly the new Eduard Mustang looks like it may have borrowed some of its breakdown from this ZM kit, the wheelwell for one being engineered the same.

I puttied the wings, a task made easier by ZM only having the panel lines present, saving you having to fill hundreds of rivets like you would have if using  the tamiya kit
Assembly proceeded quickly as I had made the decision to have the cowlings closed in order to show off the shark mouth.  Therefore I only assembled the bare bones of the engine, really just the block in actual fact.
the only fit problems encountered were  a bit of a step on one side between the cowling and the fuselage and a gap around the carburettor scoop.  Im guessing this was down to me.  You really do need to ensure all parts are aligned, otherwise it will have a knock on effect, and I think this is where my step on the cowling crept in.  On my next one (Yes, I intend to make another) I think I would save glueing the rear fuselage bulkhead until I added the empennage to further aid correct alignment
Aside from this, I managed to forget to add the landing light.  Never think you can build one of these kits without always consulting the instruction sheet at each stage.  Speaking of the instructions, I reckon they rival Wingnut Wings sheets for clarity and well thought out construction steps and build tips.

My only disappointment with the kit was, the flaps.  Like a lot of other mustang kit, the  flaps had the scalloped cutout to enable them to fit flush against the wing when added in the up position.  Given the attention to detail ZM have shown in other areas of the kit, I thought they could have given you alternative flaps for the down position like tamiya did with their kit.  Did I say only disappointment?  Irritatingly, some of the decal designs had a registration problem, the sharkmouth, serials and walkway red  L stripe all having a thin white drop shadow.  I painted this out with a thin black sharpie on the mouth, but decided to live with the serials on one side after a bit of a failed attempt at correcting the other side.  Subject to say, I can’t see the R.A.F calling me anytime soon for a job painting serial numbers on their aircraft!  The provided wheels are not weighted, and come in halves necessitating the tread to be reinstalled after eradicating the seam.  ZM do offer AM wheels, as do barracuda.  ZM also offer quite a few figures and photo etch sets to complement the model, so their website is worth looking at.  I will be purchasing their PE gun bay set so as to build the gun bay covers with the locking handles extended.  I did purchase some 500lb bombs, so may well arm her up in future as well

Z.M call out U.S colours for the camouflage, which many RAF mustangs were indeed painted in during manufacture, however, this particular machine was painted at an RAF Maintenance Unit.  I surmised that they would have painted her in RAF colours rather than US colours, so went for the standard RAF day fighter colours instead.  If you look at the build log, you can see in one of the posts a very helpful modeller posts the service history of this machine which shows it came from the factory in NMF and was camouflaged in Italy
​I went for a lightly weathered model, adding some light exhaust staining, oil leaks and grubbiness from foot traffic on the wings using oil paint.  Vallejo silver was used for the chipping with mud splatters underneath from pigments.  Testors Dullcote was used to finish off before the aerial line was added with EZ line.  Talk about a frustrating hour trying to thread it through the canopy.  It doesn’t bode well for that WNW Felixstowe in the stash patiently waiting its turn to be built.
​Im happy with my ZM mustang. I have another in the stash to build, on which I will use all the parts, and I also have a tamiya mustang to build.  It will be interesting to compare the two.

North American Mustang IVA  KH774  112 SQN Royal Air Force. Italy. 1945

TanModels 1/48 RF-84 Thunderflash

  • Completed:        May 2019
  • Enhancements: Seatbelts ExtraTech
  • Wheelwells, CMK
  • Camera access Doors- CMK
  • Control Surfaces CMK 

After the Trumpeter Thunderbolt, I was looking for something of a quicker build, so when my random stash pick system yielded the tanmodels Thundeflash, I was initially happy as I had been thinking about building this for a while. That initial enthusiasm quickly dissipated during the early stages of construction. Ejector pins marred the interior surfaces, the plastic parts had a pebbly texture that would require lots of polishing if I wanted to do a NMF and the surface detail almost disappeared on the underside of one fuselage half, meaning a rescribe would be in order. Coupled with this, assembling the brackets that hold the cameras proved fiddly with small in scale parts that had minimal glueing area. It fell apart on me a couple of times.  It would have gone back in the box if it were not for the reason I am trying to reduce the number of half built models on my stalled list, not add to them!  So construction carried on. The cockpit reminds me of the old monogram kits with nice relief on the side consoles that responded very well to dry brushing, same with the instrument panel. The seat had some generic US Seat belts added, painted, and was seat aside after a wash of Mig Products Dark Wash.

The kit has the option to cut out the camera access doors, and seeing as TanModels had gone to the trouble of including all the cameras, I thought I should show them off. The doors are demarcated by cut lines on the inside surfaces.  These lines are a little wide, so care is needed in cutting them out.  I used repeated scalpel passes, until they came away.  Separate doors are in the kit, but I decided to use nicer detailed ones from CMK that show the insulation on their interior surfaces. The cameras, save the nose one were left out until final assembly. Suddenly I was up to closing the fuselage halves! They fit together without problem I’m pleased to say, and a scribing tool and riveting tool was used to reinstate and deepen the underside surface detail using dymo tape as a guide. This actually went a lot better than I thought, given rescribing isn’t one of my better skills.  It wasn’t until this stage that I actually started enjoying the build! Dry fits had shown a very nice tight fit of the wing assemblies that slide into recessed areas on the fuselage without any need for filler, however with the intakes added, the fit was nowhere near as nice. I ended up dissembling the wing intake trunking and splitter plates (thanks Tamiya Super Thin Glue) and reassembled the splitter plates and trunking to the wings one piece at a time, constantly checking the fit of the wings to the fuselage.  This worked and led to the initial nice tight fit that the first dry fits had shown. I have no idea what the problem was, but can only guess the splitter plates when added to the assembled fuselage trunking caused the interference. It has to be said the internal trunking does not really fit together seamlessly. Ensure when done, that you sand the openings flush so that there are no steps that will cause the splitter plates to sit proud. Prior to gluing the wing halves together the CMK wheelwells were glued in place.  I found the plastic around the wheel bay opening needed to be thinned slightly.  I used a dremel. If its one measuring tool I have of my increasing skill, it’s the dremel. In years gone by this would have resulted in carnage and unusable wings. These days I can manage quite surgical cuts and thinning.  The CMK nose wheel was also used which is just a direct replacement for the kit part, but with greater detail. I also used CMK ailerons and flaps as I had them in the box for some reason, but there is no discernible difference in detail that I can see. I now had a complete airframe with filler only being used on the underside centre seam and a tiny bit around the windscreen panel.  Overall I found the fit excellent and my initial bad thoughts about the kit had disappeared.  Before any primer could be applied though, that pebbly texture had to go.

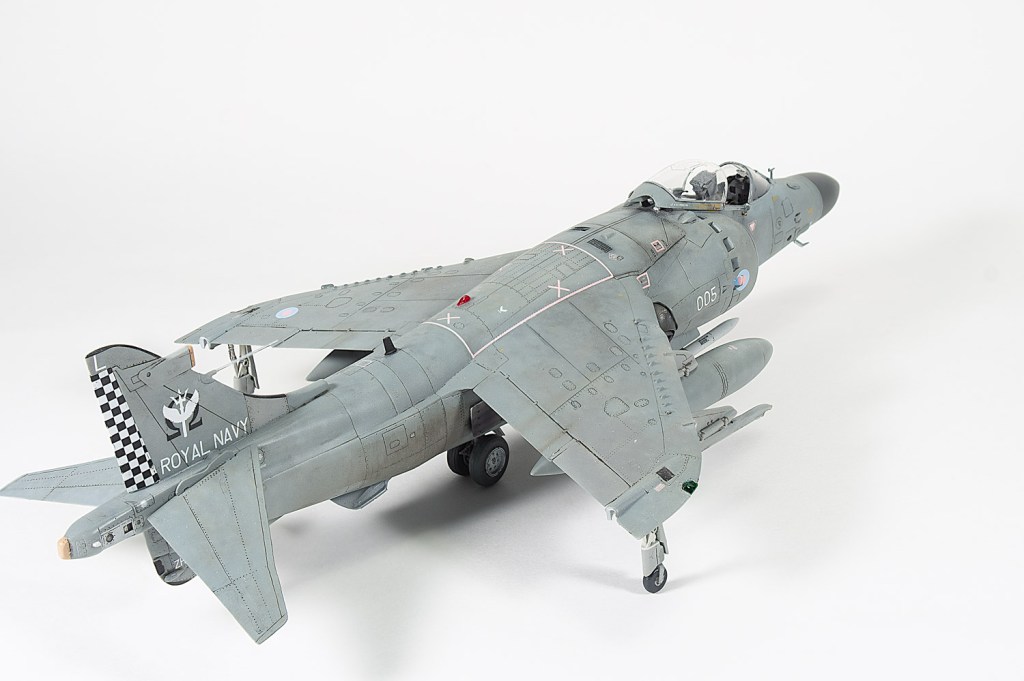
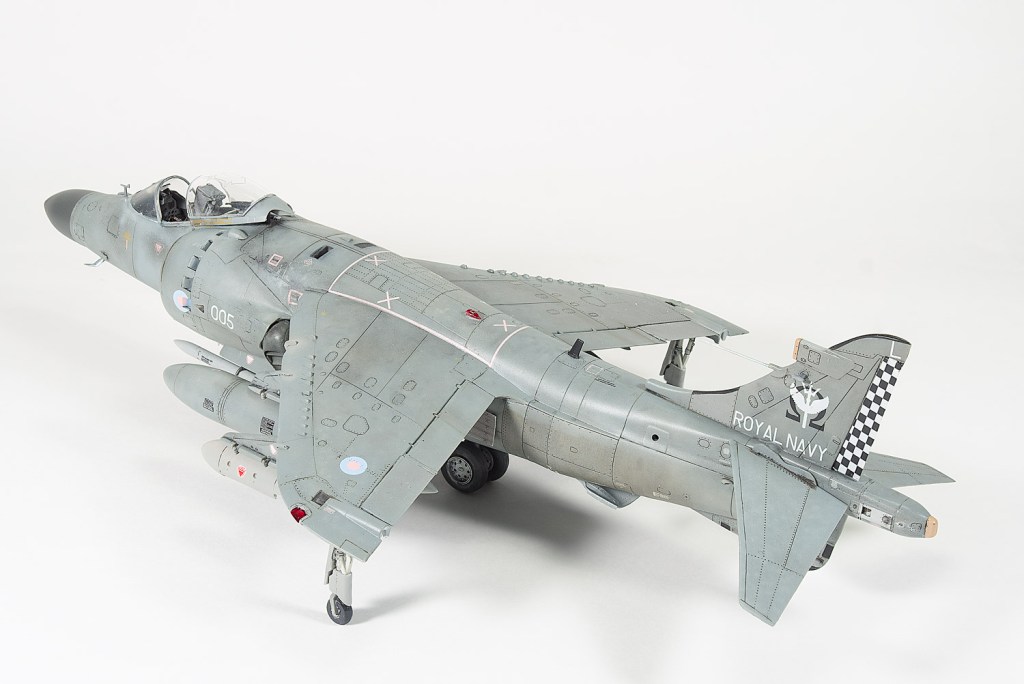
Republic RF-84F Thunderflash
27300 ER 4/33  Armee de l’Air RAF Akrotiri. Cyprus 1956