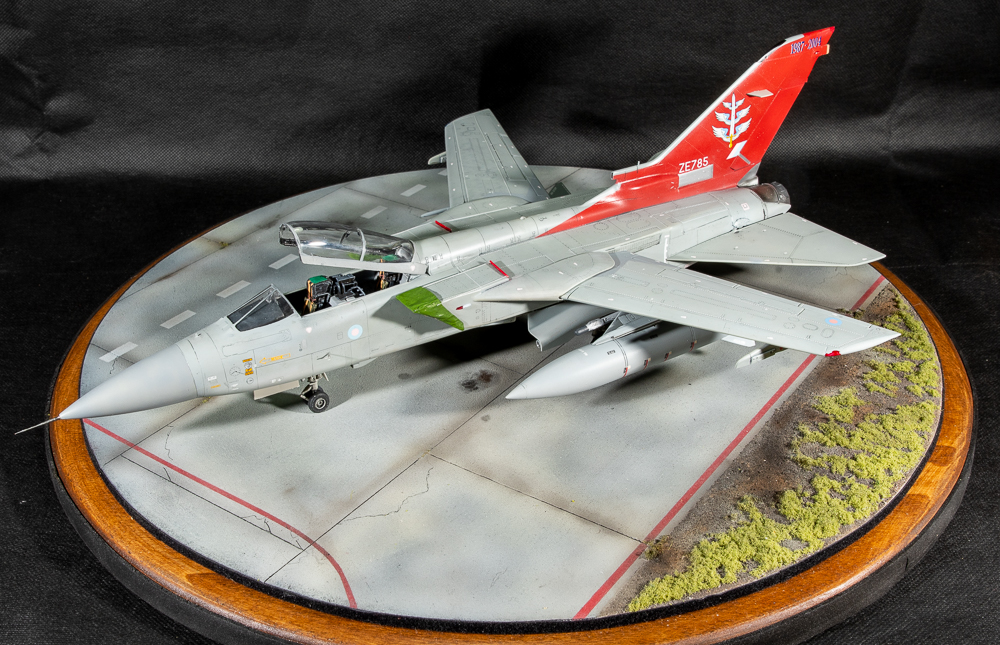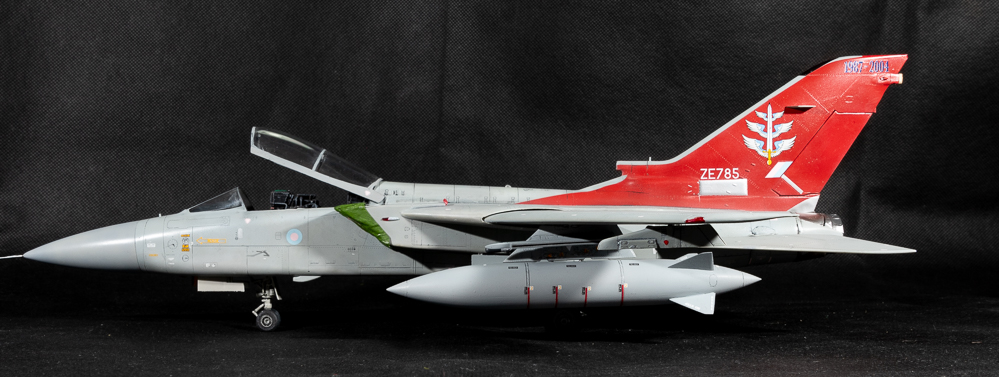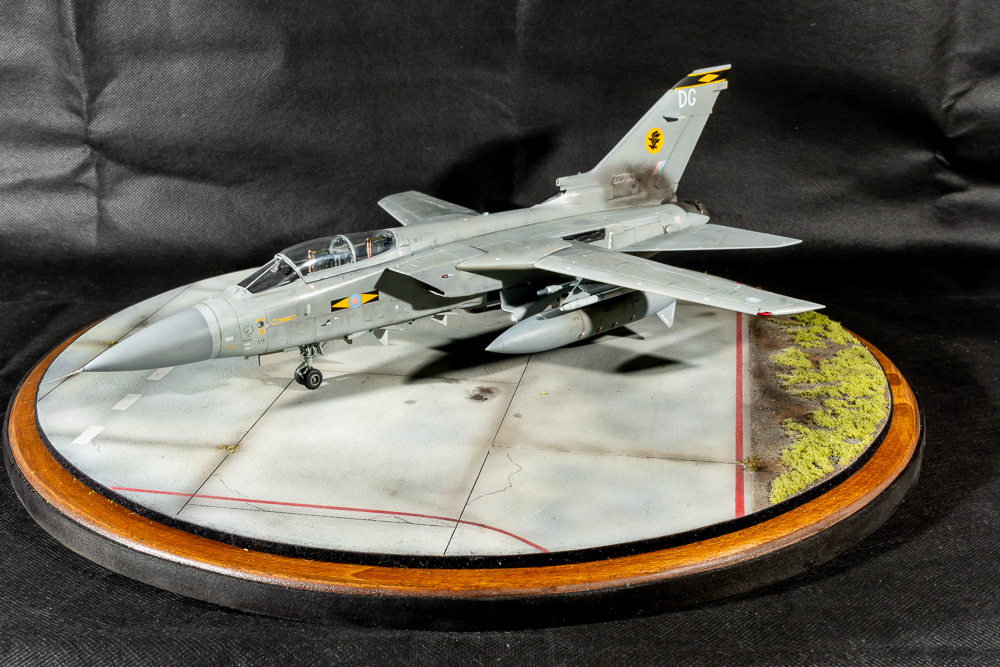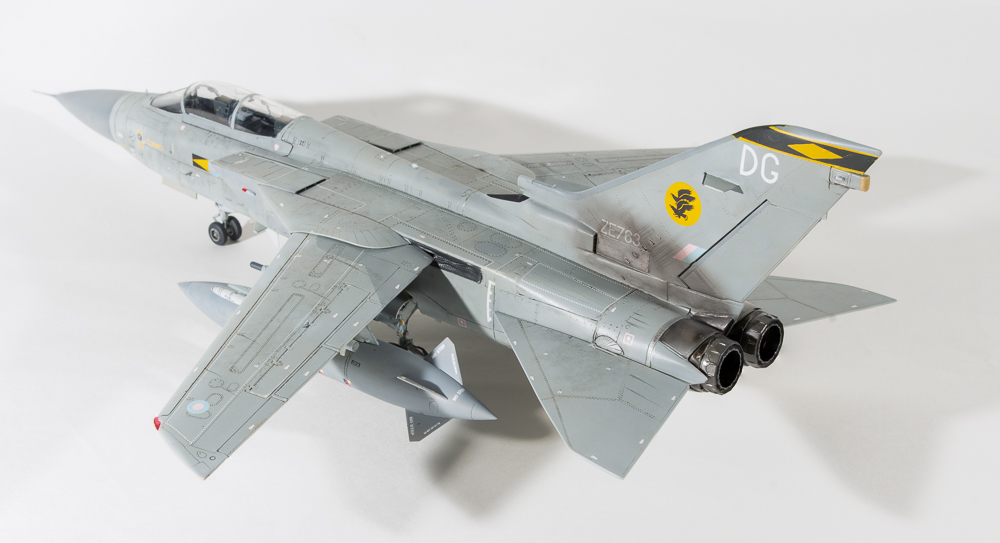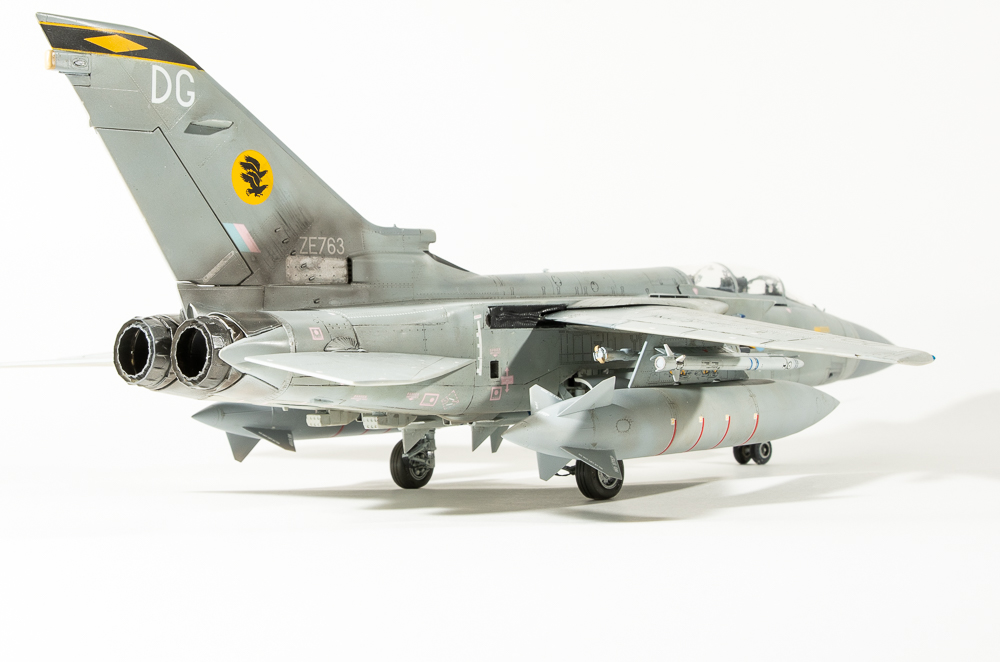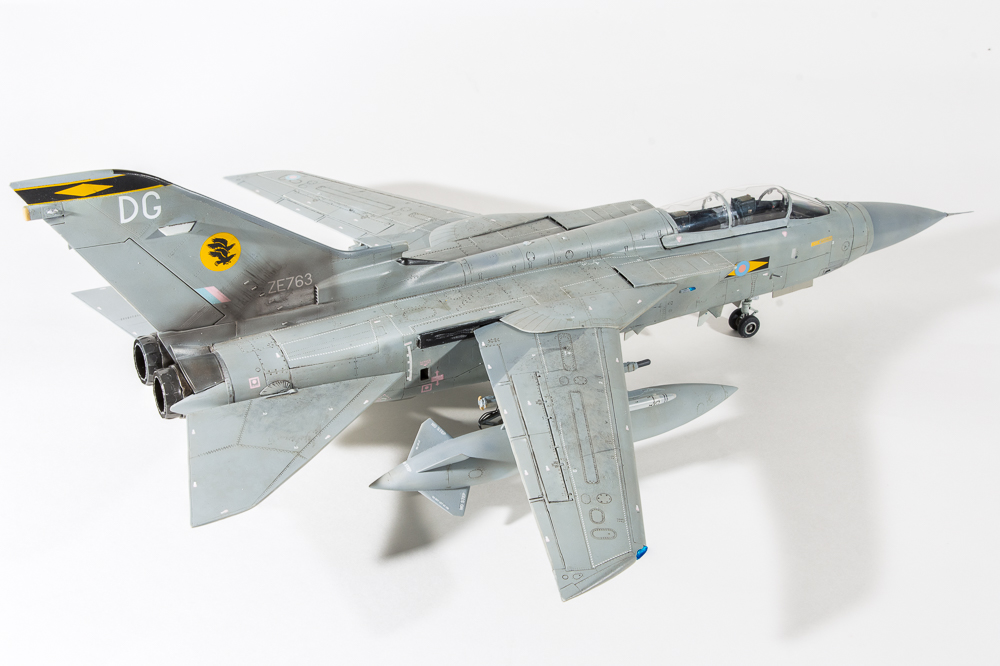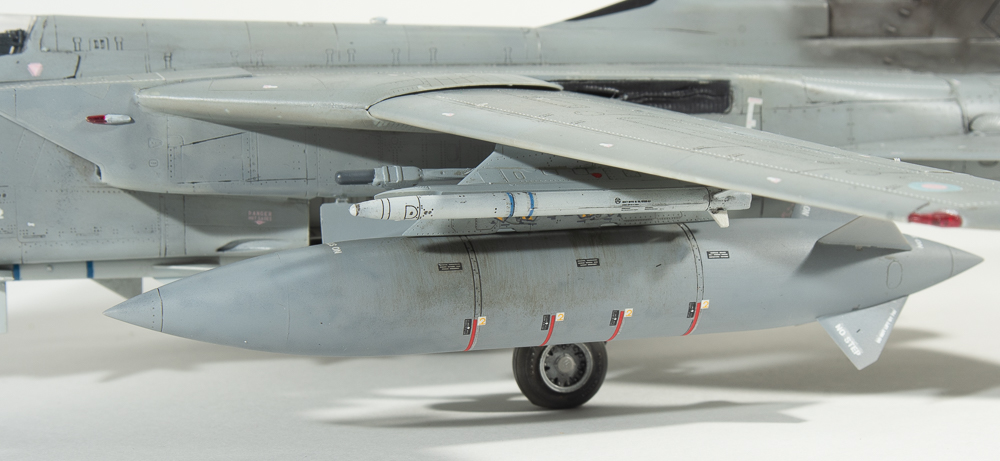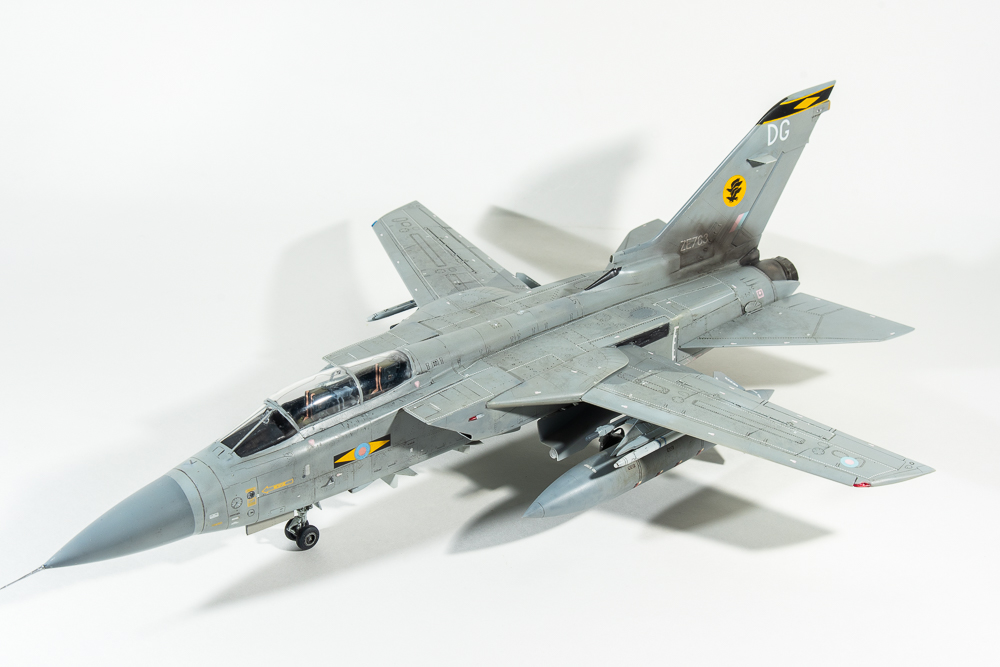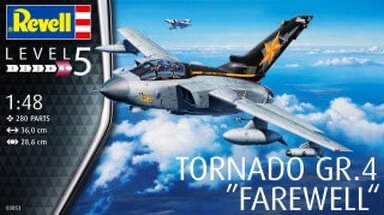
Revell 1/48 Tornado GR4

Completed:2020
Enhancements Used:  
Cockpit: Eduard
Seats: Paragon
Wheels: Brassin
Wheelwells: Eduard
Weapons: Brassin
Pitot: Master Barrel
Wing Seals: Shaun off Britmodeller
                                                                                                  Decals: Model Alliance Op Telic Part 1

The third and final instalment!  I had wanted to build Danger Mouse from the start.  For some reason I thought it was a ADV though, not a GR4, so then had to keep on  building tornadoes until I got to my GR4.  Well that’s my excuse for building 3 Revell Tornadoes.

I had a load of aftermarket I had planned on using on this build.  Some of it got binned as not value adding to the build though.  
Firmly in this camp, I place the phase Resin Hangar seamless intakes.  For a start, I just don’t think they are needed.  Whilst the kit intakes do have a nasty seam, you can really only see the first couple of mm of the kit intake trunking, ands then only by holding the model up at a weird angle and craning your neck to look down the intakes.  If this bothers you, a bit of filler and sanding will eradicate the seam. Secondly, the case resin intakes are moulded as just the intake tunnels without the bulkheads provided as part of the kit trunking.  These bulkheads form the front and back walls of the wheel wells and provide important structural integrity.  As I was going to be using the aires resin wheels this was not a dealbreaker.  What was the dealbreaker was the resin intakes would not fit over the top of the resin wheel wells without removing a big chunk.  This  was after sanding both the roof of the wells and the outer wall of the intake wafer thin, so, the resin intakes got binned and I reverted to the kit intakes.  To be fair to Phase Resin, Mike is probably not expecting you to use his intakes in congestion with resin wheel wells.  That aside, to not cast the integral bulkheads seems strange..  My opinion. Don’t bother with the intakes.  The wheel wells however do add to the kit, beautifully detailed as are all aires sets, these even fit with a minimum of fuss.  What led to them getting junked along with the intakes was after glueing them I found I just could not get the fuselage parts to line up seamlessly as the other kits had, so they got hit with the debonder and binned as well.  Not going too well so far!  The aires wells do add a lot to the kit though, and I’m sure the fit issues were due to something I did.

The rest of the build proceeded as per the other tornado builds.  Again I cut off the wing cogs to fit them at a later stage.  Again this is another thing I would never do were I to build another tornado ( I won’t be!)

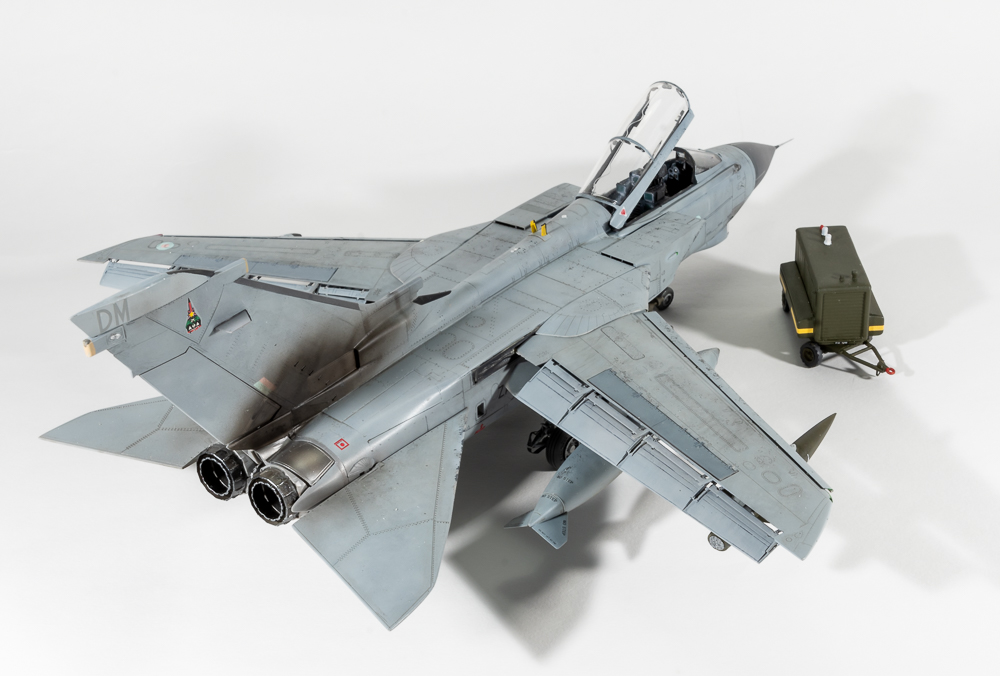
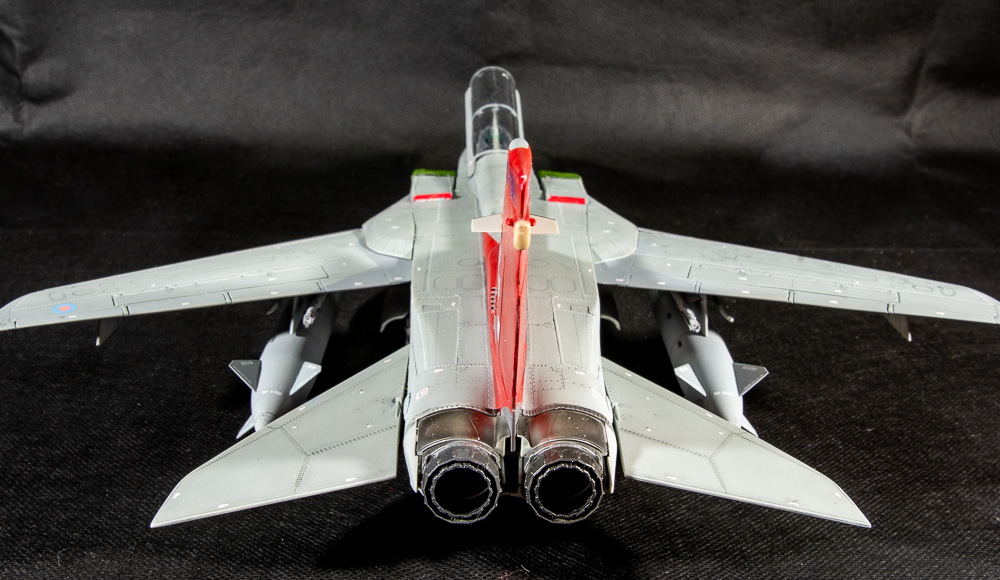
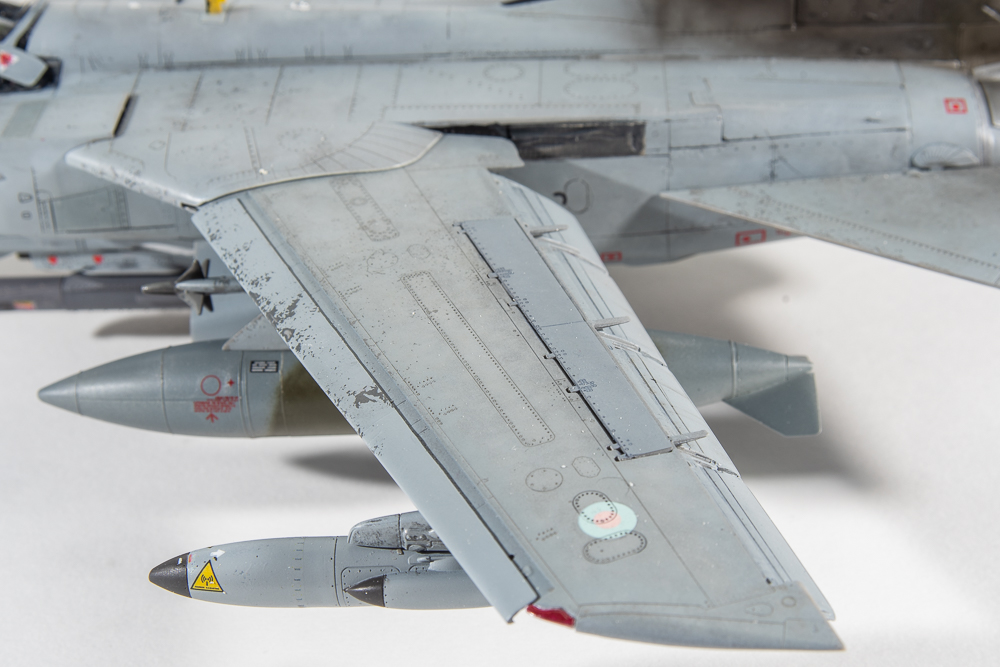
Revell would have you assemble the wing flaps as a three piece assembly whereas in real life they are one piece with only the small aerofoil section being a separate piece.  Make sure you fill and sand the join line.  Hopefully the photos explain this a bit better.  Shaun’s resin wing seals are far better representations of the real things rather than the featureless kits items.  He can be contacted through  Britmodeller.com

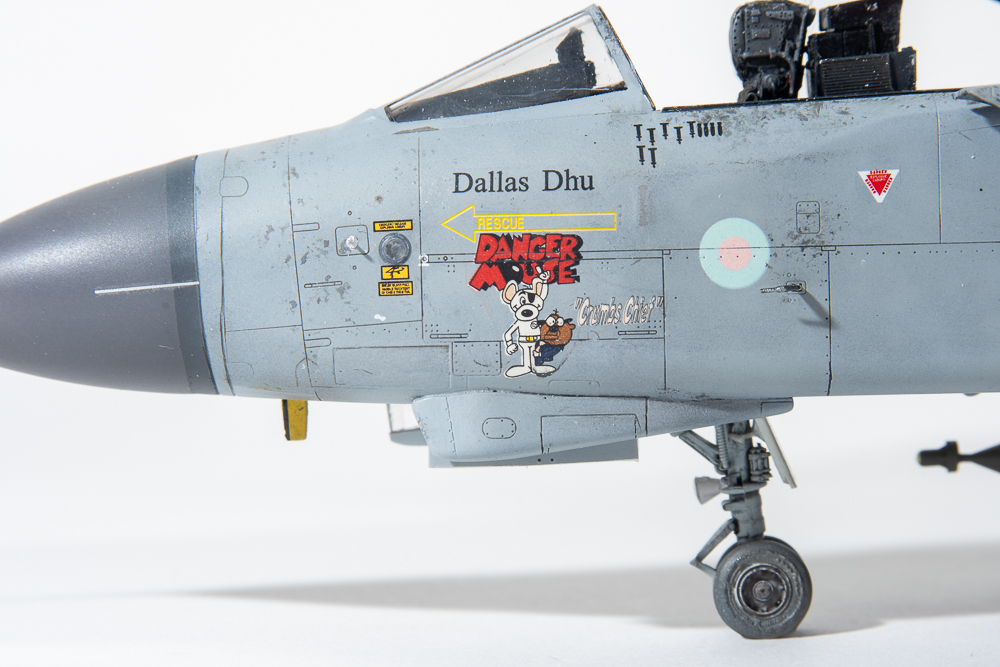
Photos I found on the net of Danger Mouse and other Operation relic jets showed a fair bit of wear and tear with scuffing and chipping of the ARTF grey paint exposing the underlying dark camouflage grey paint.  To portray this on the model. I first applied a coat of dark sea grey to the leading edge slats, nose, pylons and one of the drop tanks.  Mr Neo masking fluid was then dabbed on with a torn bit of sponge and the model sprayed with a couple of light coats of Scale Modeller’s Supply Barley Grey.  SMS is a home grown  Australian paint manufacturer.  I have been increasingly using his paints, as Im finding them excellent to spray.  You can spray them straight from the bottle, but I add a drop or two of thinner to make them spray even better.  They are a lacquer paint that has proven to be hard wearing and quick drying.  Once this paint had dried I rubbed my finger over the Neo to remove it from the airframe leaving the model looking chipped and scuffed.  The jet was made to further look worn by painting a few panels in either dark sea grey or lightened shades of the barley grey. One of the fuel tanks was painted in the old wrap around scheme, jets being fitted with different coloured tanks being quite common, even today.

I applied a panel wash with Payne’s grey oil paint straight over the SMS paint, with the excess wiped off and no damage to the underlying paint.  The decals were also placed straight over the paint, which dries with a sheen, the model Alliance decals performing well, although the DM code letters were too light and did not stand out enough when compared to photos of the real jet.  As I could not find any dark grey or black letters of the correct size to replace them, so had to resort to painting the fin top a lighter grey.  I replaced the letters with other codes from the same sheet.  Penfold’s catch cry “Crumbs Chief” should also be far pinker than the pale shade on the sheet, maybe it faded!  Op Telic jets do not seem to have been as well photographed as Op Granby jets, well so it seemed to me with good quality photos being hard to source. In particular I wanted to know if these jets wore the full suite of stencils after they were repainted.  In the end I went with just the major ones figuring only those stencils that dealt with rescue or crash procedures would have been re applied.

With this model I decided to really strengthen the pylon to wing attachment by using epoxy glue.  They ain’t coming apart now, although perhaps I should have ensured they were parallel to the centre line first!

With that Danger Mouse was done.  One of my favourite cartoon characters as a child.  There are still a few build and finish faults, but this is my favourite of the three.  I love the pugnacious look of the short nose coupled with the laser sensors.  The Eduard Brassin weapons are also a must have, being better detailed and more accurate than the kit supplied weapons.  Out of the box, you can arm a Operation Granby or Operation Telic jet.  Even the stenciling is provided.

So with three Revell Tornadoes done, what are my thoughts?  Well, let me start by saying I sold my remaining Revell tornado from the stash, as to build more would be just like beating yourself over the head repeatedly using a hammer.  I think you would really have to love Tornadoes to build multiples of the Revell kit.  Marred by soft detail in a lot of places, sink marks, flash, it can be  a troublesome build in inexperienced hands.  Take the time to research other on line builds and the previously linked youtube videos as fit problems can be mitigated if the builder departs from Revells suggested build sequence.  I really cant see anyone else aside from Airfix releasing a newer tooled Tornado, so Im thinking the revell is going to be the go-to in 48 scale for quite some time.  I might just order that new 32 scale Italeri tornado, as the Tornado itch still needs to be scratched with a wrap around GR1.

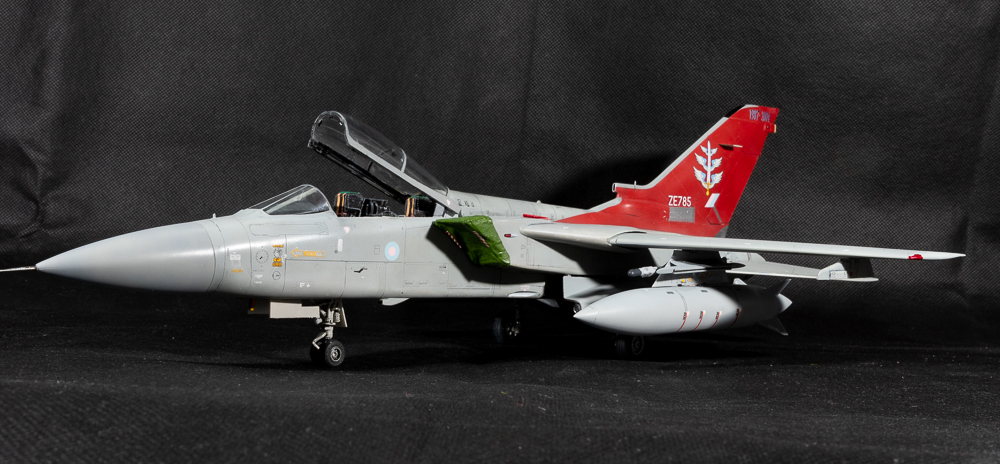
 Tornado GR4 ZA542 31SQN Royal Air Force. Combat Air Wing Ali Al Salem Op. Telic 2003
 

Revell 1/48 ADV Torando F3

Enhancements Used
Seats: CMK 
Seatbelts: Eduard steel
Wheels: Eduard
Pitot Tube: master barrels
Decals: Xtradecals Tornado F3 part 1
BOL Rails: Phase Resin Hangar

Construction Notes
 Oh God, what was I thinking, building three of these at the one time?.  In last months gripping episode you will recall that I (rashly) decided to build all three of my tornadoes from the stash at the same time.
​Well the plan didn’t quite start out like that.  This tornado was actually the first started, and the original plan was to just build this one,  however, it was not really turning out as I had pictured in my mind, – a common theme with my builds –  so it got shelved, and my other F3 pulled out of the stash, and started with the intent of being a better build (yeah, right!).  It was at this stage the idea to build all the tornadoes in my stash was born.  In actual fact, I thought I would  only be  building the other ADV  and my GR4.  
It  was only when the other ADV was almost finished, this one was revisited, and the decision made to complete it.

​Being the same kit, most of my notes from the first build stand.  My thought process with finishing this kit was to make it a clean build, as, with three builds now underway, getting  Tornadoed out, was a real possibility!   To this end, no stores were added, apart from the large tanks. Photos of the actual jet showed it sans stores anyway, save for tanks and a RAID pod on one of the BOL rails.

 This time the BOL rails came from Phase Resin hangar.  To better reflect RAF pylons, the sway braces were cut off and the “bulges” on both sides of the pylon had their length shortened.  Close enough for Govt. work as the saying goes.  there are plenty of photos available on the internet to aid as reference in this task.
The wings again had their cogged teeth cut off so that they could be painted separately and added later as part of final assembly.  This time I left I bit more of the “spar” with the result the wings attach far more securely, although they don’t have that classic Tornado anhedral

For this model, I wanted to add FOD covers too.  They were formed by covering the intake firstly with  household aluminium foil.  Kleenex tissue was then laid over the foil and coated in diluted white glue.  The thought process being to then slide the hardened tissue off the foil.  In reality, this didn’t work as the glue had worked too well, and stuck the tissue to the foil!
Once dry, the tissue FOD covers were trimmed to shape, and then painted.  Thin strips of tamiya tape formed the ties underneath the jet, whilst white EZline stood in for the bungee cords stretching back to the intake vent FOD guards which were formed from offcuts of red painted plastic card.  RBF flags came from an old Verlinden sheet.

As the Eduard PE wheel well set was not used on this model, the door retraction struts fitted neatly into their slots without the need to shorten them as was required on the other ADV build.
The kit decals were again used for the instruments, but this time the CMK seats were used, dressed with Eduard “steel” seatbelts which are far easier to use than their normal PE belts, being far more malleable, and less prone to the paint flaking off.

Paints used on this completion were Mr Color, another of my favourite brands, This actually being the first of my tornado builds, it was again plagued by large chunks of paint peeling off when the masking tape was removed.  This being one of the things that contributed to the build being abandoned in the first place, the painting process becoming an endless look of touch ups.
​In an effort to allow the wash to enhance more of the surface detail than the first kit, I applied the wash straight over the lacquer paints without first applying a barrier coat of gloss.  The excess was wiped away without removing any of the underlying paint.  Lacquer paints really are bulletproof!  Shock, Horror, the decals were then applied, still without a gloss coat.  No problems with silvering.  It was only after decalling that  a sealing coat of semi matt was applied.  
The Xtradecal decals behaved flawlessly, although again I used the too thick kit decals for the stencilling.  They stand out way too much on close inspection.  If you are building this kit, I would ditch the kit decals completely and use AM sheets, Xtradecal, also doing a stencilling sheet.

Since these photos were taken, I have  divided the four sky flash missiles from the first build between the two ADVs so each jet carries two skyflash.

So, how’d I go?  Well, in some ways I feel I did a better job on this one than the first ADV, although it still has plenty of flaws.  I still feel I can do better.  Anyway, here are the photos so you can judge for yourself.  Next instalment should be the third and final Revell Tornado.
​Thanks again for looking.

Panavia Tornado ADV. F3 OEU Royal Air Force RAF Waddington. May 2003
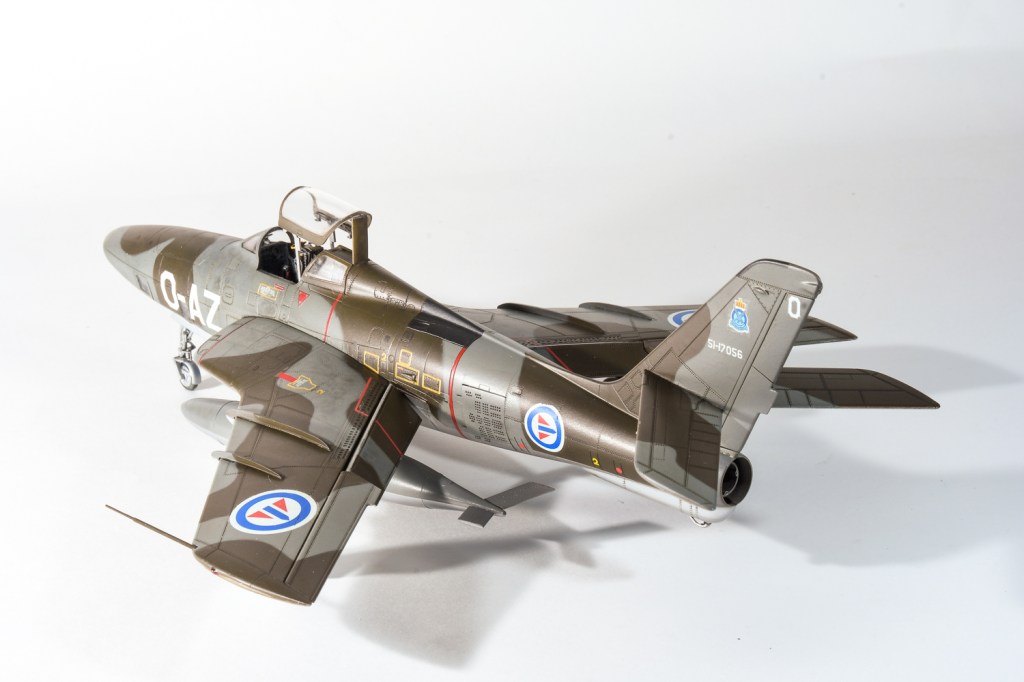
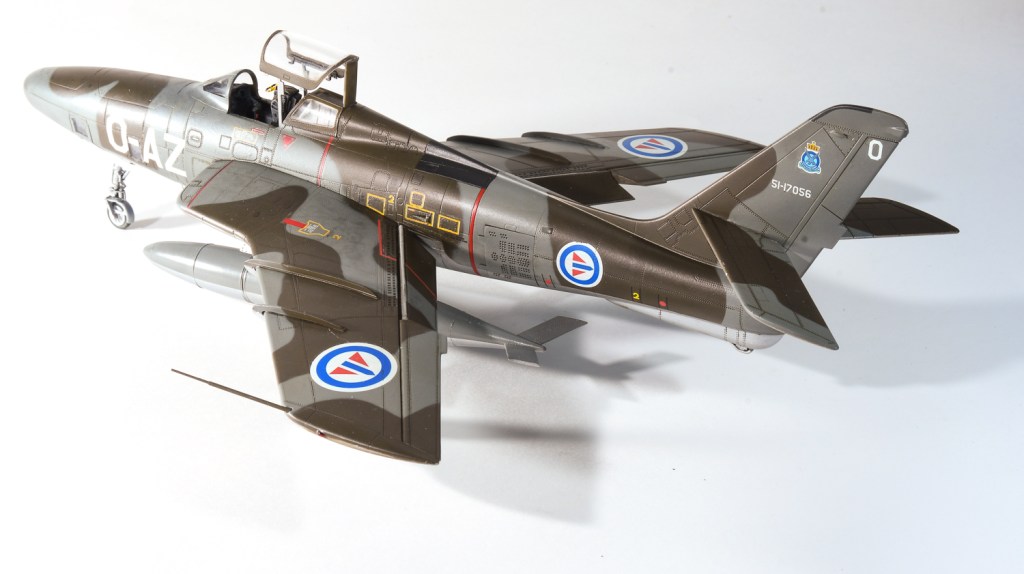
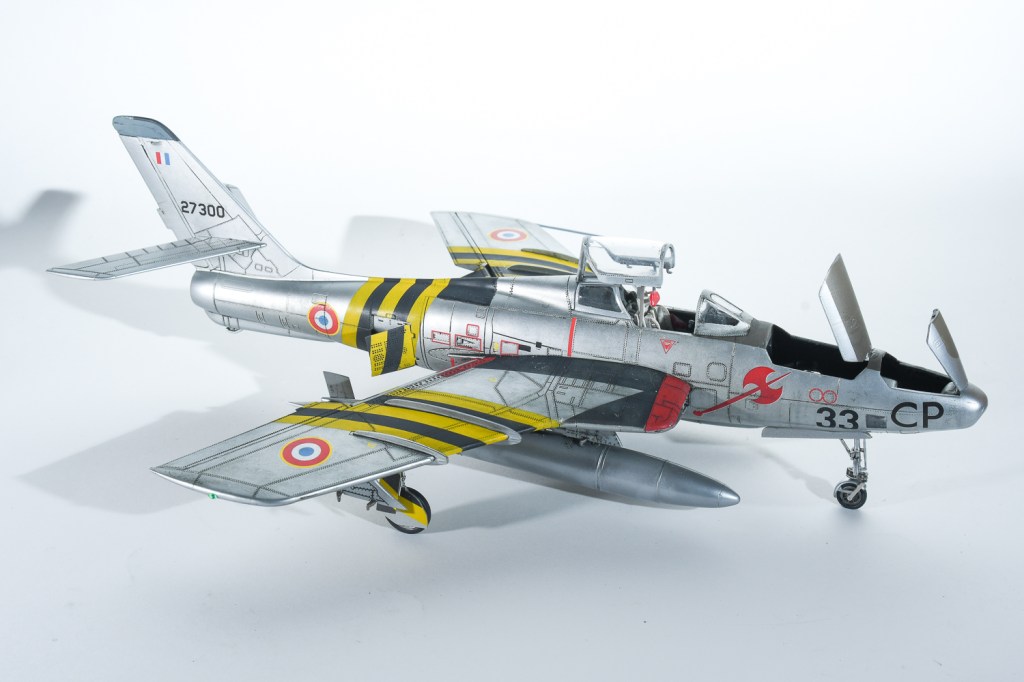
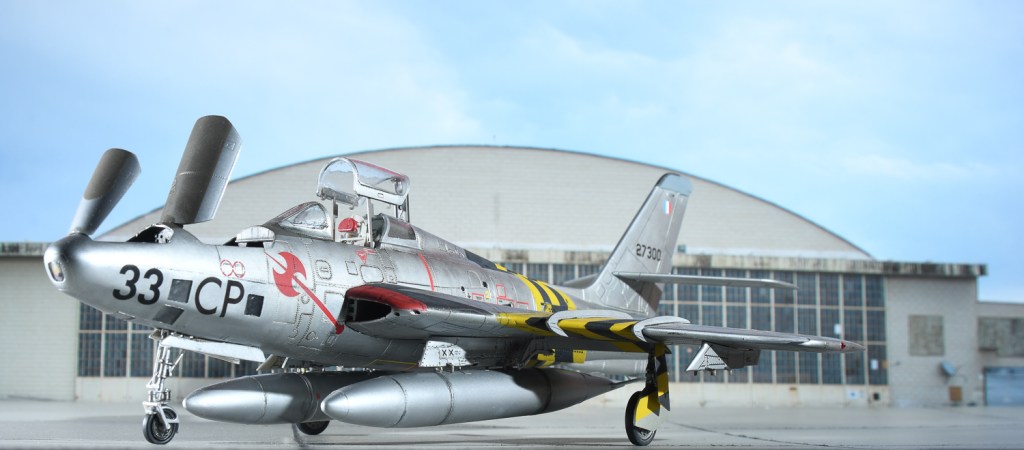
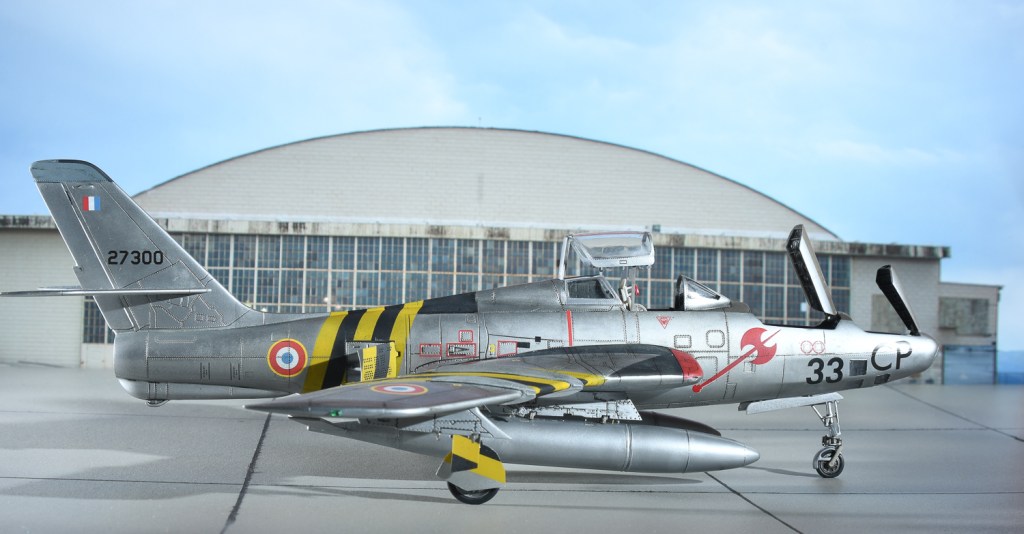
TanModel 1/48 RF-84F ThunderFlash

Built: 2019
Enhancements: CMK MB ejection seat 
Paint: AK Real Colours
Decals: OOB

My second attempt at Tanmodels Thunderflash was borne out of my dissatisfaction at my first attempt, and I have to say, Im not really happy with the second attempt either

This example was built from the first issue of the kit, but using the second release decal sheet, as it is far superior to the initial issue in quality, anyway, although I do think the first sheet had better options. Confused yet?

This first release of the kit had very pebbled plastic, so a NMF finish was out, I decided.

;In any case, I wanted to complete a camouflaged jet so as showcase the aircrafts service life and different operators.

Assembly on this one was streamlined by keeping the nose camera covers closed.You still have to build the camera bodies, which still constitute a finicky assembly due to their near scale racks.

The rest of the jet assembled a little easier than my first attempt as well.

This time, the intakes and wings assembling without any fit issues. Aside from this, all the weak points of the other build were still encountered, the disappearing panel line and rivet detail around the bottom of the fuselage, that required rescribing, the very weak attachment points for the nose landing gear doors and the sloppy fit of the tailplanes.

The model was painted using the RAL shades by AK Real Colours, my first time using these paints.  I thought they sprayed OK, but a few modelling friends have raved about their performance, so maybe I need to revisit them. The camouflage pattern was laid out using blu tac sausages.

A gloss coat was then applied and recalling commenced. The decals on this revised sheet, as stated before are a big improvement over the first sheet, being both in register and a little thinner. Im not sure about the Norwegian roundels though as they look a bit pale when compared to photos on the web.

AKs panel line wash for grey green aircraft was then brushed on and the excess removed after an hour before a final semi matt coat was sprayed all over.

The masking from the canopy was removed and the CMK seat added as these jets, in fact, all the NATO jets – apart from the French ones – were fitted with a Martin Baker seat.

The CMK seat has excellent detail and was a drop fit.

Finally the undercarriage was added, the nose leg still being a less than sound fit and the drop tanks added, although I have failed to push one of them home against the pylon with the result the nose of it droops, and it is out of line with the other one. During the build I managed to lose one of the airbrakes (I seem to lose a part every build) 

An email to Tanmodel resulted in them sending me a replacement part without charge which was very kind of TanModel, seeing as it was my fault.

So, my second TanModel ThunderFlash and the last one I can see myself doing. 

The result, again is a model that Im far from happy with. I have seen some very nicely done examples on the net, so it can be made up into a lovely looking model. As can any kit really!

Again, my lack of satisfaction with the project and how it was progressing led me to rush it towards the finish line. In fact I sold this one off in 2021.


Republic RF-84F Royal Norwegian Air Force 717 SQN. Rygge Air Base. Norway 1956

← Back

Thank you for your response. ✨

TanModels 1/48 RF-84 Thunderflash

  • Completed:        May 2019
  • Enhancements: Seatbelts ExtraTech
  • Wheelwells, CMK
  • Camera access Doors- CMK
  • Control Surfaces CMK 

After the Trumpeter Thunderbolt, I was looking for something of a quicker build, so when my random stash pick system yielded the tanmodels Thundeflash, I was initially happy as I had been thinking about building this for a while. That initial enthusiasm quickly dissipated during the early stages of construction. Ejector pins marred the interior surfaces, the plastic parts had a pebbly texture that would require lots of polishing if I wanted to do a NMF and the surface detail almost disappeared on the underside of one fuselage half, meaning a rescribe would be in order. Coupled with this, assembling the brackets that hold the cameras proved fiddly with small in scale parts that had minimal glueing area. It fell apart on me a couple of times.  It would have gone back in the box if it were not for the reason I am trying to reduce the number of half built models on my stalled list, not add to them!  So construction carried on. The cockpit reminds me of the old monogram kits with nice relief on the side consoles that responded very well to dry brushing, same with the instrument panel. The seat had some generic US Seat belts added, painted, and was seat aside after a wash of Mig Products Dark Wash.

The kit has the option to cut out the camera access doors, and seeing as TanModels had gone to the trouble of including all the cameras, I thought I should show them off. The doors are demarcated by cut lines on the inside surfaces.  These lines are a little wide, so care is needed in cutting them out.  I used repeated scalpel passes, until they came away.  Separate doors are in the kit, but I decided to use nicer detailed ones from CMK that show the insulation on their interior surfaces. The cameras, save the nose one were left out until final assembly. Suddenly I was up to closing the fuselage halves! They fit together without problem I’m pleased to say, and a scribing tool and riveting tool was used to reinstate and deepen the underside surface detail using dymo tape as a guide. This actually went a lot better than I thought, given rescribing isn’t one of my better skills.  It wasn’t until this stage that I actually started enjoying the build! Dry fits had shown a very nice tight fit of the wing assemblies that slide into recessed areas on the fuselage without any need for filler, however with the intakes added, the fit was nowhere near as nice. I ended up dissembling the wing intake trunking and splitter plates (thanks Tamiya Super Thin Glue) and reassembled the splitter plates and trunking to the wings one piece at a time, constantly checking the fit of the wings to the fuselage.  This worked and led to the initial nice tight fit that the first dry fits had shown. I have no idea what the problem was, but can only guess the splitter plates when added to the assembled fuselage trunking caused the interference. It has to be said the internal trunking does not really fit together seamlessly. Ensure when done, that you sand the openings flush so that there are no steps that will cause the splitter plates to sit proud. Prior to gluing the wing halves together the CMK wheelwells were glued in place.  I found the plastic around the wheel bay opening needed to be thinned slightly.  I used a dremel. If its one measuring tool I have of my increasing skill, it’s the dremel. In years gone by this would have resulted in carnage and unusable wings. These days I can manage quite surgical cuts and thinning.  The CMK nose wheel was also used which is just a direct replacement for the kit part, but with greater detail. I also used CMK ailerons and flaps as I had them in the box for some reason, but there is no discernible difference in detail that I can see. I now had a complete airframe with filler only being used on the underside centre seam and a tiny bit around the windscreen panel.  Overall I found the fit excellent and my initial bad thoughts about the kit had disappeared.  Before any primer could be applied though, that pebbly texture had to go.

Republic RF-84F Thunderflash
27300 ER 4/33  Armee de l’Air RAF Akrotiri. Cyprus 1956

Revell 1/48 ADV Tornado F3

  • Built 2020
  • Enhancements Used 
  • Seatbelts,  Eduard
  • Wheels   Brassin
  • Wheelbays  Eduard
  • Pitot Tubes and AoA sensors  Master Barrel
  • Weapons  Brassin ASRAAM   Hasegawa Sparrows (skyflash)  BOL rails  F4Dable Models
  • Decals  Xtradecal Tornado F3 Part 1
 Like a lot of modellers, I had heard some horror stories about the fit of the Revell Tornadoes.  The consensus seemed to be whilst they were definitely a step up on what was currently available, the fit left something to be desired.  The kit seems to be one of those that polarise modellers world wide.  The truth is, like the Hasegawa Harrier, the ease of build is directly linked to how you build the tornado.
What inspired this particular build was a mate directing me to a series of youtube videos done by a fellow named Nathan Robinson.
Nathan is a member of the IPMS Tornado SIG and admits to having built six of these!  So if anyone will have the build down pat it should be him.
Deciding to take a leaf out of Jon Bryons book, all three revell tonkas – 2 ADVs and a GR4 – were pulled from  the stash to be built as a batch.
Following Nathans build sequence, I found the build progressed fairly quickly. I still needed filler around the intakes and along the fuselage sides,where it meets the bottom plate, but these were all easy joins to clean up and rescribe.
For the cockpit, the kit decals were used which sat down surprisingly well over the moulded detail and certainly looked busy enough through the closed canopy.  Note Revell call out the wrong rear instrument panel, you need part S214

I deviated from Nathans build my cutting off the cogged part of the wing so I could add them later. To be honest, Im not sure this is the best way as you lose a bit of structural integrity. Ive already so modified all three of my kits, but wish Id left one to compare the two different methods.  Maybe on my eduard Desert Babe kit!

I replaced the rather bland wing seals with some moulded by a fellow called Shaun from Britmodeller.com.  I’m not sure if they are still available as he was doing them when the kits first became available.
The decision was also made on this model to have the flaps up, to better show off the lines of the ADV.  The best way to achieve a flush fit with the wings is to cut the bar on parts B111 &113 so you are left with separate flaps.  These can then be glued  individually to the top wing ensuring they sit  flush with the upper wing.
​
The undercarriage assembles fairly easily, despite being moulded in two halves. Revell have form here, which means you have a seam to clean up. Part C159 and 168 placement is a little vague. Step 69 shows it the best. On gluing the PE facia to the back wall of the wheelwell, I had an alarm bell go off in my head going, “I wonder if this slot the PE covers is important” Well, Yes, it is as this is where the door retraction strut sits.  Didn’t realise this until I added them, so then had to cut the struts, in fact I replaced them with thin rod. I find this annoying on Eduard’s part. They could have easily made the back facia in two parts to be fitted either side of the slot. Its not the first time Eduard have failed to take into account the fitting of kit parts around their etch, and one of the reasons I find myself using less AM these days unless it is drop fit. Some etch placards and brake lines dress up the legs nicely, but on my other F3 I will use wire and decals instead..

Photos of my chosen jet show it fitted with BOL rails on the inner side of the wing pylon. If like me, you didn’t know what BOL rails are, I can know tell you they are a launch rail with an inbuilt countermeasures pod. They are surprisingly hard to track down as an aftermarket item, considering quite a few jets use them.  A friend offered me his Steel Beach ones, but they looked quite a crude casting. The F4DModels were much better although warped.  Hot water straightened this out.

For the Barley Grey, I used a home grown paint SMS which performed quite well, Its marketed as ready to spray, but I still thinned mine a little. Colour looked good, but I find it strange they do not offer a Light Aircraft Grey in their range to go with the barley grey, so it was back to my go-to paint. Mr Color.
Again on this model, I had problems with the paint and primer peeling off when removing the tape. I have no idea whats causing this. The model was wiped down with tamiya thinner prior to paint, and was primed with Alclad Grey.  The consensus amongst my modelling mates was it could be the primer, which Ive had for a while, so in the bin it went.
The model was gloss coated for decals and in preparation for the wash. These days I apply the wash before the decals, despite this method, the wash failed to pick up a lot of the very fine detail, despite repeated applications, which was annoying in the extreme.
The decalling should have been easy, but again my poor build planning brought things unstuck. Literally!
The decals had all been applied when I realised I had not painted the fintop di electric panel, so as the tape would lay over the decalled fin band I religiously detacked the tamiya tape before laying it over the decal.  Of course, on pulling off the tape, the decal came with it, necessitating me having to  paint the fin band back on.  This in itself needed a lot of touching up as each time I pulled tape off, paint came away too. I really need to get to the bottom of why this is happening.
Surprisingly, my enthusiasm hadn’t waned for the model, so I pressed on, applying a satin sheen, which I then went over with dullcoate. Even with the satin, the model still looked far too glossy.  Annoyingly, all the stencils stood out as too thick as well. I had applied them in little pools of future to stop any silvering. I wont do this on my next one.

This just left final assembly of wheels, aerials, canopy mirrors and nav lights. none of which I managed to lose as is the usual case despite several of them pinging off the tweeezers.
And that was that! One down, two to go
So what do I think of the Revell Tornado? Well I think the main problem is, its Revell!  I have no problems with the breakdown of the kit, but the kit quality is poor indeed, flash, sink marks and ejector pin marks mar the parts, making assembly harder than it should be. These kits, like Airfix, are designed for the mass market, the so called “pocket money brigade” and the tooling shows it. You get what you pay for.
Despite this, if you ever release a new tool Jaguar, Revell, I’d buy it in a heartbeat.
Anything would be better than the horrid kittyhawk kit thats still sitting on my shelf of doom.

Panavia Tornado F3 ADV ZE763 11 SQN Leuchars Royal Air Force 2006

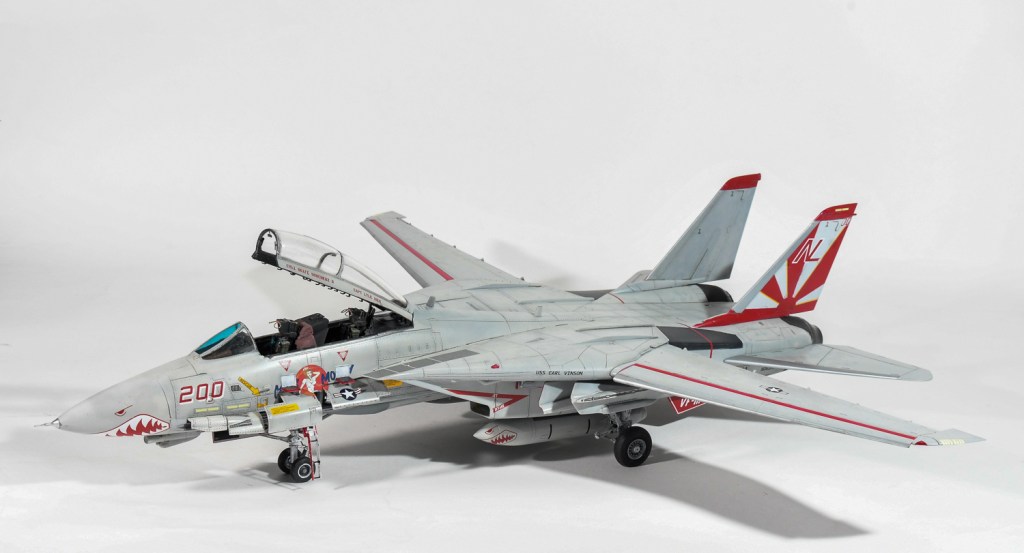
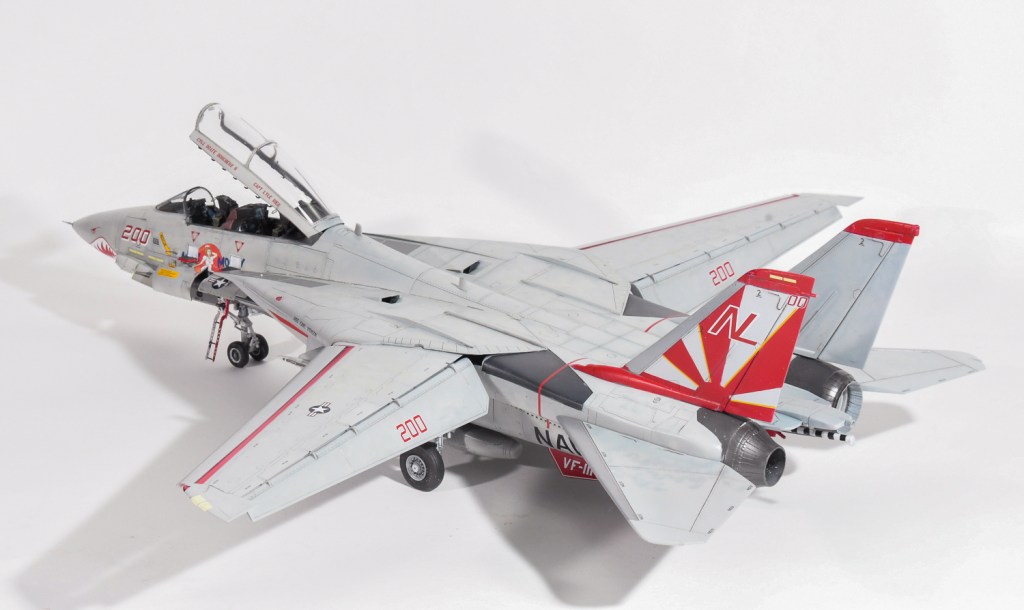
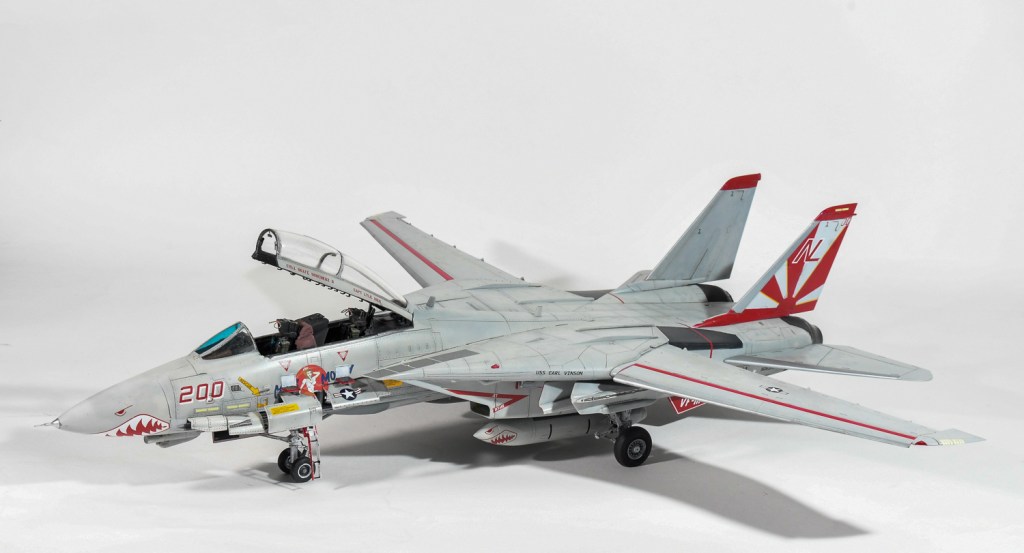
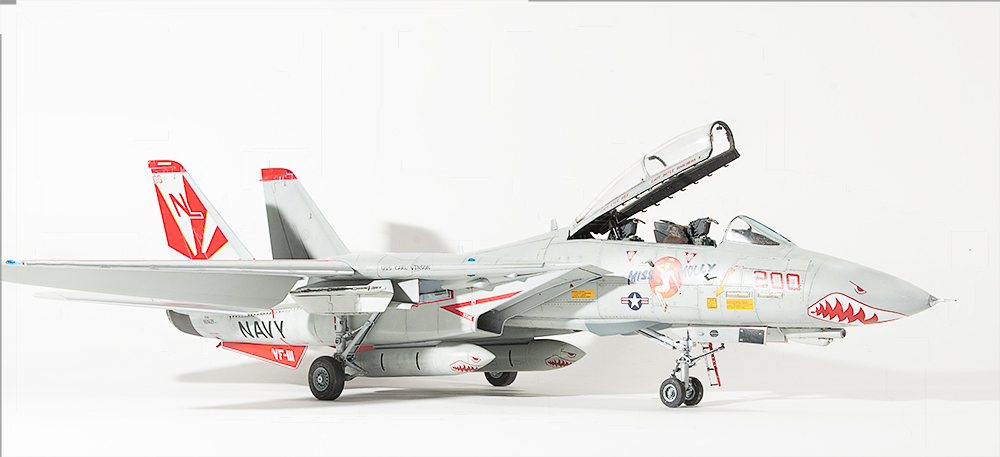
Eduard 1/48 F-14A Tomcat

Date added to stash: 2016
  Date Completed: 2018
  Aftermarket used:
some parts from Eduard Detail set 
  Paint: Mr Color Light Gull Grey
  Decals:  Furball Sundowner Anthology

I started this at the same time as lthe other Tomcat I was building for a friend.  At the time, it seemed like a good way to build a kit from my stash as well.  In hindsight, if I had not started this one, I would have sold it, because its position has been ably taken by the Tamiya kit, and building the two HobbyBoss kits was a real grind.  Not that there was anything wrong with the kit, but it was just one HB Tomcat too many. (Although this boxing was done by Eduard, it is the HobbyBoss kit, so I will refer to the kit as HobbyBoss)
The previous article covers the build in detail, although I would add my take home lesson from building Tomcats is mask the intake camouflage demarcation before you add them to the jet I didnt on either build and it was a hell of a job to add them later!
I had high hopes for this build wanting to build it with all panels open.  In the end the build just started annoying me as there ws other stuff I wanted to build and I chose to rush  a lot of things.  Im not really happy with it, but HB Tomcats are a long complicated, involved build as are many modern jets, so to do two in a year is not bad.  I have  three tamiya Tomcats in the stash and look forward to tackling those at a later date.  Just not for a while, as Im all Tomcatted out. 
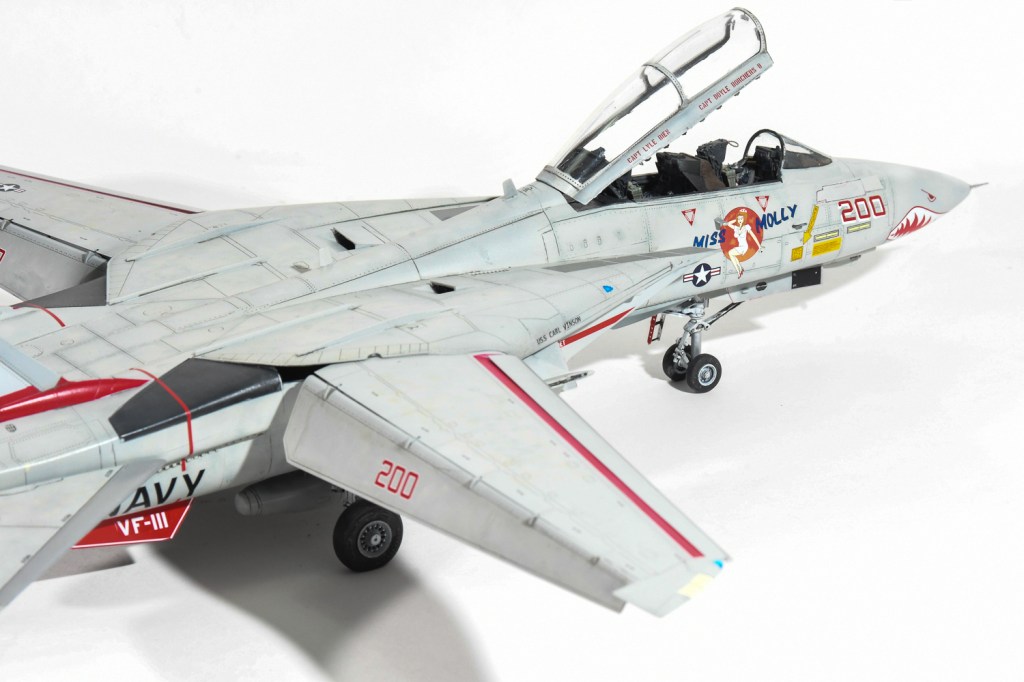
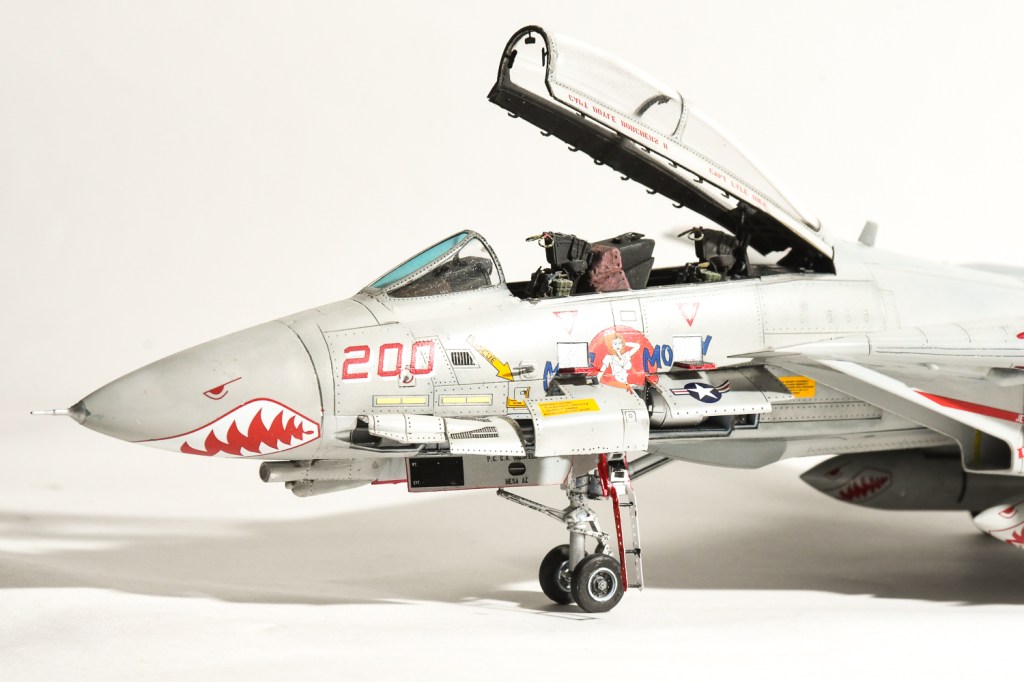
I also think Miss Molly was the wrong jet to pick, as all those open panels do not allow you to see that nose art in its entirety.  Live and Learn, hey.
And wheres that sensor gone from under Miss Molly’s hand on the starboard side?  I definetly  added it LOL
For those who don’t know, Miss Molly was named for Molly Snead, a nurse to Senator Carl  Vinson, yep, the Senator the carrier is named after.
 I visited  the USS Carl Vinson at Fremantle Western Australia in 1994, so like to model aircraft from her.
​

Grumman F-14A Tomcat VF-111 “Sundowners”  U.S Navy U.S.S Carl Vinson  1989

← Back

Thank you for your response. ✨

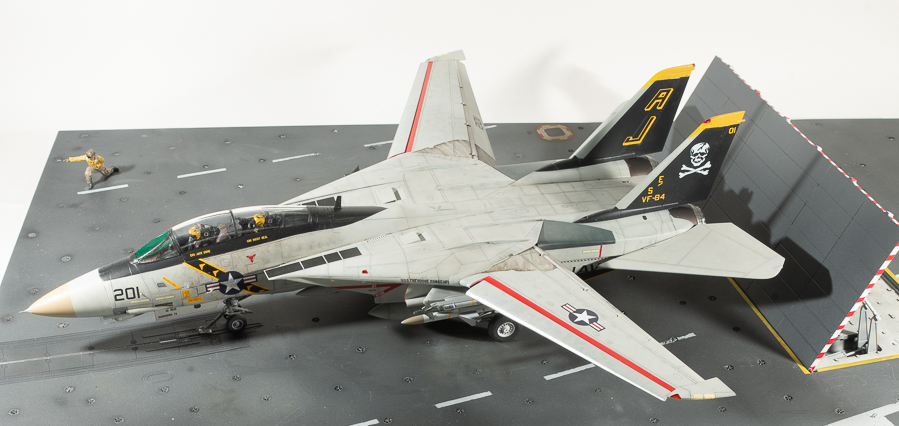
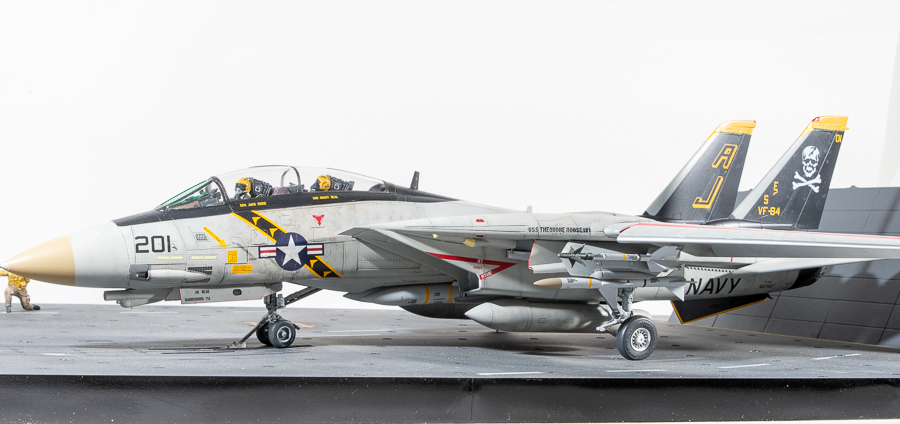
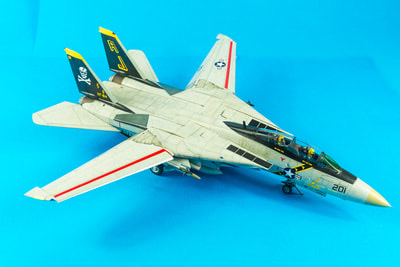
Hobby Boss 1/48 F-14A Tomcat

  • Date Completed: July2018
  • Aftermarket Used: Quickboost Pilots
  • Paint: Gunze Mr Color 
  • Decals: Kit supplied  for airframe, missile stripes from Fightertown Tomcat Data sheet           
This build was borne out of a work colleague’s request for me to build the kit for him.  As I also had the kit in my stash, I thought I would build the two of them alongside each other.  As often happens with my double builds, this one sped ahead and was completed whilst mine sat on the bench falling further and further behind.
The Eduard boxing contains the Hobby Boss plastic, brassin resin burner cans,chin pod, wheels and a PE sheet specific to this kit with a large decal sheet done by Furball Aero Designs
The HB Tomcat is a nice kit, there a few accuracy issues, most noticeably, the bottom edges of the intake openings are not parallel to the top edges as they should be, but this is only noticeable from head on.  Rivets punctuate the flying surfaces which should be smooth, but apart from that, its  a detail packed kit,  allowing you options to open the gun bay, avionics panel, display the radar and extend the wing control surfaces. 

It assembles well and does not really deserve all the wailing and teeth gnashing it gets on the internet.  I put it above the Hasegawa offering, but it has been pushed into the shade a bit with  the release of the tamiya kit.

Jeff had requested his model be finished in Jolly Roger markings as if just about to launch, so I used the compressed nose leg,  extended the wings and dropped the flaps and leading edge slats.  Naturally, all the access hatches were glued in the closed position.

  Of course this meant I also had to crew the jet, so used the aerobonus crew .  Although Aerobonus should be applauded for the idea of releasing seated pilots, I really wish that they would include alternative helmeted heads with visors down and masks in place.  As it is,  their entire range of seated pilots have visors up and masks dangling which means they can not be used for in flight models, which I imagine is what most people want them for.

I sourced correctly helmeted heads, as well as a gloved hand that grips the throttle from an Academy Phantom.  As the canopy would be closed on this particular jet, I didn’t bother using the PE consoles and panels, rather relying on the entirely adequate kit parts.  The canvas coverings over the instrument panel glare shields were beefed up with milliput draped over the kit parts, and then painted a dark leather colour, which according to the DACO book, is the shade the original black covers fade to.
The HB kit includes the short lived glove vanes, (they were wired shut in A models, puttied over in B models and left out altogether in Ds, I believe) requiring you to open up  flashed over slots in the wing gloves. Stupidly, I didn’t, thinking I could just scribe the vanes in later, This would have worked if I was halfway good at scribing, as it was, it just created more problems for me.  My tip. Open up the slots and use the kit vanes as even shut, the openings  are quite prominent on the real jet.

For some reason I had a gap when fitting the bottom plate, not sure why as dry fits had shown a good fit.  Fitting the phoenix pallets hid most of it and a plastic card shim covered the rest.  The forward fuselage fitted to the rear with no gaps or steps as did the tailfins.  I had read about fit problems when glueing the gun bay  and avionics panels in the closed position, but being patient and gluing a side at a time will reward you with reasonable fit, still, I needed a small smear of Mr Surfacer around the ladder door.

Apart from this, the kit assembled quickly.  I left the brass burner rings out after successfully bending one up, only to then  drop the pliers on it.
The WIP shots on the front page outline my painting steps in achieving a bit of tonal variation to the Light Gull Grey

Moving onto the decals, I didn’t apply any of the stencils. as photos of the actual jet showed very few.  The decal instructions call out the red turbine warning stripes to be placed along the jet nacelles whereas they should go around them.  That said, I forgot to add the stripes above the NAVY titles. I was disappointed the yellow border of the VF84 sash showed through the US star, I didn’t want to lay another start and bar over the top so left it as was.  For the other side I cut away the yellow border where from where the star and bar would overlay it.

 The Fightertown data sheet, whilst being quite comprehensive, does not include enough stripes for a full suite of phoenix, so I could only add the stripes which would remain the most visible, and with the stores fitted, the canopy was the only part left to fit.  The fit to the windscreen is not to my liking as there is a step and small gap as you can see, but at the rest of causing cracks to the canopy from forcing it, I decided to leave this too as it was.
The Jolly Rogers scheme is most attractive and I can understand why a lot of modellers choose it to adorn their Tomcats

F-14A Tomcat VF-84 “Jolly Rogers”  U.S.S Theodore Roosevelt  U.S Navy  1989


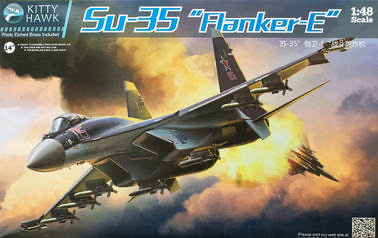
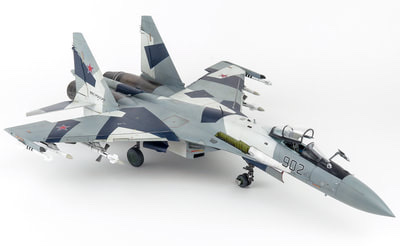
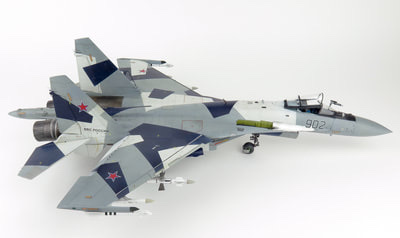
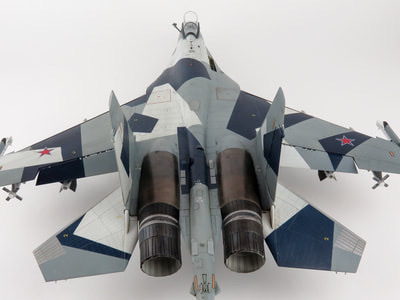
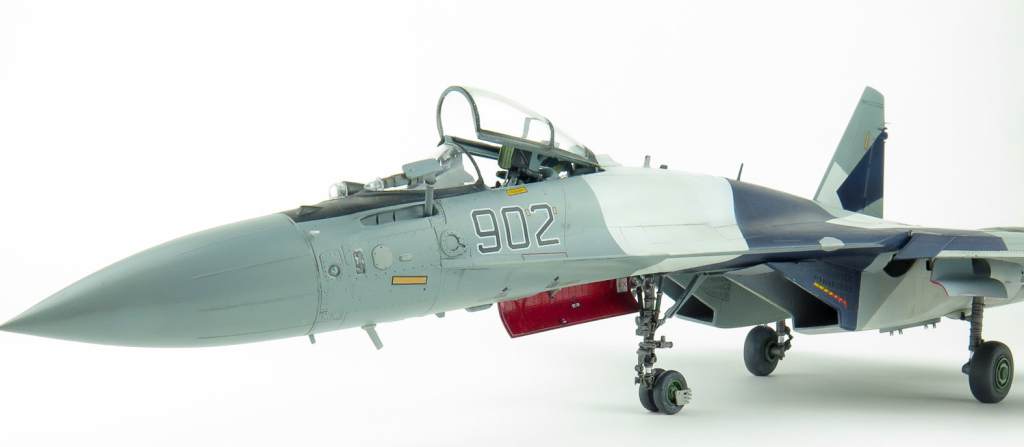
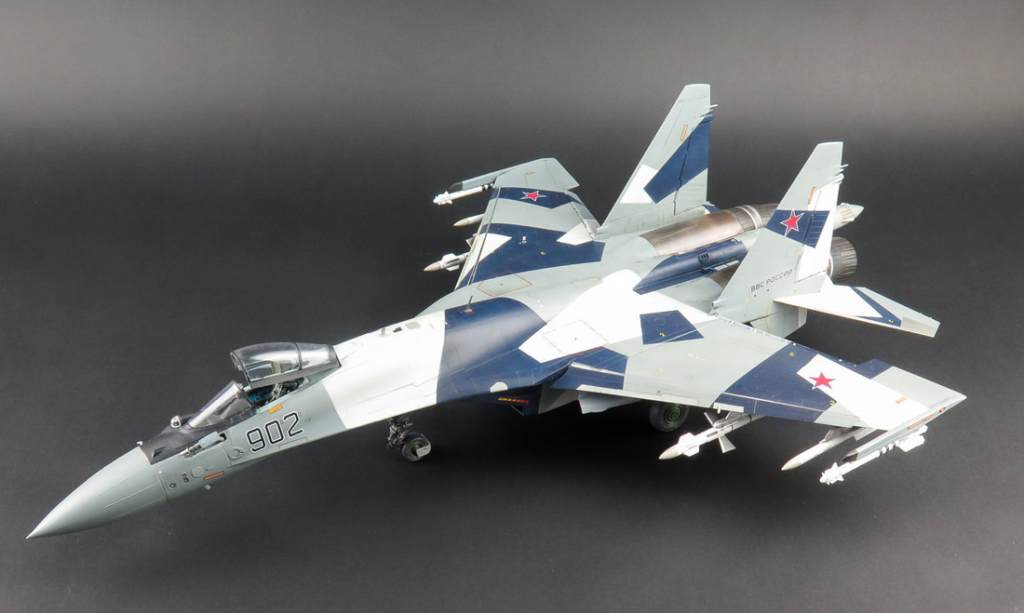
Kittyhawk 1/48 Su-35

  • Built: 2017
  • Aftermarket Used: A.M.U.R Reaver afterburners
  • Decals: Kit

This was another review I completed for The Modelling News
You can read the articles here, which covers construction and finishing of the model

Overall, I enjoyed building the model, and think it ranks as one of kittyhawks better models to date, only let down by the lack of drooped nozzles and being able to make a late version Flanker OOB. Well, that and the normal KH issues like poor instructions and could-be-better moulding . 

Really though, I thought KH might have started to overcome a few of these things by now.  That KH instructions continue to mis number parts or show them incorrectly is incredibly frustrating, and seems to just illustrate (excuse the pun) a lack of listening to customer feedback
  I cant comment on the accuracy, but nothing really glaring stood out to me.
Since I have completed this kit, Great Wall Hobbies have released theirs, and were I ever to do another, this is the kit I would choose, being superior in all facets, but I wont do another as one Su-35 in the cabinet is enough for me.
  This was also the first time I completely painted a model using Mr Color laquers, and I will certainly be using them again.  I have to say, the finished model looks quite striking in the cabinet due to its size and that colour scheme. 

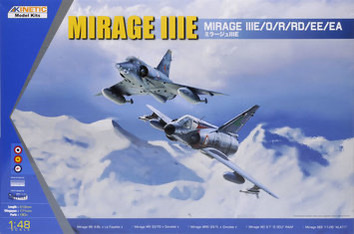
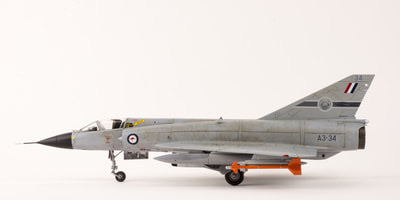
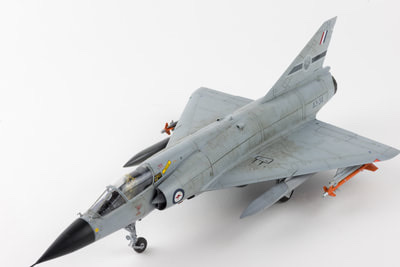
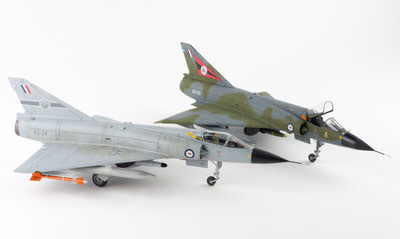
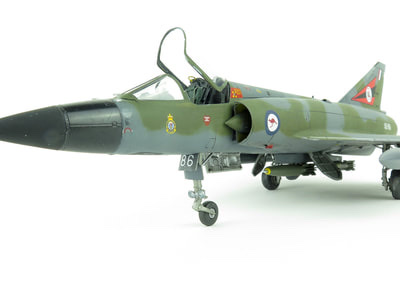
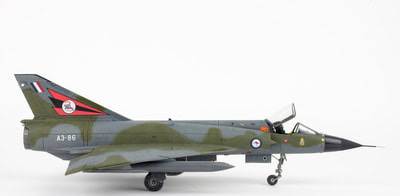
Kinetic 1/48 Dassault Mirage IIIO

  • Built: 2017
  • Aftermarket Used: Wheels-Resin art. Pitot Tube-Master detail
  • Decals: Caracal Mirages over Australia

The Mirage holds a favourite place in the hearts of many Australian Aircraft modellers, so there was much rejoicing when Kinetic announced they were releasing this kit.  Although in my opinion,  it renders the Heller and Italeri kits obsolete, moulding is a little soft and the fit is not the best. 
There is still room for the definitive kit out there. 
Two of my friends and I decided to build this kit as a challenge build to get judged at a show.  the winner gets to pick the next subject.  At least I finished this one, the last build – the Kittyhawk Jaguar- is still languishing in its box with broken u/c.  In a fit of insanity, I decided to build all three kinetic mirages in my stash.  two single seaters and a trainer, the trainer still needing to be finished as I’m a little “miraged out” at the moment.  The kit goes together quickly enough, but there are several traps  awaiting the unwary, and the moulding is quite poor for a kit released in 2015, mine having many sink marks and a lot of flash. OOB, the nose gear also has a little bit of an exaggerated backward rake.
With the two Caracal sheets, you can pretty much make any mirage in the RAAF fleet, wearing any of the many schemes it wore during its service life
 I found though, the caracal tail bands needed trimming for a better fit, and the blue in the roundels and fin flash is too vivid. 
Ronin Graphics also do a couple of very comprehensive sheets, that also allow you to build a few of the commemorative schemes.
In fact there  is a fair bit of AM around for this kit
And the winner of the challenge build?  Well, all three of us never managed to get to the show!

Dassault Mirage IIIO 77 SQN R.A.A.F Williamtown. Australia 1986

Kinetic 1/48 C.A.C Mirage IIIO

  • Date Completed;  December 2017
  • Aftermarket Used: Eduard interior set, Seat-Pavla MB4, Pitot tube- master barrel. Stores-PJ productions PM3 bomb rack, Hasegawa bombs, Wheels-Resin art
  • Decals: Caracal Mirages over Australia

The Mirage holds a favourite place in the hearts of many Australian Aircraft modellers, so there was much rejoicing when Kinetic announced they were releasing this kit.  Although in my opinion,  it renders the Heller and Italeri kits obsolete, moulding is a little soft and the fit is not the best. 
There is still room for the definitive kit out there. 
Two of my friends and I decided to build this kit as a challenge build to get judged at a show.  the winner gets to pick the next subject.  At least I finished this one, the last build – the Kittyhawk Jaguar- is still languishing in its box with broken u/c.  In a fit of insanity, I decided to build all three kinetic mirages in my stash.  two single seaters and a trainer, the trainer still needing to be finished as I’m a little “miraged out” at the moment.  The kit goes together quickly enough, but there are several traps  awaiting the unwary, and the moulding is quite poor for a kit released in 2015, mine having many sink marks and a lot of flash. OOB, the nose gear also has a little bit of an exaggerated backward rake.
With the two Caracal sheets, you can pretty much make any mirage in the RAAF fleet, wearing any of the many schemes it wore during its service life
 I found though, the caracal tail bands needed trimming for a better fit, and the blue in the roundels and fin flash is too vivid. 
Ronin Graphics also do a couple of very comprehensive sheets, that also allow you to build a few of the commemorative schemes.
In fact there  is a fair bit of AM around for this kit
And the winner of the challenge build?  Well, all three of us never managed to get to the show!

C.A.C Mirage IIIO(A) 3 SQN. Butterworth. Malaya. R.A.A F