
- Purchased: 2023
- Built:2023
- Enhancements:
- Gun Barrels: Karaya & Master Models
- Cockpit :Eduard Space 3D
- Wheels: Eduard Brassin
- Ammo feed chutes: Eduard
- Decals: ArtScale RAAF Mitchells Part 2
Hong Kong Models 1/48 B-25 J comes in a box adorned with some nice art work that is also provided as a poster inside the box. Surface detailing is by way of petite engraved rivets that unfortunately fade away slightly at the fuselage centrelines . Amongst the 249 parts are options for different shaped bullet deflectors for the upper fuselage, a top turret or, if you’re building a Mitchell without a top turret, a blanking plate and separate cheek armour if you want to build an early J that was not fitted with the additional armour. Two different fits of fixed nose guns are also provided.
The kit can be built with flaps, boarding steps and landing gear up or down. Cowl flaps can only be shown in the open position, although Quickboost do make cowlings with closed flaps.
Interior detail is adequate for what will be seen with parts for the bomb aimer’s position, cockpit, top turret and tail gunners position. A bomb bay and bombs are supplied although there is no mid fuselage detailing around the waist gunners stations. If you want to add the ammo feed chutes, they will need to be sourced from an aftermarket set.
I found the fit of all parts excellent, with the tailplane, fins, and nacelles being a push fit. The engineering is spoilt though by the requirement to fit the landing gear early during construction. If I were to do this kit again, I would modify parts F24 and 25 by cutting the pointed ends so that the struts could be added later. Same with the nose gear part E32. I would just cut the end off the drag link, so that it could be fitted later.
Despite me protecting the front leg with a protective sleeve of foam, I still managed to break it off accidentally manhandling the model around the bench. Bras rod was used to replace the broken oleo, which also lent more strength to the part, so not a total loss, but annoying nonetheless
Although the gear locates solidly into deep sockets, the model still rocks slightly on its gear. Possibly due to the soft plastic, perhaps if they had of had the drag links also locate into sockets as well, the model would sit more solidly. The supplied nose weight fits quite cleverly underneath the cockpit to form the tunnel. No other weight is required.
Construction Notes
The Eduard seat belt set only included lap belts, I added the kit PE shoulder belts as I felt they would have been fitted at this late stage of aircraft development.
When building the bomb bay, fit part E45 during final assembly, as otherwise the arms will get broken. The kit bomb fins are rather thick, As you won’t see them, I left them as is, rather than bothering to thin them or replace with PE.
As mentioned above, I would modify the landing struts so that they can be added after painting.
This is one of those kits where you are required to follow the assembly sequences as set out in the instructions. I deviated by adding the cooling flap rings to the cowls which then made inserting the engines harder. The engines as provided were adequate, but can be dressed up if you want to add ignition wiring, etc Alternatively, if your name is Sam Dwyer, and you like to buy every piece of available aftermarket for a particular kit, Quickboost make resin items 😀
The landing light glare guards part EP4 were left off my model as per reference photos I looked at. There are two scoops provided in the kit that locate into shaped cutouts in the cheek armour plates. They are pictured in stage 35, but not called out in the instructions, from memory they were parts E58 and 59.
The kit wheel treads are a bit rubbish, so best replaced with AM ones. If you are replacing the kit gun barrels with brass ones (and why wouldn’t you!) the breech holes will need drilling out slightly, lets take a moment here to recognise HKM for providing separate barrels as this certainly aids painting. Ensure though that the waist guns have been securely glued to their mounts. One could also add PE ring sights as they would certainly be visible from outside.. All the transparencies fit very well, although I have a slight step on one side of my nose, which could have been minimised with more care on my part.
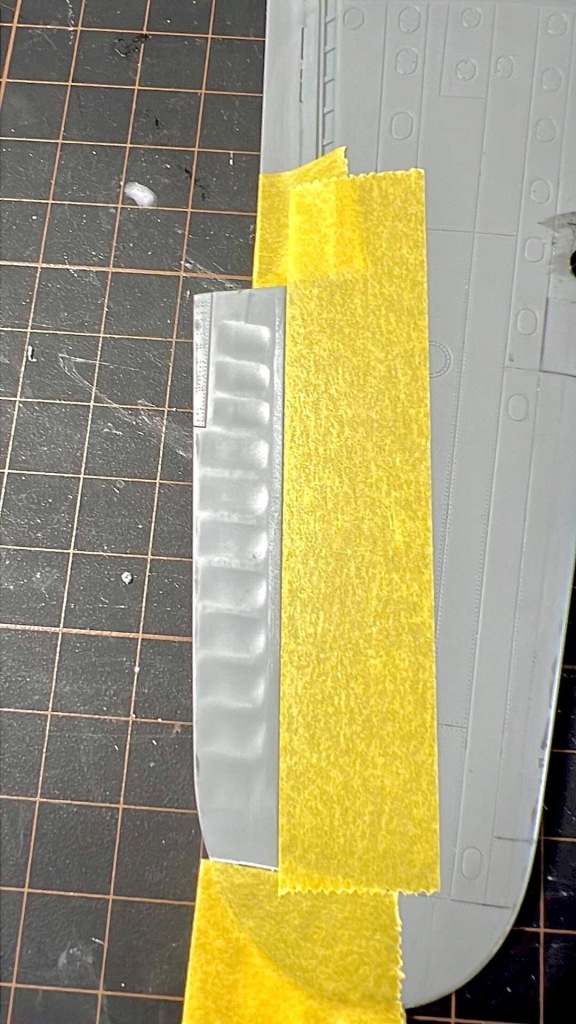
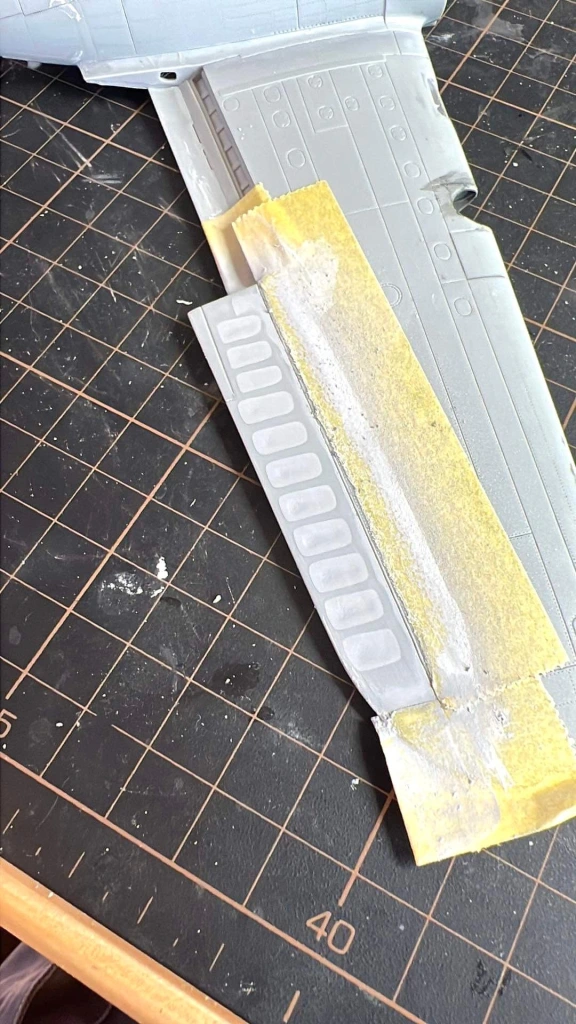
I was unhappy with the kit replication of the fabric ailerons. The elevators and rudders are fine, but the ailerons….not so much. I masked them off, then sprayed several coats of Mr Surfacer 500 primer to build the depressions up before sanding them flat. The rib tapes were simulated with tamiya tape. Although I think they look better than what was provided, Im not sure the effort was really worth it, having seen a few other built examples on the net. They don’t look too bad under paint.


Rivetting along the centre seams of the fuselage will need to be reinstated with a rivet wheel after the seams have been cleaned up. The wings can be left off to aid painting. Dry fits showed they slid easily into position, and more importantly, could also be easily removed. I also left the vertical fins off to aid painting. The fit is that good, so they were not added until very late in the build during final assembly. This makes the model a lot easier to handle. Still didn’t save that nose leg though!!
Painting, Decalling and Weathering
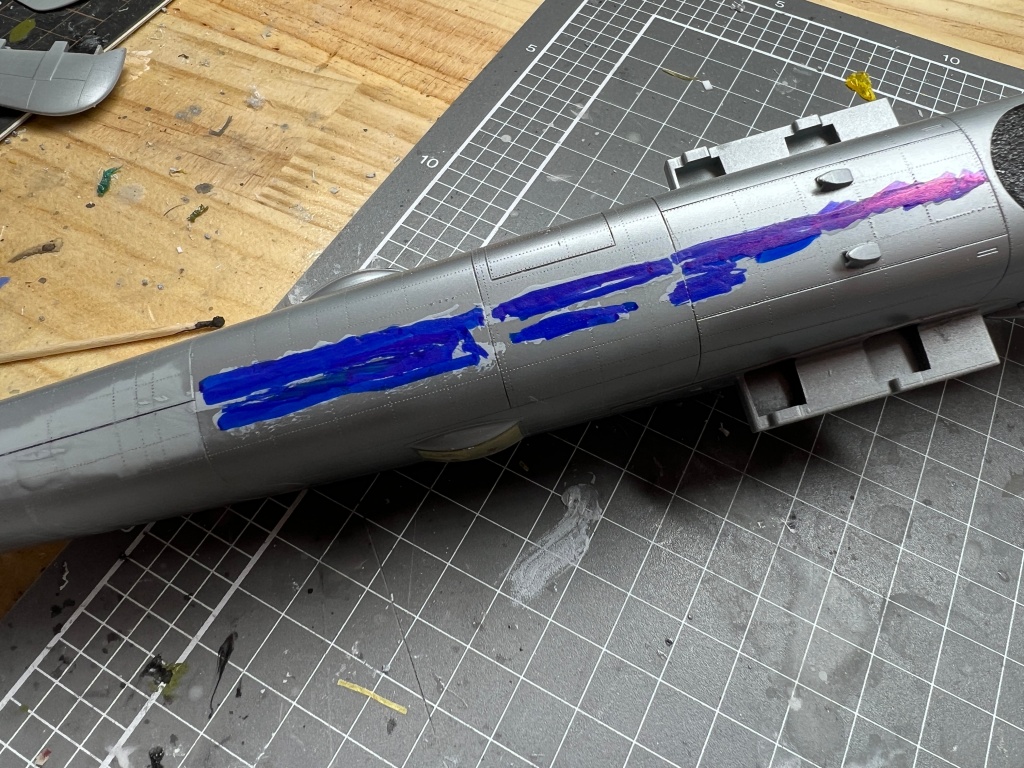
I wanted to try some hairspray chipping on this model, so first a base coat of Alclad Aluminium was laid down over the wings and engine cowlings where most of the chipping would be done. Two thin coats of generic hairspray were then sprayed over this before a coat of AK Real Colours OD was sprayed over the whole model.
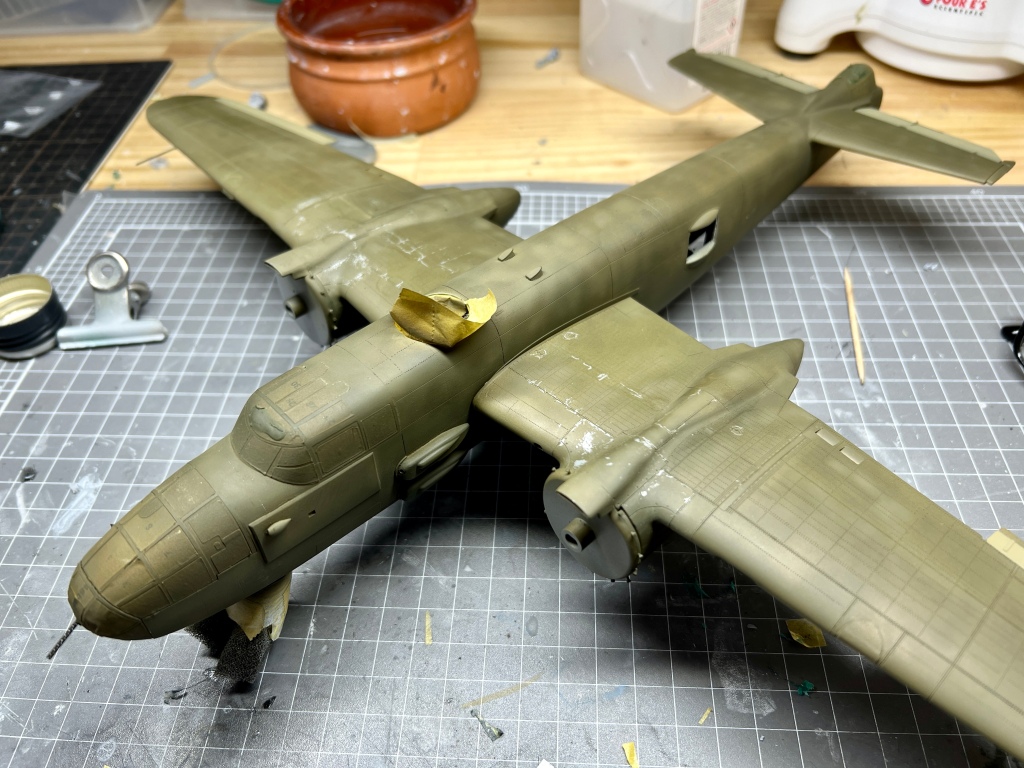
AK RC faded OD was then sprayed over the model, leaving the dark OD under the wings and tailplane. Dark yellow was then added to the faded OD and this was further mottled over the upper surfaces of wings, tailplanes and fuselage. Fabric control surfaces were masked off and hit with the faded OD, this time mixed with a decent dollop of tamiya deck tan.
The undersides were then sprayed MRP matt black with the demarcations done freehand. No fading was added to the undersides, I would be relying on washes to give it a faded dusty look.
Once I had the basic colours blocked in, I took to the fronts of the cowlings and upper nacelles with a stiff damp brush slowly chipping away the OD to reveal the underlying silver. This was the first time I had tried hairspray chipping on an aircraft, and I’m not satisfied yet that it’s the best technique for aircraft chipping, certainly for small areas of chipping, Its a technique that definitely needs more practice on my part though.
I do think the silver pencil still offers more control.
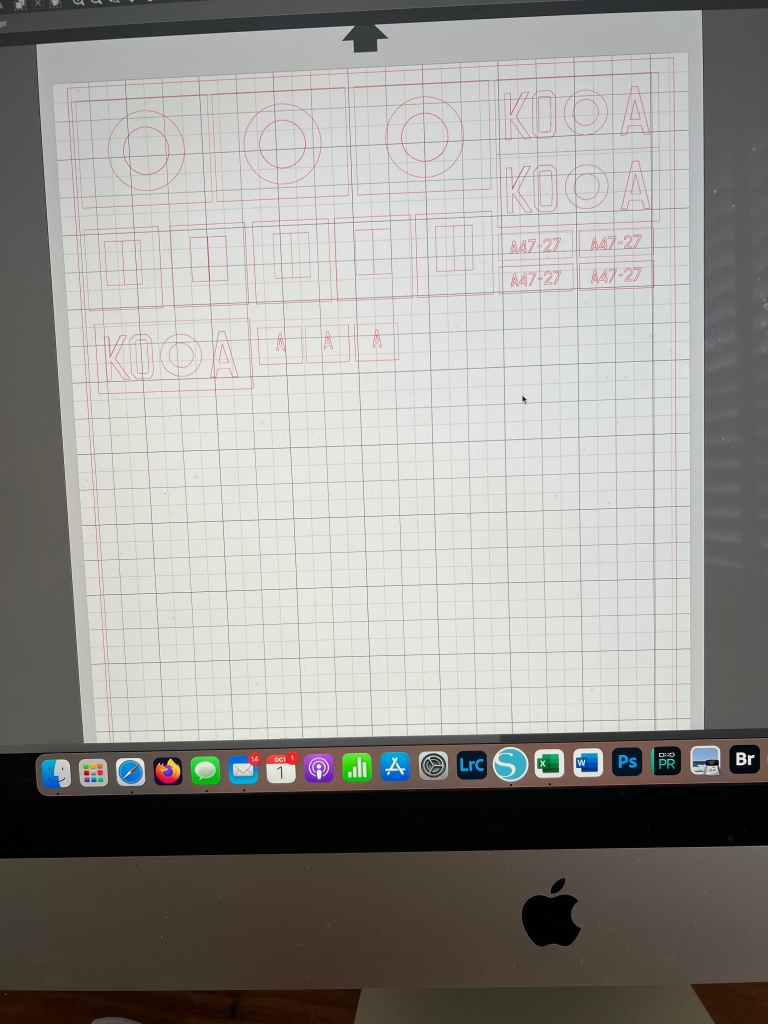
WW2 Royal Australian Air Force national markings being fairly simple, lend themselves to being painted, so the roundels, fin flash, codes and serial numbers were scanned into my silhouette software and masks cut using the last of my Oromask.
The two machines on the ASL sheet have had their neutral grey undersides overpainted in black for night intruder operations, One of them, which was my original choice had the black painted hallway up the fuselage and nacelles rather than the normal demarcation line. sadly the one photo I could find of this aircraft , although of poor quality did not seem to show the high black sidesInitially my desire was to do the aircraft with the black undersides that reached midway up the fuselage, however then one photo I could find of this aircraft, although of poor quality seemed to contradict ASK’S drawings, with the fuselage painted with OD down to the usual demarcation. Certainly the tail fins did not look black. Shame, as I quite liked this scheme as drawn.
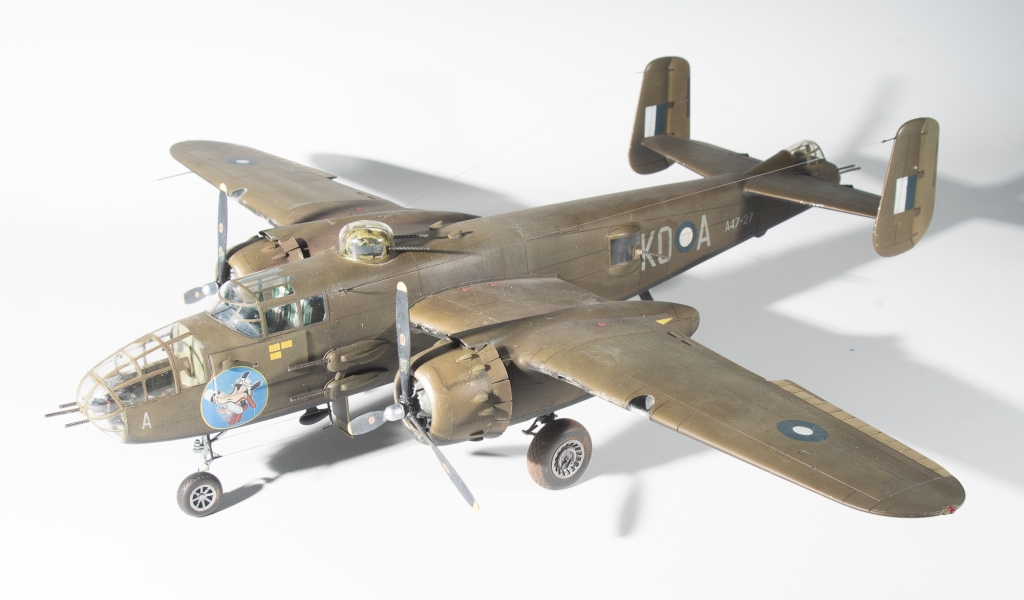
With the reasoning for my initial choice disproved, I turned to the other subject on the sheet. This in addition to the black undersides, also had nose art , although much later on I found , again. Artscales decals had probably got the background colour on this wrong too.
With the masks cut, a mate suggested that I first print them out on paper to check sizing. This was an excellent idea – thanks Calum – as it brought to light all of the decals were slightly too large according to photos of the actual machine. Subsequently, the masks were reduced size a bit. This is one of the advantages in using masks over decals.

,
Once the masks and decals had been applied another sealing coat of gloss was applied ready for the wash, which in this case was a brownish black shade of oil paint.
Once dry and the excess wiped off, a coat of semi gloss was applied ready for some oil paint weathering, semi gloss being used as the oils seem to blend a bit better over this. The problem was though, the only semi matt I had was a old bottle of low sheen Klear Kote by Alclad. This smelled like it was an enamel product and never really seemed to dry to a hard shell. Picking up the model, it remained , not tacky, but not dry over the course of a week until I dullcoted it. Even now, handling the model, my hands do not came away cleanly.
The Alclad went in the bin. This would be about the third Alclad product I have used that has not performed properly. They definitely seem to have a shelf life, well the clears and primers do!
The result of all this was, despite the matt coat, holding the model for any length of time seemed to pull away the matt coat, which led to a very truncated weathering session and my enthusiasm for the project being severely dented. Exhaust stains were sprayed on in thin coats, although looking at them, I wish I had used a darker shade. The pitot tube was replaced with Albion Alloy aluminium tube. On the underside the ADF football aerial was attached with some brass rod to secure it firmly in place. Brass rod was also used to replace the plastic pole aerials as I thought this would provide a stronger base for the EZI line strung between them. Aerial fairleads were also fashioned from brass rod for the tail fins and fuselage, Landing gear doors and actuator struts located securely to the nacelles and nose. Finally, the Karaya barrels were added to the gun positions, and the Eduard wheels glued on One gripe with these. The wheels are marketed as for use on the HKM kit, yet the axle holes required significant enlargement to take the HKM axles. If you are going to market an accessory as for a particular kit, then make it so that it is a drop fit for that kit and does not require modification. Eduard have form for this, especially their wheels. I would not be surprised if these are just their wheels for the Monogram kit, but with new packaging.
Finally, the transparencies were unmasked and to my horror, there was a lot of fluff on the inside. Most of the canopy fluff was removed by way of poking a bent micro brush through the top turret hole. I managed to pry off the nose cap as I had just used PVA.but in removing some overspray with a thinner dampened cotton bud, also managed to remove a swipe of paint off the nose . 50 ammo cans. Naturally I didn’t notice this until I had refilled the nose cap, this time with tamiya glue. Guess this model won’t be making the competition table after all.
Conclusion
I thoroughly enjoyed this build, All errors were of my own making. Lessons for me from this build were I still need to add as more parts like the wingtip lights that form part of the structure before painting, so that they can be properly faired in. My wingtip lights look like the late after thought they are. I also need to take more care with these bomber type aircraft to ensure fuselage openings are better sealed to avoid sanding swarf getting in.
Weak points of the kit though, are the exaggerated fabric effect on the ailerons and the ridiculous engineering that means the landing struts need to be added early in the build. Location points for the aerials and upper turret bullet deflectors also were non existent, which didn’t help with exact placement.
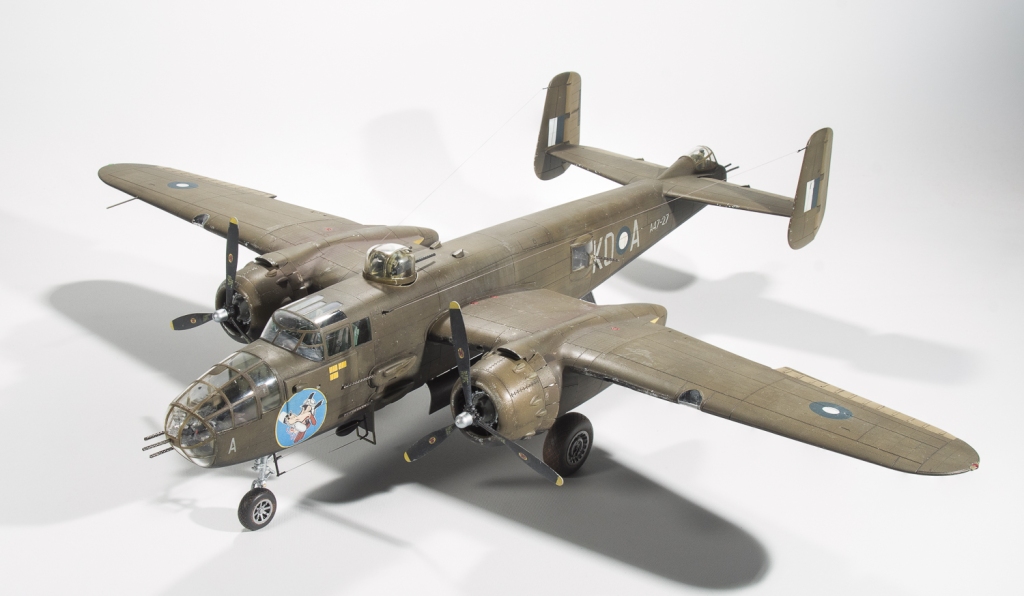
For my money though it leaves the Monogram kit in its dust, as it should. Yes, its twice the price, but in this instance is twice the kit. I will definitely be buying the solid nose strafers when HKM get around to releasing them. If using the ASK decals, do beware they are not the most accurate decals on the market in this case.
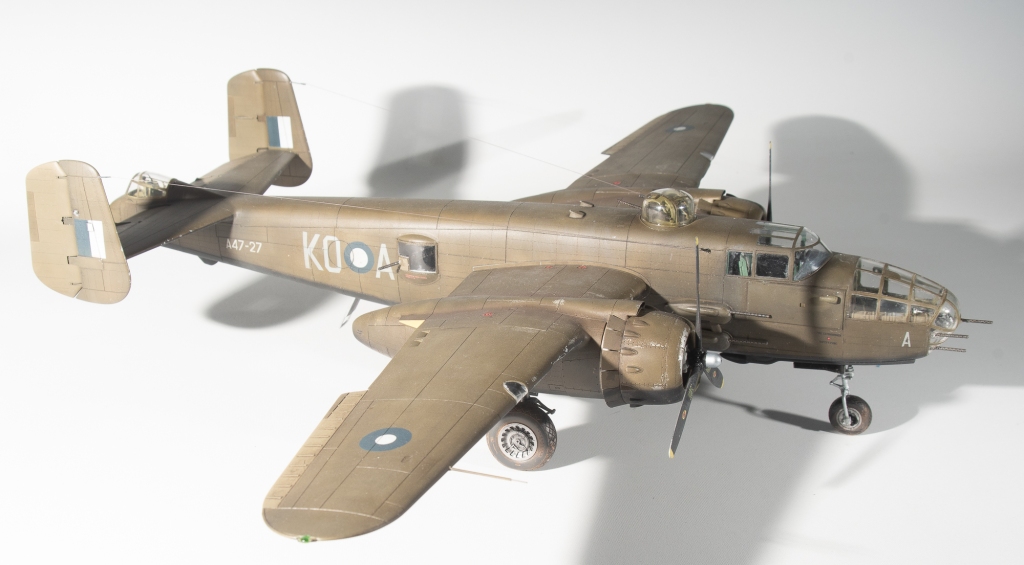
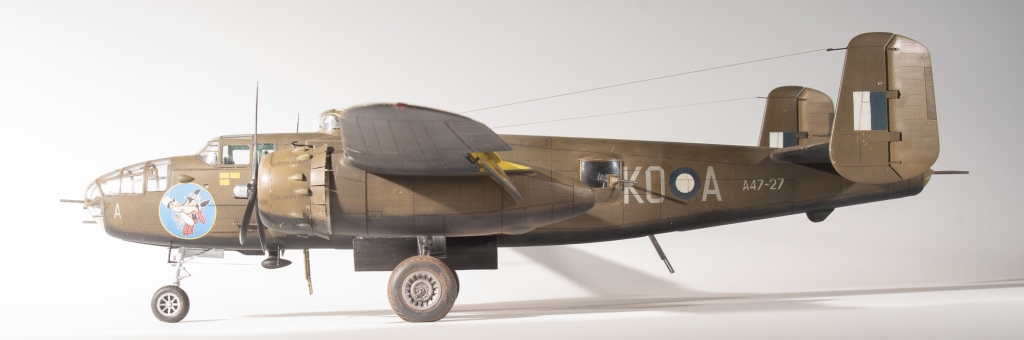
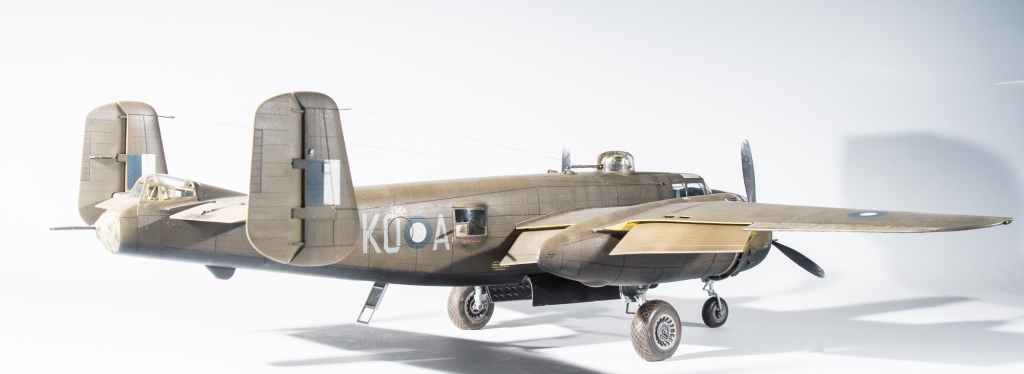
N.A.A B=25J Mitchell. 2 SQN R.A.A.F Hughes Airstrip. Northern Territory Australia 1944.


Leave a comment