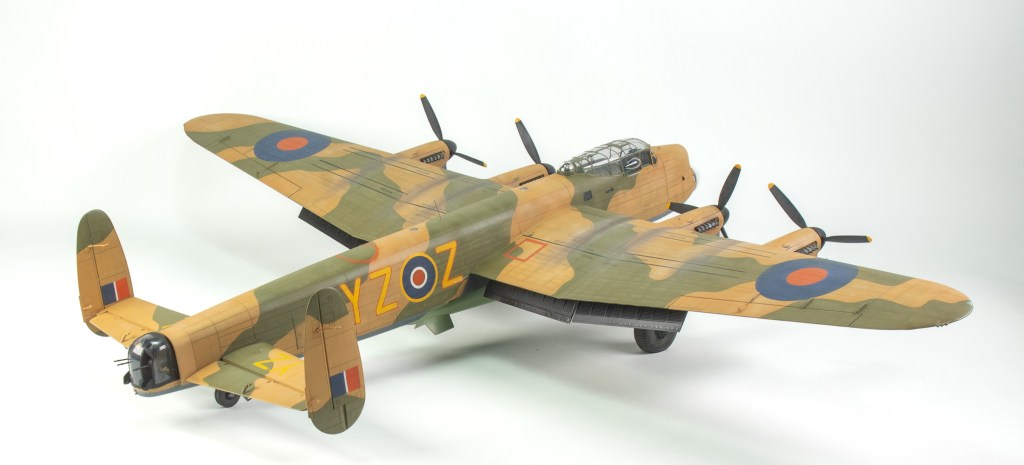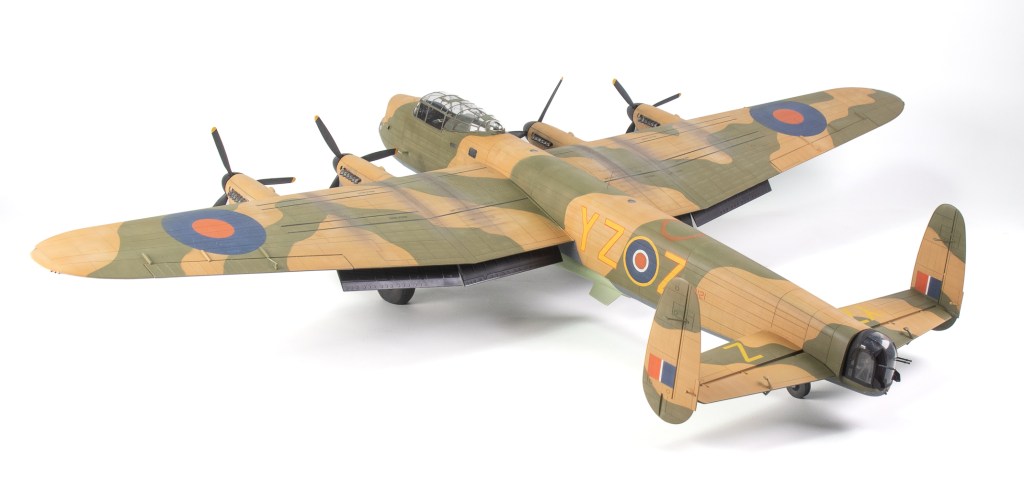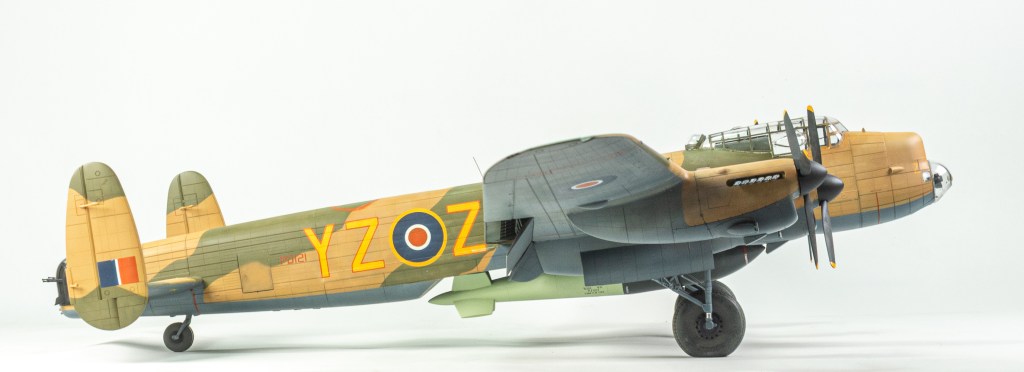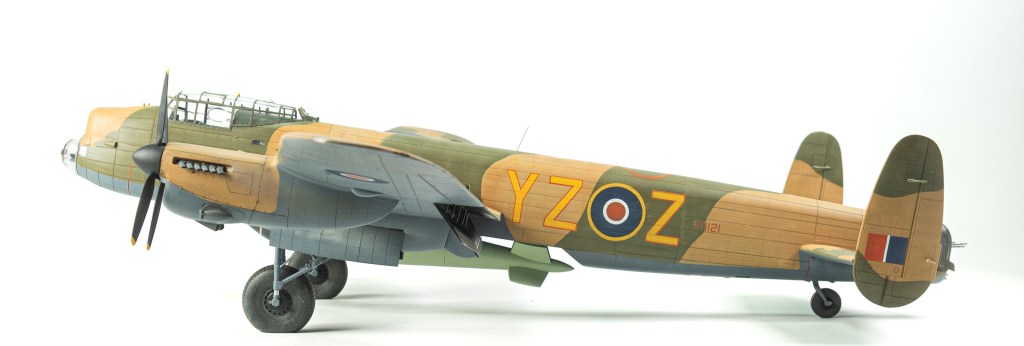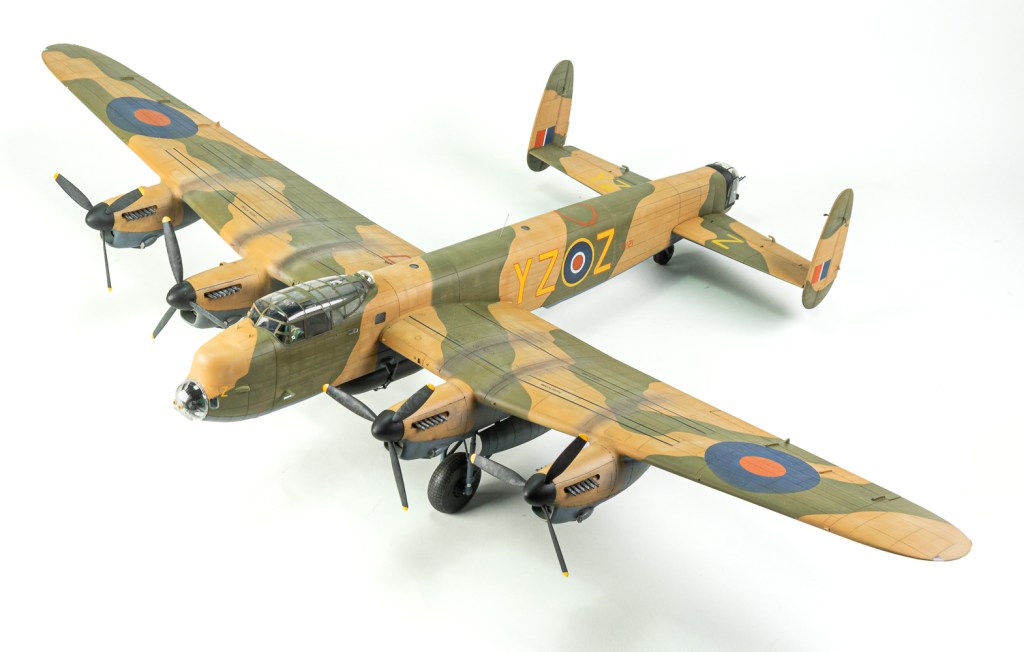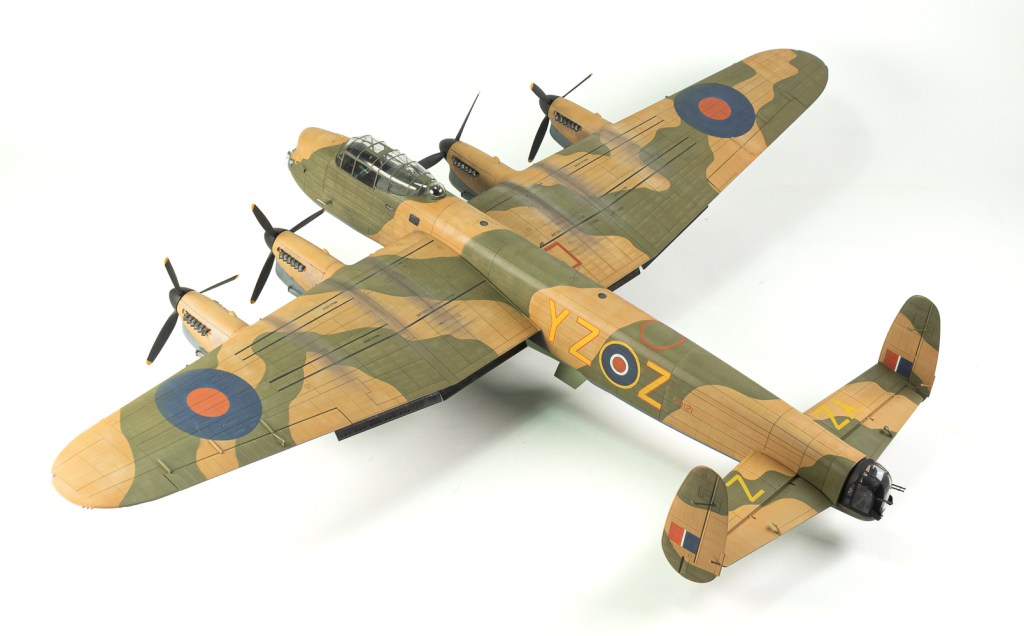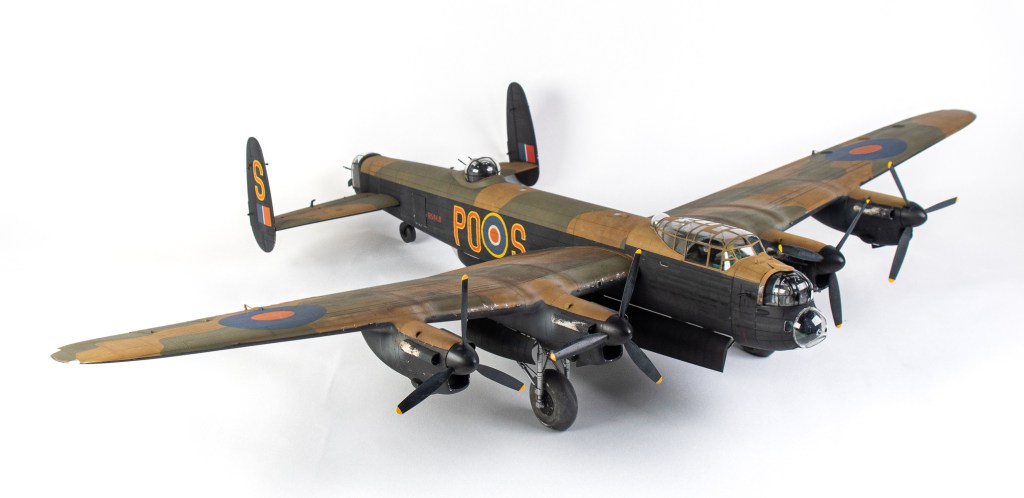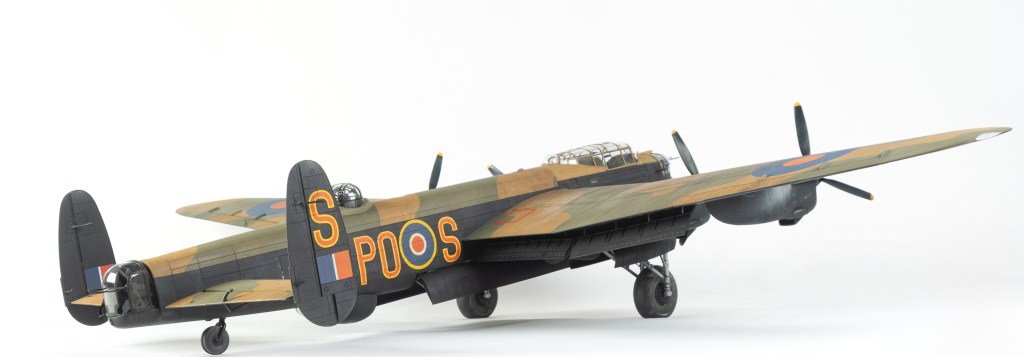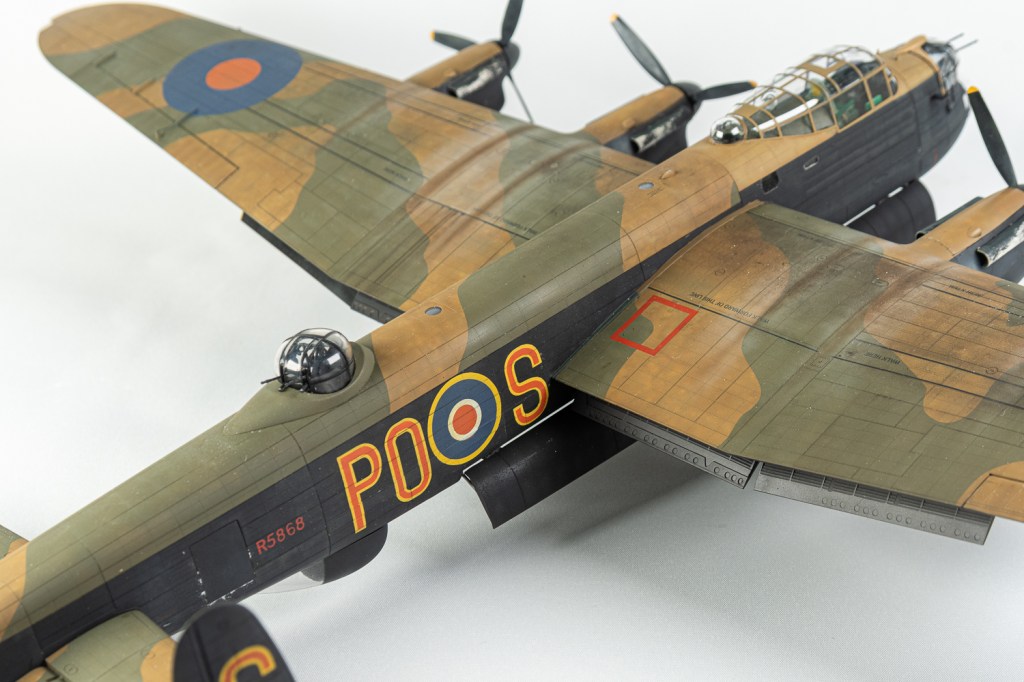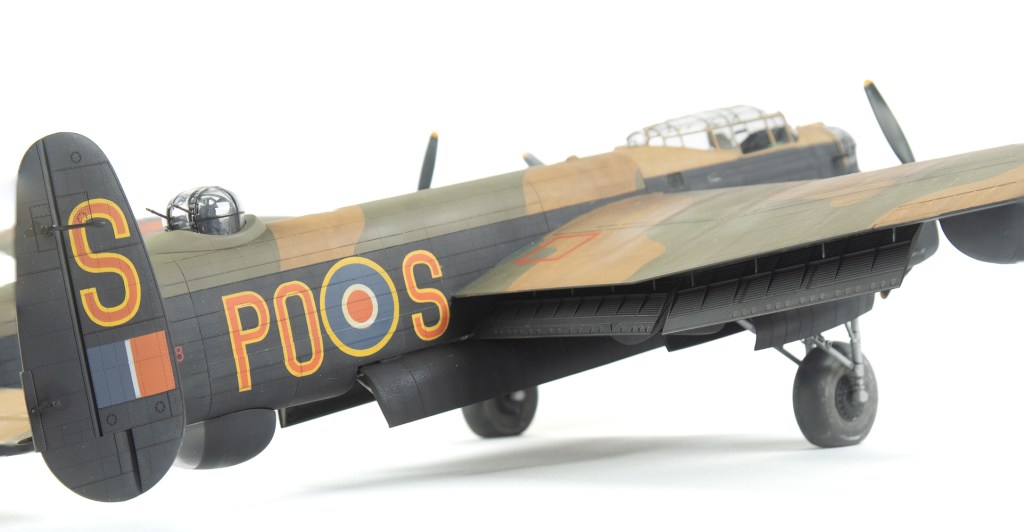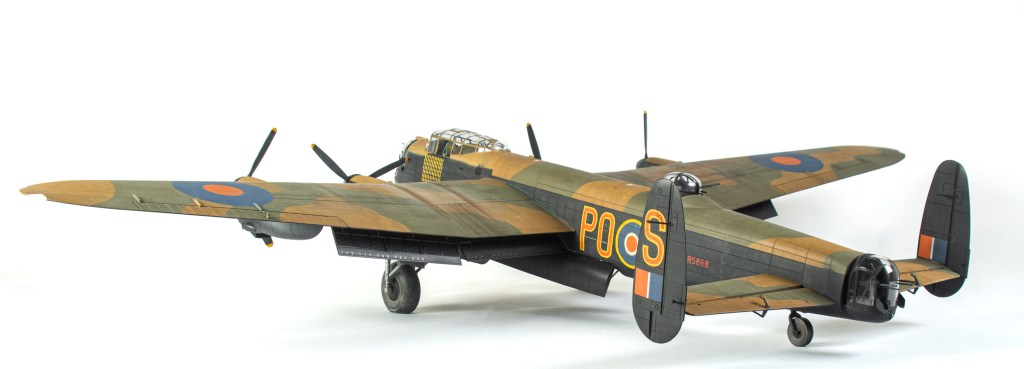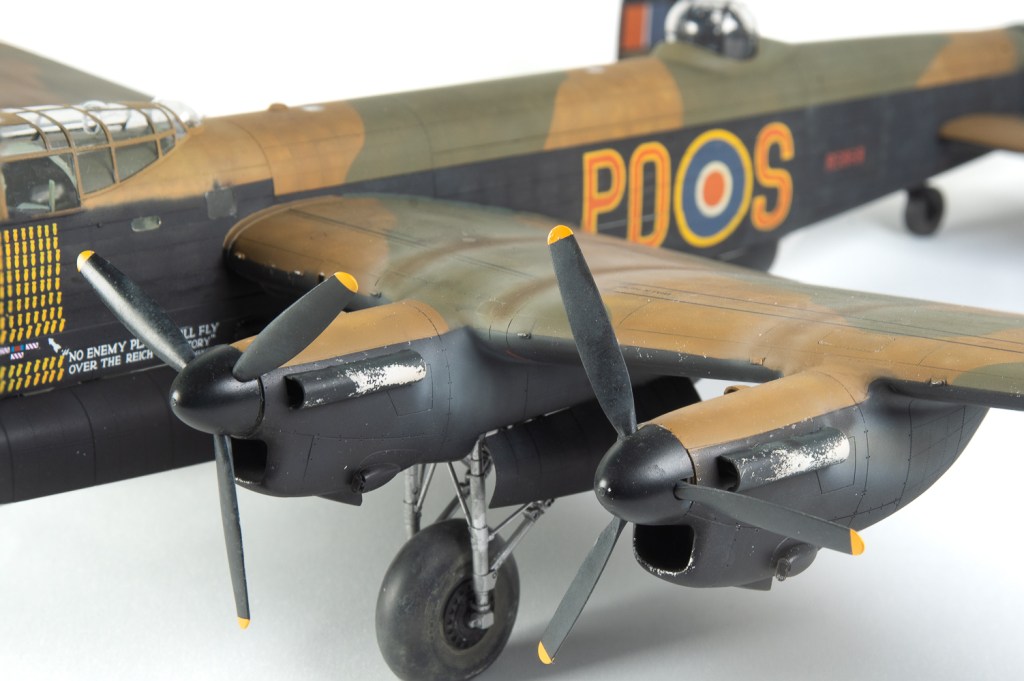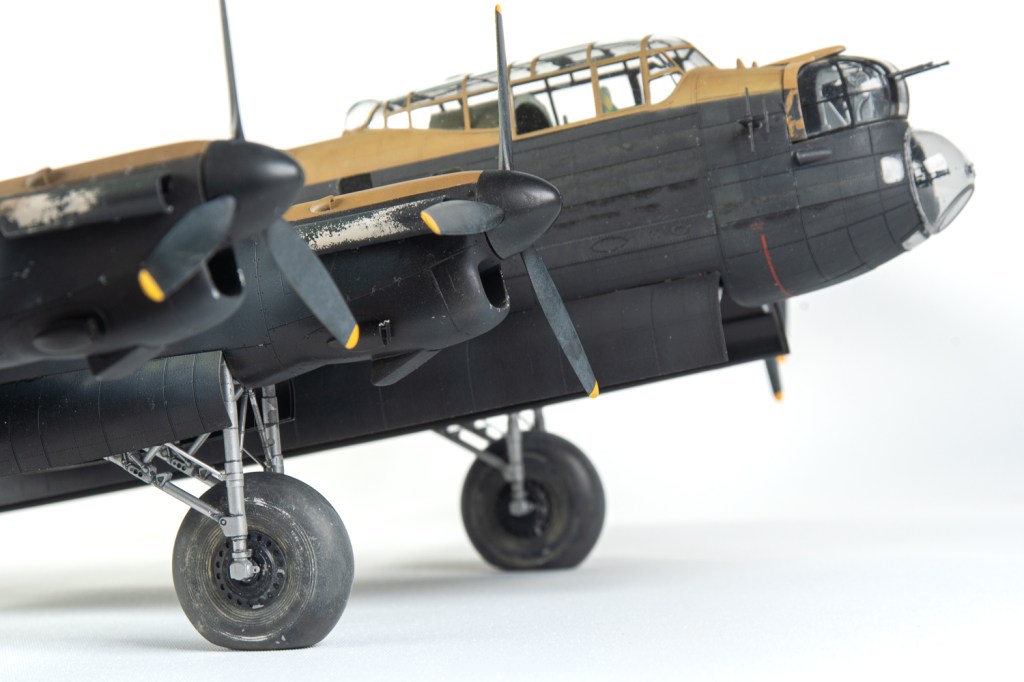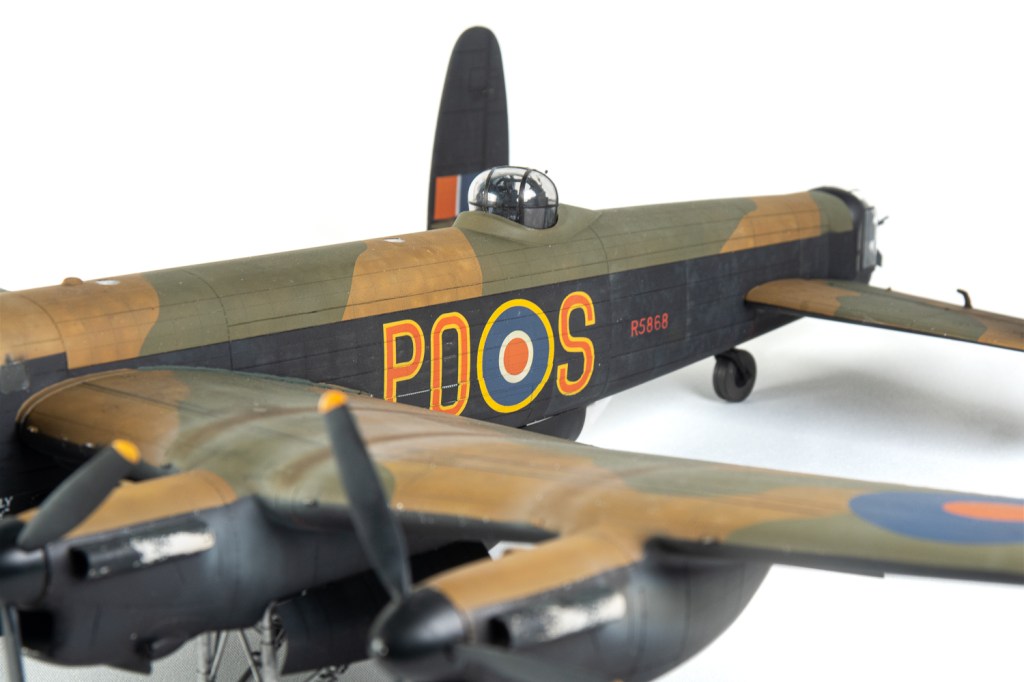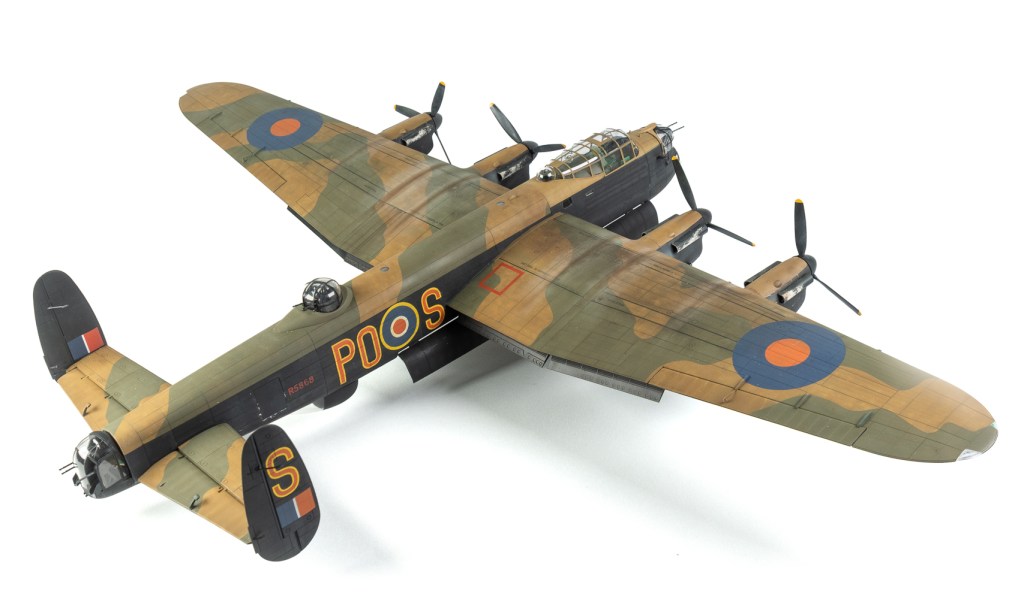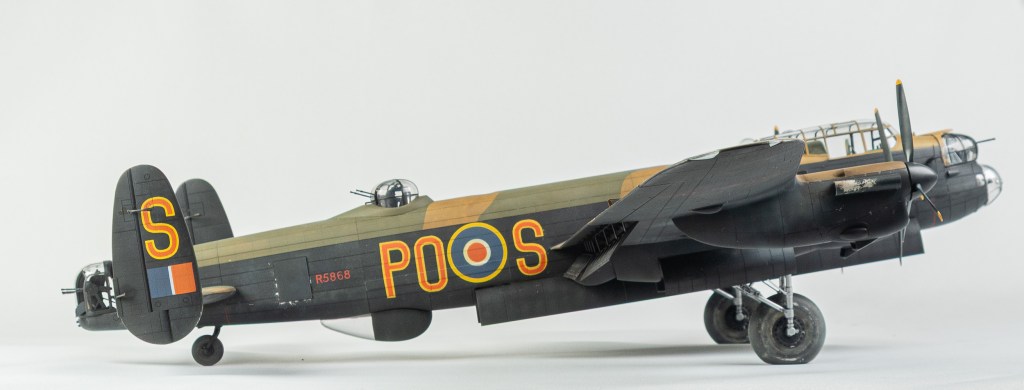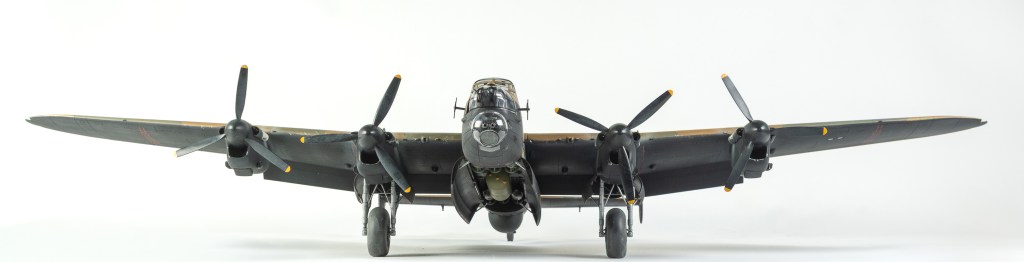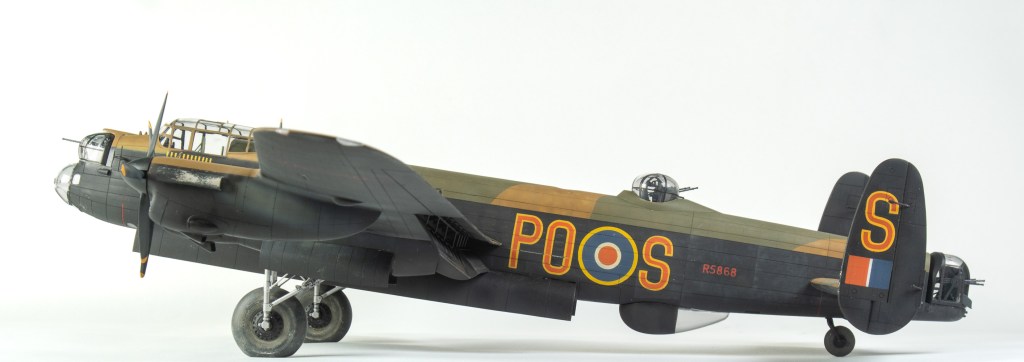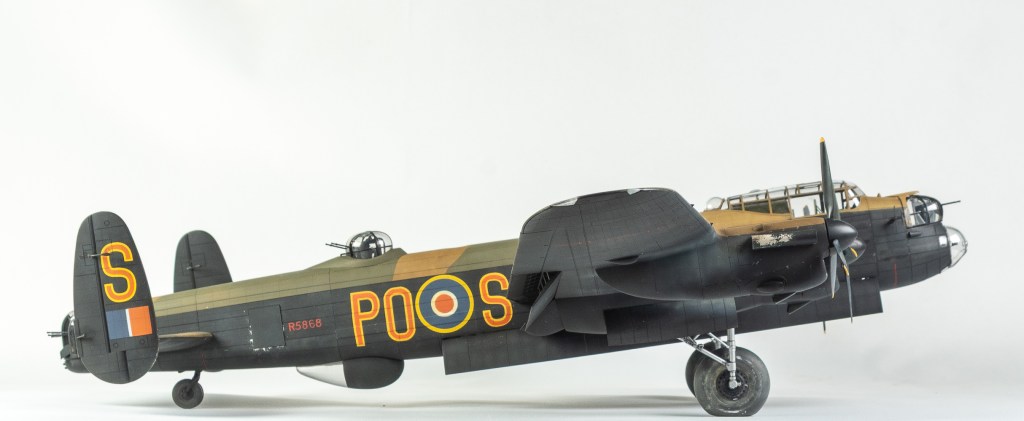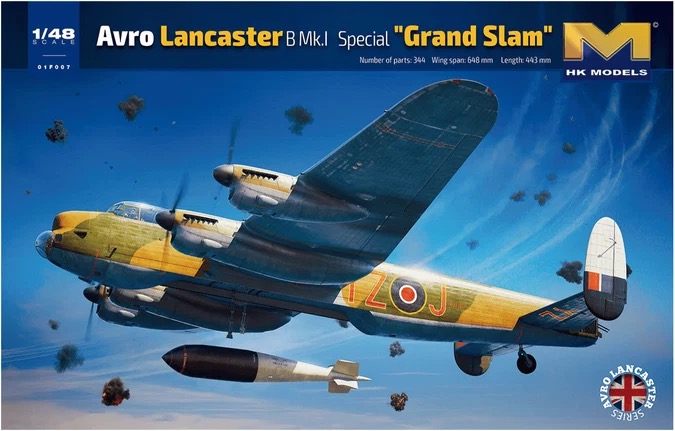
HKM 1/48 Lancaster B1 Special “Grand Slam”

  • Purchased; 2024
  • Completed; 2026
  • Enhancements;
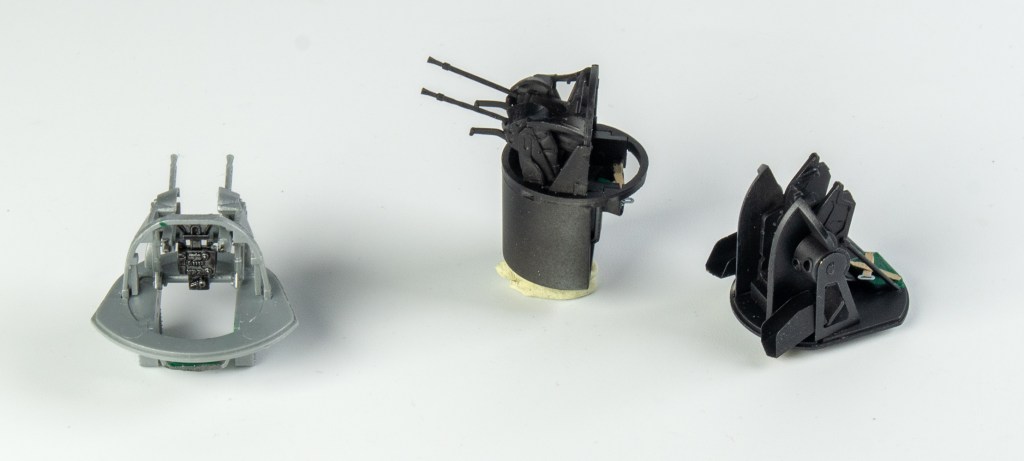
  • Gun Barrels- Quickboost
  • Exhausts-CMK
  • Seat belts- Eduard
  • Wheels- Armory
  • Decals – combination of 1man Army and home made masks

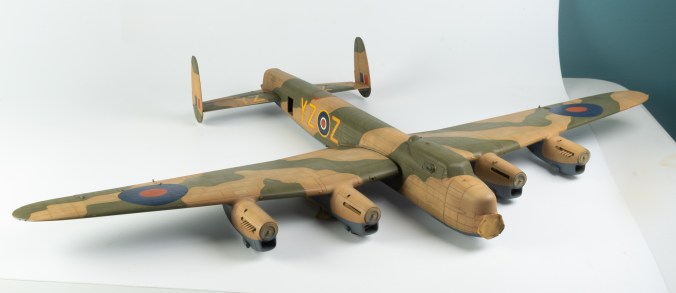
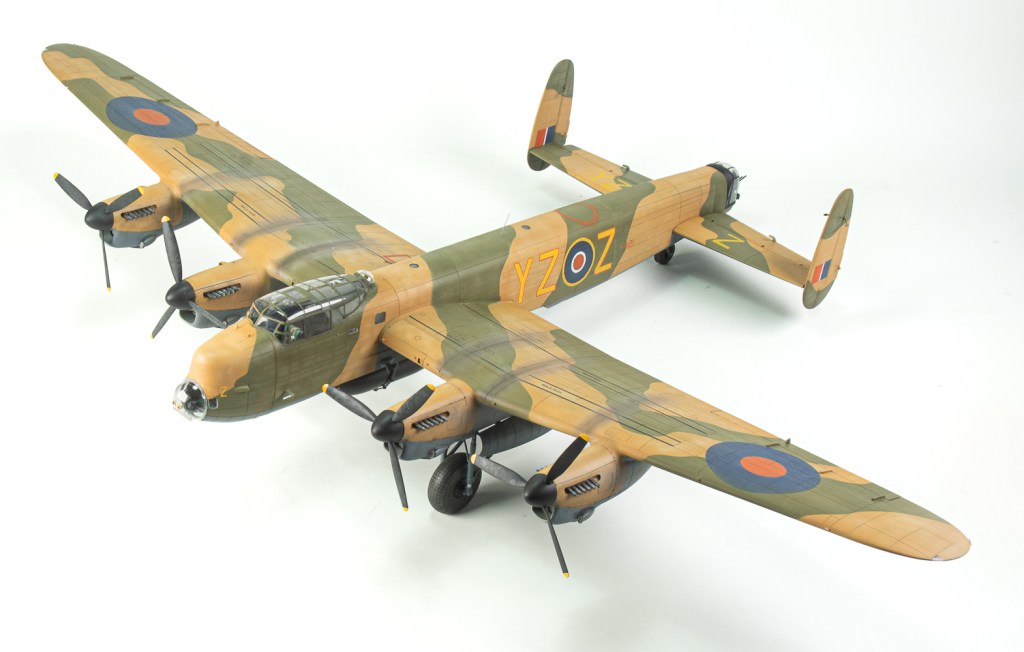
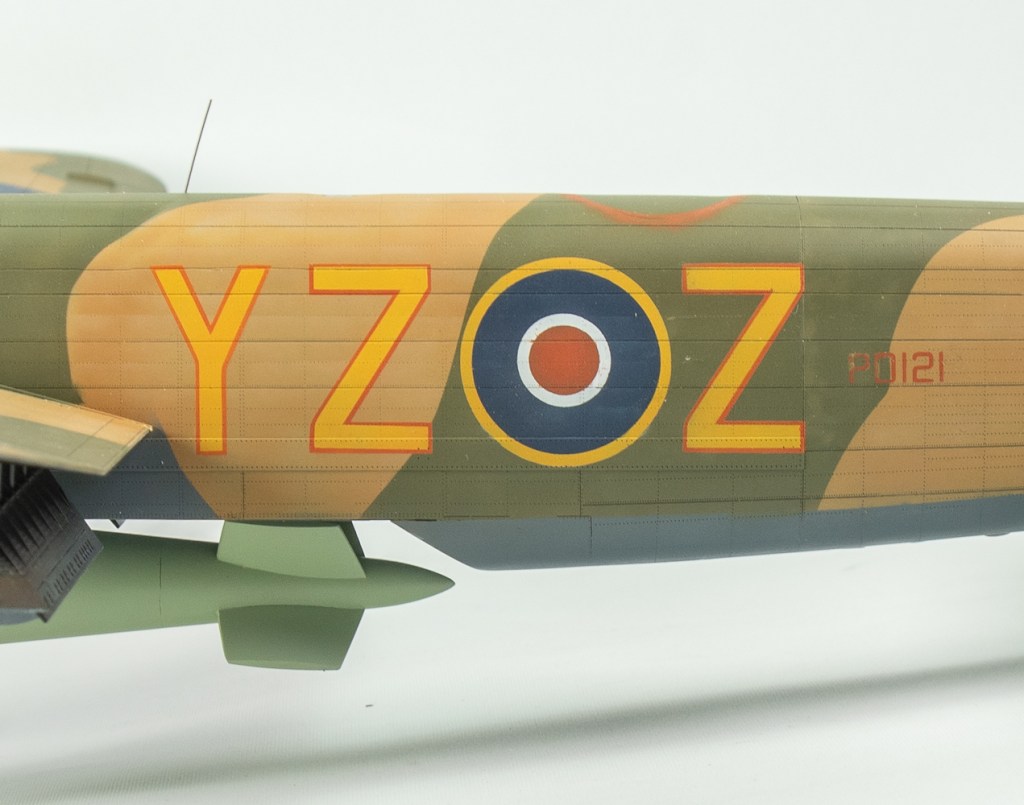
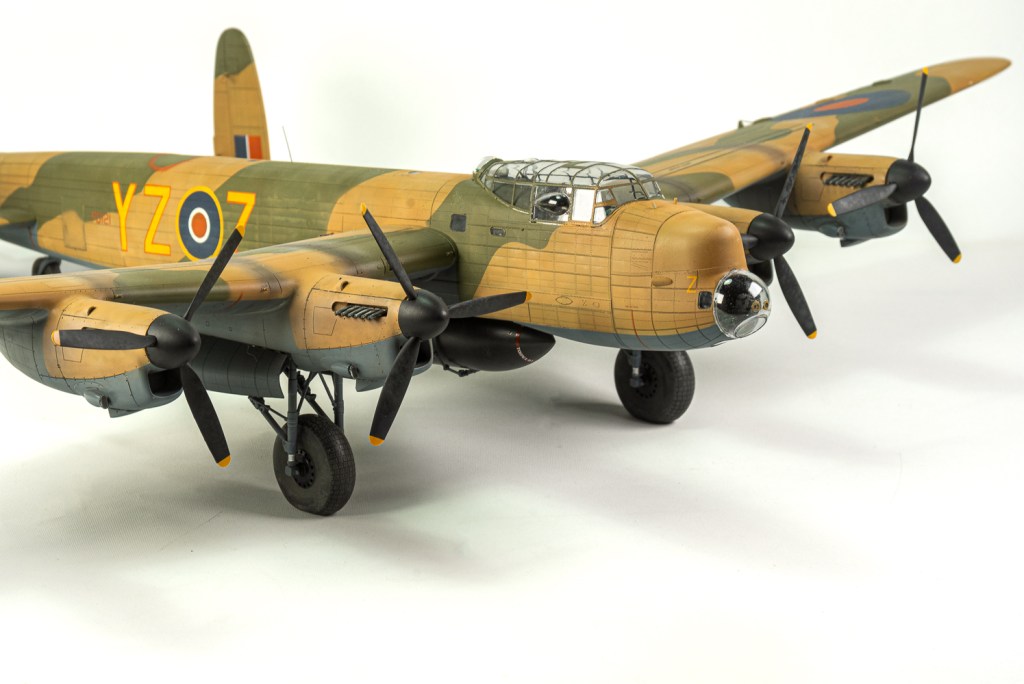
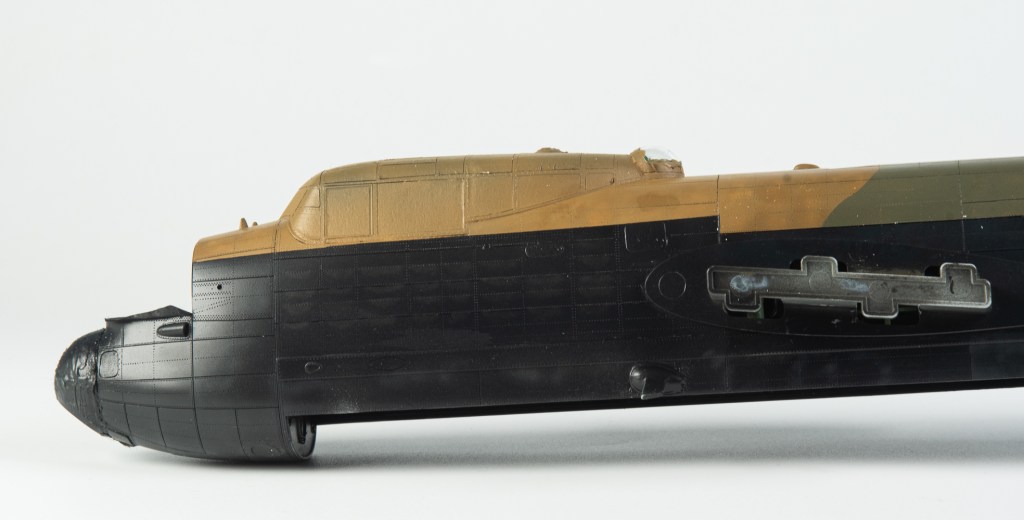
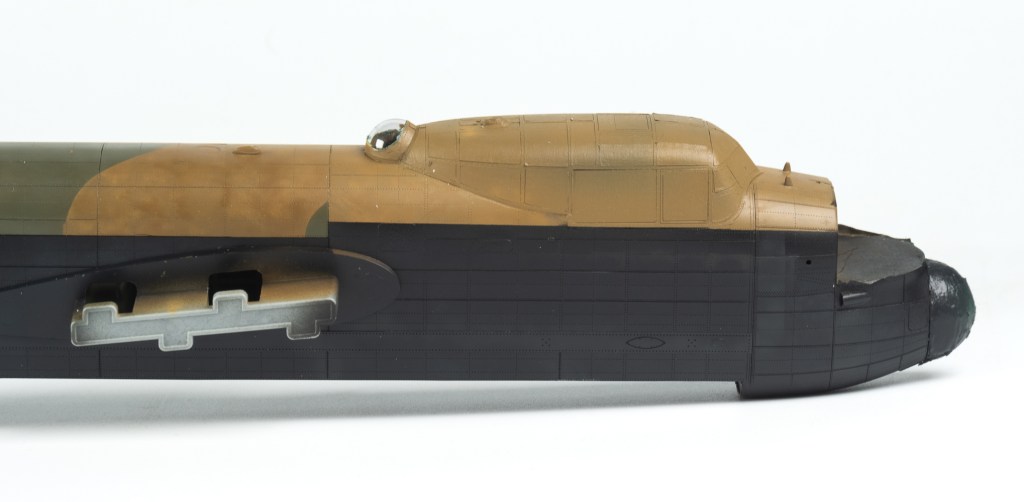
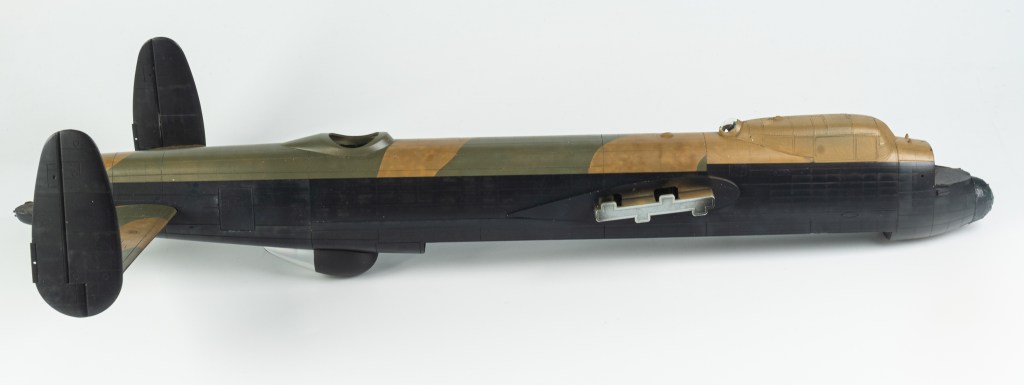
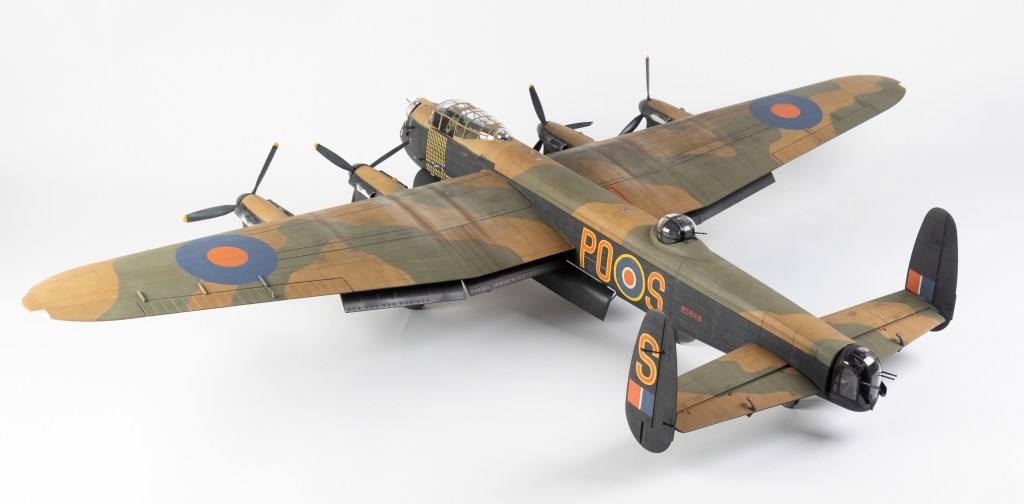
The reasoning behind my decision to make two 1/48 Lancasters at the same time must surely rate as “It seemed a good idea at the time”. It also sounds like it would be a long involved 6 month slog a build. But it really wasn’t that onerous or painful to be honest. In major part, due to the not-as-complex-as-it-looks HKM kit. The main reason for this build was an old ADS decal sheet I unearthed whilst researching my other Lancaster build One of the schemes was a post war Lancaster in Light Earth and Green with Ocean Grey undersides and red outlined yellow codes, the opposite of the normal yellow outlined red codes that came into being in 1944.

This scheme quite appealed to me as it would really ring the changes of the Grand Slam model when placed alongside my previous build.

Construction Notes

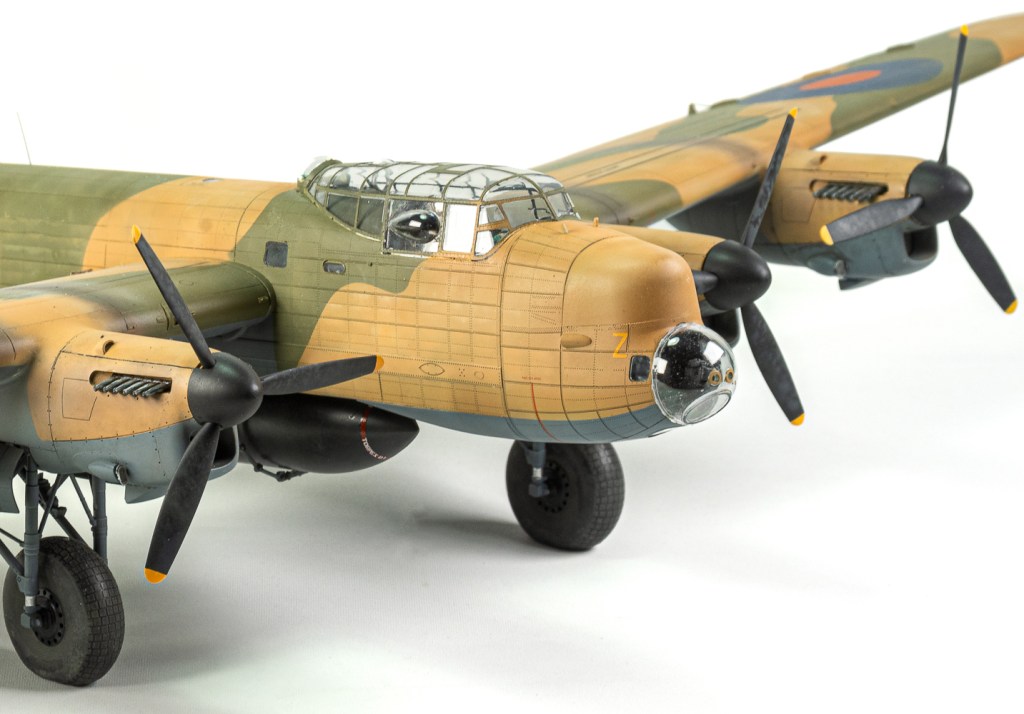
Nothing too different here compared to the other Lancaster obviously. HKM have done a good job calling out the Grand Slam specific parts in their kit, and noting any modifications needed such as cutting off the head armour on the pilot’s seat. It would have been nice if they had included the Stabilised Automatic Bomb Sight though as this was fitted to all B1 Specials. It and its associated supports are very noticeable in all photos. Also missing but needed for the B1 Special is a canopy with the tall astrodome. Whilst addressing the SABS, the kit astrodome was not modified.

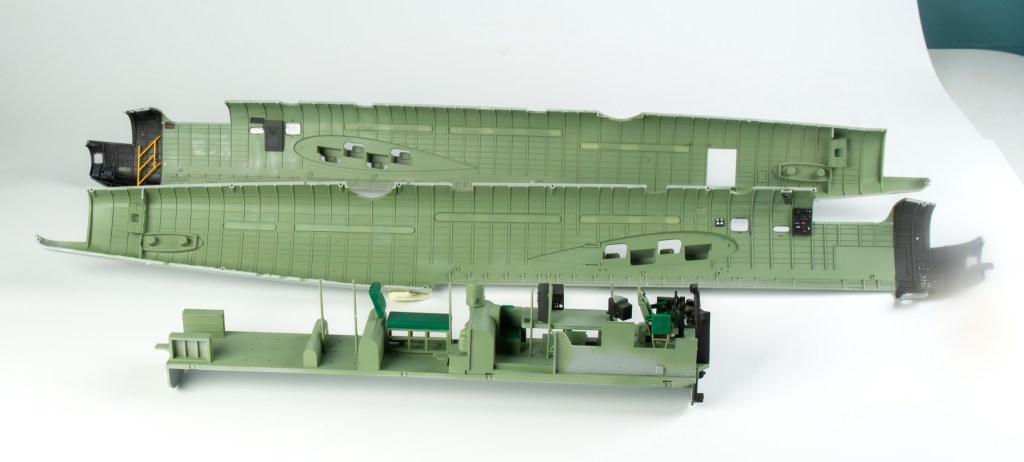
Again all the rear windows will need to be filled and the surface details rescribed. These Specials were late war builds, and the rear windows had been well and truly deleted from the production line by this stage. Again, a lot of the interior was left out as it will never been seen.

My SABS was cobbled together using parts from a Norden bombsight and is nowhere close to the real thing. I just wanted a bigger bombsight to be visible through the Bomb Layer’s blister. Again I had to pare down the rear decking to allow the canopy to fit properly. It was glued with Tamiya Extra thin and clamping gently applied to ensure it sat correctly. All this ensuring it was well and truly glued down came back to haunt me, as we will see.

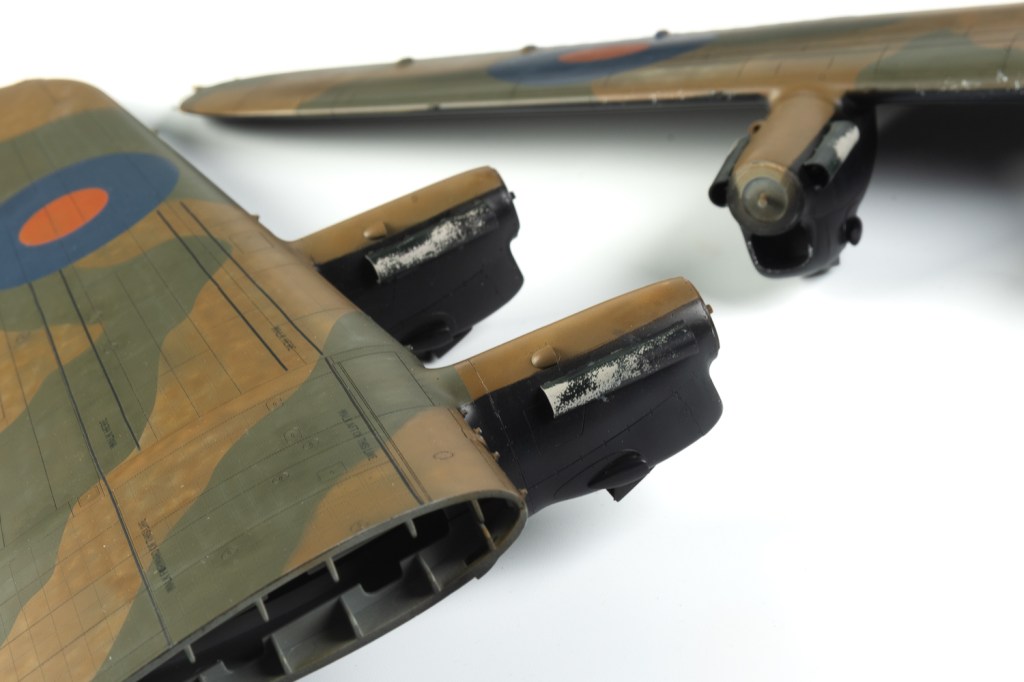
As the exhausts on the Special are unshrouded, more detailed aftermarket items from CMK were used rather than the bland kit ones. The fairings for the covered turrets are not a bad fit. With a bit of care a better fit than on my model can be easily achieved.

The slots for the tail fins and holes for the tailplanes will need gentle easing out to assist the fit of these parts. The slots on the wings that fit the tabs on the fuselage were also sanded to allow easier sliding on of the wings.

Painting the beast

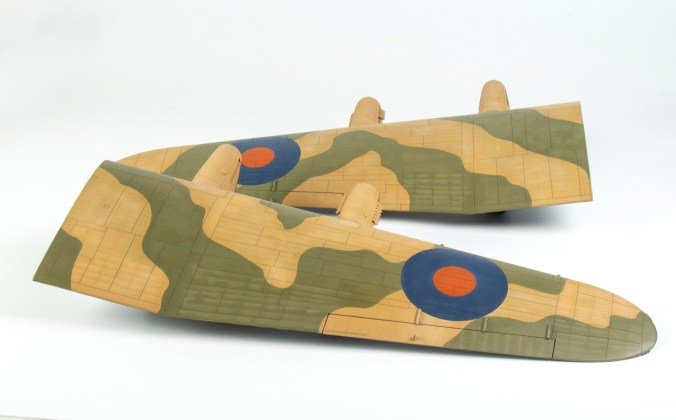
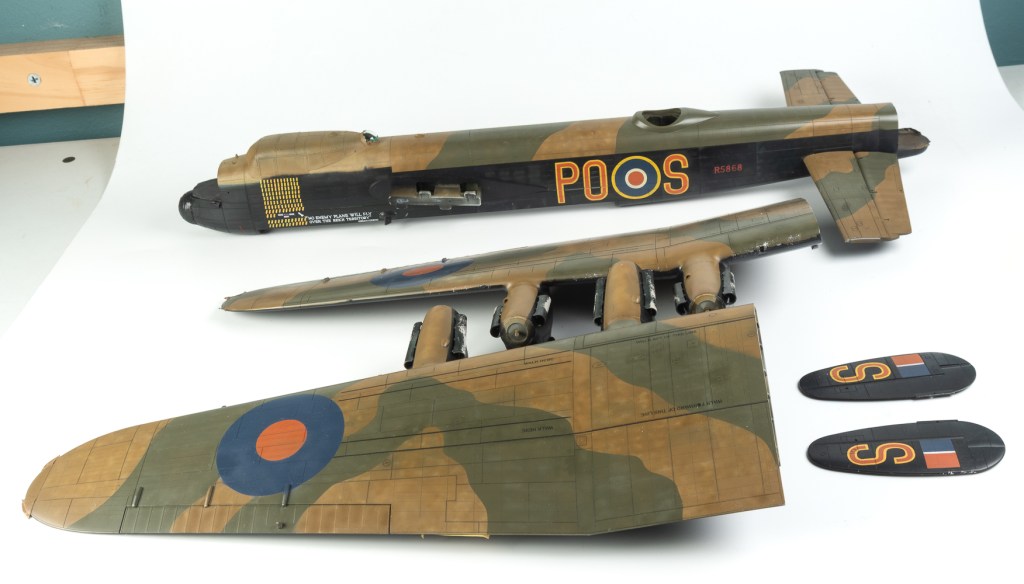
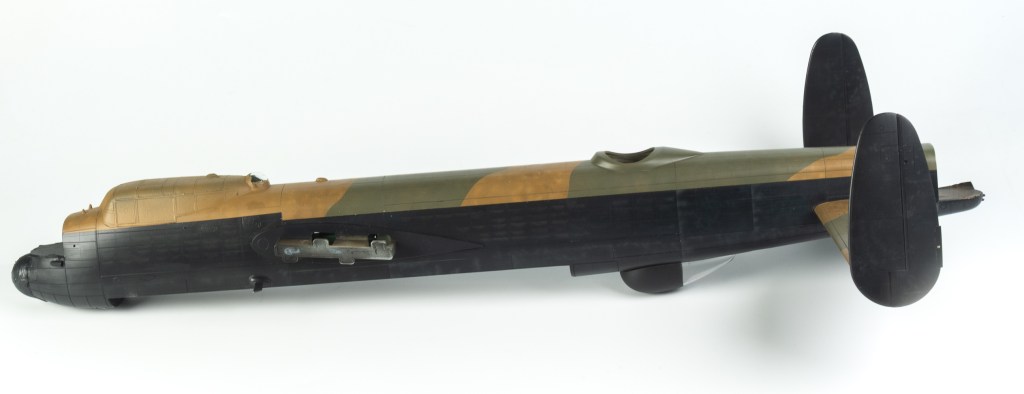
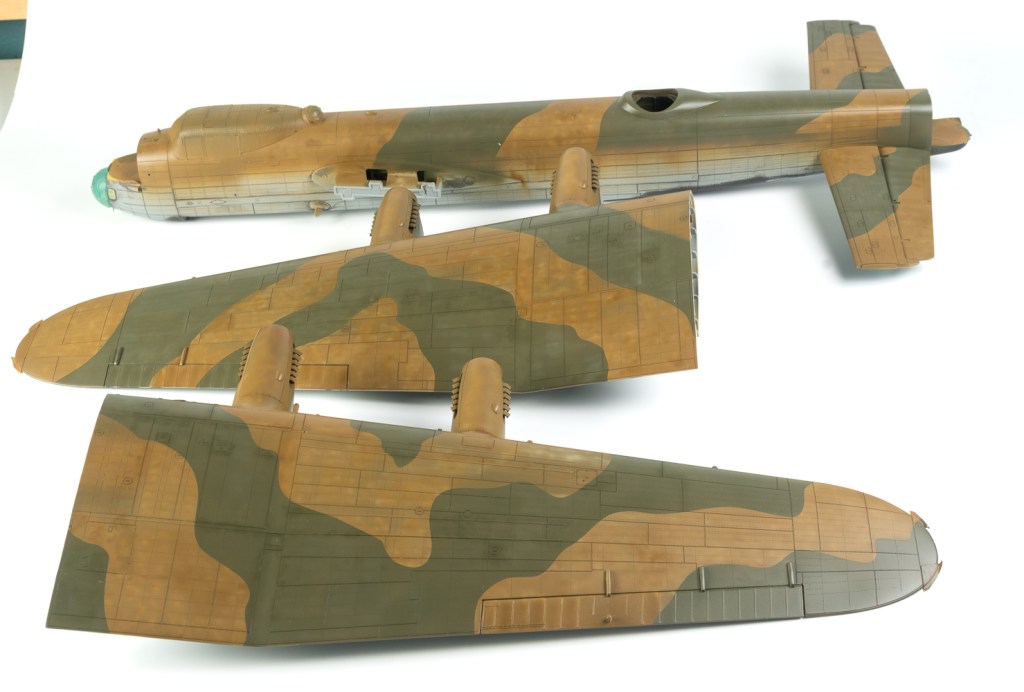
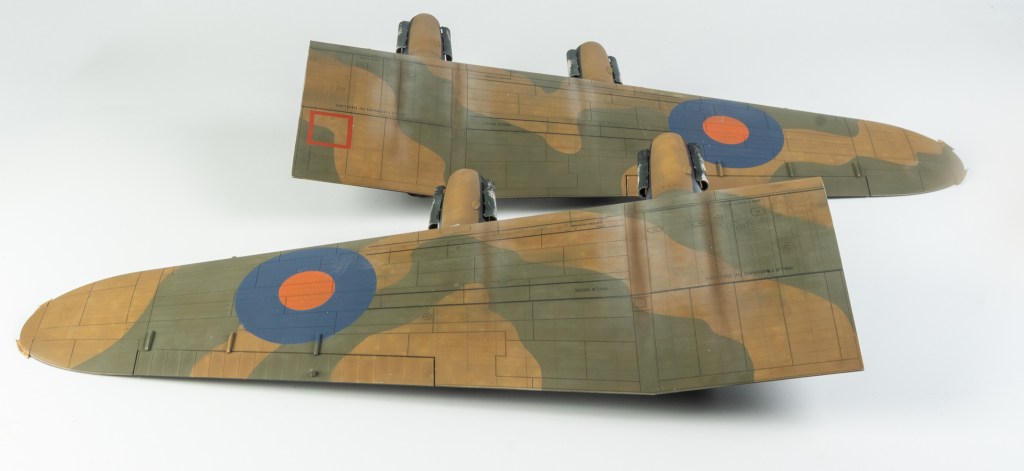
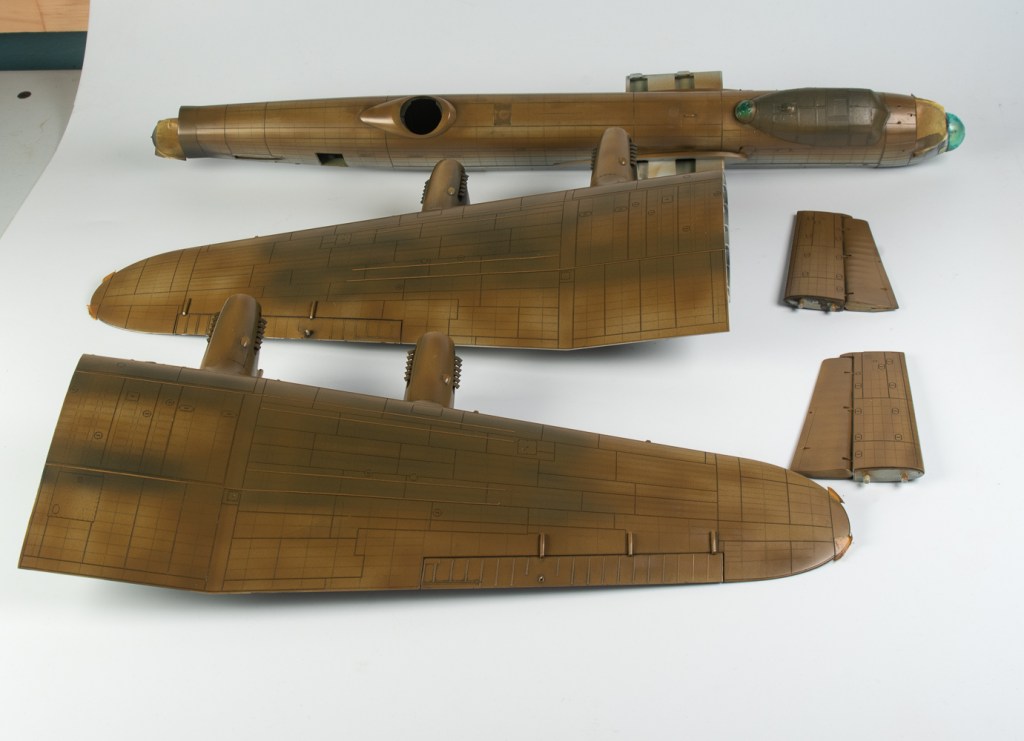
Again, the model was painted as subassemblies comprising fuselage, wings and tailplanes with the fins left separate at this stage. This makes painting and handling the model so much easier, especially if like me, you only have a small paintbooth. There has been much conjecture on the scheme of these Grand Slam/Tallboy bombers. Some people subscribing to the theory they were not Light Green/Light Earth at all but normal Dark Earth and Dark Green that had faded. The ADS instructions state my particular aircraft was examined close up by the noted aviation artist C Rupert Moore and he indeed noted it as LG/LE with Ocean Grey undersides. Looking through various responses to the question of Grand Slam bombers on Britmodeller pointed me to the original article on the colours being published in a Scale Models issue from 1973. As an aside there was a bit of dismissal of Moore’s eyewitness account of the colours, until a poster reminded members that dismissing the knowledge of these people was done at people’s peril.

A lot of these UK aircraft spotters kept quite detailed contemporaneous notes of aircraft they had viewed on wartime airfields. In Moore’s case, as an Aviation artist he also had with him samples of MAP colours. I was reminded of various so called experts dismissing the notes and observations of wartime spotters who called out blue Mustangs. Despite being close enough to write down the code letters and serial numbers!

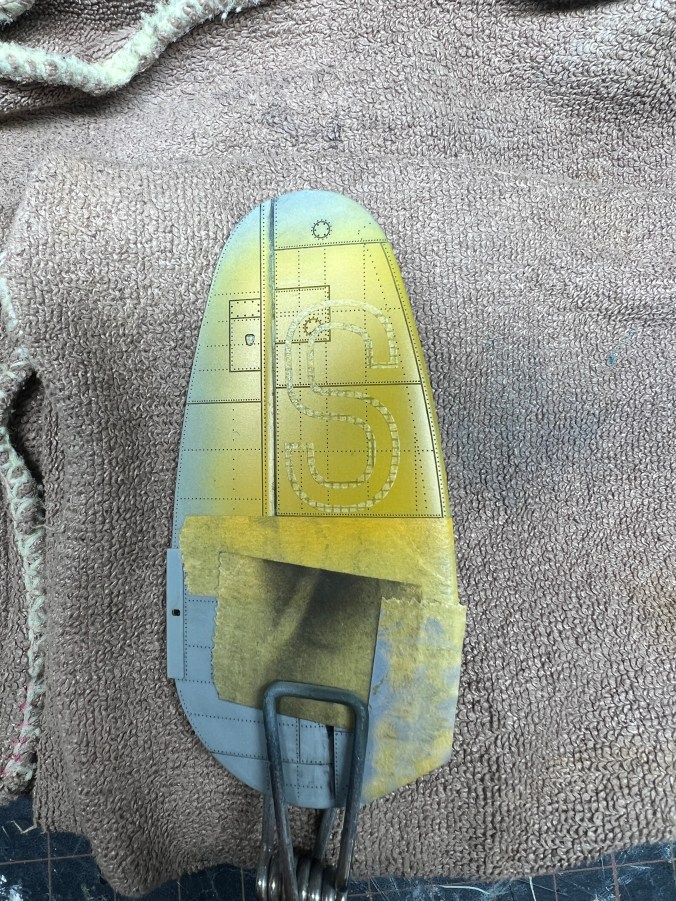
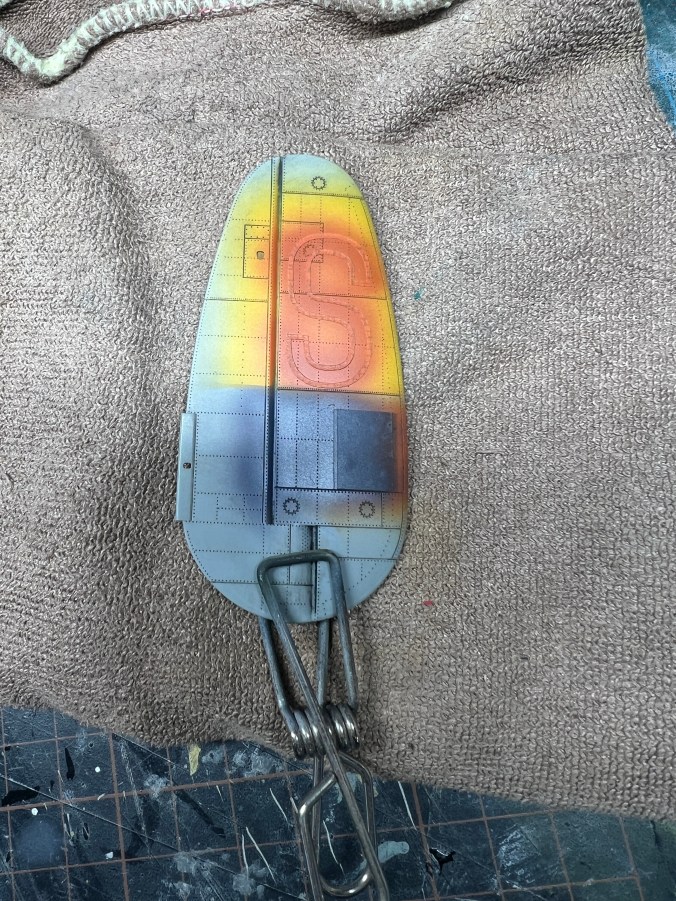
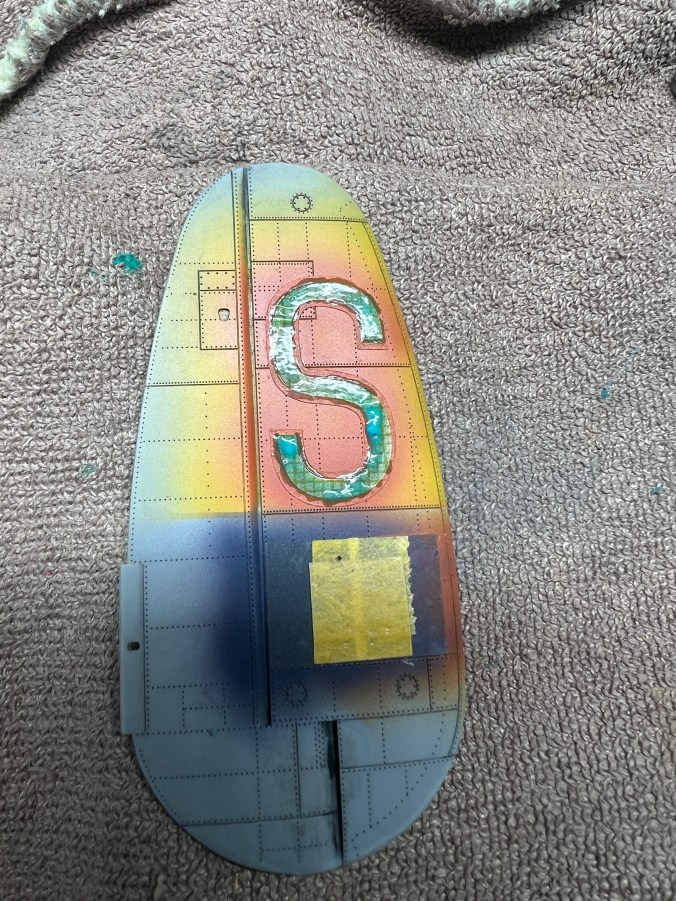
A shout for help to a good friend who has the entire collection of Scale Models resulted in me gaining a scan of the relevant article. It contained much useful information on YJ-Z, the subject of the decal sheet and also alerted me to a few faults that ADS had made with the decals for this particular aircraft. In particular, the codes on the top and bottom of the stabilisers were yellow only and did not have the red outline the fuselage codes did. The top of the letters were closest to the elevator hinge line, not as ADS have them reading from the trailing edge of the elevators.

There is no conclusive evidence as to why these particular bombers were painted in this scheme, the best theory being that the day camouflage scheme in the lighter colours made them stand out to the rest of the formation as the lightly armed Grand Slam/Tallboy bombers. The Lancaster was very much operating at its all up weight threshold carrying these weapons and all excess weight that could be removed from the aircraft was. C. Rupert Moore details in his article how they followed a fully laden Lancaster down the runway. Upon takeoff he described how the wings flexed “quite alarmingly” As well as removing the pilots armour and radios, the navigators chair was replaced by a wicker one! I didn’t try to portray this on my model though.

Recipes for mixing the Light Earth and Light Green using Tamiya colours were again sourced from Britmodeller. The LF Camouflage masks were reused for the upper surfaces with blutack being used to extend the colours down the fuselage sides. It really does look quite smart in the lighter colours with the grey undersides. To the point, the choice was made to keep the weathering down to a minimum.

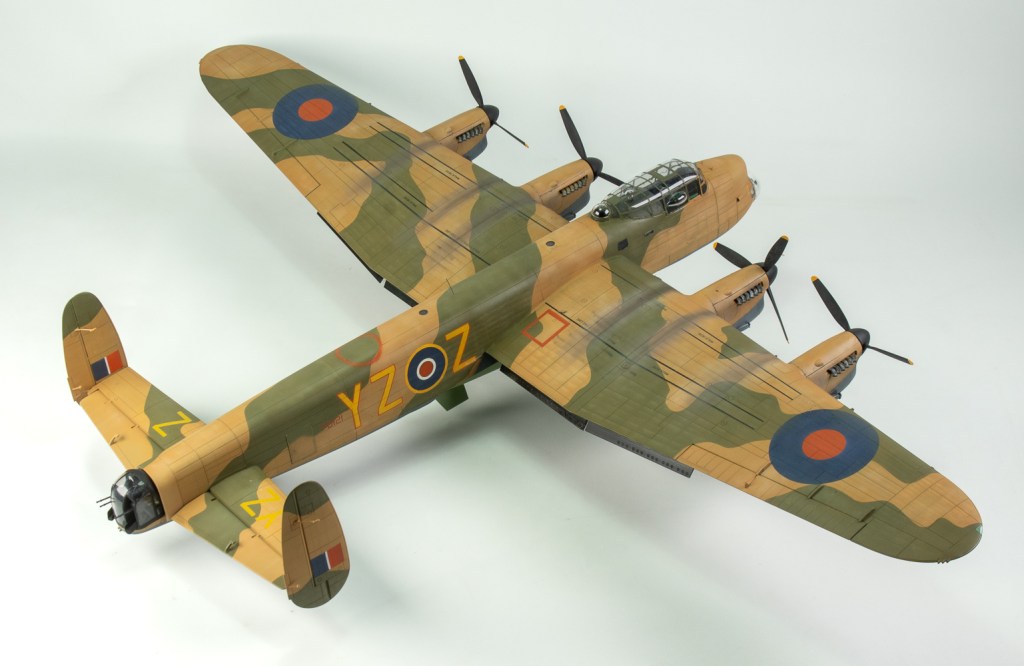
Masks were again cut for the national insignia and codes.. The yellow codes with the red outlines were trialled due to the red codes not standing out enough against the lighter camouflage. I have no idea of the results of the trial, but to me, reversing the colour of the codes would not have made that big a difference.

As with the Lancaster some panels were masked and post shaded with lighter shades of the colours to mimic oil canning. This time around, it worked quite well. Moore describes in his article how a lot of the aircraft had red doped patches around the top turret blanking plates. No doubt to fix leaks. In my model I initially used thin strips of Tamiya tape to portray this, but it just didn’t look right, so resorted to just a rough painted ring.

Exhasust stains were applied as per previous Lancaster article
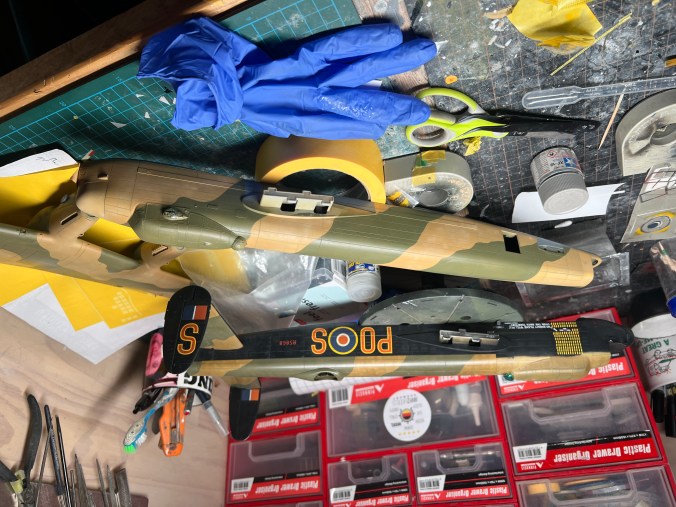
And now for this model’s stuff up……..

Final assembly done and time to unmask all the transparencies……..which revealed I had inadvertently left a couple of the interior masks on
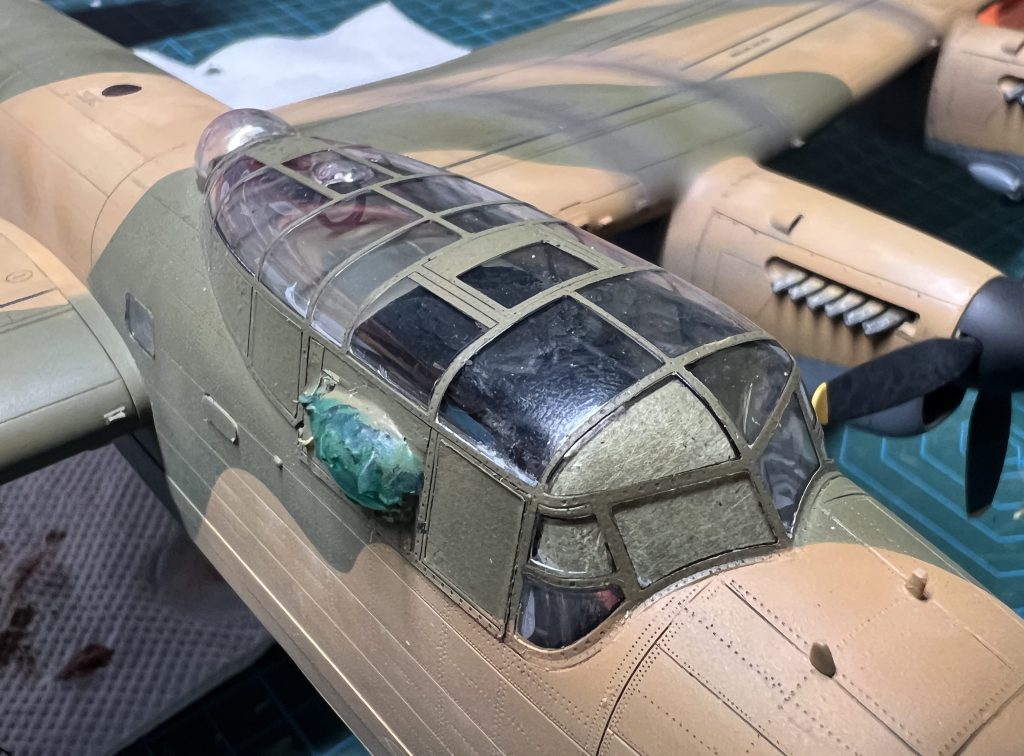
Of course the canopy had been glued down with extra thin rather than PVA which I keep meaning to use, but never actually do. Until something like this happens, making me vow all over again to “use PVA next time”. The bright idea of pushing in the side panel occurred to me. The stupid things kept coming loose anyway. Of course now that I wanted them to actually come out, the stupid panel refused to budge. Eventually the Flight Engineer’s side fell in landing on the cockpit floor. Tweezers could not get to it, and shaking the model left me with the horrifying vision of it disappearing down into the rear of the fuselage. Ever increasing violent shaking did not dislodge it. This left me with the only option of removing the whole canopy. Remember how I made sure it was securely glued down?

Well it came away very cleanly, leaving no glue marks at all to clean up.

In. My. Dreams!

Of course it didn’t come away cleanly, in fact snapping and leaving a remnant firmly still glued in place.

No option now but to order a new clear sprue from HKM . This duly arrived costing me about AUD35. It also left me fairly impressed with HKM’s after sales service. Communication from them was excellent. I’d imagine if they were replacing missing or faulty parts there would be no charge, but don’t quote me!

This time around handles for the sliding portions of the canopy were fashioned from thin copper wire, being glued into place with small drops of PVA. Removing the canopy masking this time revealed no interior masking unintentionally left on. Well it wouldn’t would it as I only used an exterior set this time. What it did reveal though was a smudge near the central windscreen frame. AAAAAAGGGGGGHHHH. I can remove the canopy as PVA glue was used this time, but honestly, to quote Doogs Models, I’d run out of fucks. At least the option is still there to safely remove it if I want to sometime down the track. The handles on the inside do look good though.

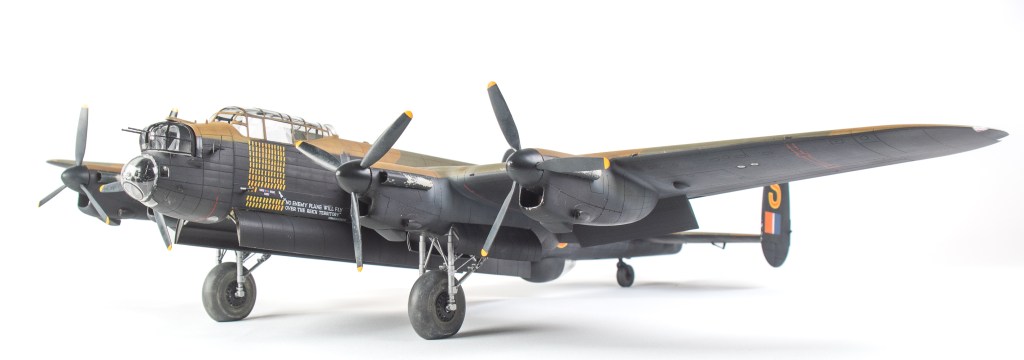
The Specials had treaded tyres, so a set from Armory were used as the kit only provides smooth tyres.The Armory wheels slipped straight onto the HKM axles without needing further drilling out. The rear turret was pushed in and a small whip antenna from thin wire added along the spine for the one radio that wasn’t removed.

And with that, she’s done. And Im done with 48 scale Lancasters!

Final Thoughts

Not much to add that hasn’t already been said about this kit in my last Lancaster article. The modified day camouflage scheme certainly rings the changes on this version and stands it apart from the standard bomber version. HKM’s Dambuster boxing also graced my stash along with these two, but it’s since been moved on.

I think 2 Lancasters are enough……..Or, are they?

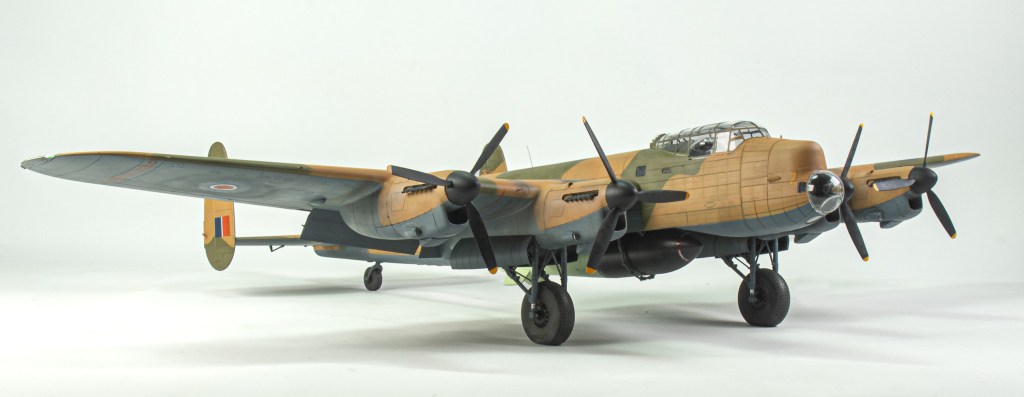
Avro Lancaster B1(special). 617 SQN RAF Woodhall Spa UK 1945
Leave a Reply

HKM 1/48 Lancaster B1

  • Purchased; 2021
  • Completed; 2026
  • Enhancements;
  • Instrument Panel -Eduard Look
  • Seat Belts-Eduard
  • Propellers- alans3dmodels.co.uk
  • Gun Barrels – Quickboost
  • Wheels- Brassin
  • Radiator screens-Eduard
  • Bombsight -Eduard.
  • Decals- Combination of 1Man Army, Top-Notch and home made masks

Avro’s Lancaster always loomed large in my childhood. Growing uo in Perth West Australia, one only had to visit the Airport in the 70s and 80s to see a real one up close. Parked at the entrance to the airport – for a while next to a Mosquito – in a fenced enclosure, it had been donated to the WA RAAF Association by the French Aeronavale. Once a month it was open to the public, and you could even clamber inside for a small fee.

Consequently in my mind, it has always remained as THE most iconic strategic bomber of The Second World War. Although this has not really been reflected in the number of Lancaster models completed by me over the years.

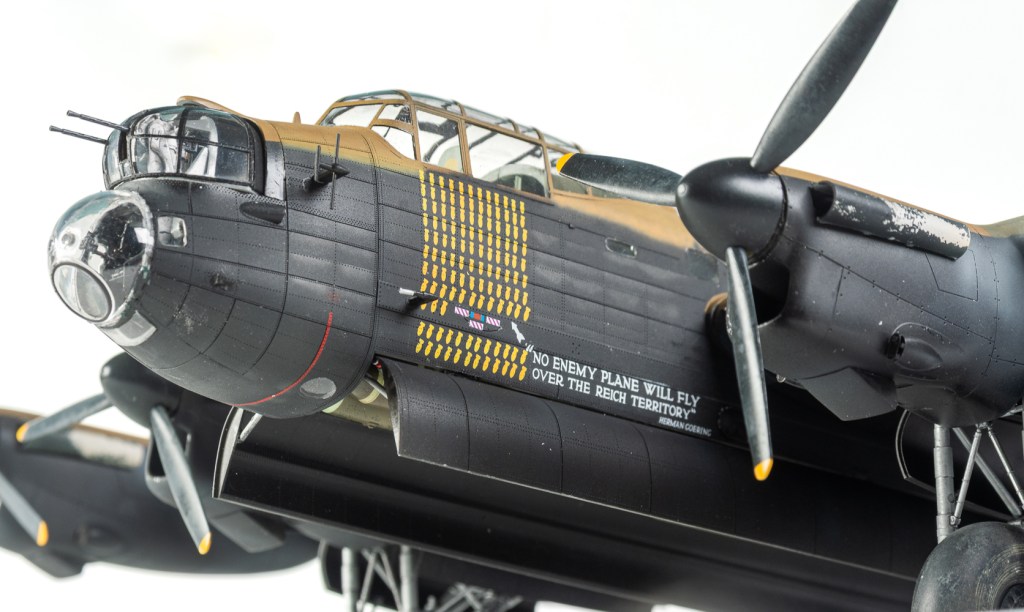
First there was the Revell 1/72 model completed as S Sugar during my childhood, then the Airfix one., which was completed as G-George. The Tamiya 1/48 kit was also purchased upon its release, but I have no recollection of actually building it! The yellow outlined codes and quote on the nose stayed with me though, and I determined to pay homage to it with this model.

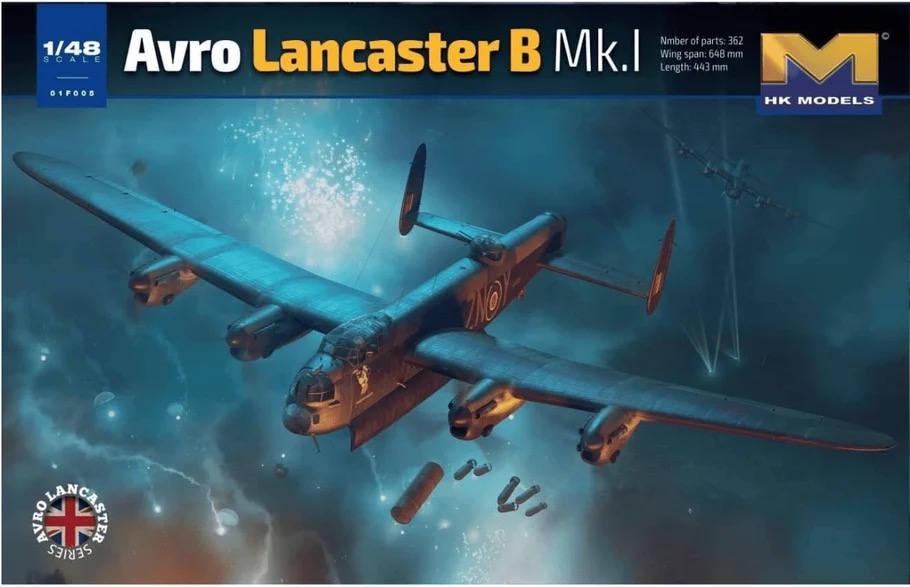
The Hong Kong Models 1/48 Lancaster

If you still have the Tamiya kit in your stash……Sell it and buy this one! There no comparison. It really does make the old Tamiya kit obsolete. Fine recessed surface detail, a far more detailed and accurate interior, not that you can see much of it, and, most importantly, it contains most of the parts you will need to also build a late model Lancaster including the larger Bomb Aimer’s blister, which was sadly lacking from the Tamiya kit, thereby limiting it to a early Lancaster only. This boxing only has the needle propeller blades though, so again limits it to early and mid life Lancasters. It would have been great if HKM also included the paddle blades as well, but early and late style pitots are included as are various aerial fits. The fit and engineering are also good with solid locations for the undercarriage, as well as the option to have dropped or retracted flaps. As this kit models the early S-Sugar, some modifications would be needed to reflect R5868 in the later stages of her life.

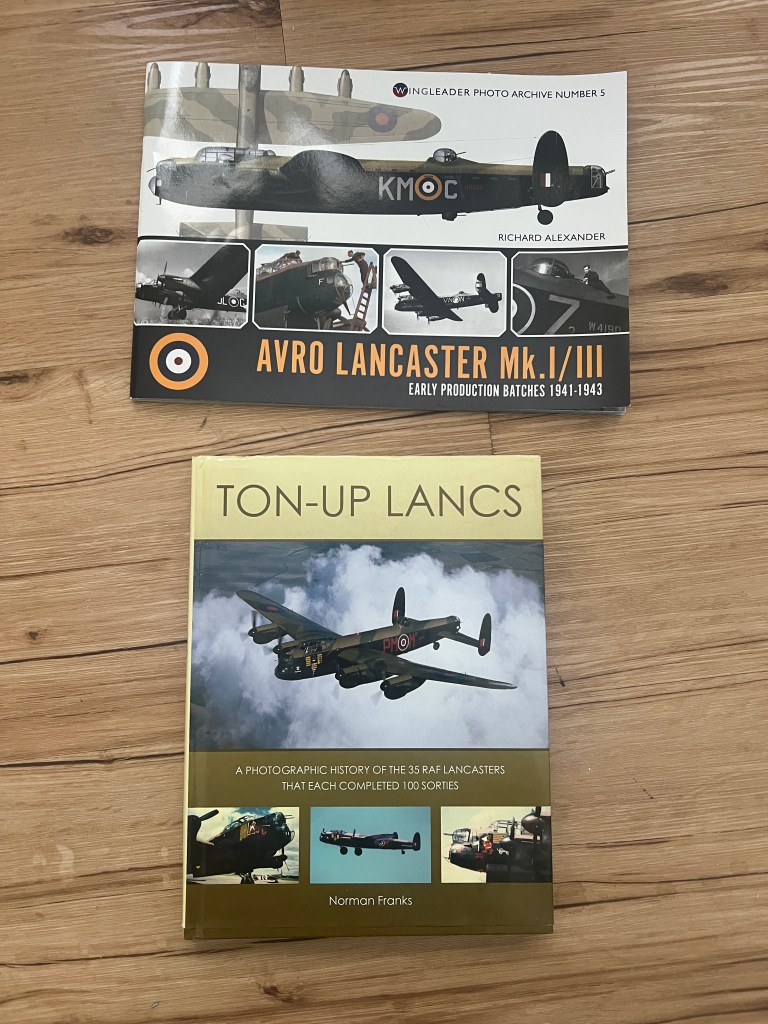
2 references were invaluable here. Ton-Up Lancs by Norman Franks and Wingleader Photo Archive No.5

I should add here, I rarely go into this much depth researching my builds, mainly because I want a speedy build, but for some reason, absolutely went down the rabbit hole on this particular aeroplane. I can see why some modellers are fascinated by this aspect of the hobby. What I found out was R5868 was a bit of a unique girl as her nose was a very early build, but in 1944 was attached to a new build rear fuselage, so had many late war features that would not otherwise be found on an early build aircraft like this.

Anyway, using the above two books the following list was compiled of changes that needed to be made to the stock kit to make a late war S-Sugar.

Paddle Blade propellers

Large Bomb Aimer’s Blister – comes in kit

Late Model rear gun turret -comes in kit (phew!)

Monica and Rebecca Aerials- included in kit

No rear fuselage windows,

H2S radar – comes in kit

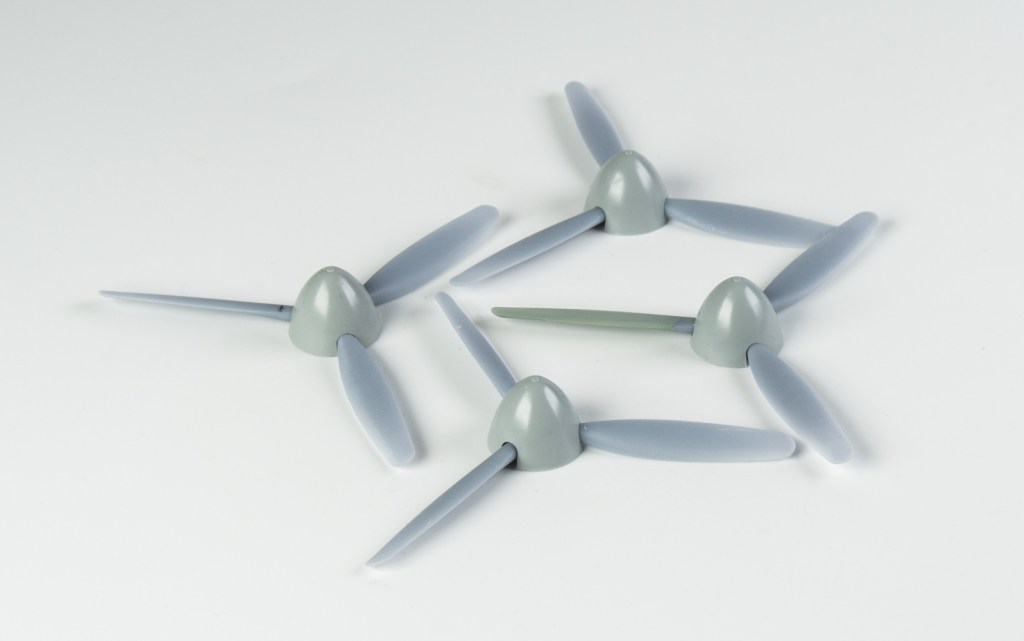
All easily done as most of the parts were in the kit, aside from the paddle bladed props. Briefly, I considered contacting HKM to see if I could purchase the propeller sprue from their Grand Slam boxing, but scouring Britmodeller put me onto a UK modeller who has done a 3D set, so this problem was then solved.

Construction

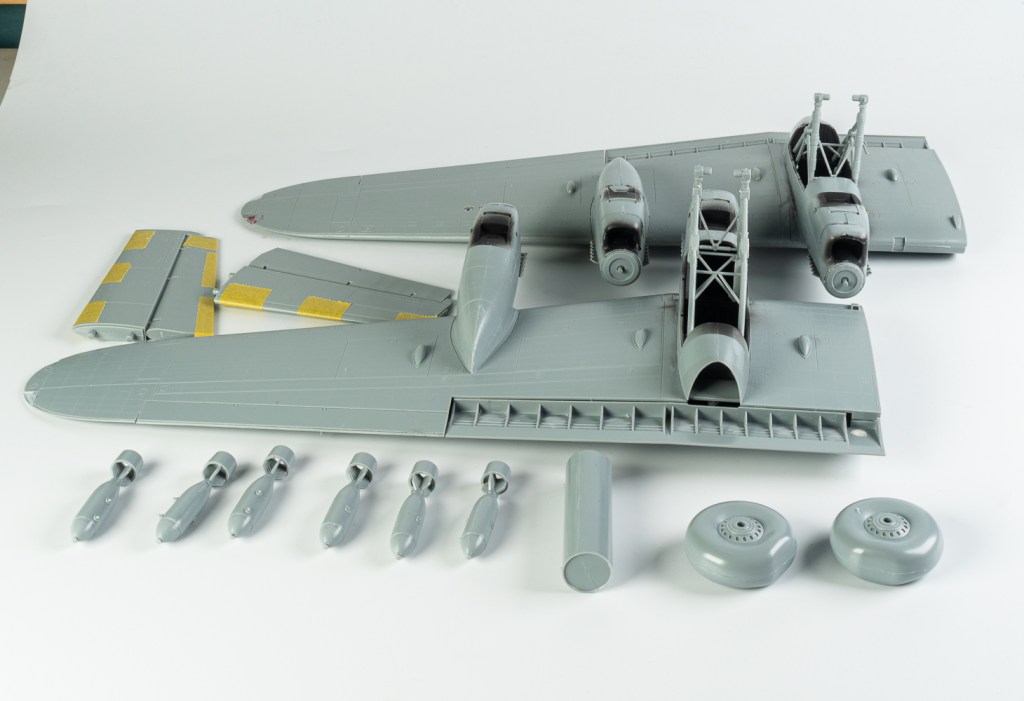
Because I didn’t want to write ‘ construction started with the cockpit” (Hang on, did I just type that anyway!). I started building the wings and engine nacelles. Forewarned that the nacelles were a very tight fit over the engines, I left off the cam covers, parts M7 and M8. This made the fit a lot better, although you will still have to sand and rescribe the panel lines around the top of the engines. I found the radiators didn’t have the most solid of joints, so make sure you glue them securely. You don’t want them coming adrift once you’ve closed the nacelles as they are a bastard to get back into place. How do I know this? Well………

Whilst on the wings, HKM have moulded the aileron actuating rods as solid. I cut mine away and later replaced them with stretched sprue. Another small tweak was adding bare metal foil to the rear of the landing lights once they were cemented into the wing to represent the reflectors. A minor annoyance with the HKM instructions is that they do not clearly indicate where to glue the cable cutters or the engine intakes in Step 41. Looking closely at photos and using a simple jig like a piece of tape is your friend here.

Once the wing halves were glued and drying I glued the rear fuselage windows into place before slathering epoxy over them from the outside. Once this had dried they were sanded to remove all trace of them. From around late 43, these windows were removed completely from Lancasters and not just painted over. In a first for me, one of my many riveting wheels had exactly the same spacing as the kit rivets, so this was used to replace all the lost detail, and again once the fuselage seams had been filled and sanded. Whilst on the subject of windows, the wireless and navigator’s windows stood slightly proud of the surrounding fuselage, so these too had CA applied around their edges and were sanded back flush with the fuselage. Their clarity was then restored with Tamiya polishing compound and micromesh.

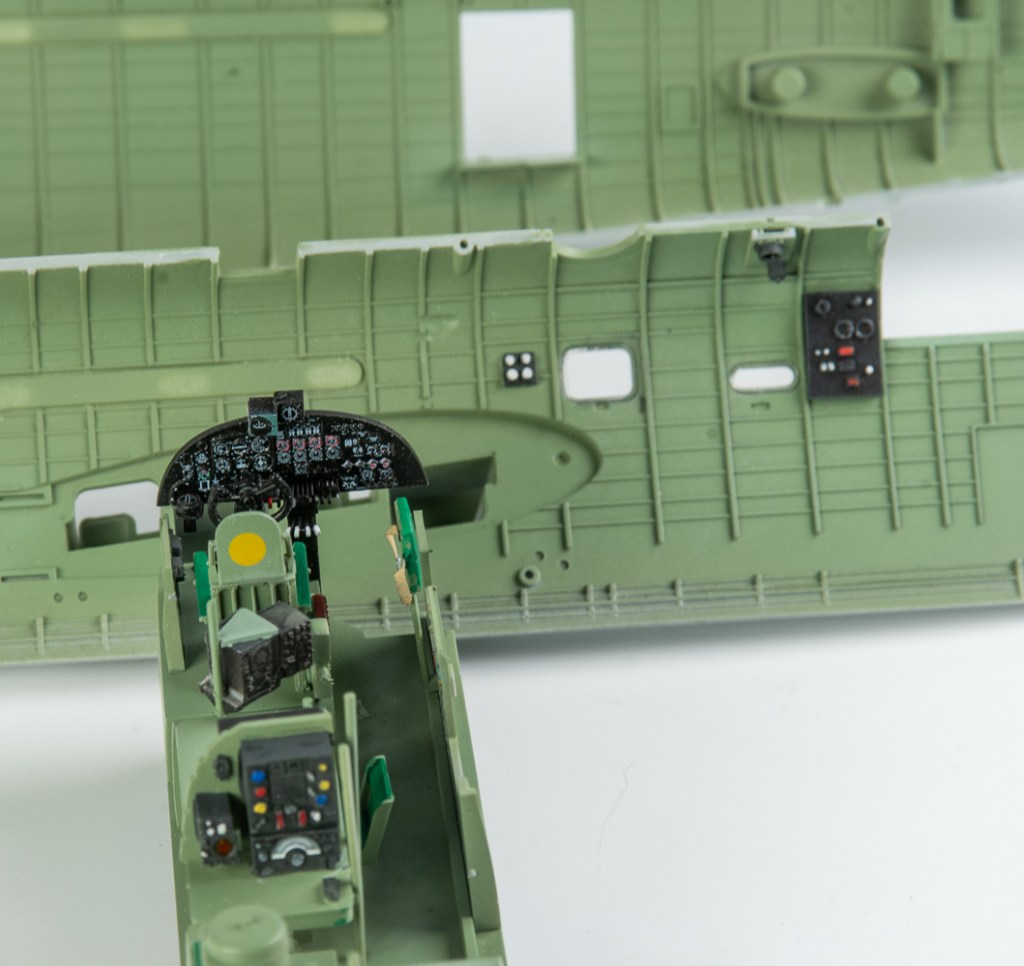
In building the interior, a lot of the parts aft of the Navigators station were left out, as they will not be visible anyway. An Eduard Look! Instrument panel was used instead of the kit panel. Take a bit of time with the cockpit as you will be surprised how much can be seen through that big canopy. Being an early build Lancaster, my interior was painted with SMS RAF Interior Green. The turrets were also completed at this time. Id suggest sanding the slots in the rear turret a touch wider to allow the PE spent shell chutes to sit a bit more securely.

Being initially an early build Lanc, the nose turret interior was painted silver, whilst the top and tail turrets were painted black as befitting a later build Lancaster. Gun barrels were replaced with Quickboost items after ever so carefully drilling holes in the breeches once the plastic barrels had been cut off. It’s annoying that you cannot add the nose turret fairing without first adding the turret, so both items were left until well after painting to add. The beauty of this kit is all major airframe parts can be completed separately, even to the painting and decalling stage. This feature certainly aids handling the model on the workbench, even so, as usual, I managed to clang wings and fuselage against desk lamps, spray booth etc! The turrets can also be left off until the final stage, which certainly helps with masking aside from the nose turret. I replaced the kit bomb sight with an Eduard 3D item, although the kit one is fine for all intents and purposes.

Unlike the Tamiya kit, HKM includes many late model Lancaster parts in their kit. In 1945 Sugar was fitted with the H2S radar , Rebecca aerials and large Bomb Aimers blister with the Z fitting. All these parts being included in the kit made building her in this configuration so much easier. It was just a matter of finding photos and following them. A bit of research also revealed the rear of the H2S blister was clear to allow the rearmost downward facing ID lamp to still be seen.
The Wingleader book was massively helpful here in pointing out various points on the airframe and differences between various builds. I cannot recommend them highly enough, nor the Britmodeller forum and the many helpful folk on it. You will find that you need to sand or scape away a bit of material from the rear deck where it meets the sides of the canopy to allow the canopy to sit down properly. Also the holes for the rear tailplanes need boring out a bit. This, the canopy and the nacelle tops were about the only major fit issues I experienced. The small gaps around where the nacelles sit into the undersides of the wing were easily filled with a bit of Perfect Plastic Putty. I found fitting the small Eduard etched screens for the side intakes quite fiddly until I decided to cut the small PE brackets away and just mounted them directly onto two thin strips of plastic card glued directly to the front of the intakes. From the side they are not noticeable and the strip is far sturdier than the thin folded PE.

Painting and Decalling

The topsides were first painted in SMS RAF Dark Earth. To this was added a healthy dollop of Tamiya Desert Yellow to give a bleached looking Dark Earth. This colour was used to paint the upper forward fuselage to the field break just in front of the main spar, as photos show the nose looking very faded. The rest of the upper surfaces were then sprayed SMS Dark Earth with just a touch this time of Tamiya dark Yellow to lighten it slightly. LF Models Lancaster Camouflage masking set was then applied to set all the correct demarcations and Tamiya RAF Dark Green Type 2 applied. Both these colours were then mottled with various lighter and darker mixes to produce a battered looking finish. Lancasters got absolutely filthy, very quickly, as evidenced by numerous photos, in the Wingleader book. So don’t believe the old “they didn’t last long enough to get dirty” line. Once the upper surfaces were done, they were masked off ready for the undersides to get painted. R5868 came from the factory with a higher than normal demarcation line above the line of the rear windows. The rear fuselage would have had the normal demarcation line just below the window line. (Told you I went down a rabbit hole on this!)

I added a stepped demarcation line to reinforce that this aeroplane was made from an early nose section mated to a rebuilt rear fuselage. The demarcation line under the Portside canopy was also freehanded as photos showed a lot of overspray her from touchups.

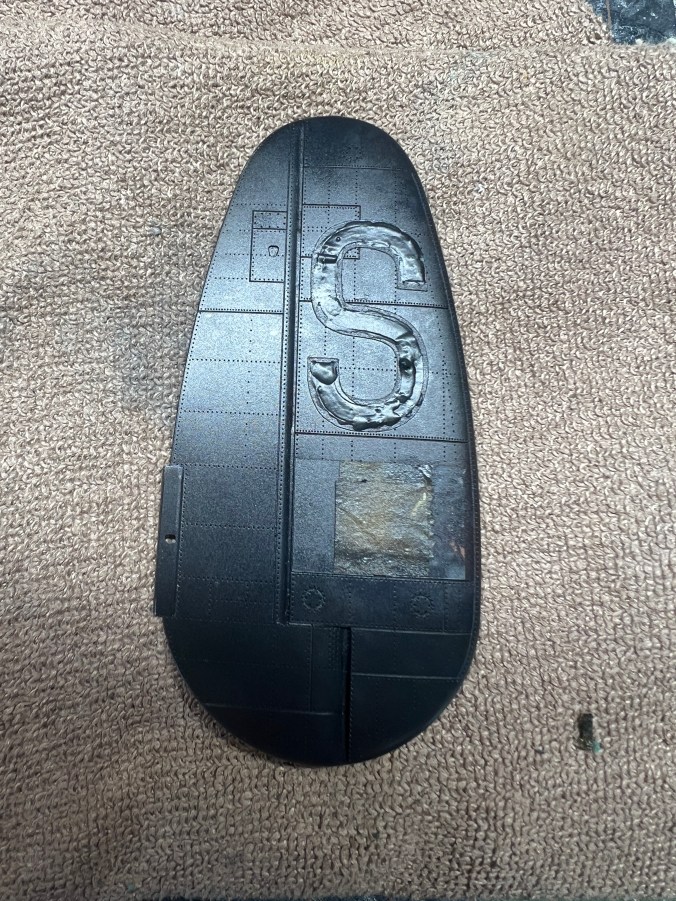
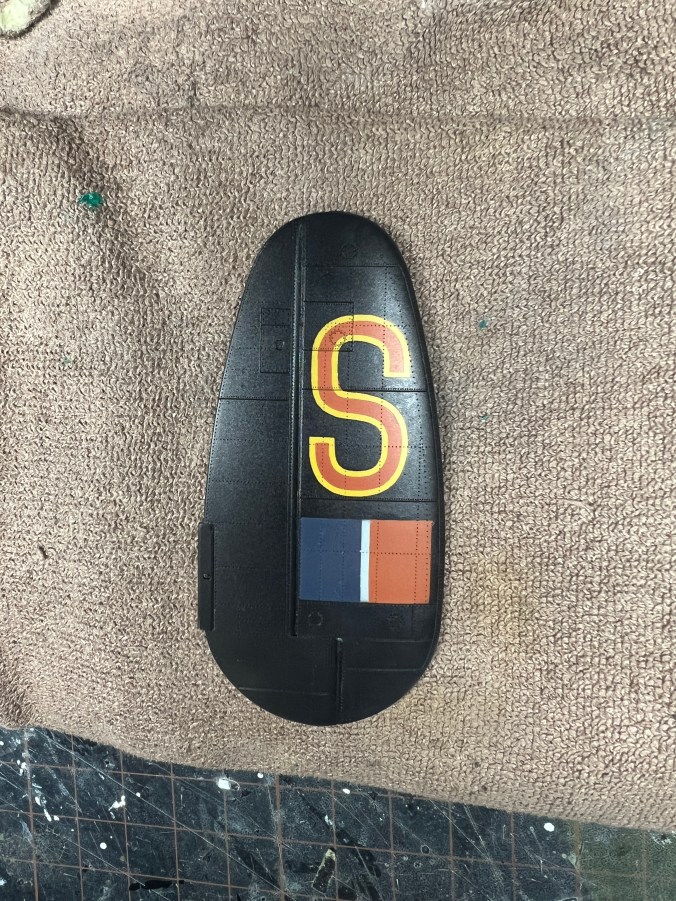
Another thing that stood out when looking at photos of Lancaster’s was the rippled skin, or “oil canning” on various parts of the fuselage and wings. Modellers have used scalpels along rivet lines or built up the individual panels in the past to portray this. I wanted to try just paint.. White pre shading was applied in various patterns along the rivet lines using tape and super thinned paint through the airbrush. SMS Camo Black was then sprayed over the top in very thin coats until the effect I wanted was achieved. I’m not saying this is the best or only way to mimic oil canning, but I was reasonably happy with my results when viewed from normal viewing distance. The black was also treated to various mottles with other shades of very dark grey and different blacks such as rubber, NATO Black, CARC Black etc. Codes and national markings were all sprayed through 1man Army and Top Notch masks. Getting consistent yellow outlines was an absolute Pain. In. The. Arse. The masks for the codes on the tail ended up getting completely mangled and deformed beyond all recognition. In the end I cut my own masks on my Silhouette machine. The tail codes were applied before the camouflage went on. This was a much easier way of doing it and I wish I had done all the markings this way

The below photos outline the process.

1Man Army even supply the Goering quote and the bomb tally as masks. I mangled the quote and crew decorations, but applied the mission markings successfully. an extra 2 rows were added to correctly reflect Sugar’s end of war tally, being 132 (125 officially). I even painted the bombs in different shades of yellow! The exhaust shrouds were painted Tamiya Deck tan, followed by a coat of hairspray. Black was then applied and a stiff water moistened brush used to chip away the black to achieve the effect of the black burning off exposing the asbestos underneath. Exhaust stains were done by first spraying a cloudy diffuse layer of Deck Tan over the wings and nacelles before adding Tamiya Black and Red Brown to the mix. In all honesty they should have been far more pronounced, but I chickened out a little.

Conclusion

I won’t bore you with all the final assembly steps, subject to say the wings were REALLY hard to push in to their proper locked location. Despite not being glued, they’re not coming off in a hurry! The only real faff was positioning the flaps, especially the inner ones, not sure there is any easy way to do this, apart from growing a third hand

So what do I think of Hong Kong’s Lancaster. I absolutely enjoyed every minute of it.which is just as well, given I built 2 in parallel. It has some minor accuracy issues, but I’ve long since stopped caring about these. There are a few flaws in my build, but it’s probably my favourite build of the year, and I just love looking at it in the cabinet. A lot of my builds either get sold or thrown out to make way for new models, but I think this and its Grand Slam brother will be gracing the cabinet for quite some time yet. Highly recommended if you have the room.

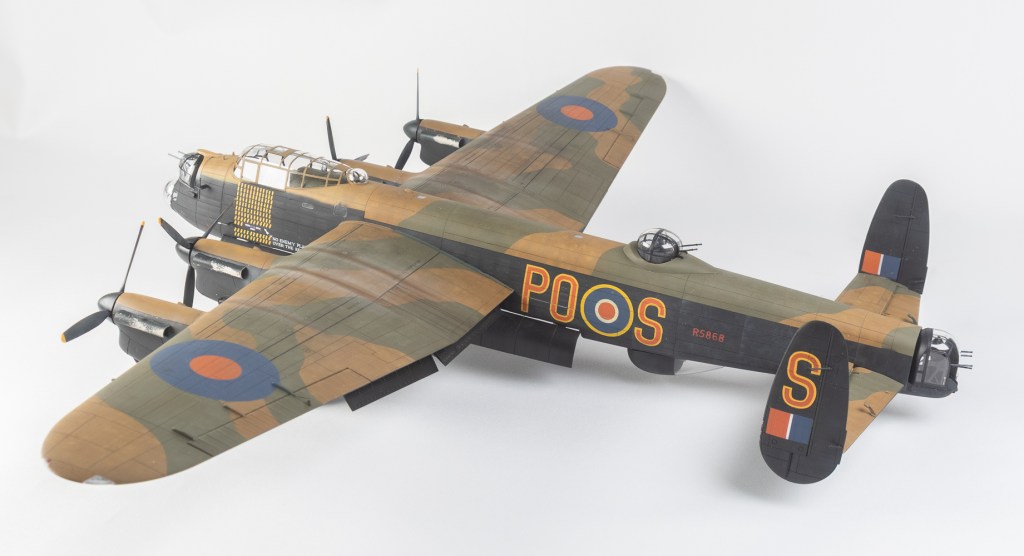
Avro Lancaster B1 467 SQN RAAF. Waddington UK May 1945
2 responses to “HKM 1/48 Lancaster B1”

  1. andyk21 Avatar

    Another great build and finish Bruce! Fantastic!!

    Like

  2. HKM 1/48 Lancaster B1 Special “Grand Slam” | Bruce’s-Scale-Models Avatar

    […] kit. The main reason for this build was an old ADS decal sheet I unearthed whilst researching my other Lancaster build One of the schemes was a post war Lancaster in Light Earth and Green with Ocean Grey undersides and […]

    Like

Leave a Reply

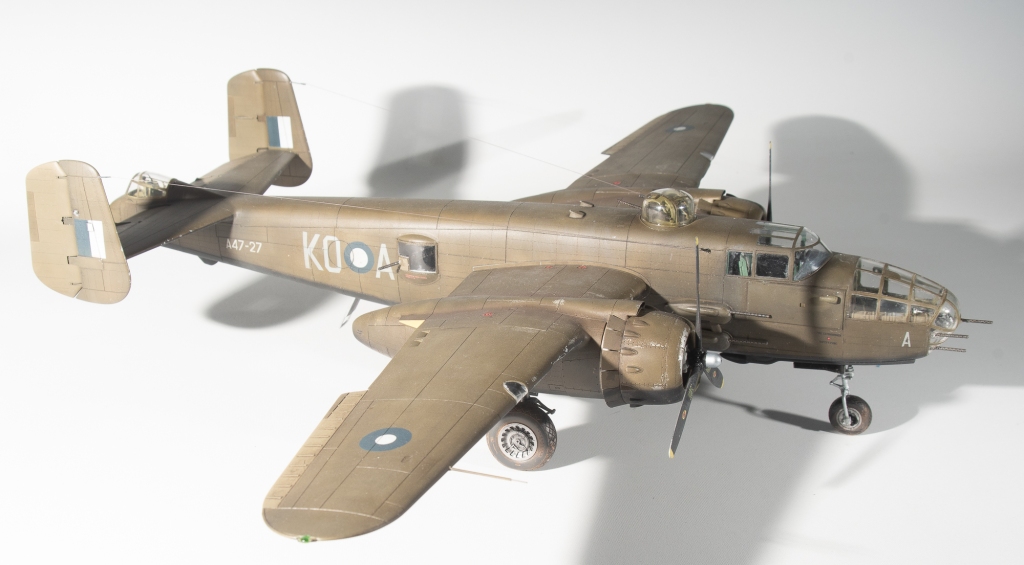
Hong Kong Models 1/48 B-25J Mitchell

  • Purchased: 2023
  • Built:2023
  • Enhancements:
  • Gun Barrels: Karaya & Master Models
  • Cockpit :Eduard Space 3D
  • Wheels: Eduard Brassin
  • Ammo feed chutes: Eduard
  • Decals: ArtScale RAAF Mitchells Part 2

Hong Kong Models 1/48 B-25 J comes in a box adorned with some nice art work that is also provided as a poster inside the box. Surface detailing is by way of petite engraved rivets that unfortunately fade away slightly at the fuselage centrelines . Amongst the 249 parts are options for different shaped bullet deflectors for the upper fuselage, a top turret or, if you’re building a Mitchell without a top turret, a blanking plate and separate cheek armour if you want to build an early J that was not fitted with the additional armour. Two different fits of fixed nose guns are also provided.

The kit can be built with flaps, boarding steps and landing gear up or down. Cowl flaps can only be shown in the open position, although Quickboost do make cowlings with closed flaps.

Interior detail is adequate for what will be seen with parts for the bomb aimer’s position, cockpit, top turret and tail gunners position. A bomb bay and bombs are supplied although there is no mid fuselage detailing around the waist gunners stations. If you want to add the ammo feed chutes, they will need to be sourced from an aftermarket set.

I found the fit of all parts excellent, with the tailplane, fins, and nacelles being a push fit. The engineering is spoilt though by the requirement to fit the landing gear early during construction. If I were to do this kit again, I would modify parts F24 and 25 by cutting the pointed ends so that the struts could be added later. Same with the nose gear part E32. I would just cut the end off the drag link, so that it could be fitted later.

Despite me protecting the front leg with a protective sleeve of foam, I still managed to break it off accidentally manhandling the model around the bench. Bras rod was used to replace the broken oleo, which also lent more strength to the part, so not a total loss, but annoying nonetheless

Although the gear locates solidly into deep sockets, the model still rocks slightly on its gear. Possibly due to the soft plastic, perhaps if they had of had the drag links also locate into sockets as well, the model would sit more solidly. The supplied nose weight fits quite cleverly underneath the cockpit to form the tunnel. No other weight is required.

Construction Notes

The Eduard seat belt set only included lap belts, I added the kit PE shoulder belts as I felt they would have been fitted at this late stage of aircraft development.

When building the bomb bay, fit part E45 during final assembly, as otherwise the arms will get broken. The kit bomb fins are rather thick, As you won’t see them, I left them as is, rather than bothering to thin them or replace with PE.
As mentioned above, I would modify the landing struts so that they can be added after painting.

This is one of those kits where you are required to follow the assembly sequences as set out in the instructions. I deviated by adding the cooling flap rings to the cowls which then made inserting the engines harder. The engines as provided were adequate, but can be dressed up if you want to add ignition wiring, etc Alternatively, if your name is Sam Dwyer, and you like to buy every piece of available aftermarket for a particular kit, Quickboost make resin items 😀

The landing light glare guards part EP4 were left off my model as per reference photos I looked at. There are two scoops provided in the kit that locate into shaped cutouts in the cheek armour plates. They are pictured in stage 35, but not called out in the instructions, from memory they were parts E58 and 59.

The kit wheel treads are a bit rubbish, so best replaced with AM ones. If you are replacing the kit gun barrels with brass ones (and why wouldn’t you!) the breech holes will need drilling out slightly, lets take a moment here to recognise HKM for providing separate barrels as this certainly aids painting. Ensure though that the waist guns have been securely glued to their mounts. One could also add PE ring sights as they would certainly be visible from outside.. All the transparencies fit very well, although I have a slight step on one side of my nose, which could have been minimised with more care on my part.

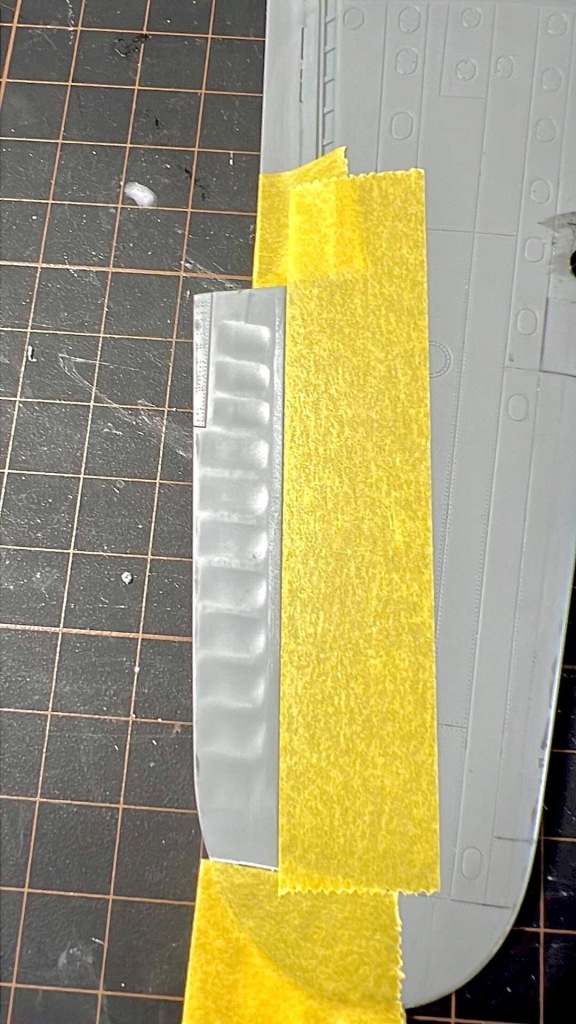
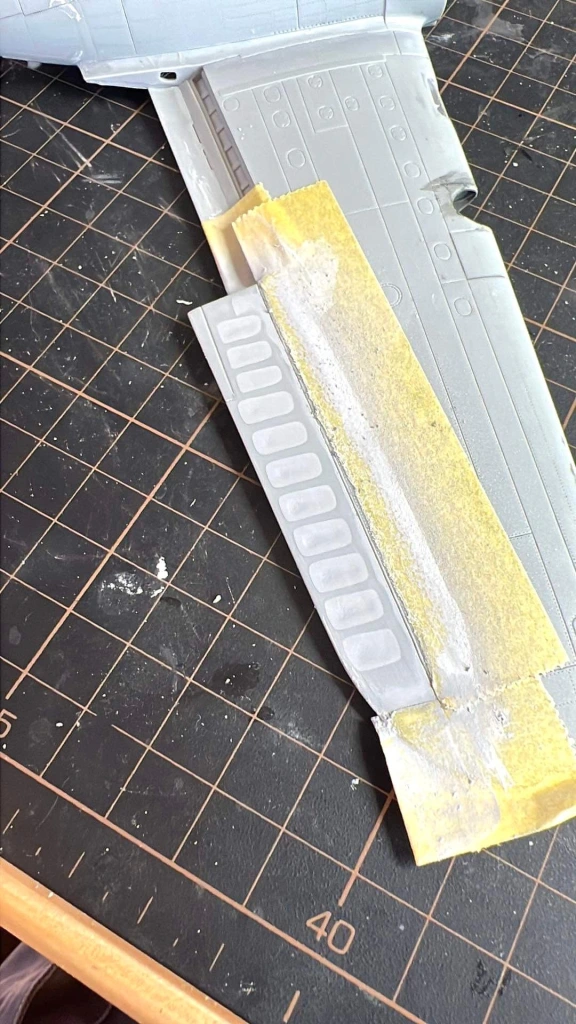
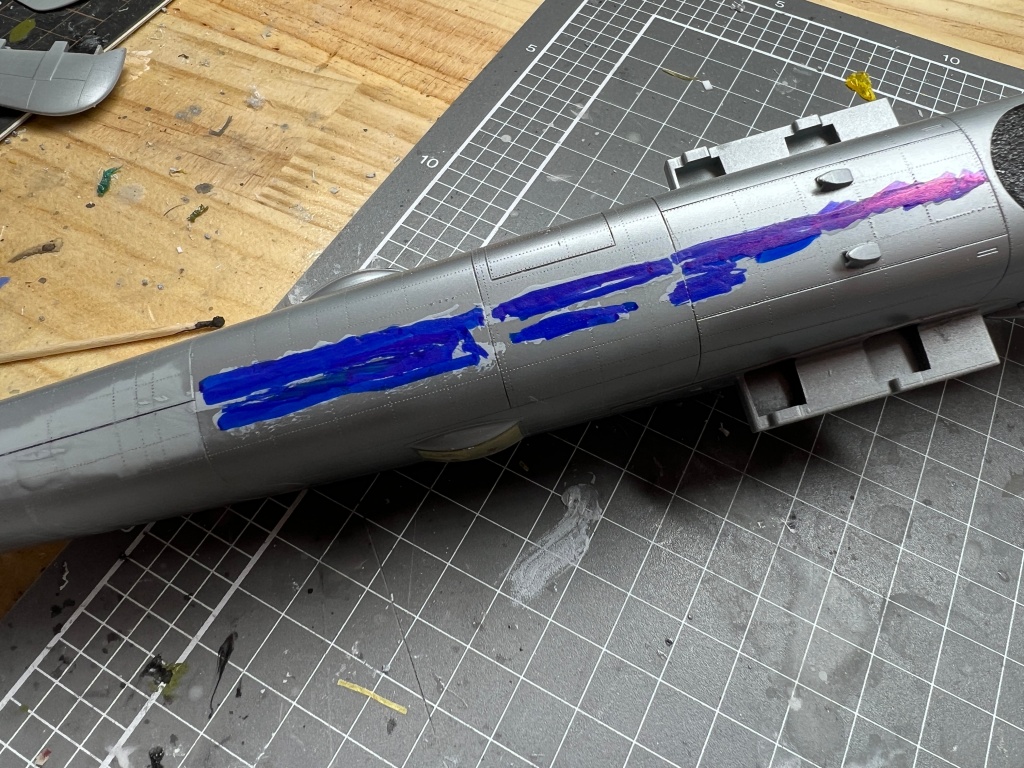
I was unhappy with the kit replication of the fabric ailerons. The elevators and rudders are fine, but the ailerons….not so much. I masked them off, then sprayed several coats of Mr Surfacer 500 primer to build the depressions up before sanding them flat. The rib tapes were simulated with tamiya tape. Although I think they look better than what was provided, Im not sure the effort was really worth it, having seen a few other built examples on the net. They don’t look too bad under paint.

Rivetting along the centre seams of the fuselage will need to be reinstated with a rivet wheel after the seams have been cleaned up. The wings can be left off to aid painting. Dry fits showed they slid easily into position, and more importantly, could also be easily removed. I also left the vertical fins off to aid painting. The fit is that good, so they were not added until very late in the build during final assembly. This makes the model a lot easier to handle. Still didn’t save that nose leg though!!

Painting, Decalling and Weathering

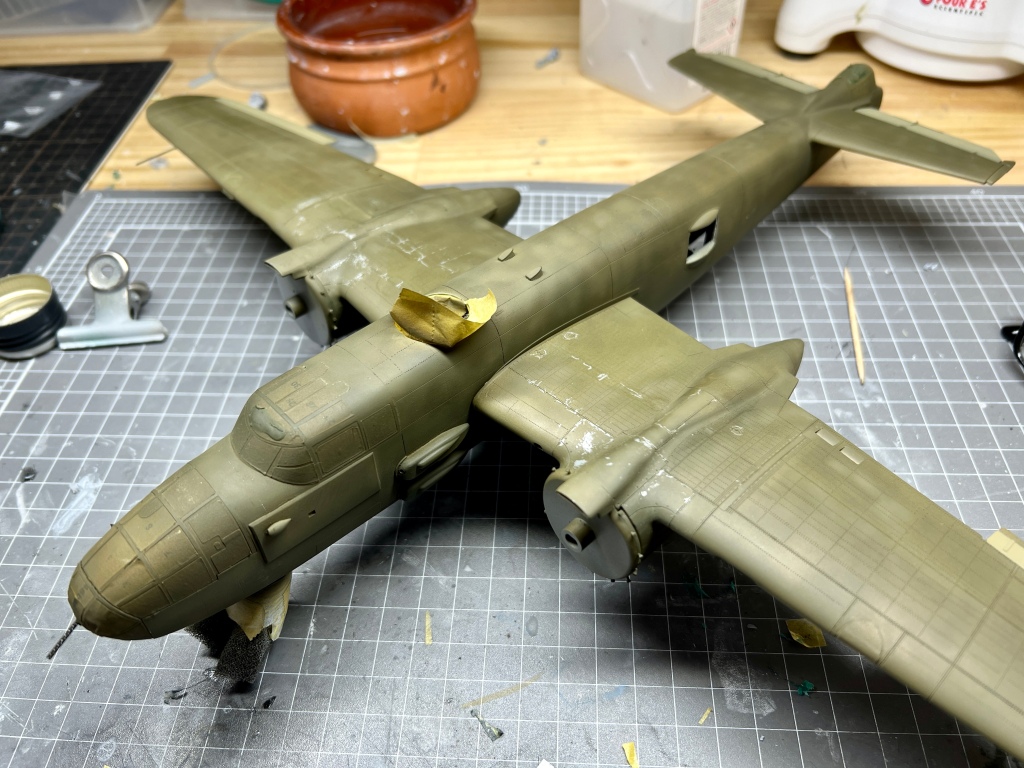
I wanted to try some hairspray chipping on this model, so first a base coat of Alclad Aluminium was laid down over the wings and engine cowlings where most of the chipping would be done. Two thin coats of generic hairspray were then sprayed over this before a coat of AK Real Colours OD was sprayed over the whole model.

AK RC faded OD was then sprayed over the model, leaving the dark OD under the wings and tailplane. Dark yellow was then added to the faded OD and this was further mottled over the upper surfaces of wings, tailplanes and fuselage. Fabric control surfaces were masked off and hit with the faded OD, this time mixed with a decent dollop of tamiya deck tan.

The undersides were then sprayed MRP matt black with the demarcations done freehand. No fading was added to the undersides, I would be relying on washes to give it a faded dusty look.

Once I had the basic colours blocked in, I took to the fronts of the cowlings and upper nacelles with a stiff damp brush slowly chipping away the OD to reveal the underlying silver. This was the first time I had tried hairspray chipping on an aircraft, and I’m not satisfied yet that it’s the best technique for aircraft chipping, certainly for small areas of chipping, Its a technique that definitely needs more practice on my part though.

I do think the silver pencil still offers more control.

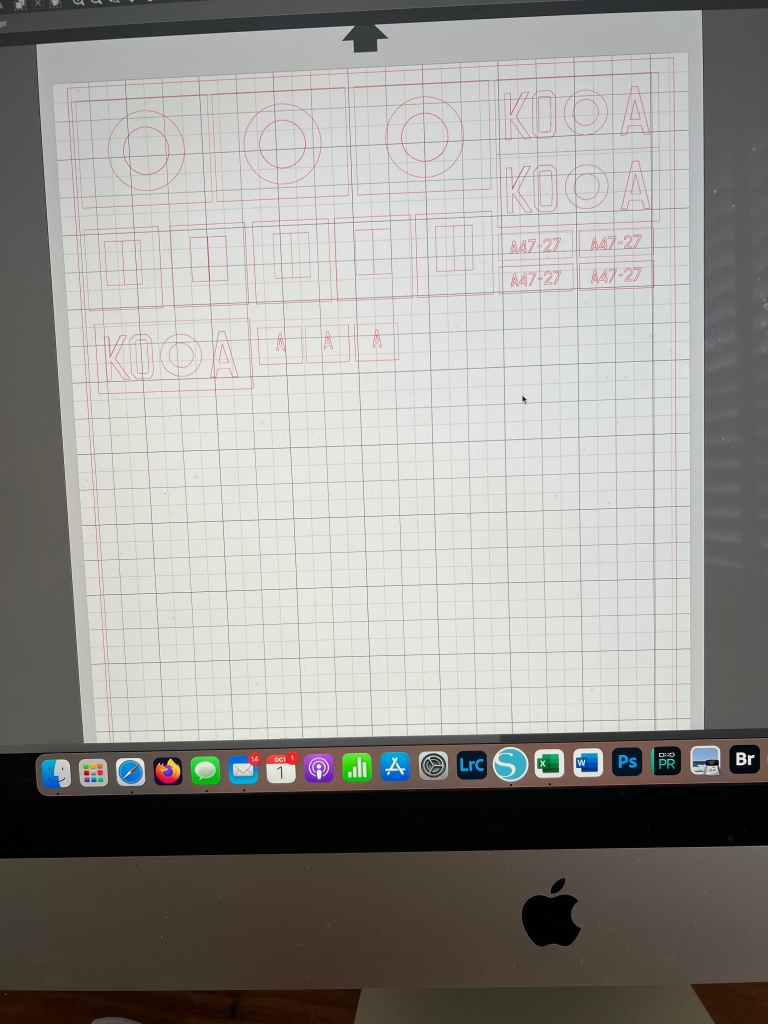
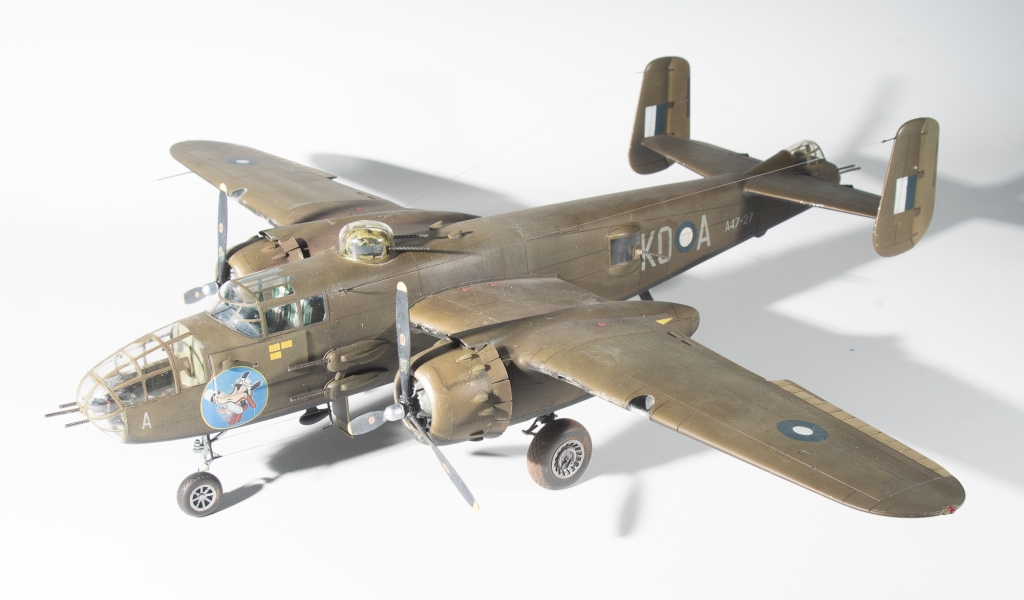
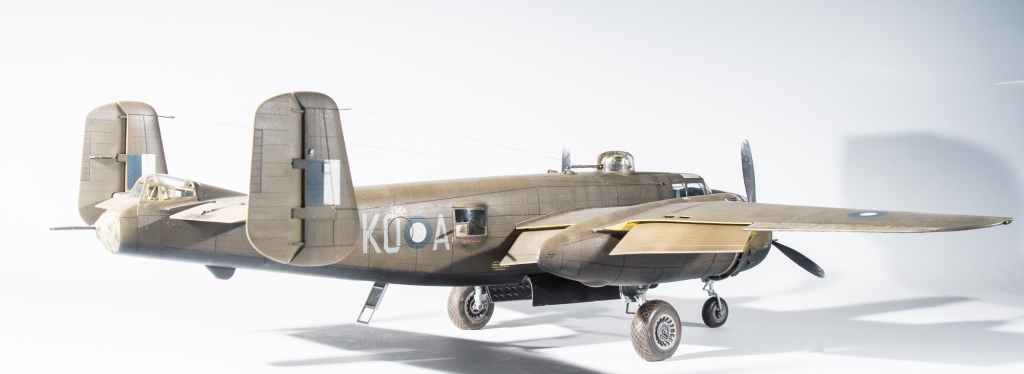
WW2 Royal Australian Air Force national markings being fairly simple, lend themselves to being painted, so the roundels, fin flash, codes and serial numbers were scanned into my silhouette software and masks cut using the last of my Oromask.

The two machines on the ASL sheet have had their neutral grey undersides overpainted in black for night intruder operations, One of them, which was my original choice had the black painted hallway up the fuselage and nacelles rather than the normal demarcation line. sadly the one photo I could find of this aircraft , although of poor quality did not seem to show the high black sidesInitially my desire was to do the aircraft with the black undersides that reached midway up the fuselage, however then one photo I could find of this aircraft, although of poor quality seemed to contradict ASK’S drawings, with the fuselage painted with OD down to the usual demarcation. Certainly the tail fins did not look black. Shame, as I quite liked this scheme as drawn.

With the reasoning for my initial choice disproved, I turned to the other subject on the sheet. This in addition to the black undersides, also had nose art , although much later on I found , again. Artscales decals had probably got the background colour on this wrong too.

With the masks cut, a mate suggested that I first print them out on paper to check sizing. This was an excellent idea – thanks Calum – as it brought to light all of the decals were slightly too large according to photos of the actual machine. Subsequently, the masks were reduced size a bit. This is one of the advantages in using masks over decals.

,

Once the masks and decals had been applied another sealing coat of gloss was applied ready for the wash, which in this case was a brownish black shade of oil paint.

Once dry and the excess wiped off, a coat of semi gloss was applied ready for some oil paint weathering, semi gloss being used as the oils seem to blend a bit better over this. The problem was though, the only semi matt I had was a old bottle of low sheen Klear Kote by Alclad. This smelled like it was an enamel product and never really seemed to dry to a hard shell. Picking up the model, it remained , not tacky, but not dry over the course of a week until I dullcoted it. Even now, handling the model, my hands do not came away cleanly.

The Alclad went in the bin. This would be about the third Alclad product I have used that has not performed properly. They definitely seem to have a shelf life, well the clears and primers do!

The result of all this was, despite the matt coat, holding the model for any length of time seemed to pull away the matt coat, which led to a very truncated weathering session and my enthusiasm for the project being severely dented. Exhaust stains were sprayed on in thin coats, although looking at them, I wish I had used a darker shade. The pitot tube was replaced with Albion Alloy aluminium tube. On the underside the ADF football aerial was attached with some brass rod to secure it firmly in place. Brass rod was also used to replace the plastic pole aerials as I thought this would provide a stronger base for the EZI line strung between them. Aerial fairleads were also fashioned from brass rod for the tail fins and fuselage, Landing gear doors and actuator struts located securely to the nacelles and nose. Finally, the Karaya barrels were added to the gun positions, and the Eduard wheels glued on One gripe with these. The wheels are marketed as for use on the HKM kit, yet the axle holes required significant enlargement to take the HKM axles. If you are going to market an accessory as for a particular kit, then make it so that it is a drop fit for that kit and does not require modification. Eduard have form for this, especially their wheels. I would not be surprised if these are just their wheels for the Monogram kit, but with new packaging.

Finally, the transparencies were unmasked and to my horror, there was a lot of fluff on the inside. Most of the canopy fluff was removed by way of poking a bent micro brush through the top turret hole. I managed to pry off the nose cap as I had just used PVA.but in removing some overspray with a thinner dampened cotton bud, also managed to remove a swipe of paint off the nose . 50 ammo cans. Naturally I didn’t notice this until I had refilled the nose cap, this time with tamiya glue. Guess this model won’t be making the competition table after all.

Conclusion

I thoroughly enjoyed this build, All errors were of my own making. Lessons for me from this build were I still need to add as more parts like the wingtip lights that form part of the structure before painting, so that they can be properly faired in. My wingtip lights look like the late after thought they are. I also need to take more care with these bomber type aircraft to ensure fuselage openings are better sealed to avoid sanding swarf getting in.

Weak points of the kit though, are the exaggerated fabric effect on the ailerons and the ridiculous engineering that means the landing struts need to be added early in the build. Location points for the aerials and upper turret bullet deflectors also were non existent, which didn’t help with exact placement.

For my money though it leaves the Monogram kit in its dust, as it should. Yes, its twice the price, but in this instance is twice the kit. I will definitely be buying the solid nose strafers when HKM get around to releasing them. If using the ASK decals, do beware they are not the most accurate decals on the market in this case.

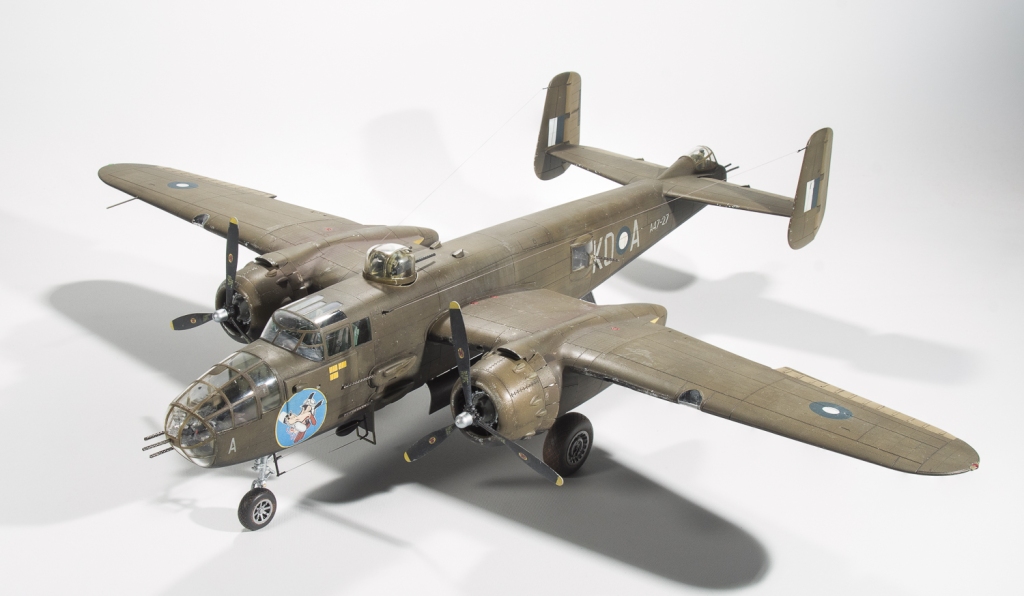
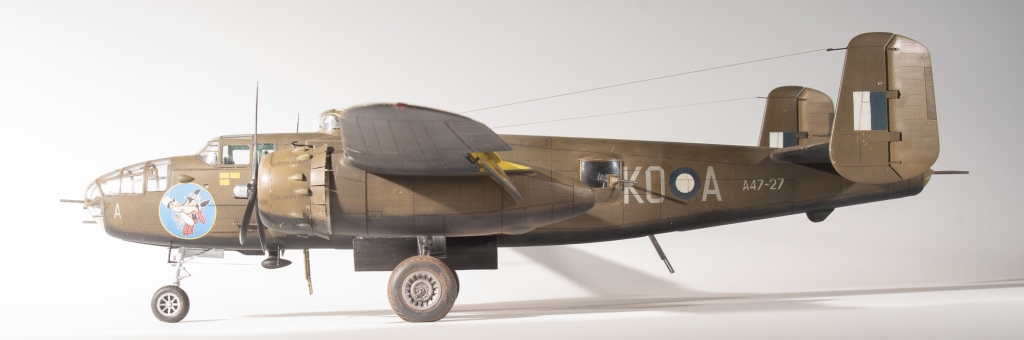
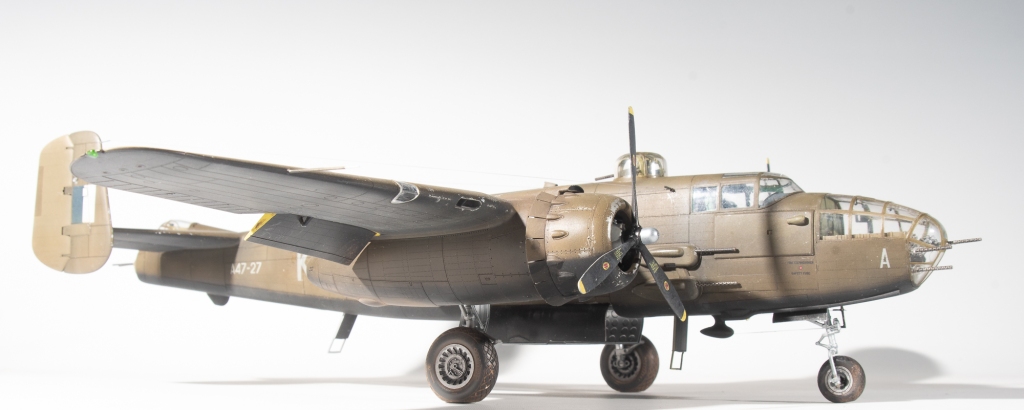
N.A.A B=25J Mitchell. 2 SQN R.A.A.F Hughes Airstrip. Northern Territory Australia 1944.

Leave a Reply