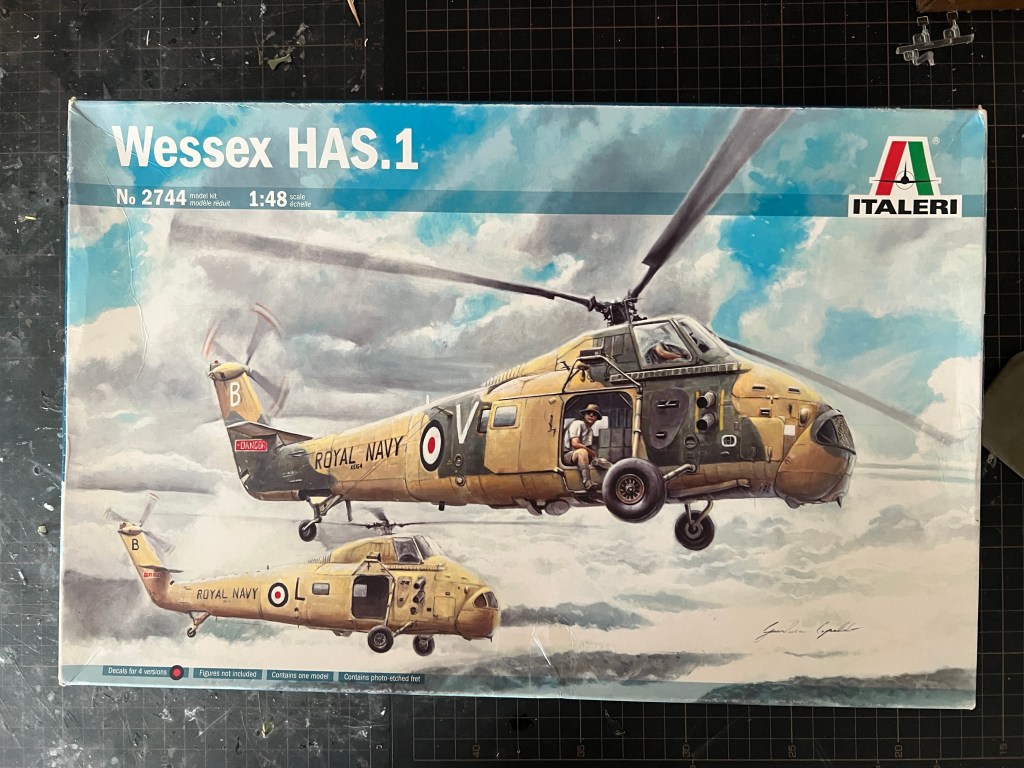
- Purchased; 2015
- Completed; 2025
- Enhancements:
- Dogbox – Hendies scale models Wessex Set E
- Pilots seats. Hendies Scale Models Wessex Set D
- Exhausts: Hendies Scale Models. Set B
- Wheels; Armory
- PE details. Eduard
- Stores carrier and fuel tank. Hamilton Hobbies
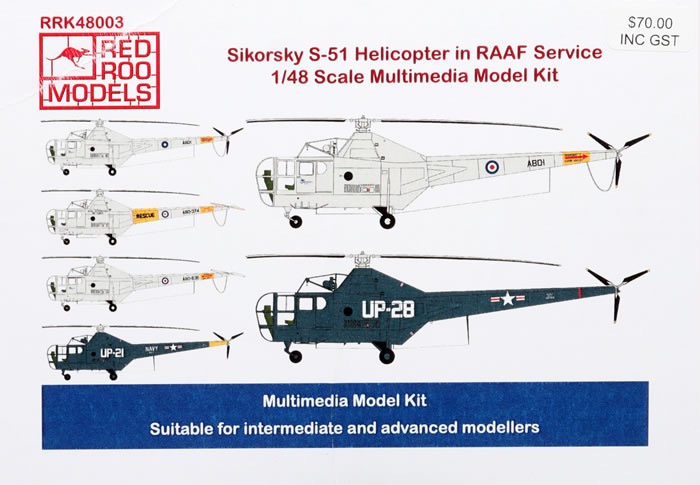
- Decals; L Decals
This build illustrates the progressive march of better aftermarket accessories that have hit the market over time for particular kits.
To make a Mk31B used by the Royal Australian Navy, you needed to combine this kit with the Italeri HAS3. That kit included the Dogbox, that sat on the rear engine deck. The HAS3 kit was also needed for some scoops and fairings present on a Mk31. These days though, there are people like Hendie from Britmodeller making available the parts needed here. One doesn’t need to have both kits for this conversion. If only using the HAS1, though, some scratch building of scoops and fairings will still be required.
Similarly, the decals, once upon a time, offered only the less than comprehensive Aussie Decals sheet. Now there is the far superior L Decals sheet. If you can still find it, the Southern Sky Models decal sheet includes all the stencilling as well.
Sadly, Italeri’s kit hasn’t improved with time. However, even using this as a base kit is progress. Prior to this, the modeller would have had to use the old and poorly detailed Revell kit. The plastic in this boxing is particularly pebbly and textured. It requires much sanding down and describing. Plus, all the shallow and inconsistent rivet detail needs redrilling. In the end, it needed more rubbing down. Some areas were still textured after the application of paint. Id love Airfix to release a new tool Wessex, but fear they would only do the HC2 version
Construction Notes
Of course, us Australians had to fiddle around and change stuff! So a Mk31 cannot accurately be made straight out of the Italeri box. There are a few additions and modifications required. The best online reference for these is Graeme Moulenoux’s Grubby Fingers site.
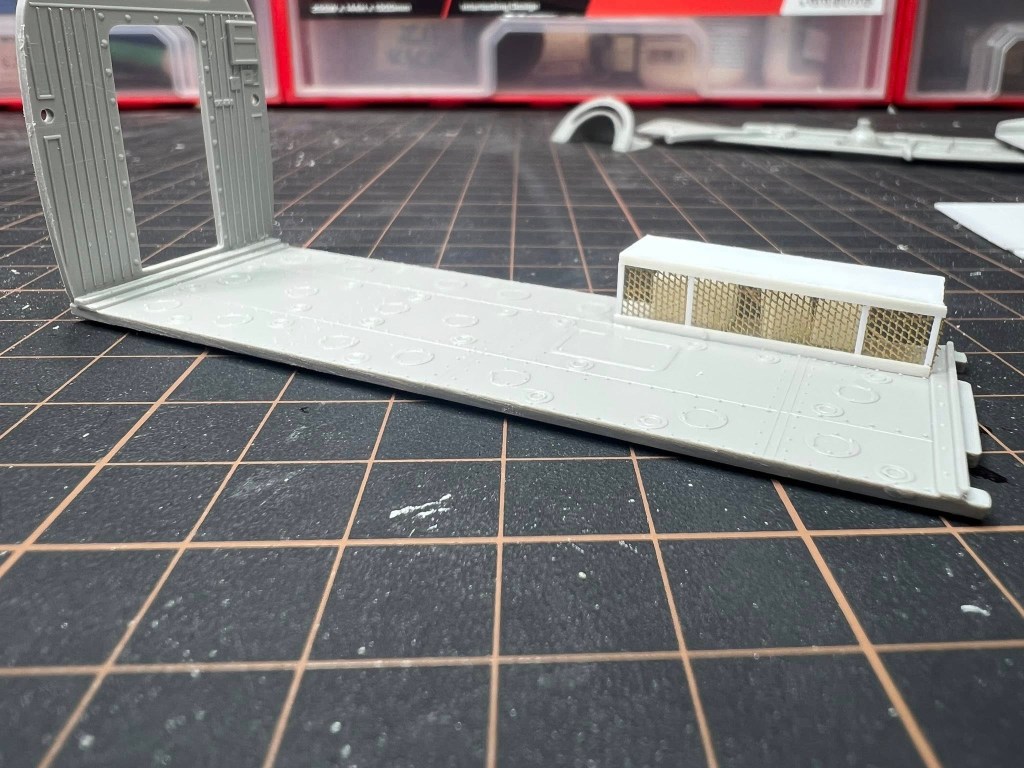
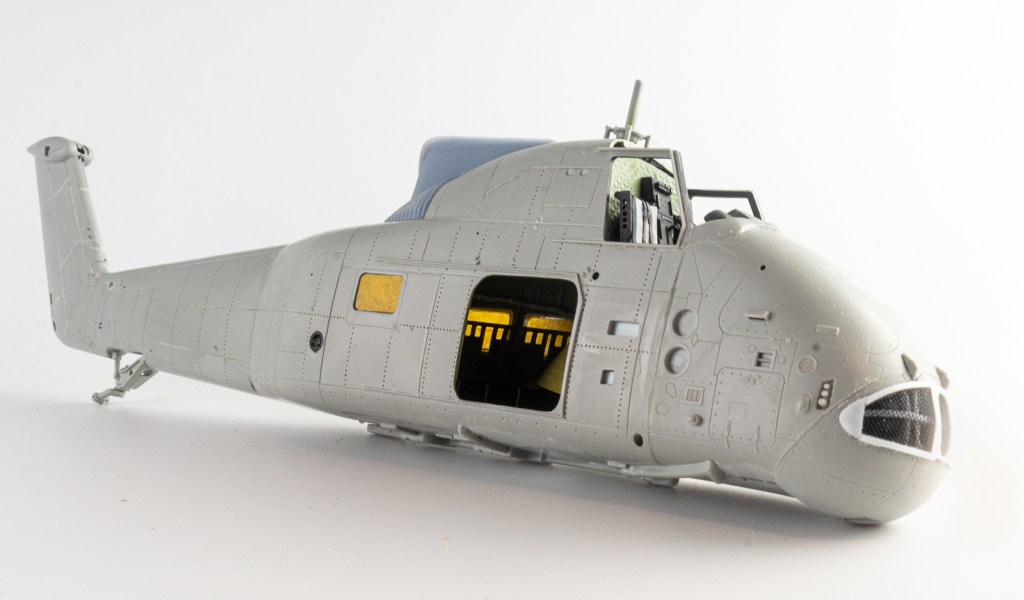
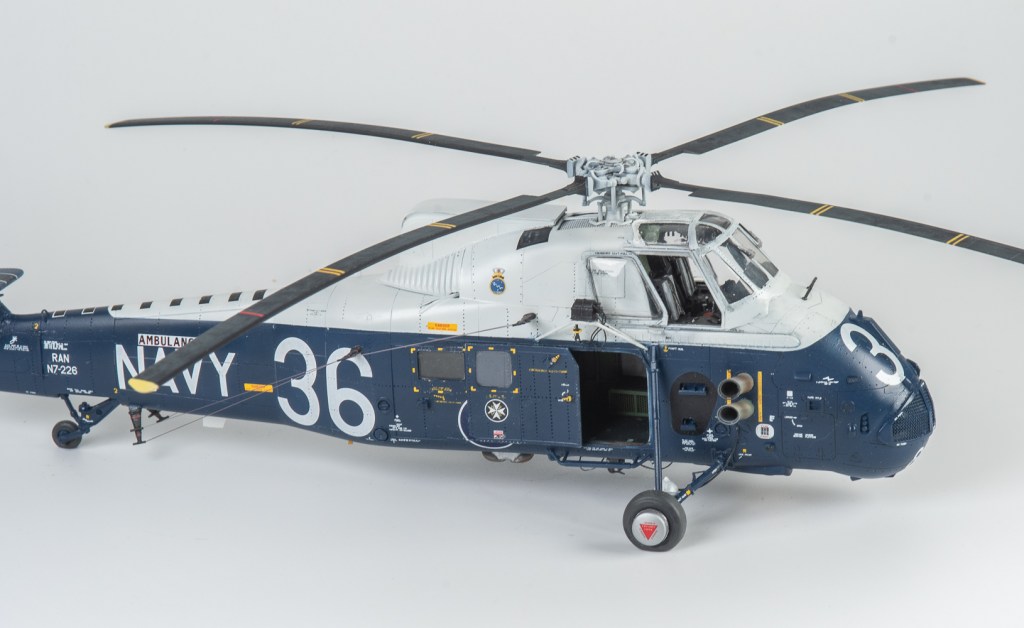
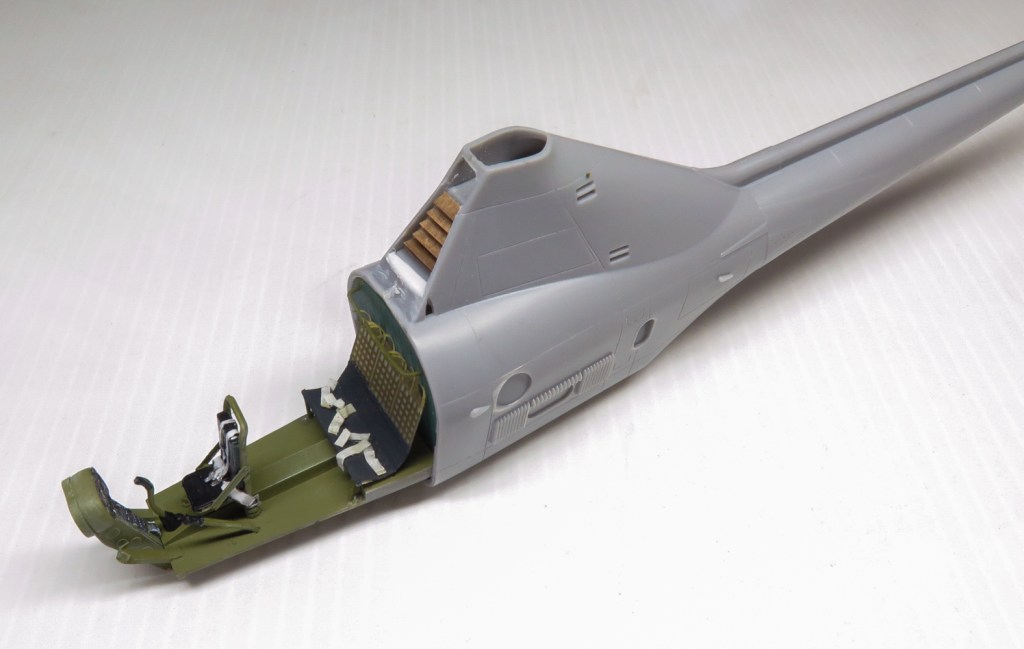
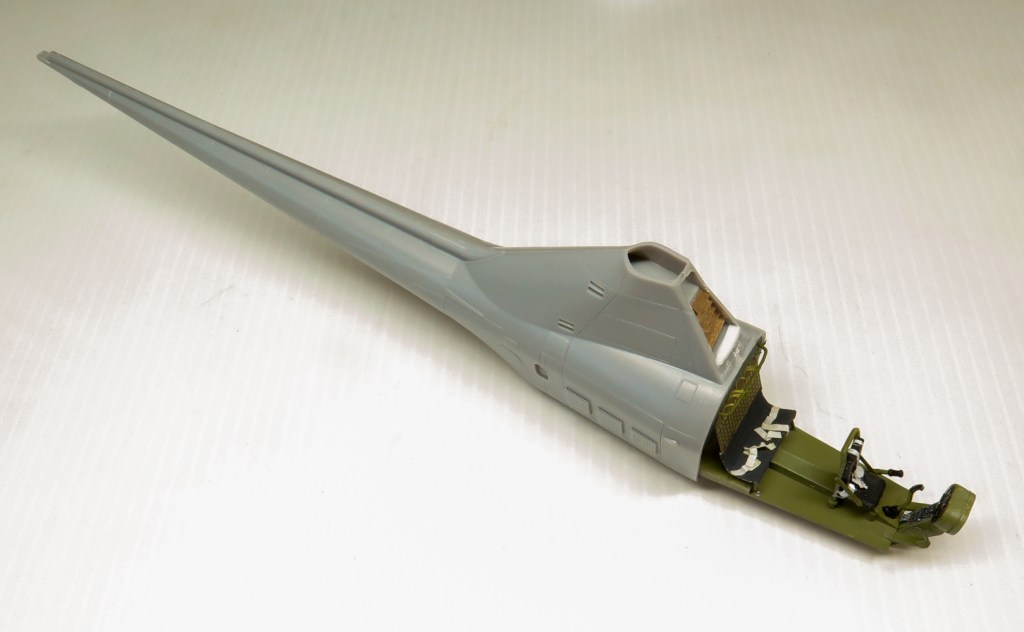
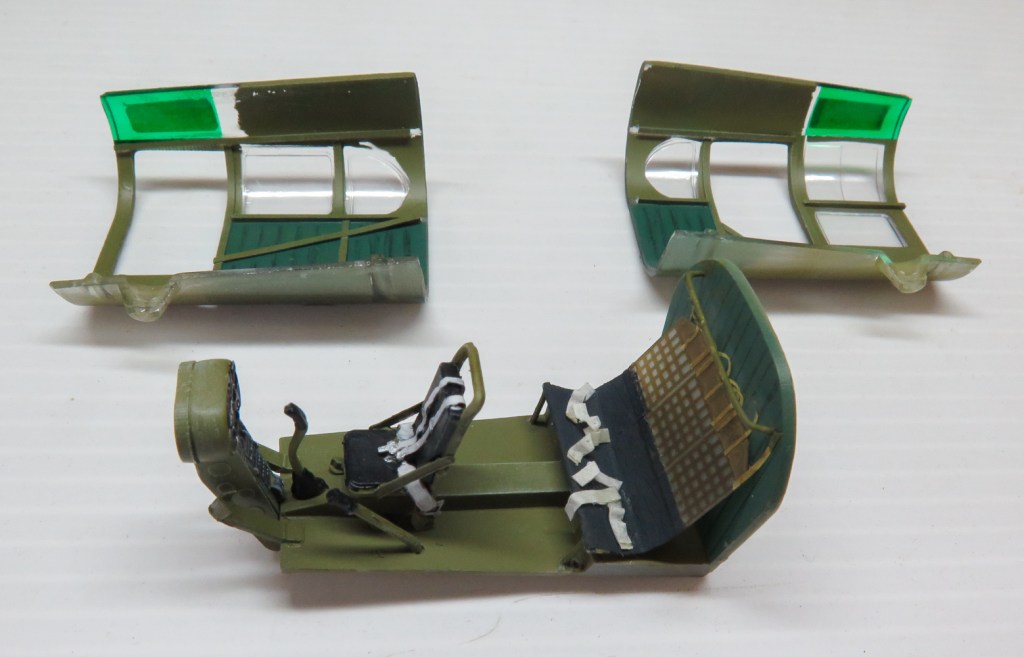
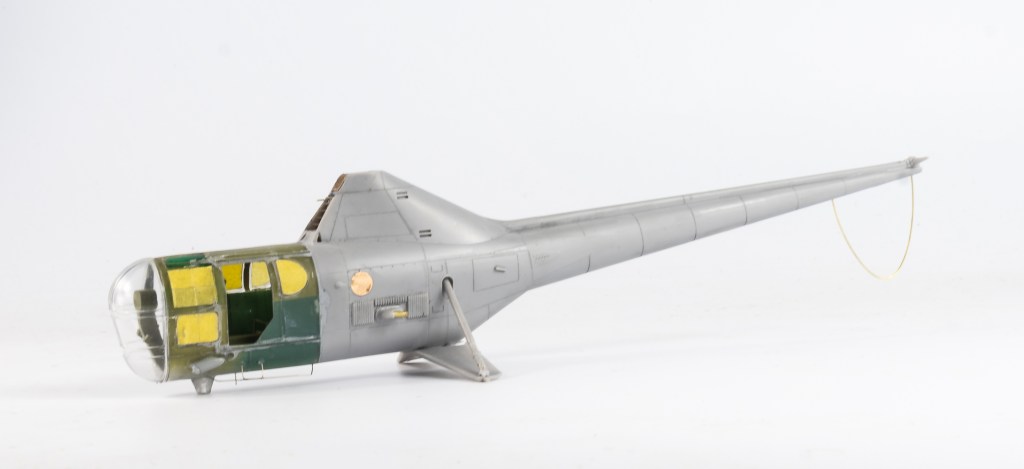
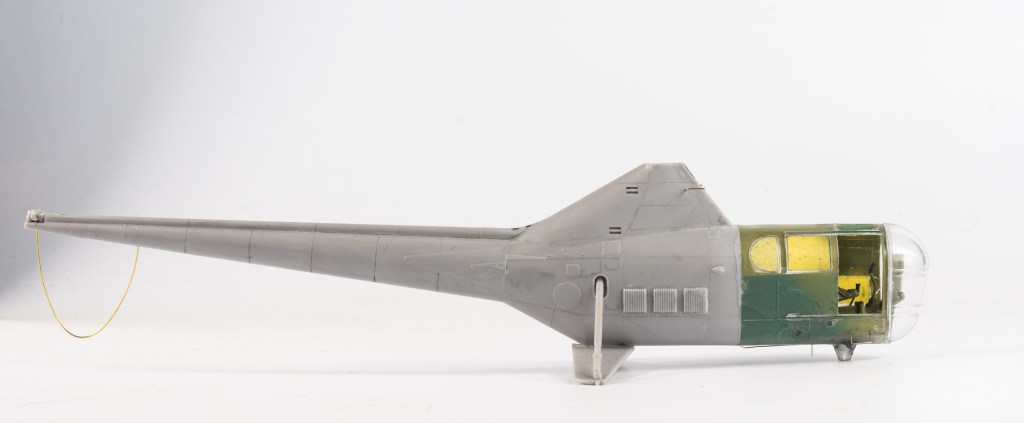
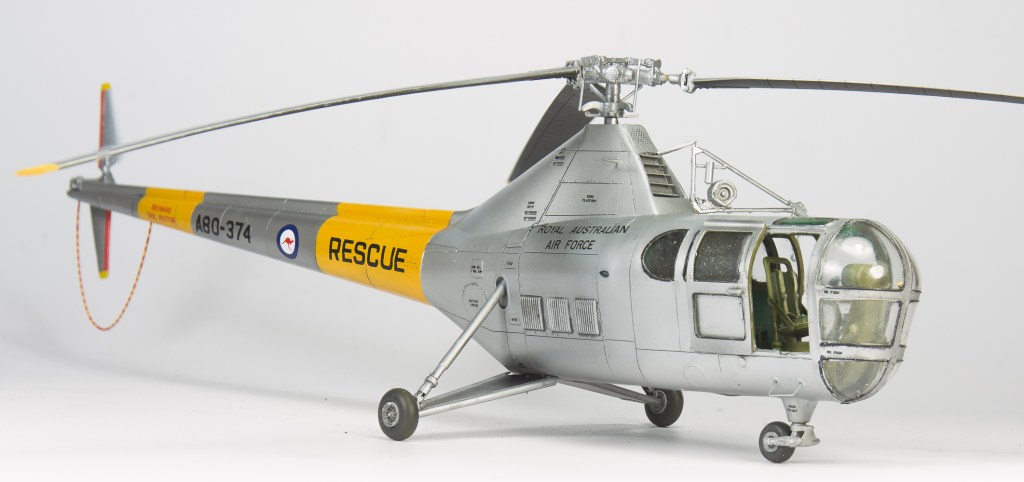
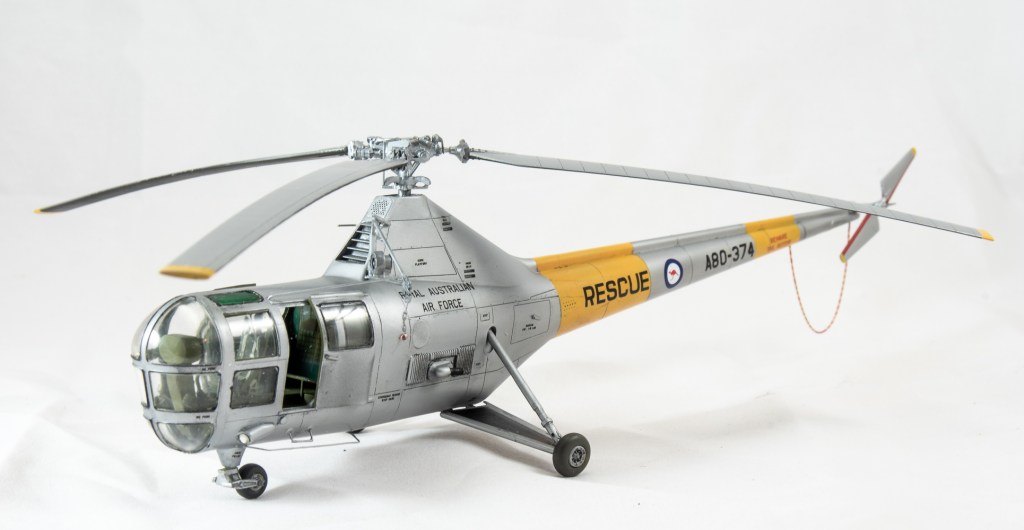
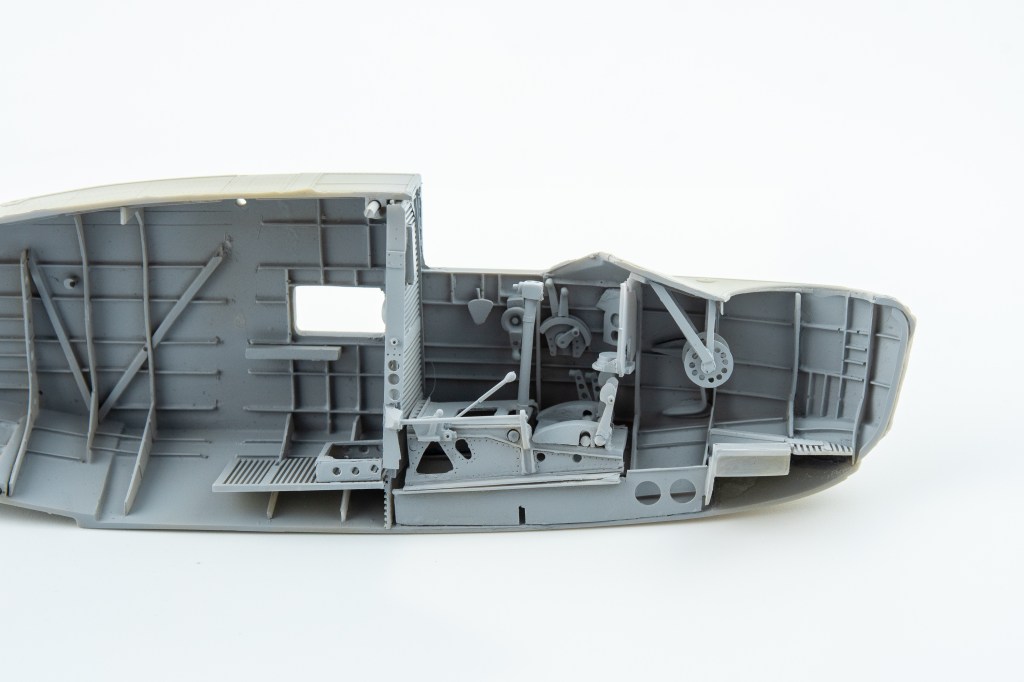
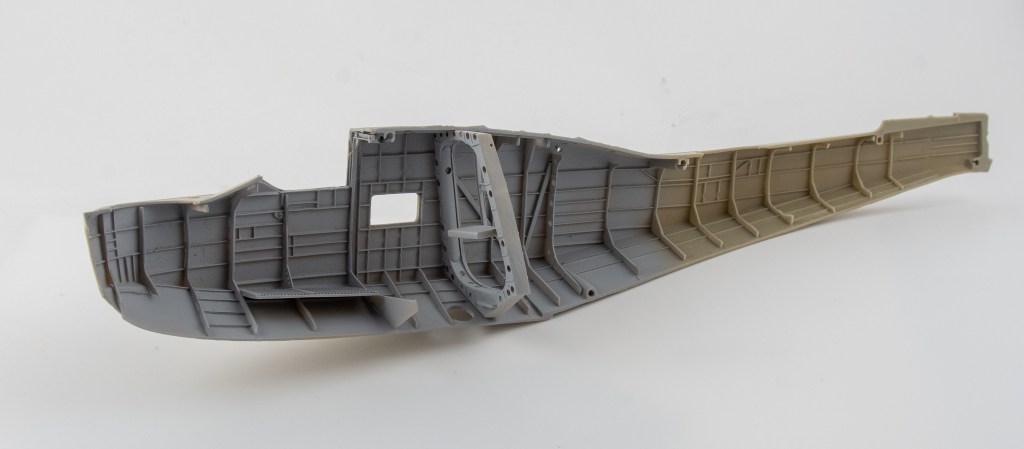
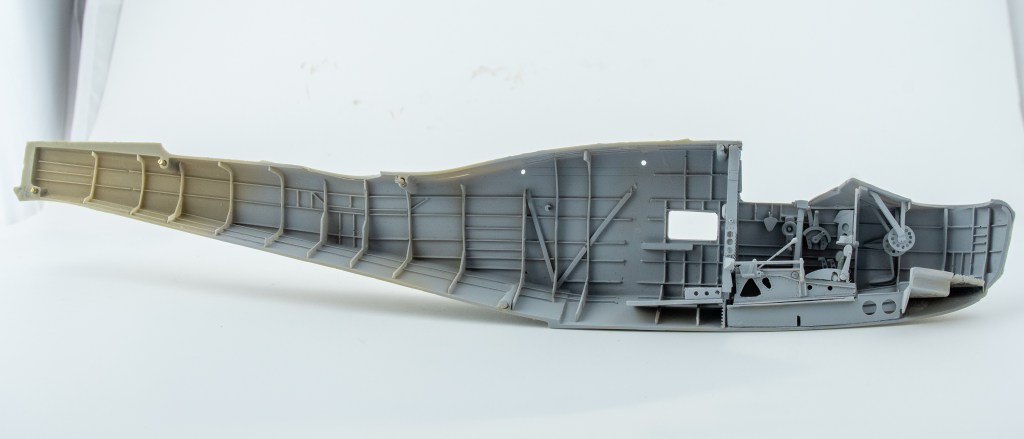
We start off with the interior. Scrap plastic strip and mesh were used to build up a bench seat. It sits over the auto hover gubbins, so no need to scratch build all this stuff. The Navy also had the good grace to hide all the interior wire jumble behind a drape. This was made from rolled Tamiya epoxy putty.
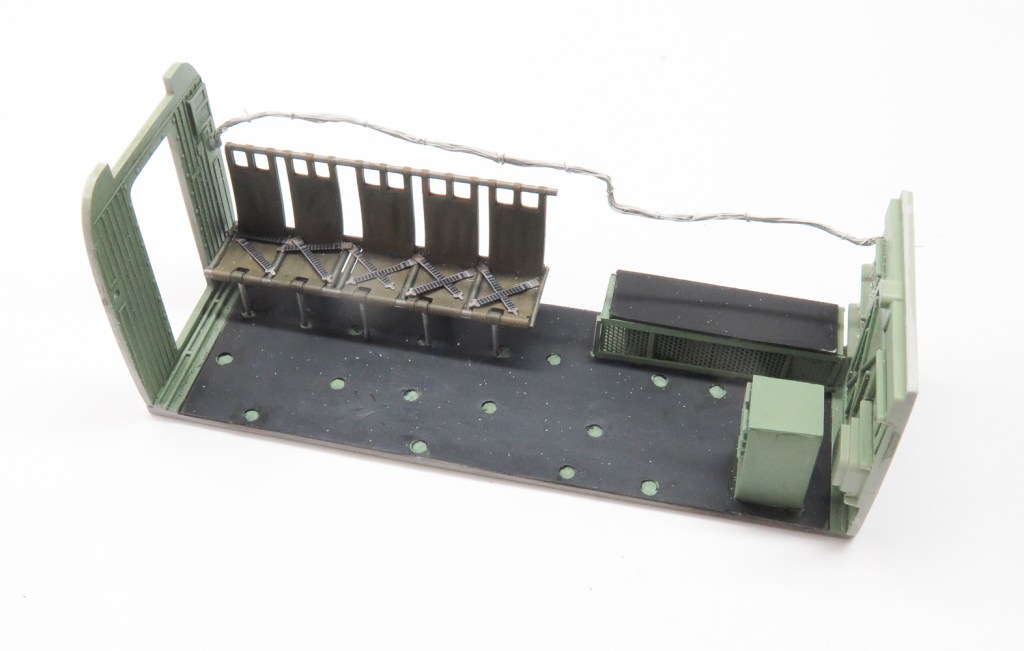
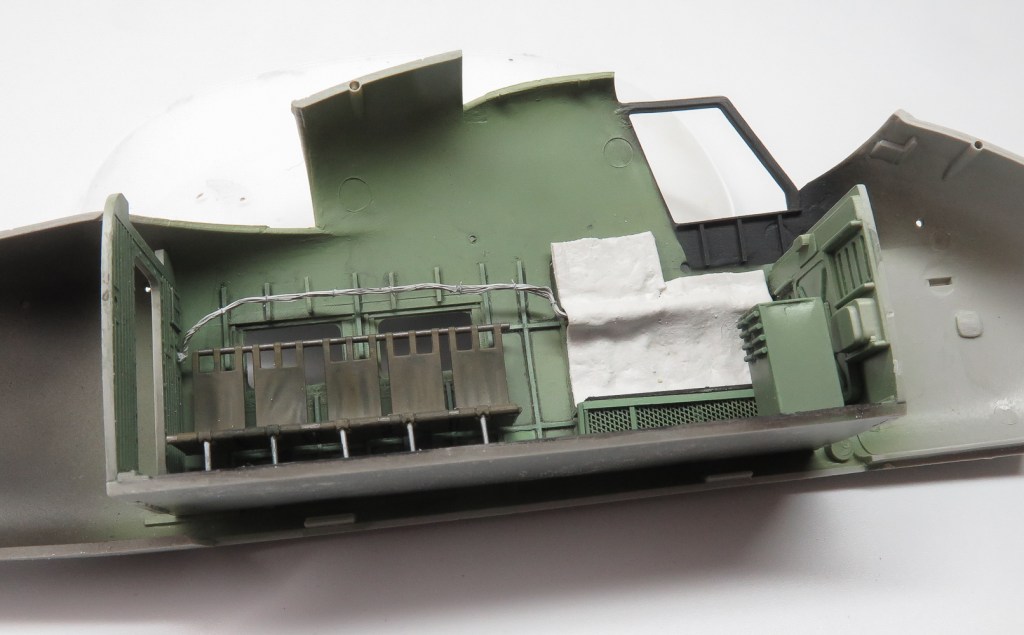
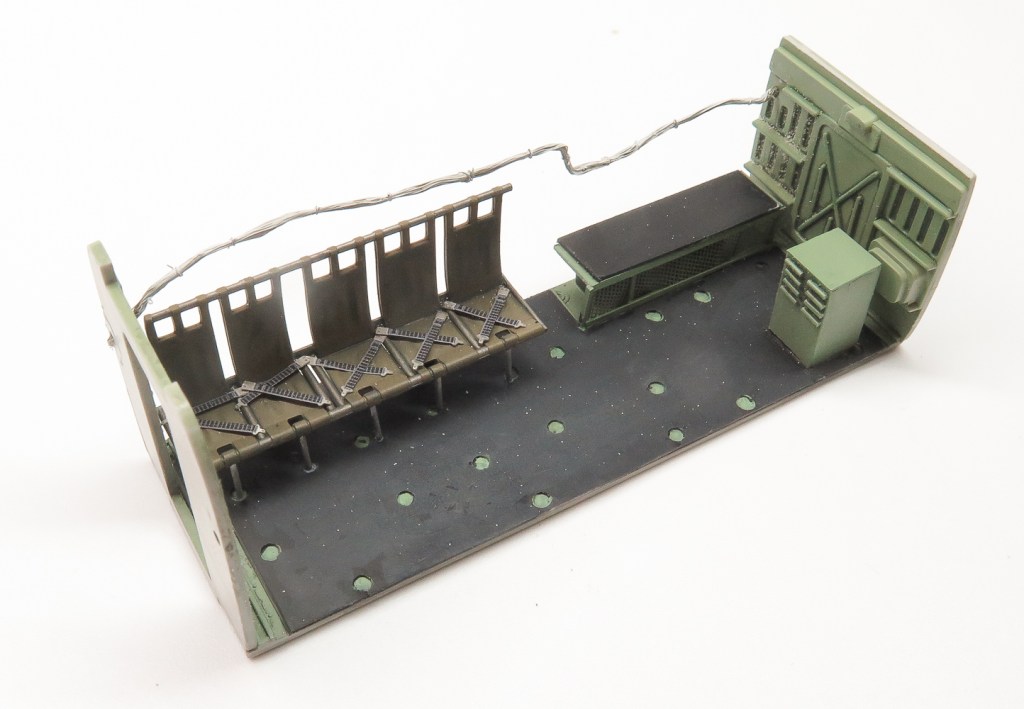
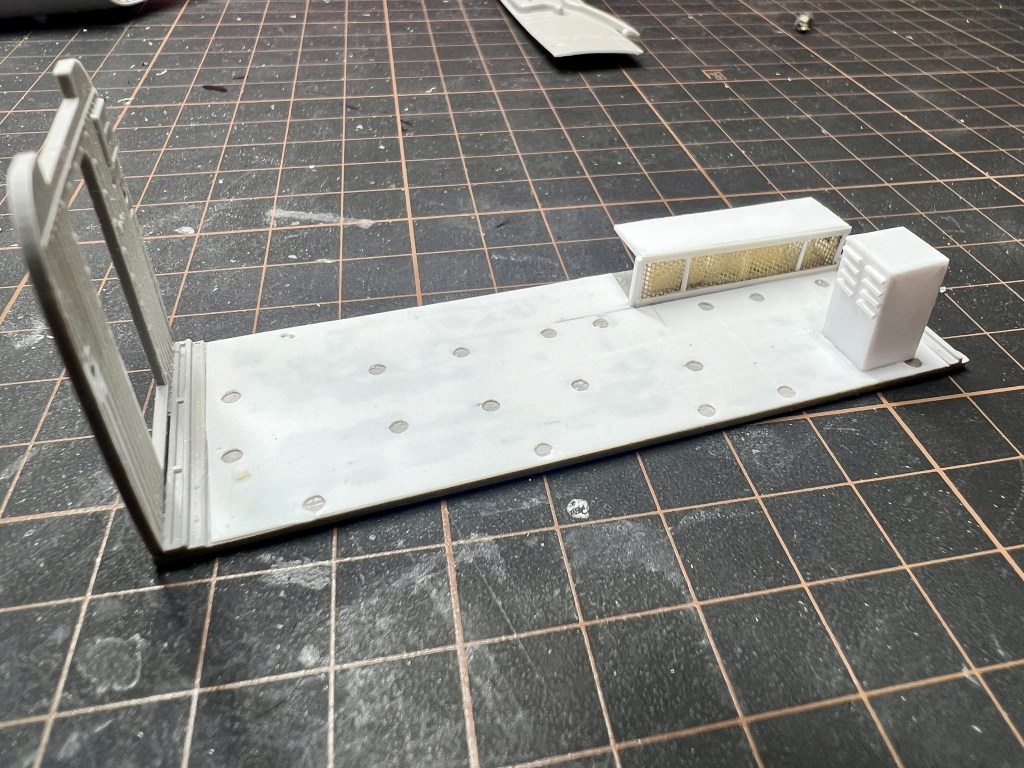
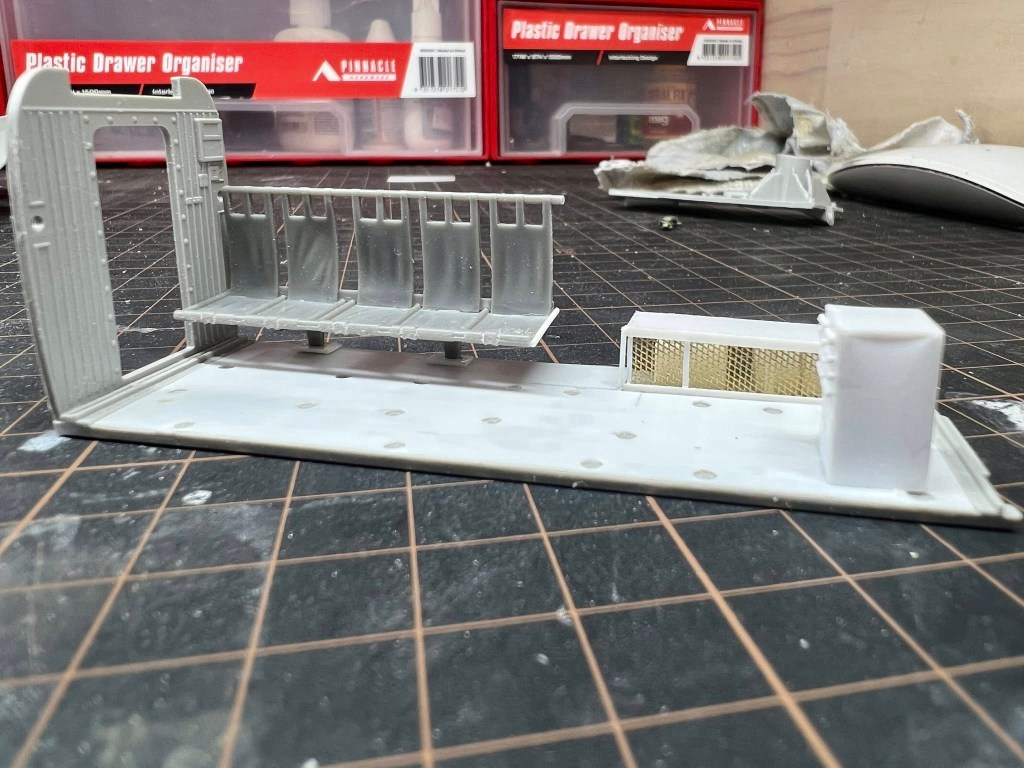
The bench seats came from an Airfix Seaking and the cabinet was built from plastic card. Plastic card also filled in for the plywood floor the RAN fitted over the actual floor. The electrical component box was constructed from the ever useful plastic card. The wire loom was crafted using speaker wire.
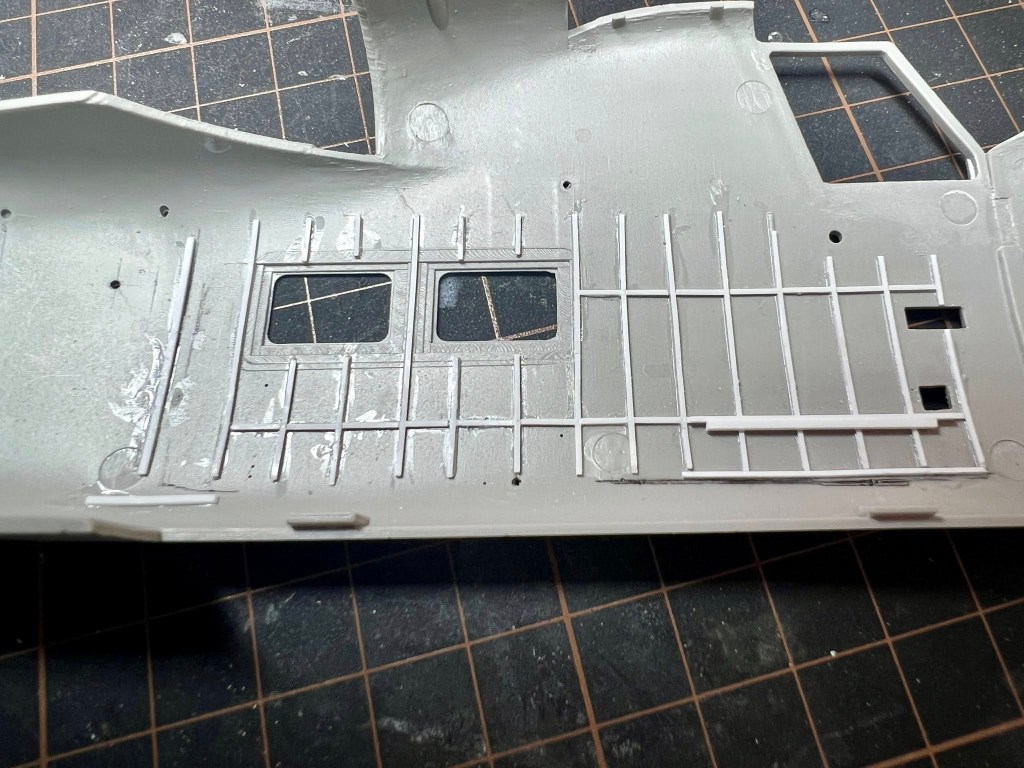
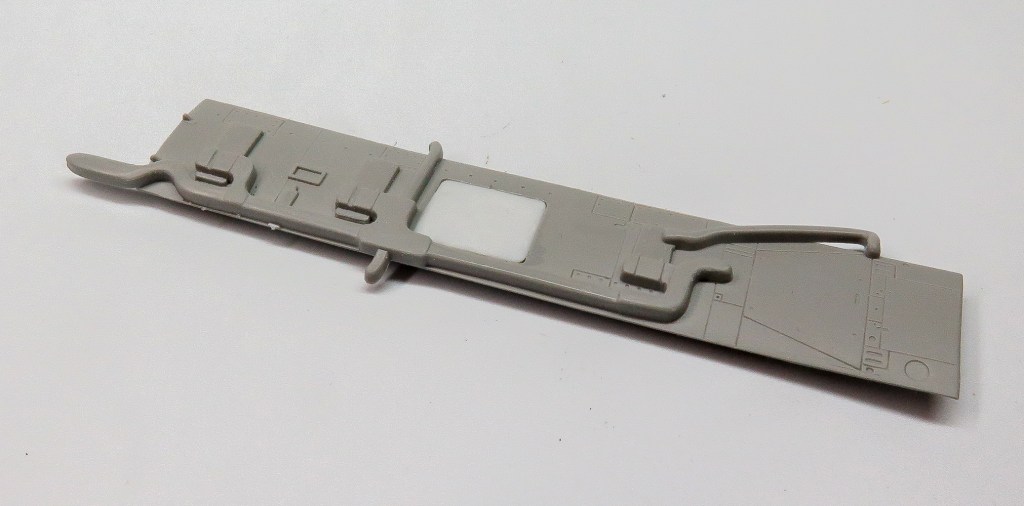
The bottom panel needs the sonar detail removed from within the hatch. Then, the opening should be faired over with a panel from plastic card.
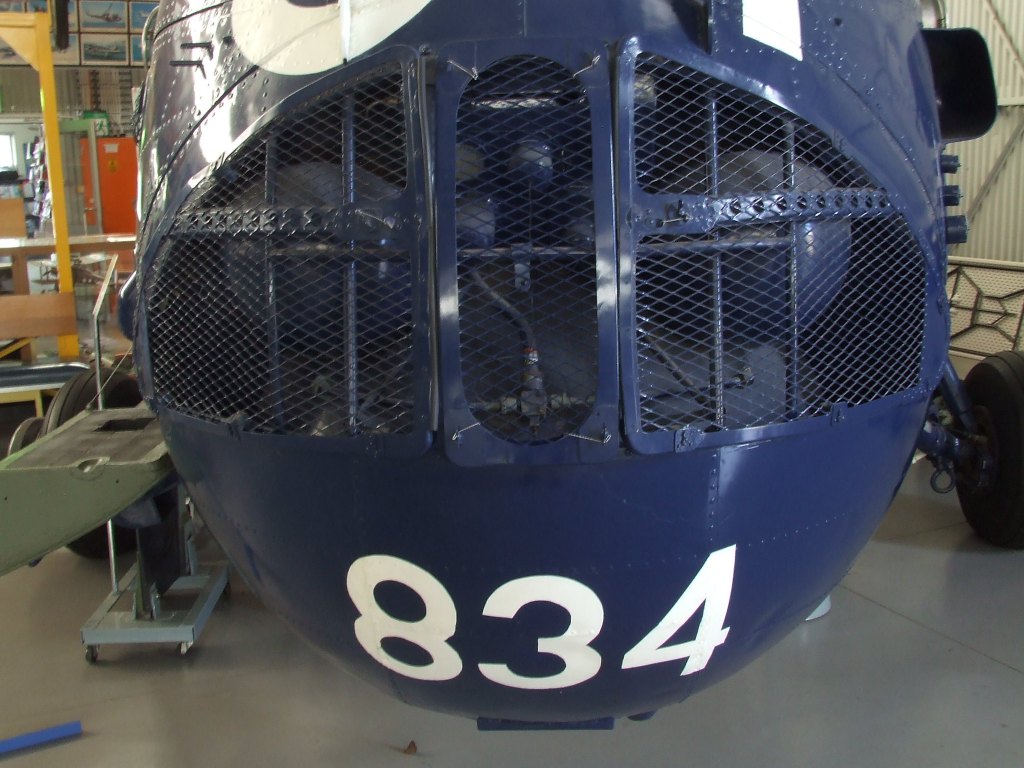
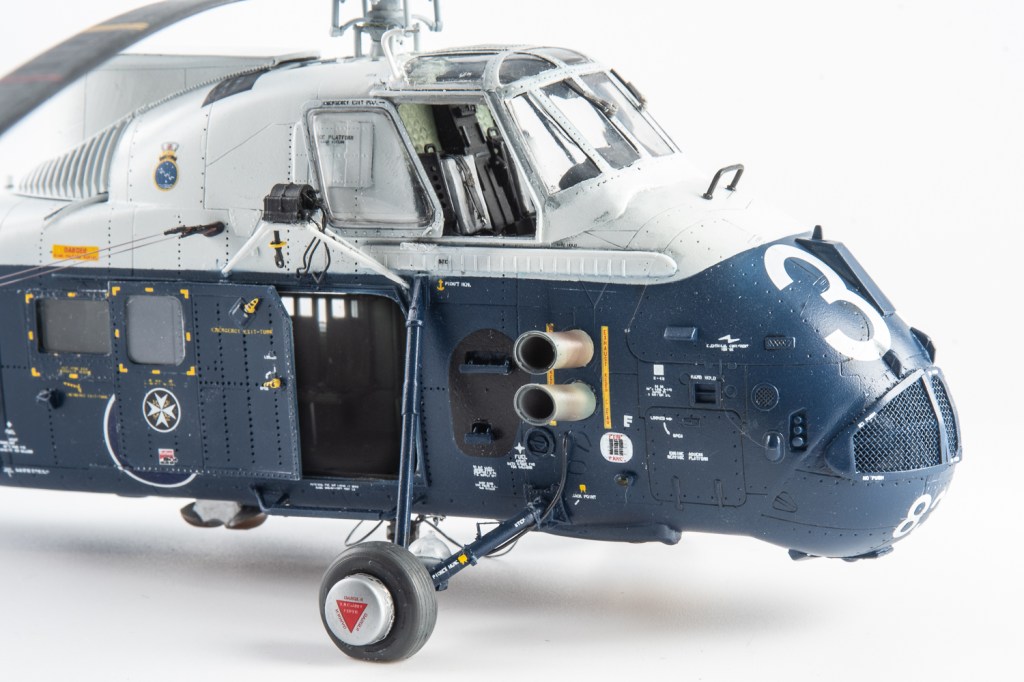
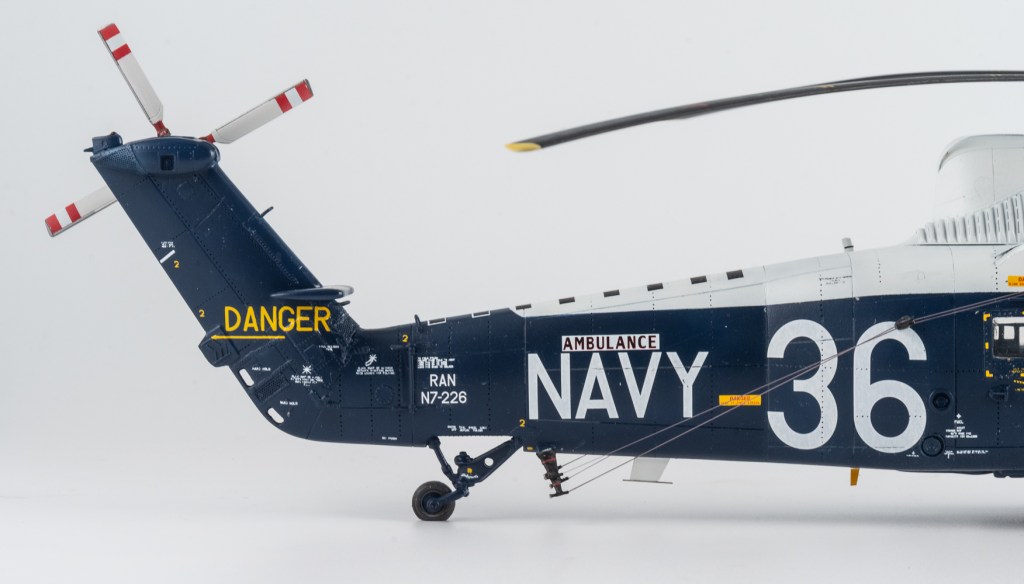
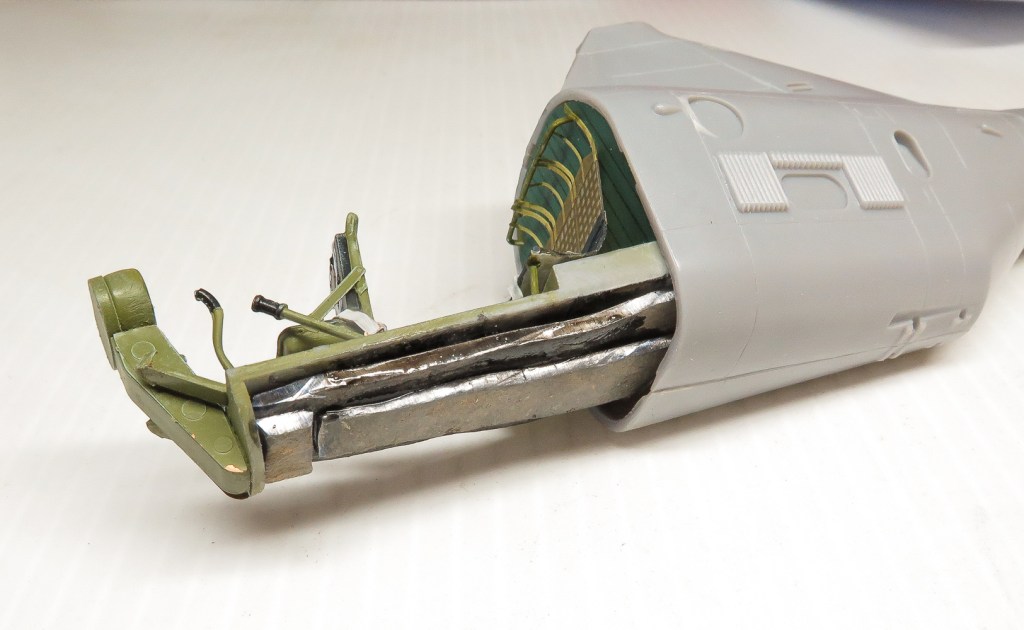
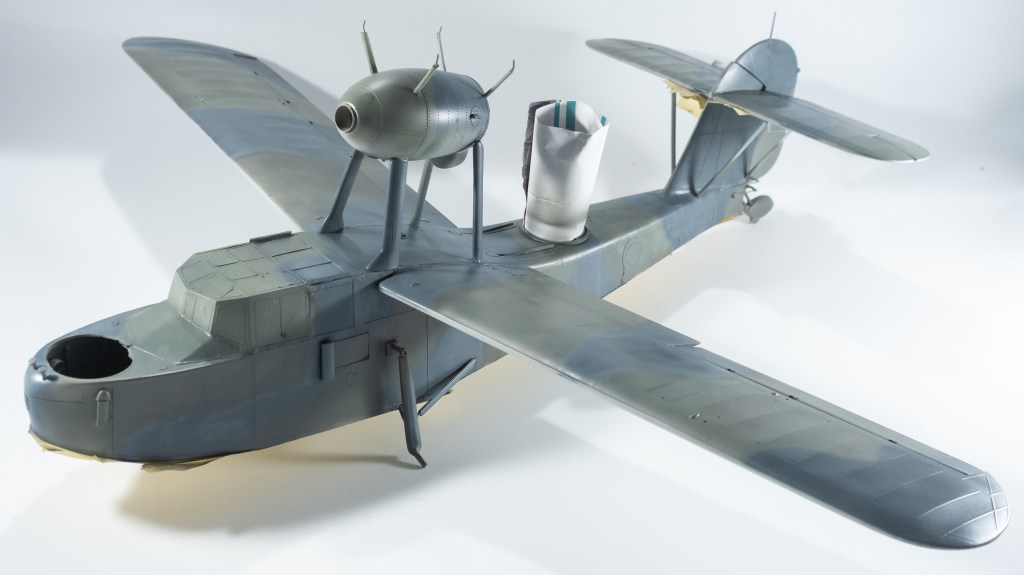
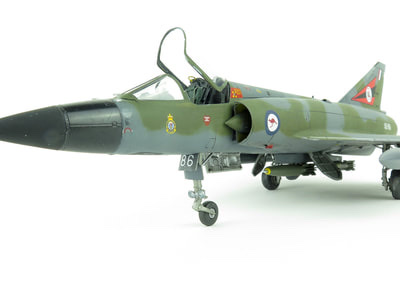
The below image taken by myself of the Wessex in the South Australia Air Museum shows what is required of the kit nose filter to properly represent a RAN Mk31B
Basically, two spherical compressed air bottles and extra framing around the grill.
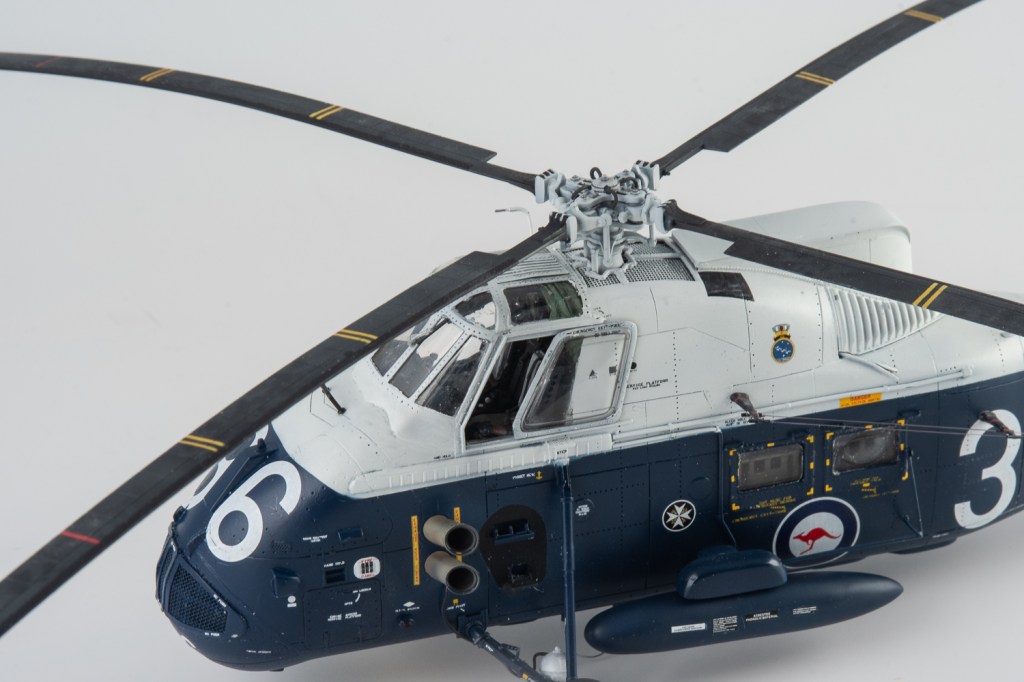
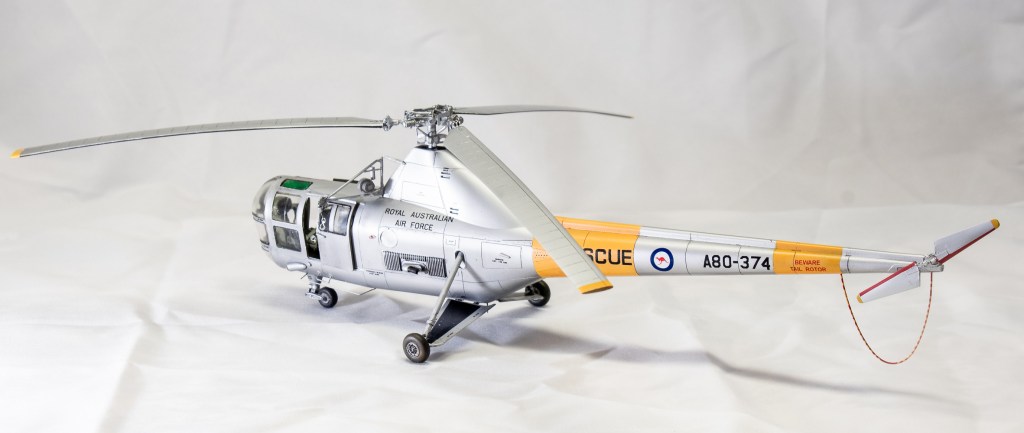
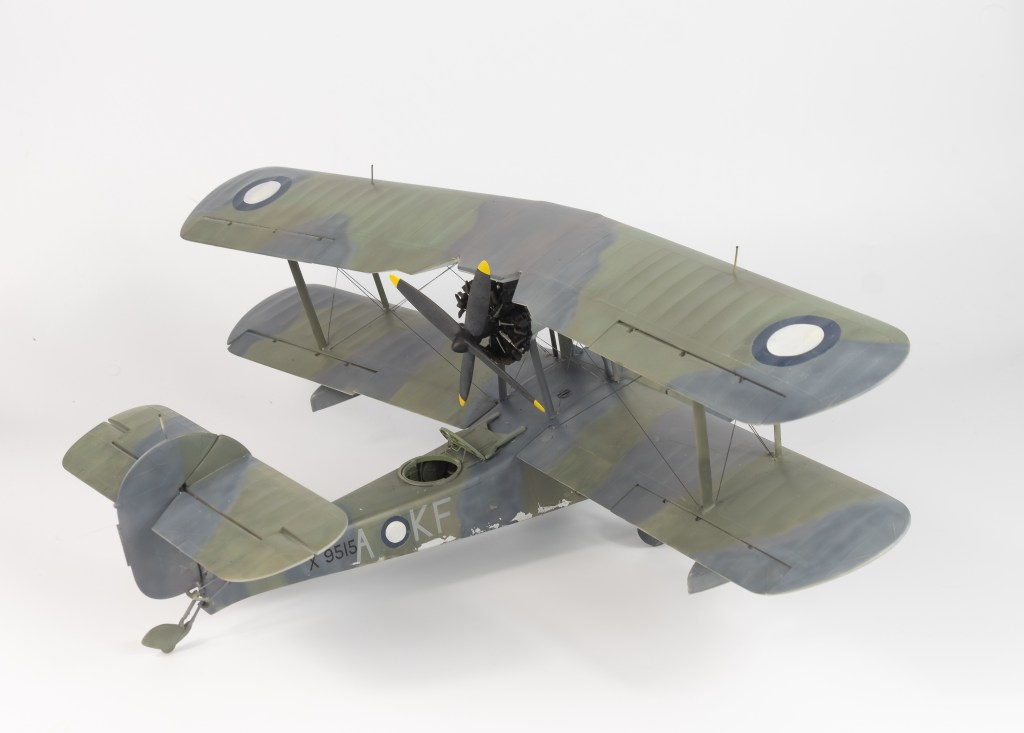
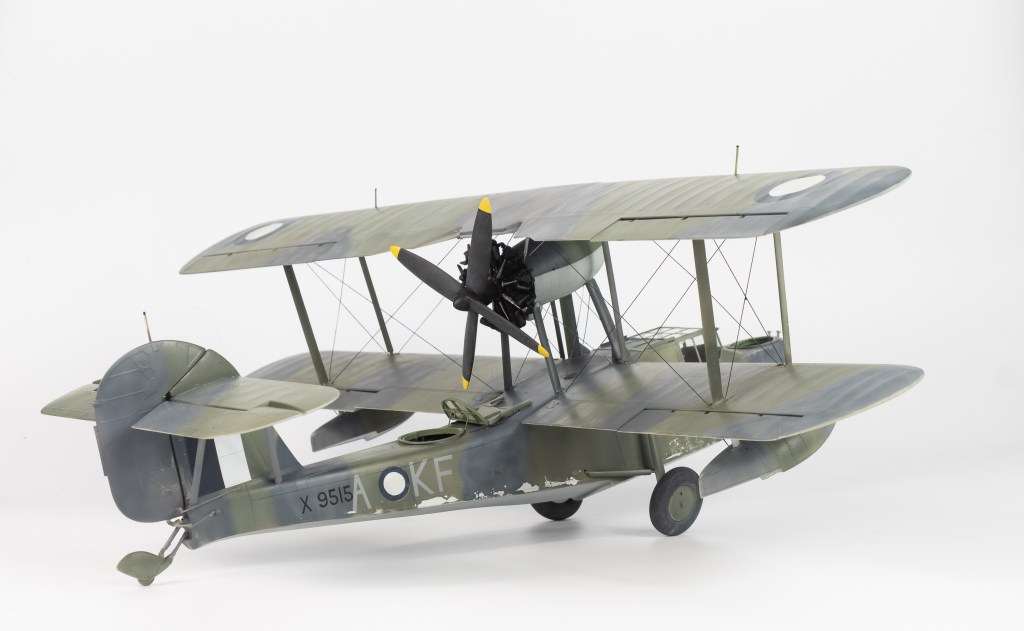
Hendie Models supplied a new nose bulkhead complete with the bottles and piping, and plastic strip formed the framework. The scoop you can see on the right side of the photo will also need to be added. I used the item from a HAS3 kit I had in the stash. The HAS3 also gave up the rectangular slanted fairing that sits on the nose. From this point, I methodically worked around the airframe. I added bits and pieces that I noticed when comparing the photos to the kit parts. These included a scratchbuilt IFF antenna to the rear of the fin. I moved and added fuel caps. Additionally, extra antennae needed to be added.
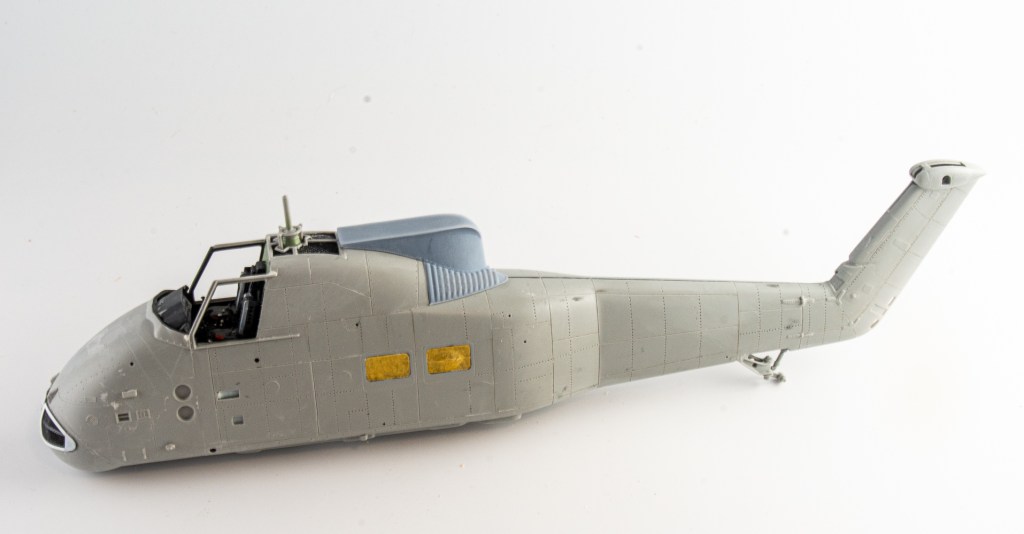

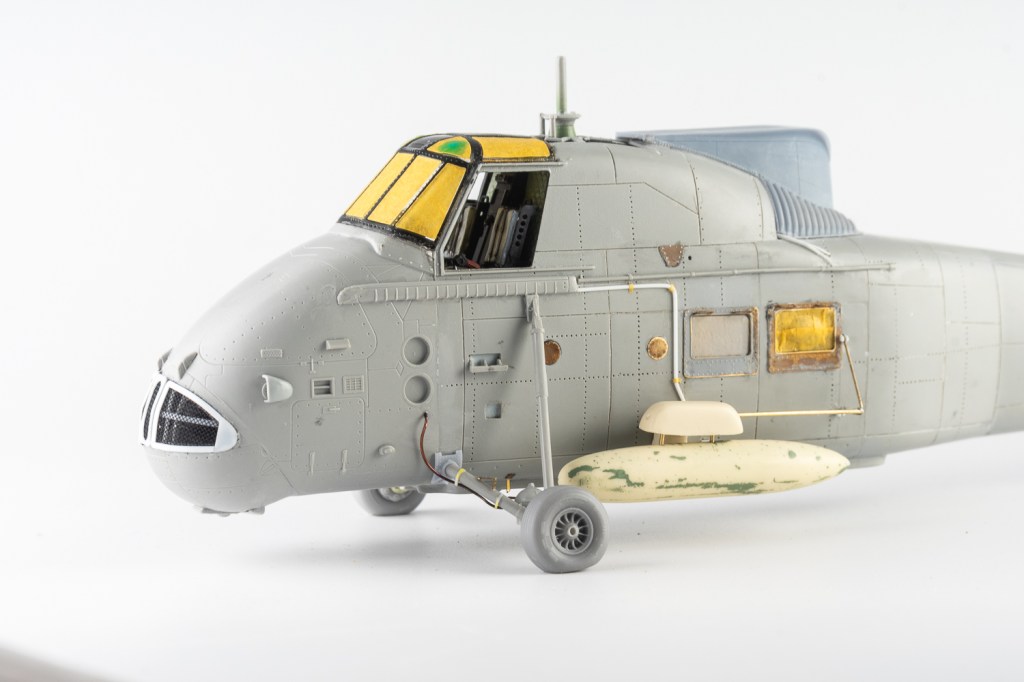

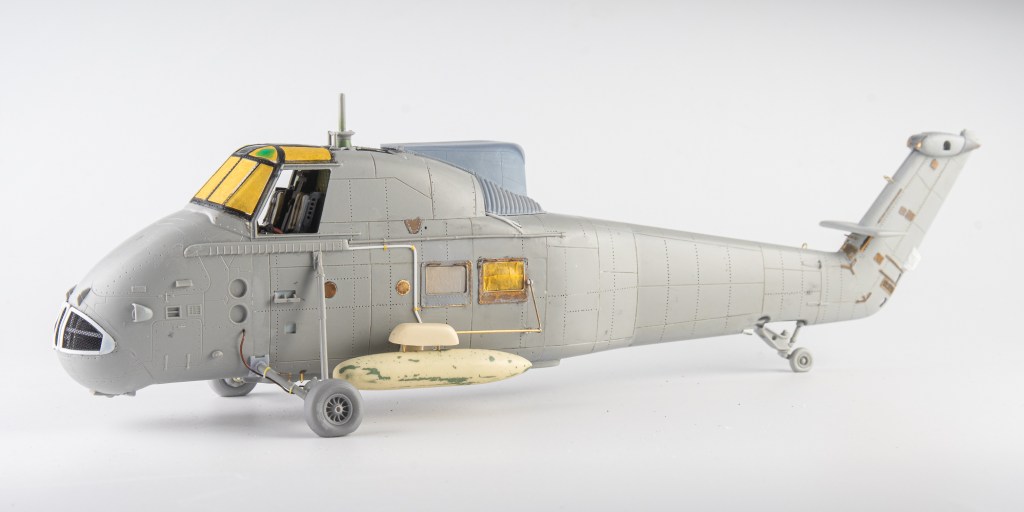
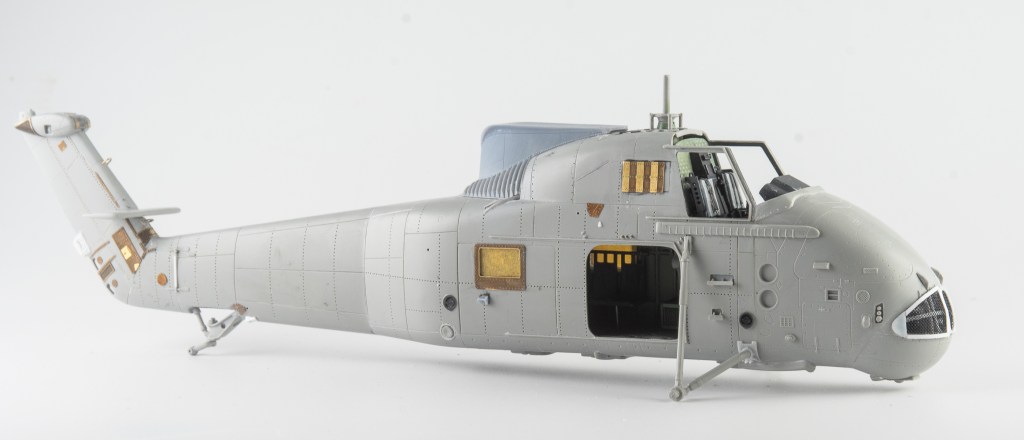
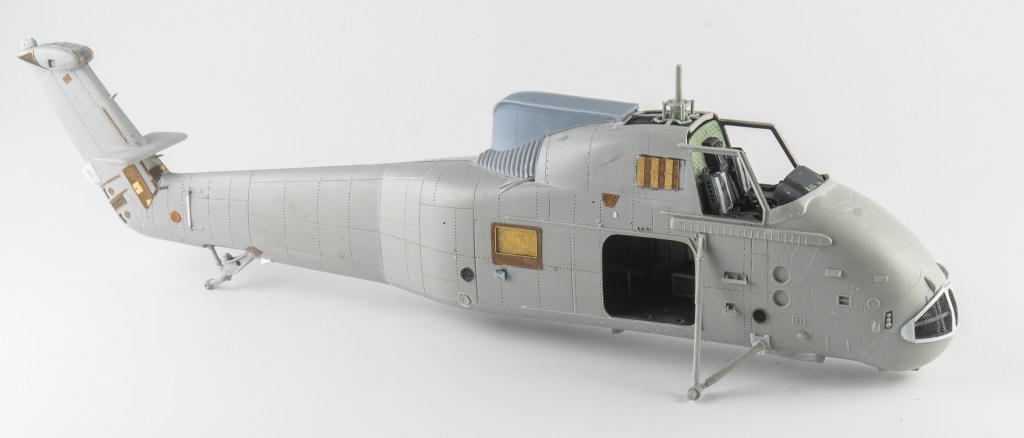
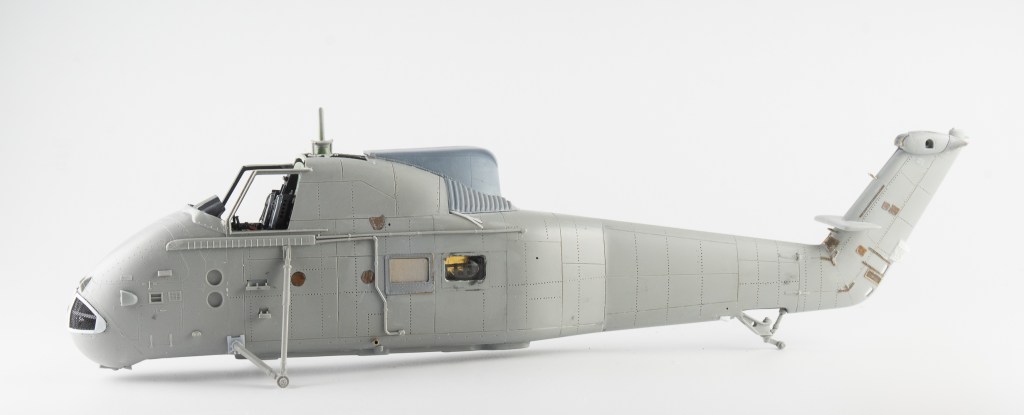
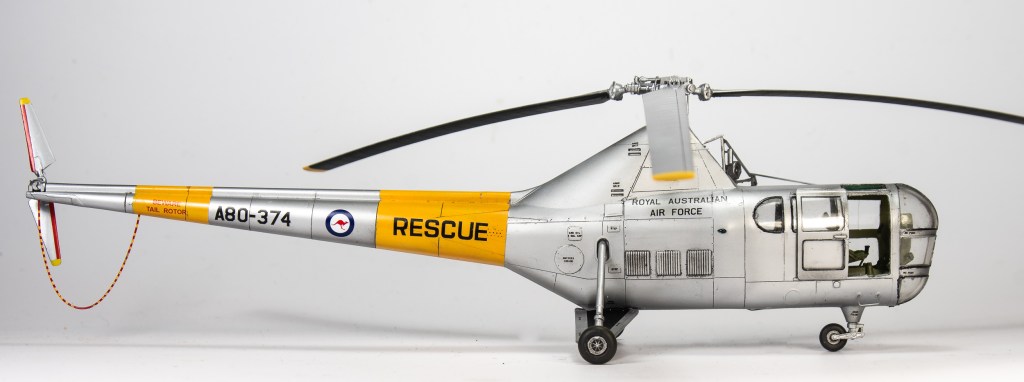
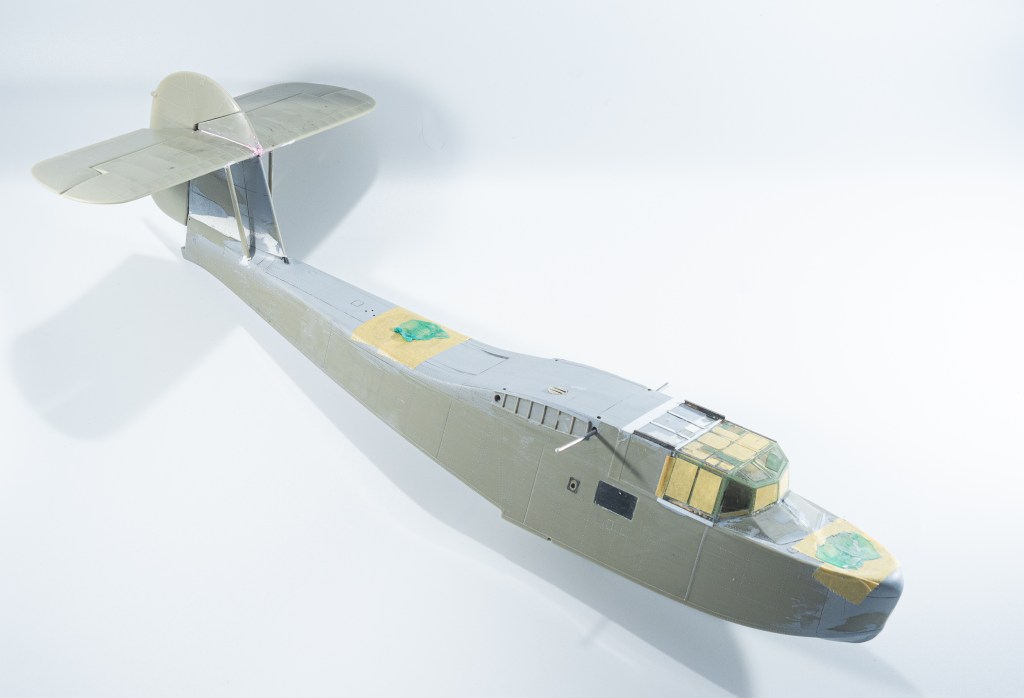
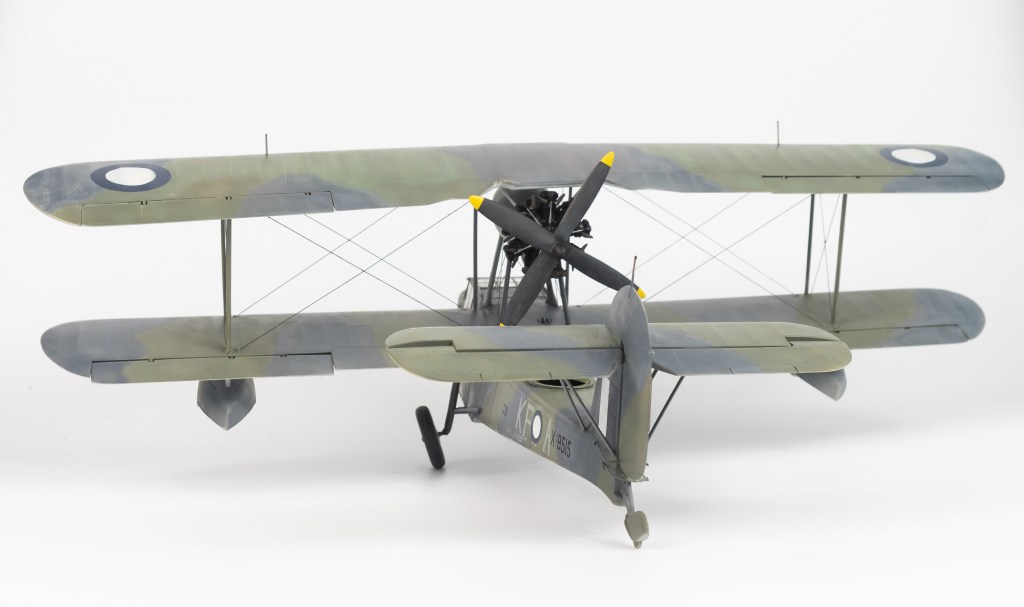
The pylon, stores carrier and fuel tank were resin items from a local Australian cottage producer, Hamilton Hobbies. The tank required several rounds of filling and sanding to reduce all the pinholes. A Hawker Hunter drop tank could also be used if you have a spare one floating around. Cabling was added from the flotation bag compressed air canisters to the fuselage. Brake lines from the wheels also need to be added , although I didn’t . An eagle eyed mate spotted I had glued a length of the kit ducting on at an angle. It broke into three bits when I tried to remove it. I had to use plastic rod to make up new ducting. An Eduard PE set provided various enhancements around the airframe as well.
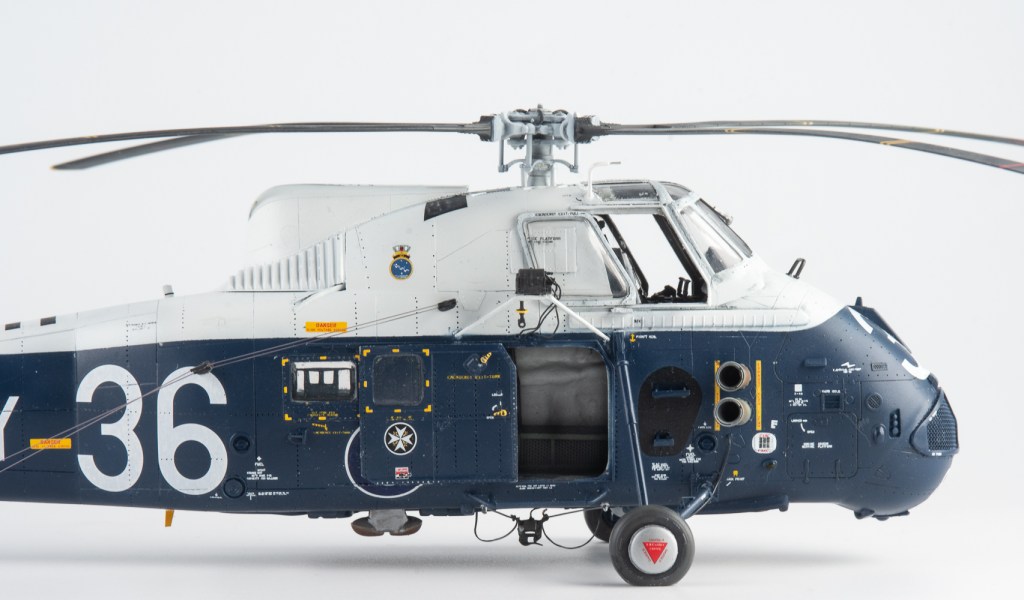
Sun blinds were made from paper and added to the upper panes of the windscreen. The windscreen was not the best fit, requiring a lot of fairing in around its base.
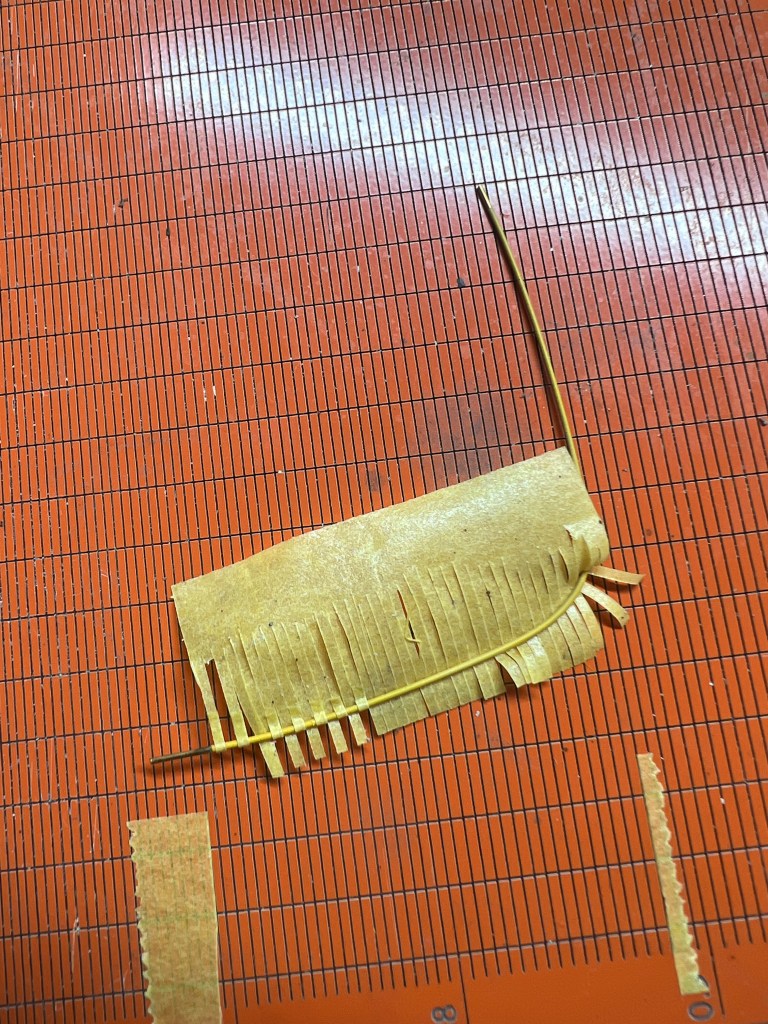
The side kit aerial masts were modified with sections of brass tubing. This allowed EZ line to be run through them to represent the aerial wires. Rather than rely on glue, these masts were all drilled and pinned with brass wire for some additional strength.
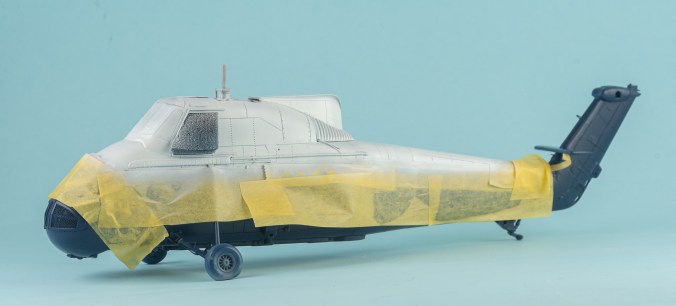
A final look was made to check for seams. The airframe then received a coat of Mr Surfacer primer. This revealed a few seams that still needed addressing. Always the case with my models. No matter how smooth and blemish free I think I have the model, the first primer coat still always reveals flaws.
Painting and Decalling
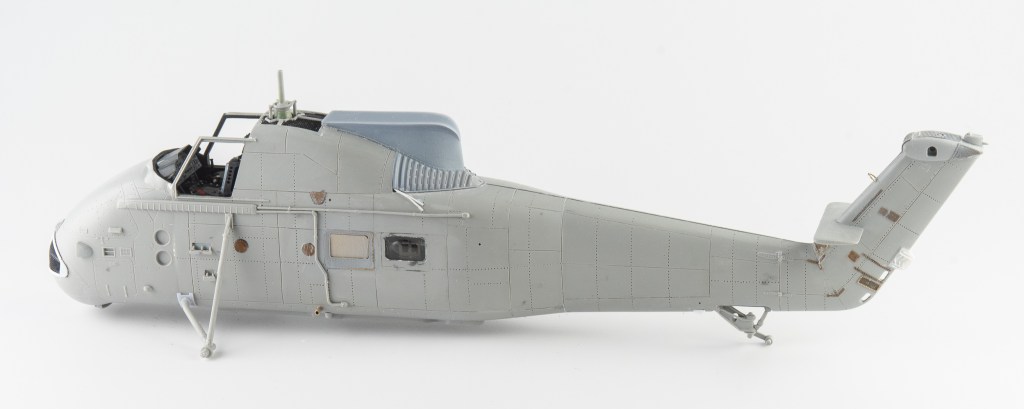
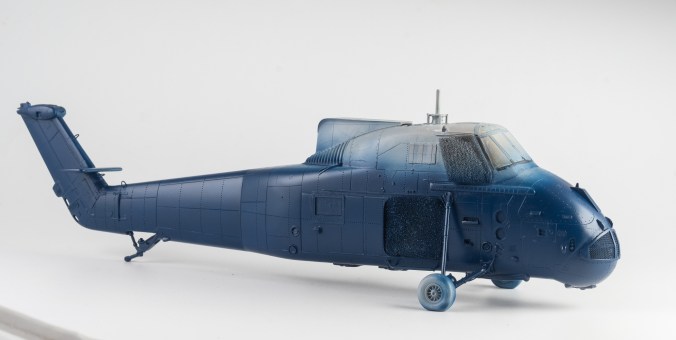
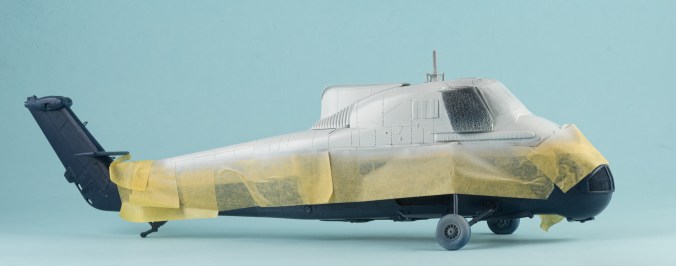
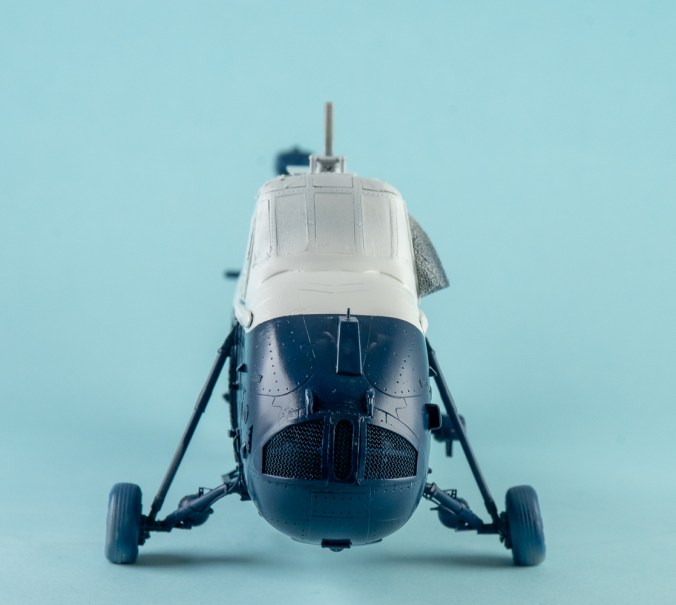
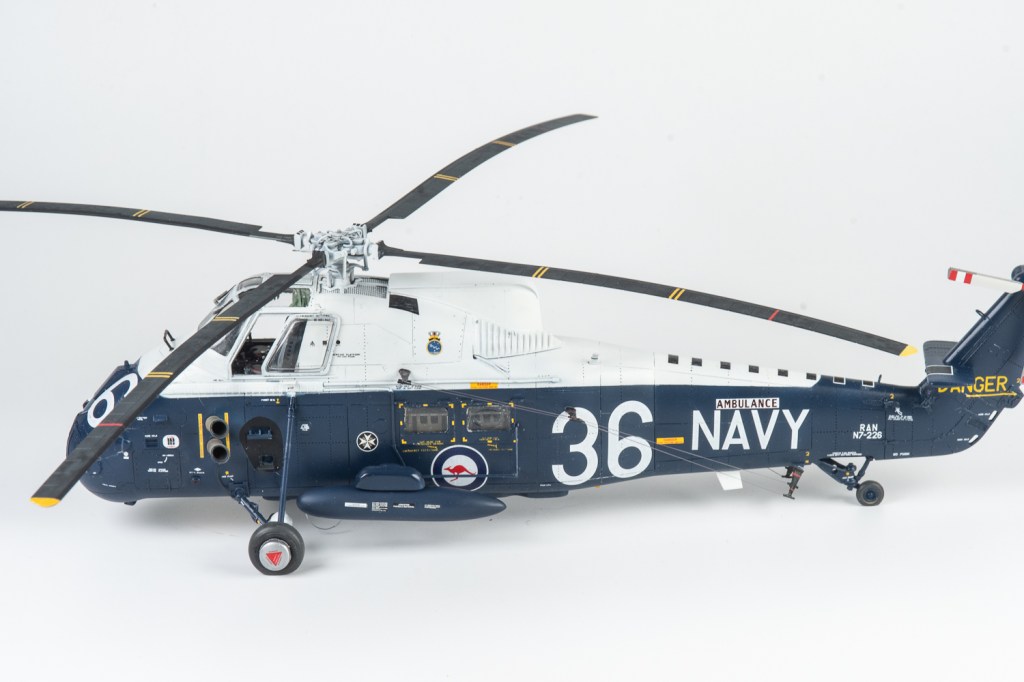
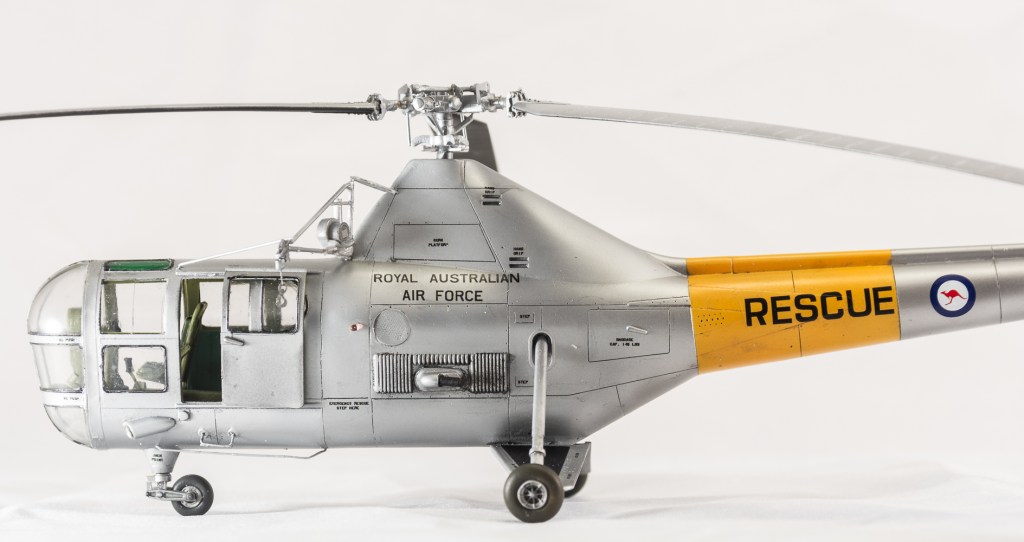
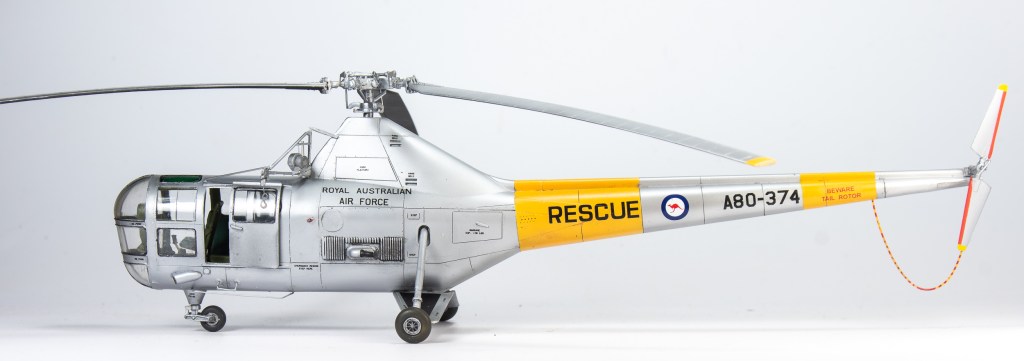
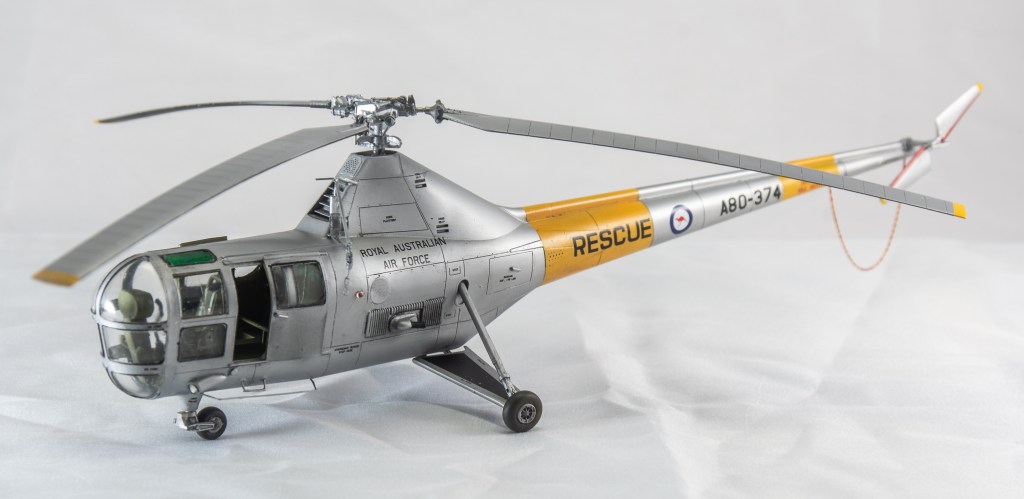
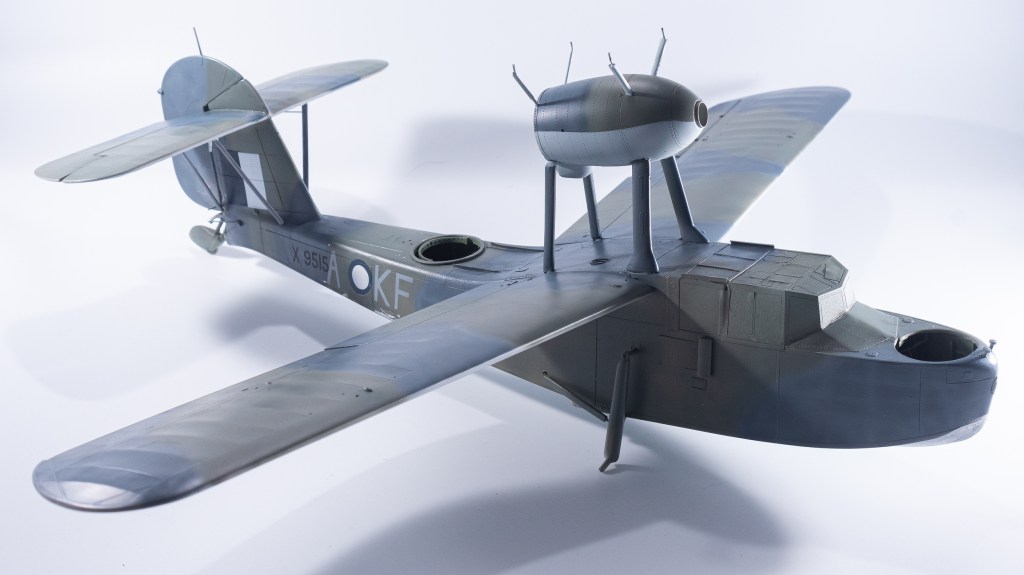
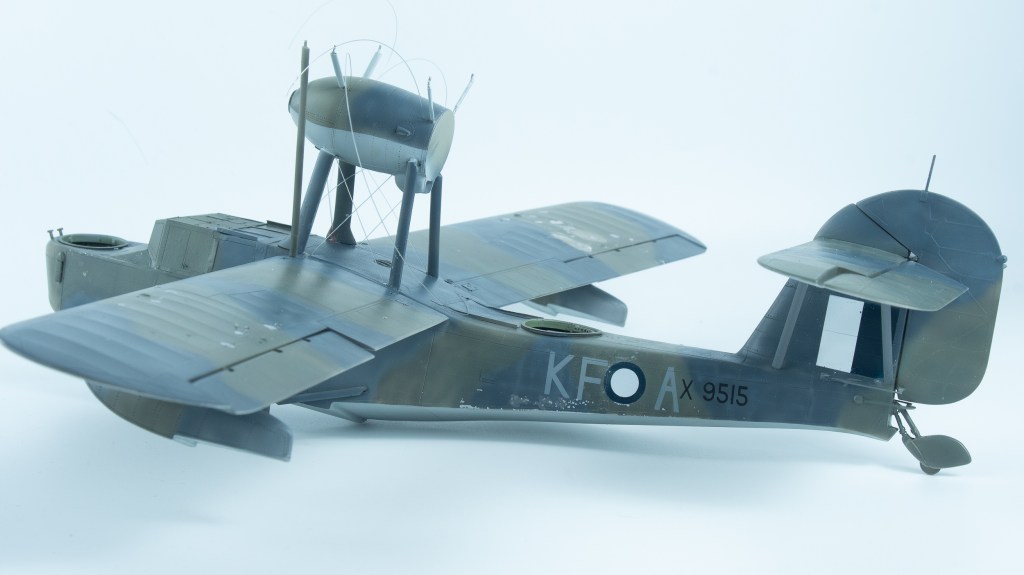
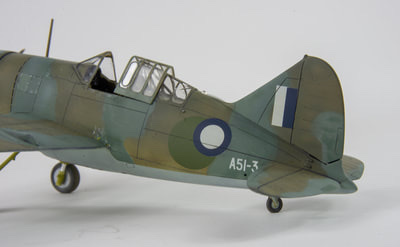
Common sense would dictate starting with the white, but on this occasion I thought masking the model would be easier starting with the blue. Initially the model was painted with Gunze Mr Color C328. I returned to the model the next day and realised it looked too “blue.” As a result, the blue was darkened with a few drops of black and resprayed. Now it looked a much better match to photos of the actual aircraft. The white was GSI Mr Color Character White. Some touchups were needed where I had not applied the tape tightly enough around protrusions. The front curved demarcation was achieved with Tamiya flexible tape. The rear one over the tail boom was created using a circle cutter to cut a tape mask.


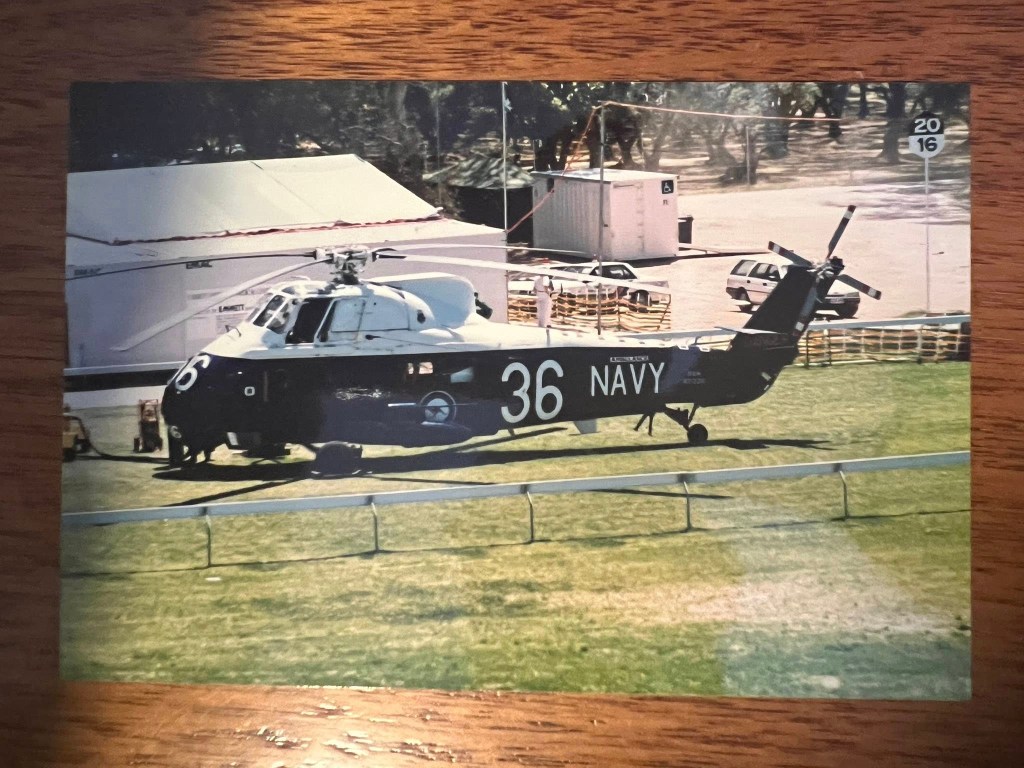
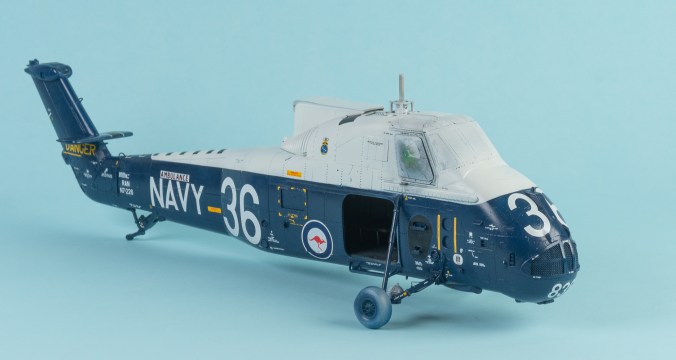
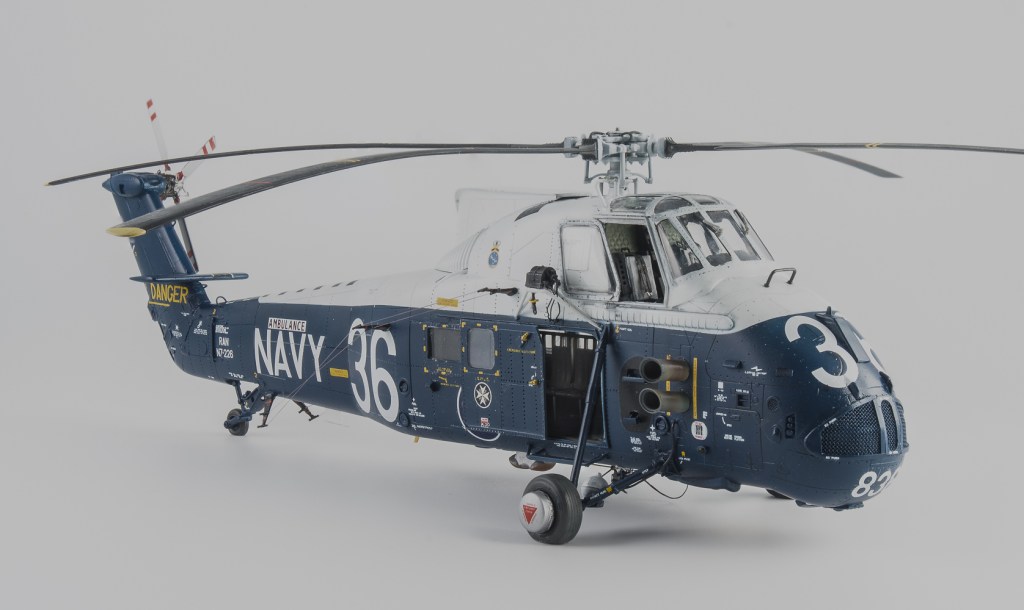
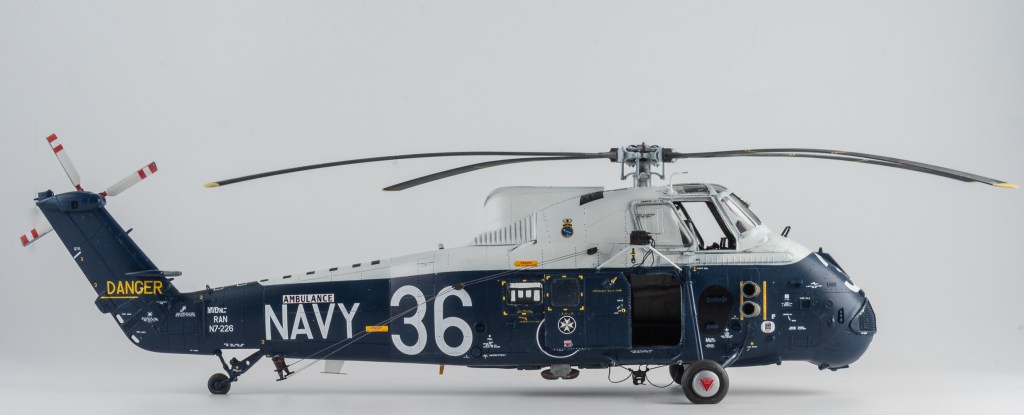
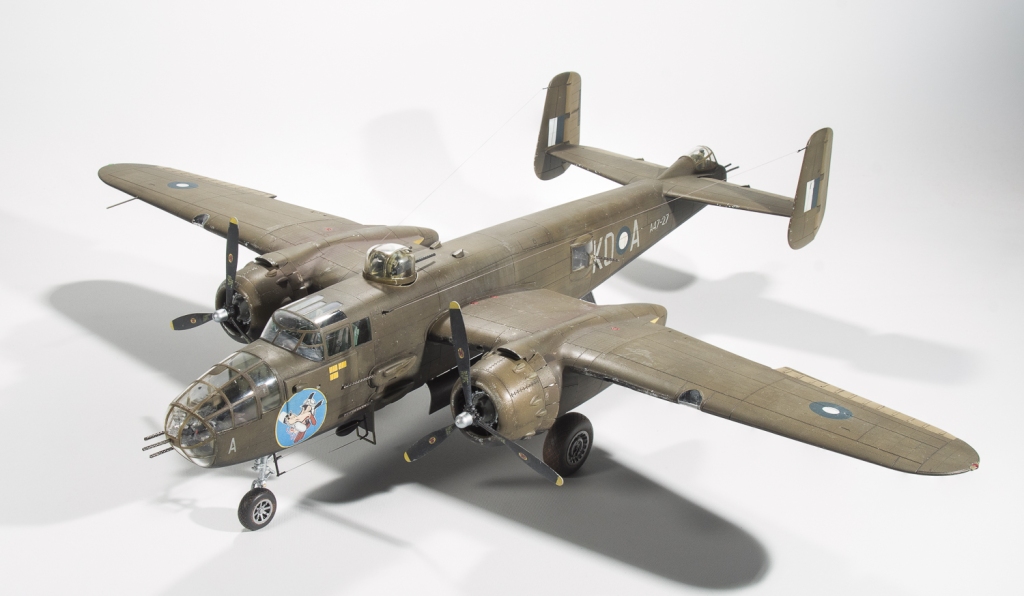
To say I was stoked when L Decals released their sheet containing 36 is putting it mildly! This particular helicopter is now preserved in the Fleet Air Arm Museum at Nowra NSW. I first came upon it whilst it was operating as an Air Ambulance at The Australian Grand Prix Adelaide 1987. The crew even allowed me to clamber up and stick my head in the cockpit. The memory of how basic the cockpit looked staying with me.And of course there is the Ambulance connection reflecting my 40 years as a Paramedic.
The L decals are beautifully printed, although some of the yellow items were slightly out of register on the sheet. No matter as I used these items from the superlative Southern Sky Models Wessex decal sheet. Unlike the L decals sheet, this contained all the stencilling for the aircraft. The kit sheet stencilling is a bit oversized in my opinion.
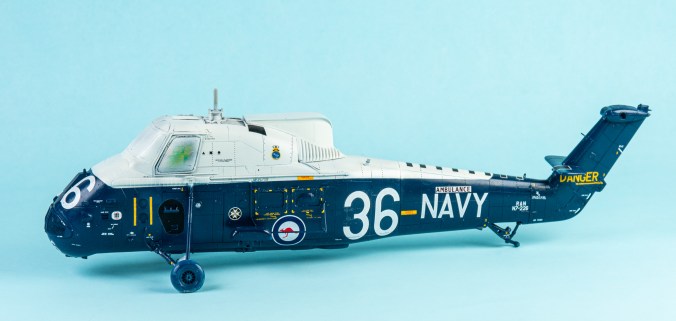
Decalling was carried out over 2 nights. Applying all the stencilling was finicky. However, it really does add to the busyness of the airframe. All the decals were excellent to use. They required just a couple of applications of Microsol. This allowed the decals to conform to all the raised and recessed detail. A toothpick also being employed to push the decals into all the recessed rivets where required. Stencil date from an Airfix Hunter sheet was used on the fuel tank. The writing on the white panel should have red lettering, but on the decal was black unfortunately. I will keep looking for an appropriate decal.
Final Assembly
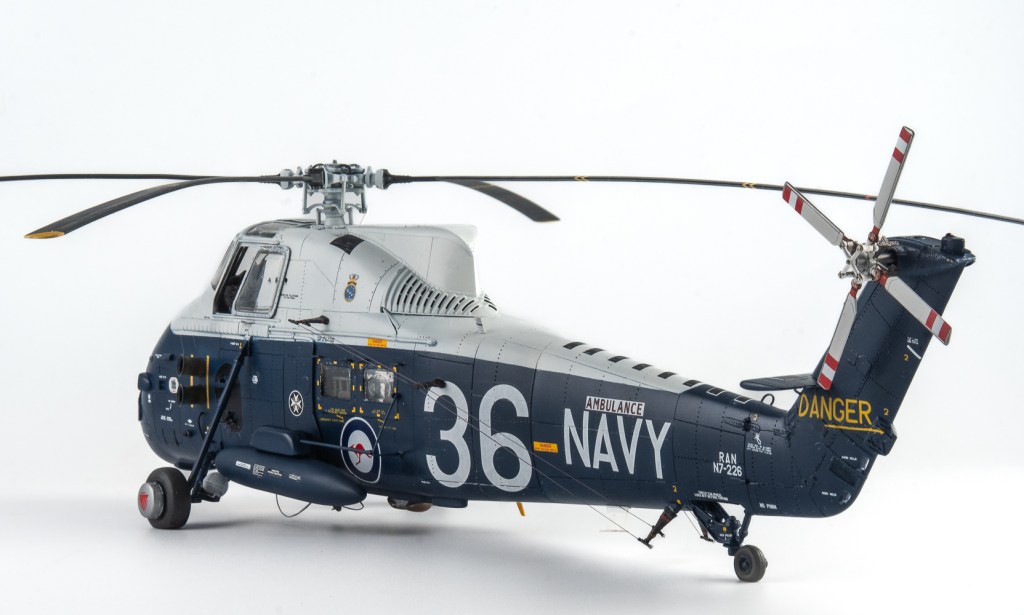
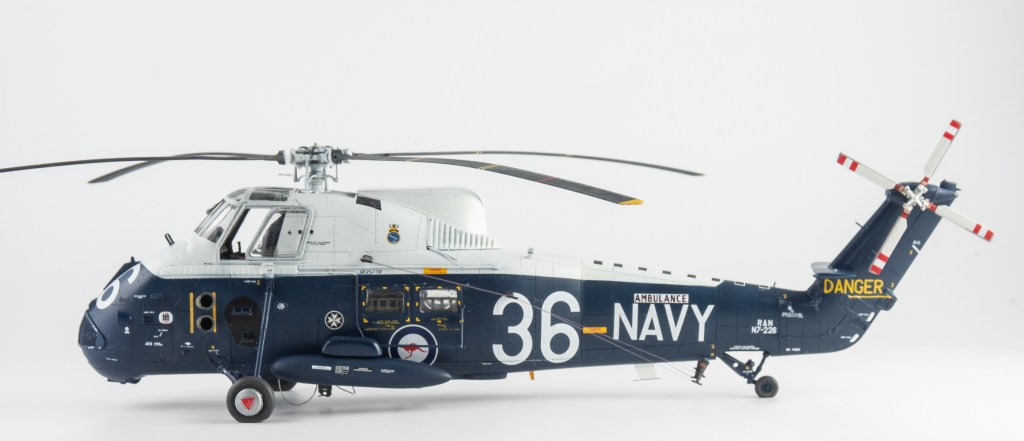
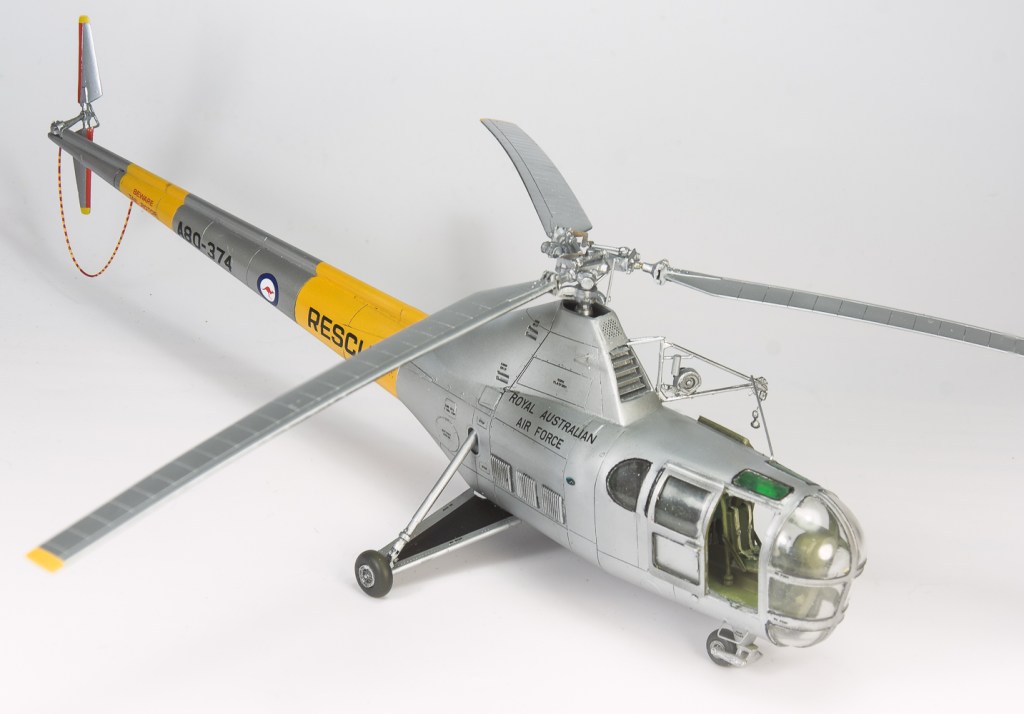
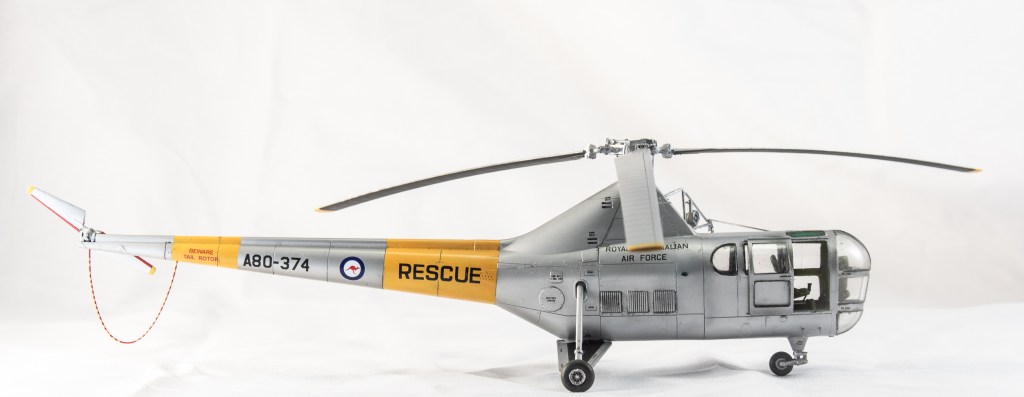
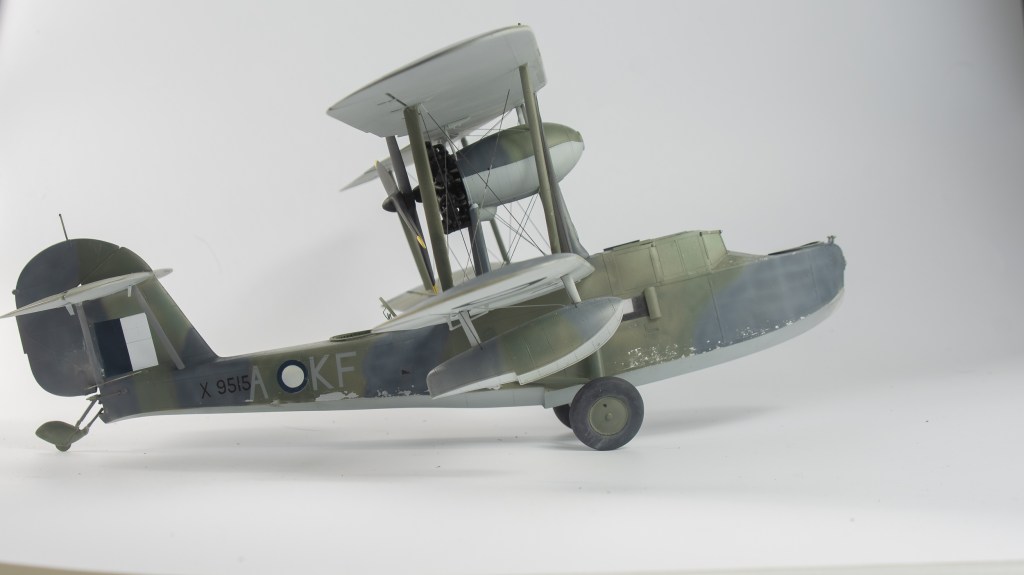
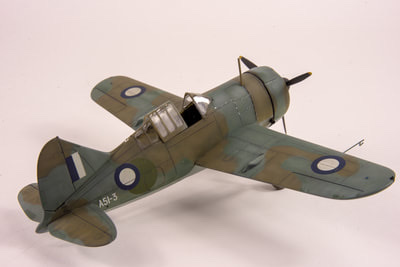
The rotors had already been assembled and painted , just needing a matt coat. It was decided to use a semi sheen to dull down the very glossy paint used on the model., although I did brush matt clear over all the walkway areas. No weathering was added. All examples I had seen in contemporary photos looked reasonably clean. However, people who worked on the machine tell me the underside was filthy with oil leaks and stains.
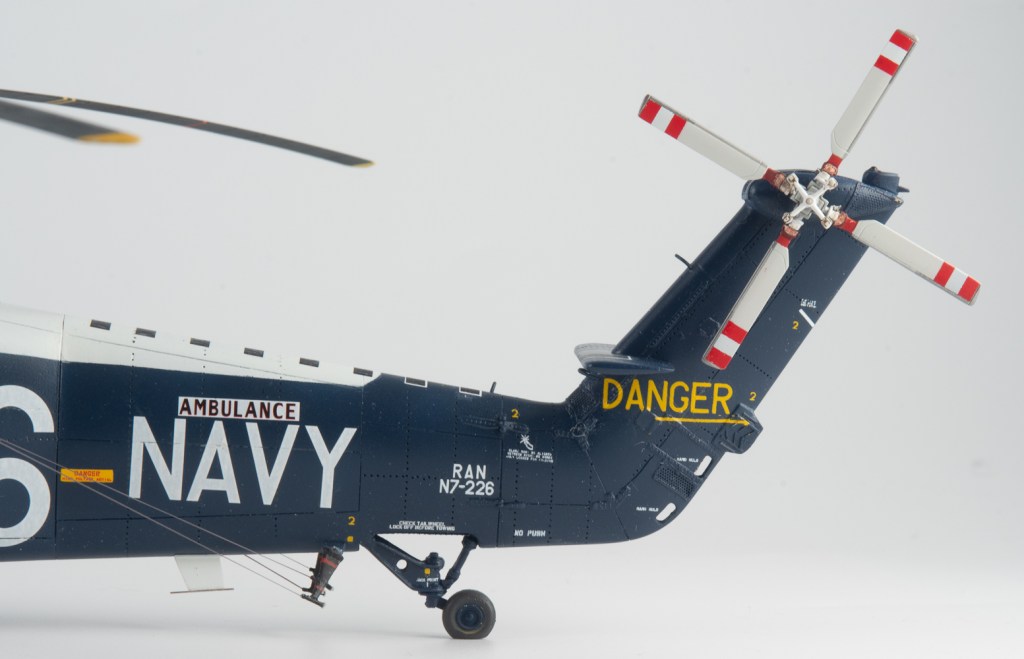
Probably one of the trickiest parts of the build was rigging the cargo hook underneath. This was eventually accomplished with brass wire and EZ line. The aerial wires were then added using the same material, and with that she was done. Well, done is a relative term! But where do you stop? There were plenty of details, the modeller could still add like tie down rings and other cabling. There should also be aerial wires that wrap around under the tail. By this stage though I was ready to move on. All my models are compromises in this way, but I am happy to accept that. It is what allows me to complete 5-7 models a year. These models are reasonable in detail rather than one super detailed model that is accurate to every last detail.
Conclusion
The build was not enjoyable at times, but ultimately satisfying once complete. The Italeri kit is typical of their products, inconsistent detail, poor fit of some parts and soft mouldings. However, it is leaps and bounds over the old Revell kit. The kit has shortcomings. Despite this, I am still eager to tackle another to finish as a 945 SQN RN machine from the Borneo conflict. The aftermarket items I used are not absolutely necessary to build a RAN Mk31. You only need them if you don’t have a HAS3 to use, although , there will still need to be some scratchbuilding required. . The fuel tank and carrier can be easily converted from other components. They can also be scratch built. The Hamilton Hobbies items are still available. Naturally you will need decals for a RAN aircraft, again, the L decals are still available. The rest of the Hendie stuff is just a very nice refinement over the kit parts.
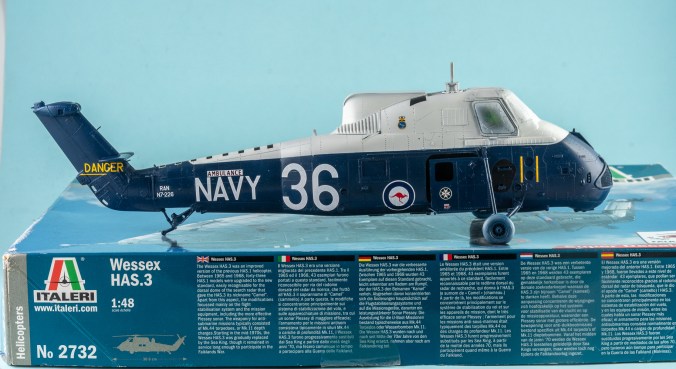
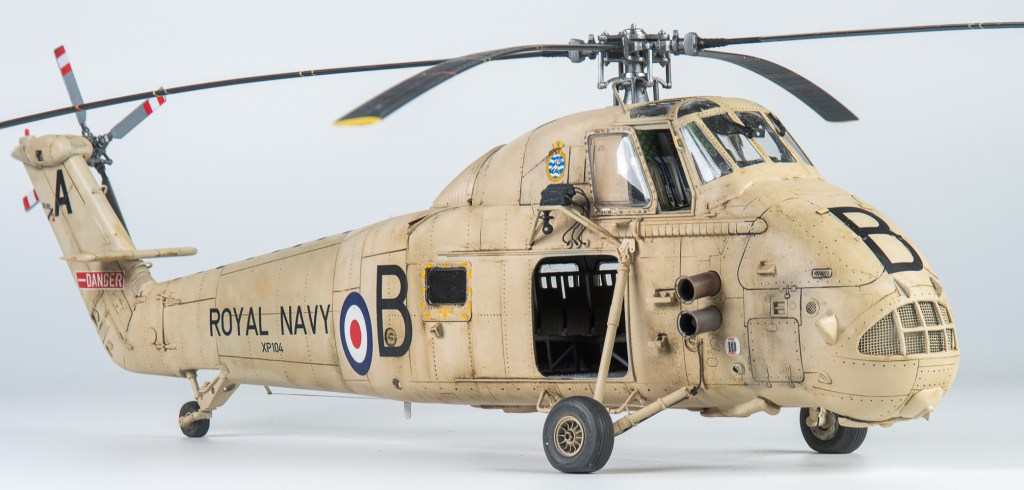
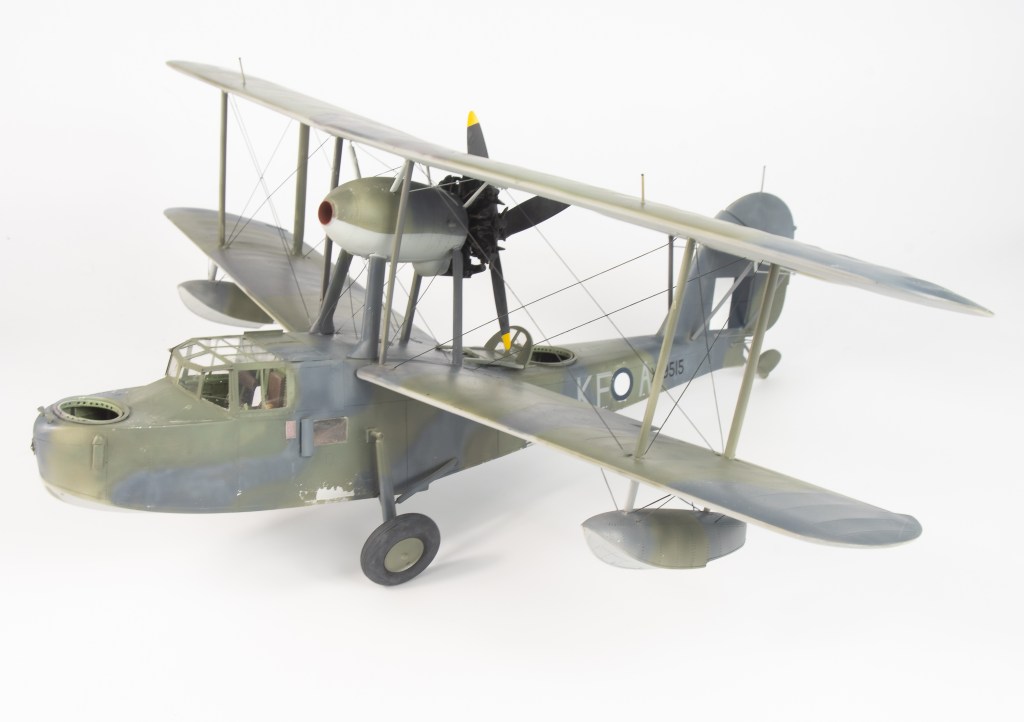
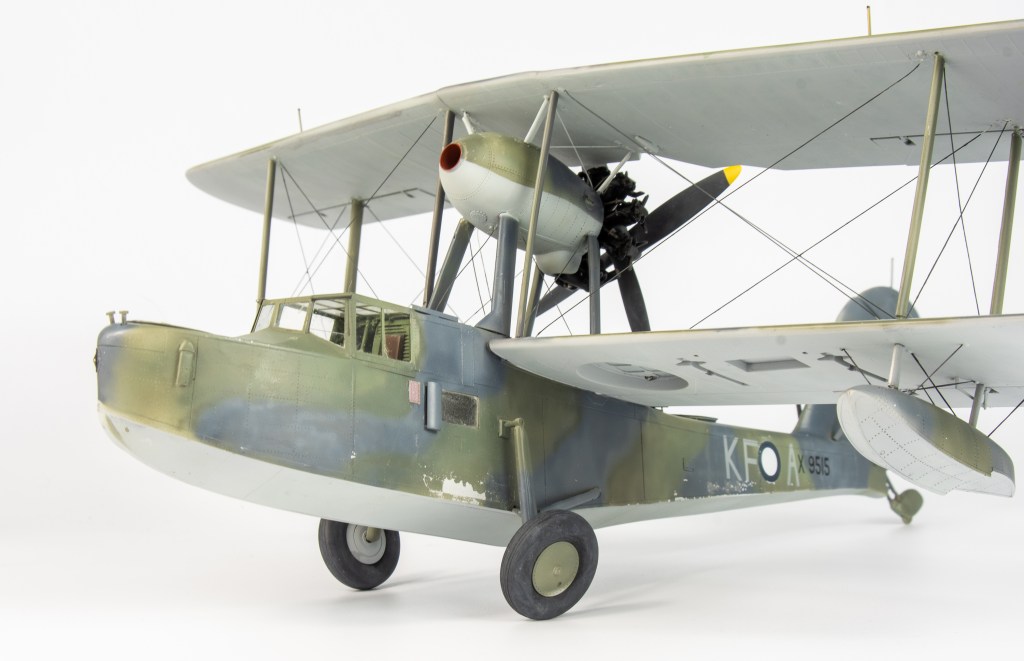
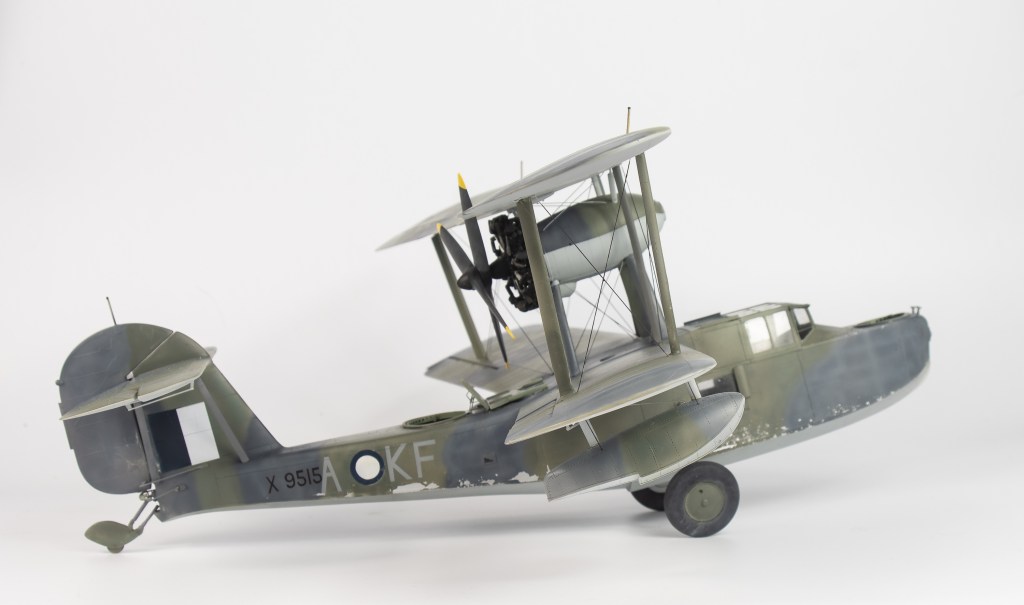
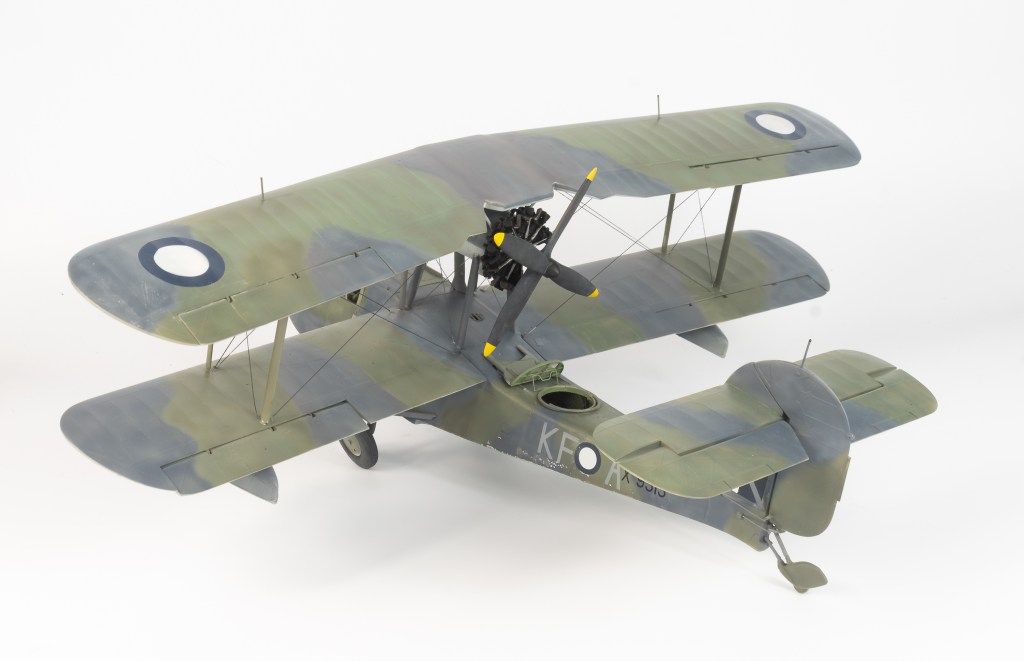
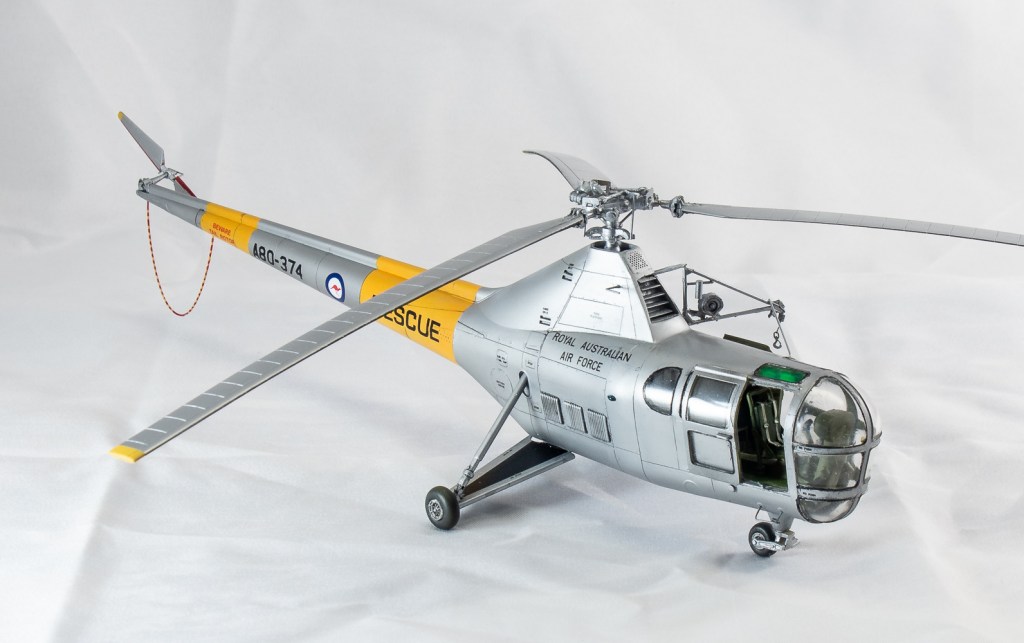
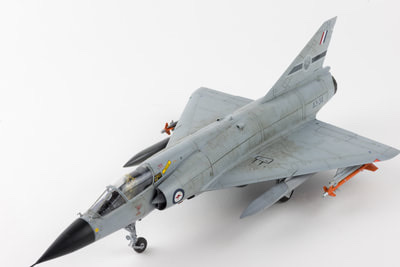
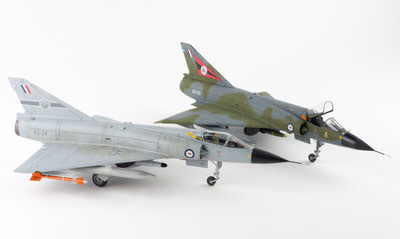
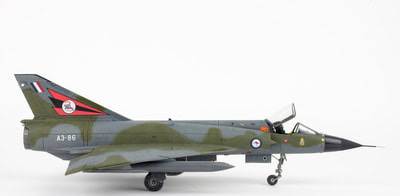
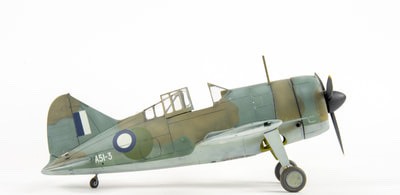
Westland Wessex Mk31B. 723 SQN R.A.N Adelaide South Australia 1987


Leave a comment