
- Purchased : 2023
- Built; 2023
- Enhancements: Gun barrels replaced with aluminium tube
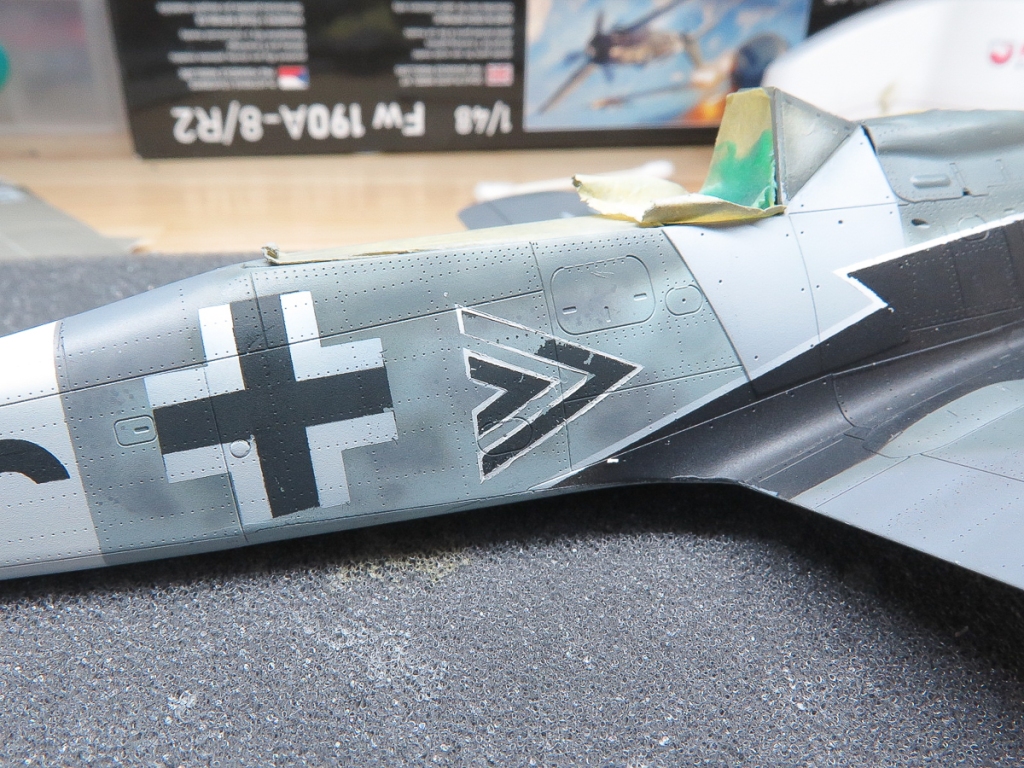
- Decals: Combination of kit decals and painted using Montex masks.
Construction Notes
Eduard’s new series of 190s have been written about in various online reviews as being viceless builds. Whilst they show a marked improvement in engineering, ease of assembly and surface detail over the older kits, I still found a few issues.
Everything in the cockpit is fairly straightforward, although I found the instrument panel has a tenuous and somewhat vague location between the two fuselage halves.
The same with part A32, I found it difficult getting it to seat properly. With the wheel wells, I was initially dubious of Eduards call out to paint them RLM76 rather than the usual RLM02. Perusing Eduard’s instructions for their other 190s showed me Eduard do call out 02 for the earlier marks. The A8/R2 kit is the only model where they suggest 76 wheel wells,
I decided they must know something I don’t! They have done quite significant research into the Rammjager as evidenced by back copies of the info magazine.
I cut the barrels off the inboard guns – to be reattached during final assembly – as they were bound to get knocked off during sanding operations.
Dry fitting the wing to the fuselage revealed a gap on one wing root. Consequently I delayed adding the gun deck and upper cowl parts to the fuselage so as to allow me to push the fuselage half out to meet the wing and reduce the gap. Great in theory, but I think doing that just created another problem for myself.
With the airframe together, one wing looked to have greater dihedral than the other. The wing root join was broken by way of using tamiya extra thin to rehydrate the join, then a shim added to reduce the dihedral. This seemed to fix the problem, or so I thought!
I should know better. Fiddling with wing roots like this just seems to muck with the geometry. Probably would have been better to add a sprue spreader under the cockpit. There are 2 more Eduard 190s in the stash, so it will be interesting to see if this problem appears on those, or was a construction fault on my part.
This aside, the model built up quickly. Filler was used on the centreline seam and the leading edges of the wings only. The tailplanes and gun covers fit perfectly.
Of course, its too much to ask of me for a build to go flawlessly, and so it was again in this case, although problems did not rear their head until well into decalling. Again, an unforced error, falling foul of Eduards decals. Well, thats probably a bit unkind on Eduard. It was me trying a new (to me) technique of removing the carrier film with white spirits. This had gone swimmingly on the wing crosses, then I got cocky. For those not aware of this technique. I refer you to Gary Wickham’s excellent tutorial contained within his superb Tempest build. My mistake was I left the white spirits on the swastika and chevron for longer than a minute, the result being the white spirits removed the carrier film, the decal AND the underlying paint. AAAGGGGHH
Had I mentioned I was really happy with my overall paint job and tight mottling? No, well I was! In all, this was a fairly simple mistake to correct, but it occurred during a stage in my modelling where frustration with this kind of thing was overriding my perseverance, so back in the box it went.
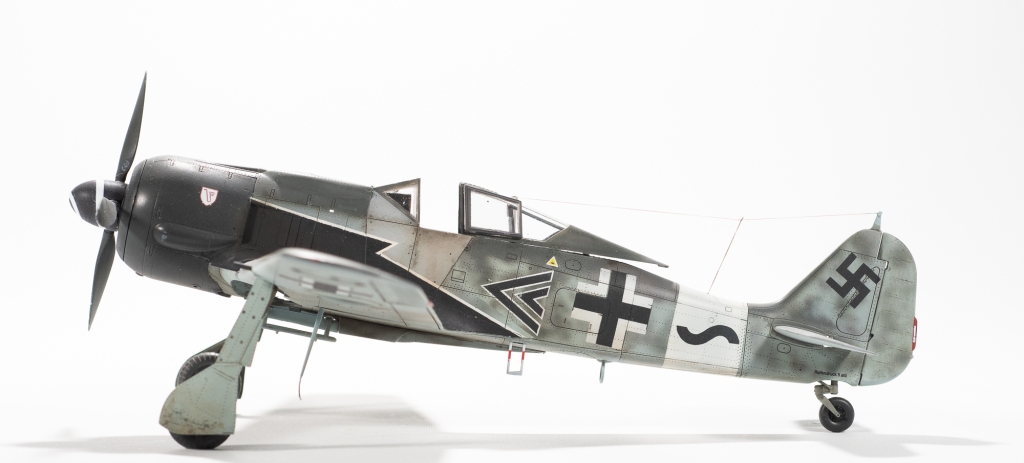
Completing the phantom renewed my enthusiasm to complete the 190, so back out of the box it came. The existing paintjob was stripped using Gunze thinners and now that I had a blank canvas again, was repainted using Mr Colour paints, although my mottling was probably a little tighter on my first attempt.
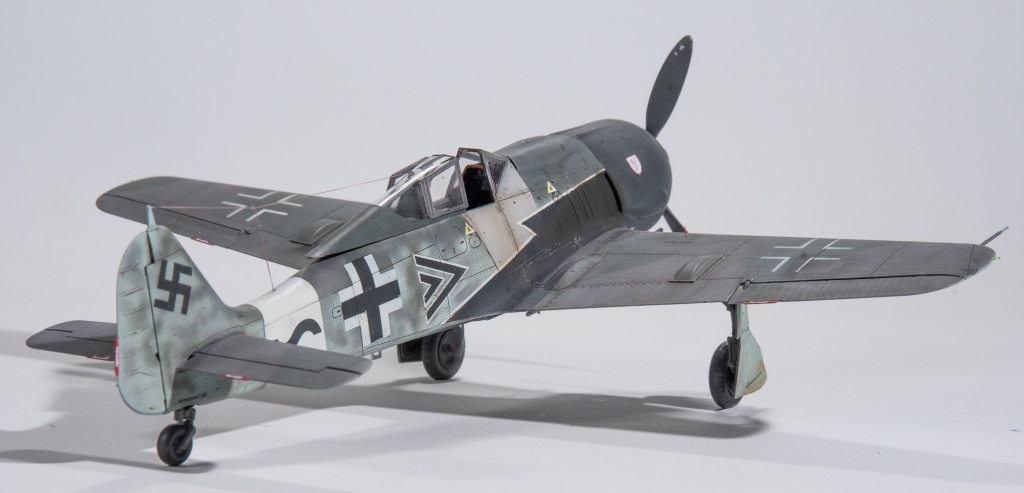
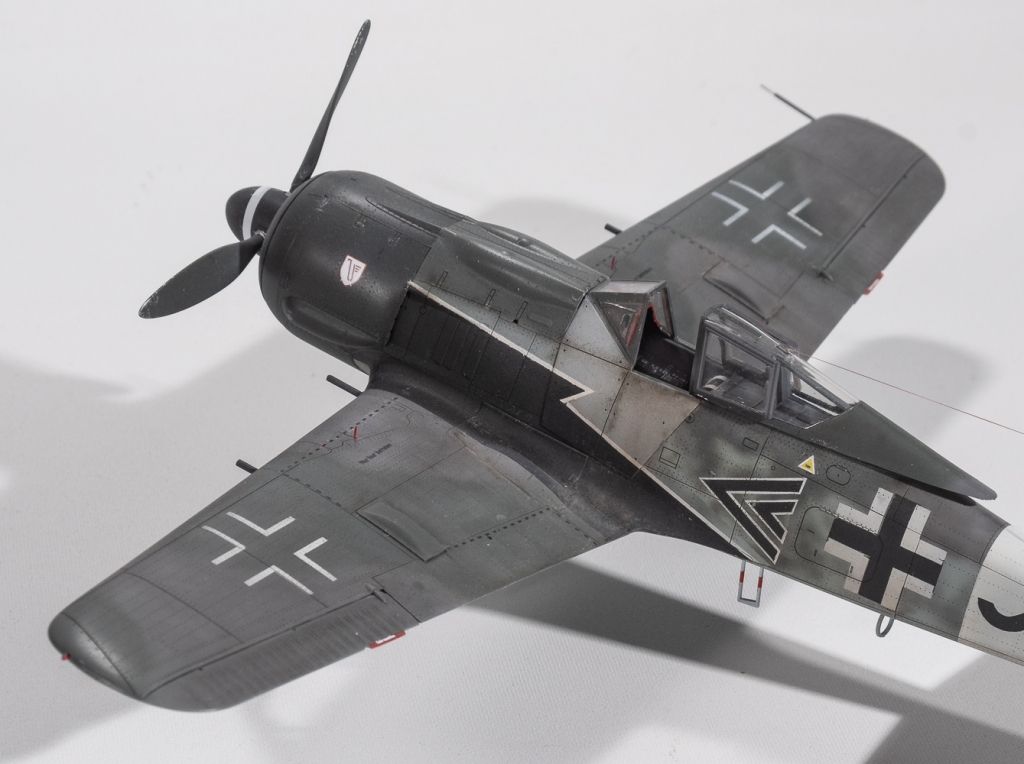
For the major markings a montex set designed for the tamiya kit was used. This was also not without some problems with recurrent peeling of paint and repeated masking and touch ups required. A couple of months earlier , this would have seen it relegated to the box or the bin, but this time I powered through, even cutting a new chevron and underwing code letter on my silhouette to replace the by now distorted montex masks. Its amazing how little achievements like this can lift your enjoyment for the hobby. Kit decals were used for the Udet emblem on the cowling, on this occasion, the carrier film not being peeled as they had laid down perfectly.


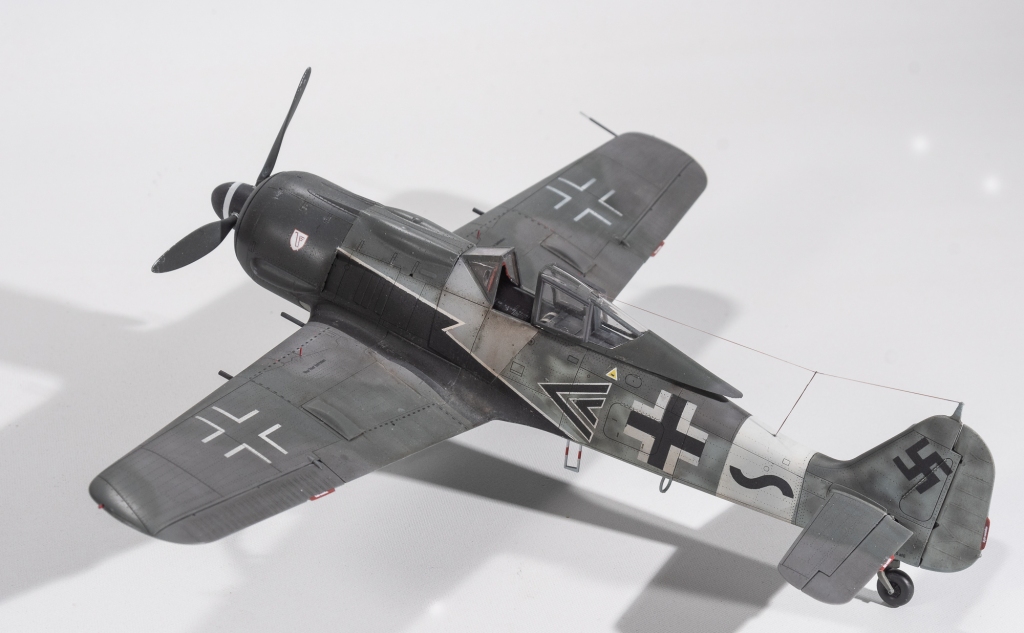
SMS flat was used as the final coat as this is not dead flat but leaves a nice sheen, which can be seen on period photos of Luftwaffe machines, the service life of which – by this stage of the war- could be counted in weeks, even days.
Oils were used on the underside to impart some staining. This technique still eludes me, analysing my attempt on this model has led me to think I need to apply smaller amounts in future. Oils certainly go a long way!
Casting an eye over the completed model, the geometry looks a bit askance to me despite Eduards engineering to ensure the added undercarriage sits at the right angles.. That added shim to the wing perhaps contributing to this, one wingtip still measuring higher.
Im reasonably happy with my efforts on this, more so, that – with this model – I had the perseverance to push through a couple of hurdles that presented themselves. I definitely feel Im back on the horse!
Would I build another Eduard 190? Definitely!
Focke Wulf 190A8/R2 IV (Sturm) JG3 Luftwaffe.
Mennington, Germany . July 1944


Leave a reply to andyk21 Cancel reply