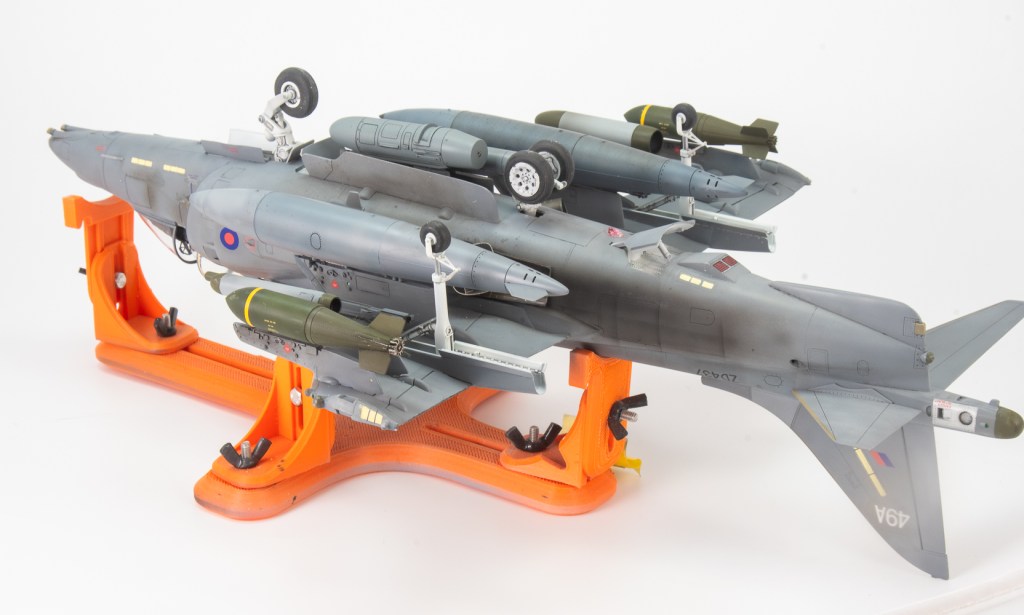
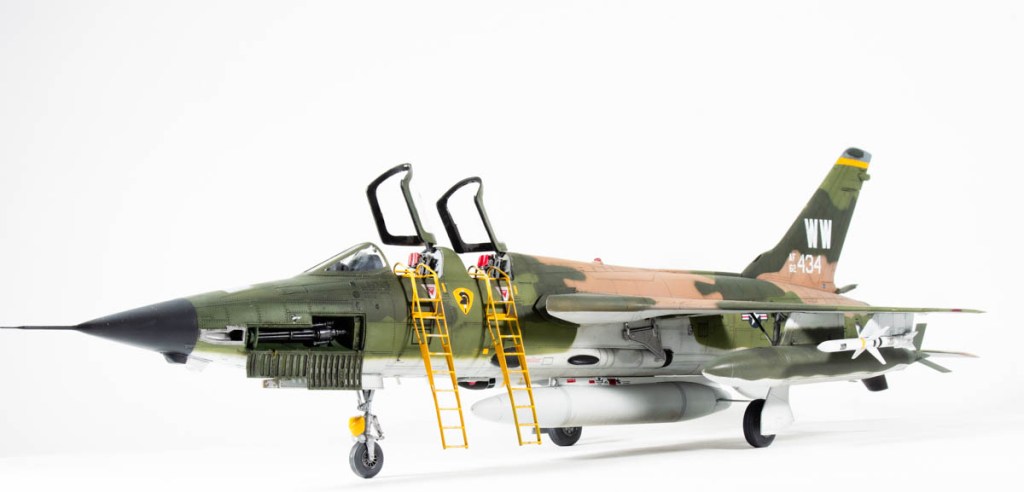
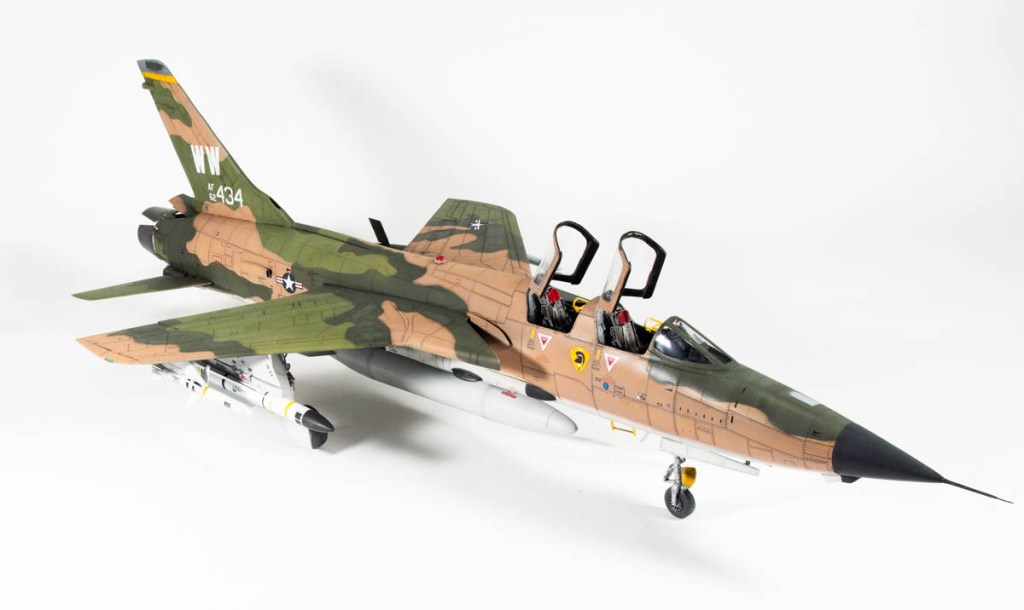
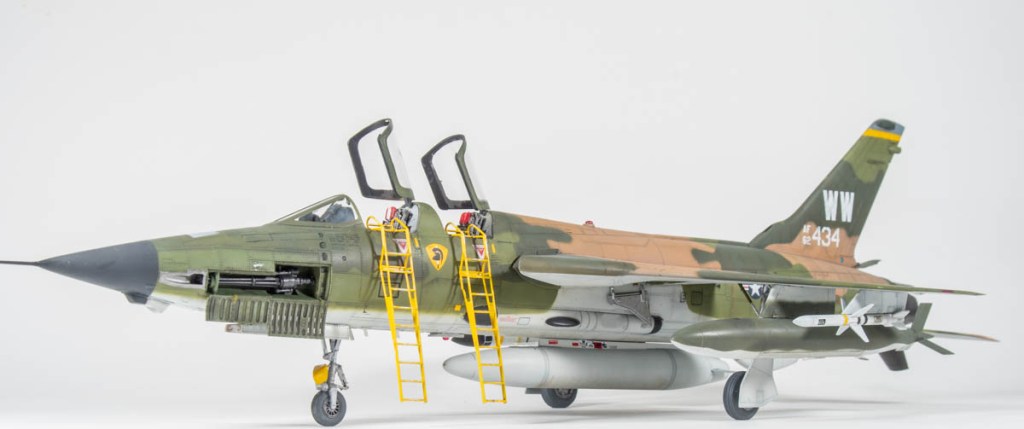
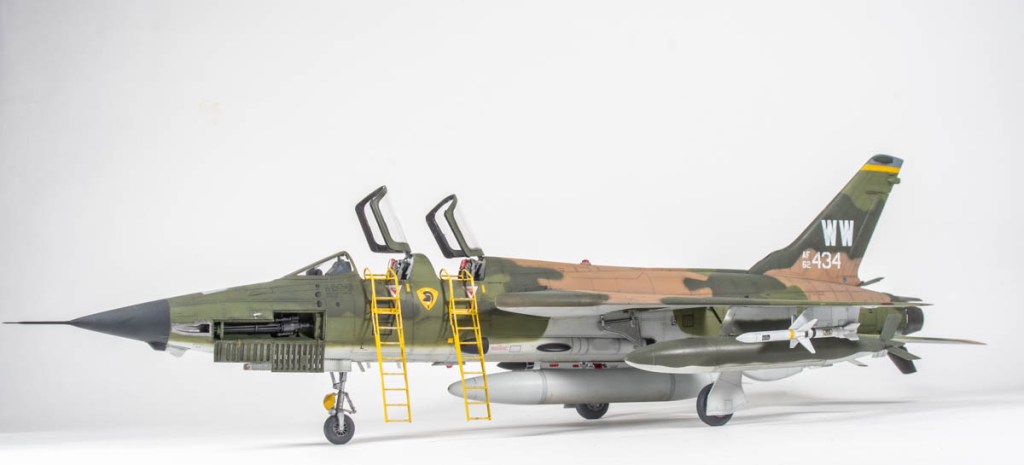
- Purchased: 1998
- Built: 2025
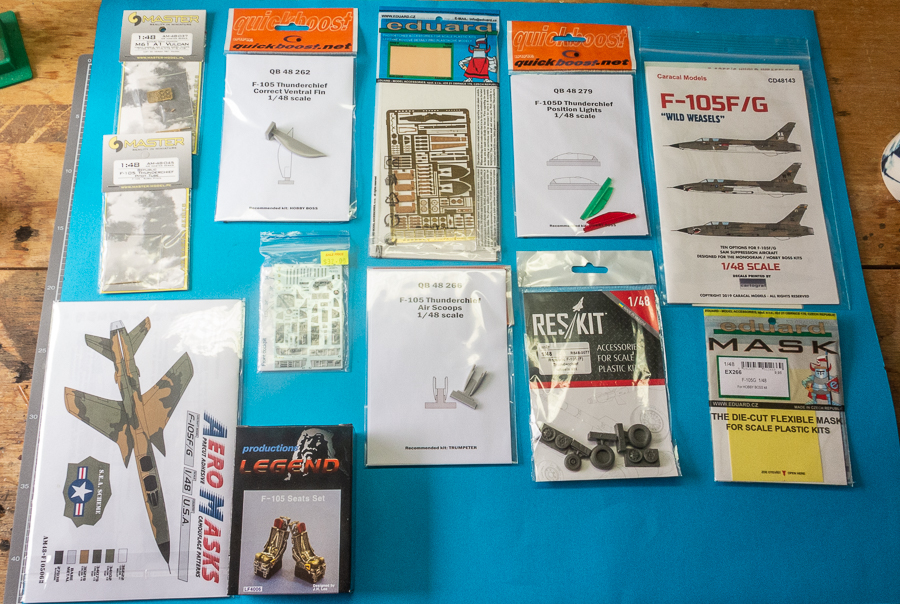
- Enhancements:
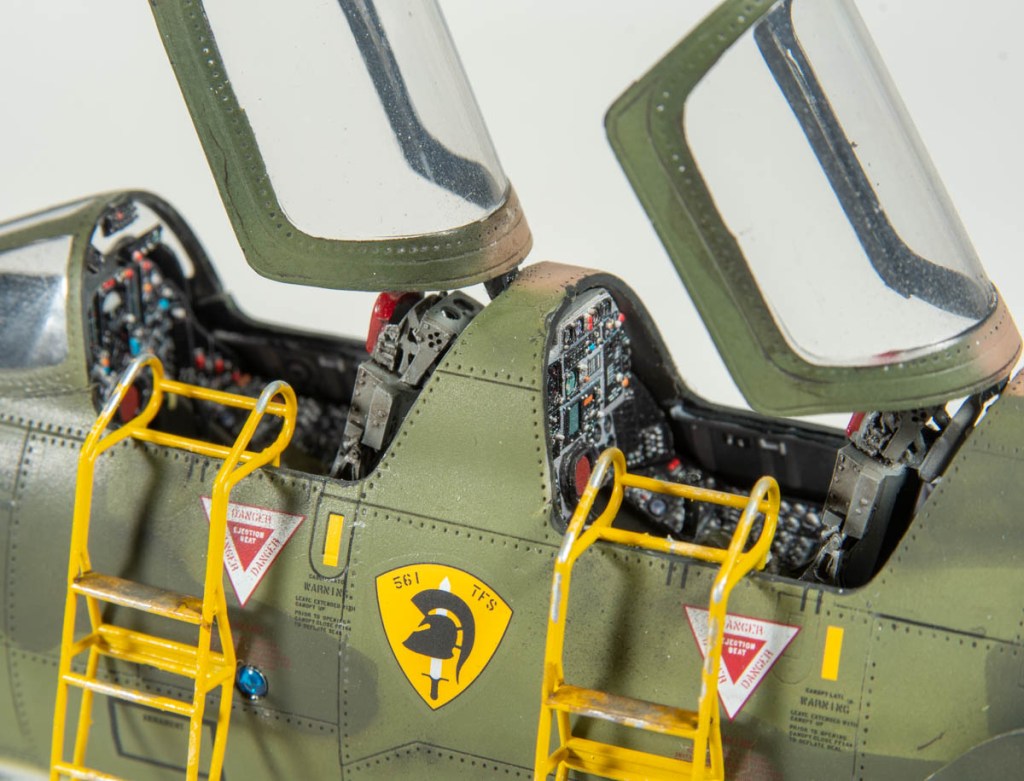
- Cockpit and seat – Cutting Edge
- Wheels – Armory
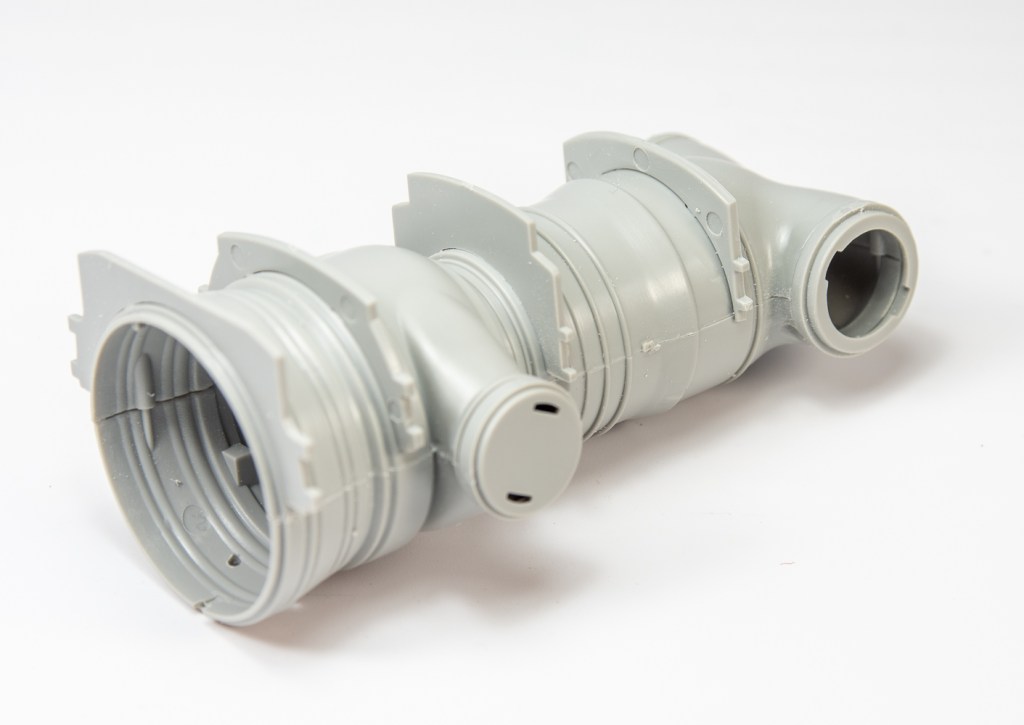
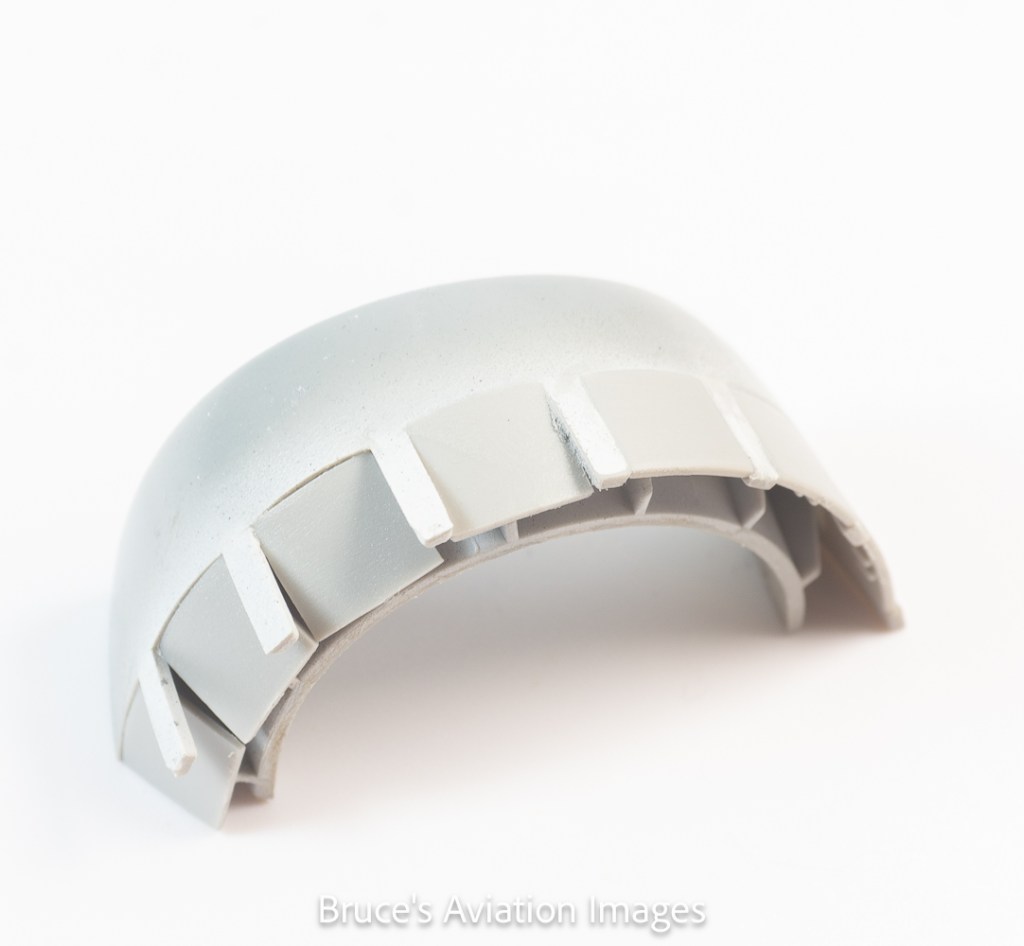
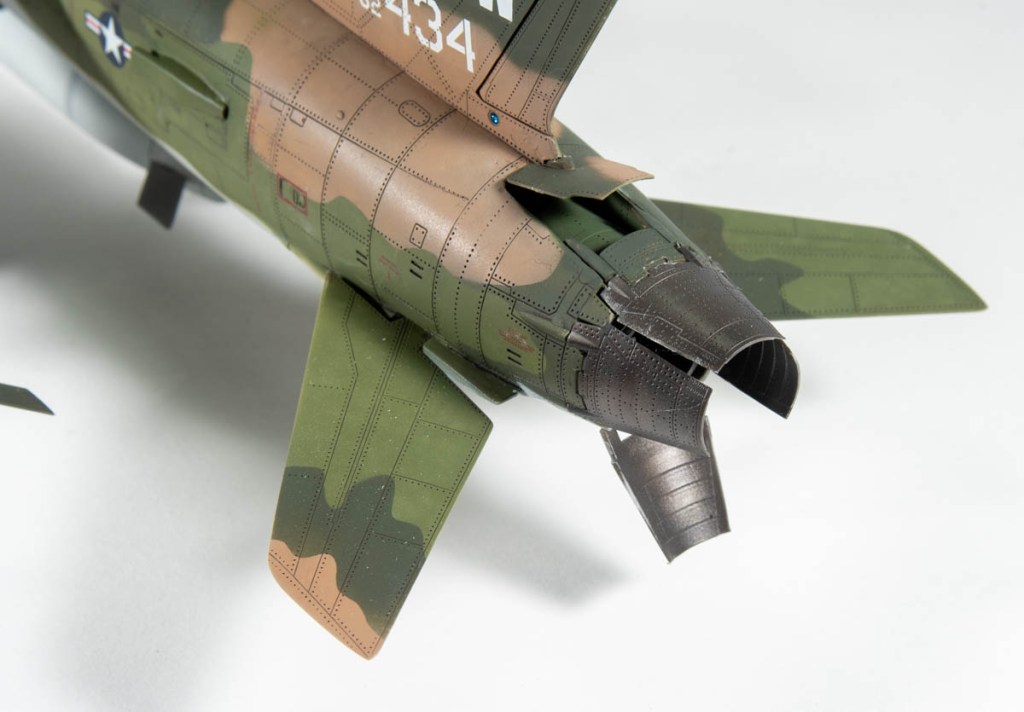
- Exhausts – Reskit
- Wheel well roofs : Eduard PE
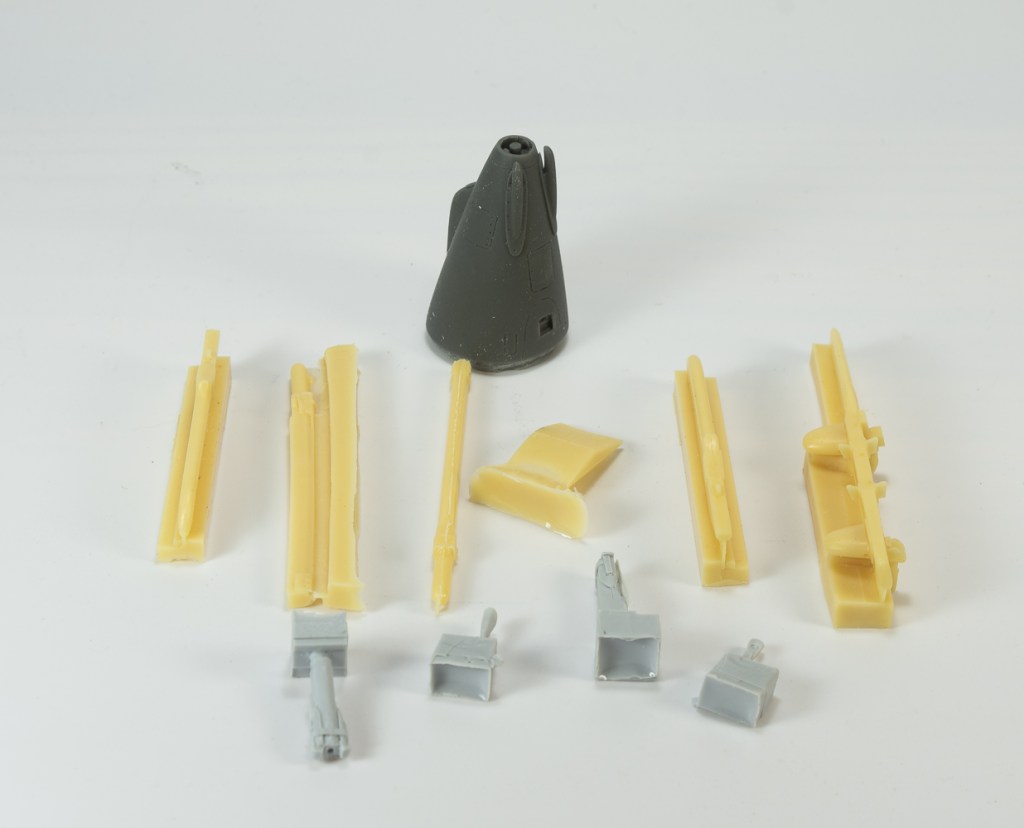
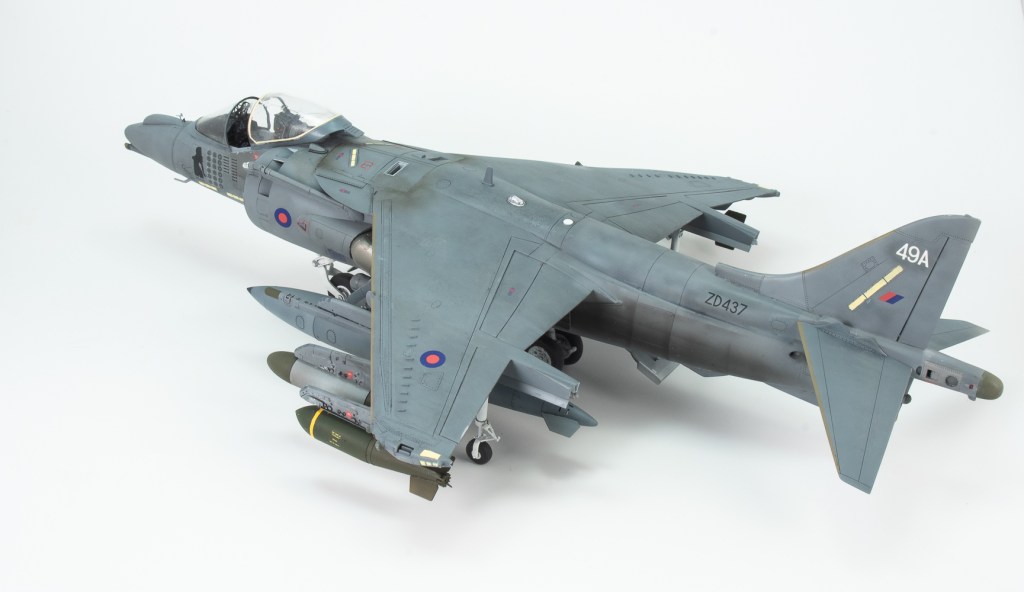
- Missiles – Reskit
- Pitot Tube – Master Details
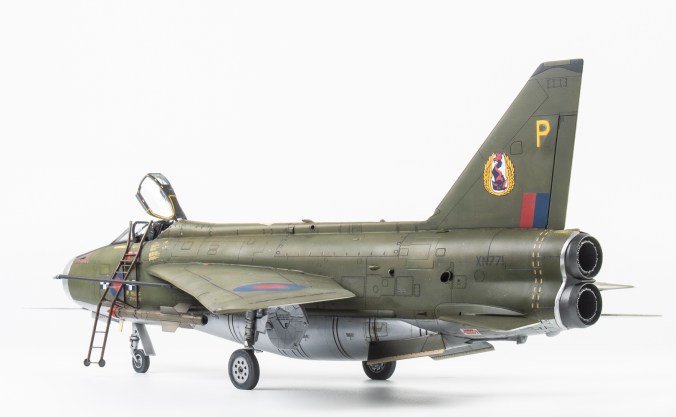
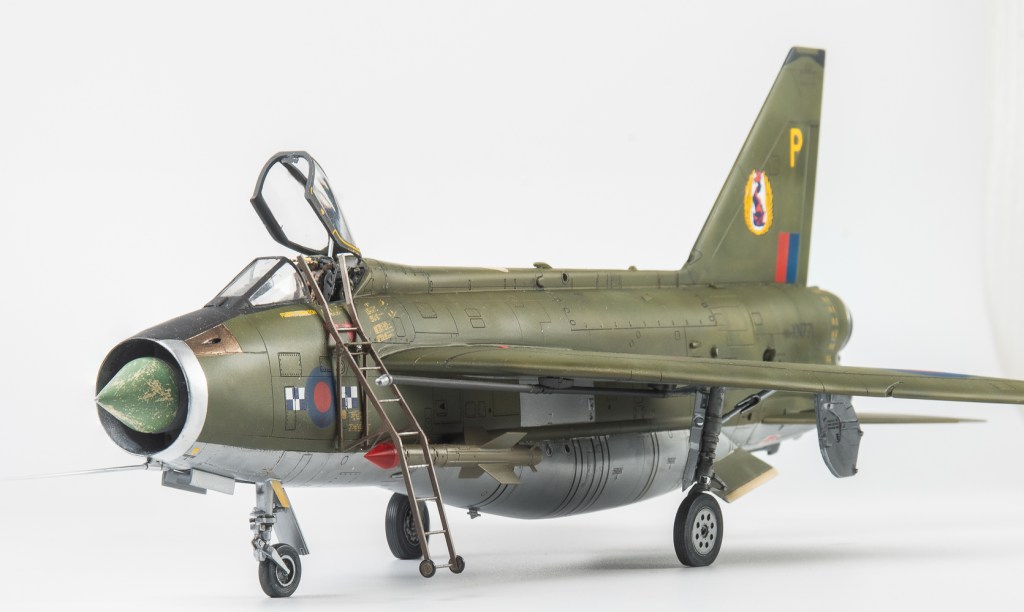
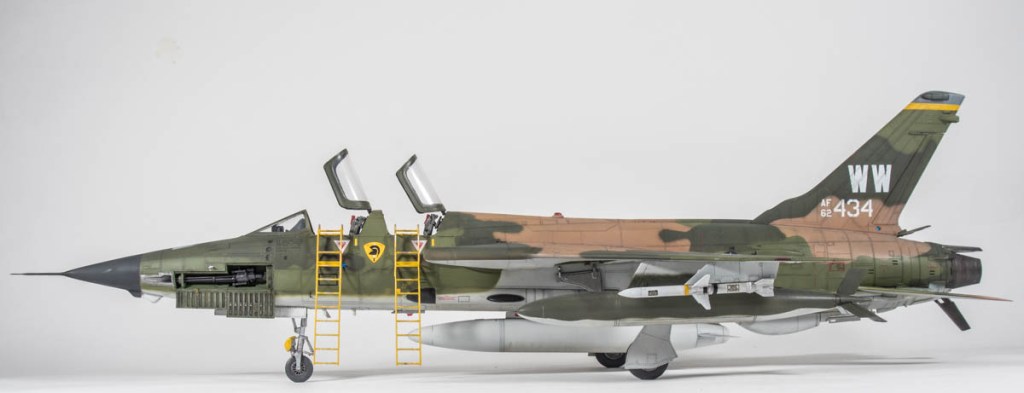
- Ladder: LP Models
- Decals- Cutting Edge, then Model Alliance, then painted!
Introduction
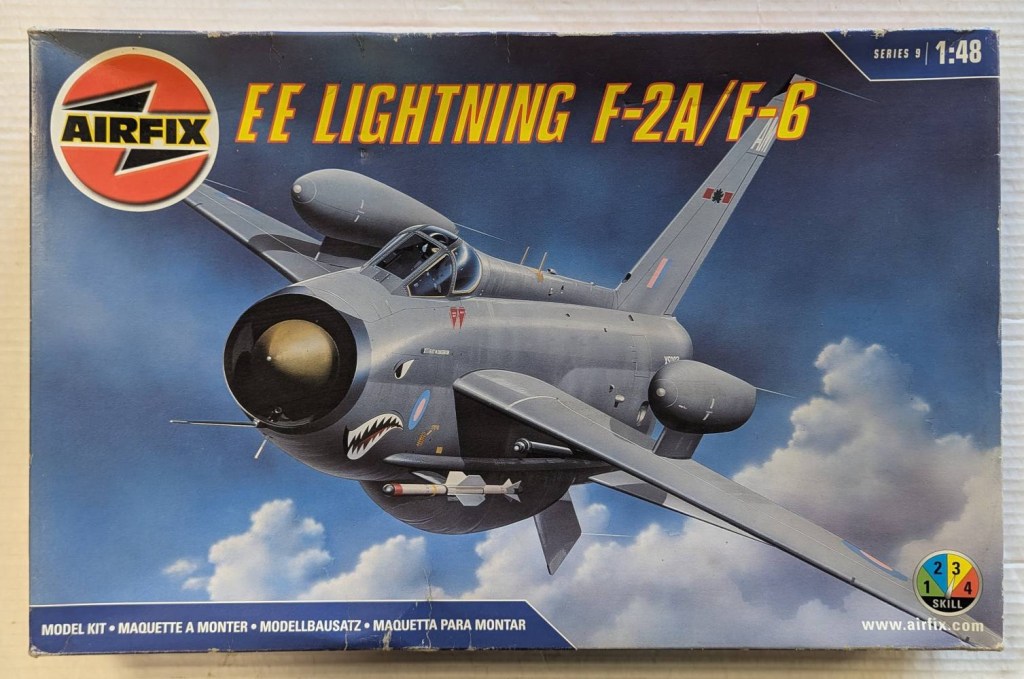
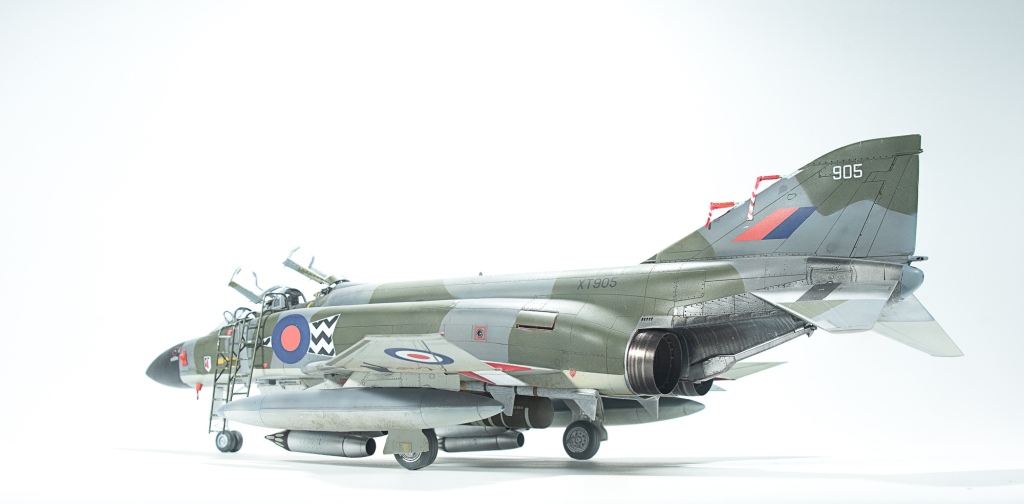
This, after the Phantom is the oldest kit in my stash. It was purchased shortly after its original release from Wonderland Hobbies Scotland for the princely sum of 21.99 pounds according to the sticker on the box. Back when the only way to order kits from overseas was to actually telephone the shop! Back in the Jurassic Period before on-line ordering became the norm.
Upon release the Airfix Lightnings were lauded in the modelling press as Airfix at its zenith. And many modellers, particularly those from the UK still seem to think this.
This modeller though certainly does not. Perhaps if I had built the model upon its release, my impressions of it too, would still be favourable. However, building it in 2025 and measuring it – perhaps unfairly – against newer Airfix kits brings forward all its shortcomings. In fact, even measured against contemporary Japanese kits, it falls a little short. Poor cockpit details, no wheel well detail at all, vague instructions, sink marks, thick decals. It certainly was not the kit I was expecting. A mate came to the same conclusion after building his. The kit was the subject of the Annual friendly Build-Off between The HamFisted Modeller and myself. The results are judged at a local competition we both attend. It should be noted that HFM handicaps himself to give me a chance. (EDIT.) Suspiciously that last sentence only appeared after I sent the article to HFM for proofreading
Construction Notes
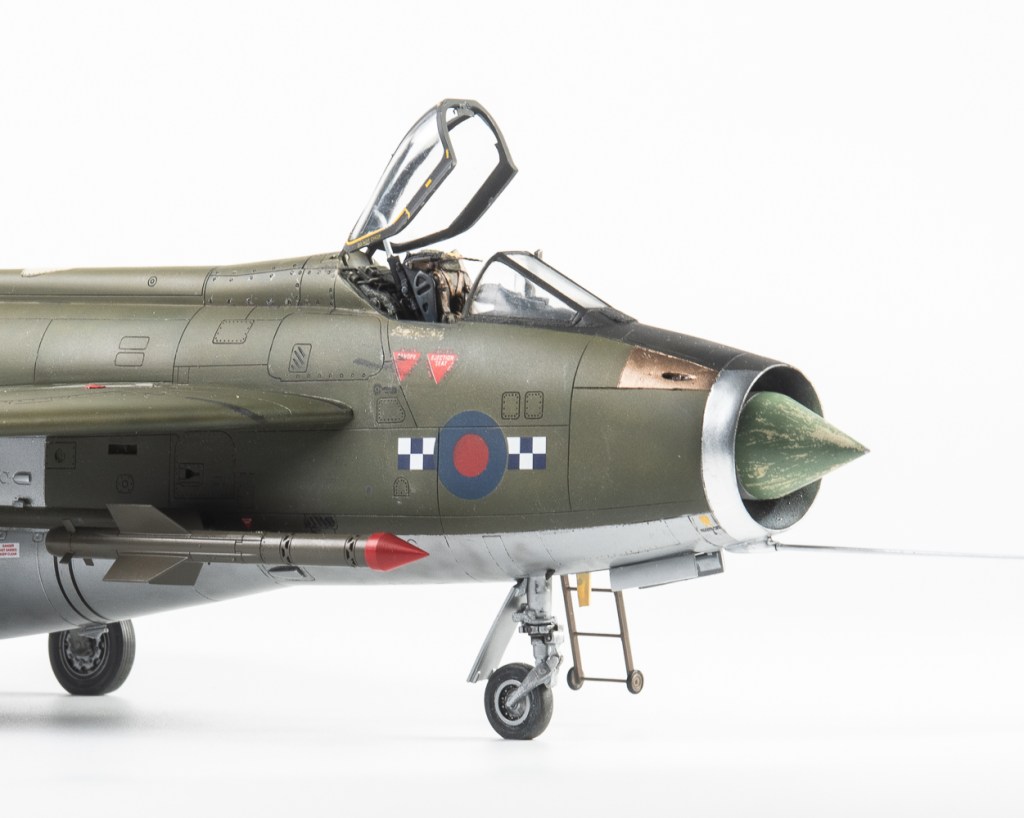
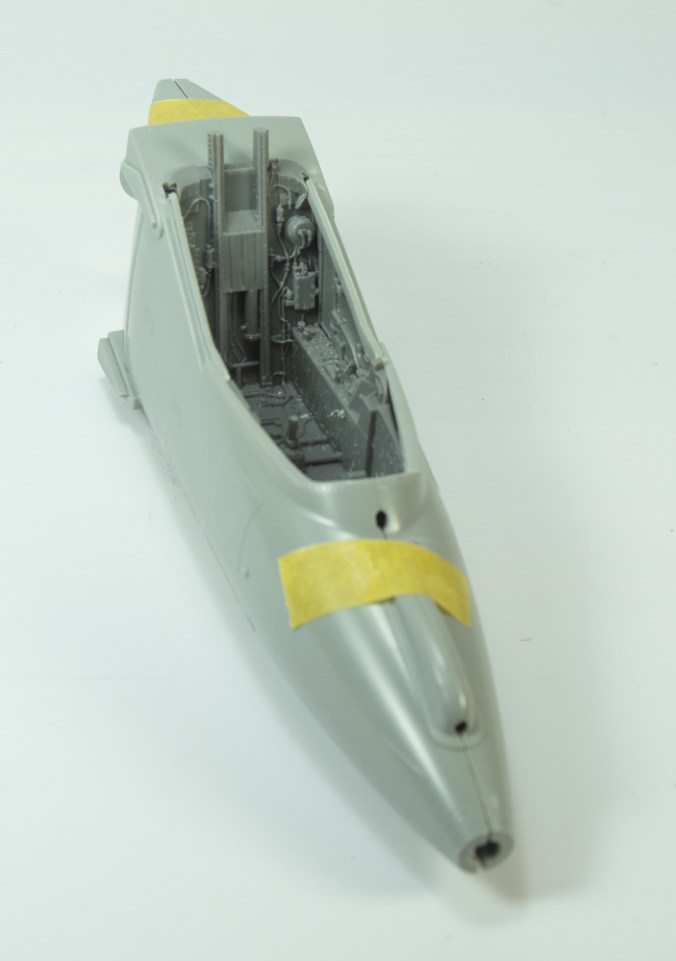
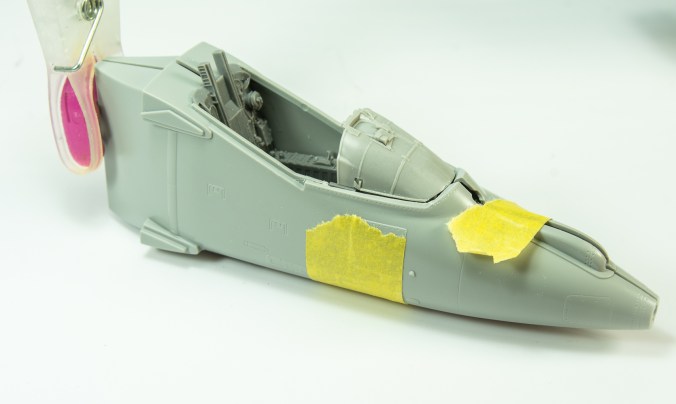
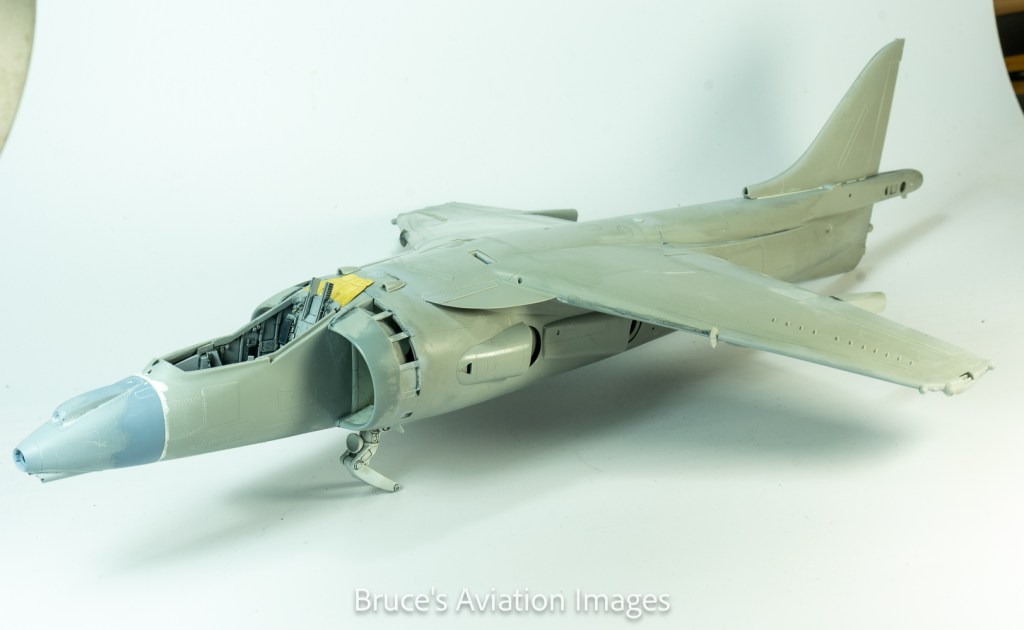
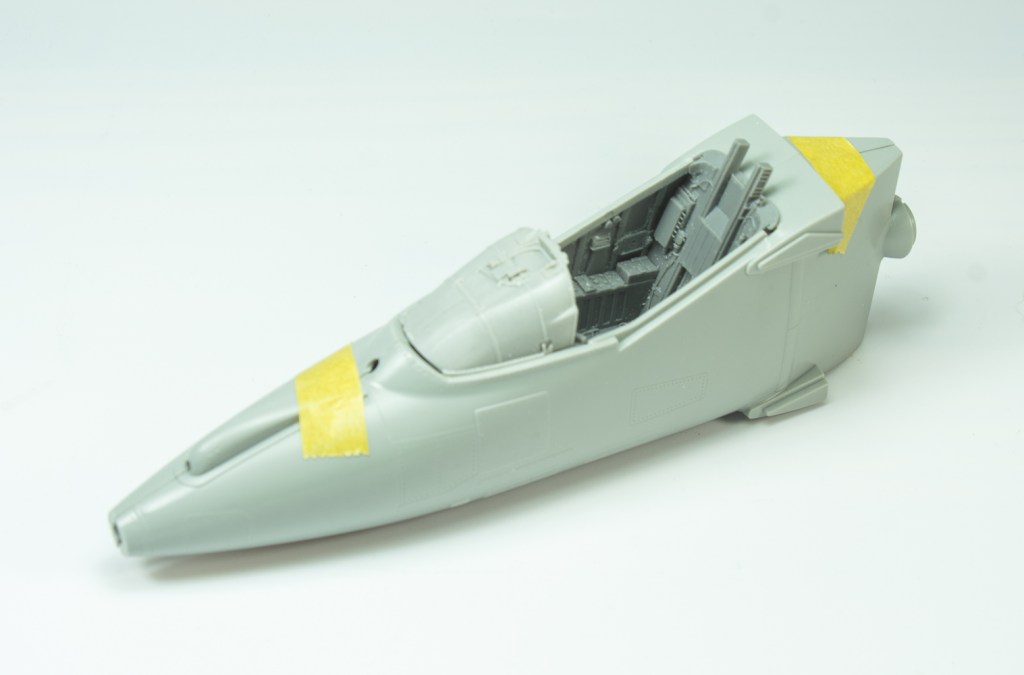
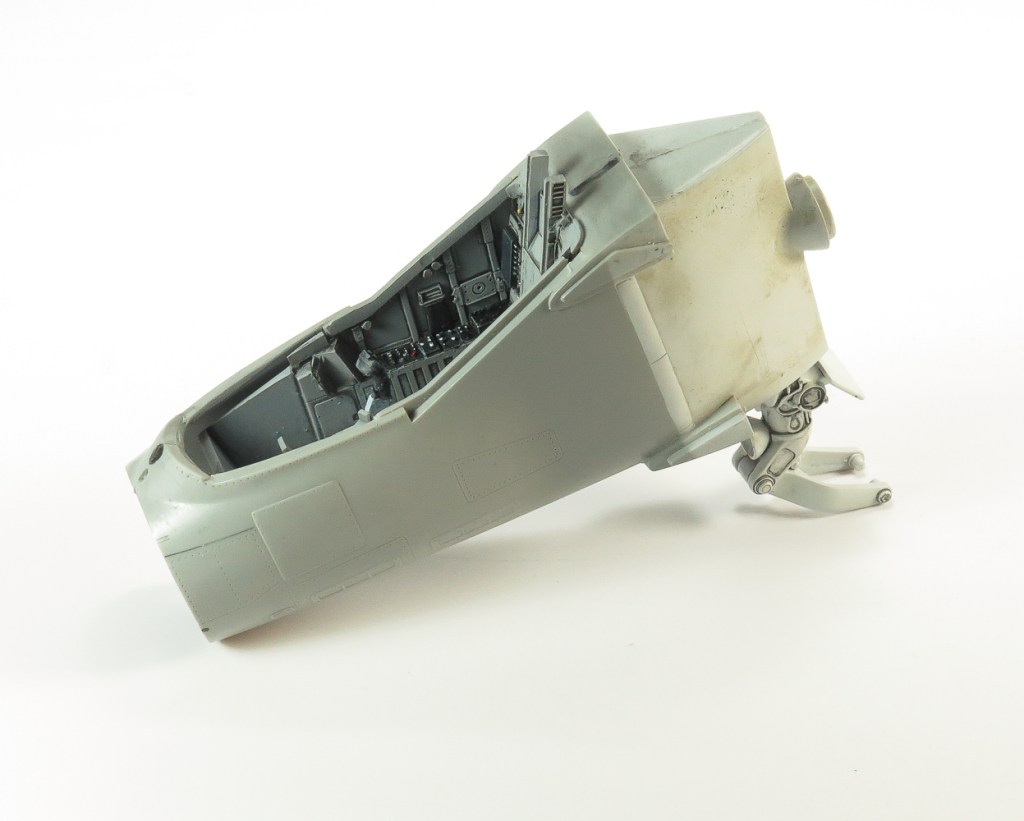
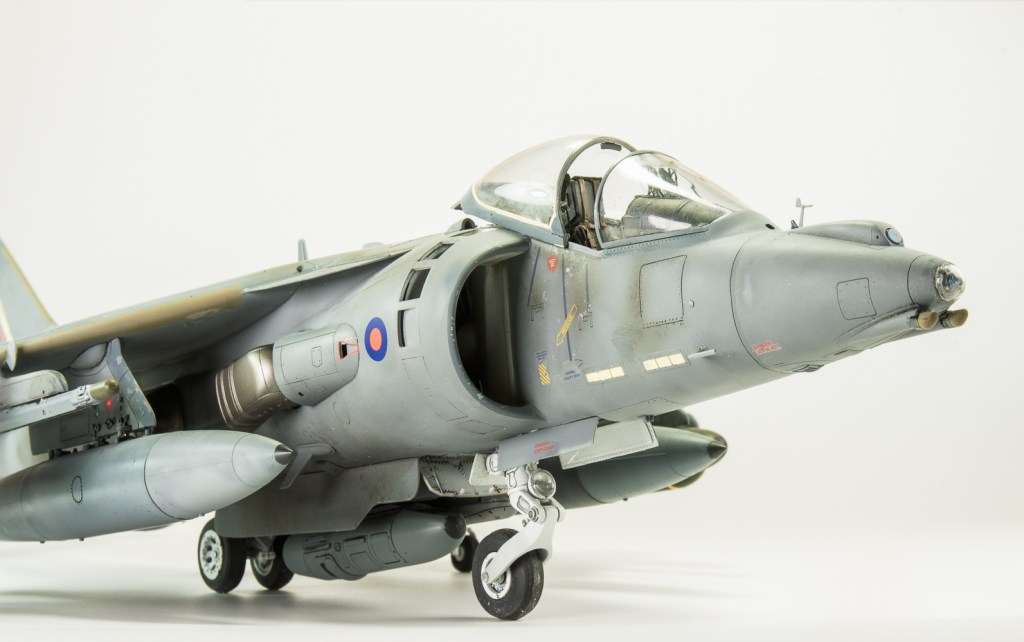
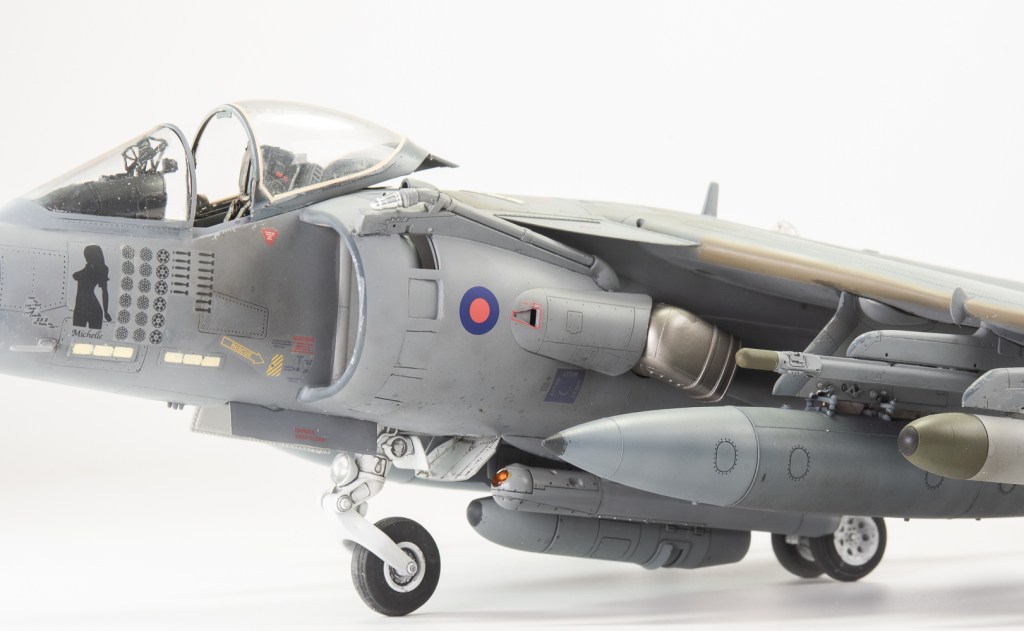
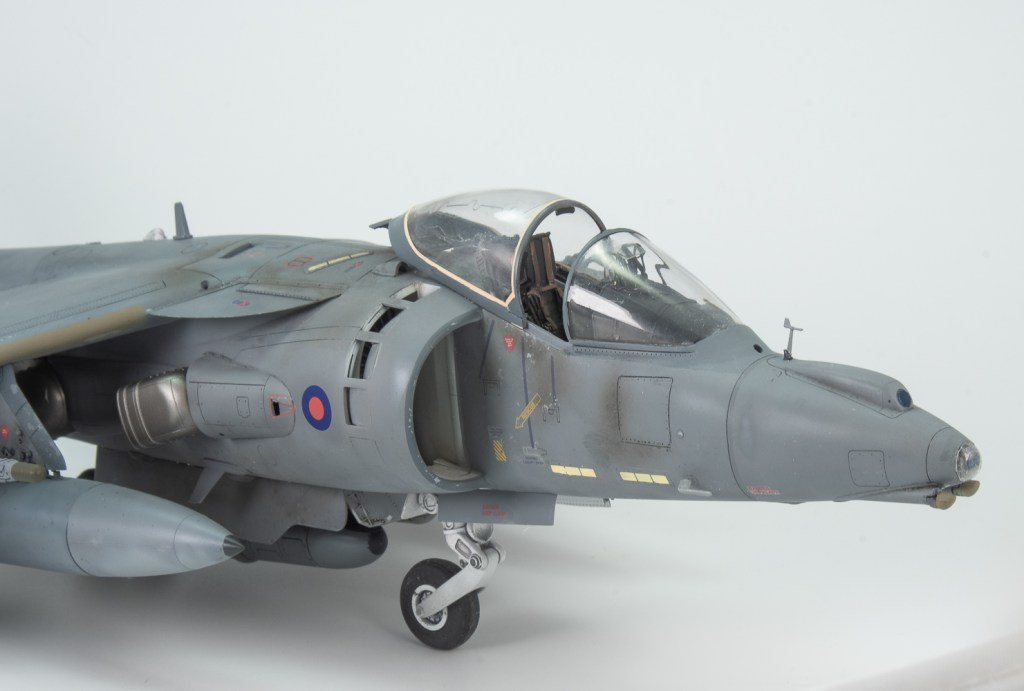
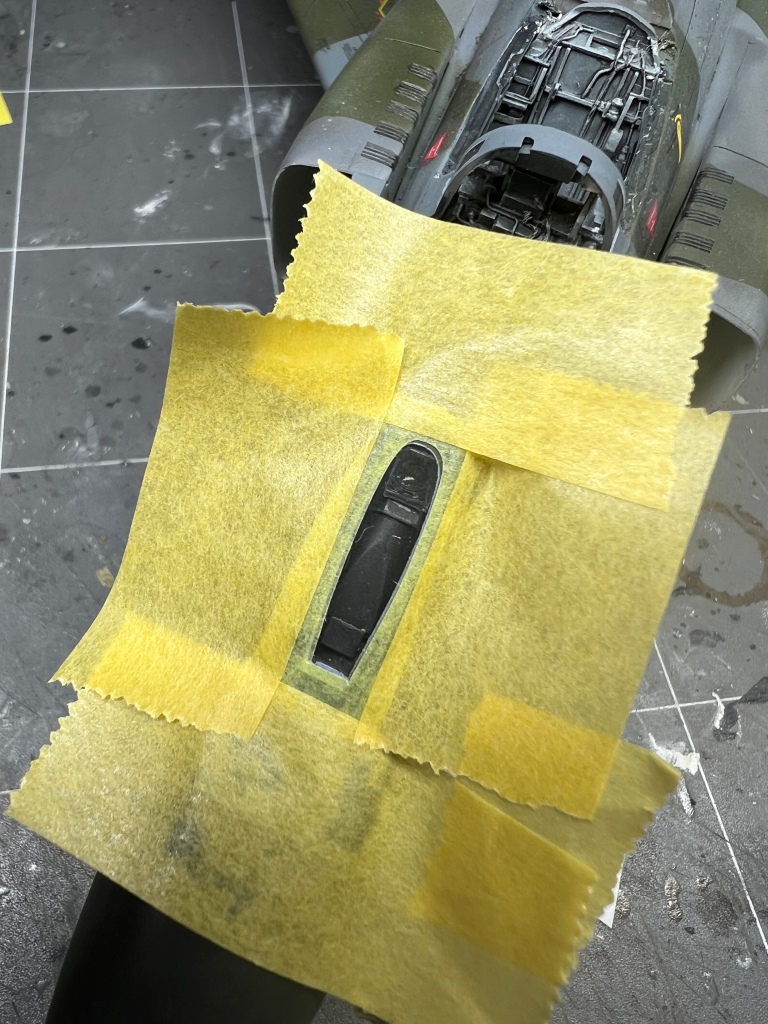
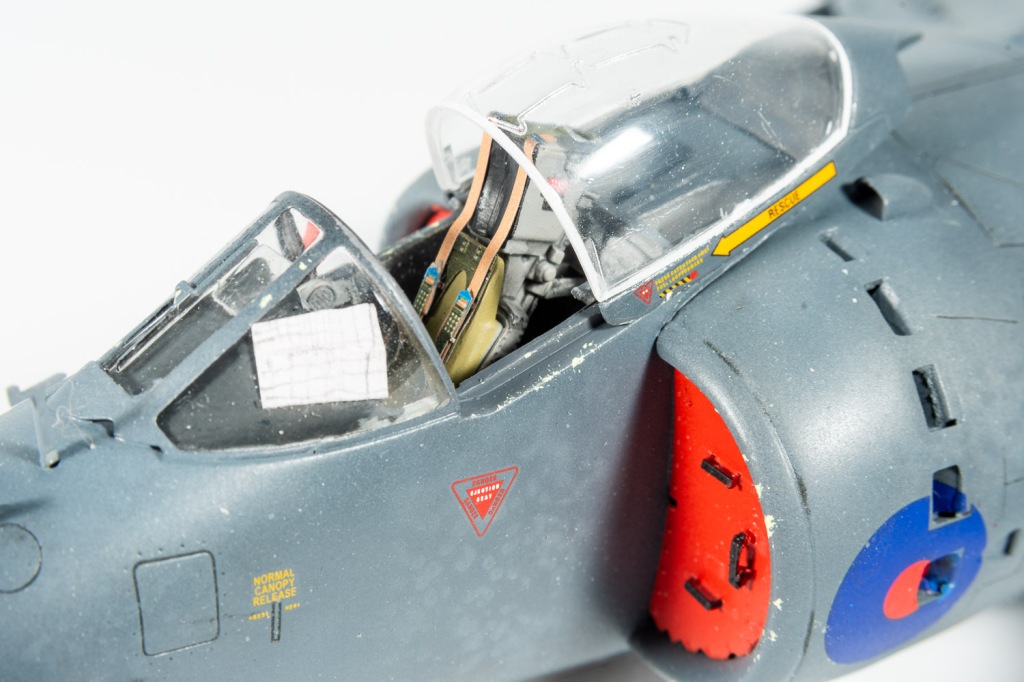
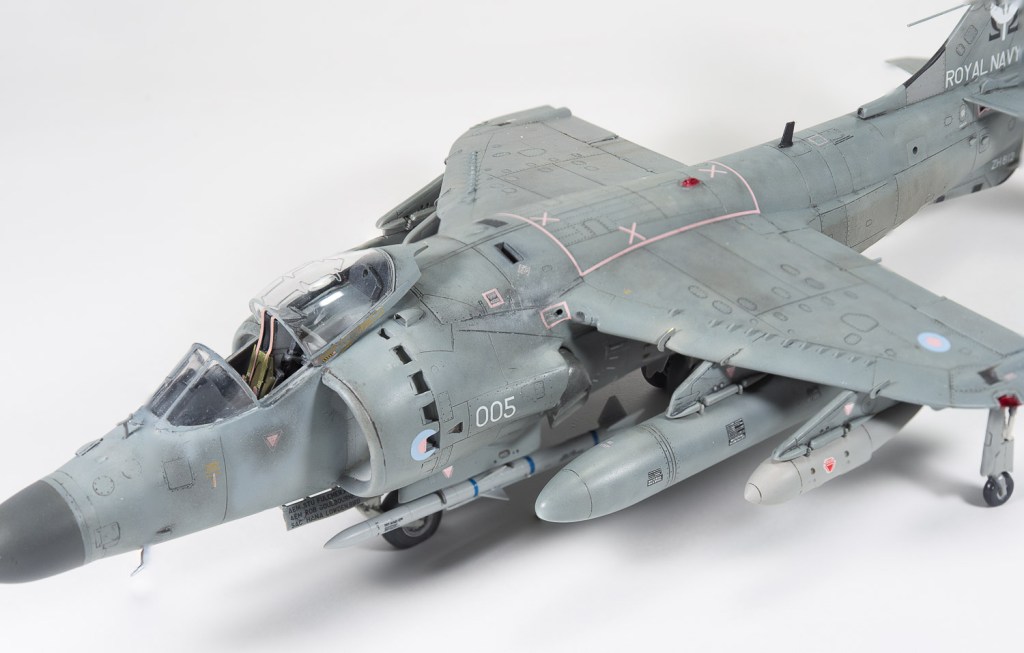
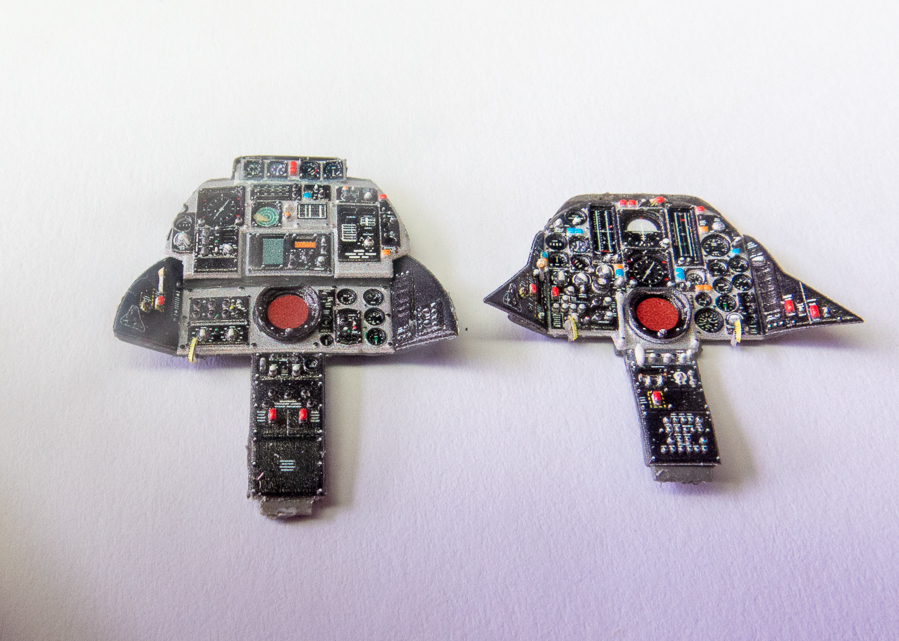
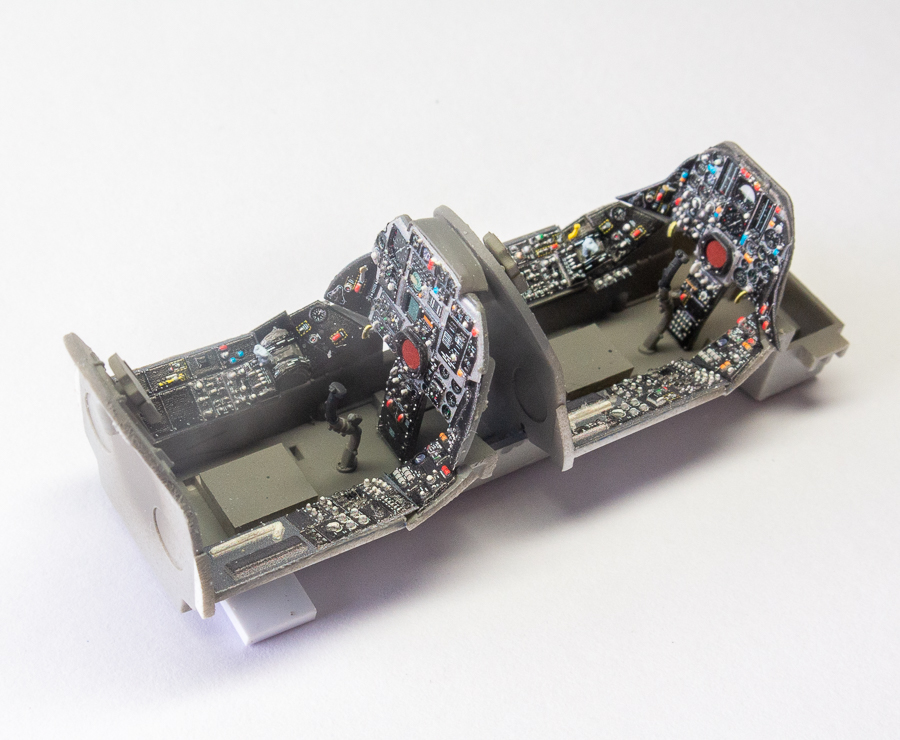
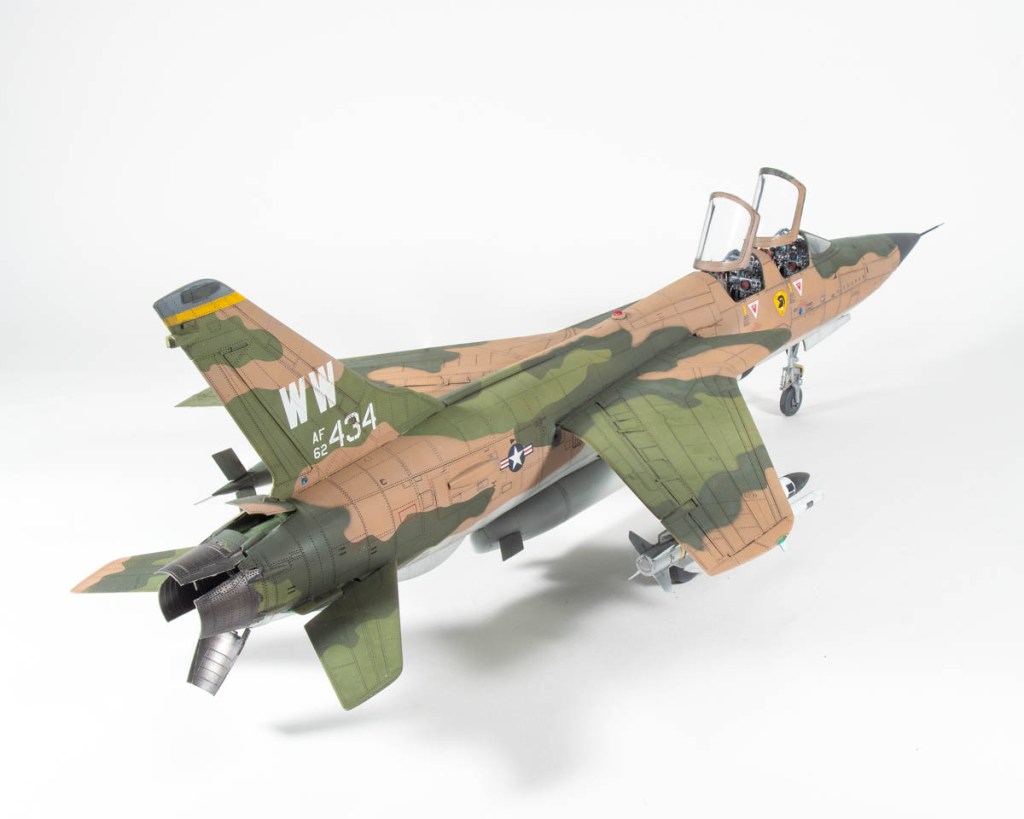
The Cutting Edge Super detailed Cockpit upgrade was one of many aftermarket sets stuffed in the box. It was used to replace the woefully detailed kit cockpit. Calum had stated that pretty much nothing of the cockpit can be seen anyway. Anyway , as I had the set, it was used. Unlike an Aires set, minimal sanding was required to make it fit. Just the backs of the sidewalls and some material removed from the casting block to ensure the tub sat down over the intake trunking.
The cockpit was painted with MRP Medium Sea Grey, this being a later mark Lightning.
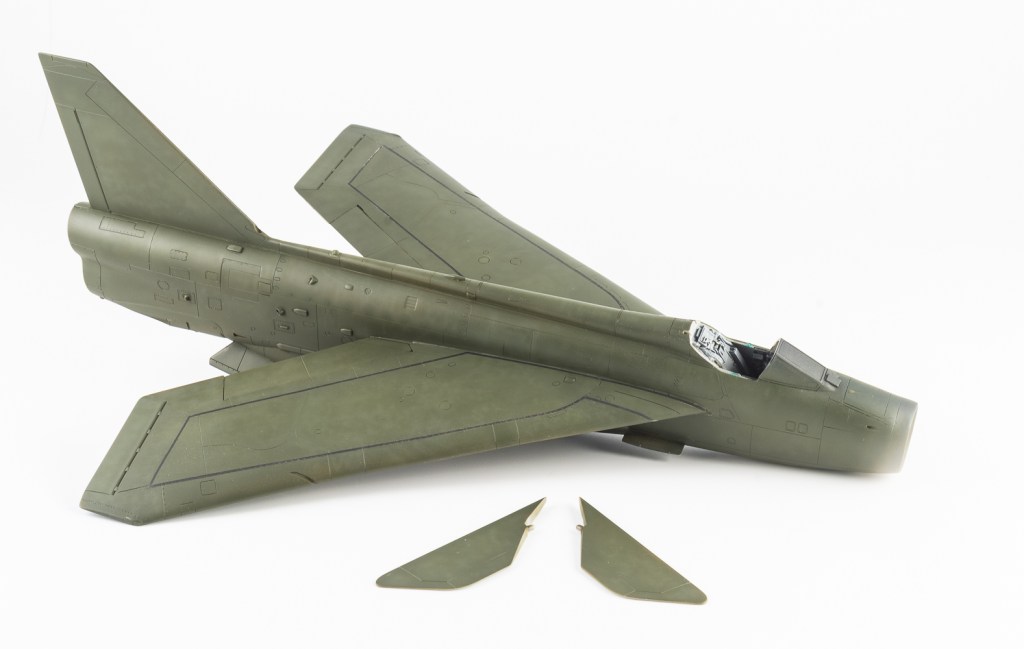
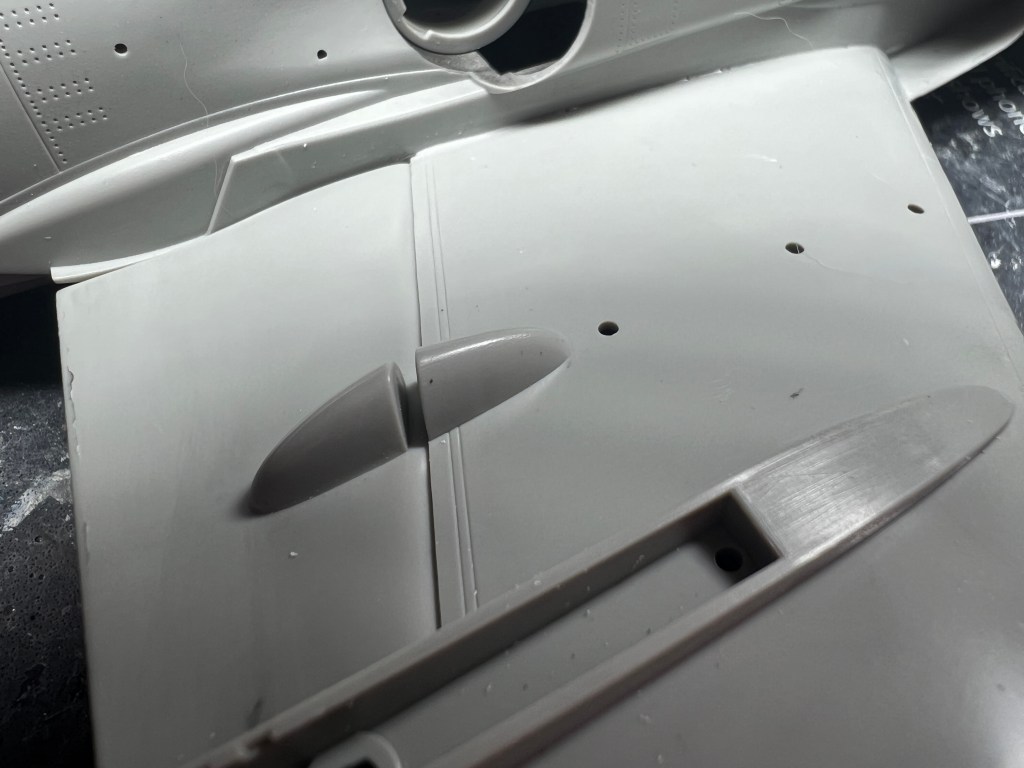
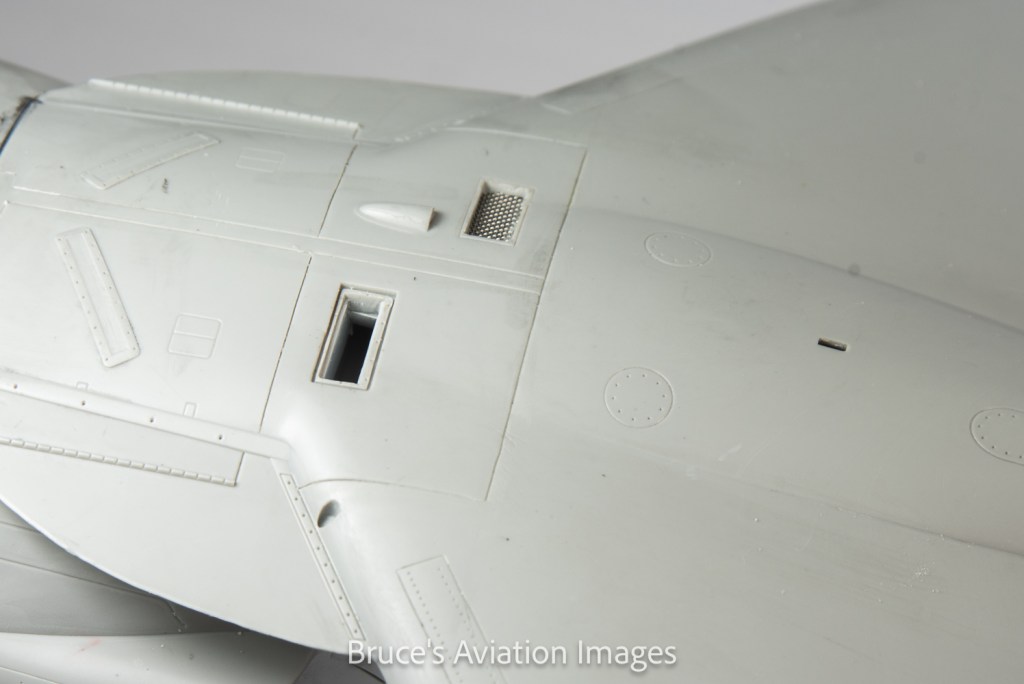
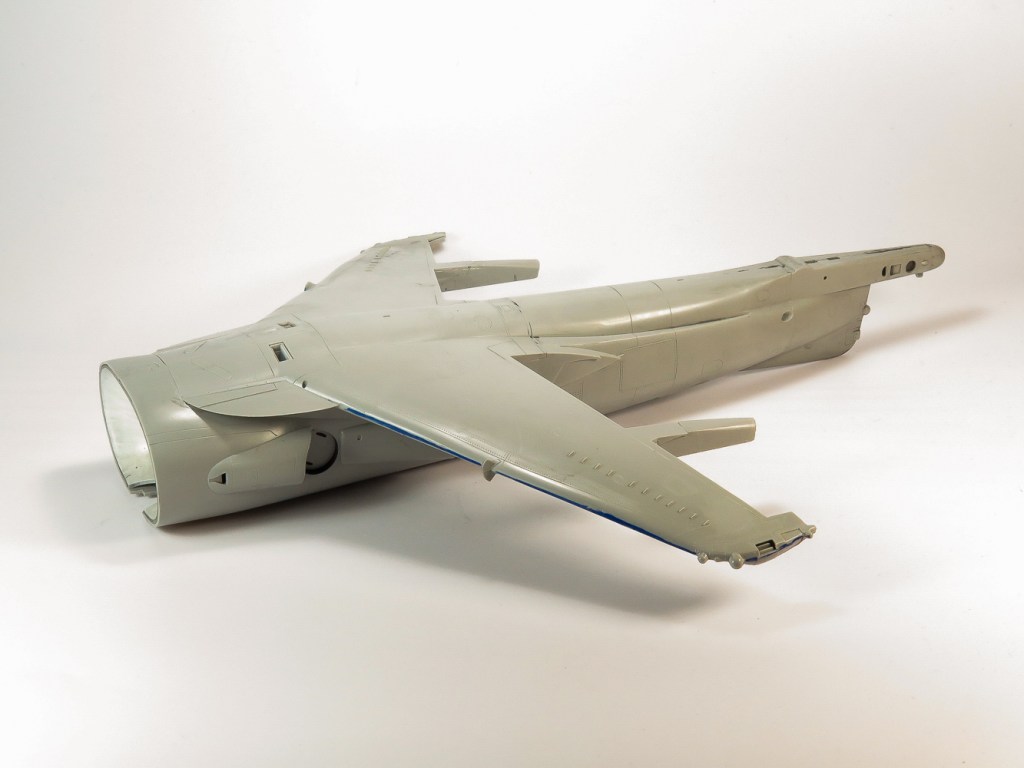
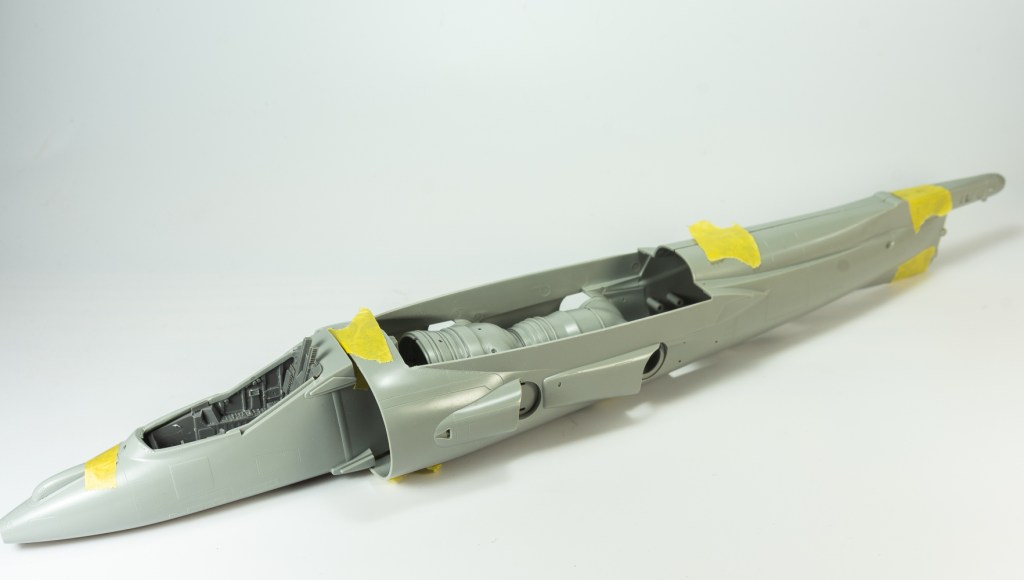
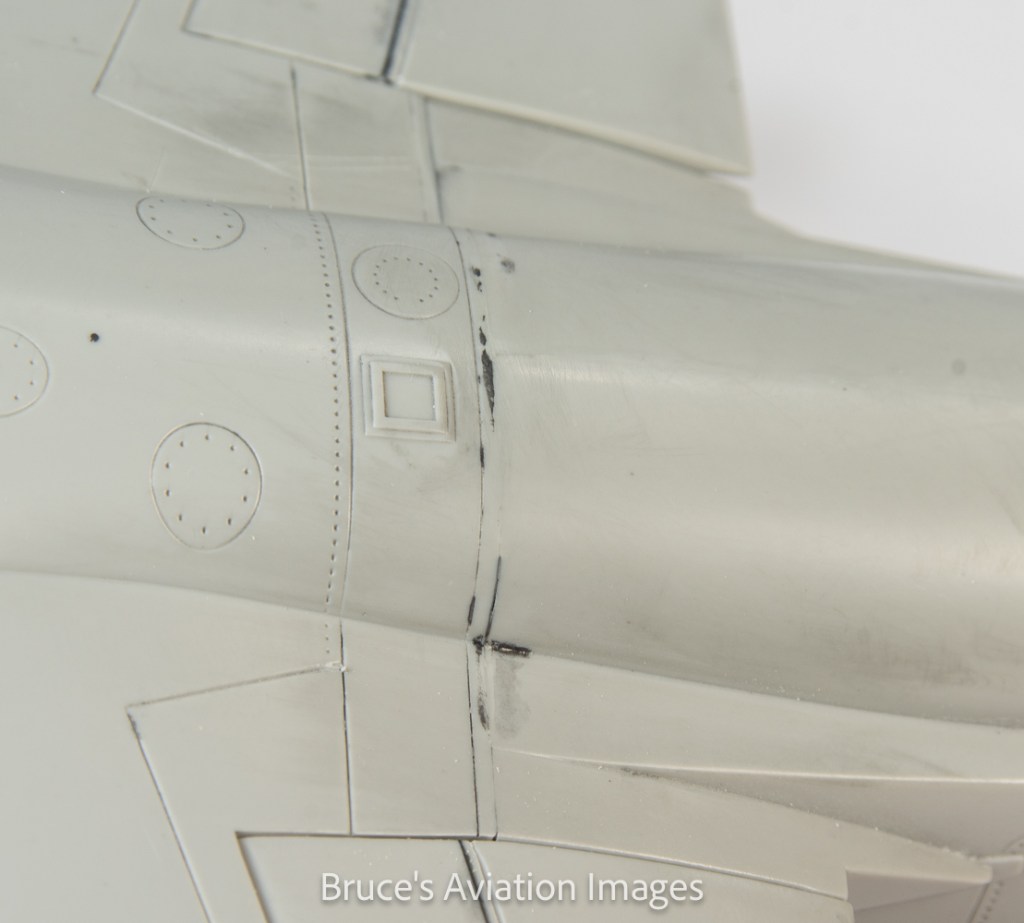
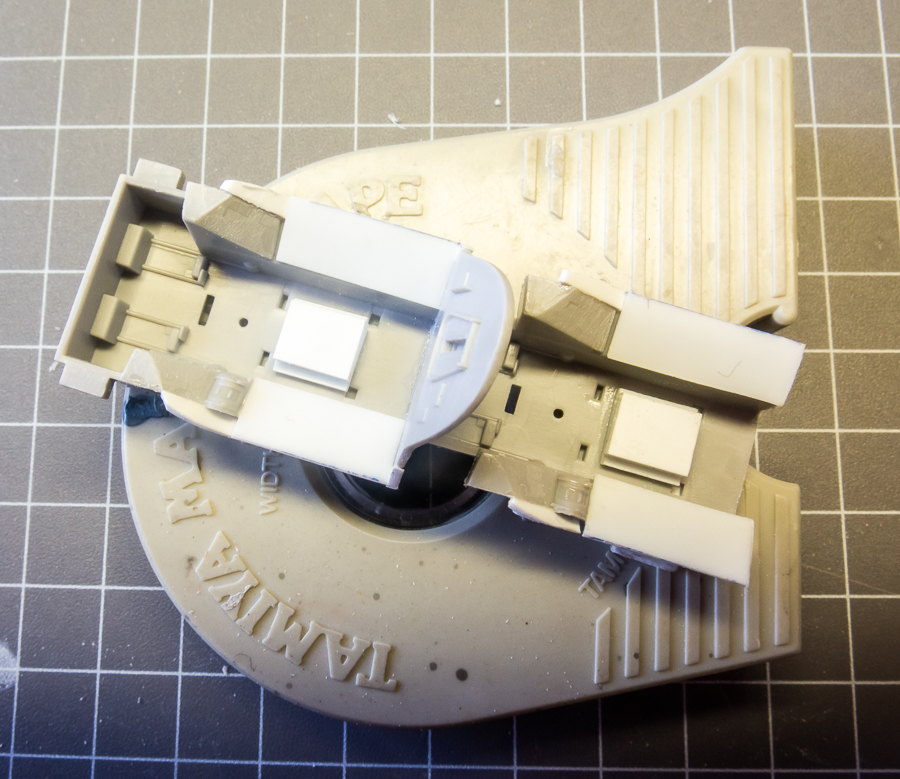
Building the intake we come to the first “WTF Airfix?” moment. The bottom of the nose wheel well is a rectangle to fit the wheel well opening. Airfix want you to mate it to the top half which is an elliptical shape. This of course leaves large visible gaps. I left it as is, as there id very limited viewing up into the well. Very poor engineering on Airfix’s part.
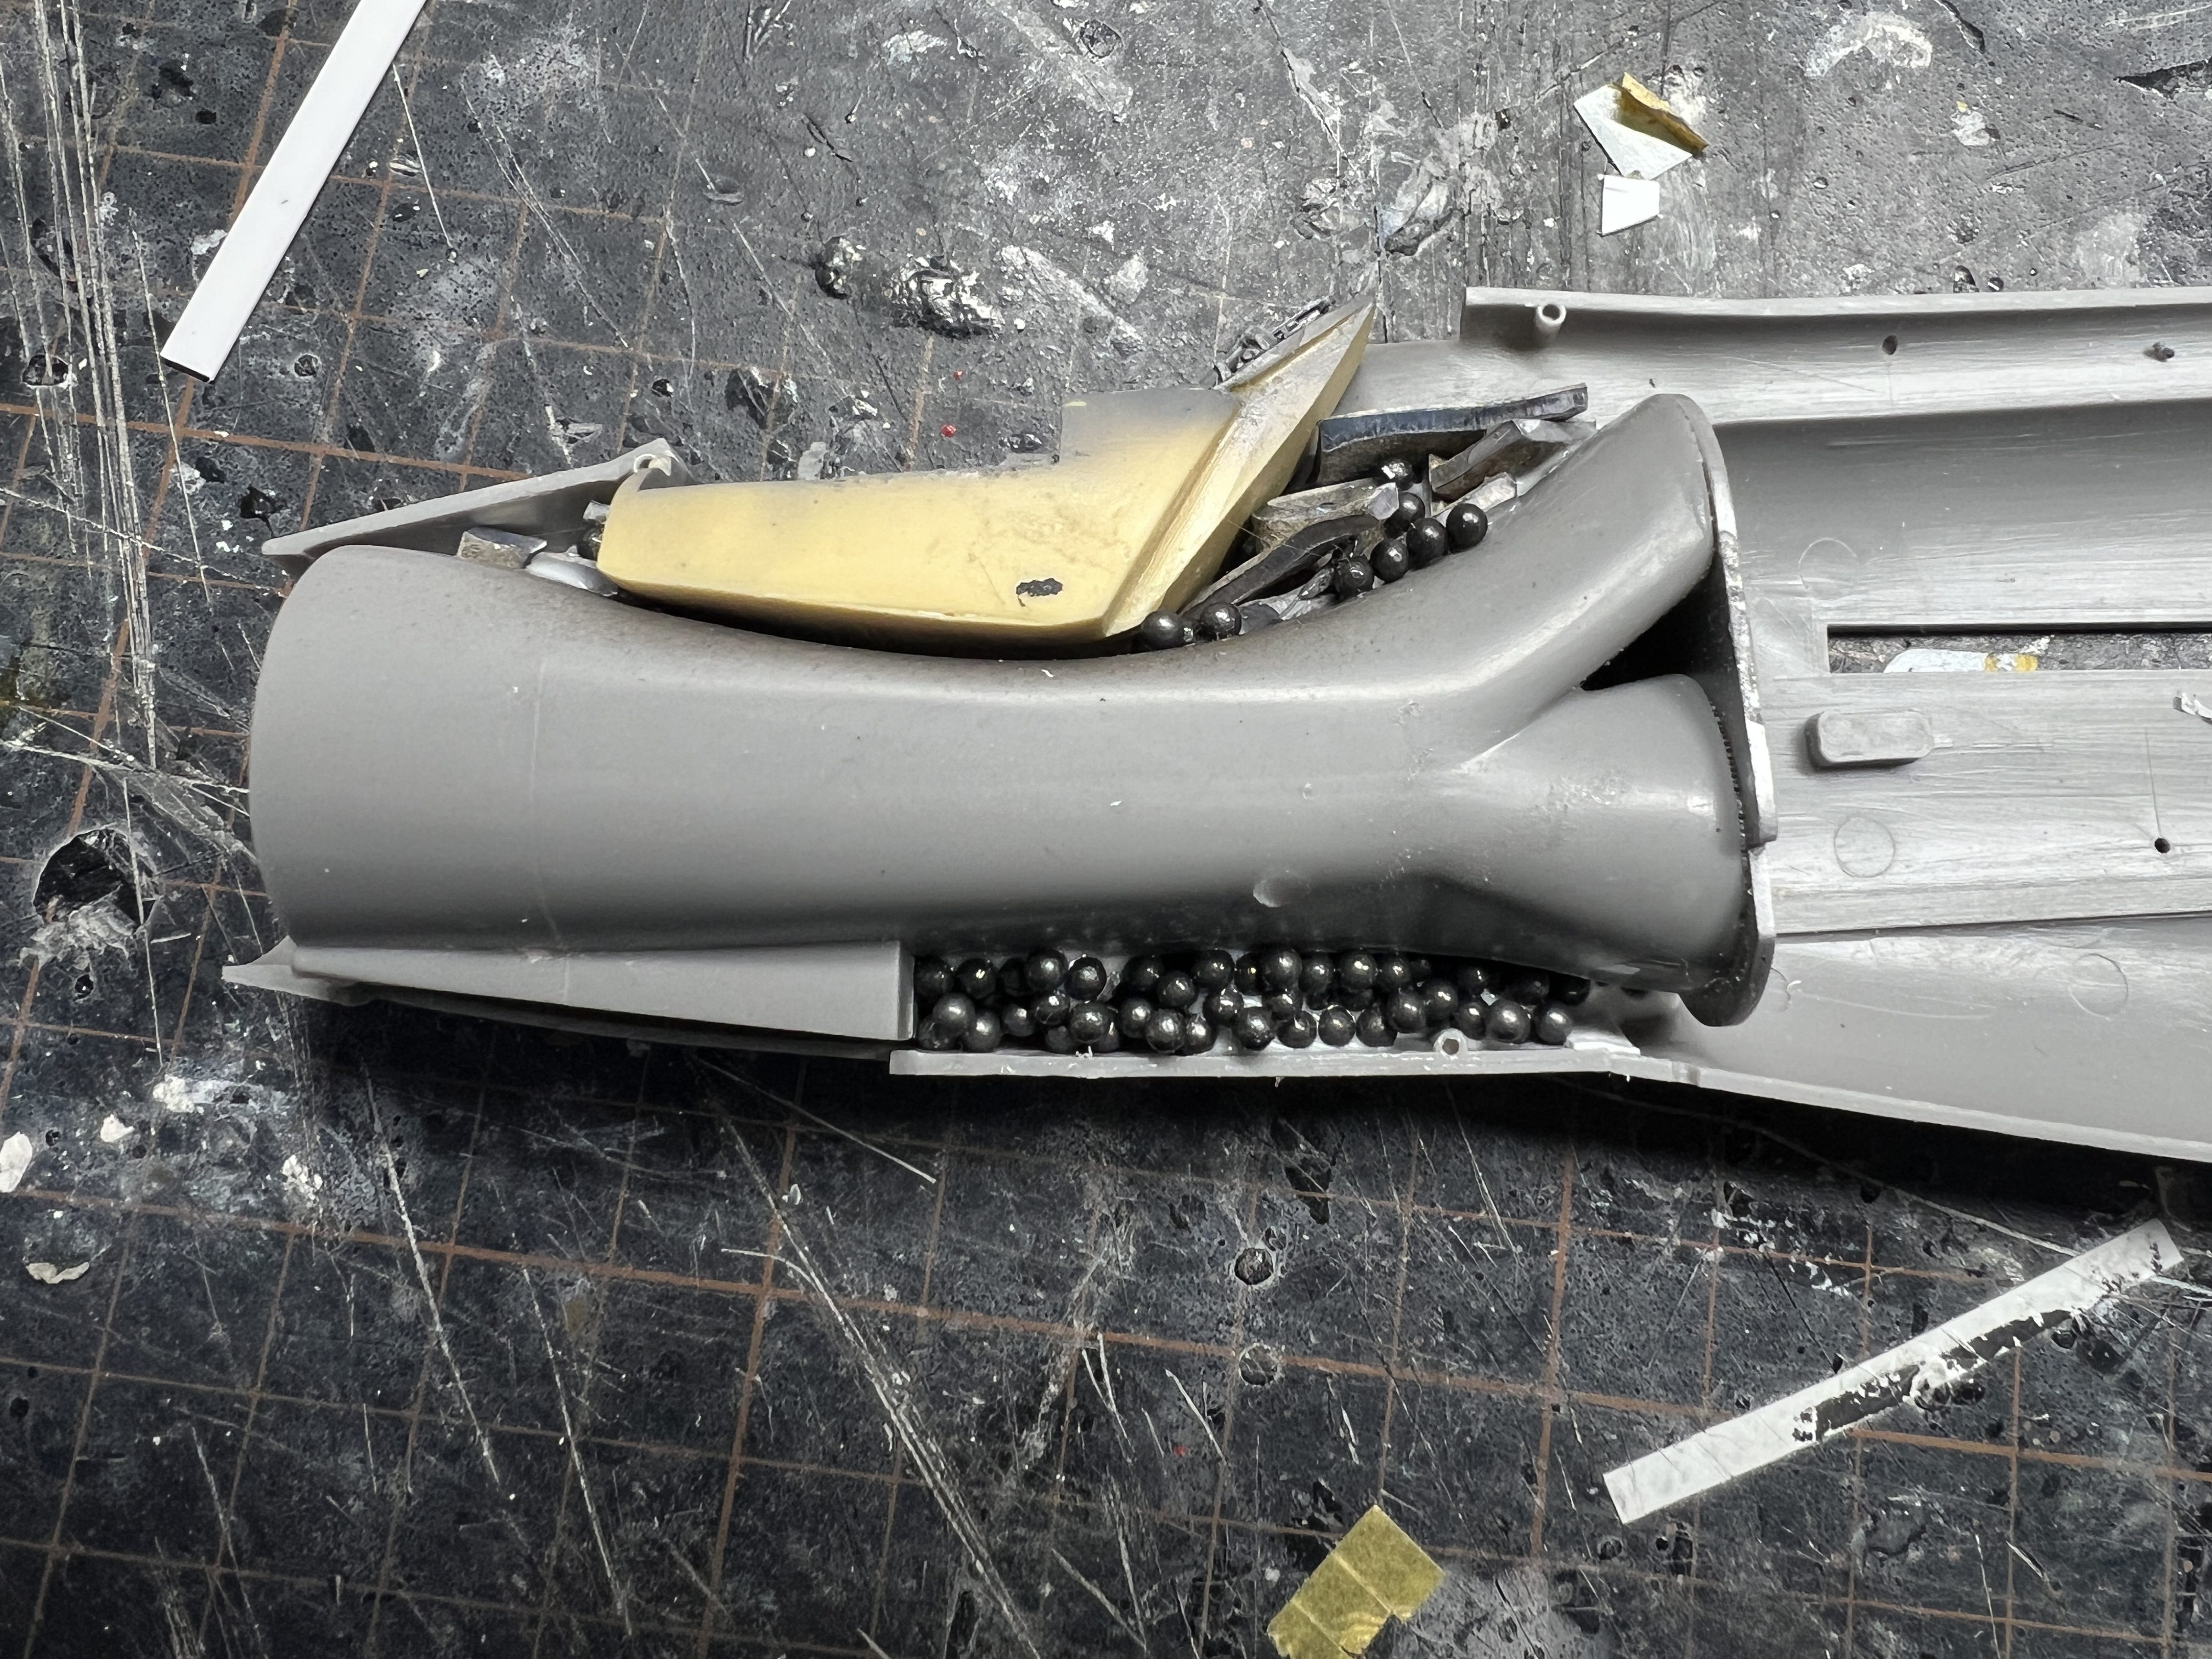
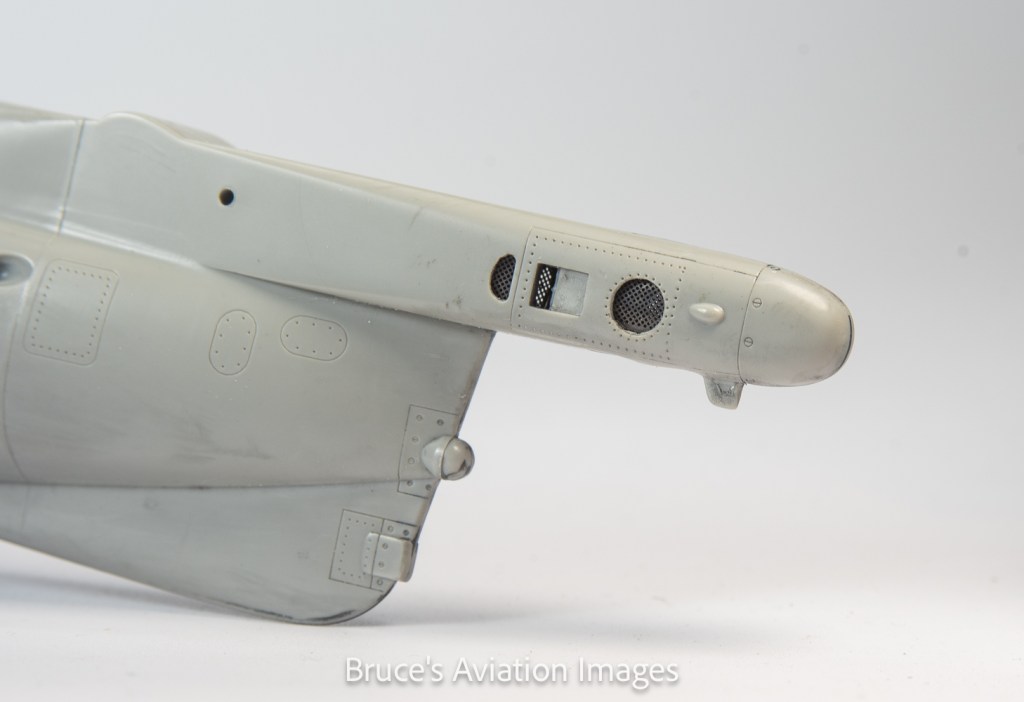
Take care to ensure the radar bullet nose cone is central in the intake. Also don’t forget the nose weight, remembering to take into account the added weight of resin exhaust cans if you are using some. Airfix helpfully includes a diagram in the instructions of the best place to pack it. The fuselage on mine closed up OK, but the panel lines did not align across the seams, requiring them all to be filled and rescribed. The nose ring is a poor fit and will require fairing in.
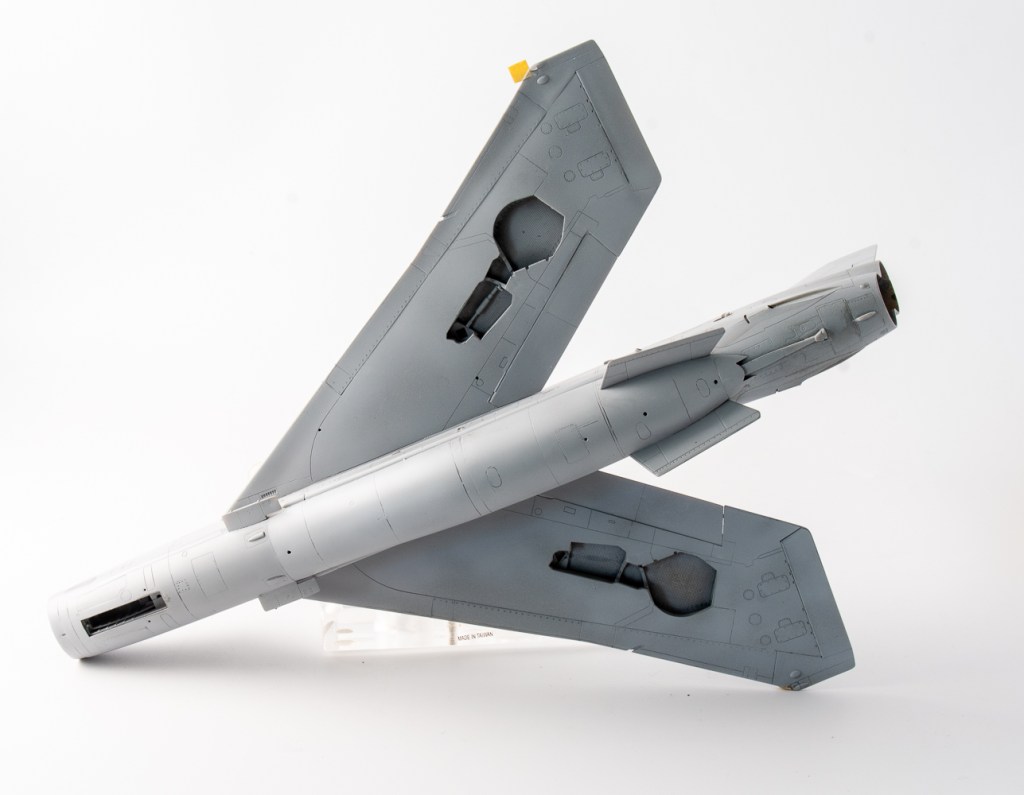
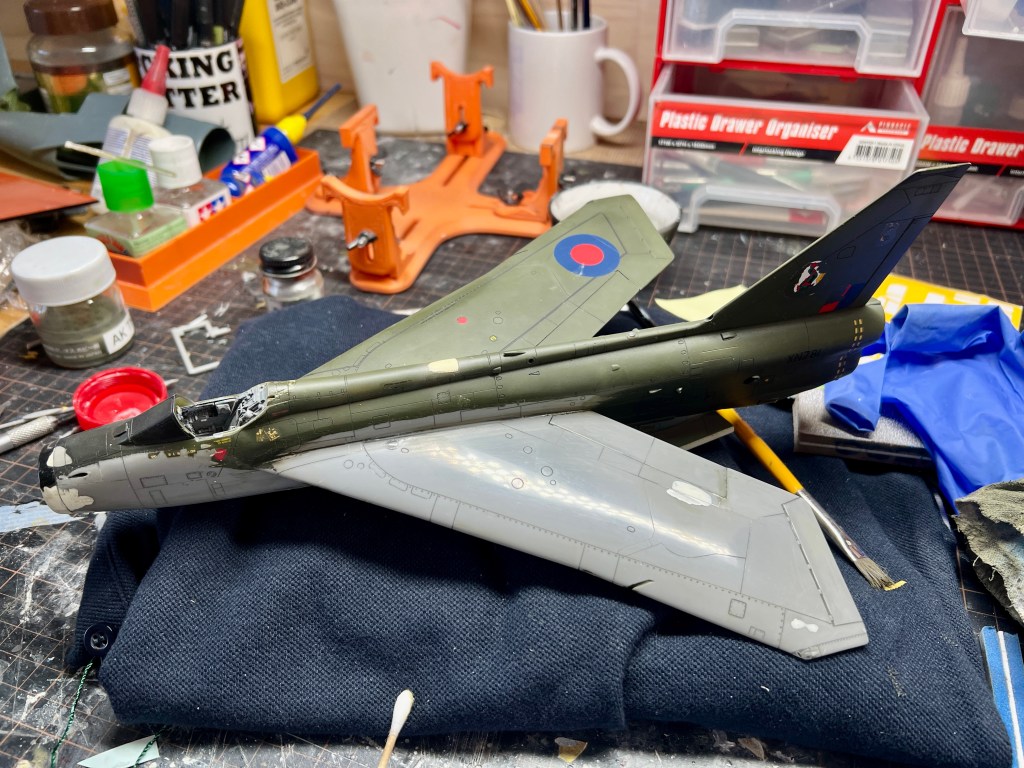
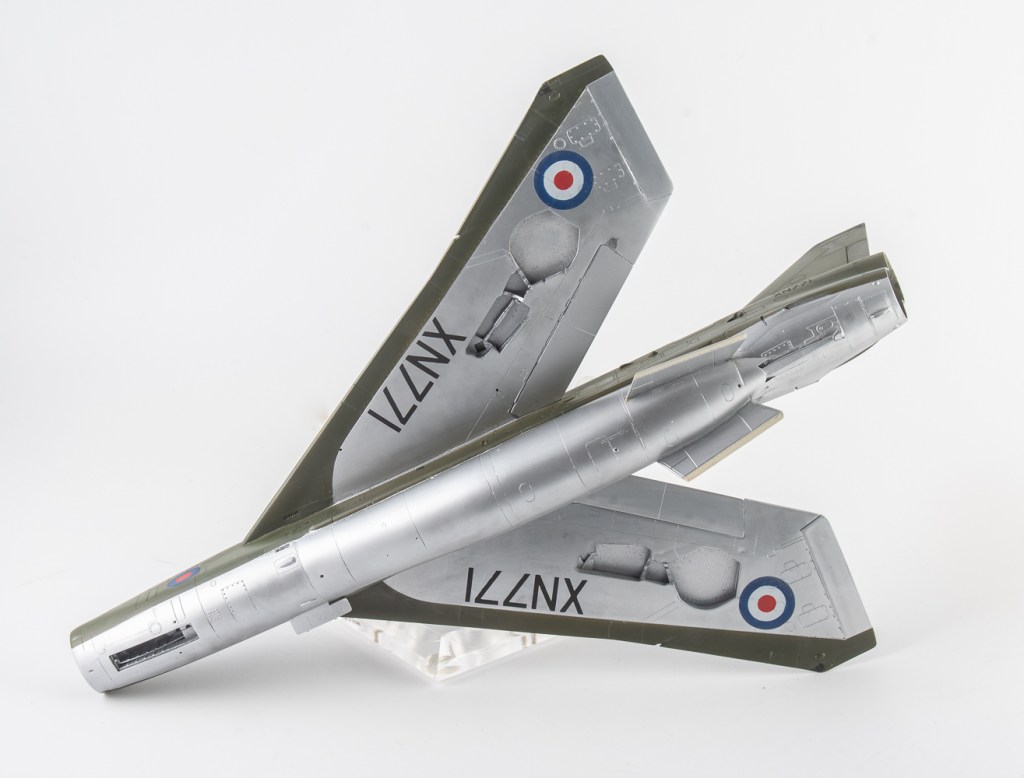
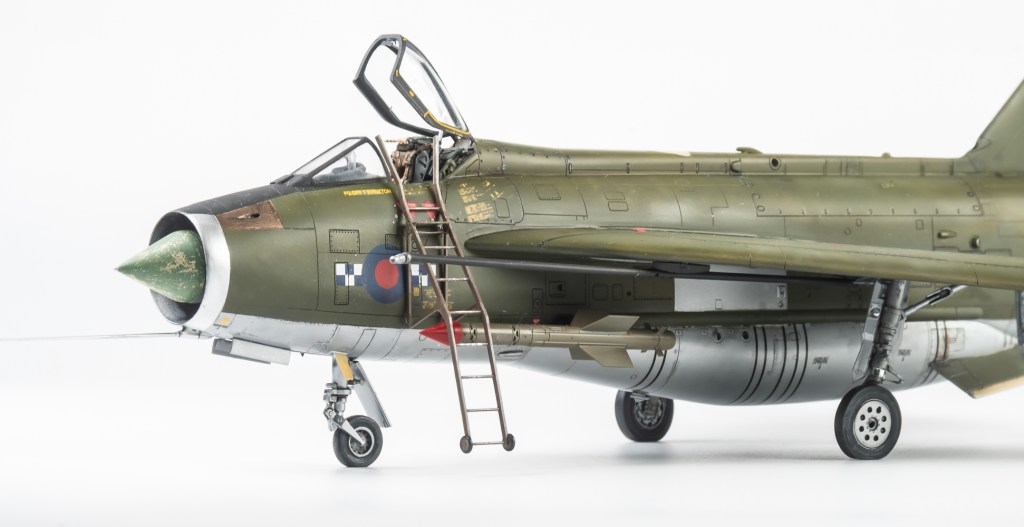
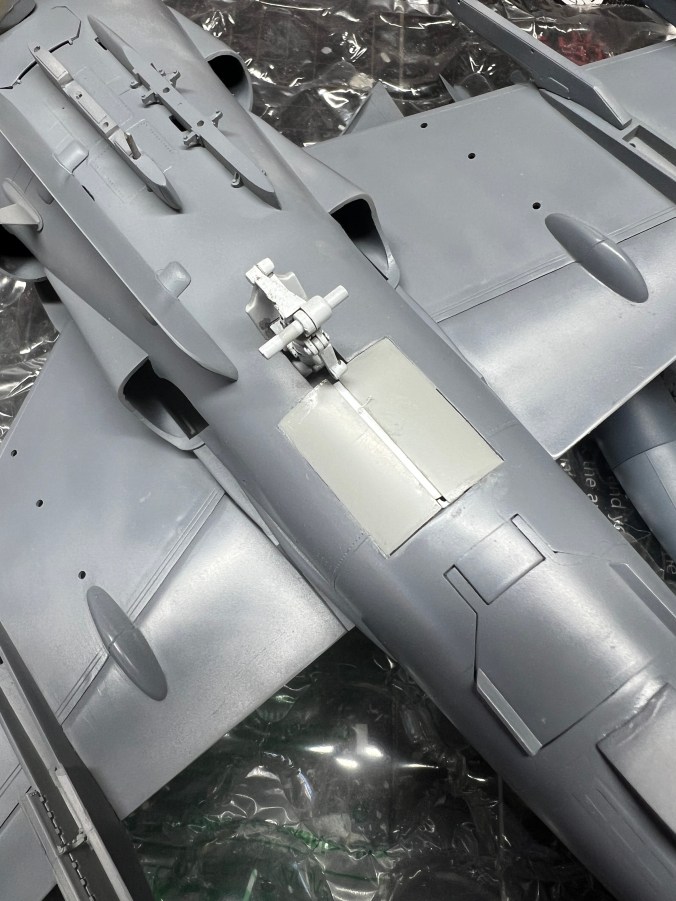
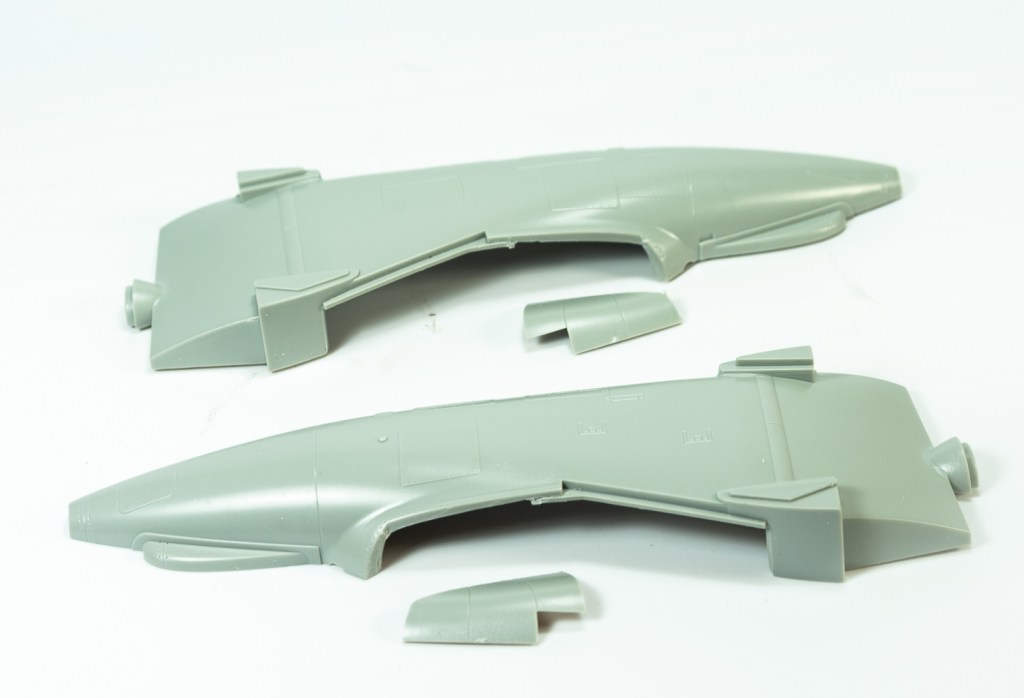
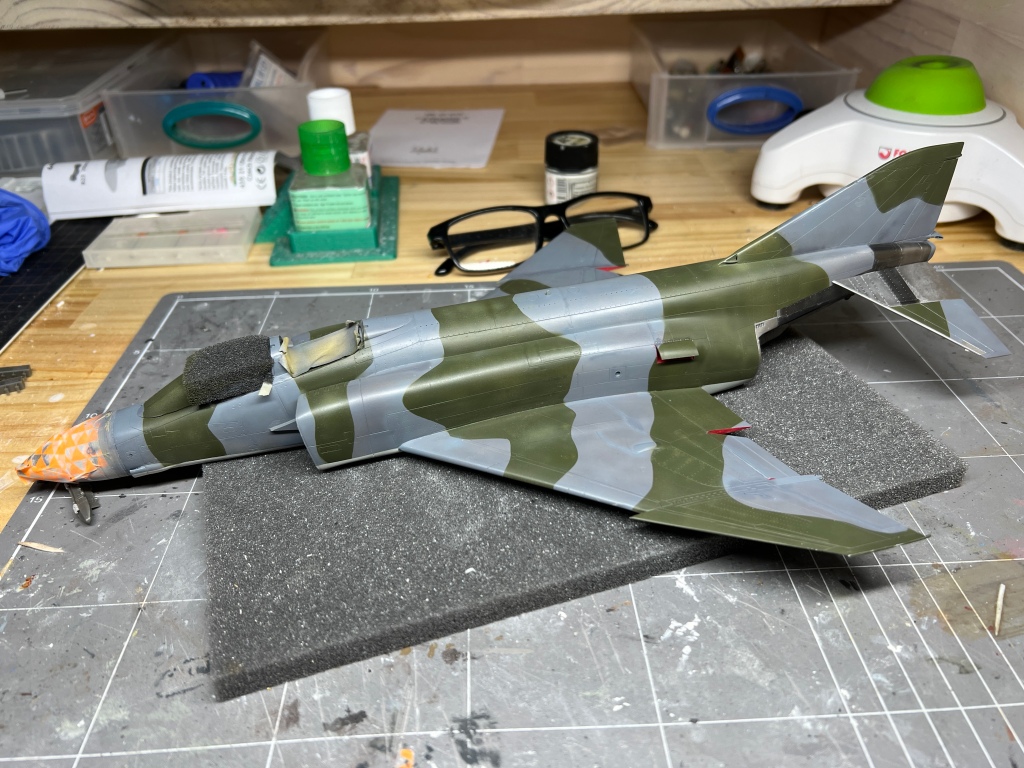
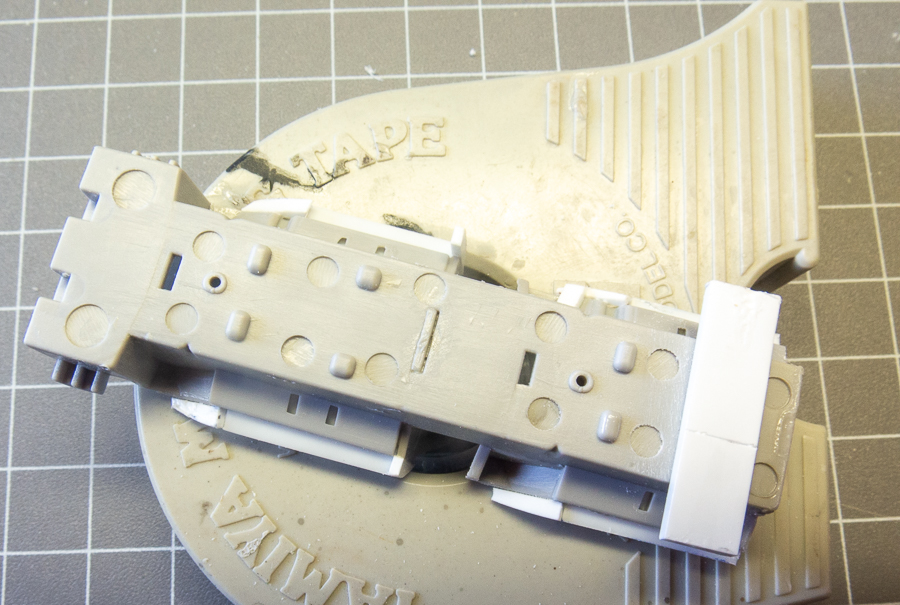
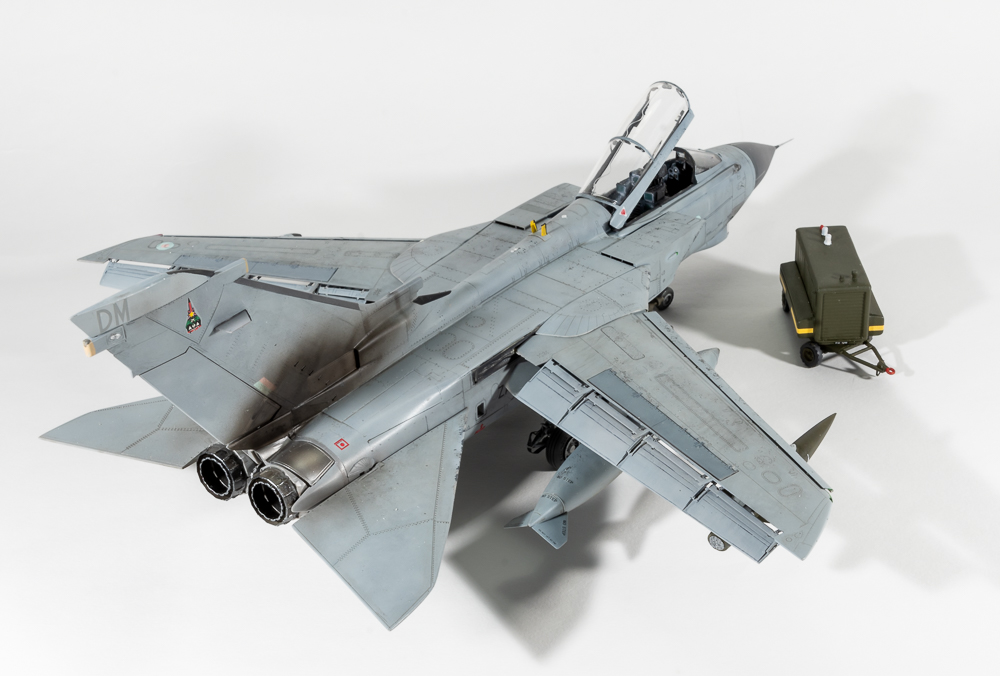
Onto the wings, and mine were looking a little warped. There were also several sink marks requiring filling. Airfix provide absolutely no wheel well detail. CMK and Aires both have resin sets in their ranges. I decided to steer clear. I knew full well the work these would require fitting to the model. Instead, The HamFisted Modeller generously provided an Eduard PE set. It was put to use to add the distinctive patterned roofs to the wheel wells. It is very worth your time to set up the undercarriage leg components now. Dry fitting them helps in seeing how they fit together. You must carefully look at photos of the real jet. The Airfix instructions are of no use at all. I had to add small blocks of sprue to each leg to allow the retraction strut to locate. There is nothing moulded on the leg. Again, really poor engineering by Airfix. I must apologise here as I thought I had photographed this step, but apparently not!
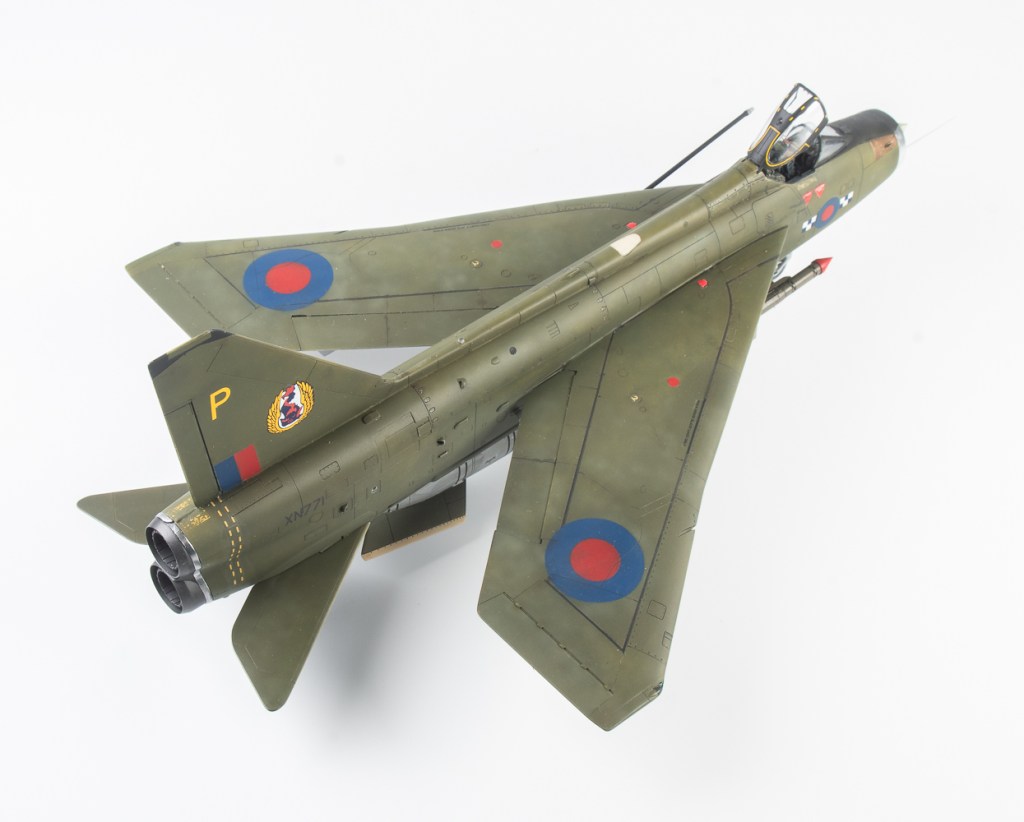
Out of the box, the kit wings do fit to the fuselage quite well, only problem is they are level, whereas the real wings had slight anhedral. Adding this to the kit wings left a slight gap on each top surface which was filled with Milliput
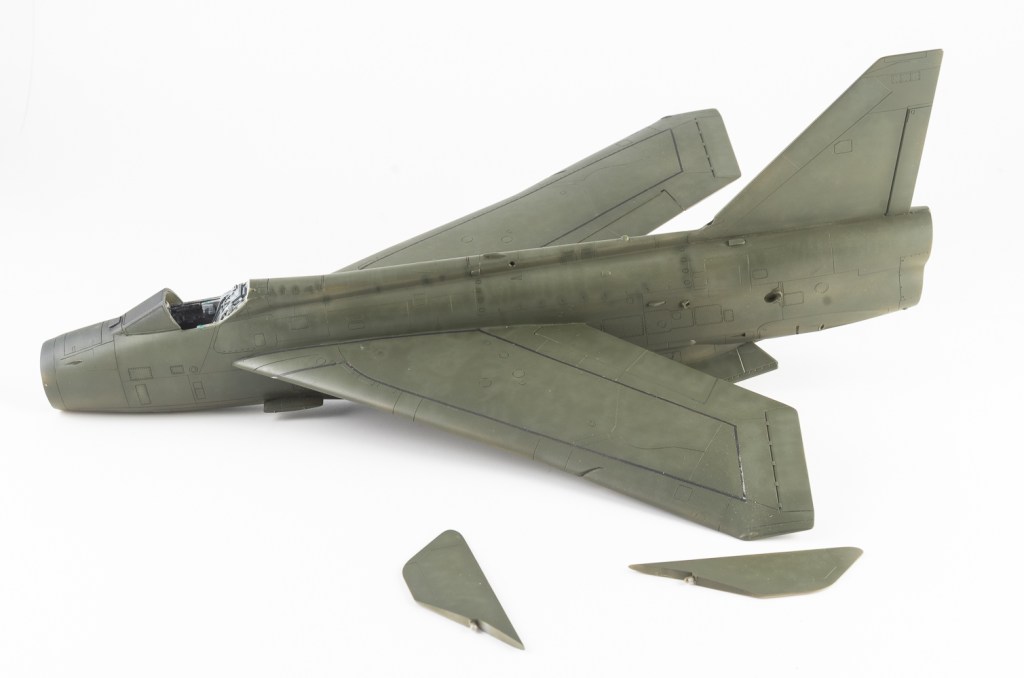
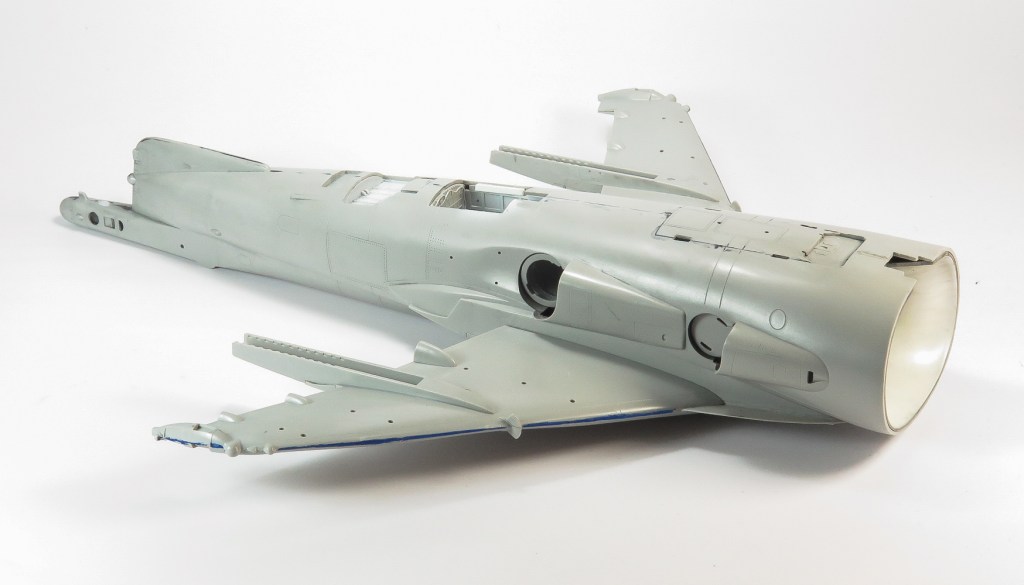
So far, despite the noted annoyances, the model had gone together reasonably well, and construction progress was swift. Unfortunately this was about to change rather drastically with the decalling.
Painting and Decalling
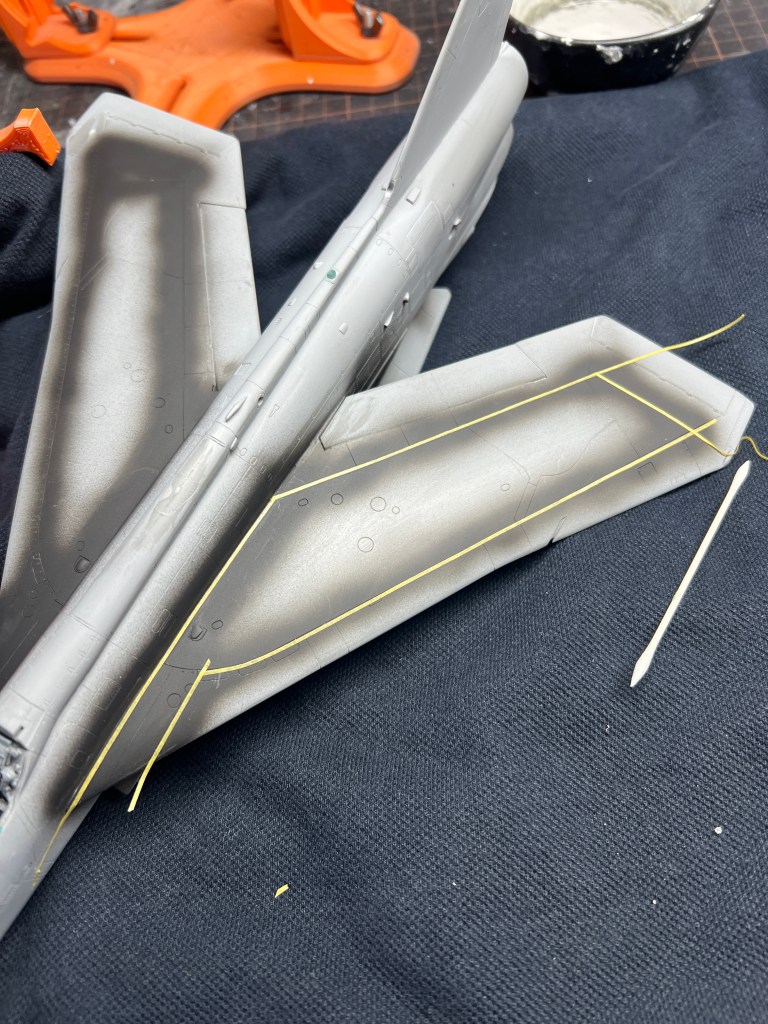
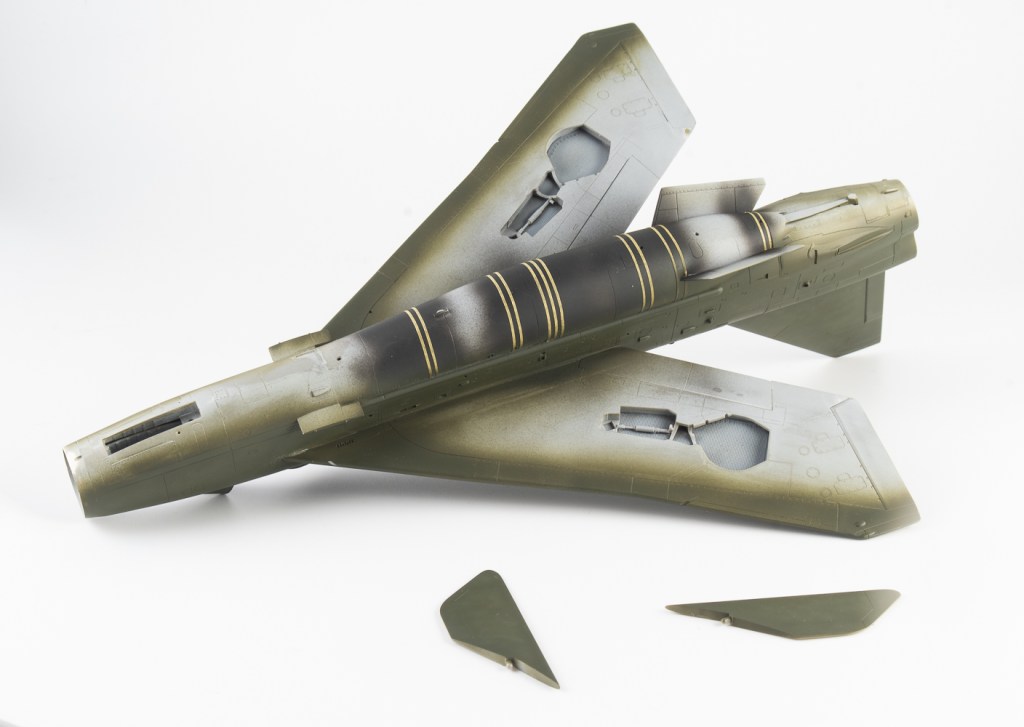
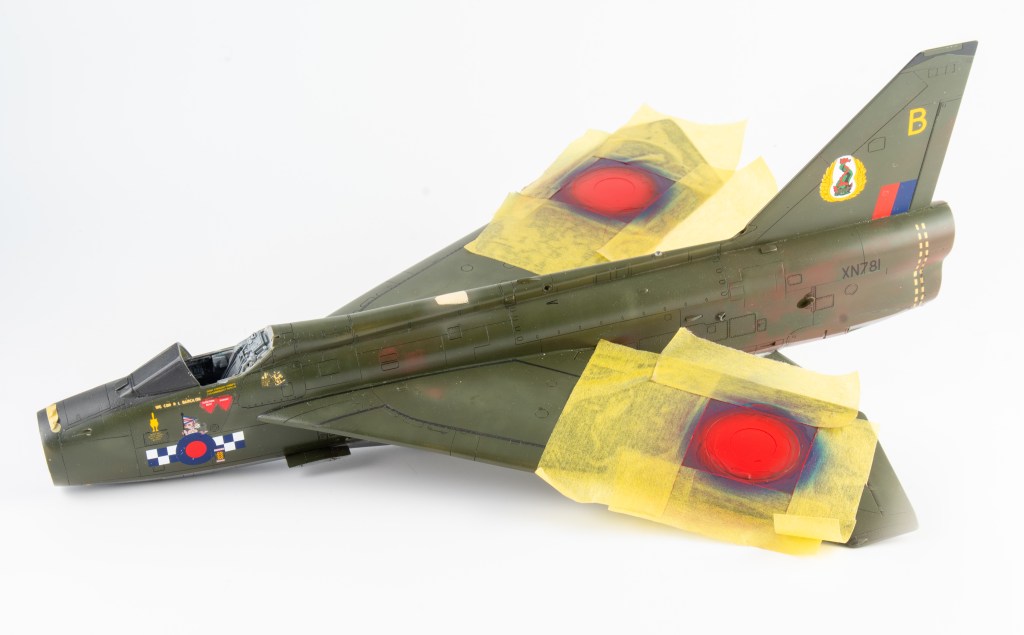
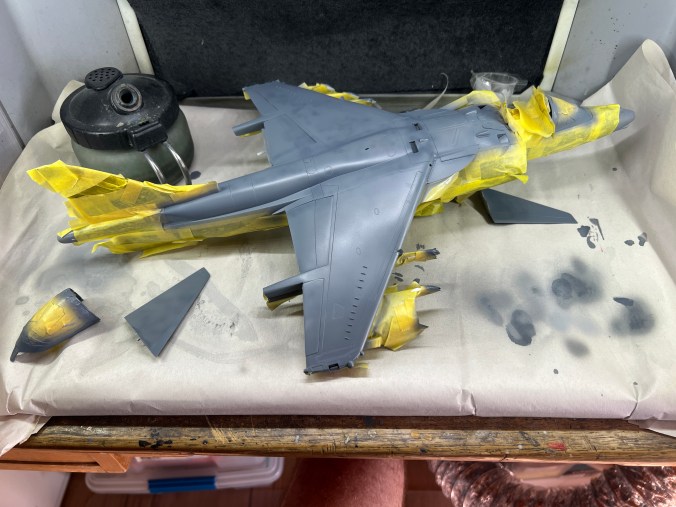
To limit the chances of silvering, I opted to paint the walkway and tank stripes. First, I applied a coat of matt black. Then, I masked out the stripes with thin strips of tape.
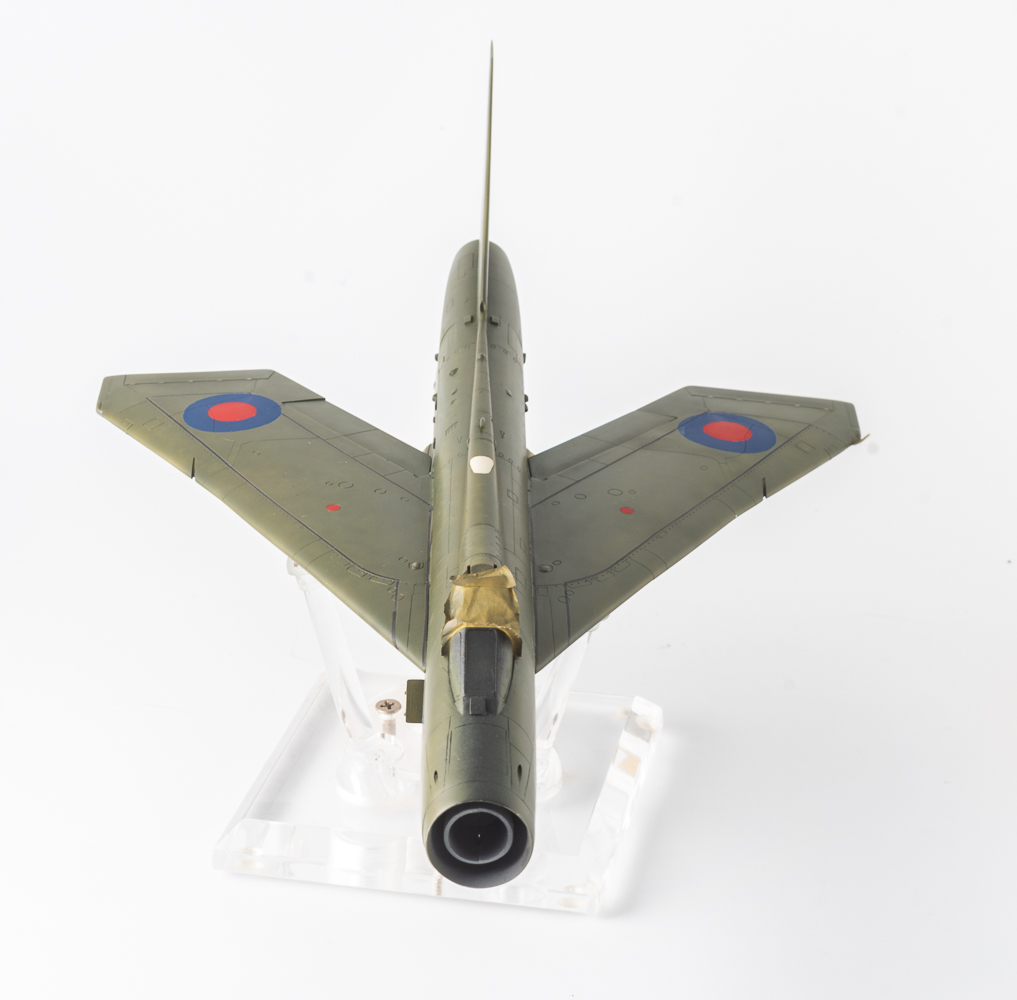
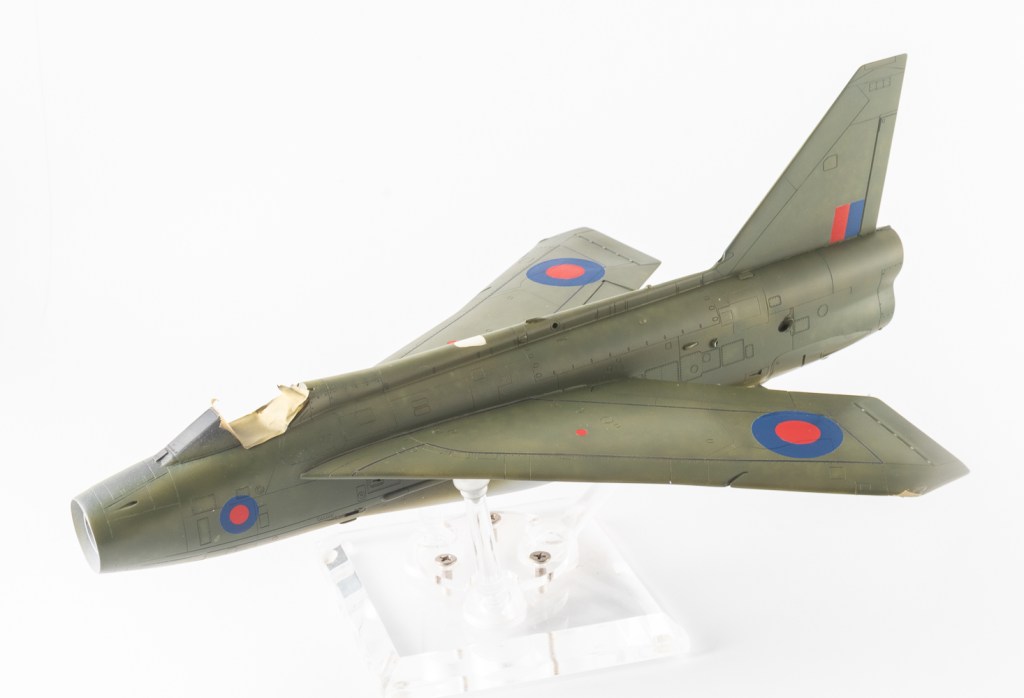
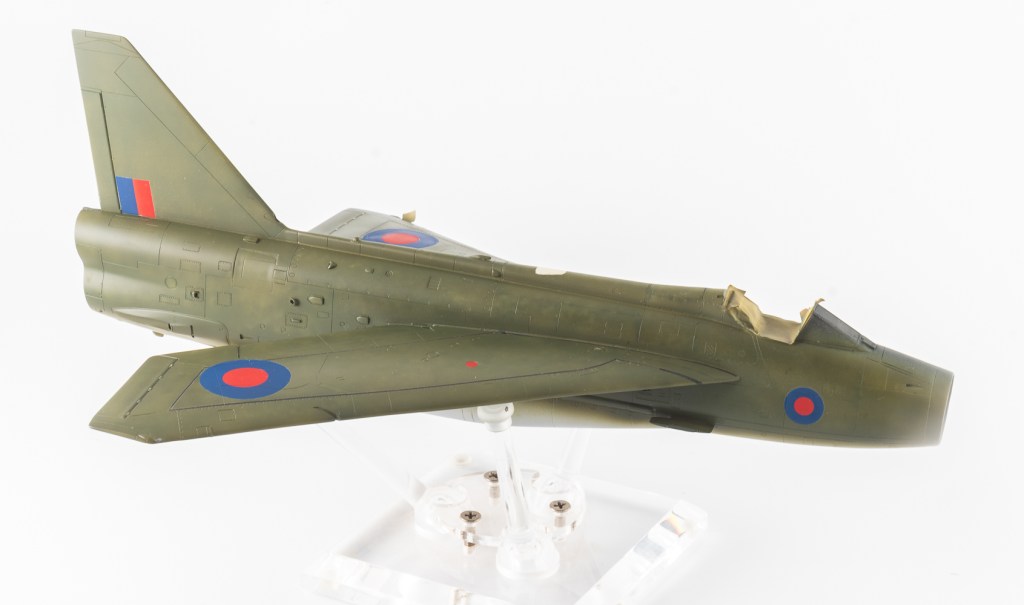
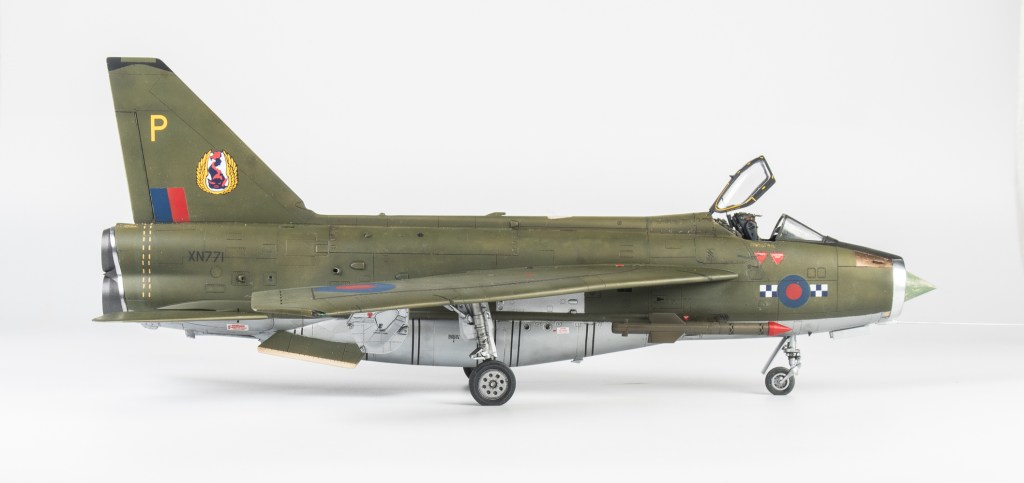
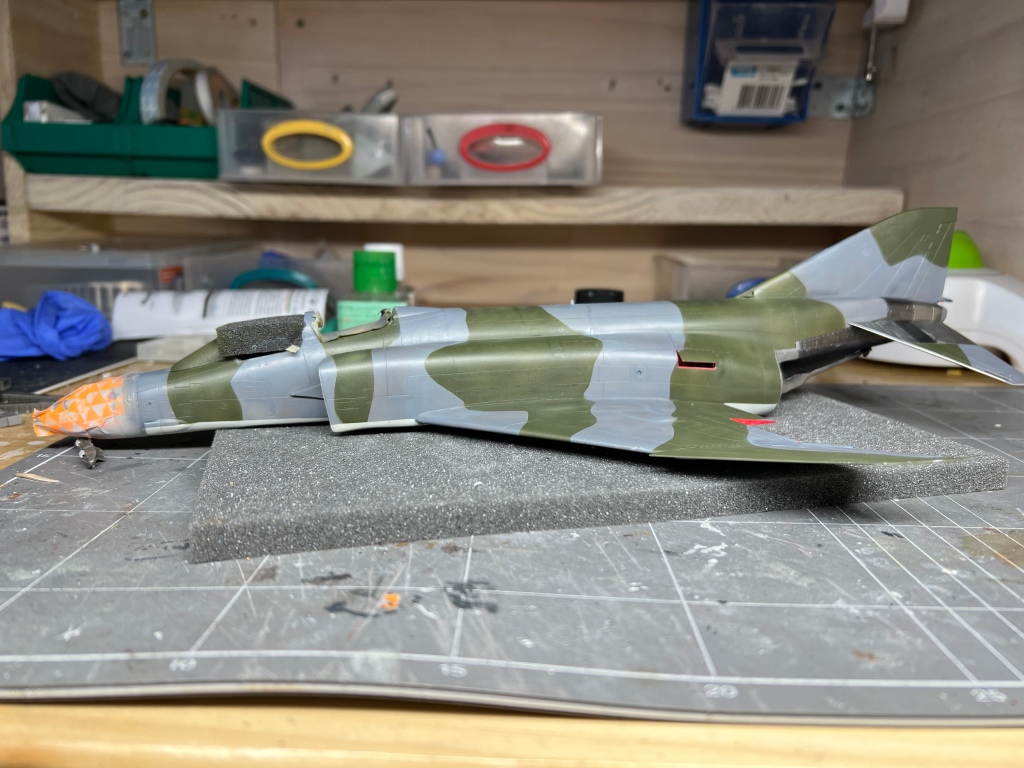
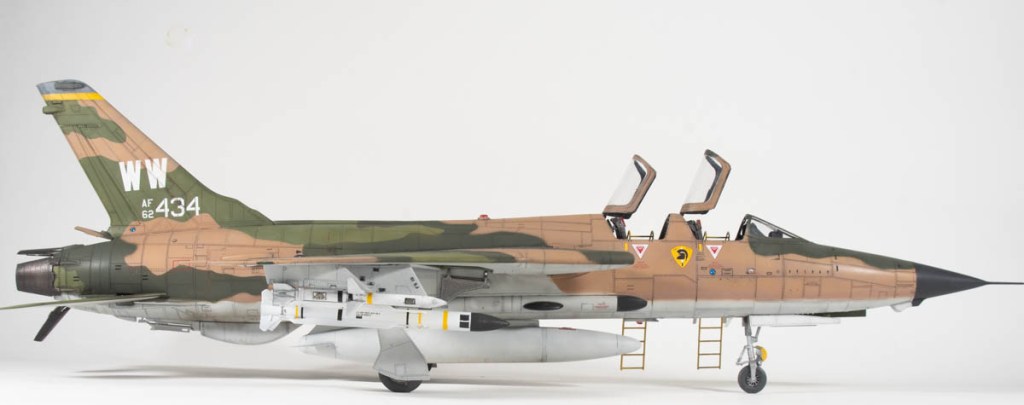
For the top surfaces, Gunze Mr Color 330 was used. Lightened as out of the bottle it is quite dark. Various shades lightened with yellow and white were applied with the undersides being spread with Tamiya LP-11 Silver
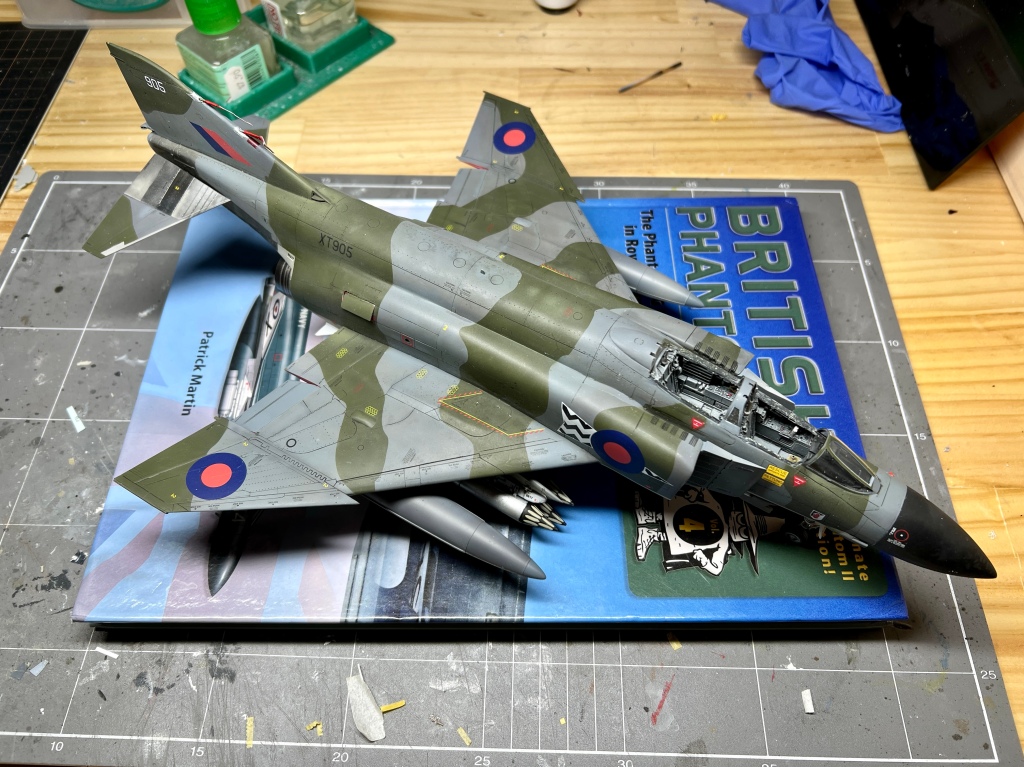
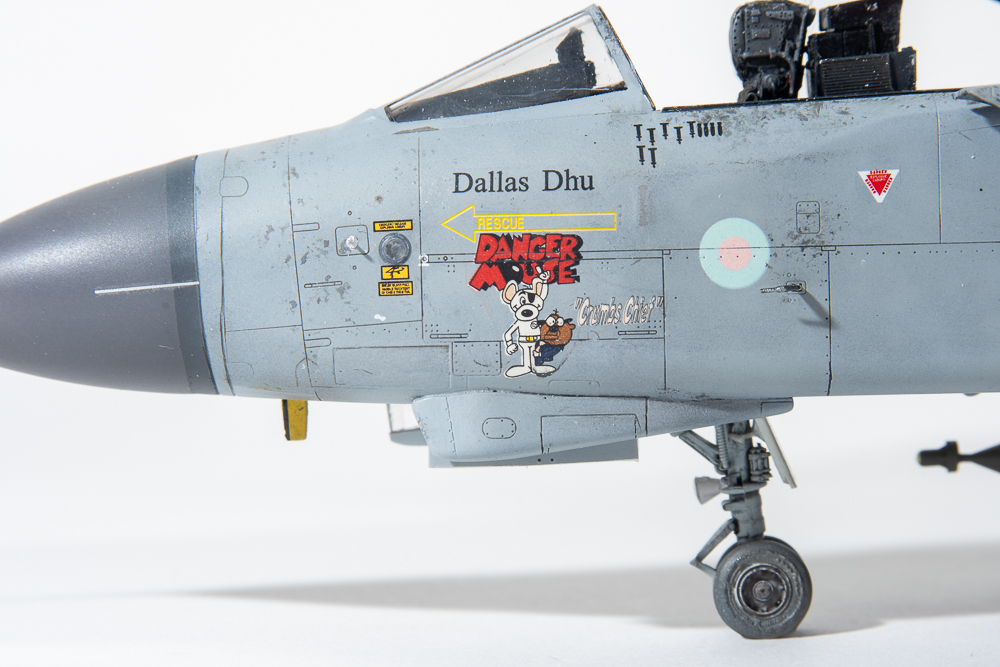
I was actually quite pleased with the appearance of the model. at this point so it was straight on to decalling. After applying a coat of Tamiya Gloss varnish. The decal sheet I was using was a Cutting Edge set. It had far better printing, colour, and register than the Airfix sheet. It should be noted that the sheet in my kit was the original issue. Later releases of the kit have included better printed decals
The Cutting Edge decals looked fine on the sheet, so the two large upper wing roundels were applied. One promptly tore whilst moving it into position , and the other separated into bits whilst in the water. Not a great start, but not to worry as these would be easy to mask and paint. Next up were the various individual jet markings. All decals were sandwiched between a layer of Mr Setter and Mig Ammo decal solvent.. I rolled a cotton bud across some of the decals to squeeze out excess solution. This revealed some of the decals were not adhering to the model very well..
A sealing clear coat was applied. Then, a wash using Tamiya dark Brown accent colour was run into all the panel lines. It was now that the lack of adhesion from the decals started to give me problems. After inspecting the model, I found that I had managed to remove the face of the gargoyle at some stage. Possibly with my sticky mitts! This was patched using a bit of the Airfix decal. Further handling of the model pulled the nose checks off, despite my gloves and the protective gloss coat. Some of the underwing serial numbers also pulled off, again requiring replacement.
SMS Matt coat was used to dull down the gloss to achieve the flat finish I wanted. SMS is one of my favourite matt coats, drying to a low sheen smooth finish. Not this time though, as there was frosting evident around the flanks of the fuselage behind the wings.
With its mid mounted swept back wings, the Lightning has a multitude of tricky areas to get an airbrush into. All those right angles caused turbulence in my spray pattern. They resulted in texture and buildup of the clear coat. I had some frosting along the fuselage underneath the wings. There was also some silvering evident on some of the smaller decals. I was starting to feel like the model was getting away from me but I pushed on anyway as I really wanted it off the bench. Everything came to a head., when whilst masking off the nose ring, a corner of the tape caught the nose check decal. It pulled them off with far too much ease.
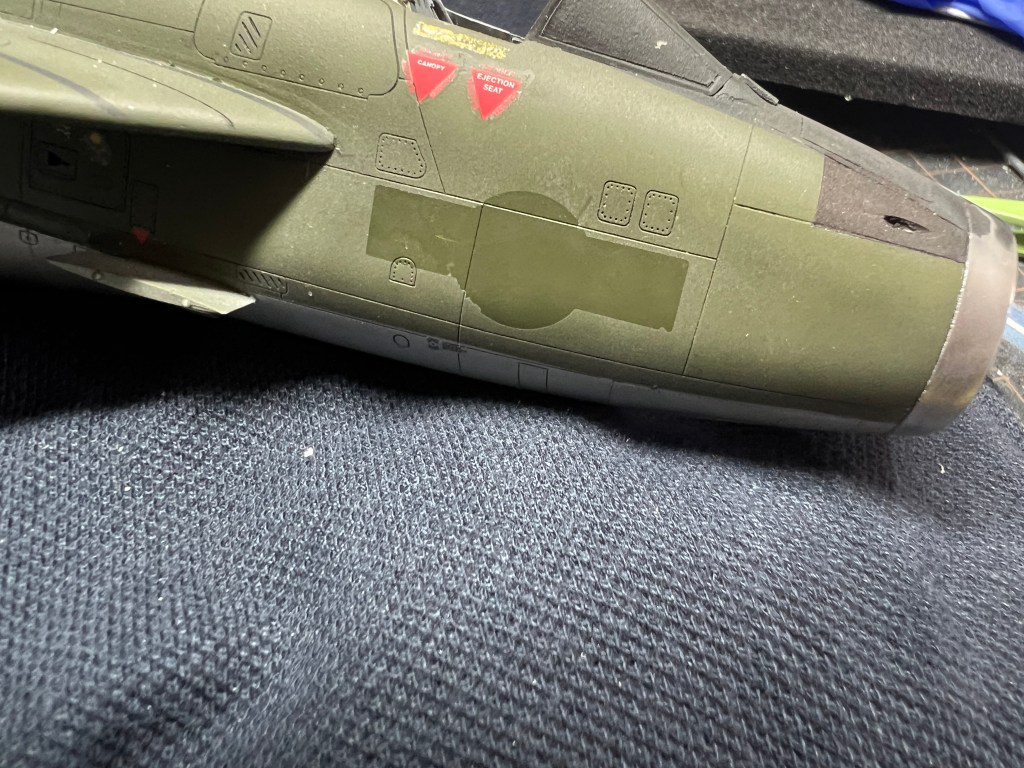
To be honest, the kit almost got binned at this stage, but I decided to sleep on it. In the morning, a thorough analysis was taken of my progress on the model. There were several aspects I was not happy with. These included the frosty matt coat, silvered decals, and textured paint. Therefore, the decision was made to strip it back to bare plastic. Also I knew a DNF (did not finish) would subject me to much “Gibson Grief”, and no-one needs that!
So, out came the VMS Clean Slate and after some vigorous scrubbing we were indeed back to a clean slate.


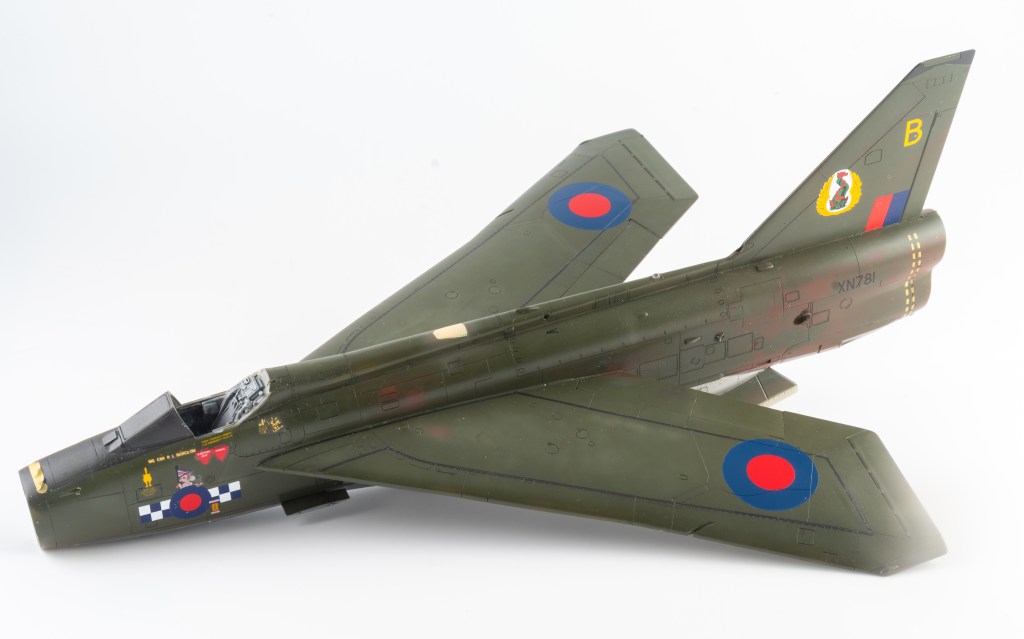
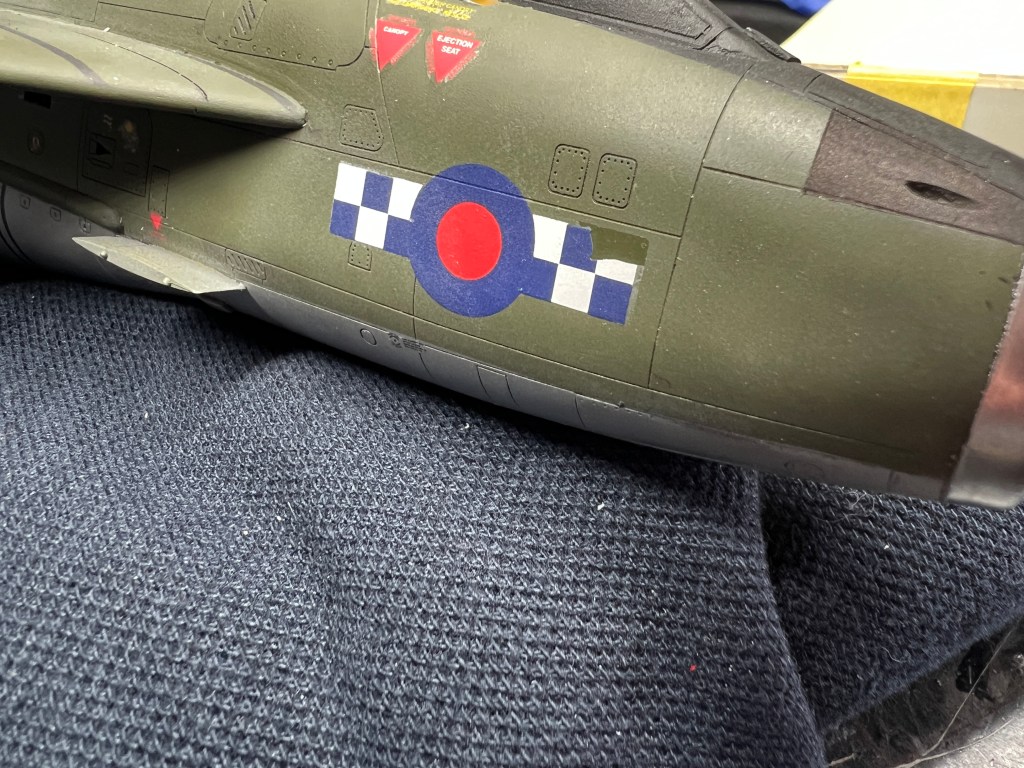
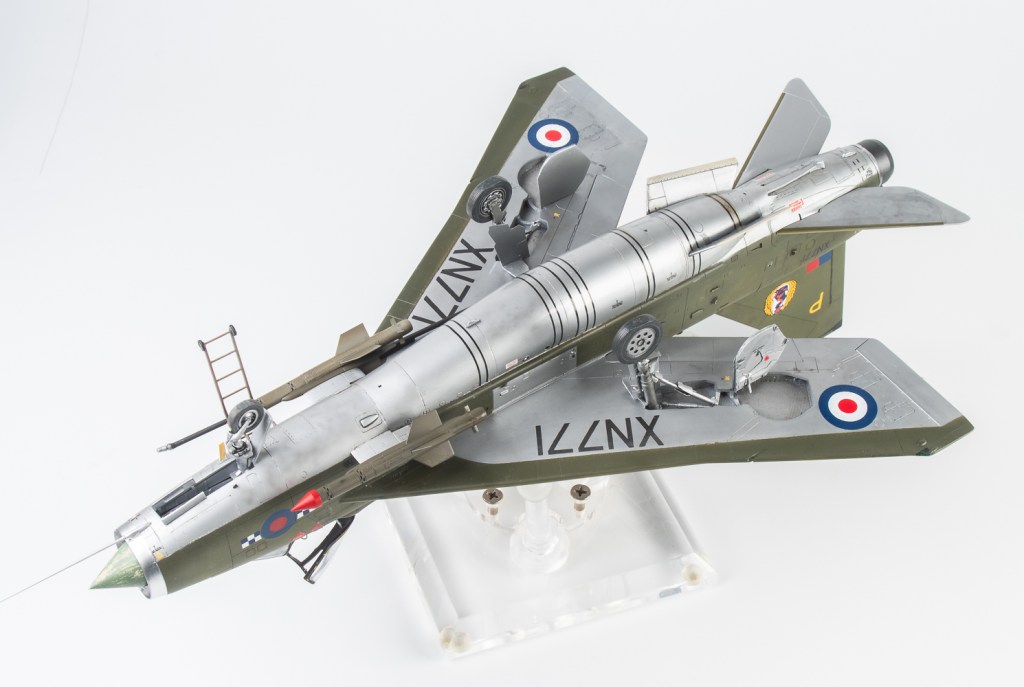
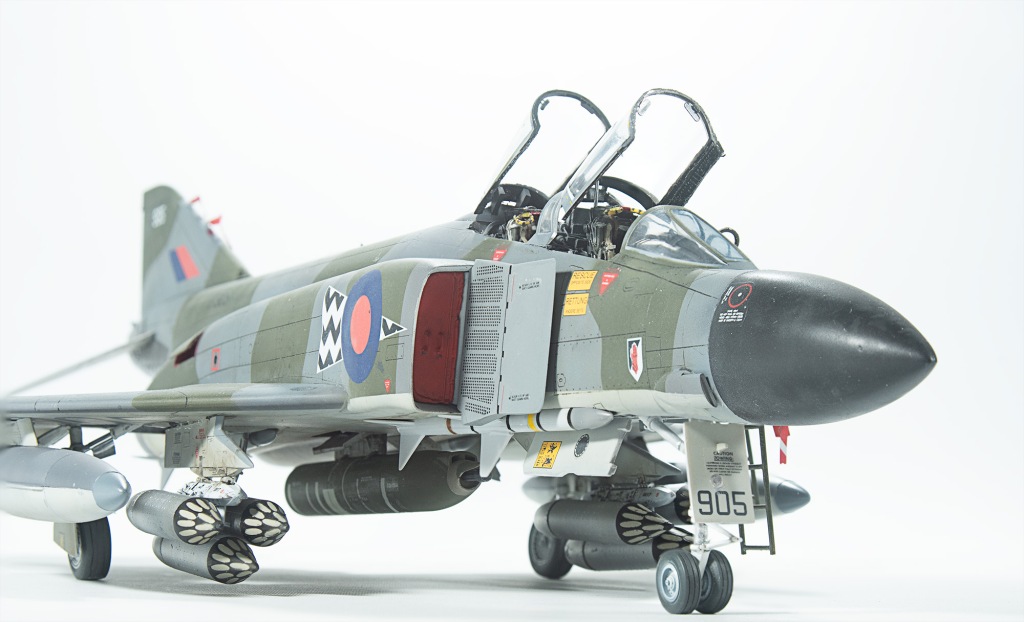
Then, it was simply a matter of repeating all the steps. This time, I painted all the National Markings and serials.
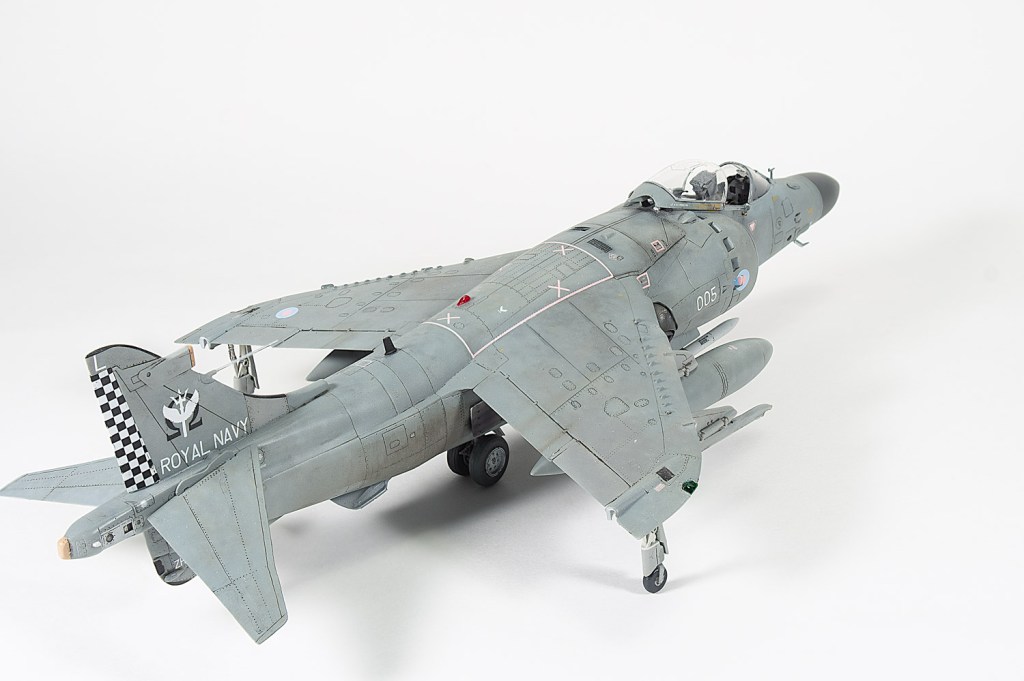
A mate sent me a set of Model Alliance decals for another jet from the same SQN. These were applied without issue. However, I had to scrimp on the stencilling out of necessity this time around. There were no yellow stencils left on any of the sheets. The Barracuda stencil sheet is very comprehensive. However, Roy, for some reason, includes none of the unique yellow stencilling seen on the RAFG jets. Quite a glaring omission in my book.
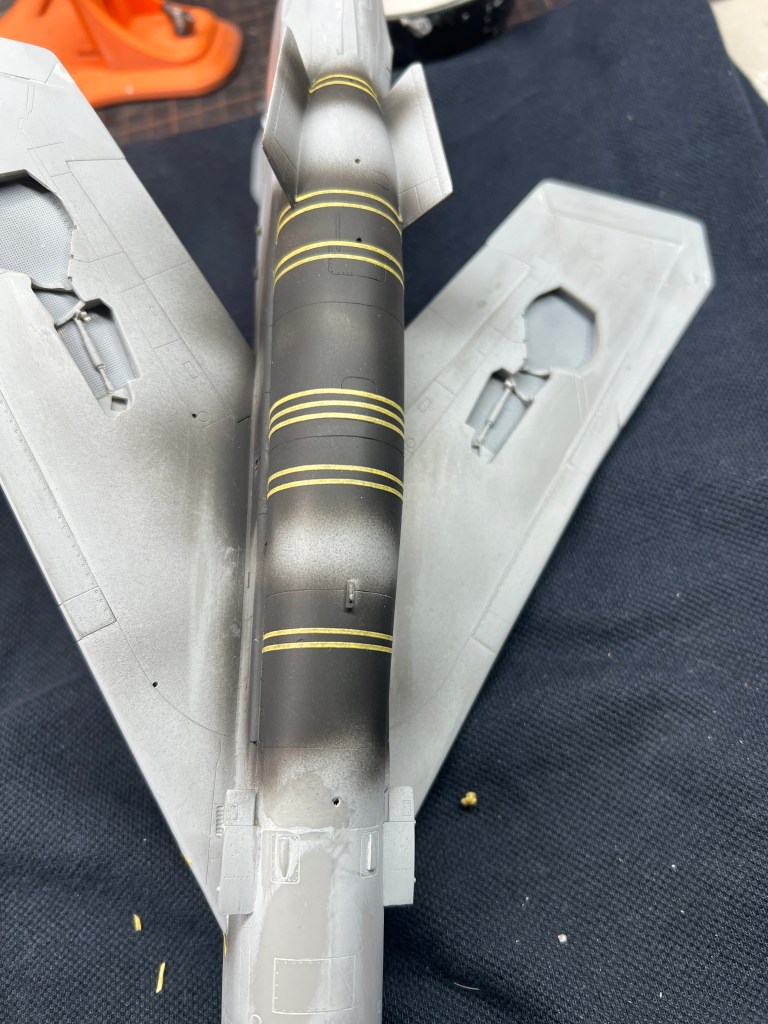
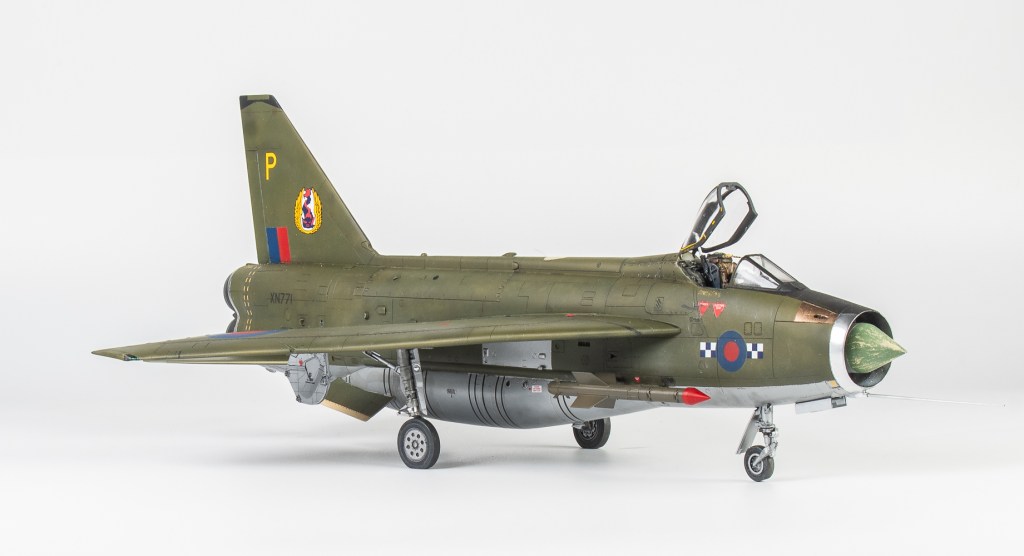
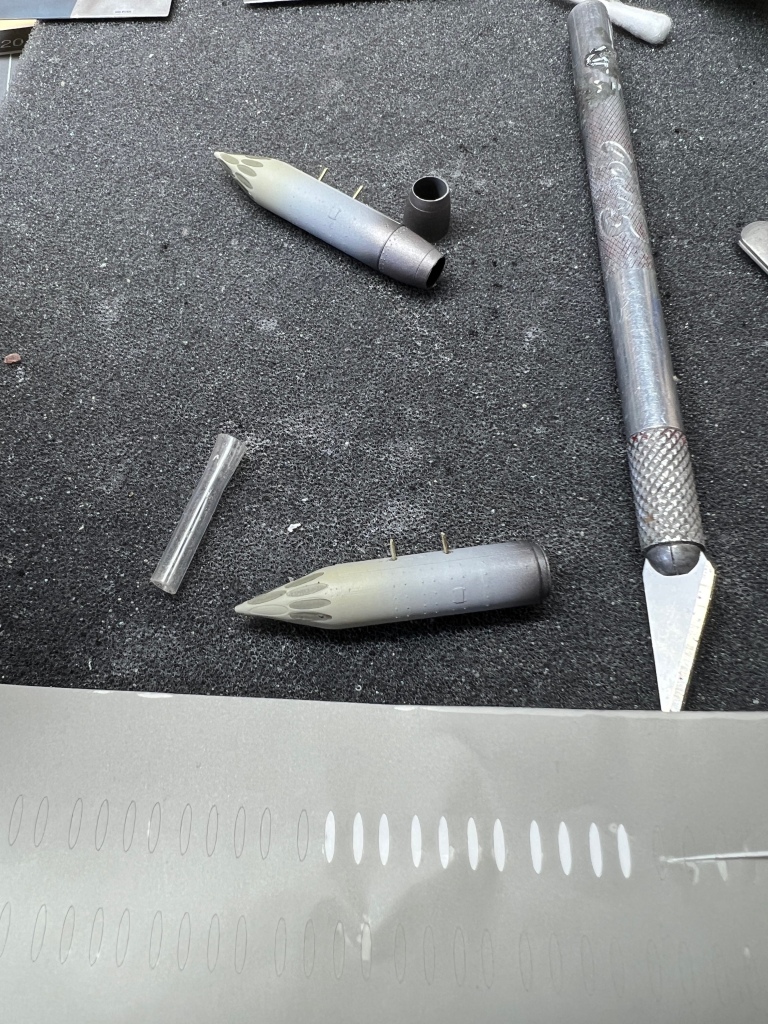
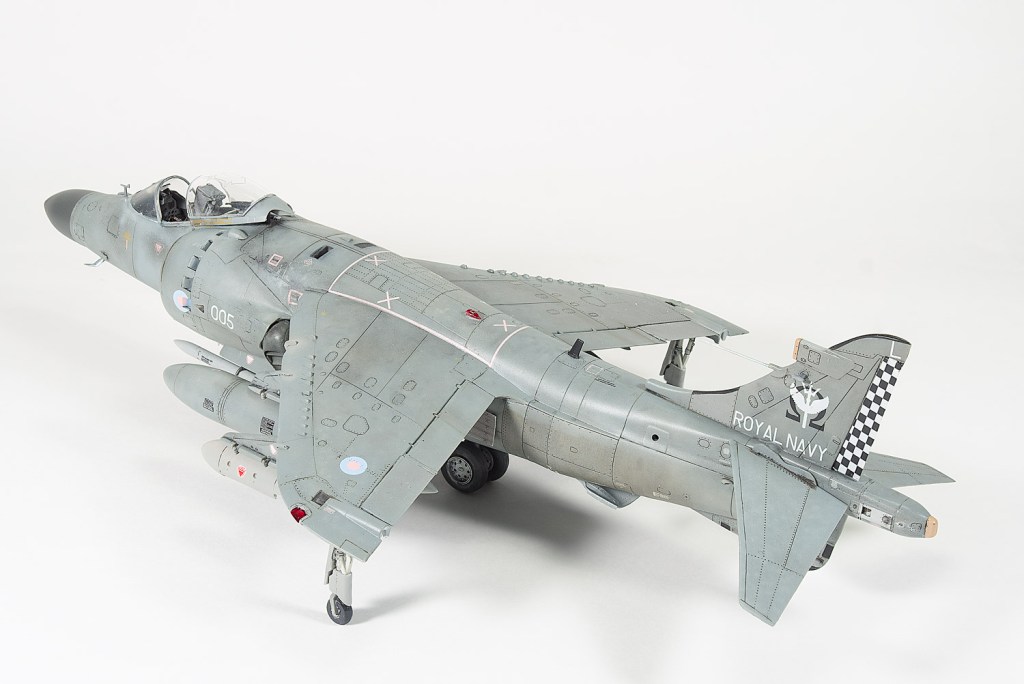
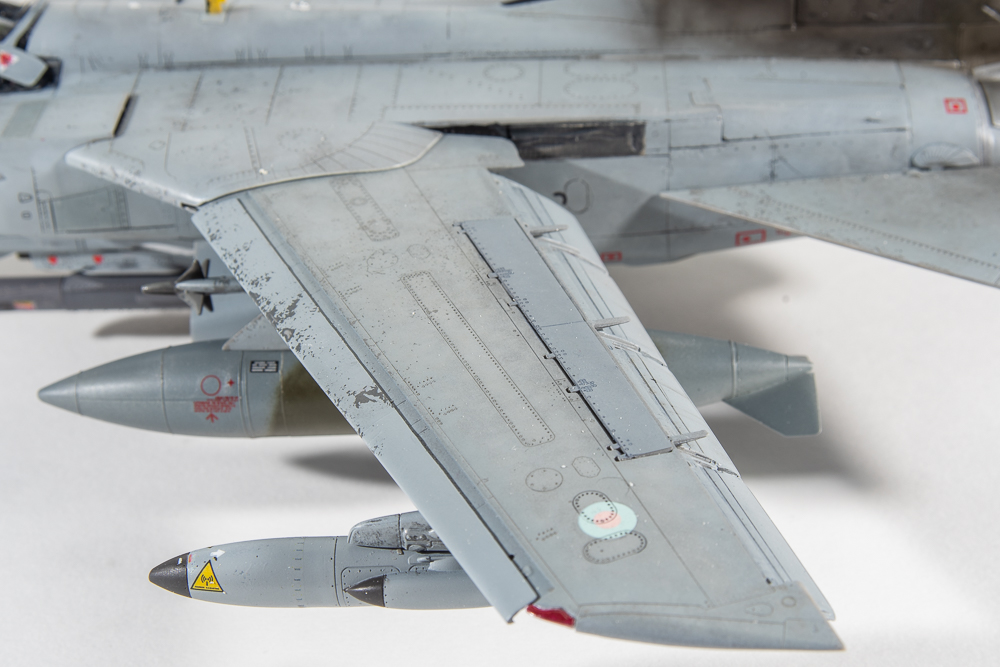
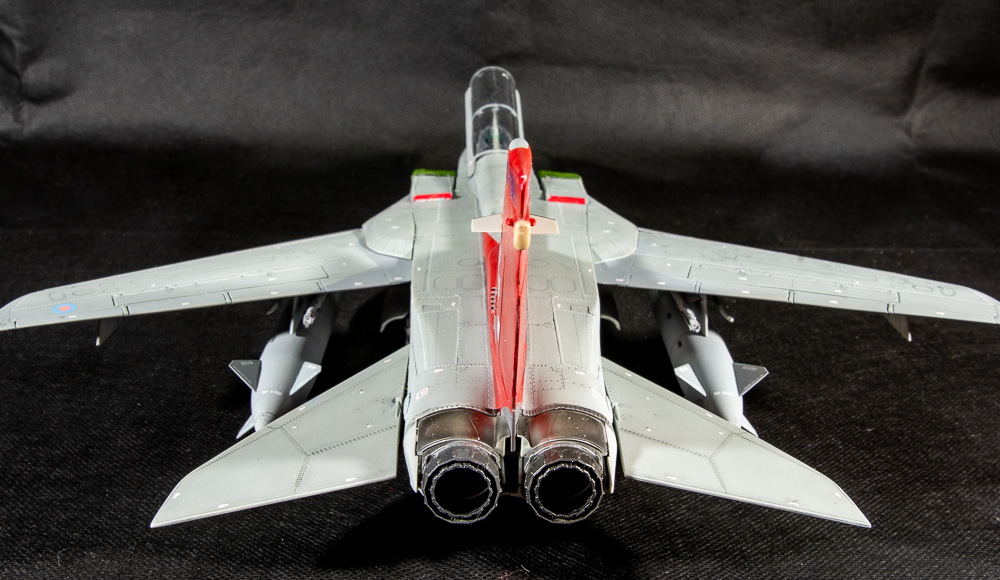
Again a Sepia wash was applied to all the panel lines. By this time, I was well over the model. Weathering was limited to some chipping around fasteners. This chipping was evident in all photos of these jets I looked at. The chipping on the nose cone was done using the hairspray method. That just left final assembly. Whilst the Reskit missiles are beautiful models in their own right, they lacked positive location devices. There was no way to mount them on the rails. I understand this is to preserve the detail on them and the rails. If you wish to mount them off the jet, 3DP should surely allow you to print them with solid locating pins. These pins can be cut off or filled if not needed. I glued them on with copious amounts of white glue.
The undercarriage was easy to locate, thanks to my pre-planning. and adding those bits of plastic stock.
Conclusion
Finally, it’s done, But, Man! What a slog in getting there! This was mainly to do with unforced errors on my part, but the kit certainly played its part.
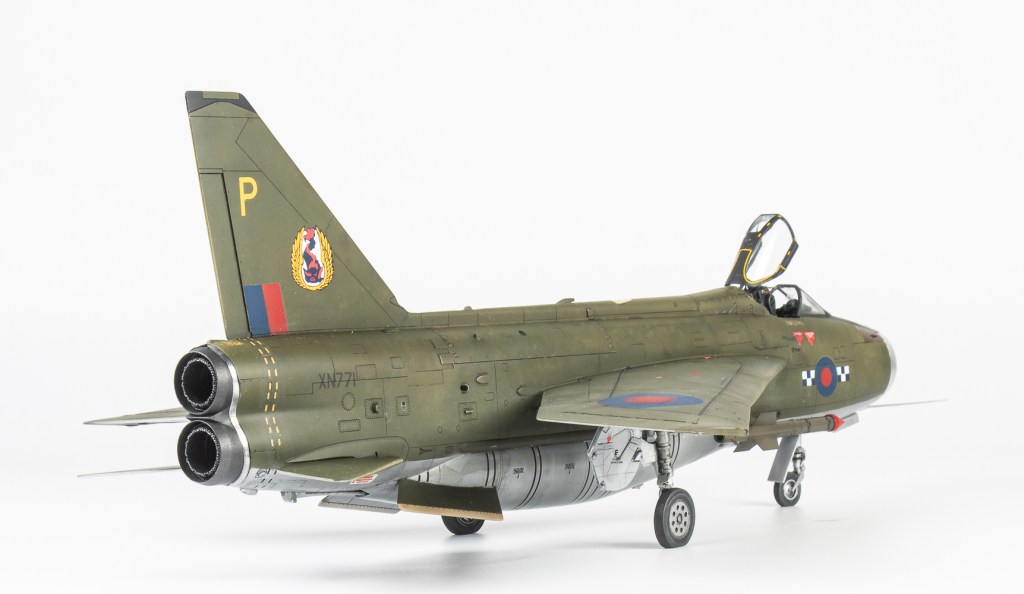
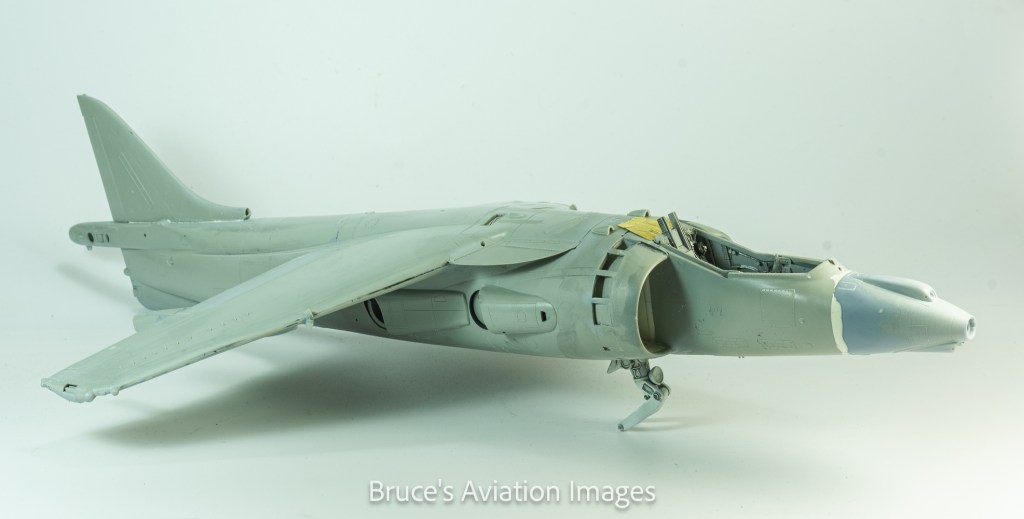
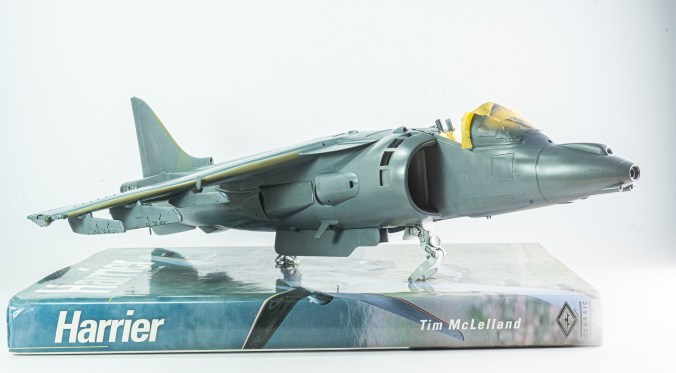
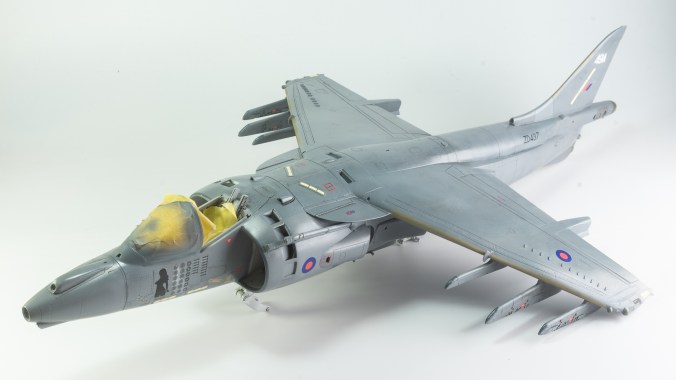
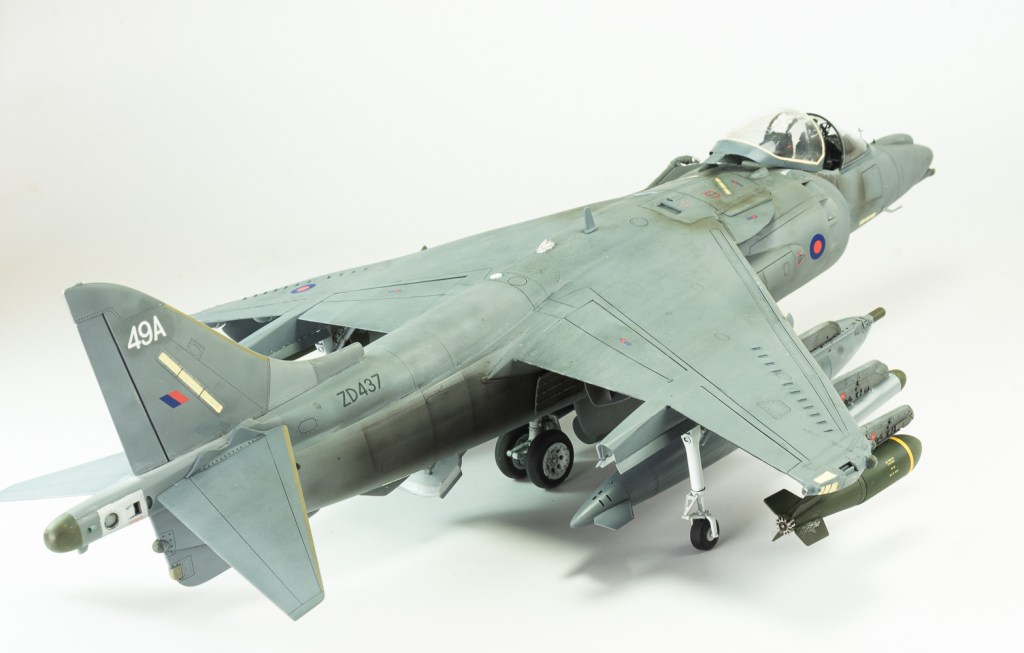
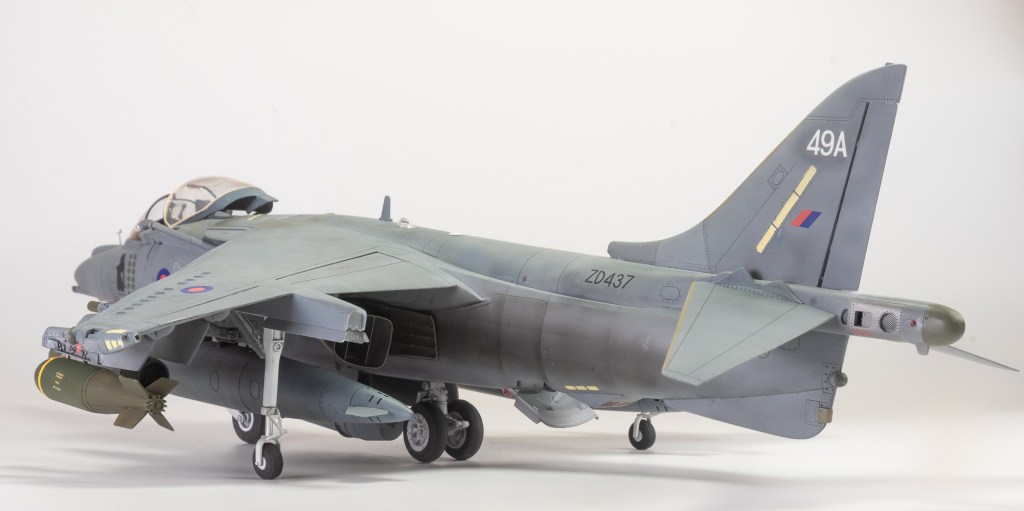
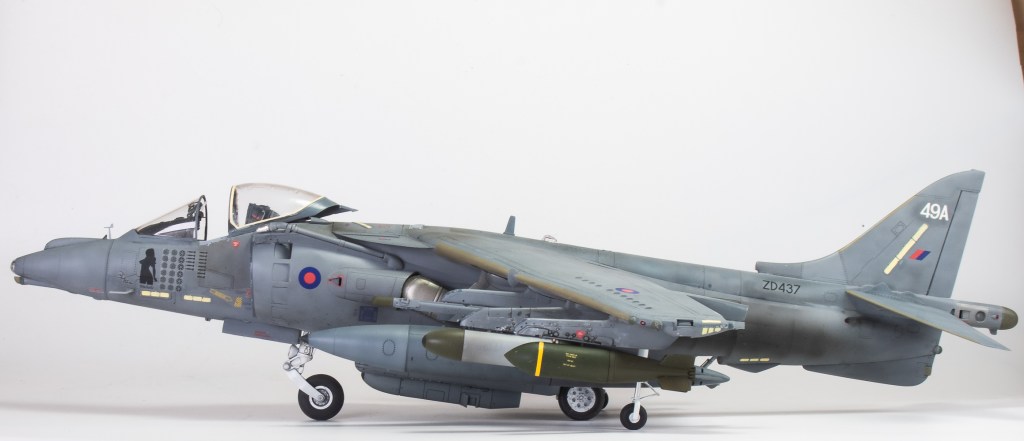
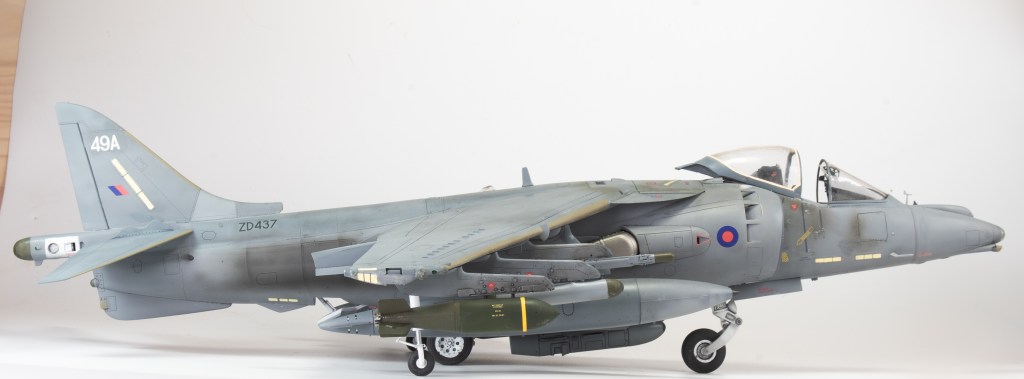
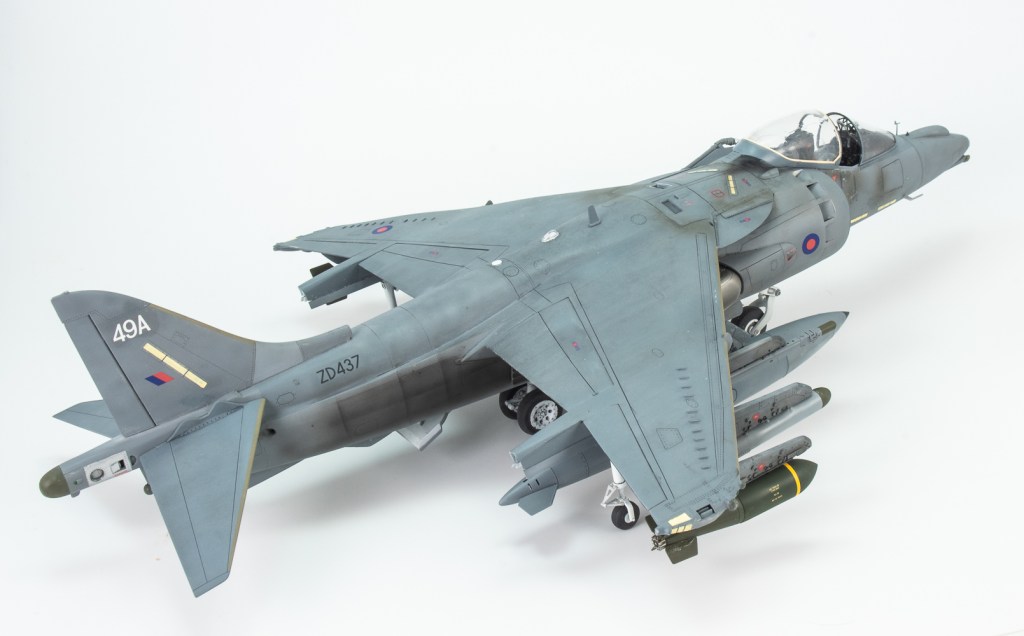
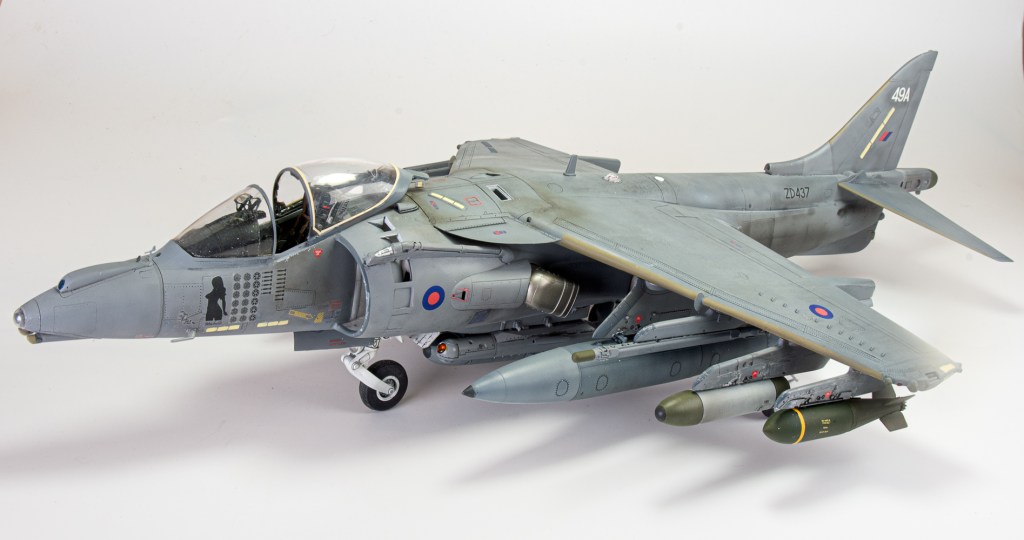
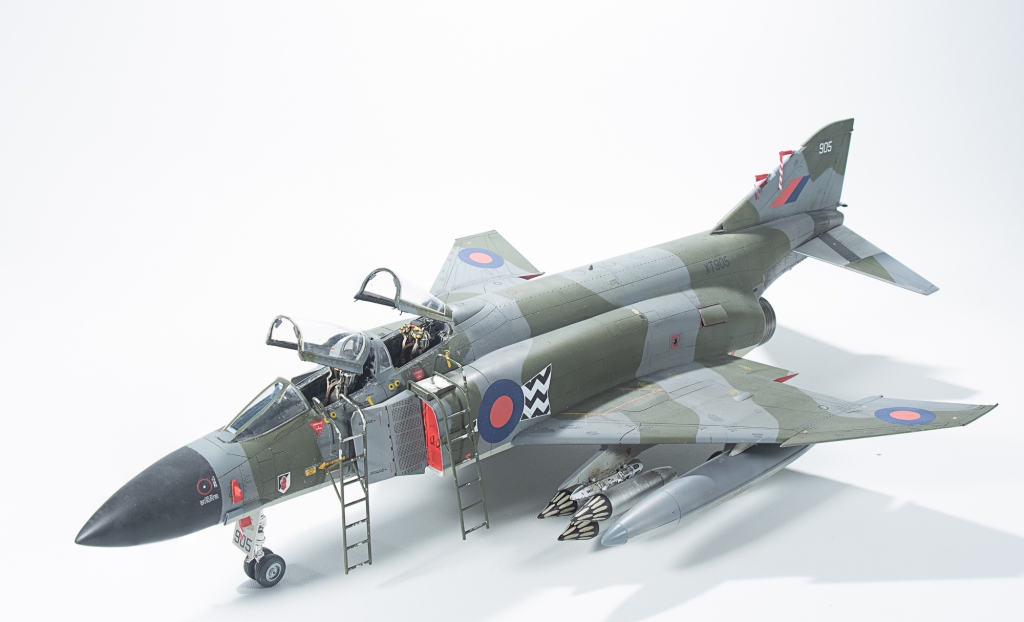
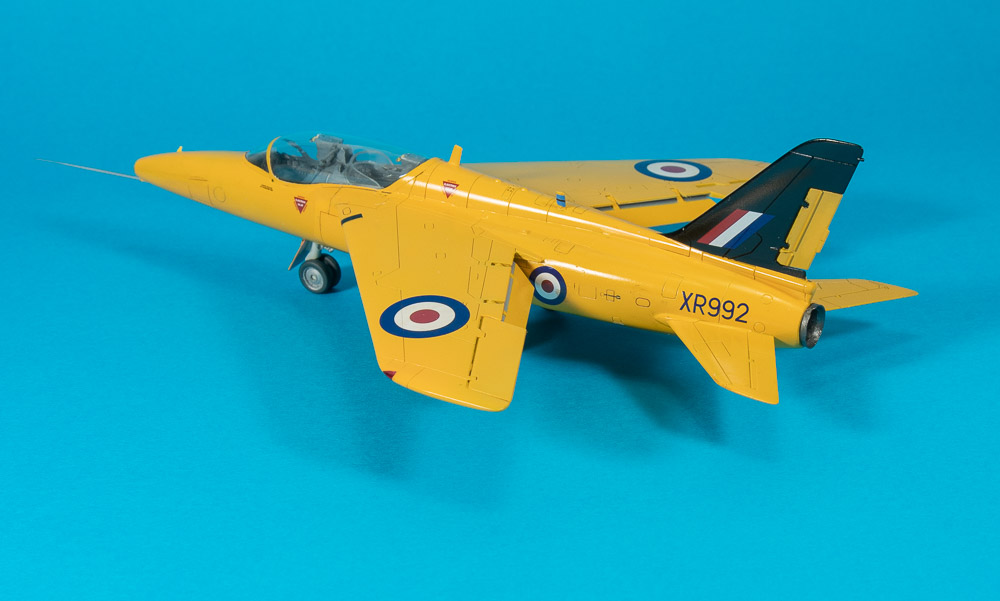
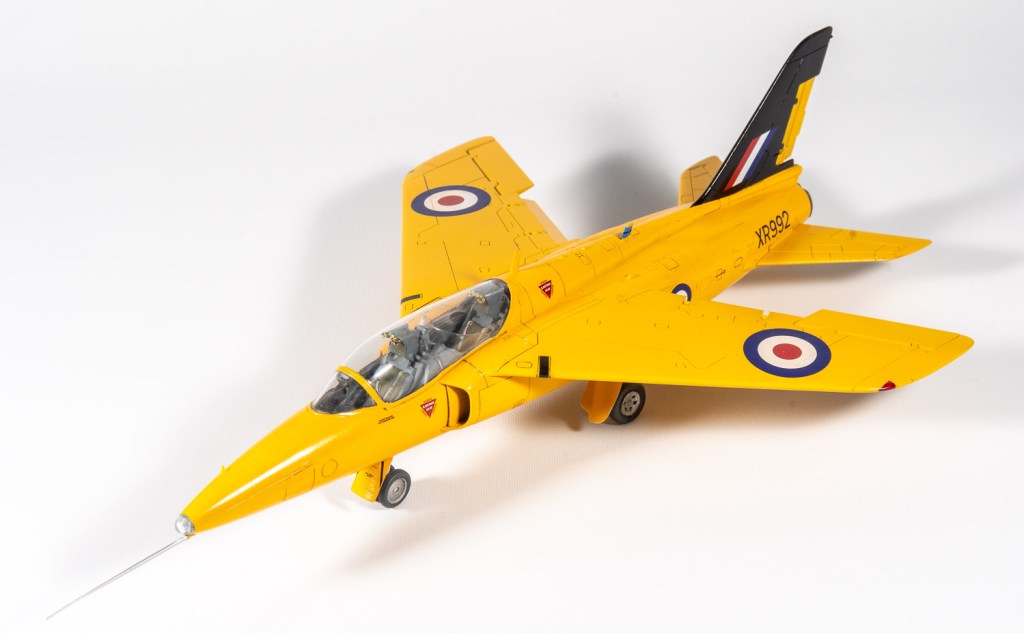
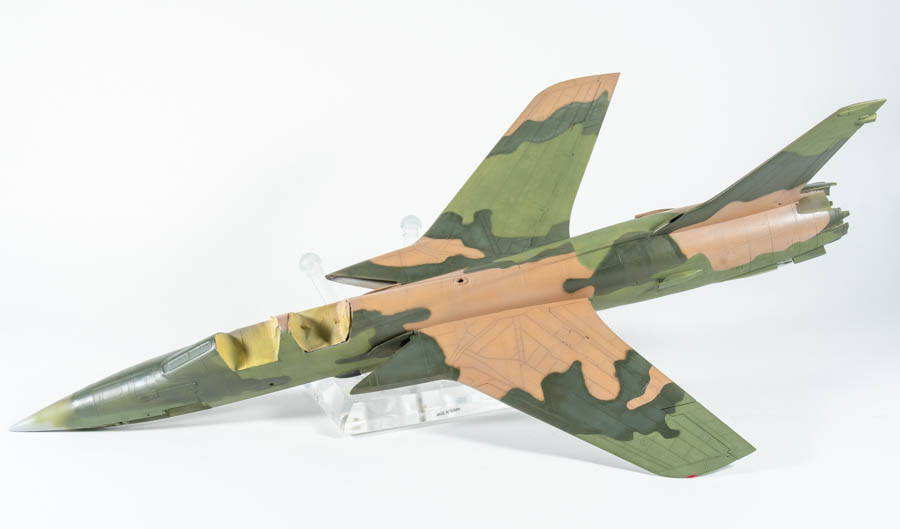
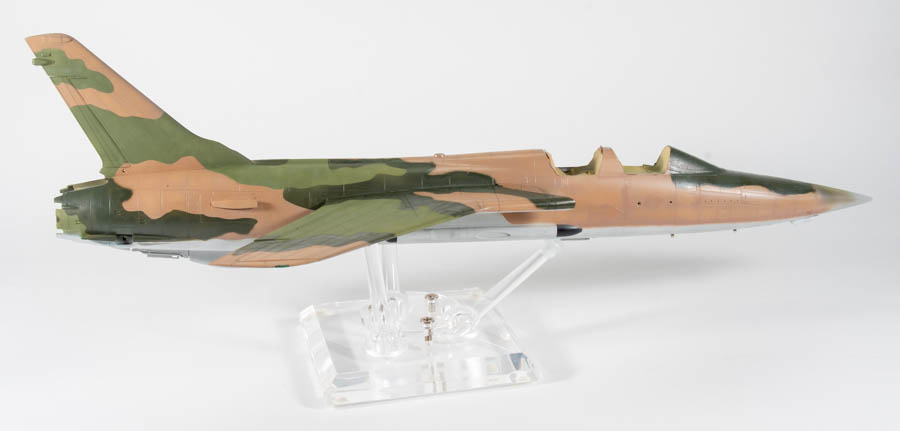
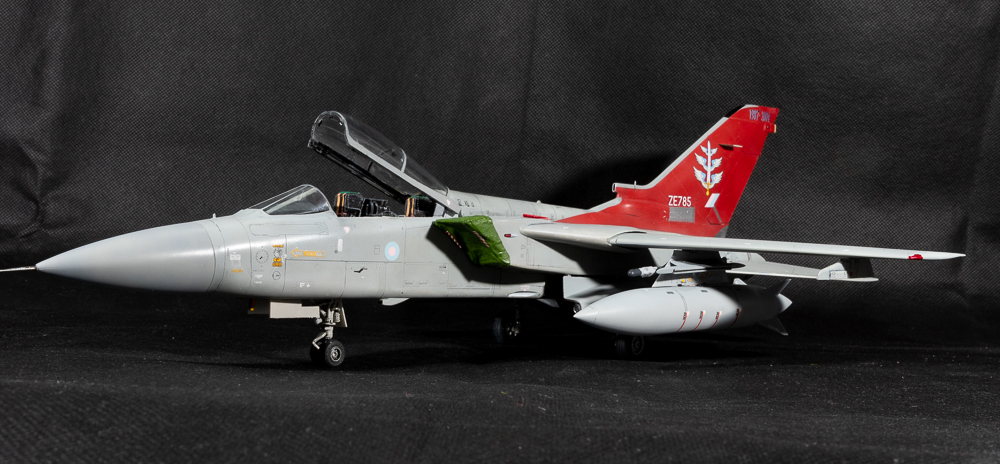
It’s great to have a Lightning in the green RAFG gracing my shelves again. My first Lightning in this scheme being the ancient Matchbox kit way back in the 1970s. My love for this scheme has stayed with me ever since. To my mind’s eye, it looks like what I envisioned when the build was started. This is due to me making the decision to strip and repaint the model. Even so, it’s not my best work. It looks just workmanlike. However, it is far better than it would have looked if I had continued pushing ahead with the original finish.
Regarding aftermarket used, the only essentials in my opinion would be a seat and metal pitot tube. Nothing can be seen of the cockpit, or even the wheel wells, despite the high wing. The Armoury wheels look good and are weighted but ,the kit wheels also suffice.
The Lightning is such a brute of a machine and an icon of Cold war British Air Power. It deserves to be retooled up to Airfix’s current standard. In its current form, Im not sure I’d build another one.
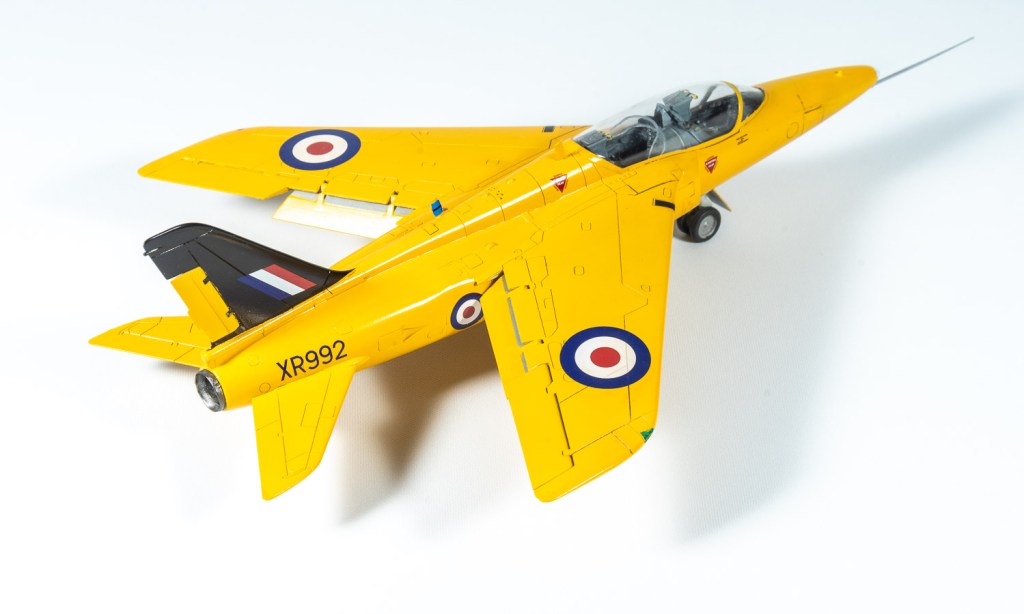
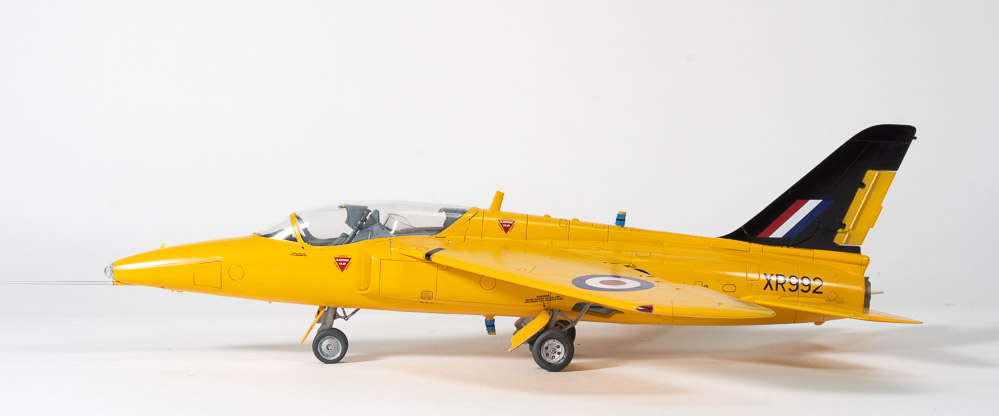
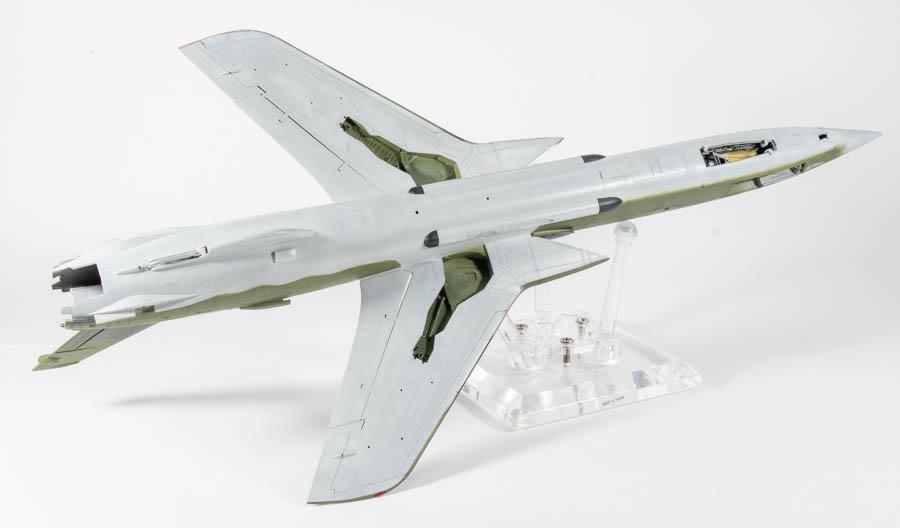
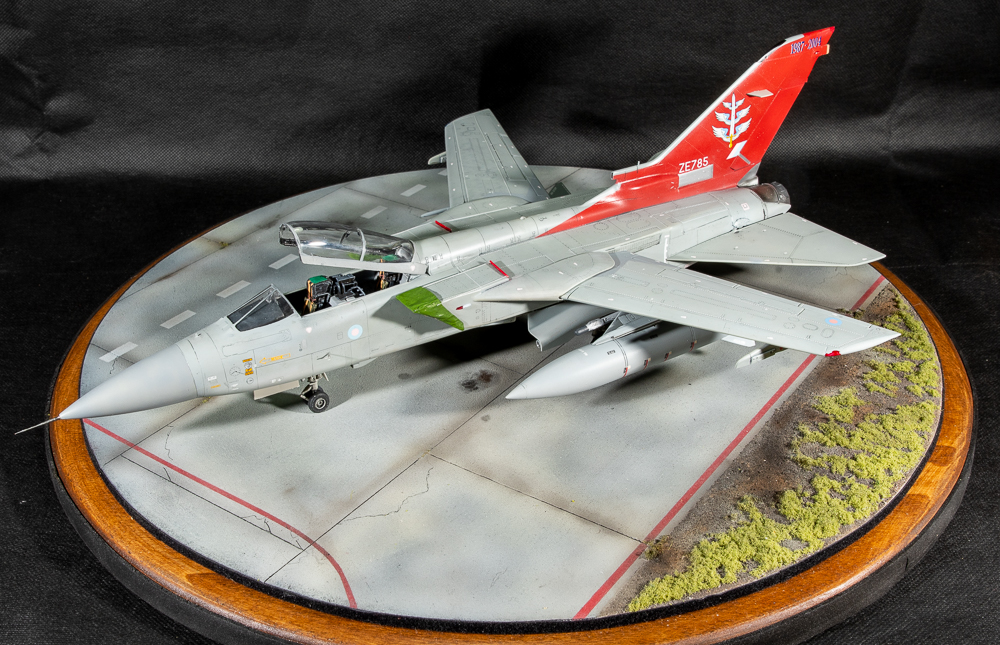
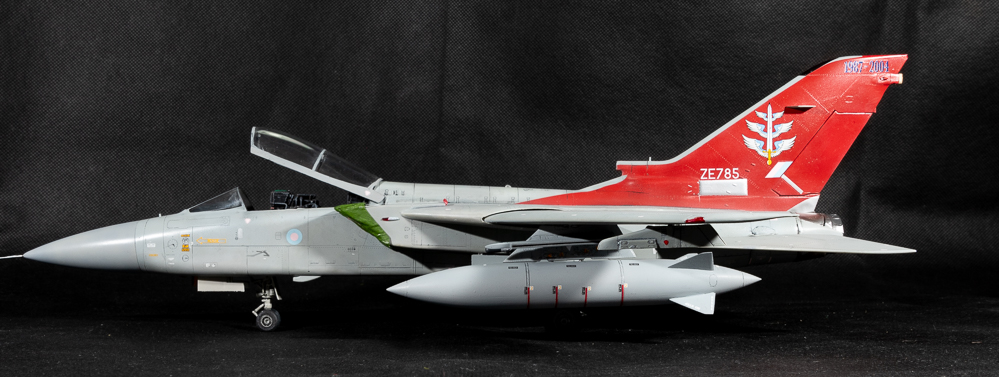
E.E Lightning F2A. Royal Air Force 19 SQN. Guttersloh Germany 1973


Leave a comment