Eduard 1/48 P-51D Mustang

  • Purchased; 2023
  • Built; 2024
  • Enhancements:
  • drop tanks Eduard Brassin
  • Wheels. Eduard Brassin
  • Decals; OOB

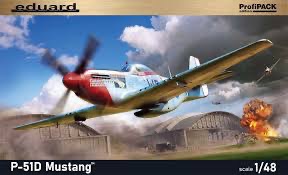
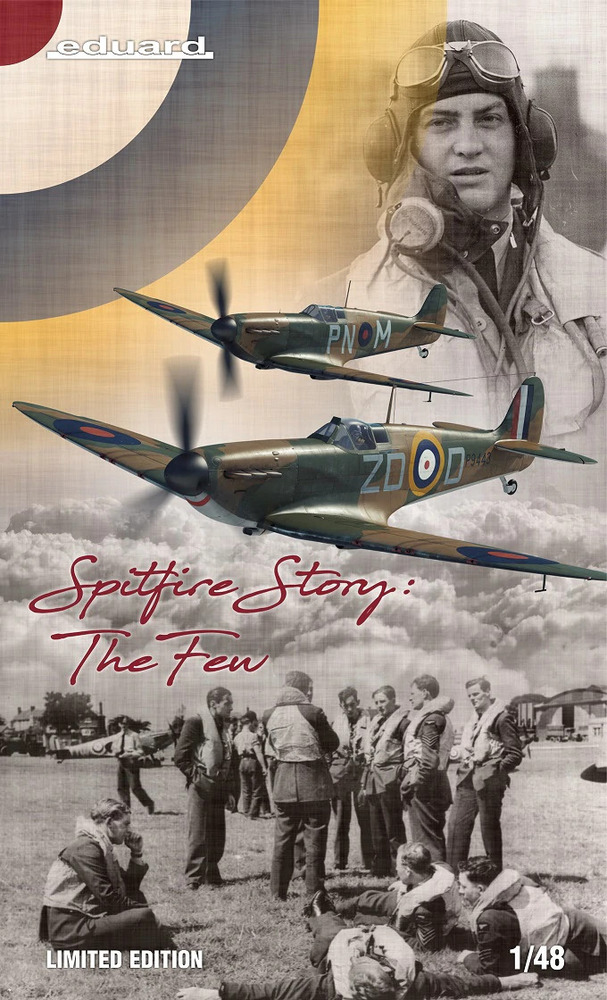
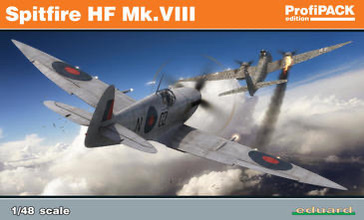
Whoever said “Box art doesn’t sell” obviously has never laid eyes on this particular box. Because it absolutely made me pull the kit off the shelf at Frontline Hobbies in Newcastle NSW and march straight to the checkout.

Prior to this, a few friends experience with building the Eduard Mustang had left me with the impression it was one of Eduard’s more fiddly kits to assemble. That and the fact there were a few 1/32 examples of the Mustang resting in the stash made me slightly ambivalent about building the Eduard 1/48 example.

Construction

There is certainly some merit in the suggestion, the better the kit, the better the result will be. Of course a decent result can be achieved from any kit, but when, say, talking about the Walrus I did earlier in the year, far more effort is required to deliver a good result as opposed to a newer tooled kit like this Eduard kit. From opening the box to applying the final navigation light took me about a fortnight, it would have been less if I had not diverted some effort into filling the wing panel lines to represent the puttied wing joins of the Mustang’s laminar flow wing. Initially this seemed like a simple task, super glue being flowed into all the lines with a toothpick. In fact I was congratulating myself on my fast work and how easy this simple task had been.

Until the first coat of primer revealed a few infuriatingly still visible panel lines. These stubbornly remained so despite 2 other filling and sanding sessions. They finally disappeared when medium super glue was used instead of the thin CA that had previously been used.

The rest of the model assembled flawlessly, with very few fit issues, although part PE42 left me perplexed. It appearing far too small and having no real locator of any substance, It wouldn’t surprise me if there is a larger plastic piece in Weekend Edition boxings

Ensure also that you sand flat any burrs or glue globs off the top of the assembled wheel well top and bottom before sandwiching it between the wing halves. talking about the wheel wells, John Colasante from Matters of Scale FB page and PPP Podcast fame has generously shared a mask set he created for painting the spars Yellow Zinc Chromate , if you want to finish your well this way.

Download is here https://l.facebook.com/l.php?u=https%3A%2F%2Fdrive.google.com%2Ffile%2Fd%2F1_YhMnMfNkFKw5rmcnJnBeAj5_50ol1pn%2Fview%3Fusp%3Dsharing%26fbclid%3DIwZXh0bgNhZW0CMTAAAR0qu-N6dP3icPgdzLQSvrnG57iiswOR74Mj3EGm1xqwj8IIM2nq5VdSCd8_aem_o4kzKpw0kSuFAi7NWiVYYw&h=AT3evXFZRQLjhfcgPEo_QMAZkIQJOXXKapXGveyzuhWuLvYF6DEZHIQXvvDB_Nkv4ONbbYu9WaeYNhREejFgU7DeC4hxFmBzu40k4FlY6nnaBi9lbdbJ3a_ufUCqUFR2E3j_ag4&__tn__=-UK-R&c[0]=AT12ShwH-ekLdtqAN0q6n7vwcTOyXALRjvAl7585CMtWeF4k3TCOKjMNAnQuUGE_WDYITGq-GvFQNXhbf8YRCEIhBGR2VbWJv_5fhdZpXxVkQYMfHIZQH_HMrCHm66ocDise3DSDbhmQtQF9c3UUyukbKenF5HkUemHw85N4hDgDZWCbYbeX2QZC238qaYk. And I highly recommend having a look around John’s page at his fabulous work whilst you are there.

The tailplane was also a little bit of a loose fit on mine. Another fit issue I had was the spinner halves. A dry fit without the blades gave a nice tight fit, with the blades………. Not So Much, with a gap between the front and back of the spinner.

Leading me to assume the prop hub was the issue. To resolve this, the blades were cut from the hub and inserted once the spinner halves had joined. I have seen no other mention of this issue in any other build blogs, so maybe it was something I had done. On my next Eduard Mustang, I will shave the little boss moulded onto the spinner backplate that you glue the hub to, and see if this also resolves the problem.

These niggles aside, the model flew together. The Mustang, does suffer from the Achilles Heel of all Eduard kits, in that the location tabs for all control surfaces and undercarriage legs are weak and poorly engineered..

Eduard also deserves a smack on the arse for the very poor attachment points on the ordnance and pylons and having the modeller assemble PE sway braces for the stores. This is just silly.

Painting and Decalling

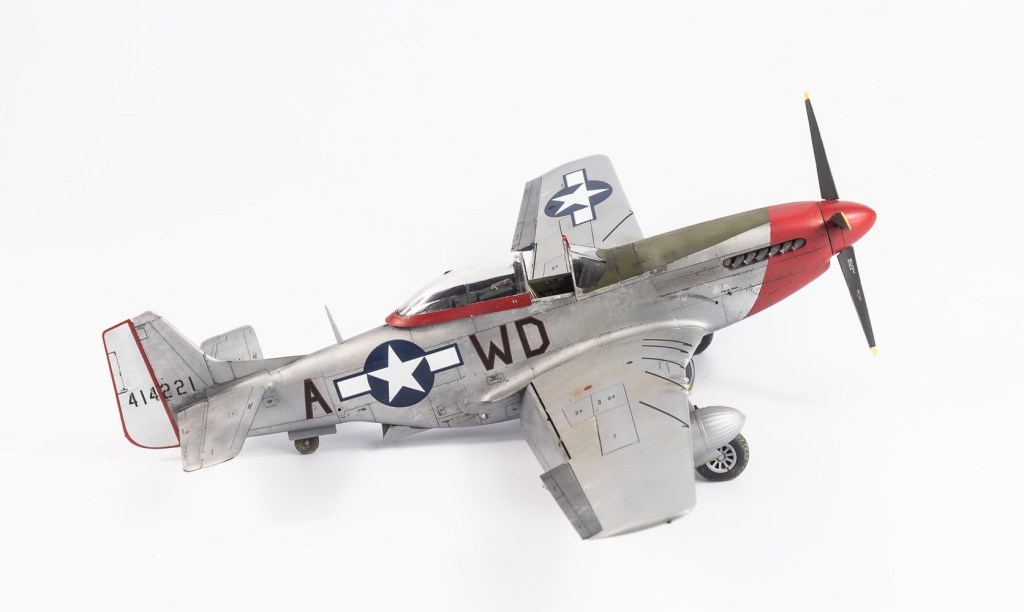
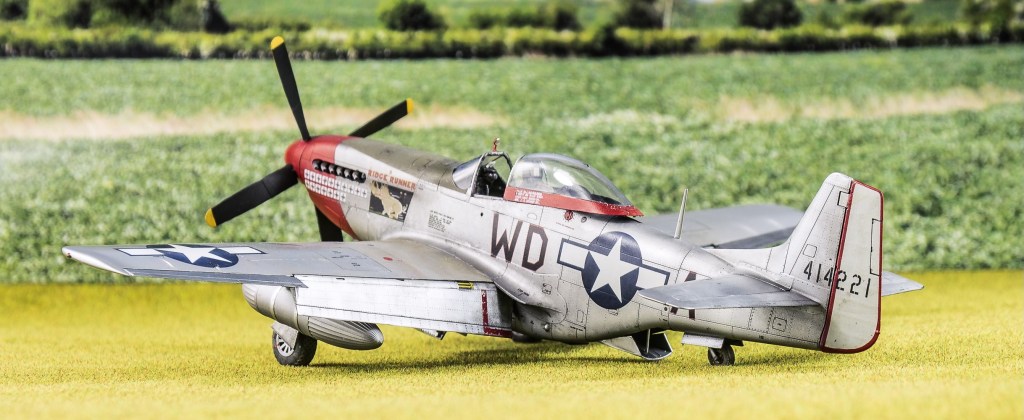
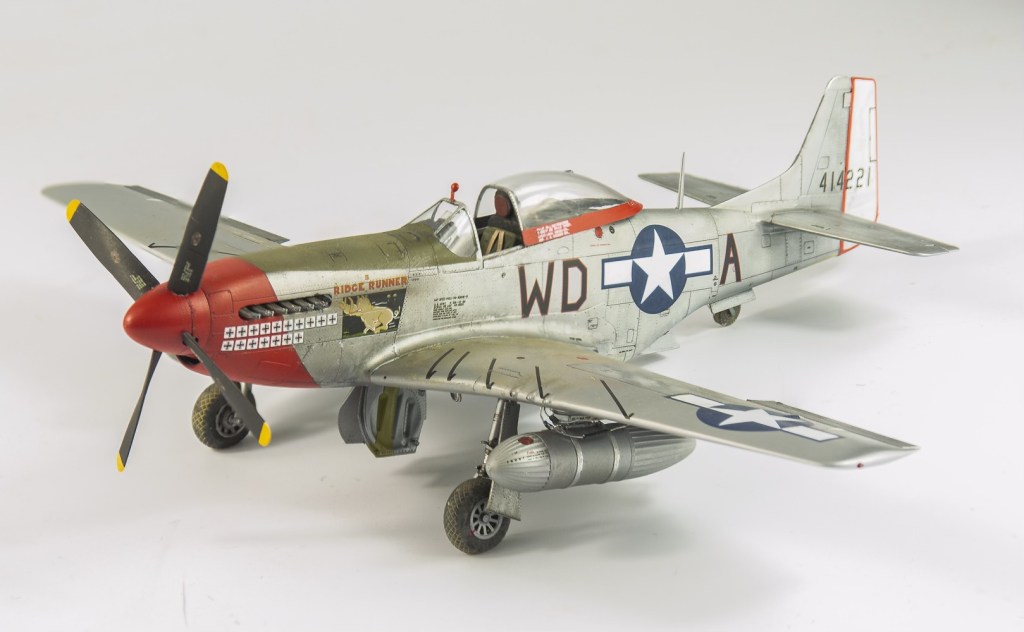
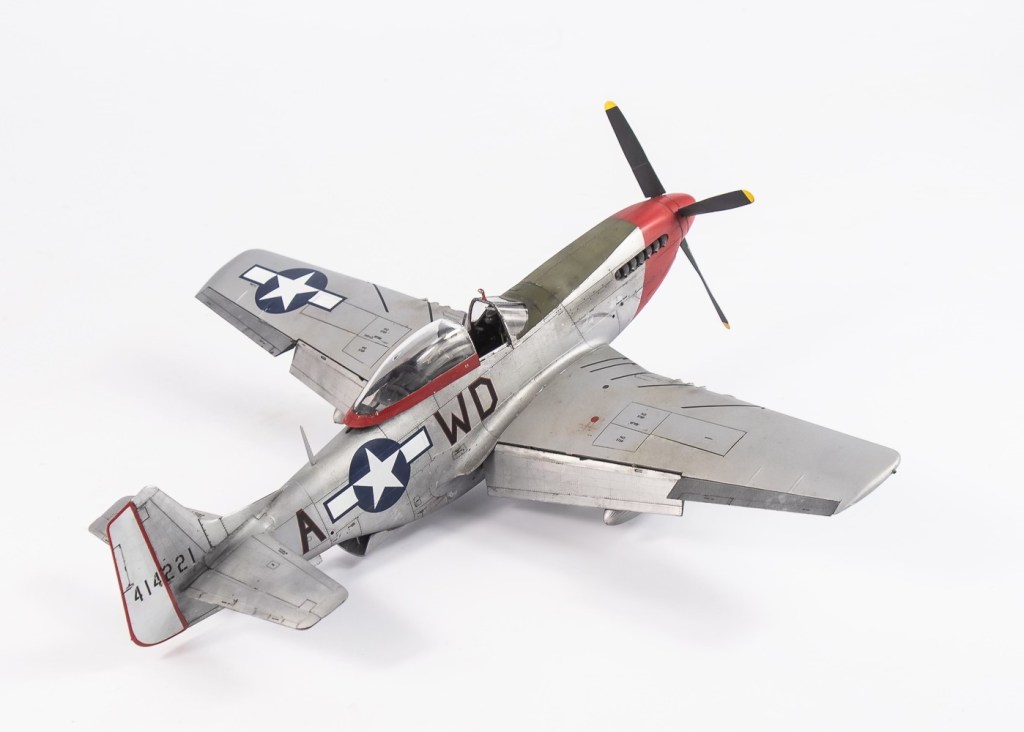
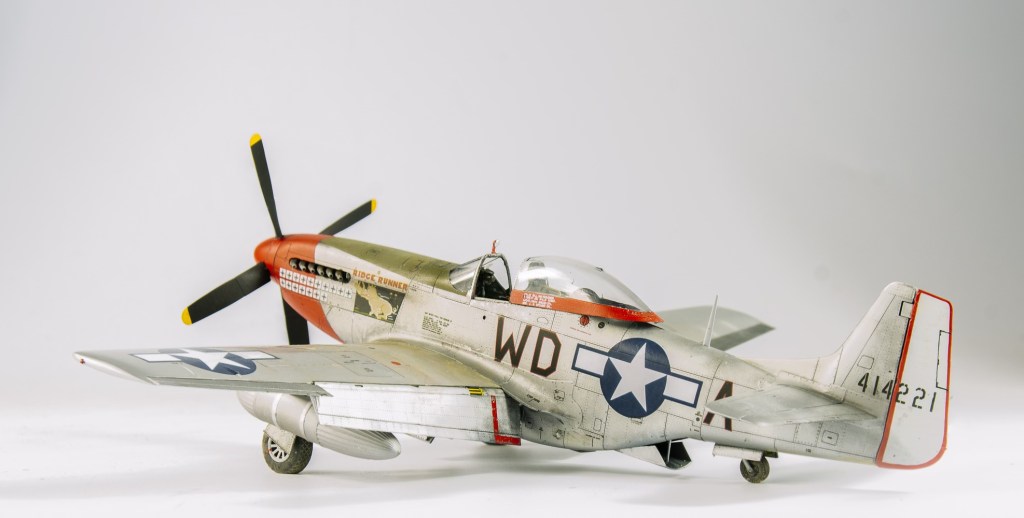
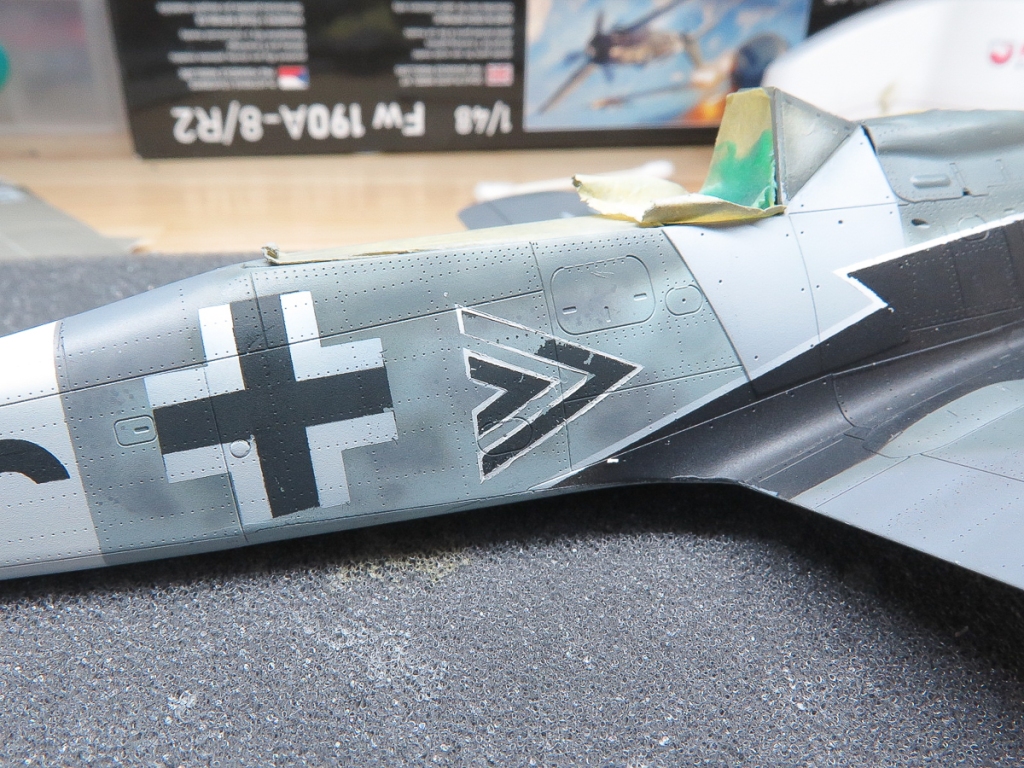
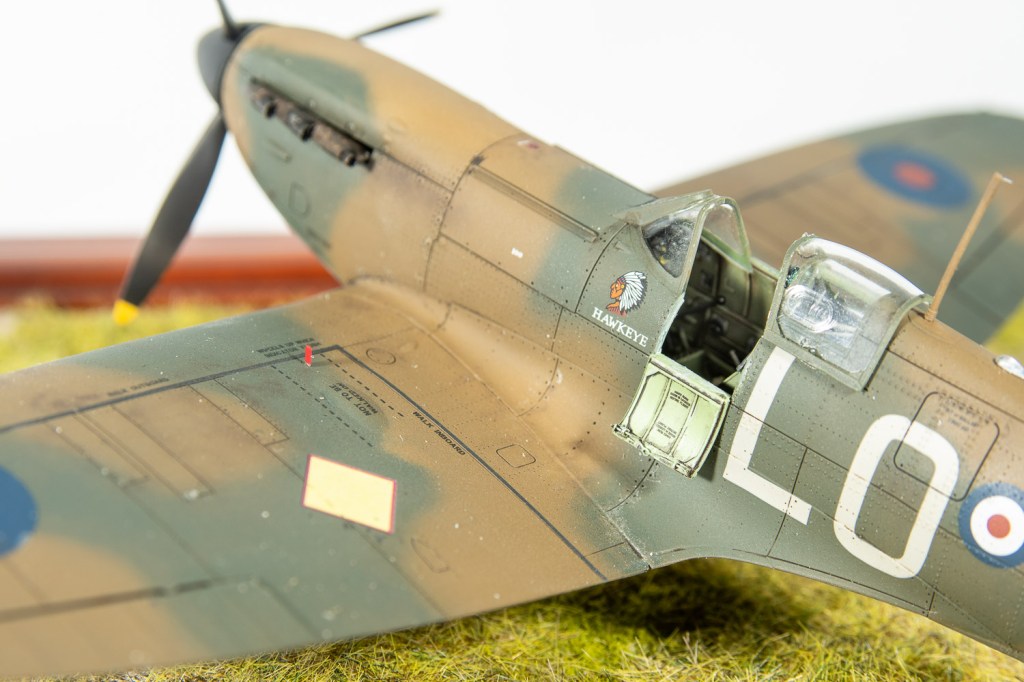
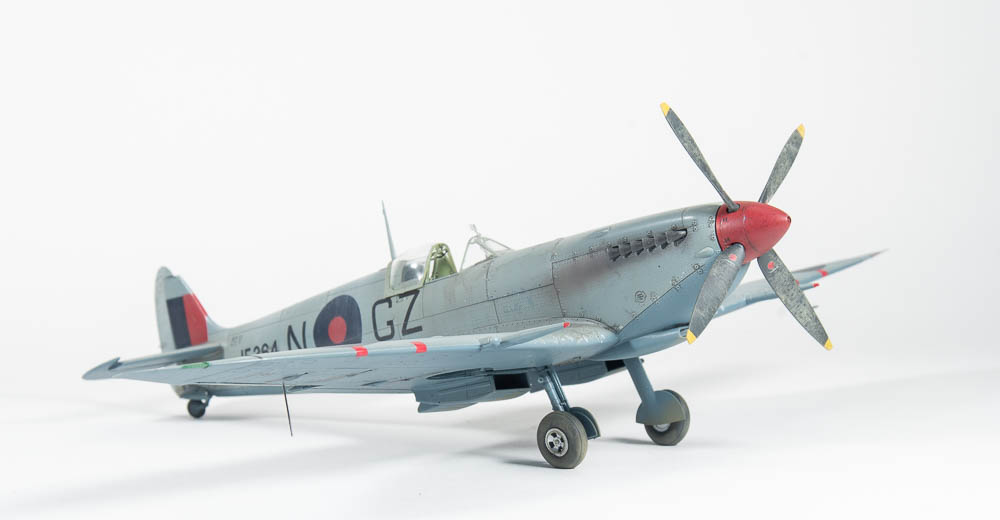
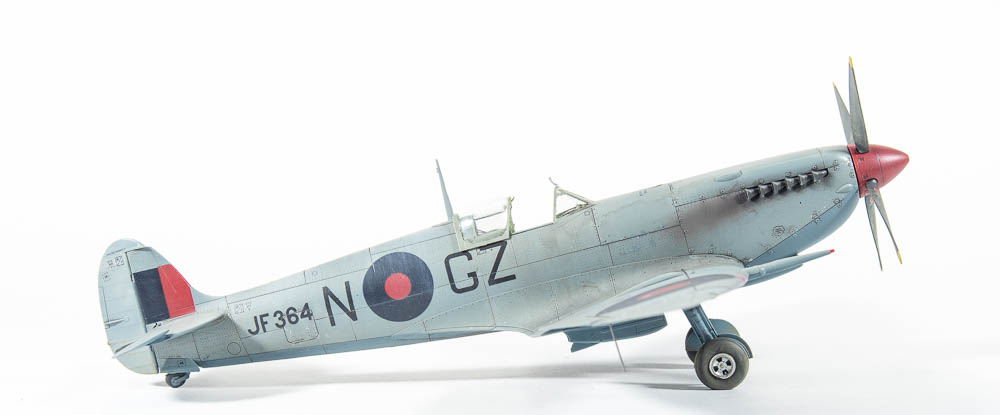
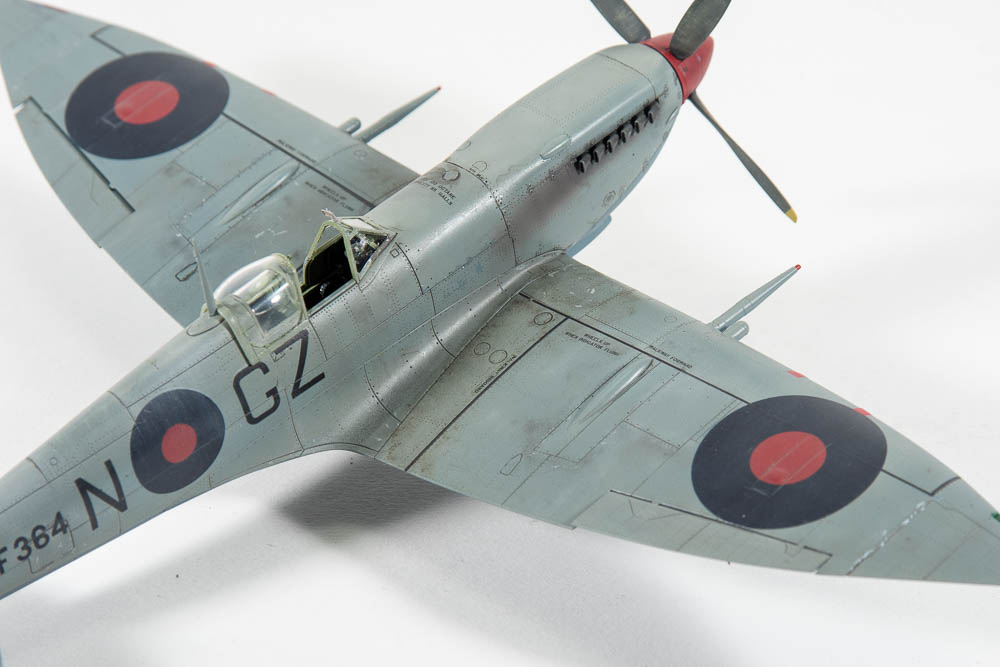
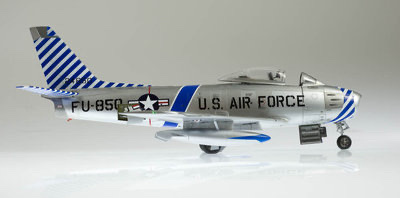
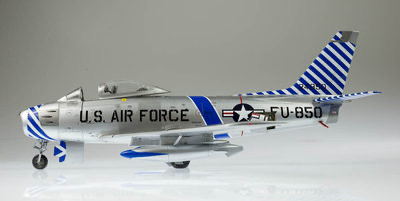
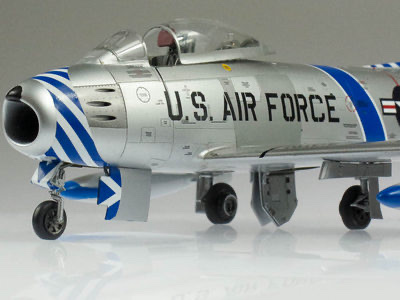
One of the prime aims with this was to simulate a worn natural metal finish. To this end all parts of the aircraft that were left unpainted are primed with Mr Surfacer black, the wings having previously being primed with Mr Surfacer Grey, then sprayed with Tamiya LP11 before being masked. The Black primer was then rubbed down to remove any irregularities. The next stage was to apply a light grey random mottle through a splatter mask. Alclad’s Polished Aluminium was then sprayed followed by Alclad Hi Speed silver , this time through a very fine splatter mask. I have seen people use a torn piece of of teased out scotchbrite pad to achieve the same effect. Alclad white Aluminium was then sprayed, again through a fine spatter mask to leave me with a variegated silver finish, which is exactly what I was after.

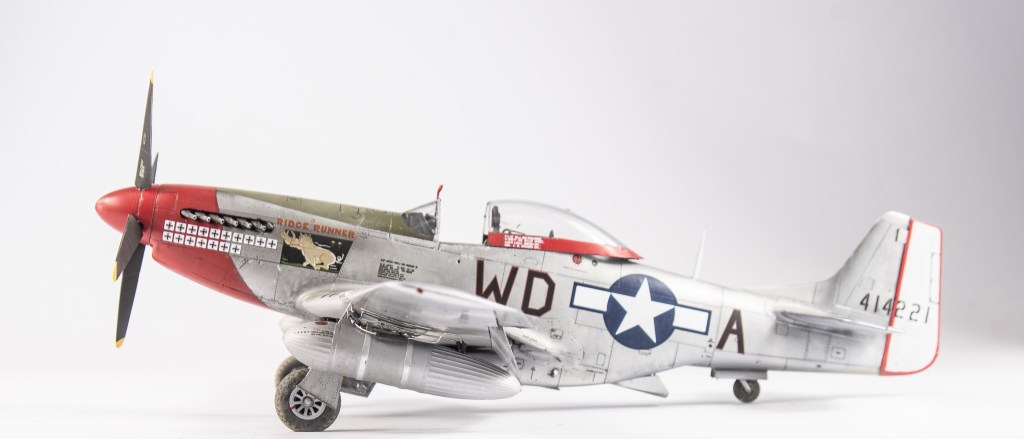
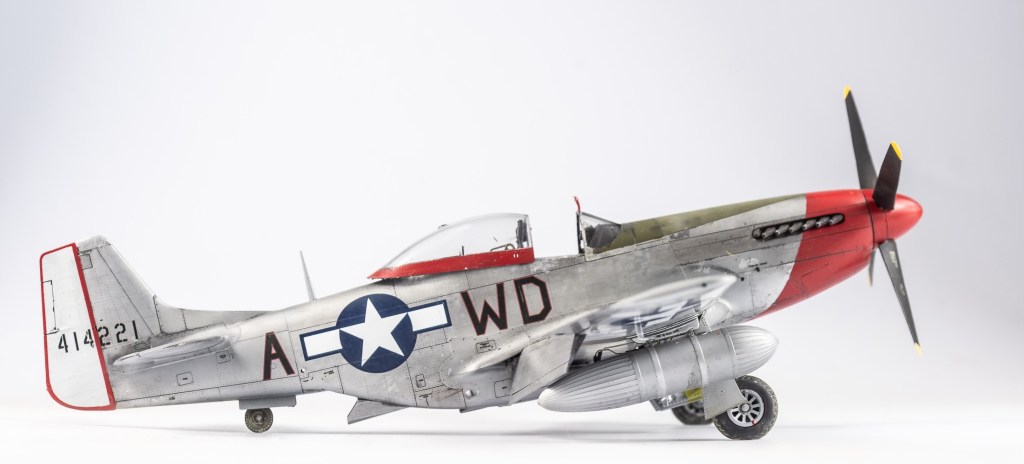
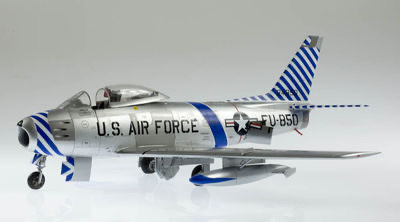
The red nose was sprayed by way of upscaling the Eduard paint instructions to the actual kit size, then cutting a template from the painting guide. To do this measure the kit fuselage and then the drawing fuselage size. It’s then a simple matter of dividing the kit part measurement by the drawing measurement. In this case it was 1.16, so the drawing was enlarged by 116%. Instead of using the kit red rudder border decals, I cut a mask on my silhouette machine and sprayed it. The anti glare panel was SMS OD lightened with middle stone. The panel immediately in front of the windscreen was left in neat OD to suggest a replacement panel.

The model was then clear coated with Alclad AquaGloss to prepare for the wash, in this instance Tamiya Dark Grey panel Line accent. However wiping this off with odourless thinners also removed some of the red and Alclad Polished metal. Not sure what the underlying cause of this was. Polished Aluminium is notorious for its fragility, but I thought the clear coat would protect it. Either way, the damage was repaired and the Polished Metal binned. I’ve amassed quite a selection of different branded paints over the years, but these days the ones that don’t consistently perform get binned rather than getting pushed to the back of the drawer.

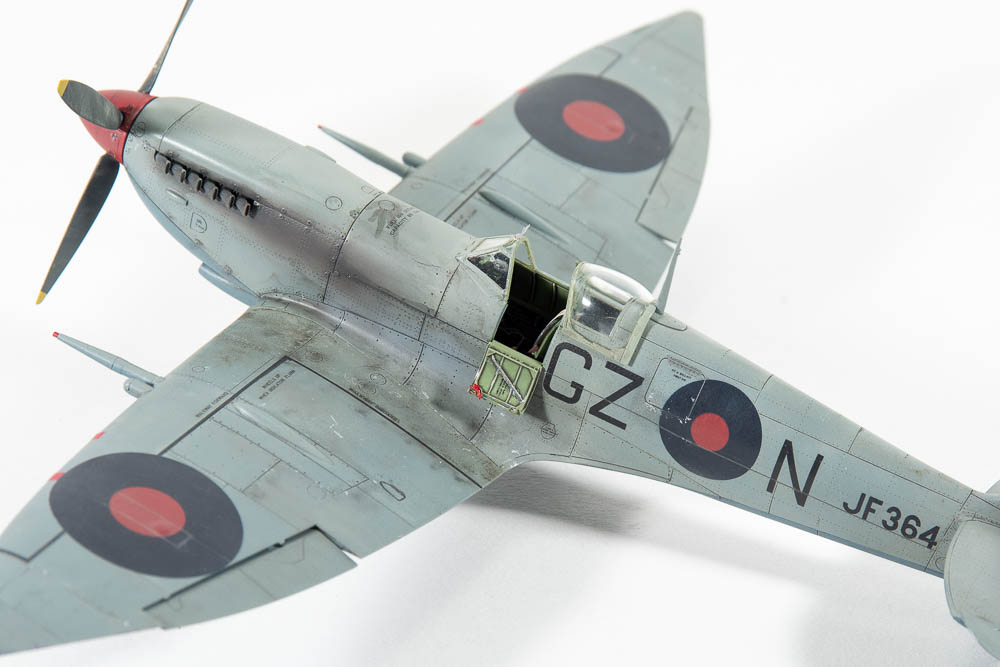
Eduard’s decals performed magnificently, being bedded down between Micro Set and Micro Sol. The carrier film was removed with nil damage to the underlying decals. The decals then being sealed with another coat of Aquagloss.

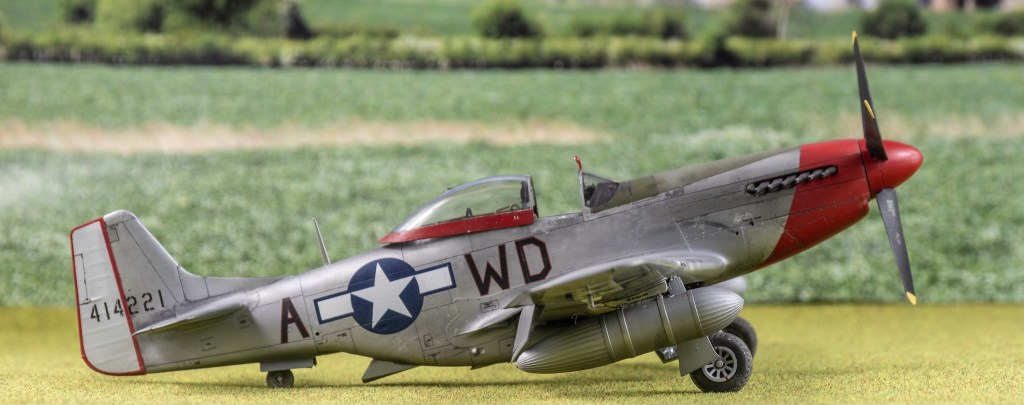
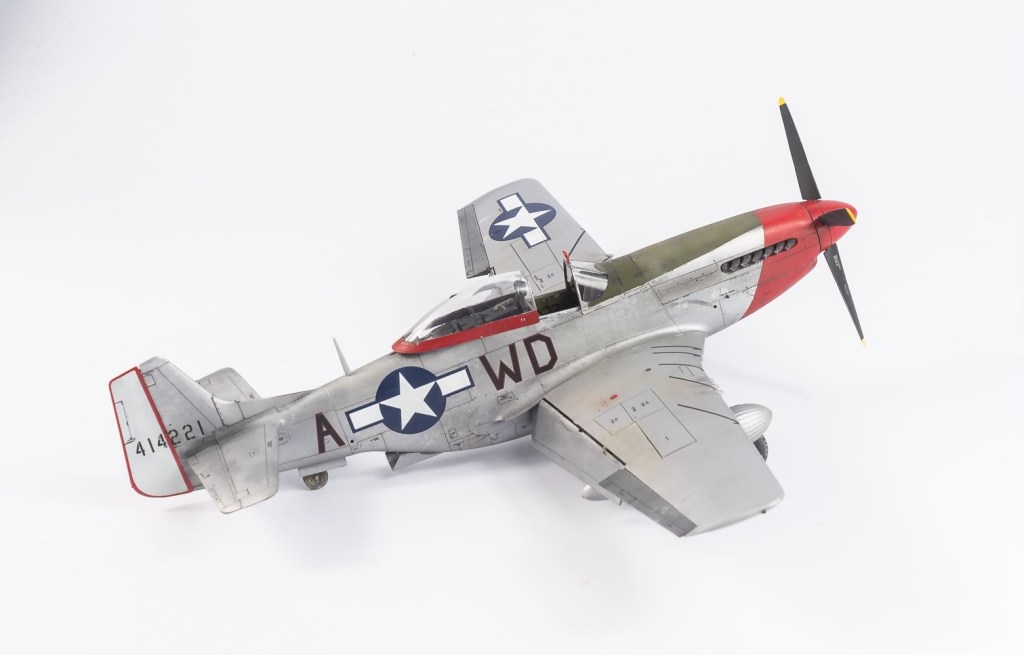
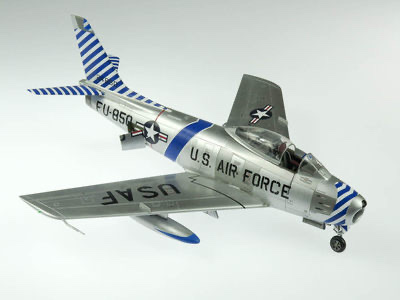
As one would hope, the resin 108 gallon drop tanks are far superior to the kit provided ones, being one piece with better defined detail. Although Eduard provides the PE fuel lines, I decided to complicate things by making my own from thin copper wire.

The kit exhausts were drilled out and added, the fit being very tight. Eduard’s resin wheels must have been reprinted. A couple of mates who have built the kit previously, reported their resin wheels were slightly too big in diameter. This necessitated them trimming the bottom of the strut where it joins the yoke, so the wheel fit without rubbing.

Conclusion

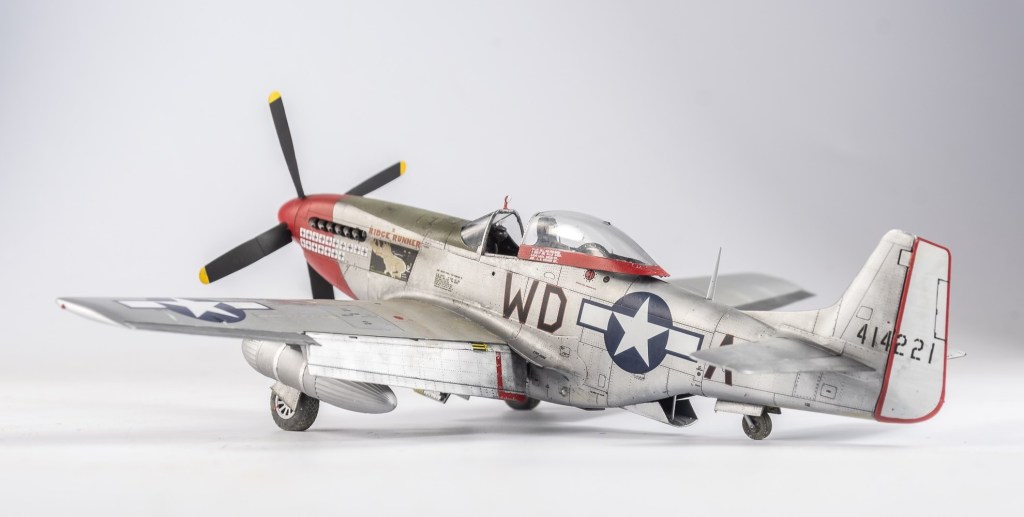
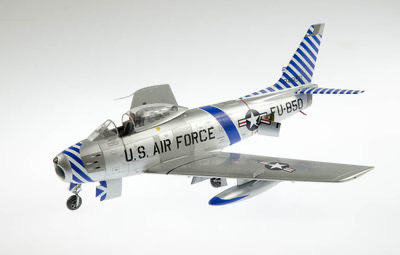
Eduard’s Mustang for me was a throughly enjoyable build. There are two more in the stash, and they will get built. Is it the best 48 scale Mustang out there? That will depend on what matters to the builder. I loved the finesse, surface detail and overall buildability of it, with the caveat that some modellers my find it a bit too complex and “over engineered” for their liking, but the modeller can virtually build any sub variant of the Mustang from any boxing. That has to be a plus. For me, it’s the best Mustang currently available, well, until Tamiya decide to retool their ageing 1/48 P-51D.

Well, that’s the “Would I build it again” answered. My other question is always “Where could I have improved?” Well on this one, whilst happy with my general construction, my finishing skills again let me down. The mottled NMF technique still needs a little refinement, as does my weathering, especially the blending of the oils, and – again- I can see Ive not cleaned up the wash too well in some places. You always find this out once the matt varnish has dried!

There’s only one way to fix this.; Build. More. Models!

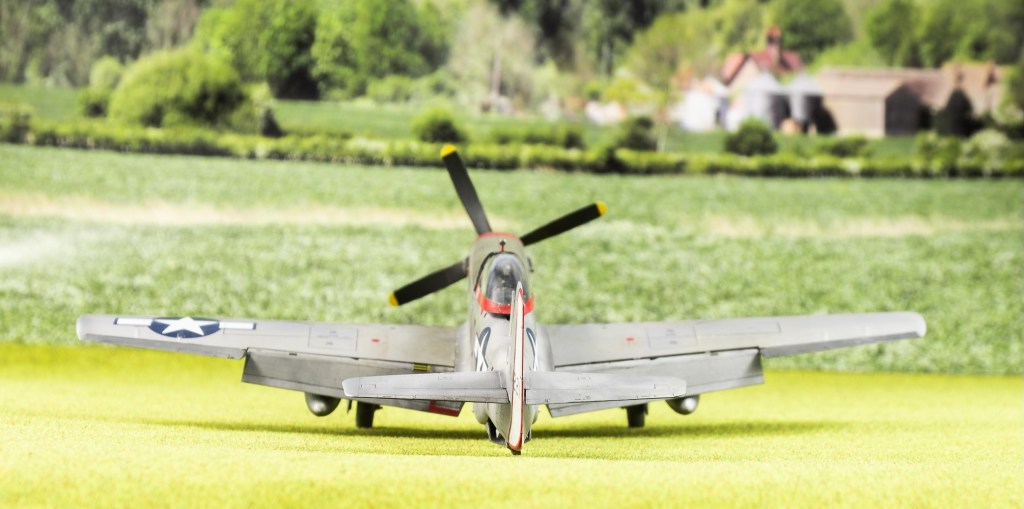
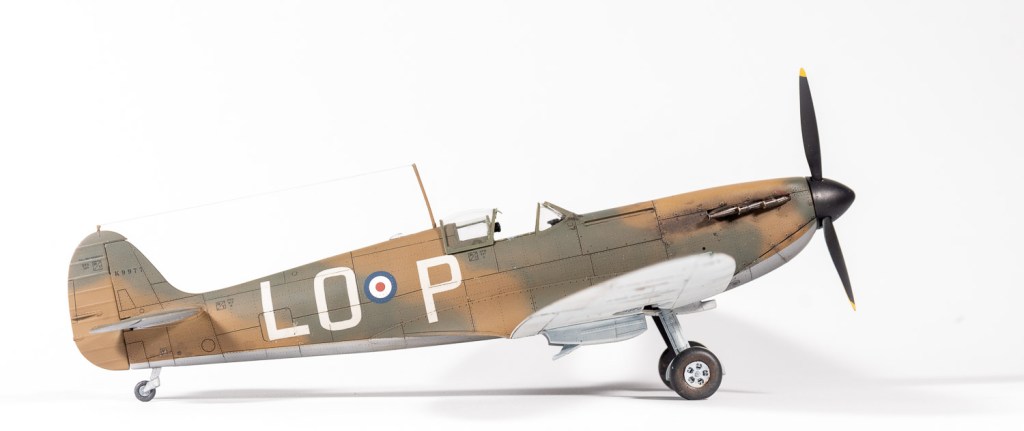
P-51D-10. 355th FS. 4thFG. 8th AF U.S Army Air Forces Debden UK 1945

Leave a comment

Eduard 1/48 FW190A8/R2

  • Purchased : 2023
  • Built; 2023
  • Enhancements: Gun barrels replaced with aluminium tube
  • Decals: Combination of kit decals and painted using Montex masks.

Construction Notes

Eduard’s new series of 190s have been written about in various online reviews as being viceless builds. Whilst they show a marked improvement in engineering, ease of assembly and surface detail over the older kits, I still found a few issues.

Everything in the cockpit is fairly straightforward, although I found the instrument panel has a tenuous and somewhat vague location between the two fuselage halves.

The same with part A32, I found it difficult getting it to seat properly. With the wheel wells, I was initially dubious of Eduards call out to paint them RLM76 rather than the usual RLM02. Perusing Eduard’s instructions for their other 190s showed me Eduard do call out 02 for the earlier marks. The A8/R2 kit is the only model where they suggest 76 wheel wells,

I decided they must know something I don’t! They have done quite significant research into the Rammjager as evidenced by back copies of the info magazine.

I cut the barrels off the inboard guns – to be reattached during final assembly – as they were bound to get knocked off during sanding operations.

Dry fitting the wing to the fuselage revealed a gap on one wing root. Consequently I delayed adding the gun deck and upper cowl parts to the fuselage so as to allow me to push the fuselage half out to meet the wing and reduce the gap. Great in theory, but I think doing that just created another problem for myself.

With the airframe together, one wing looked to have greater dihedral than the other. The wing root join was broken by way of using tamiya extra thin to rehydrate the join, then a shim added to reduce the dihedral. This seemed to fix the problem, or so I thought!

I should know better. Fiddling with wing roots like this just seems to muck with the geometry. Probably would have been better to add a sprue spreader under the cockpit. There are 2 more Eduard 190s in the stash, so it will be interesting to see if this problem appears on those, or was a construction fault on my part.

This aside, the model built up quickly. Filler was used on the centreline seam and the leading edges of the wings only. The tailplanes and gun covers fit perfectly.

Of course, its too much to ask of me for a build to go flawlessly, and so it was again in this case, although problems did not rear their head until well into decalling. Again, an unforced error, falling foul of Eduards decals. Well, thats probably a bit unkind on Eduard. It was me trying a new (to me) technique of removing the carrier film with white spirits. This had gone swimmingly on the wing crosses, then I got cocky. For those not aware of this technique. I refer you to Gary Wickham’s excellent tutorial contained within his superb Tempest build. My mistake was I left the white spirits on the swastika and chevron for longer than a minute, the result being the white spirits removed the carrier film, the decal AND the underlying paint. AAAGGGGHH

Had I mentioned I was really happy with my overall paint job and tight mottling? No, well I was! In all, this was a fairly simple mistake to correct, but it occurred during a stage in my modelling where frustration with this kind of thing was overriding my perseverance, so back in the box it went.

Completing the phantom renewed my enthusiasm to complete the 190, so back out of the box it came. The existing paintjob was stripped using Gunze thinners and now that I had a blank canvas again, was repainted using Mr Colour paints, although my mottling was probably a little tighter on my first attempt.

For the major markings a montex set designed for the tamiya kit was used. This was also not without some problems with recurrent peeling of paint and repeated masking and touch ups required. A couple of months earlier , this would have seen it relegated to the box or the bin, but this time I powered through, even cutting a new chevron and underwing code letter on my silhouette to replace the by now distorted montex masks. Its amazing how little achievements like this can lift your enjoyment for the hobby. Kit decals were used for the Udet emblem on the cowling, on this occasion, the carrier film not being peeled as they had laid down perfectly.

SMS flat was used as the final coat as this is not dead flat but leaves a nice sheen, which can be seen on period photos of Luftwaffe machines, the service life of which – by this stage of the war- could be counted in weeks, even days.

Oils were used on the underside to impart some staining. This technique still eludes me, analysing my attempt on this model has led me to think I need to apply smaller amounts in future. Oils certainly go a long way!

Casting an eye over the completed model, the geometry looks a bit askance to me despite Eduards engineering to ensure the added undercarriage sits at the right angles.. That added shim to the wing perhaps contributing to this, one wingtip still measuring higher.

Im reasonably happy with my efforts on this, more so, that – with this model – I had the perseverance to push through a couple of hurdles that presented themselves. I definitely feel Im back on the horse!

Would I build another Eduard 190? Definitely!

Focke Wulf 190A8/R2 IV (Sturm) JG3 Luftwaffe.

Mennington, Germany . July 1944

Leave a comment

Eduard 1/48 Spitfire Mk1

  • Built: 2022
  • Added to stash: 2021
  • Enhancements: None
  • Decals: Fundekals, Early War Spitfires Part 2

This is my second build of Eduard’s spitfire, and I found the experience as enjoyable as the first.

Upon examination of the parts the first thing the jumps out at you is the extensive surface detail Eduard’s mould makers have lavished on this kit. The empennage is covered in fine raised rivets whilst the wing rivets are recessed.

Careful study of the instructions and sprues reveals that Eduard have included parts to make any spitfire from the first production machines up to mid 1940 machines. There are unarmored and armoured windscreens, various separate armour plates and gunsights plus seats. Useful to understand all these differences was Wingleaders photo archive on the Spitfire Mk1. The Few boxing allows one to build two Spitfires, one with the later armoured fuel tank and one without, although this was not immediately apparent to me. It was only after careful study of the Wingleader book and the Fundekal instructions that I understood the various differences that I was looking at in photos. That Eduard has included all these optional parts shows how thoroughly they researched the aircraft.

Its a shame they did not include the later undercarriage selection lever as that would then allow you to build any spitfire up to the end of the Battle of Britain, although the later selection lever looks easy enough to scratchbuild, or you could just buy the Tamiya Mk 1. My research unearthed the electric undercarriage selector appeared around the 600th or February 1940 build machines. I could not find a definitive answer.

For this build, I deviated from the instructions a bit in that the cockpit sidewalls were added to the fuselage sides before being painted. The floor, complete with stick, rudder pedals and seat was treated as a separate subassembly. As were the various bulkheads, the rear bulkheads having their lightening holes drilled out. This method made it harder to get a paintbrush to all the little detail areas, and for the second build, the instructions were followed to the letter, which resulted in details being easier to reach with the paintbrush. The cockpit colour used for this build was a coat of SMS RAF interior green with the sidewalls washed with Mig Dark Wash.

With the cockpit completed, the rest of the build proceeds quite quickly. Ensure all mating surfaces of the wheel well parts are sanded at the correct angles to lessen gaps between the parts . Eduard, I feel could have made the fit of the sockets that accept the landing gear legs far more positive. Be careful ensuring you locate these carefully into parts xxx . Any misalignment here will affect the sit of the model later.

I had some gaps at the wing roots that I thought I could close up by running tape spanwise from wingtip to wingtip. While this did close up the gaps, it also introduced other problems such as too great a dihedral and led to some alignment issues. I won’t be doing that again!

A smear of filler was needed around the stabilisers, and we were ready for paint. For this model I had decided to use some Mission Models Paint I had previously purchased. Reading up on peoples experience with this paint revealed modellers have a love hate relationship with it, but if modellers of the stature of Mike Rinaldi swear by it, it can’t be that bad, surely ?

Whilst I managed to get the paint down OK, I had great difficulty getting a fine line with the dark green, despite following MMPs mixing ratios and advised spraying pressure. The paint is also a little fragile with it lifting in several spots. A Peter on my FB page suggested thinning it with future with I will try on my next Spitfire build. The undersides were finished in Tamiya lacquers as per my usual practice.

Like MMP , Eduard’s decals also seem to have polarised modellers. For this build, only their stencils were used. Over a gloss coat, they were applied on little pools of Mr Setter, with the excess being wicked away with a cotton bud. Left to set overnight, I found I could peel away the carrier film off some of the larger designs like the trestle markings and gas patch, without tearing the decal.

The code letters and roundels came from the fundekals sheets and performed absolutely flawlessly, even over the raised rivets on the fuselage. The unusually sized roundel appealed to me, and I wanted to represent a Spitfire from The Phony War period during which the R.A.Fs markings were rapidly evolving.

I should have mentioned prior to laying down the camouflage colours, black was airbrushed along the wings, then masked off to portray the wing walk lines.

Final assembly saw the wheels, propeller resin exhausts and aerial pole mounted, the antenna wire from infinity rigging wire, which despite my best efforts, still bent under the elasticity of the infini thread. I’ll replace the kit part with some brass rod on my next build.

Eduard’s spitfire was a very enjoyable build. To my mind though, the kit contains some unnecessary complications, the undercarriage sockets being one. Fit was for the most part good, with a slight smear being needed on the taipan roots, and most reviewers stating the wing root fit also leaves a slight gap. Ima already working on the second kit from the box and have added the Vb dual boxing to the stash.

Supermarine Spitfire Mk 1. Royal Air Force Drem Scotland Jan. 1940

Eduard 1/48 Supermarine Spitfire HFVIII

  • Date Completed:2018
  •   Aftermarket Used:  None, model built completely from box
  •   Paint Used: Xtracolour Medium Sea Grey and PRU Blue

Supermarine Spitfire HF Mk.VIII 32 SQN Foggia. Italy 1944

This model was completed as a review build for The Modelling News, so I will not put a detailed guide here as the article covers the build and finishing in depth.
http://www.themodellingnews.com/2018/08/build-guide-spitfire-mk-hf-viii-in-48th.html
http://www.themodellingnews.com/2018/08/painting-finishing-bruce-tops-off-his.html#more
  Which only leaves me to say, this really was an enjoyable build.  If you have not built one of the Eduard Spitfires, Get On it!!!

Eduard 1/48 F-14A Tomcat

Date added to stash: 2016
  Date Completed: 2018
  Aftermarket used:
some parts from Eduard Detail set 
  Paint: Mr Color Light Gull Grey
  Decals:  Furball Sundowner Anthology

I started this at the same time as lthe other Tomcat I was building for a friend.  At the time, it seemed like a good way to build a kit from my stash as well.  In hindsight, if I had not started this one, I would have sold it, because its position has been ably taken by the Tamiya kit, and building the two HobbyBoss kits was a real grind.  Not that there was anything wrong with the kit, but it was just one HB Tomcat too many. (Although this boxing was done by Eduard, it is the HobbyBoss kit, so I will refer to the kit as HobbyBoss)
The previous article covers the build in detail, although I would add my take home lesson from building Tomcats is mask the intake camouflage demarcation before you add them to the jet I didnt on either build and it was a hell of a job to add them later!
I had high hopes for this build wanting to build it with all panels open.  In the end the build just started annoying me as there ws other stuff I wanted to build and I chose to rush  a lot of things.  Im not really happy with it, but HB Tomcats are a long complicated, involved build as are many modern jets, so to do two in a year is not bad.  I have  three tamiya Tomcats in the stash and look forward to tackling those at a later date.  Just not for a while, as Im all Tomcatted out. 
I also think Miss Molly was the wrong jet to pick, as all those open panels do not allow you to see that nose art in its entirety.  Live and Learn, hey.
And wheres that sensor gone from under Miss Molly’s hand on the starboard side?  I definetly  added it LOL
For those who don’t know, Miss Molly was named for Molly Snead, a nurse to Senator Carl  Vinson, yep, the Senator the carrier is named after.
 I visited  the USS Carl Vinson at Fremantle Western Australia in 1994, so like to model aircraft from her.

Grumman F-14A Tomcat VF-111 “Sundowners”  U.S Navy U.S.S Carl Vinson  1989

Go back

Your message has been sent

Warning
Warning
Warning
Warning.

Eduard 1/48 N.A.A. F-86 Sabre

  • Built: 2016
  • Aftermarket Used: Multimedia kit OOB
  • Decals: kit

This is Hasegawa’s still very nice plastic rebooted by Eduard and supersized with some of their excellent resin and Photo etch.  

This was built for a review for The Modelling News, and rather than go through the build again, I will just send you there via this link

I was quite happy with the finished model and it still resides in my cabinet.

North American Aviation F-86F Sabre 390th FBS, Alexandria AFB, Louisiana, USA, 1955