This was the second review I did for The Modelling News and I had high hopes for it. Unfortunately the kit was a bit of a chore, whether this was because I had just built a kittyhawk, or because of all the remedial work required, I found myself having to dig deep to finish the build. Despite its inaccuracies, the kit has some nice features, although I can not recommend it given the Airfix kit is far superior. I imagine this will be relegated to the shadows, especially in the Western market.
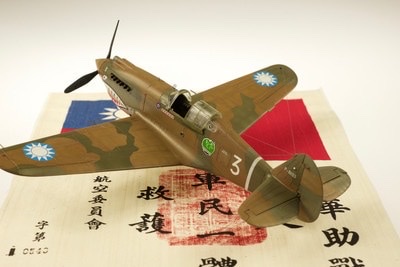
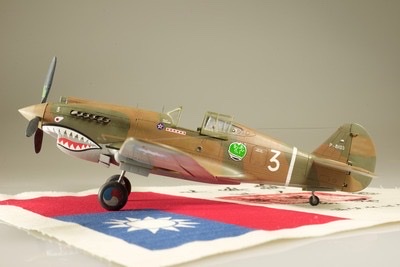
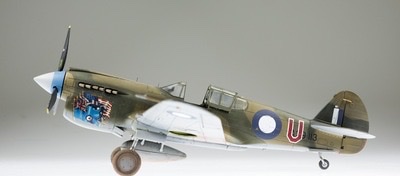
Curtiss 81-A2 Hawk. American Volunteer Group. China. 1941
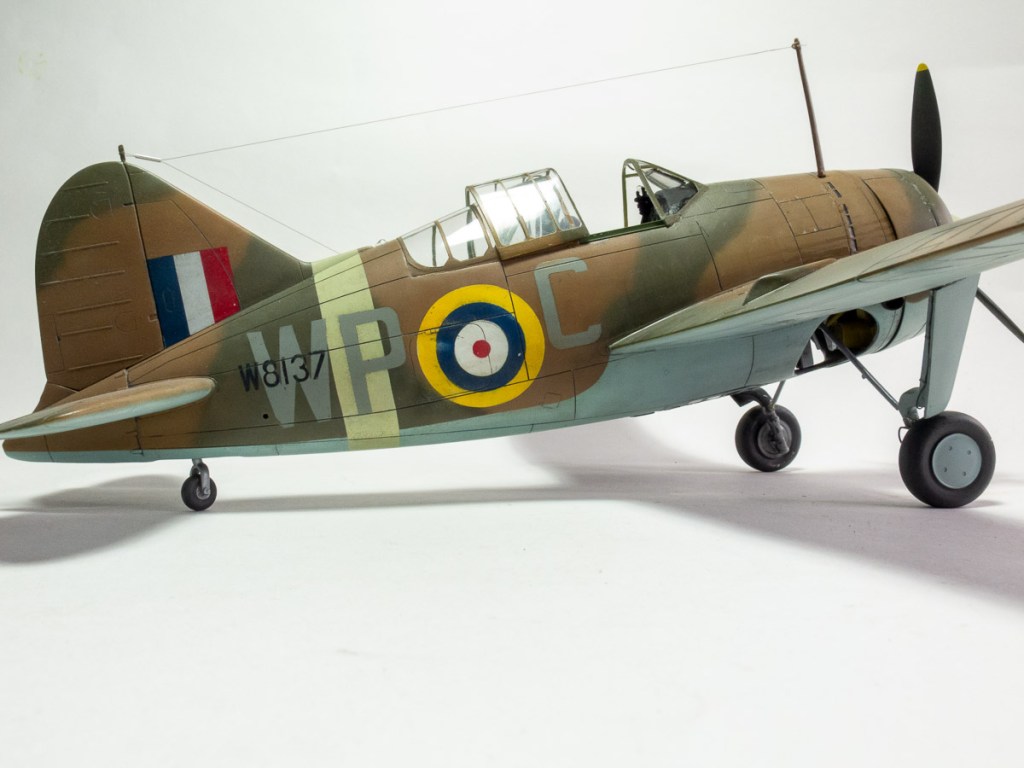
This one had a period on The Shelf of Doom due to me damaging the windscreen. Special Hobby kindly came to the rescue and supplied me a new one free of charge. Exceedingly generous of them seeing as I was the one who cocked it up. I added a few additions to the cockpit such as a British reflector gunsight and armoured glass screen to reflect the British modifications. All markings are sprayed using Montex masks. I have since discovered a few colour inaccuracies, the fuselage band should be sky blue and there should be no yellow ring on the underside roundel. I still like it though. Its actually a kit that I would like to revisit as I do i have a soft spot for the tubby Buffalo. This being the third one I have built, well fourth, as I remember building the old tamiya kit as well.
Decals: Combination of Cutting Edge Pyn Up and Aussie decals
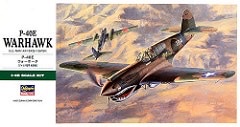
Hasegawa’s P-40 series seems to be one of those kits modellers either love or hate Flick through any of the fora and you will find modellers that rate it as a horrible fitting kit through to other modellers that have had no fit problems at all. It does require care in assembly – like any kit – but I found mine went together reasonably well with only a small amount of iller needed around the gun ports and fuselage. To be honest, I found the Cutting Edge decals a real disappointment, thick and reluctant to conform to recessed details. The nose art decals, although very thin, were not sharply printed. I dare say though printing technology has improved since these decals were first released.
Aftermarket Used: Master barrel brass gun barrels, RedRoo Models tropical cowls, Vector corrected control surfaces, MDC main wheels.
Decals: RedRoo Models
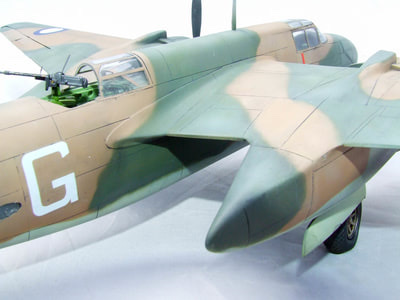
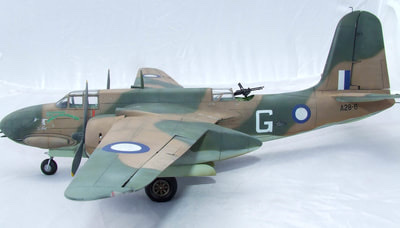
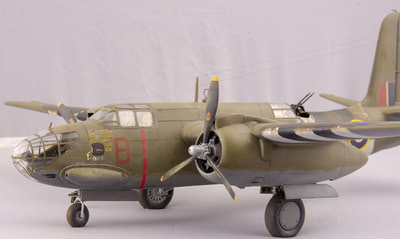
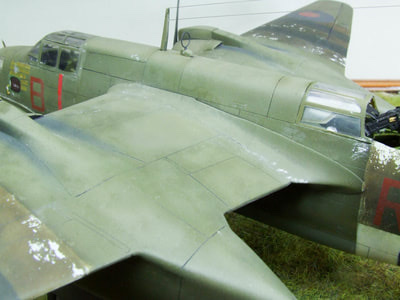
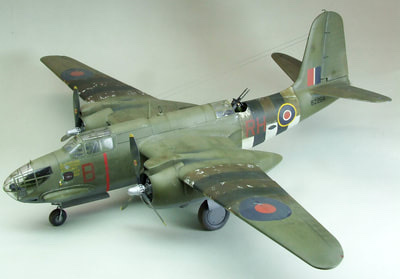
The second of a parallel Boston build, This one was finished as a RAAF machine. All the comments from my first Boston Build apply here too, including the spindly landing gear.
Decals: Various spare decals with nose art being hand painted.
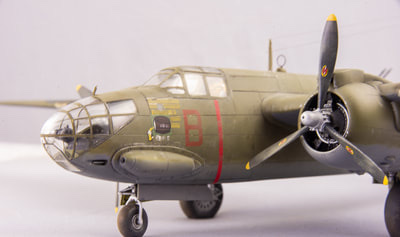
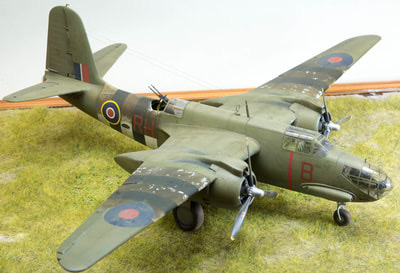
Another two builds of the same kit in parallel. AMTs kit is getting rather old now and we really need a new one. Detail is soft, although there are now sets available for it from Vector, and it has several inaccuracies including metal control surfaces where they should be fabric and I believe the main landing gear is to far backward, or forward, cant remember which. That said, it is a pretty viceless build. The only weak point being the undercarriage attachment. It is incredibly flimsy. Mine have sheared off twice!!. The doors also have poor attachment points. I cut out all the control surfaces and replaced them with the Vector resin replacements, I built the RAF one for a group build on an on-line forum. It was the first time I had used the salt chipping method, and I was quite pleased with the results. I wanted an machine that reflected the haste with which some units applied their invasion stripes., so the stripes were hand painted using vallejo paints.
As there are no decals for this scheme in 48 scale I used various generic sheets for the codes and national markings and hand painted the nose art. She was flown by an Australian crew. Im really hoping a new tool kit of this important aircraft is released soon. The A.M.T kit has served well, but is long overdue for replacement.
Xtracolour enamels were again used
Douglas Boston Mk IIIA Royal Air Force. England. 1944
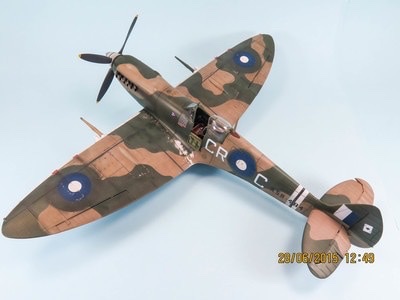
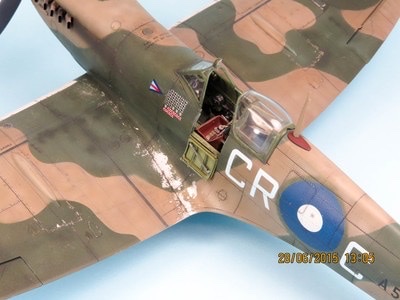
This Tamiya kit lived up to all the hype about it, which is just what I needed after coming out the other end of a mojo drought. I didn’t bother with the engine, knowing it would slow the build down. Rather than opting for the kit shark mouth scheme, I went for something different choosing Group Captain Clive Caldwell’s machine. Codes and unit markings were from Victory Productions Spitfire Aces sheet, whilst all national markings were painted. A real joy from start to finish. In retrospect though, I lightened the dark earth a little too much, so it doesn’t quite capture the darker looking camouflage of our spitfires.
Spitfire MkVIII 80 Wing Royal Australian Air Force. Moritai. 1944
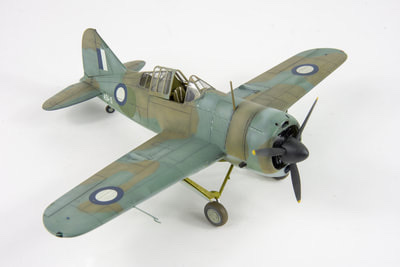
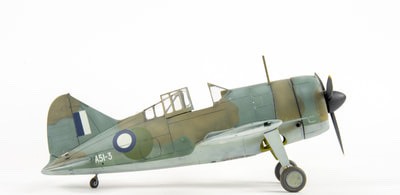
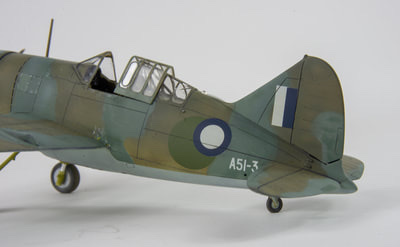
The second part of my double Buffalo build. Like the other build, this one also went together quite effortlessly.
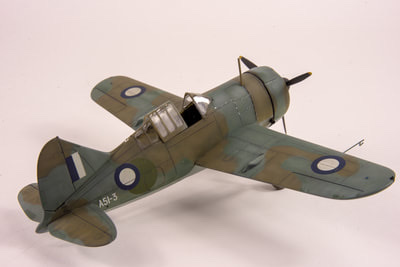
To paint it I used the then popular “black base” technique. I remember not liking it that much as I didn’t think it gave you a lot of range with the colours. The colours on this were all lightened considerably to portray a faded machine that had been operating under a blazing hot Northern Territory sun.
Extracolour paints were again used from my now diminishing supply.
I think this one turned out better than the U.S one I completed just prior.
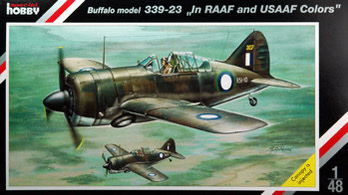
Brewster Buffalo. 1 P.R.U SQN Royal Australian Air Force. Hughes Air Base.N.T 1942
Date Completed: 2014 Aftermarket Used CMK Armament set,
Decals: Montex masks
Another double build in which was eventually a pretty productive year after a few false starts! From memory these Buffalos were lovely kits to build, being fairly straightforward, even the CMK gun bays fitted without too much scraping and grinding The completed models were painted with extra colour paints which were my preferred brand until export restrictions stopped them coming into the country. I still have several tins I am slowly using up on current projects.
For the USN one, I could not go past those oversized early war stars, which I found on a Montex mask set. This were the second set of markings I had masked after my dakota I found the process a little more difficult lining up all the elements and there was a fait bit of touching up to do. I cannot remember what colour I used for the USN blue grey, the underside grey was Extracolour with a dark wash from Flory Models. A small piece of brass mesh was inserted behind the oil cover opening. Looking at the model now, you can see I have rushed the weathering with none on the undersides or gun bays. Despite this, it still looks nice sitting in the cabinet with those big stars.
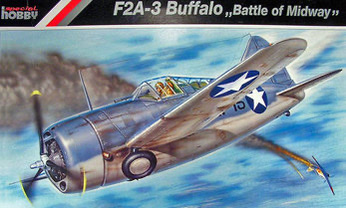
Brewster F2A-3 Buffalo MCAS Ewa WMF-221 Hawaii. USA 1942
Aftermarket Used: Rocket rails and radiator recast from Guideline Publications items, Ultracast wheels and exhaust
Decals: from the “decal bank”
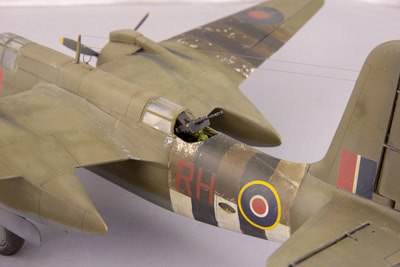
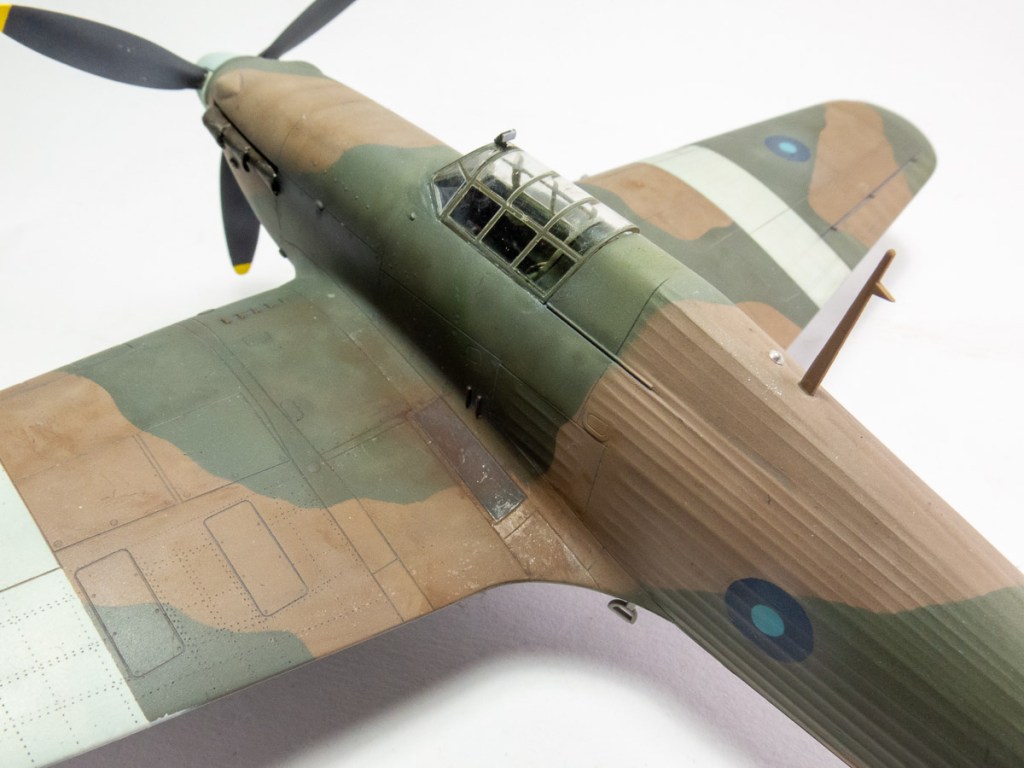
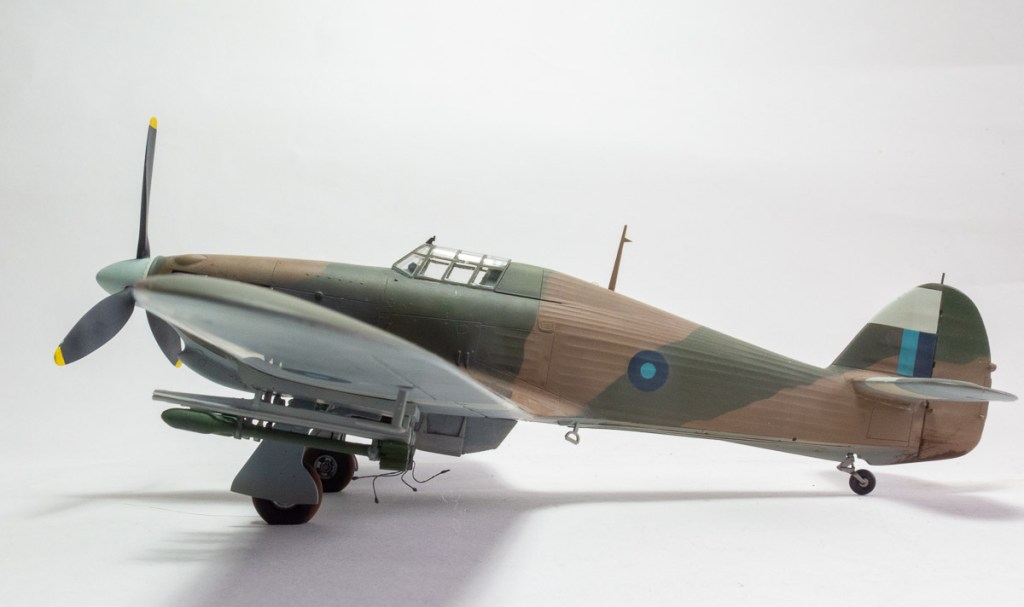
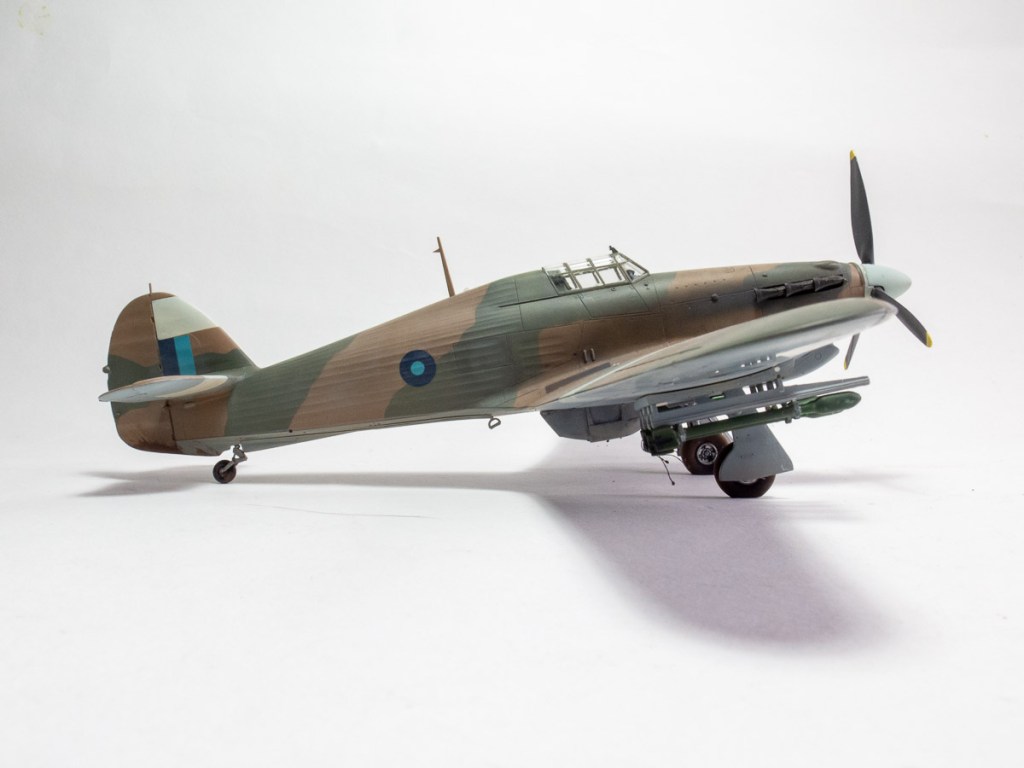
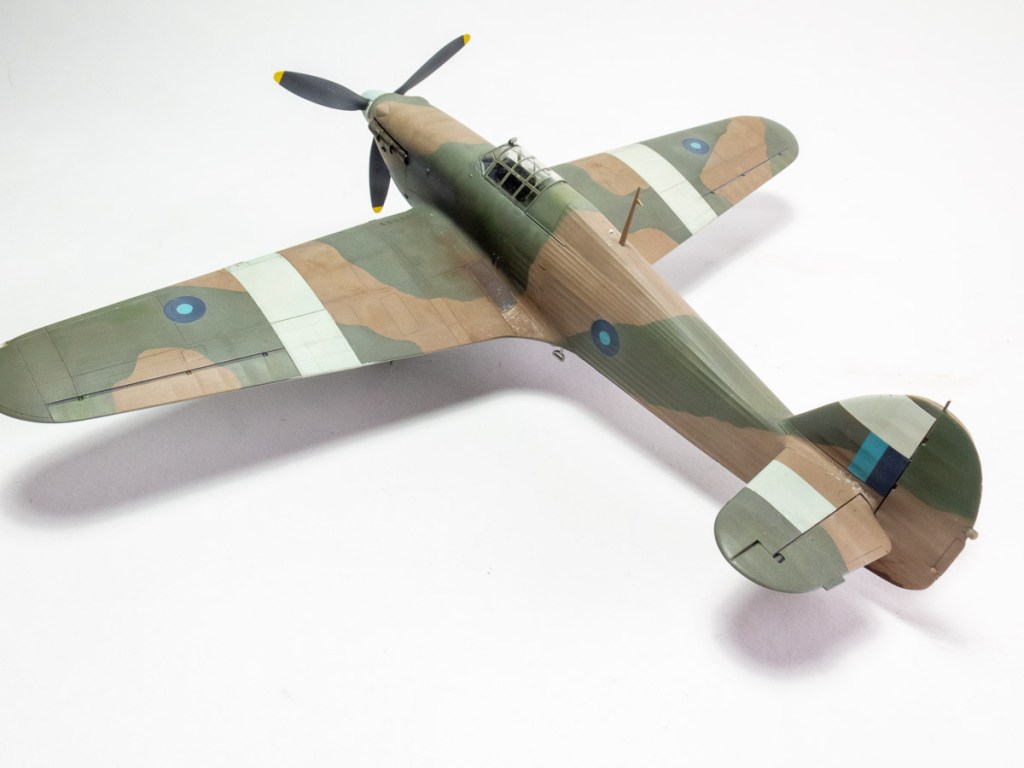
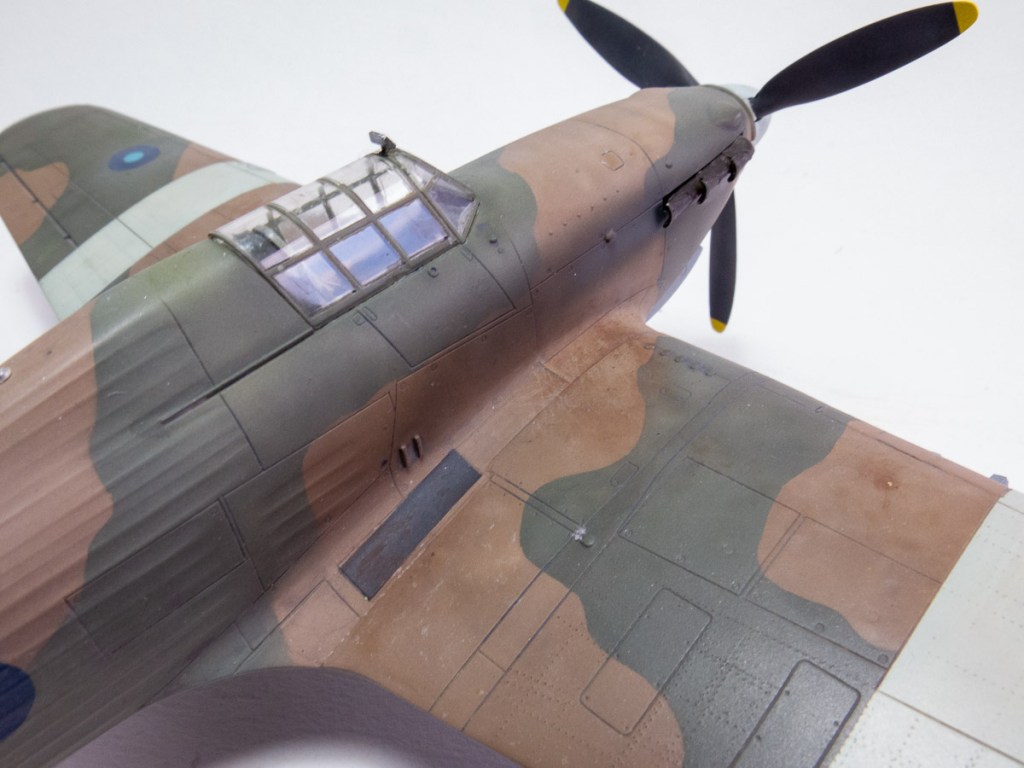
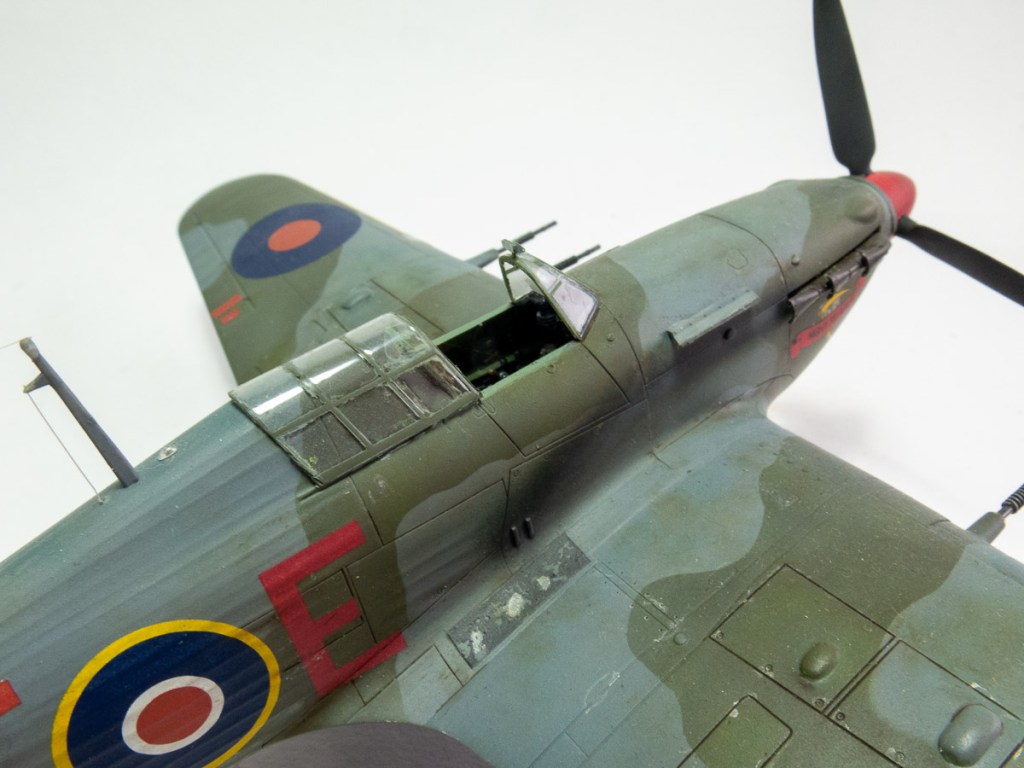
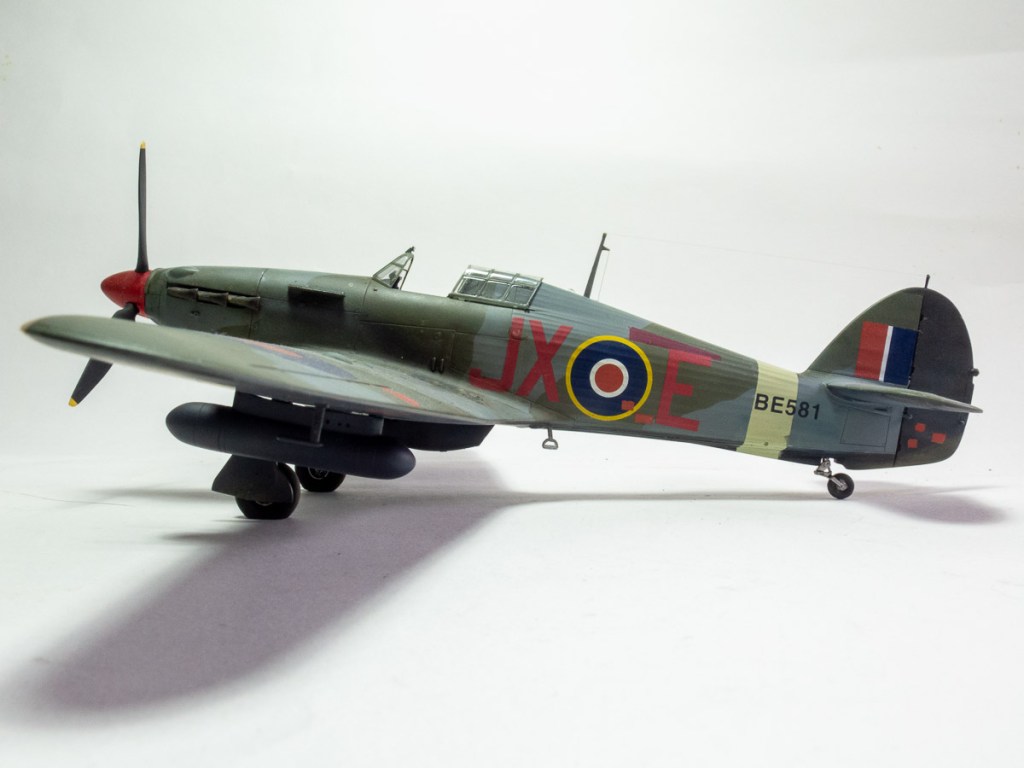
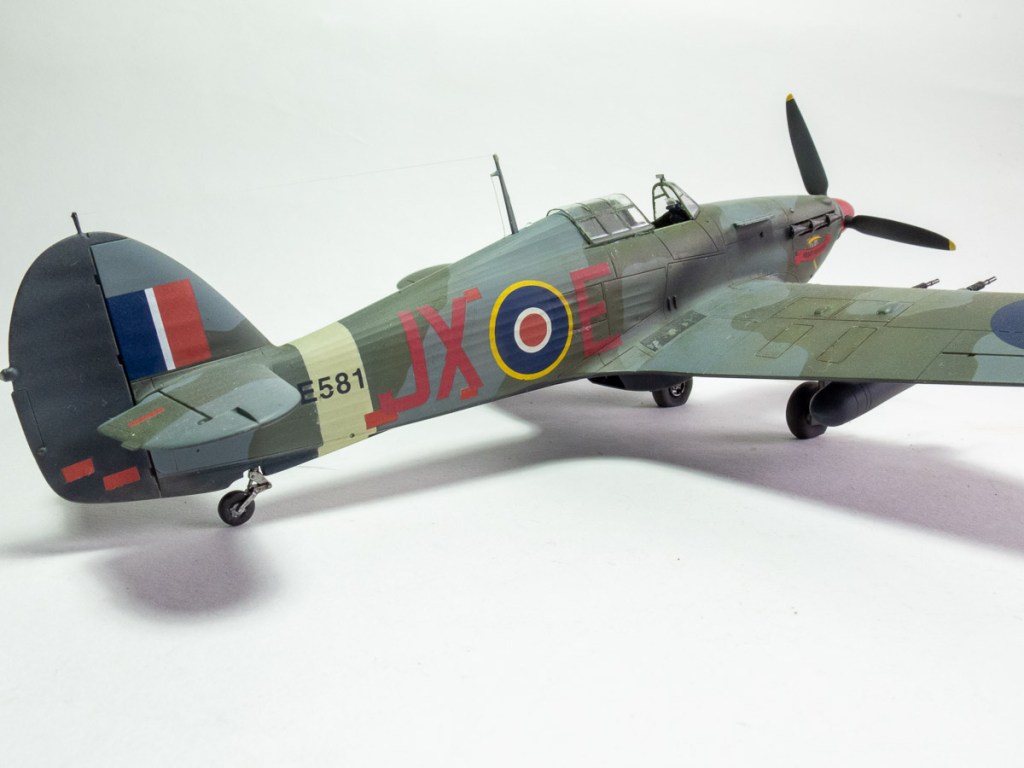
I have always loved the look of the Hurricane armed with rockets. Again it evokes memories of building the 72 Airfix kit as a child. It was another model I wanted to revisit, so my second Hasegawa Hurricane used a resin conversion set from Guideline Publications which included the armoured radiator and resin rockets and rails. The rails were rather twisted so a friend kindly recast me a new set. Searching out colour schemes was interesting as it was quite difficult locating photos of rocket armed Hurricanes. I eventually settled on this one from South East Asia Command, although you will note it has no codes or serial. Much searching and asking of questions failed to reveal an accurate combination I could use. This model was also riveted with my new Rosie the Riveter tool, although I just confined it to the wing upper surfaces
Hawker Hurricane MkIV 20 SQN Royal Air Force. Burma 1944
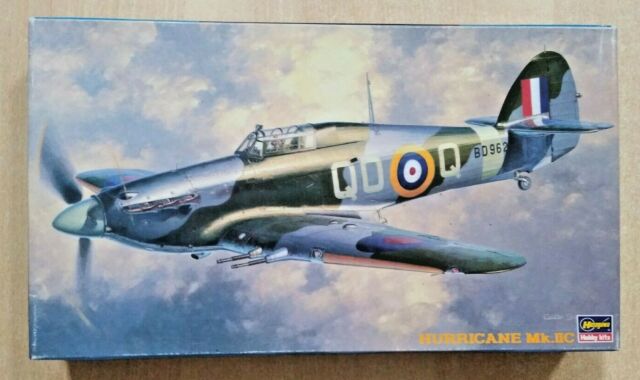
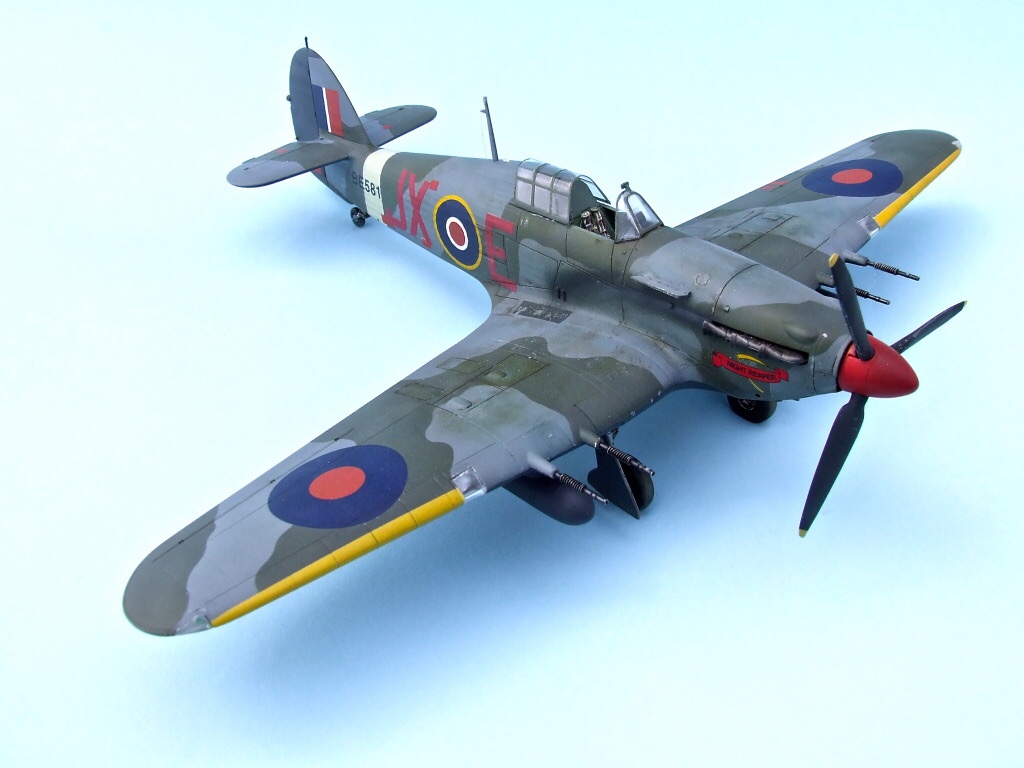
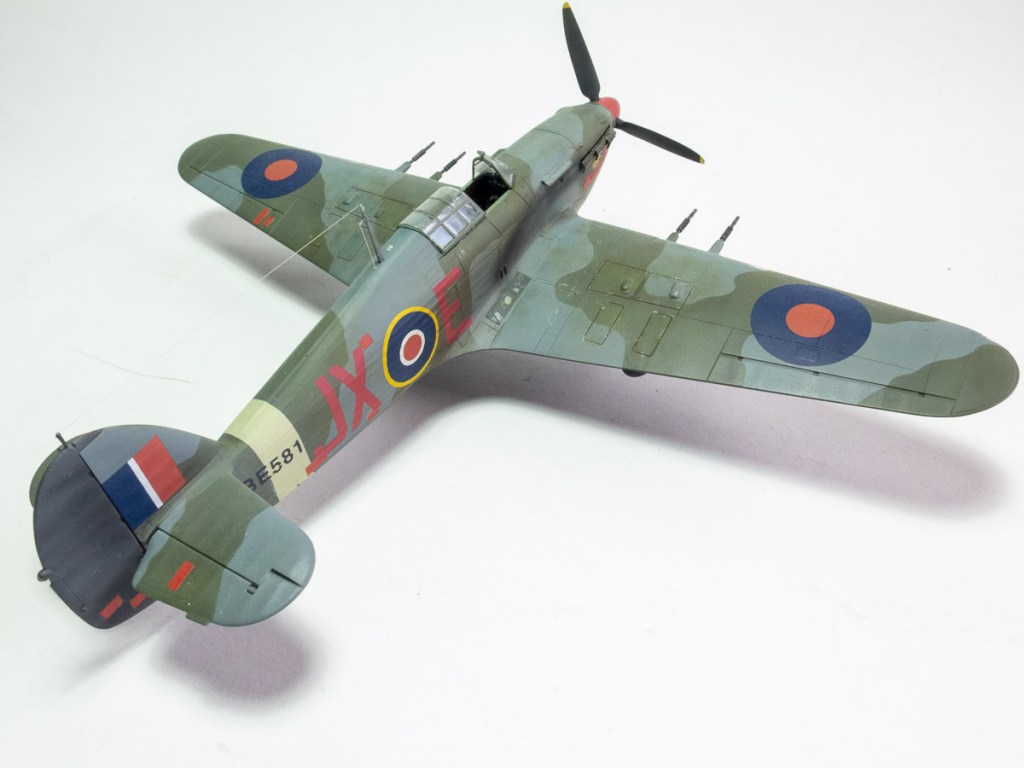
The Hurricane has to rate as one of my favourite WW2 aeroplanes. At the time it was released, hasegawa’s was probably the pick of the bunch. It did have some inaccuracies, the fabric effect was a bit too pronounced and assembly was made unnecessarily complicated by the underside, fuselage wing join being straight through the middle of the fabric detail. Totally bizarre engineering from Hasegawa. That said, its finesse and crispness of detail was light years ahead of the Monogram and Hobbycraft kits, those being the only other players on the 48 scale Hurricane field. Although the monogram kit could be built as a IID and a IV with rockets which was totally cool.
As a child I can remember building the ancient Frog kit in these markings. Who can forget that box art of Kuttlewascher blasting over the burning German hangars? So doing this kit in these markings is an ode to that original Hurricane I did long ago.
The decals came from a Sky decals sheet, with me sourcing the red dope repair patches from an old Monogram Hurricane sheet, which also came with these markings.
Paint would have been xtracolour, which was my go to paint for many years, until the Dangerous Goods Code imposed by Air carriers meant it could no longer be sourced here on shop shelves.
Hawker Hurricane Mk IIc 1 SQN Royal Air Force. Redhill. U.K 1942