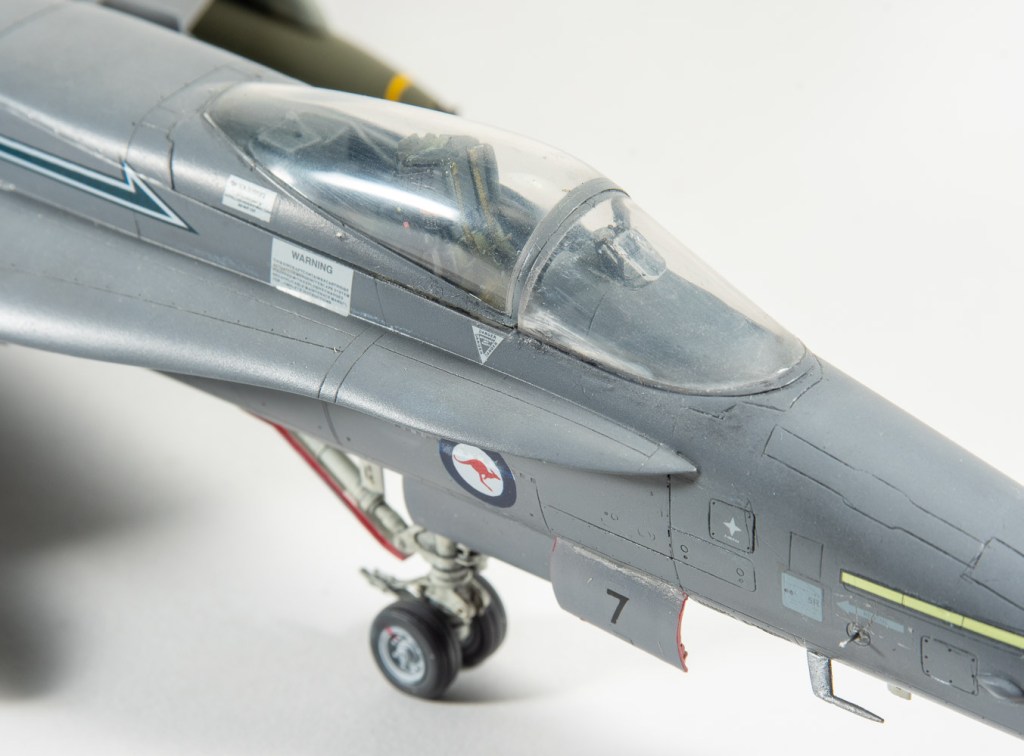
Kinetic 1/48 C.A.C Mirage IIIO

  • Date Completed;  December 2017
  • Aftermarket Used: Eduard interior set, Seat-Pavla MB4, Pitot tube- master barrel. Stores-PJ productions PM3 bomb rack, Hasegawa bombs, Wheels-Resin art
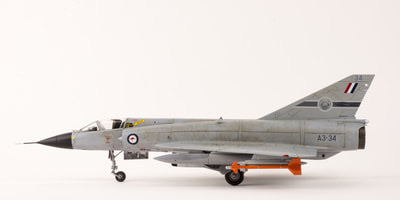
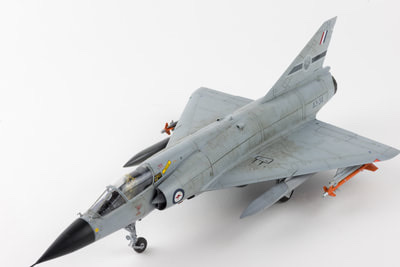
  • Decals: Caracal Mirages over Australia

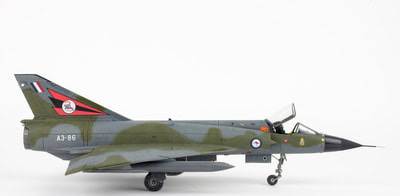
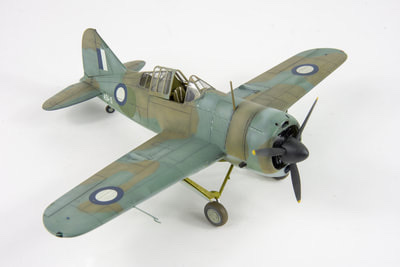
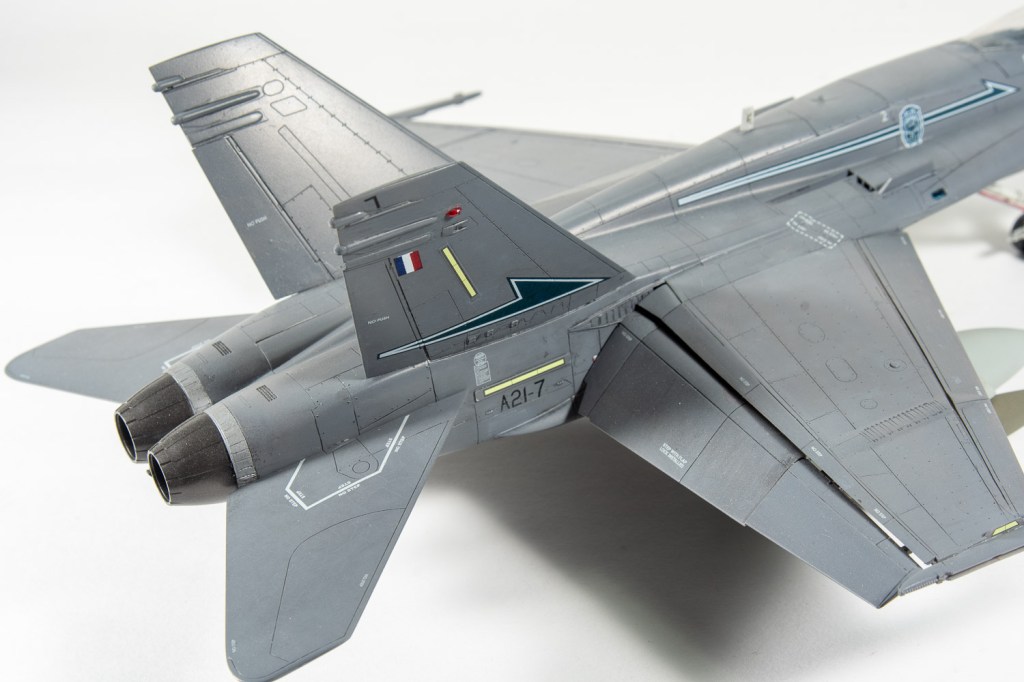
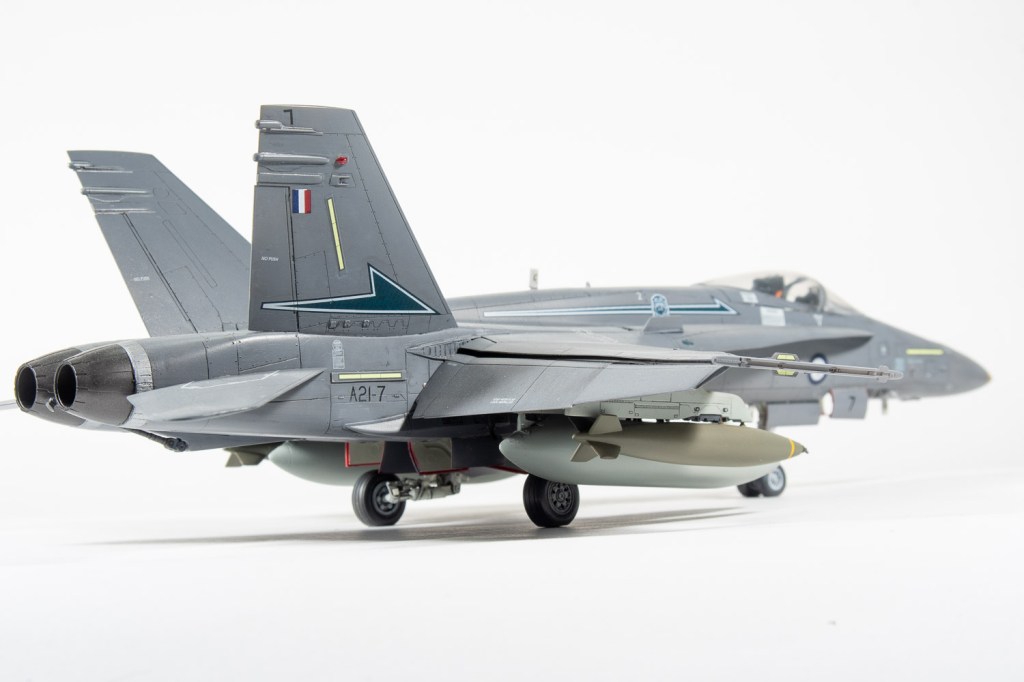
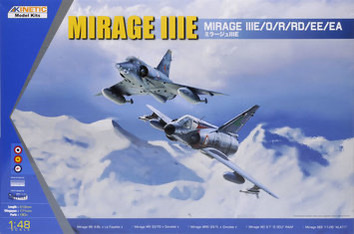
The Mirage holds a favourite place in the hearts of many Australian Aircraft modellers, so there was much rejoicing when Kinetic announced they were releasing this kit.  Although in my opinion,  it renders the Heller and Italeri kits obsolete, moulding is a little soft and the fit is not the best. 
There is still room for the definitive kit out there. 
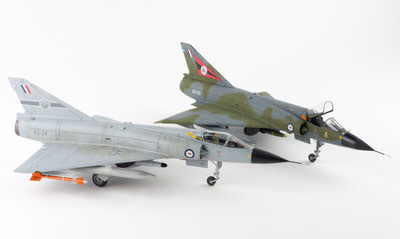
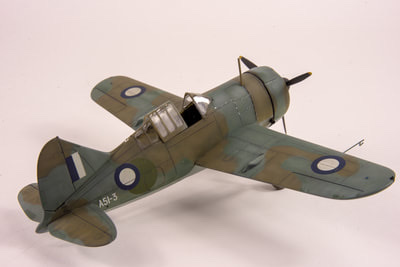
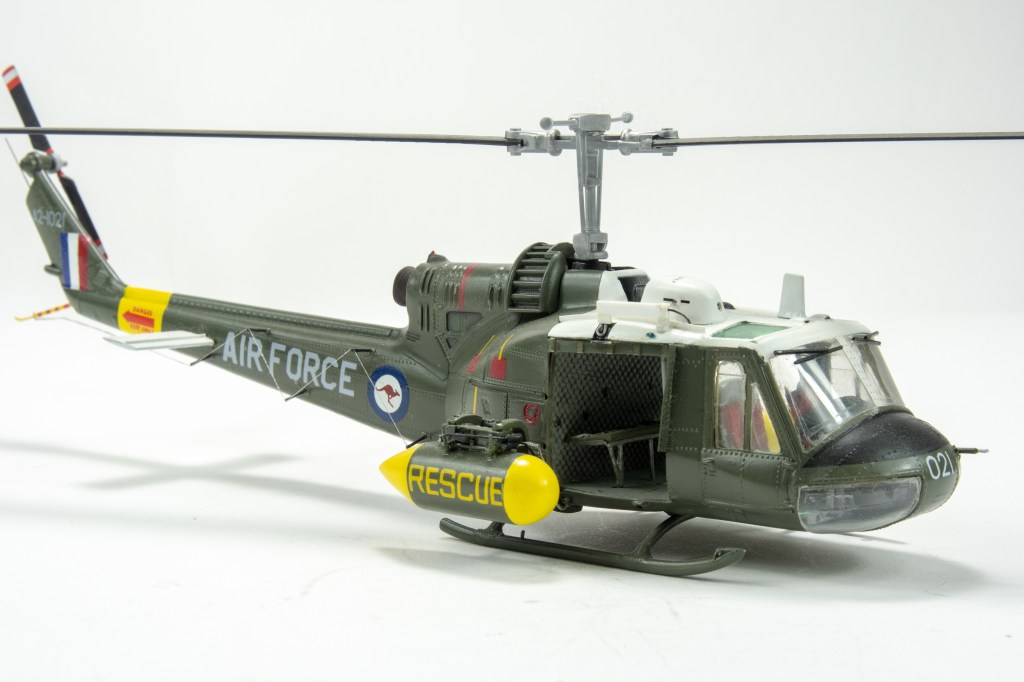
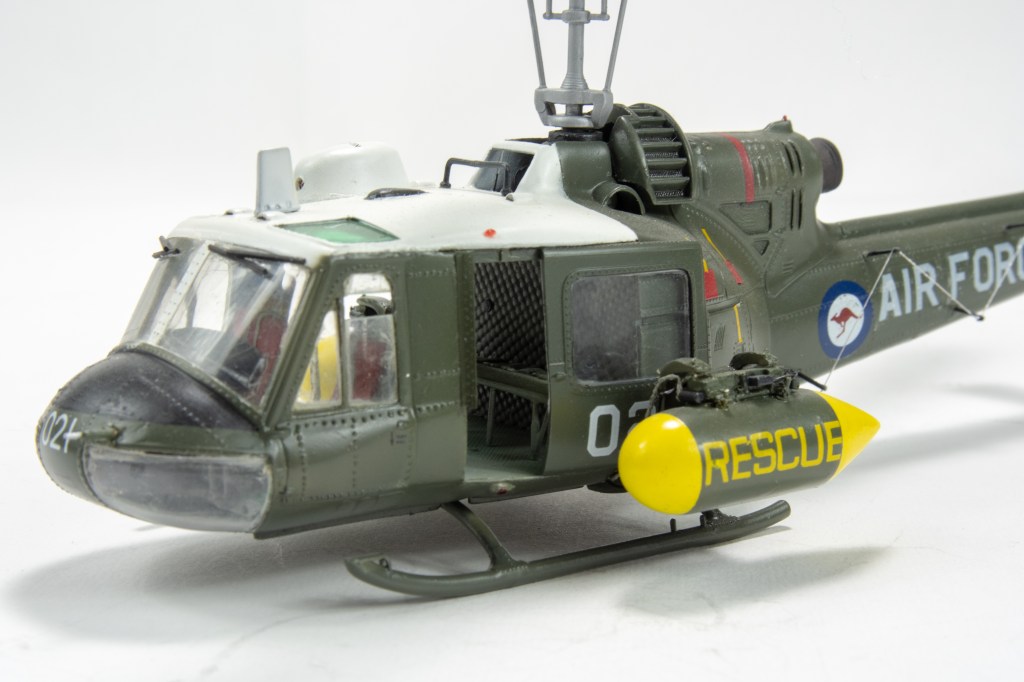
Two of my friends and I decided to build this kit as a challenge build to get judged at a show.  the winner gets to pick the next subject.  At least I finished this one, the last build – the Kittyhawk Jaguar- is still languishing in its box with broken u/c.  In a fit of insanity, I decided to build all three kinetic mirages in my stash.  two single seaters and a trainer, the trainer still needing to be finished as I’m a little “miraged out” at the moment.  The kit goes together quickly enough, but there are several traps  awaiting the unwary, and the moulding is quite poor for a kit released in 2015, mine having many sink marks and a lot of flash. OOB, the nose gear also has a little bit of an exaggerated backward rake.
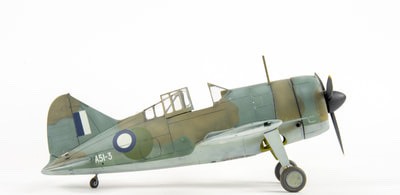
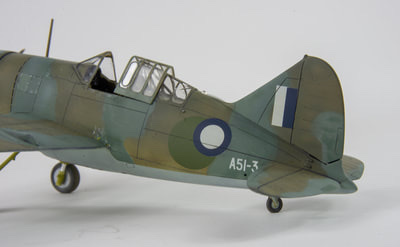
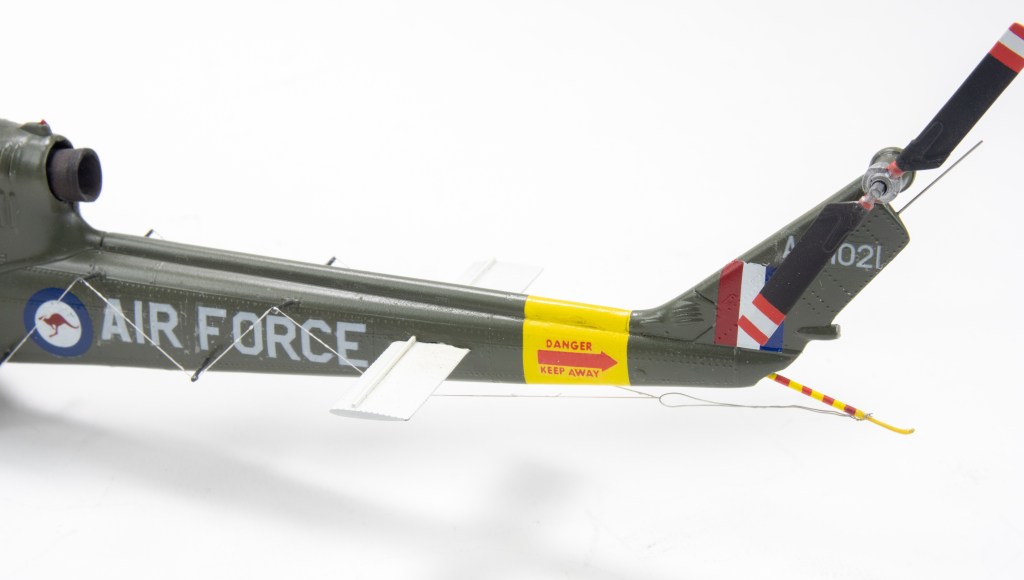
With the two Caracal sheets, you can pretty much make any mirage in the RAAF fleet, wearing any of the many schemes it wore during its service life
 I found though, the caracal tail bands needed trimming for a better fit, and the blue in the roundels and fin flash is too vivid. 
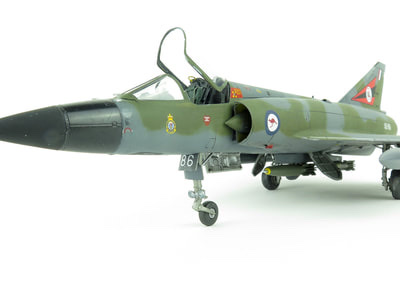
Ronin Graphics also do a couple of very comprehensive sheets, that also allow you to build a few of the commemorative schemes.
In fact there  is a fair bit of AM around for this kit
And the winner of the challenge build?  Well, all three of us never managed to get to the show!
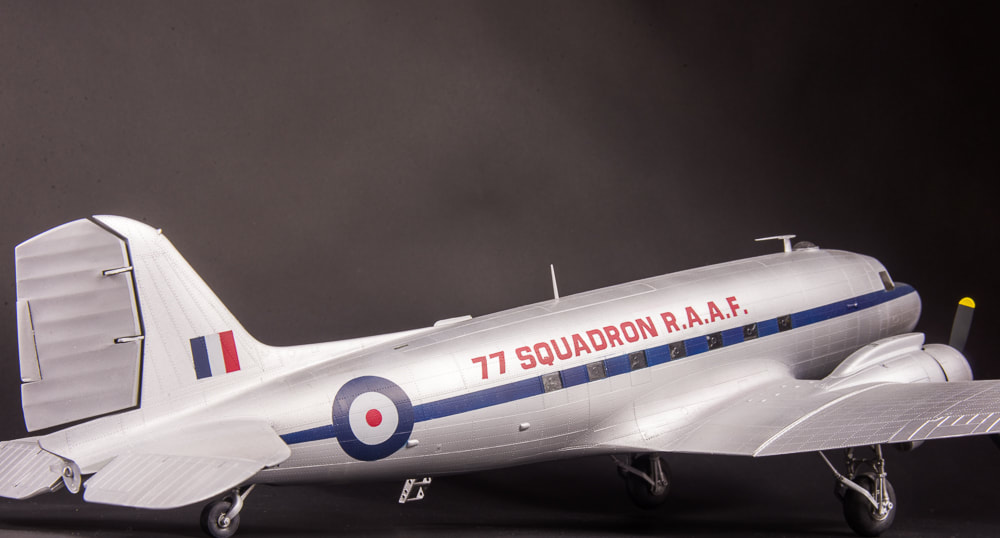
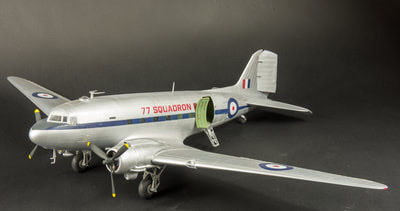
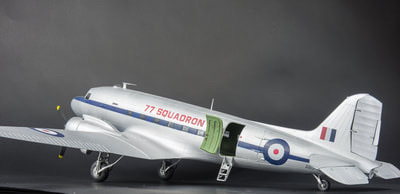
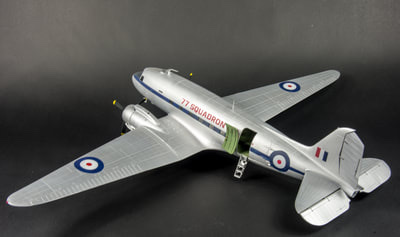
C.A.C Mirage IIIO(A) 3 SQN. Butterworth. Malaya. R.A.A F

Hasegawa 1/48 P-40E Kittyhawk

  • Built:   2016
  •   Ultracast P-40 seat
  •   Ultracast P-40 Block tread wheels
  •   Ultracast P-40 Tubular exhausts

Decals:            Combination of Cutting Edge Pyn Up and Aussie decals

​Hasegawa’s P-40 series seems to be one of those kits modellers either love or hate 
 Flick through any of the fora and you will find modellers that rate it as a horrible fitting kit through to other modellers that have had no fit problems at all.  It does require care in assembly – like any kit – but I found mine went together reasonably well with only a small amount of iller needed around the gun ports and fuselage.  To be honest, I found the Cutting Edge decals a real disappointment, thick and reluctant to conform to recessed details.  The nose art decals, although very thin, were not sharply printed.  I dare say though printing technology has improved since these decals were first released.

Curtiss P-40 E-CE Kittyhawk

A.M.T 1/48 Douglas A-20C

  • Built: 2014
  • Aftermarket Used: Master barrel brass gun barrels, RedRoo Models tropical cowls, Vector corrected control surfaces, MDC main wheels.
  • Decals: RedRoo Models

The second of a parallel Boston build, This one was finished as a RAAF machine. All the comments from my first Boston Build apply here too, including the spindly landing gear.

Douglas A-20C 22 SQN Royal Australian Air Force .

Goodenough Island New Guinea 1942

Tamiya 1/32 Supermarine Spitfire MkVIII


Date Completed:2015
Aftermarket:  barracuda Starboard cockpit sidewall. Barracuda Spitfire Block tread Wheels
Decals: Victory Productions Commonwealth Spitfire Aces

This Tamiya kit lived up to all the hype about it, which is just what I needed after coming out the other end of a mojo drought.  I didn’t bother with the engine, knowing it would slow the build down.  Rather than opting for the kit shark mouth scheme, I went for something different choosing Group Captain Clive Caldwell’s machine.  Codes and unit markings were from Victory Productions Spitfire Aces sheet, whilst all national markings were painted. A real joy from start to finish.
In retrospect though, I lightened the dark earth a little too much, so it doesn’t quite capture the darker looking camouflage of our spitfires. 

Spitfire MkVIII 80 Wing Royal Australian Air Force. Moritai. 1944

Special Hobby 1/48 Brewster Model 339 Buffalo

  • Built: 2014
  • Aftermarket Used: Nil. OOB
  • Decals: Kit

The second part of my double Buffalo build. Like the other build, this one also went together quite effortlessly.

To paint it I used the then popular “black base” technique. I remember not liking it that much as I didn’t think it gave you a lot of range with the colours. The colours on this were all lightened considerably to portray a faded machine that had been operating under a blazing hot Northern Territory sun.

Extracolour paints were again used from my now diminishing supply.

I think this one turned out better than the U.S one I completed just prior.

Brewster Buffalo. 1 P.R.U SQN Royal Australian Air Force. Hughes Air Base.N.T 1942

Trumpeter 1/48 Douglas C-47 Dakota

Date Completed: 2014
Aftermarket used: Quickboost rudder and corrected cowlings
Decals  Not decals at all, but masks from Mal’s Miracle Masks


Trumpeter’s Dakota gets cast as inferior to Monogram’s ancient model in  some quarters.  I built the monogram one as a kid and   found the Trumpeter kit  light years ahead in fit, detail and engineering.  Ok, there are some accuracy issues, the rudder is riveted where it should be fabric covered, the cowlings are based on the soviet copycat aircraft and the sit of the aircraft is not quite correct but these can be fixed with aftermarket items.  I just love all the riveting on the kit which you really need on a kit this size.  Mine was built for a Korean war GB on Britmodeller.com.  Th year had started off with several failed builds, so this one reaching the finish line was very satisfying indeed
I left the wings removable to ease transport, which leaves slight gaps, maybe this is why it has received no love at competitions, plus I have modelled it clean with no weathering whatsoever.
I increased the height of the undercarriage by adding plastic block spacers to the locators in the cowlings so the aircraft nose points up more.  The drag links were lengthened with rod.
This was the first time I painted national markings on using masks.  I got Mal Mayfield to cut masks from a Hawkeye decal sheet.  I impressed myself with how easy painting the roundels was, and determined to go this route on all of my future larger builds.  There is some conjecture over whether the cheat line was red or blue.  I opted for blue after seeking answers on Aussie Modeller International on-line forum

​C-47B Dakota 77 SQN  Royal Australian Air Force Korea 1952


Hasegawa 1/48 F-18A Hornet

  • Built: 2012
  • Aftermarket Used:
  • Decals: Hawkeye Australia
  • Bomb: Hasegawa Weapons set

Theres not too much I can remember about this build, being as Im writing it up about ten years after completion. The gunship grey scheme the RAAF trialled appealed to me, and I thought it would make the jet stand out from all the other Aussie hornets you see.

In fact the jet standing out is why the RAAF did not go ahead with the scheme

Decals are Hawkeye decals which, although quite thick performed adequately. There are much better decals on the market now, although up to date markings for RAAF “Classic” remain rarer than hens teeth.

For some reason, even our own Australian decal manufactures can not come up with a decent decal sheet. The long OOP Afterburner sheet remaining the best out there still.

This model no longer remains ion my collection having been sold off in 2021. I will replace it with a hopefully better RAAF Classic Hornet build sometime in the future.

McDonnell Douglas F-18A Hornet 77SQN R.A.A.F Williamtown Australia

Revell 1/48 UH-1B


This image has an empty alt attribute; its file name is 5e5ea59c-8674-467c-aaf6-4df45a534280_4_5005_c.jpeg
 
 
  • Built: 2010
  • Aftermarket Used: Hamilton Hobbies UH-1B conversion
  • Decals: Custom made
Add block
 
The short bodied Hueys have been woefully represented in 48 scale, with still no decent kit available.  The best of a bad bunch being the Monogram boxing, in its various boxings, which is the basis of this model.  As a young Air Training Corps cadet, this helicopter gave me my first ride in a military aircraft, and what a ride it was.  Based at RAAF Base Pearce as part of their SAR flight, in the mid seventies they were crewed by pilots and crewmen who had seen service in the recently ended Vietnam war, and boy, did they give us rides to remember.  I loved every minute of it and it started a love affair with helicopters, even though I don’t model a lot of them.
Out of the box, the monogram (although it is now boxed by revell) Huey C is a mix of B and C features, which need correcting.  As I was not building this as a gunship, I started off by cutting off the integrally moulded ammo box from the floor and filling the gap with plastic card.  The rear bulkhead is detailed with a curtain, that also got shaved off before the sound proof quilting was restored with embossed tin foil.  New scratchbuilt unarmoured pilot seats replaced the armoured kit seats.
Sealing the fuselage halves up –  not a great fit-  attention turned to the roof. where a bit of rectangular stock was used for the hoist arm.  The motor housing came from Hamilton Hobbies. A local producer of home made resin conversions for ADF aircraft. Although a bit rudimentary at times they were a godsend for modellers of ADF aircraft. The roof also had the airvents repositioned to their proper locations.  The kit pylons were used to hang the Kellett tanks from.  Ryan Hamilton again doing the hard work for me by providing the tanks in his detail set. Copper wire was used for the fuel lines that run from the tanks to the airframe
 The rotor head and blades came ftom an ESCI Huey 1D, the blades having been cut down to the shorter B length.  This assembly replacing the kits C type rotor head and wide chord blades, which were not used on the B model.  Finally, the model could be painted using Xtracolour olive drab and white with yellow trim on the tanks.  Speaking of yellow, I must have bought every sheet of yellow lettering available trying to source correct font and size for the RESCUE titles, without success, same with the AIR FORCE titles on the boom.  There was no other option, but to get custom decals made.  These cost me a small fortune, thanks to the manufacturer not using paypal or CC, so I had to transfer the money using Western Union.  This aside the finished items semed to match my photos of the real machine exactly, however they were translucent when applied, probably having been ALPS printed.  The Air Force titles have been built up with two layers to produce opaque lettering which still looks light grey rather than white.  White underlays were supplied for the tanks yellow titles, but for some strange reason, were differently sized from the yellow lettering.  In the end Ryan Hamilton came to my rescue (pun intended) with some decent yellow RESCUE titles.  All that was left to do was add the rear aerial from brass wire and EZ line and she was done.  Looking at the photos, you can make out it is well below my best work, but I just cannot bring myself to retire it yet.  Perhaps because of the memories it brings back to me.  It is definitely a model I will revisit once someone releases a decent B model in 35th scale.  Ronin Decals of Australia hopefully will release his long promised Huey history sheet in 35 scale as well EDIT, still has not been released as of 2021.

Bell UH-1B SAR Flight 2 Flying Training School. Royal Australian Air Force. Pearce. West Australia 1977