Hasegawa 1/48 B6N2 Tenzan

  • Purchased; 2023
  • Completed: 2025
  • Enhancements: OOB
  • Decals: Myk-Design

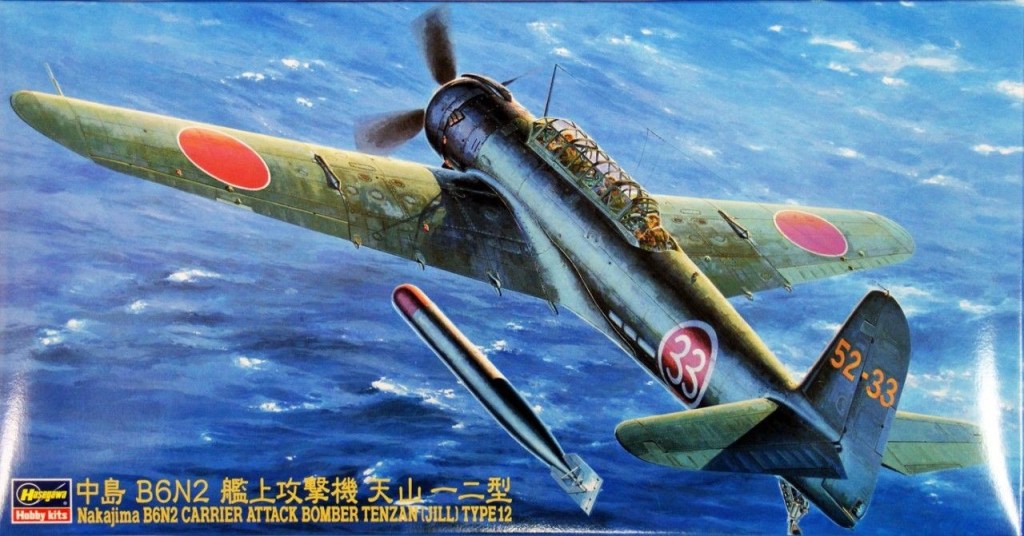
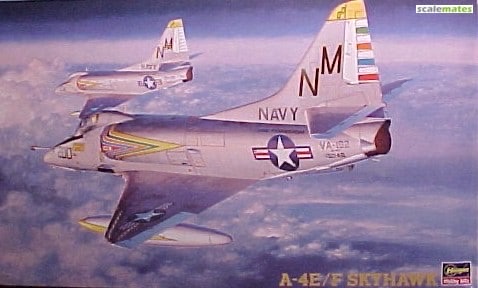
For modellers that first built these kits upon their release, there is something comforting about returning to a Hasegawa kit, many years later. Yes, far better examples of their subjects can be found in other manufacturers ranges these days. However, there is still that wonderful emotive box art by Shigeo Koike. Those nicely moulded grey parts with their sharp, but shallow engraved panel lines the crisp detail, and, for the most part, a fairly uncomplicated build. Of course, there were also the odd fit issue, the not-quite-white decals, sometimes vague instructions, and not-quite-crystal-clear transparencies. The builds were usually very enjoyable, albeit the models could be a bit bland, Hasegawa not generally offering options for open hatches or separate control surfaces to give your model a bit of individuality.

Construction Notes

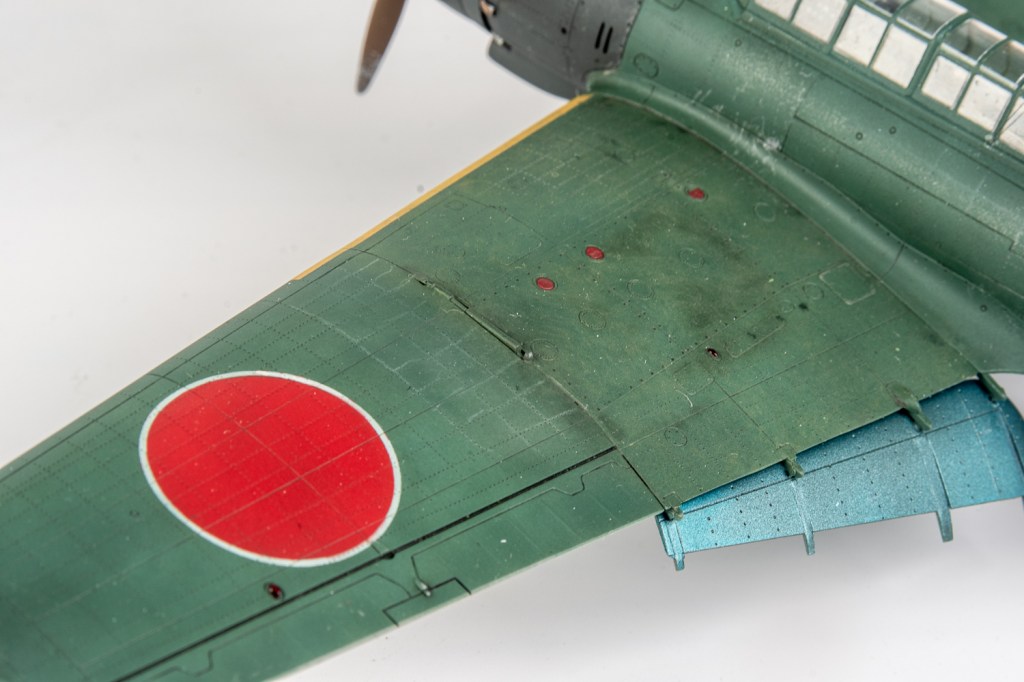
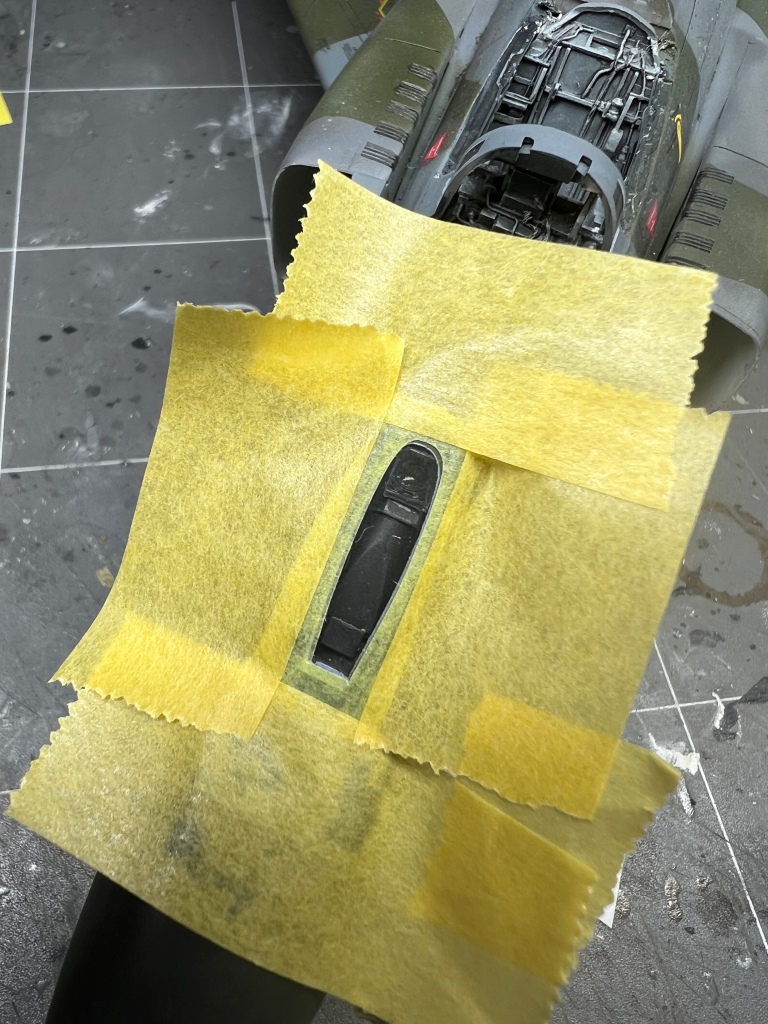
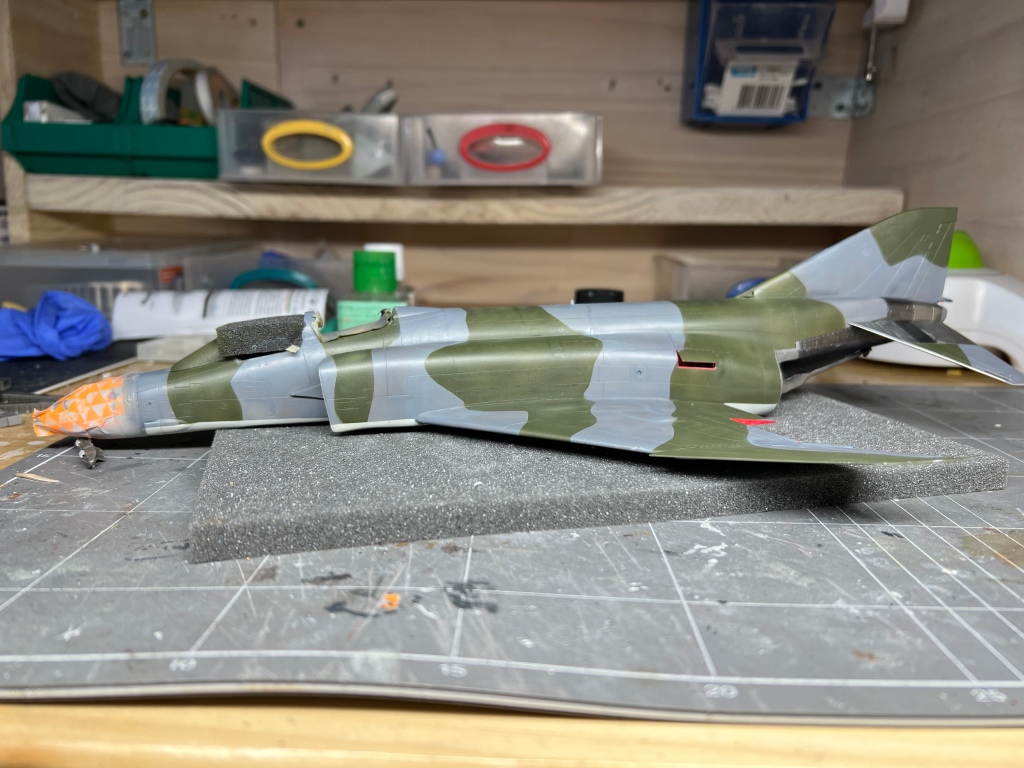
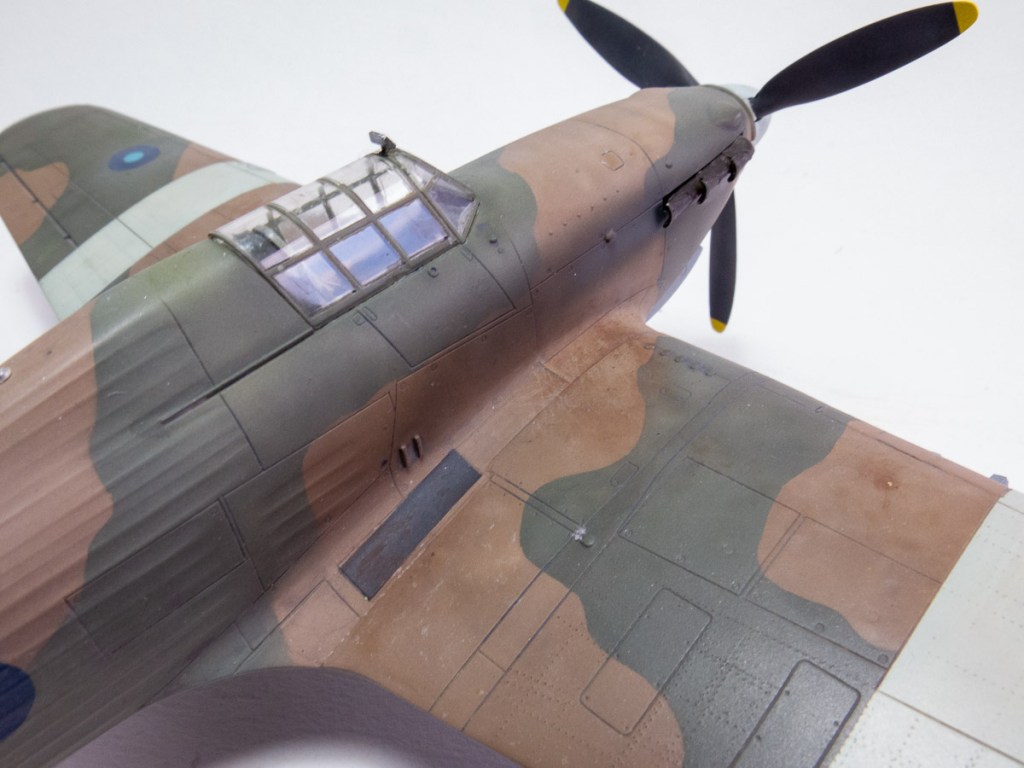
And so we come to Hasegawa’s Tenzan. It is a fitting end to my year’s builds. This one was going to be purely built from the box. It serves as a pause from my other sometimes long and protracted builds. The complication (there’s always a complication!) added by me was the decision to rivet the surfaces to add a bit of “busyness” to the airframe. To be fair, this wasn’t that much of a complication. It involves finding suitable drawings that show the rivet details. In this case, the drawings come from a Kagero Top Drawings book. The next steps are scaling the drawing up and transcribing the lines onto the model. A riveting tool is then used to push the rivets into the plastic. Search YouTube for “The Model Guy” who has a video of how to do it step by step. I couldn’t post the video here for some reason. After the riveting was completed, a black wash was run into all the rivets and panel lines to assess them. there were a few wonky lines! And as a friend mentioned there should also be river lines alongside all the panel lines as well.

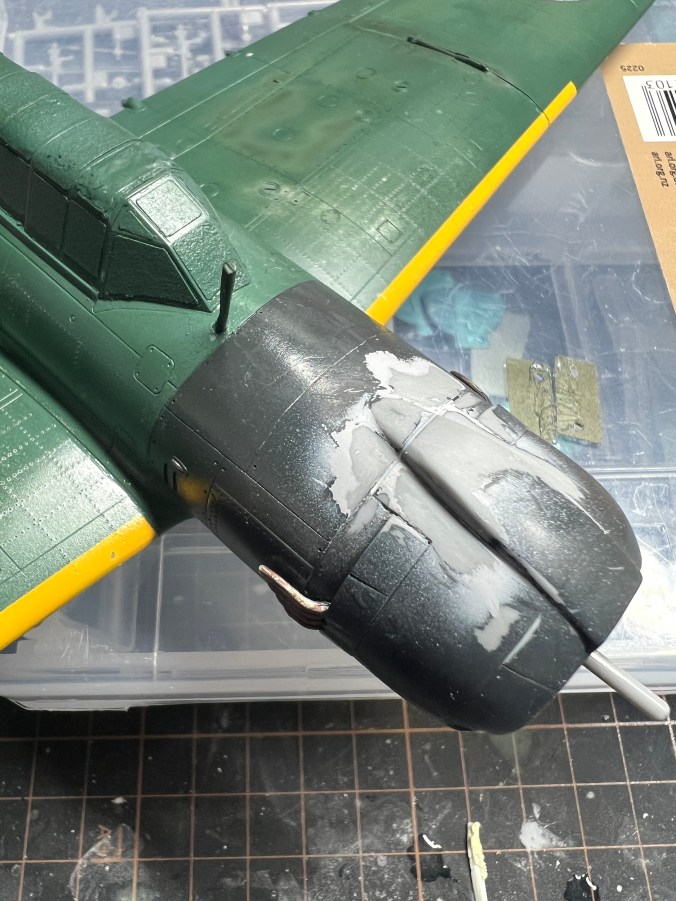
The actual build proceeded with few real issues. There was a gap when joining the front cowling to the rear cowling, despite all the parts being lined up correctly. Talking to other modellers who have built the kit, it’s a known issue. Plastic card took care of this. after the problem was discovered far too late in the build.

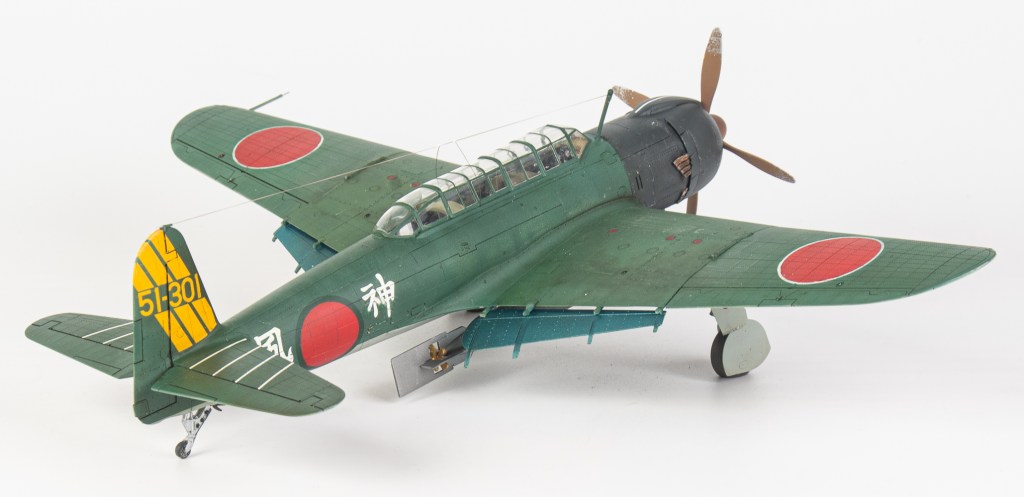
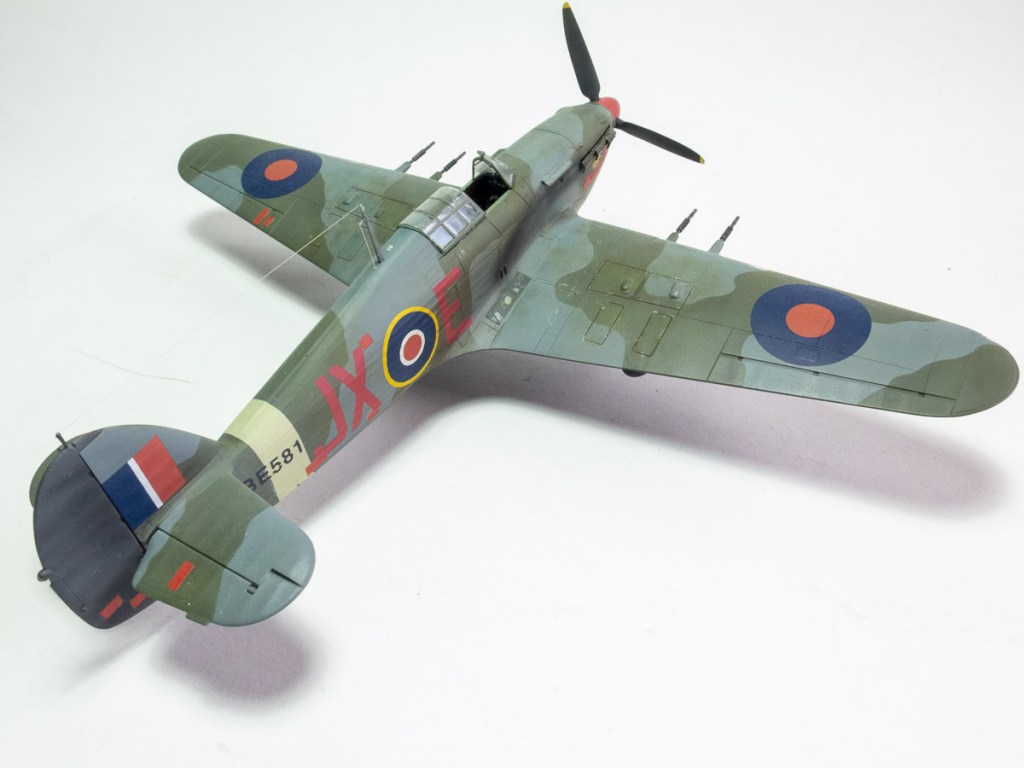
I would suggest adding the cockpit sidewalls to their respective fuselage halves rather than the floor as the instructions illustrate. I found building the kit as per instructions, my sidewalls sat a bit proud from the cockpit sills. The kit includes the option of folded or extended wings. Poly caps hold the wings in either position. This allows the modeller to change the attitude of the kit, even after completion. I thought I was smarter than Hasegawa and left their wing ribs out choosing to reinforce the wings with plastic strip. Turns out I’m not smarter than Hasegawa though, as the floppy wingtips prove!

Painting and Decalling

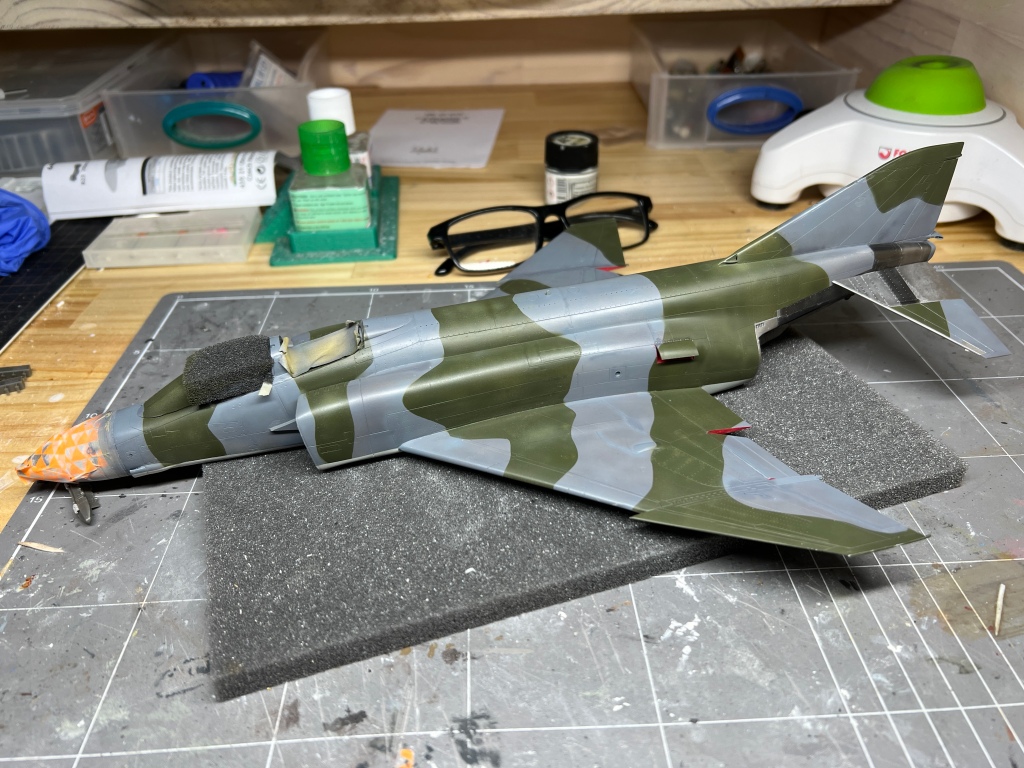
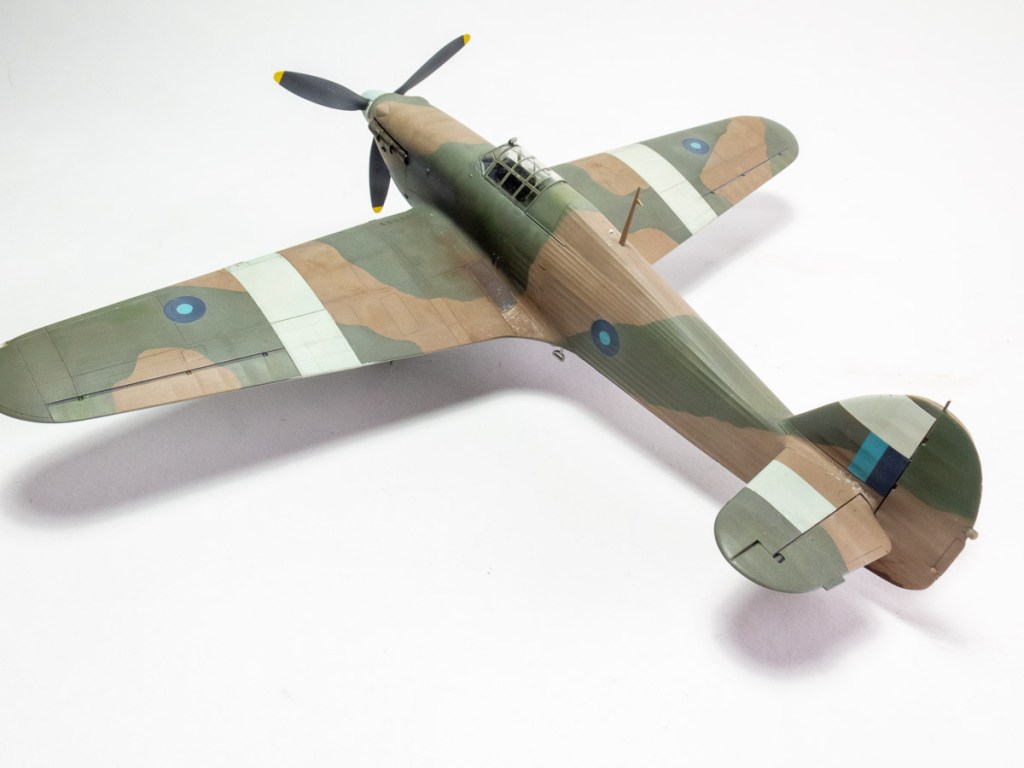
MRP Super silver was first laid down on the centre section of the wings and fuselage. The next coat to follow was a lightened version of Tamiya IJN followed by another application, this time straight from the jar. All paints were thinned with Mr Hobby thinner.

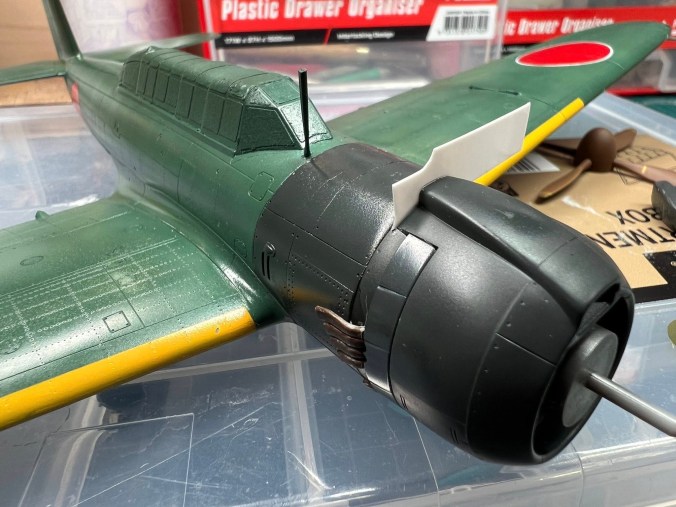
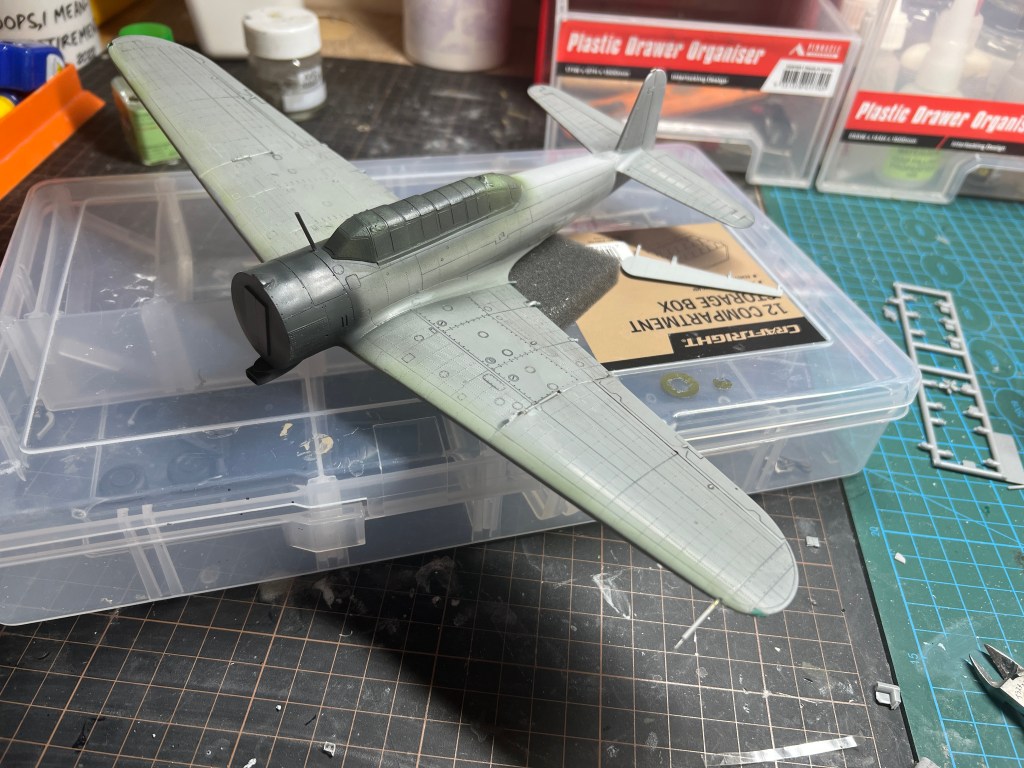
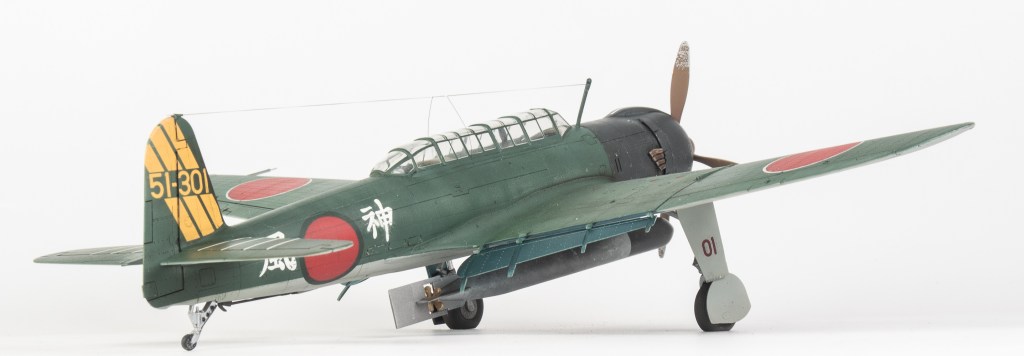
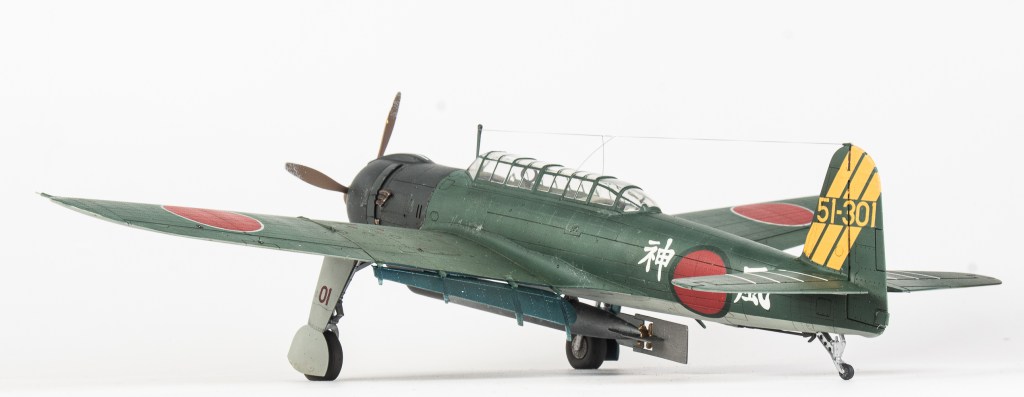
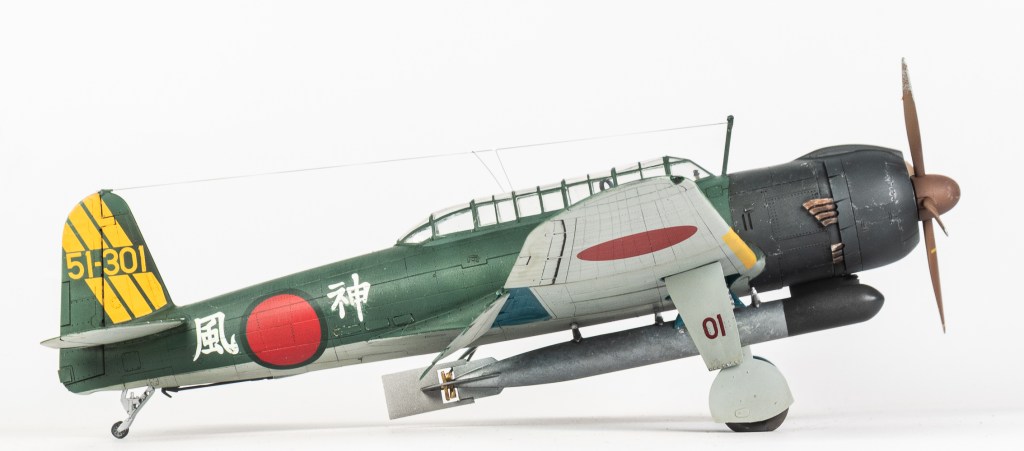
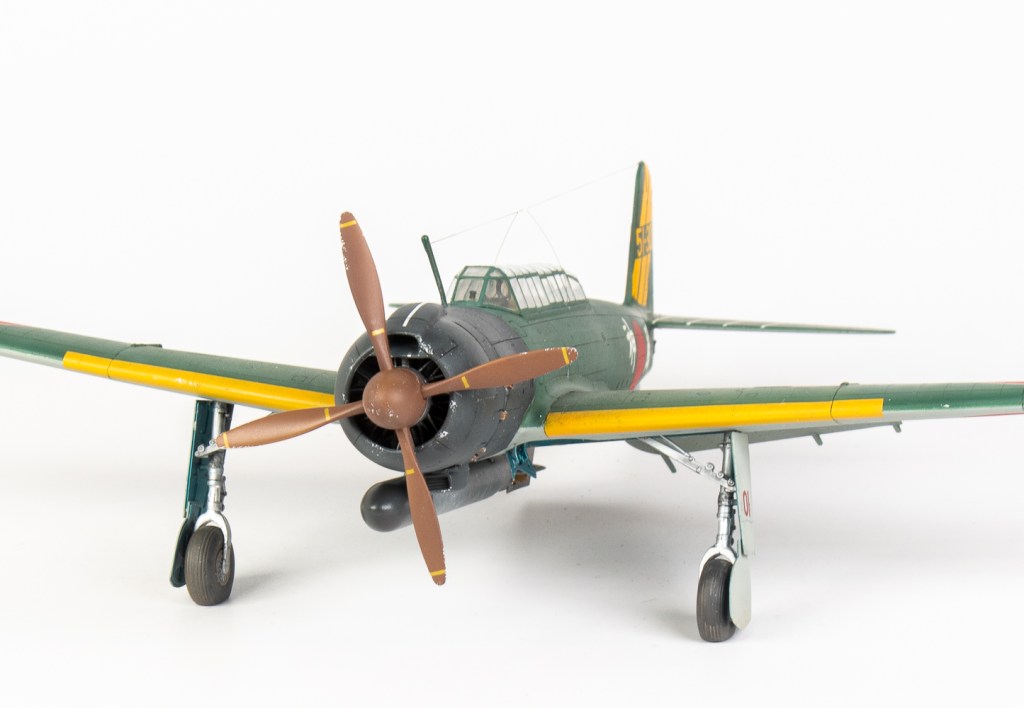
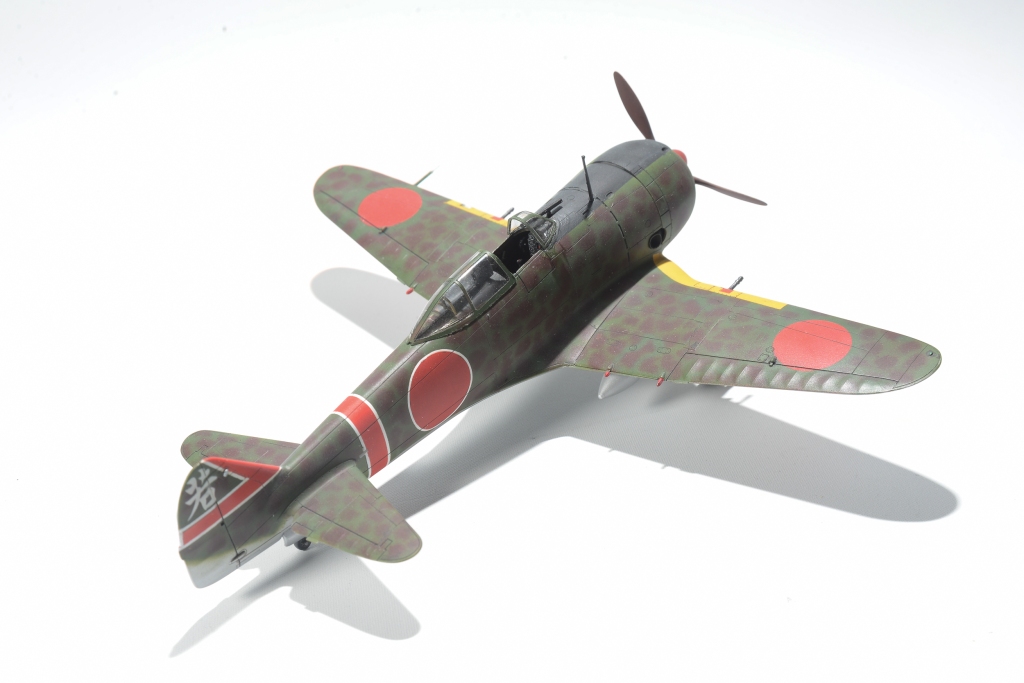
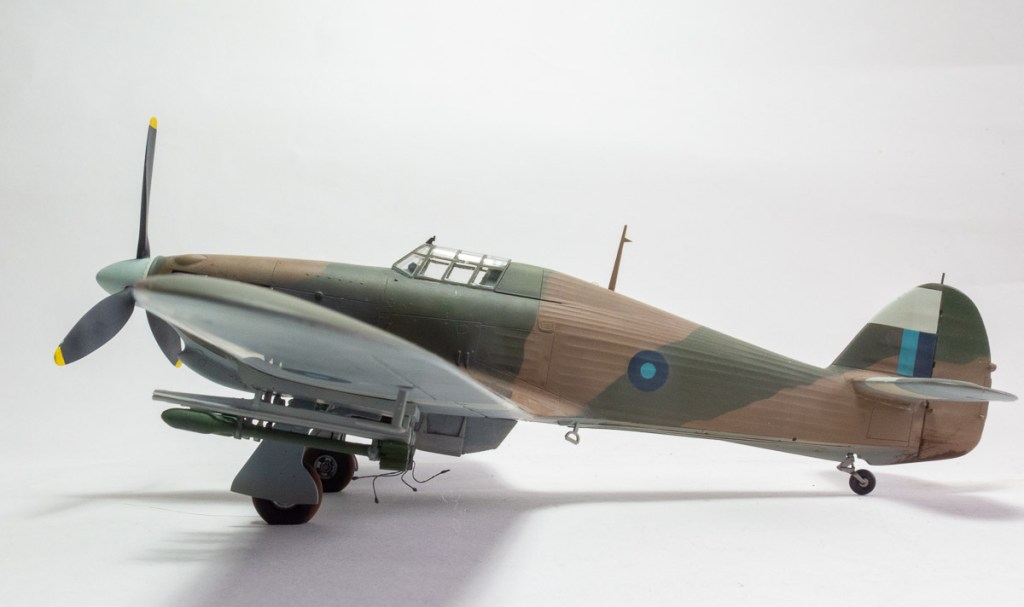
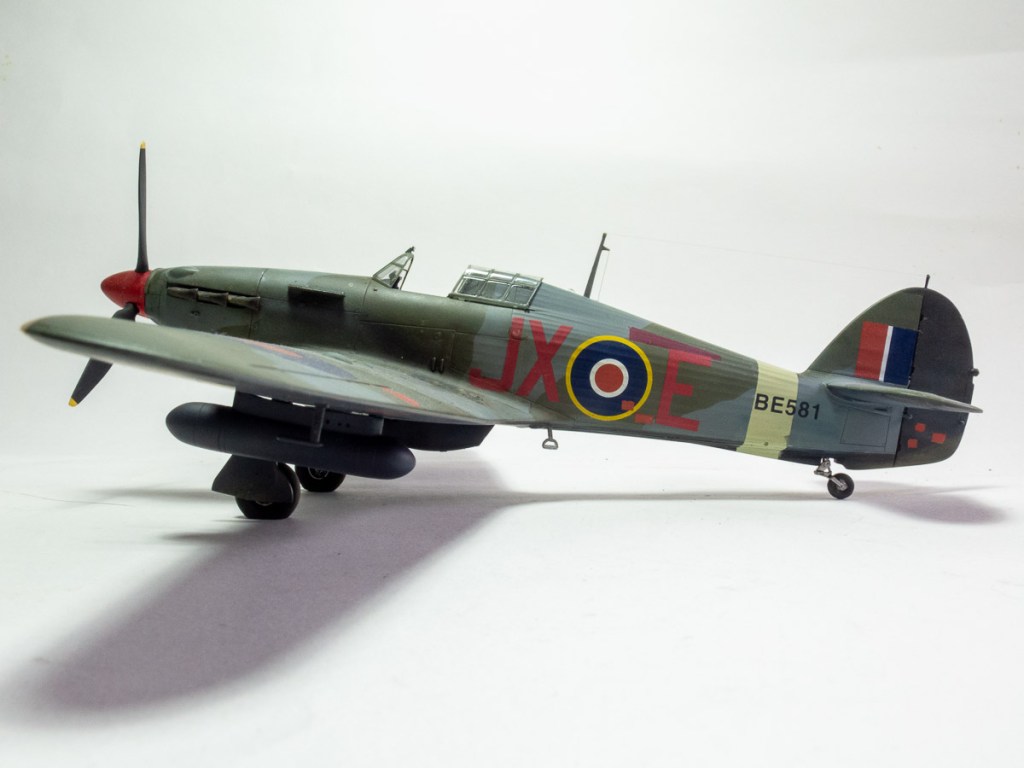
Undersides were SMS Storm Grey, which is a grey with a slight tinge of green in it. I think it does a reasonable job of standing in for IJN Grey, of which I had none. Once the colours were set, a small worn piece of 800 grit wet and dry was used. This gently abraded the inner wings, just enough to allow the rivets to show through. While researching the unit’s history, I found out they were ferried to Truk Island and only flew a couple of missions after arriving before being wiped out. Thus my weathering on this aircraft is only slight. There is just some staining and touchups on the wings. Additionally, there is chipping around the cowling. None of the photos examined showed any sort of exhaust staining. Japanese contemporary photos are pretty much universally of poor quality though. Rather Ironic, really ! Speaking of the cowling, this was finished with SMS Blue Black, and the propeller with Tamiya Red Brown. Gunze Metallic Blue was used in the wheel and flap wells.

Decals were a brand called Myk-Design that I picked up whilst roaming hobby shops in Japan. The instructions are all in Japanese, but they do have a website with English instructions on how to apply. It was here that I discovered they had peelable film, like Eduard and HGW, Unlike Eduard though, the film on these is designed to be peeled off. They were applied over Mr Setter and left for 12 hours as per the instructions. The film peeled off very easily, , usually coming away in one big sheet. An oil wash mix using Abterlung dark green and black oil paint was applied to the upper surfaces with dark brown used on the undersides . The excess being wiped off before the final matt coat was applied.

Final Assembly

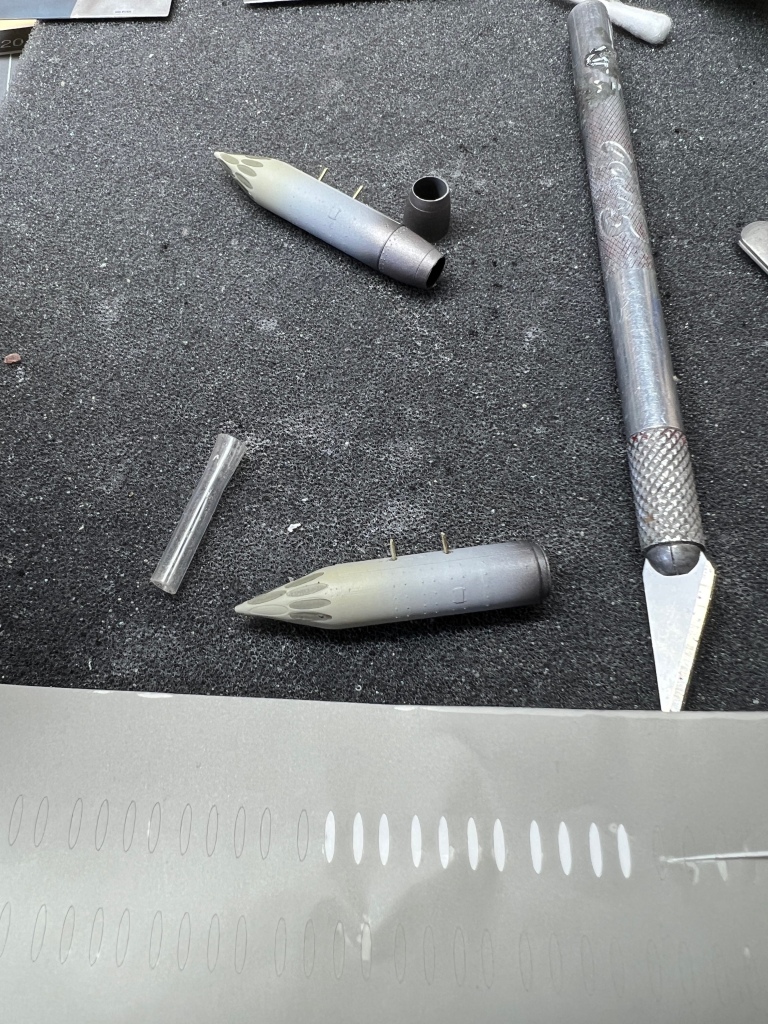
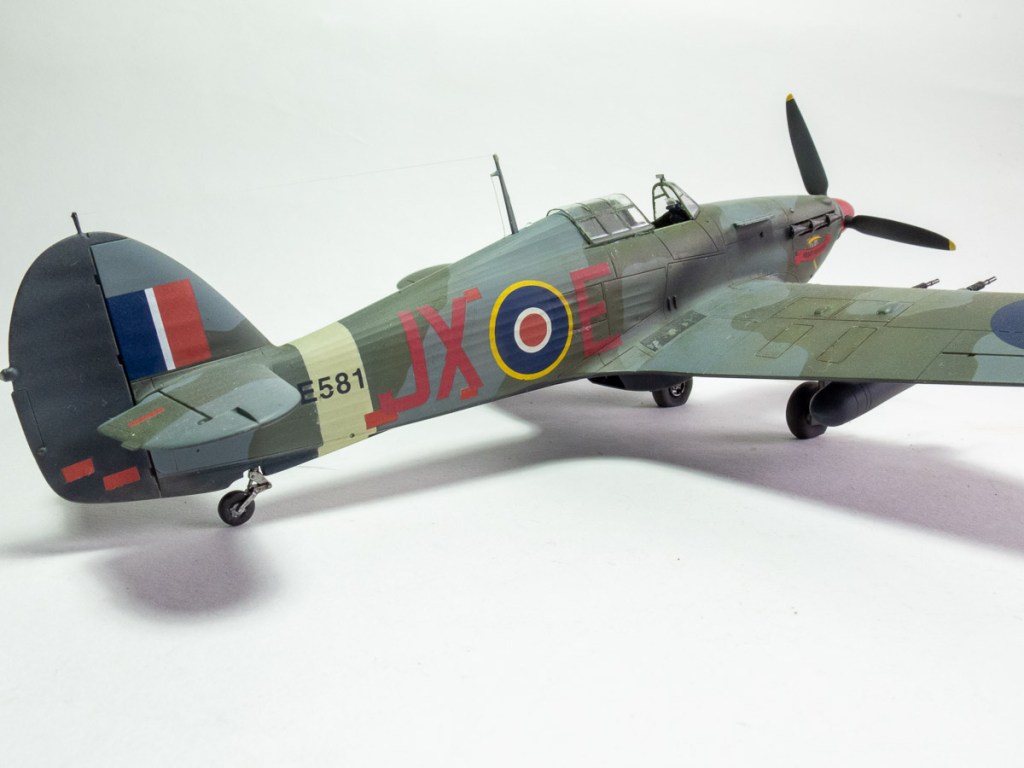
Somewhere along the way, the kit aerial mast was misplaced so a replacement was made from brass rod. It was filed to a rough aerofoil section before adding it to the model. The pitot tube was also fabricated from brass rod.. Whilst we are talking about fumbles, I also managed to glue the retraction struts to the wrong gear legs, and then snapped them off trying to remove them. In addition the locating holes for the gear doors were mistakenly filled as I thought they were ejector pin holes. I probably should have just built this as an in -flight model! Did I mention the gear door that I also managed to snap in half?

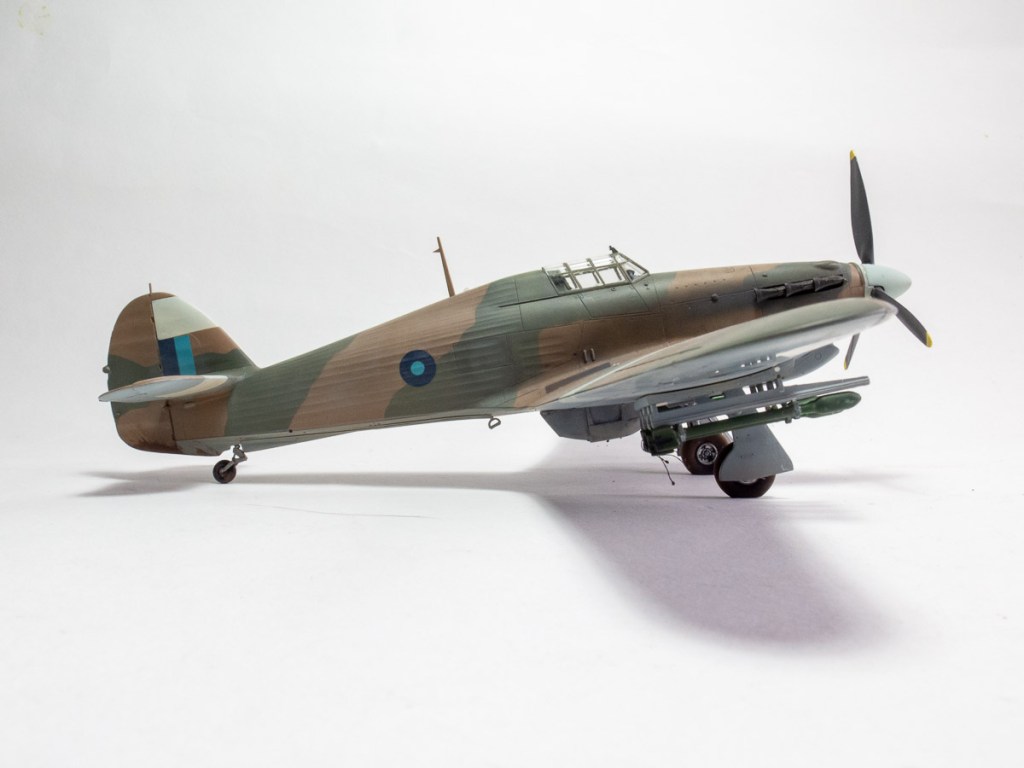
The included torpedo is one of the weaker parts of the kit, and a resin replacement was almost purchased before deciding it was going to be underneath, so not really visible. The kit part was therefore used. All these parts plug in due to Hasegawa’s copious use of poly caps as locating aids throughout the kit. In fact I don’t think Ive seen another aircraft kit that uses so many of the things, even Tamiya kits!

The antenna wire was EZ Line. My enthusiasm for this product though has started to wane. Its just too easy to introduce twists into the elastic, unless you reeeeeeaaaaaly stretch it out, which just puts undue stress on everything. Although in this case I had also glued a small length of micro tube to the top of the tail fin, The EZ line was just run through this and then glued in place

Conclusion

In the end, quite an enjoyable painfree build. Yes there are some compromises in detailing and paintwork, but I long ago reconciled myself to the fact that not every model built will be a showstopper. Its a compromise that needs to be made if you want your end game to be building as many models from your stash as you can, before you are forced to give up the hobby through age or medical issues.

To close, the Jill is quite a pretty aeroplane. There will be more Japanese builds in my future.

Nakajima B6N2 Tenzan. 251st Attack SQN. 551st Naval Flying Group. Imperial Japanese Navy. Chuuk Lagoon 1944

Hasegawa 1/48 Phantom FGR2

  • Acquired: 1988
  • Completed: 2023
  • Enhancements
  • Seats; Quickboost
  • Cockpit; Aires
  • Wheels; Reskit
  • Matra Pods; Reskit
  • Exhausts: Reskit
  • FOD covers; Quickboost and Two Mikes
  • Decals; Model Alliance RAF in Germany Part 1
  • Wing Tanks; Hypersonic
  • Triple Ejector Racks for Matras; Eduard Brassin
  • Ladders; LP Models

Up until completing this build 2023 had been a horror year for me modelling wise, with several kits started, but none completed.

The bin was the final repository for more than one of those builds that had not satisfied me.

Whether it was my recent retirement, the house move, the time taken setting up a new model room or a combination of all those factors playing with me, I found myself getting easily frustrated with builds that actually weren’t that bad, but to me had been ruined by some silly minor error on my part.

In an effort to reset, I decided to build the model that appeared first on m stash database, the venerable Hasegawa Phantom, even this was not without its setbacks, but this time I persevered through to completion. It may not be my finest work, but at least I have completed a model, which brings my total to 4 so far this year. Four! I built more when I was working full time.

This particular kit is the oldest kit in my stash, having been purchased in 1988 when it first appeared in Australian shops, its been packed, unpacked, placed on shelfs, shoved behind shelves, fallen down the back of shelves several times and the box bears the scars.

Opening the box revealed a fair bit of aftermarket had been purchased for it over the years. Even closer inspection showing I had at some stage made a start on the model, most likely soon after buying it, as that’s how I rolled then. Heady days indeed!

Wheel wells and undercarriage struts bore testament to my early airbrushing efforts where seemingly I blasted everything with thick underthinned paint at about 40 bar!

However what it did show me was my modelling has in fact improved greatly over the intervening years. If like me, you have long disposed of your early canon of work, it can be difficult to determine if you have indeed made great strides in modelling Looking at recent models in the cabinet sometimes only reveals incremental improvement. Looking at your amateurish attempts from 35 years ago certainly brings home the large improvements you have made in your modelling.

Construction Notes

The Aires cockpits are always incredibly detailed but have a reputation for being difficult to fit in just about all cases. That being the case with this one too, although I found it easier than some of their products. That was once I’d worked out what parts of the kit to remove. The instructions being virtually useless in this regard, save for the sage advice of “kit parts will need got be sanded”.

Eventually I worked out from studying the resin parts, the kit sills needed to go. The clue was the sill detail contained on the Aires part.

Still, the bottom of the resin cockpit floor and the top of the kit nose wheel well had to be sanded to within a mm of their life, before the cockpit would sit at the right height. Width wise though, not a lot of sanding needed to be done apart from removing the rudimentary side wall detail from the Hasegawa fuselage halves.

Stout plastic sheet locators were fabricated to hold it in place and the gaps between the sills and plastic fuselage sides filled with Milliput.

The rest of the kit went together remarkably well, minimal gaps at the intakes, a slightly wider gap at the front edge where the underside of the wing joins the nose was shimmed with plastic card which helped to minimise the filling. As the plan was to use FOD guards I could dispense with faffing around adding full intake trunking, although the abrupt end to the intakes trunking as hasegawa have moulded it is not a huge issue in my book, and can be minimised with some creative painting.

I say relatively well. There were complications but these were due to the kit missing a few parts due to the length of time it has been in my stash and the repeated packing and unpacking it has seen with various house moves. Here I have a friend, Ian Bevan who came to my rescue. If you are using the reskit exhausts, be forewarned you need to either shorten the rear of the flat area that forms the bottom of the fuselage halves or cut out openings to accept the extra length of the RESKIT exhaust tubes.

The spine just needed some panels and covers rescribed and she was pretty much ready for paint.

This model was always going to be in the classic cold war scheme – for me anyway- of grey/green/light grey camouflage they wore whilst employed in the strike role.

Gunze paints were used for the topside colours, AK Real Colours Light Aircraft Grey was employed on the underside due to it having a warmer tone, than Gunzes interpretation, which seemed to match my refs better

The Model Alliance decals were no problem. Stencils came from an Extradecals sheet for British Phantom stencils, and being printed by Microscale, also performed well, although Im not sure all the stencils on the sheet were applied to British Phantoms. The Xtradecal sheet was employed as the Hasegawa stencils had shown a propensity to break up when introduced to water.

Gunze gloss had been applied prior and post decal application followed by SMS Flat which gave the required sheen I was looking for. However the edges of all carrier film was still very visible, no silvering, but quite apparent edges. I have read where these lacquer clears can be too thin to hide decal carrier film edges. A coat of Testers Dullcote was applied, which hid all the carrier film, but also led to some frosting. Subsequent coats of SMS flat failed to bring back the sheen I wanted. Semi gloss should have been used in retrospect.

Later analysis showed this was the point where things started to go wrong!

My reference photos of this particular jet, (and here I need to mention Geoff Coughlin’s suburb e-book series) showed the jets from 17 SQN at this particular time to be fairly well looked after, with minimal weathering on top surfaces although the undersides were filthy. The jets at this stage being fairly new in squadron service.

To this end oils were used to impart heavy streaking and fluid loss. Speckling was also heavily employed to show the grime that would have been flicked up from wet runways.

For the loadout, I came across a photo in Double Ugly’s book on British Phantoms that showed a load of 3 MATRA Pods being carried on TERs. Hasegawa TERS from one of their weapon sets would be used, that is, until I screwed up drilling holes in them for brass pins, so Brassin TERS were used instead.

The whole drilling-tiny-holes-and-pinning-stores-to-pylons affair was incredibly frustrating. It didn’t help the hasegawa inboard pylons are an incredibly loose fit to the wing too.. The hypersonic tanks and pylons were trouble free and were a push fit.

With the Matra pods I also have to throw out a thanks to The Hamfisted Modeller for sending me the cut files for the frangible covers on the nose cones. The method is outlined in his build of the Kinetic Harrier

I did ask him to send me some skill too, but sadly , he had run out!

With the canopies, I found the Eduard PE canopy bow fascias just would not fit the canopy profiles. I should have just yanked them off, FGR2s of this era were only fitted with 2 mirrors so the centre one was cut off, Bizarre thing with the rear canopy, it had no hinges moulded on like the pilot canopy, a check of the FG! in the stash revealed that canopy also with no hinges.

Fault by Hasegawa maybe? Its marked as the standard F-4 Sprue, and all other Phantom sprues I have seen have been correctly moulded.

By this stage, as always happens with kits that aren’t going the way I envisaged, I began to take shortcuts and rush things as I really just wanted it off the bench. The next model will be wayyyyy better, right?

Therefore I didn’t bother with the full complement of RBF flags, so with the addition of the LP Ladders, I called it done.

Its not as good as I was hoping for, but Im pleased to have finally built the oldest model in my stash. There is the FG1 to build as well, but first a cheap Hasegawa Phantom will need to be sourced to replenish the parts I took from it to build this kit.

Hopefully Airfix see fit to release this iconic jet in 48 scale. The Hasegawa Phantom series have not aged as well as some of their other kits, the B/N, E, C/D and J all being rendered pretty much obsolete by newer kits from Meng and Zoukie Mura.

However, the Hasegawa kits remain the only Spey engined Phantoms in 48 scale to this day, and are still well sought after. They are still available on the second hand market as are the Revell reboxings for reasonable prices, well, here in Australia anyway.

Finally, Im not one for nostalgia kits or rebuilding kits from my youth, but this kit does have special meaning for me. Decades ago, it was purchased from a stalwart of the Perth modelling scene.,Tim Vickerage who owned a shop in Fremantle of which I forget the name, Modelcraft?

Tim was responsible for introducing me to Iwata airbrushes, Xtracolour paints and the model club scene. Tim sadly is no longer with us, so this build is dedicated to his memory.

Phantom FGR2 17 SQN. Royal Air Force RAF Bruggen Germany 1975

Leave a comment

Hasegawa 1/48 Nakajima Ki44 Tojo

  • Added to stash: 2022
  • Built: 2022
  • Enhancements: Seat belts- Eduard
  • Decals: Combination of kit and home made masks

There is not really much to say about the construction off this kit at all, it being virtually viceless

The model was purchased off Facebook along with the hasegawa Val, both fine examples of Hasegawa single engined Japanese WW2 aircraft dating from the early 2000s. Kits that have pretty much stood the test of time well, although some of the details could now be considered a bit clunky.

The only tweak made to the model was to insert a spreader bar of plastic to eliminate a wing root gap.

Aside from this, assembly was trouble free. The model was assembled with super glue in an effort to avoid ghost seams. The fact I still experienced some has left me on the fence about assembling kits with superglue. Certainly with this kit, it led to no advantage.

The intent behind this model was purely as a fun build and to test my airbrush skills whilst I waited for resin bits to arrive for my Meng Super Hornet build. As such, only PE seatbelts were added and I left it as a clean unweathered build. Given the simple shapes of the markings, the opportunity was taken to further learn how to use my silhouette machine. The decal sheet was scanned and the required decals traced out and cut from Oromask 810. This is certainly getting easier, the more I use the machine and software.

Undersides were painted in tamiya LP11 whilst upper surfaces were done using Mr Color nakajima green and a mix of tamiya acrylics to match the gunze colour “propeller colour” which is a dark brown. It took me two goes with my Iwata HP-C, the first being stripped back as the mottle did not look dense enough compared to the kit paint guide.

Yellow ID bands were gunze yellow with a bit of red added. Lastly the black anti glare panel was added before all the bits such as undercarriage, doors, tanks were glued on. Well, not all bits, the telescope sight managed to end up in that alternate universe a lot of plastic kit parts end up in. This necessitated a new one being made from some plastic rod and the windscreen being levered off to fit it. I never managed to get a clean fit on the windscreen again, so left it slightly wonky.

The Hasegawa Tojo was a fun little build. I didn’t get it done in the last week of my holidays as planned due to coming down with Covid, and its certainly not my best work, I mean look at that windscreen for gods sake! As a break from larger and more complicated builds though, it certainly was the required tonic. The big brother of this kit lives in my stash, and I wouldn’t mind doing this one in the box scheme from this kit with those striking blue bands.

Nakajima Ki44-II “tojo” 2nd Company 85th Flight Reg.

Imperial Japanese Army. China 1944

Leave a comment

Eduard 1/48 N.A.A. F-86 Sabre

  • Built: 2016
  • Aftermarket Used: Multimedia kit OOB
  • Decals: kit

This is Hasegawa’s still very nice plastic rebooted by Eduard and supersized with some of their excellent resin and Photo etch.  

This was built for a review for The Modelling News, and rather than go through the build again, I will just send you there via this link

I was quite happy with the finished model and it still resides in my cabinet.

North American Aviation F-86F Sabre 390th FBS, Alexandria AFB, Louisiana, USA, 1955

Hasegawa 1/48 P-40E Kittyhawk

  • Built:   2016
  •   Ultracast P-40 seat
  •   Ultracast P-40 Block tread wheels
  •   Ultracast P-40 Tubular exhausts

Decals:            Combination of Cutting Edge Pyn Up and Aussie decals

​Hasegawa’s P-40 series seems to be one of those kits modellers either love or hate 
 Flick through any of the fora and you will find modellers that rate it as a horrible fitting kit through to other modellers that have had no fit problems at all.  It does require care in assembly – like any kit – but I found mine went together reasonably well with only a small amount of iller needed around the gun ports and fuselage.  To be honest, I found the Cutting Edge decals a real disappointment, thick and reluctant to conform to recessed details.  The nose art decals, although very thin, were not sharply printed.  I dare say though printing technology has improved since these decals were first released.

Curtiss P-40 E-CE Kittyhawk

Hasegawa 1/48 A4G Skyhawk

  • Built: 2013
  • Aftermarket Used: Steel Beach Tailplane plates
  • Decals: Hawkeye Australia

A little more effort was put into this model of the skyhawk than my last one as I wanted to display it with the tailplanes tinted up exposing the hole through the fin and the hellhole open.

Cutting off the moulded tailplane rub plates was trickier than expected, but I got there in the end using a thin razor saw. These days I would use a P.E saw.

I made up some rudimentary innards through the open hell hole door. The door itself had its interior detailed with plastic strip and some foil to replicate the small bag for the R.B.Fs. These doors were commonly seen open on the flight line.

The air superiority scheme consisted of light and dark admiralty grey. At the time of modelling, no off the shelf paints were available from any of the major manufacturers.

The paints for this came from a local company that actually made model railway colours. As far as I kno, these paints were their only foray into aircraft sets.. The practise bomb carrier seen so often on Aussie skyhawks was scratch built from plastic card and strip.

McDonald Douglas A-4G Skyhawk 805 SQN R.A.N F.A.A H.M.A.S Melbourne

Hasegawa 1/48 A-4G Skyhawk

  • Built: 2013
  • Aftermarket Used: Nil. OOB
  • Decals: Ronin Decals
This is one of my older models.  The still nice Hasegawa 1/48 Skyhawk from when Hasegawa were a big name in model kits.  This one has been modified into a Royal Australian Navy A-4G which were basically E models anyway.  All the parts to make a G are included in the kit.  I decided to do an early Skyhawk before colourful unit markings became all the rage in the R.A.N.  Mainly because I had not seen one done before. As well as completing this one, I also did one in the Air Superiority scheme as a parallel build.
Decals came from a Hawkeye sheet for R.A.N Skyhawks, which was an early ALPS printed sheet.  The decals were thick and the underlying white shapes for the decals that needed them were oversized.  In a word they were crap, but Steve Evans is completely redoing the sheet under his Ronin Aviation Graphics label.  The decals released under this label bear no resemblance to his earlier Hawkeye sheets in either printing or performance  The latest sheet –  when he finally gets around to releasing it –  will allow you to model any skyhawk that saw service. 
Centre line TER came from Aerobonus and bombs came from a hasegawa weapons set.  There are lots of mistakes if you look closely, but I am happy with it. It remains as a timeline marker as to how my skills are slowly improving.  I remember the kit as being easy to assemble with some fit issues around intakes and the gun inserts.


A-4G Skyhawk 805 SQN. H.M.A.S Melbourne. Royal Australian Navy


Hasegawa 1/48 Hurricane MkIV

  • Built: 2013
  • Aftermarket Used: Rocket rails and radiator recast from Guideline Publications items, Ultracast wheels and exhaust
  • Decals: from the “decal bank”

I have always loved the look of the Hurricane armed with rockets. Again it evokes memories of building the 72 Airfix kit as a child. It was another model I wanted to revisit, so my second Hasegawa Hurricane used a resin conversion set from Guideline Publications which included the armoured radiator and resin rockets and rails. The rails were rather twisted so a friend kindly recast me a new set. Searching out colour schemes was interesting as it was quite difficult locating photos of rocket armed Hurricanes. I eventually settled on this one from South East Asia Command, although you will note it has no codes or serial. Much searching and asking of questions failed to reveal an accurate combination I could use. This model was also riveted with my new Rosie the Riveter tool, although I just confined it to the wing upper surfaces

Hawker Hurricane MkIV 20 SQN Royal Air Force. Burma 1944

Hasegawa 1/48 F-18A Hornet

  • Built: 2012
  • Aftermarket Used:
  • Decals: Hawkeye Australia
  • Bomb: Hasegawa Weapons set

Theres not too much I can remember about this build, being as Im writing it up about ten years after completion. The gunship grey scheme the RAAF trialled appealed to me, and I thought it would make the jet stand out from all the other Aussie hornets you see.

In fact the jet standing out is why the RAAF did not go ahead with the scheme

Decals are Hawkeye decals which, although quite thick performed adequately. There are much better decals on the market now, although up to date markings for RAAF “Classic” remain rarer than hens teeth.

For some reason, even our own Australian decal manufactures can not come up with a decent decal sheet. The long OOP Afterburner sheet remaining the best out there still.

This model no longer remains ion my collection having been sold off in 2021. I will replace it with a hopefully better RAAF Classic Hornet build sometime in the future.

McDonnell Douglas F-18A Hornet 77SQN R.A.A.F Williamtown Australia

Hasegawa 1/48 Hawker Hurricane IIc

  • Built: 2012
  • Aftermarket Used: CMK Drop tanks, Ultracast seat
  • Decals: Sky Decals

The Hurricane has to rate as one of my favourite WW2 aeroplanes. At the time it was released, hasegawa’s was probably the pick of the bunch. It did have some inaccuracies, the fabric effect was a bit too pronounced and assembly was made unnecessarily complicated by the underside, fuselage wing join being straight through the middle of the fabric detail. Totally bizarre engineering from Hasegawa. That said, its finesse and crispness of detail was light years ahead of the Monogram and Hobbycraft kits, those being the only other players on the 48 scale Hurricane field. Although the monogram kit could be built as a IID and a IV with rockets which was totally cool.

As a child I can remember building the ancient Frog kit in these markings. Who can forget that box art of Kuttlewascher blasting over the burning German hangars? So doing this kit in these markings is an ode to that original Hurricane I did long ago.

The decals came from a Sky decals sheet, with me sourcing the red dope repair patches from an old Monogram Hurricane sheet, which also came with these markings.

Paint would have been xtracolour, which was my go to paint for many years, until the Dangerous Goods Code imposed by Air carriers meant it could no longer be sourced here on shop shelves.

Hawker Hurricane Mk IIc 1 SQN Royal Air Force. Redhill. U.K 1942