Date added to stash: 2016
Date Completed: 2018
Aftermarket used: some parts from Eduard Detail set
Paint: Mr Color Light Gull Grey
Decals: Furball Sundowner Anthology
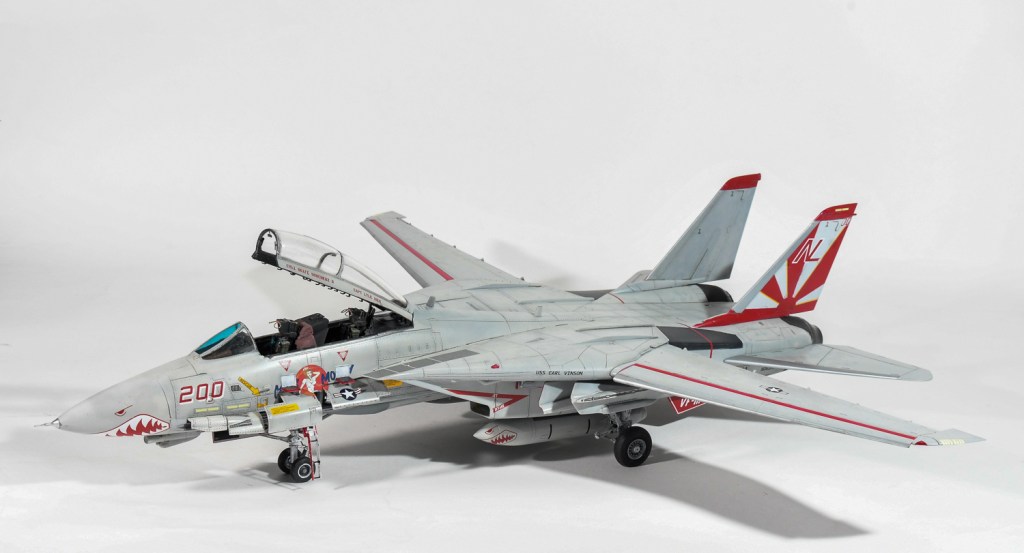
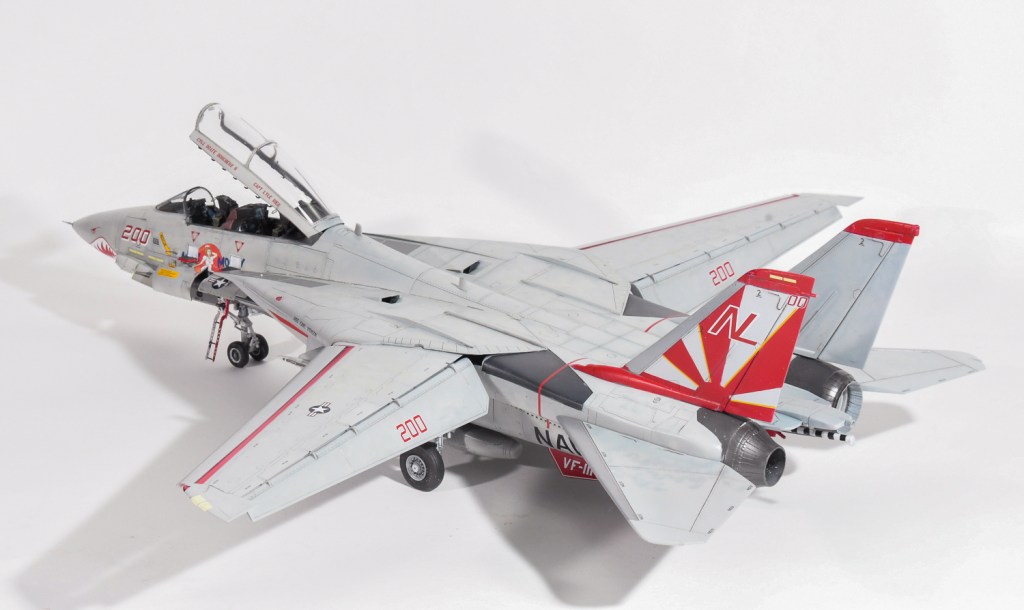
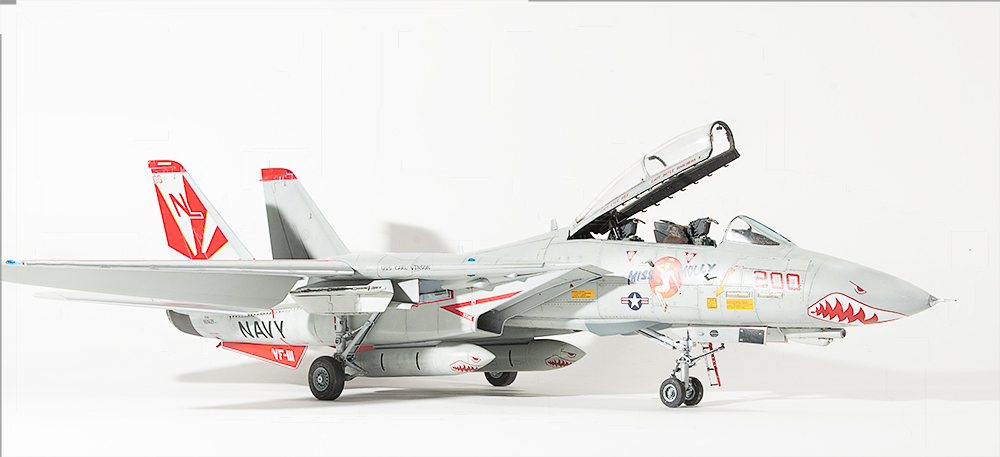
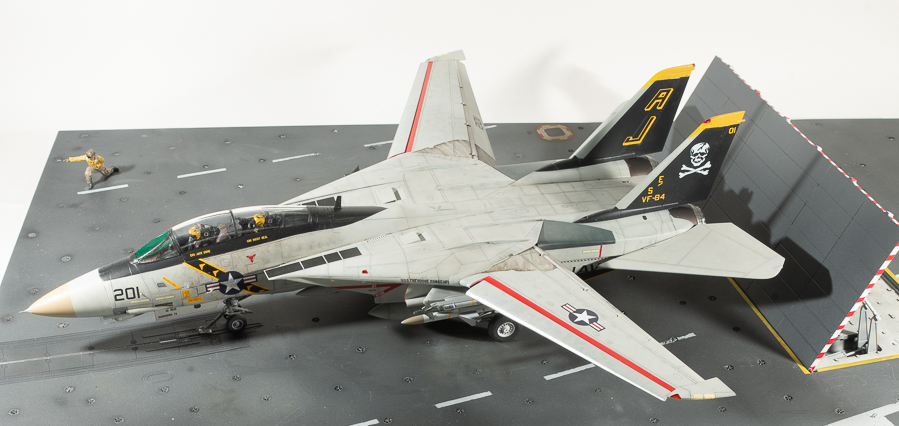
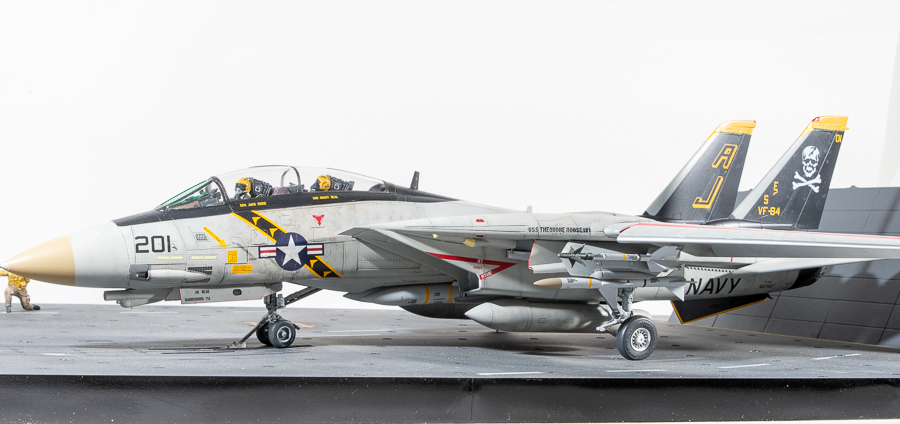
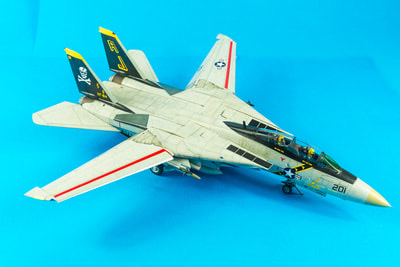
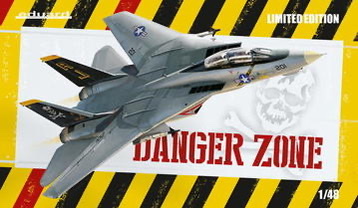
I started this at the same time as lthe other Tomcat I was building for a friend. At the time, it seemed like a good way to build a kit from my stash as well. In hindsight, if I had not started this one, I would have sold it, because its position has been ably taken by the Tamiya kit, and building the two HobbyBoss kits was a real grind. Not that there was anything wrong with the kit, but it was just one HB Tomcat too many. (Although this boxing was done by Eduard, it is the HobbyBoss kit, so I will refer to the kit as HobbyBoss)
The previous article covers the build in detail, although I would add my take home lesson from building Tomcats is mask the intake camouflage demarcation before you add them to the jet I didnt on either build and it was a hell of a job to add them later!
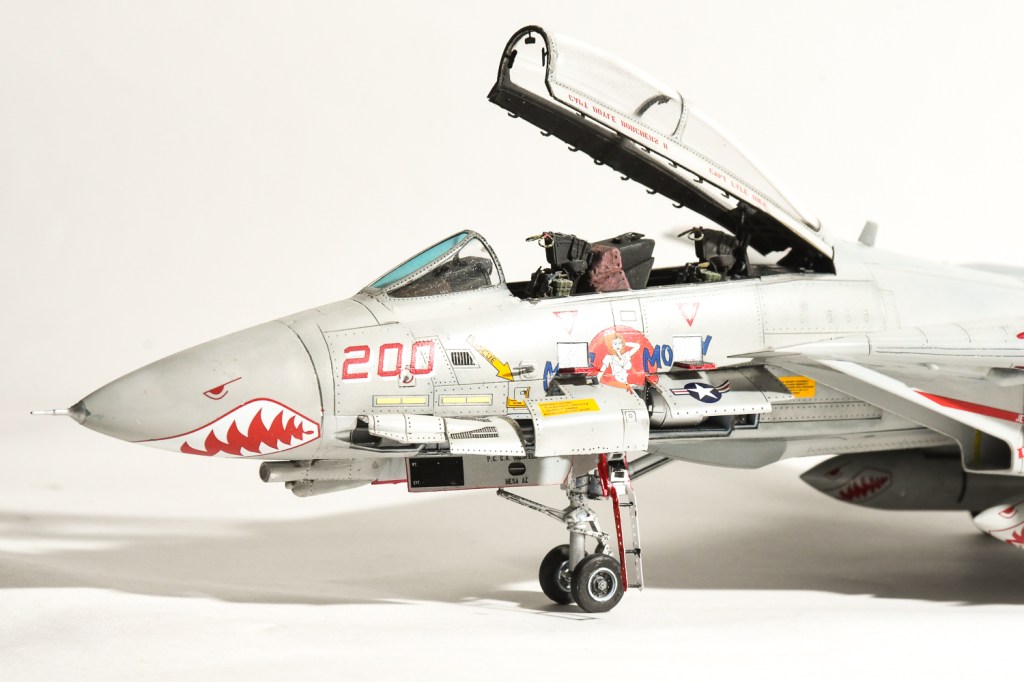
I had high hopes for this build wanting to build it with all panels open. In the end the build just started annoying me as there ws other stuff I wanted to build and I chose to rush a lot of things. Im not really happy with it, but HB Tomcats are a long complicated, involved build as are many modern jets, so to do two in a year is not bad. I have three tamiya Tomcats in the stash and look forward to tackling those at a later date. Just not for a while, as Im all Tomcatted out.
I also think Miss Molly was the wrong jet to pick, as all those open panels do not allow you to see that nose art in its entirety. Live and Learn, hey.
And wheres that sensor gone from under Miss Molly’s hand on the starboard side? I definetly added it LOL
For those who don’t know, Miss Molly was named for Molly Snead, a nurse to Senator Carl Vinson, yep, the Senator the carrier is named after.
I visited the USS Carl Vinson at Fremantle Western Australia in 1994, so like to model aircraft from her.
The previous article covers the build in detail, although I would add my take home lesson from building Tomcats is mask the intake camouflage demarcation before you add them to the jet I didnt on either build and it was a hell of a job to add them later!
I had high hopes for this build wanting to build it with all panels open. In the end the build just started annoying me as there ws other stuff I wanted to build and I chose to rush a lot of things. Im not really happy with it, but HB Tomcats are a long complicated, involved build as are many modern jets, so to do two in a year is not bad. I have three tamiya Tomcats in the stash and look forward to tackling those at a later date. Just not for a while, as Im all Tomcatted out.
I also think Miss Molly was the wrong jet to pick, as all those open panels do not allow you to see that nose art in its entirety. Live and Learn, hey.
And wheres that sensor gone from under Miss Molly’s hand on the starboard side? I definetly added it LOL
For those who don’t know, Miss Molly was named for Molly Snead, a nurse to Senator Carl Vinson, yep, the Senator the carrier is named after.
I visited the USS Carl Vinson at Fremantle Western Australia in 1994, so like to model aircraft from her.
Grumman F-14A Tomcat VF-111 “Sundowners” U.S Navy U.S.S Carl Vinson 1989