- Purchased: 2023
- Built: 2023
- Enhancements:
- Seat belts; Eduard
- FuG 202 aerials: Gaspatch Models
- Wheels: Aires
- Decals: Painted using montex mask set
- Weapons; AIMS, Master details barrels and Vector MG131s
I’ve wanted a 1/48 Do217N in the collection since Koster Aero Enterprises bought out their vacform conversion for the Monogram kit way back in the early 2000s. Despite this, the kit and conversion set were sold in The Great Stash Slash of 2004. But, now that doesn’t matter as we have a much nicer kit of this variant that can be built straight from the box
The path that led me to the purchase and building of ICM’s lovely kit was again, one of impulse!
I had recently purchased some of AIMS 1/32 night fighter conversions for the Revell Ju88, which saw me flipping through a book on German night fighters.
A picture of an all black 217 rekindled the earlier enthusiasm with the resultant jump to remembering reading a build article by Andy King on the ICM 217 he did for The Modelling News.
Next minute, I’m on the BNA website and its in my basket! How does this stuff happen??? As a mate and I have repeatedly theorised, impulse buys need to be started straight away, whilst the enthusiasm is hot, or the danger is you will be selling that same kit at a swap and sell 5 years down the track.
So, box was duly opened, my work bench being opportunely clean of current builds.
The size of the aircraft took me by surprise upon opening the box and looking at the one piece wing, the only other ICM kit Ive built being the Do17. One could say the Do217 is to the Do17 as the Super Hornet is to the Classic Hornet
That wing has beautifully engraved crisp panel lines, but these do not carry over to the rest of the kit, the fuselage and some parts like radiators having shallower detail, and also quite textured surfaces that will require a rub down before paint. Two complete engines are included in the kit should you wish to display the model with cowlings off. I saw no need to make the aircraft uglier than it already is, so my nacelles will be closed. A bomb bay is also included as there are parts to allow both opened and closed doors. I dallied with the idea of an open bay to show off the interesting way the doors open, but again, the aircraft looked decidedly pregnant with open doors, plus there is only very rudimentary detail. A fuel cell is included, but no bombs. As my chosen schemes was the all black night fighter, I didn’t think a bomb load would be carried.
Construction Notes
The instructions are a bit vague in places in regard to where some of the cockpit components fit to each other. I found by studying all the parts, there are locations for the pilot seats and floor in the side walls, just that they are not called out very well in the instructions. I also found them a little confusing regarding displaying the engines until I realised you are required to cut the cowlings off if you want to display the engines. After this, it all made sense. This model was being made all closed up, so all steps dealing with the engines were crossed out to avoid mistakes and make things a little clearer.
I used part A15 as a jig to position the cockpit side walls. The cockpit was painted RLM 66 instead of ICMs suggested 02, as I think by 1943 this was the colour of Luftwaffe cockpits. Tamiya XF24 Dark Grey standing in for RLM66 on this occasion. Beware of the decal dials for the instrument panels as they are separate, not a one piece decal. Here was my first introduction to the keenness of ICM decals to fold over themselves, hmmmmm, those wingwalks were going to be fun! Make sure you paint the back of part E12 as it can be seen through the canopy. Ask me how I know!! It has a pin mark that needs to be filled or, do as I did and skin the rear of it with some plastic card. I went to the trouble of adding thin stretched sprue levers to part E31, I didn’t bother with the decal as it will never been seen. Seat belts were added to all seats from Eduard.
Although ICM say you can leave out the bomb bay floor if doing the 217 with closed doors, I decided to add it to provide a little bit of structural support to the fuselage. It a long assembly with minimal surface area for glue and I could see me cracking joins just through picking it up. In the event, I should also have added the sidewalls C18 and 22 for added support as the floor by itself does not really add any strength.
I managed to crack the wing leading edge joint several times, due to the broad chord of the wings coupled with , again minimal glueing area at the leading edge mating surfaces.
Take particular care ensuring you are using the correct parts for the nacelles. I managed to glue the port outer to the starboard inner side, then wondered why the nacelles weren’t a good fit! This was luckily, quickly corrected with a much better fit of the nacelles being achieved, in fact, the fit throughout was above average.
I found the best fit for the wing was to push it as far forward as possible to ensure a tidy fit on the ‘shoulders” This does leave you with a gap to be filled at the rear, but this was easily filled with a shim of plasticard. Before adding the wing, ensure all mating surfaces are free of burrs and flash, which helps in getting the best fit possible. Of course this advice should stem to all facets of assembly, in addition to plenty of dry fitting.
I replaced the peg on the tailwheel yoke part E42 with brass wire, similarly, I drilled and pinned the undercarriage legs for added strength rather than relying on the kits butt joins. ICMs wheels are fine OOB, but I had already purchased the Aires set. I would also suggest Quickboosts resin exhausts if you don’t want to deal with the joins on the kit items.
Painting and Decalling
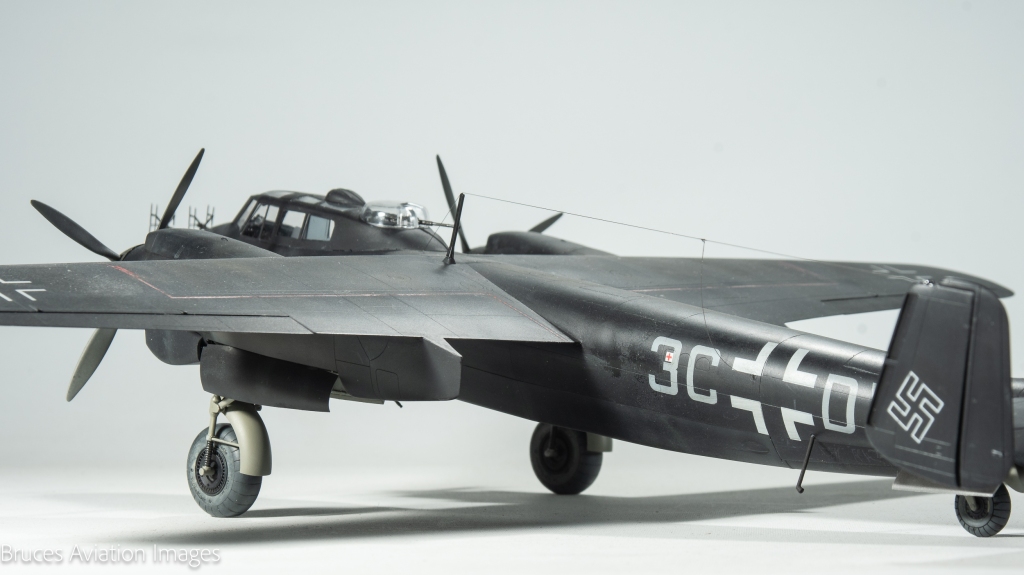
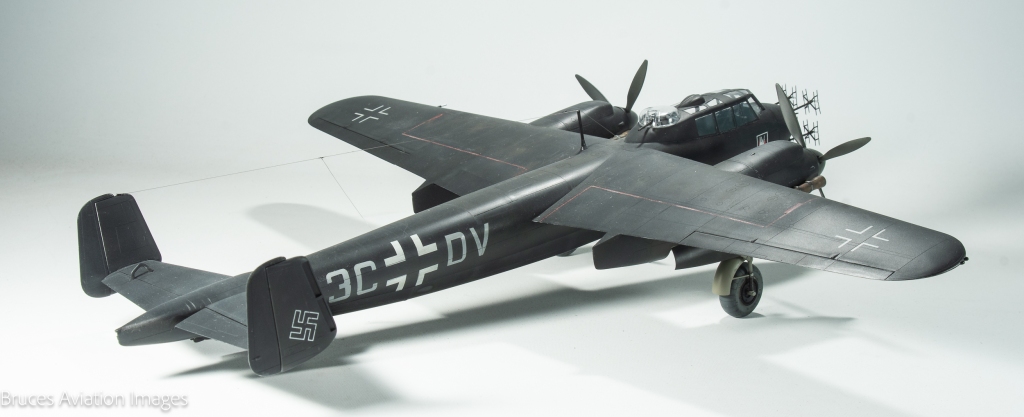
SMS Camo black was settled upon as the base colour. This is quite a nice warm dirty black, very similar in fact to the colour of Mr Surfacer 1500 black. For highlights I used SMS German grey randomly mottled on the wing centre section through various Uschi van Der Rosten masks. All national insignia save for the swastikas was sprayed on using a montex mask set. The swastikas came from an old Aeromaster sheet.
Im not sure if these machines were painted black at the factory or at maintenance units, but figured either way – rightly or wrongly – the stencilling would not have been reapplied perhaps apart from the wingwalks.
I elected to use the wing walk decals which went on surprisingly well, despite me and long thin decals usually not getting on. Plenty of water was the secret. I was still congratulating myself on this miracle right up to the point where I managed to accidentally touch and remove a strip of the decal! Luckily a very generous modelling friend in the UK sent me some make for painting dotted wingwalks . Thanks Andy
ON reflection, I wished I had painted all the wingwalks as I was left with some silvering.
Some panels were then masked off and MRP black sprayed along panel lines which stood out nicely. Well until the Dullcote was applied. Then everything kind of blended together. Typical!
Exhausts were base coated in SMS dark earth before a layer of hairspray was added, then a mix of NATO brown and NOTO black . This was then chipped off. To be honest, Im not really happy with the results. I think I would have been better off stippling these colours on with some sponge
For the canopy, this is the second model I have used interior canopy masks on. This is a leaf out of Jamie haggo’s book, as he does it on all his models where the canopy interior is visible from the outside, his rationale being painted interior framing looks much better than the shiny plastic visible if you were to follow the normal convention of spraying the interior colour from the outside. And he’s right!
Final Assembly
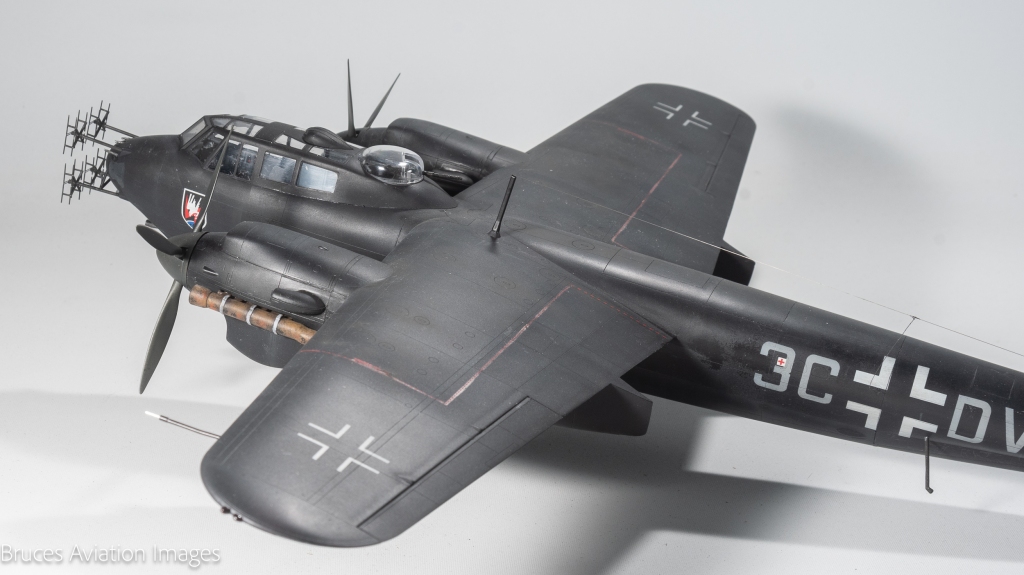
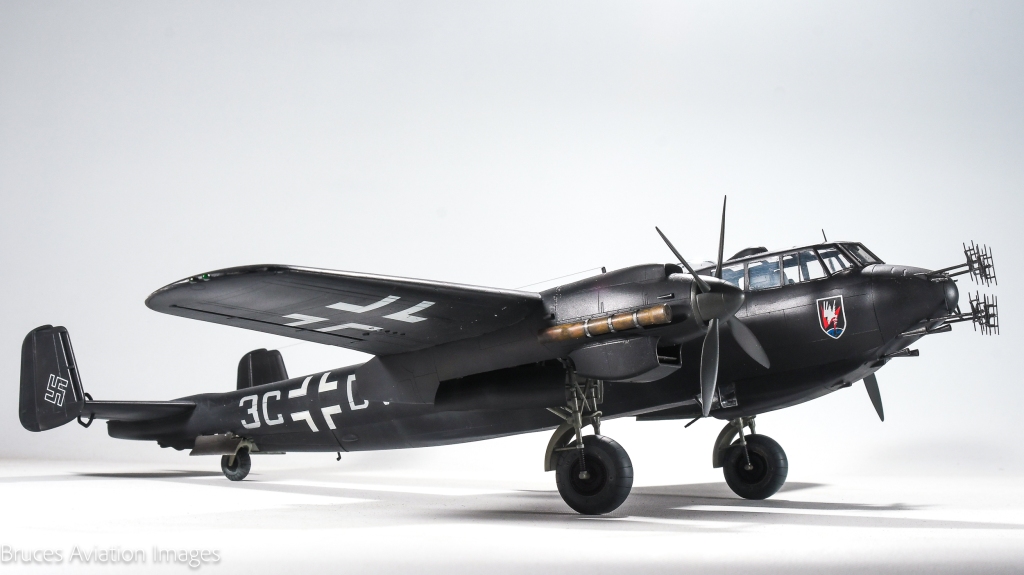
This comprised of adding the undercarriage doors, all of which located securely. The aerial was added from invisible thread, and the machine gun and cannon barrels added. AIMS cannon barrels were used as, unlike the kit ones, they had open flash suppressors. I didn’t bother drilling out the mg barrels as the diameter was too small. Finally, the piece-de-resistance. the Gaspatch radar array was added. Cutting them away from the supports was heart in mouth stuff, let me tell you! I employed a new scalpel blade plus used a new set of nippers. They were painted in Tamiya dark Iron. If there is one must have Aftermarket accessory for this kit, its these, although looking at my slightly wobbly ones in my photos, this crew will have a hard time finding any Lancasters!
Conclusion
Im really happy to have a black Dornier 217 in the cabinet, and a much better replica than the old KAE and Monogram kit would have provided thanks to the access we now have to things like 3DP radar arrays and brass gun barrels.
The model itself was very enjoyable to build, with no real vices along the way, aside from the somewhat soft plastic, which does not suit structural components like landing gear. Despite this I look forward to building more ICM kits. The Do217N was unloved by its crews, its performance suffering greatly due to its increased armament, and all the added radar gear. But in my cabinet, its loved greatly by me!
Dornier 217N-1 II./NJG4 Luftwaffe. Germany 1943


Leave a comment