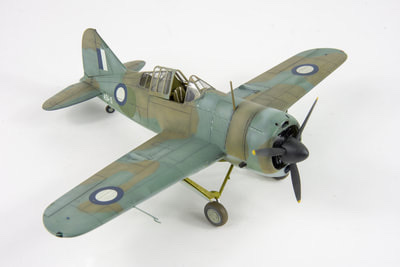
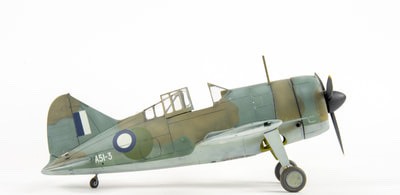
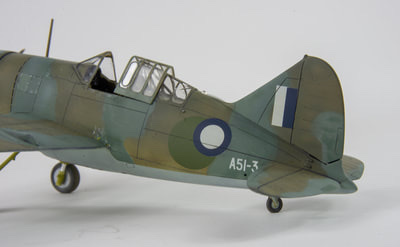
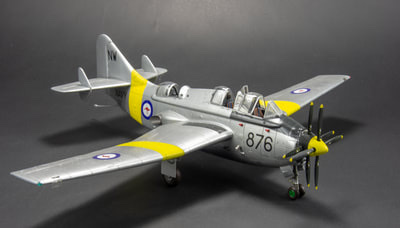
The second part of my double Buffalo build. Like the other build, this one also went together quite effortlessly.
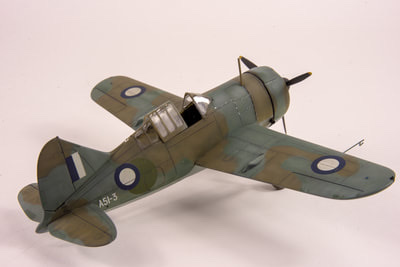
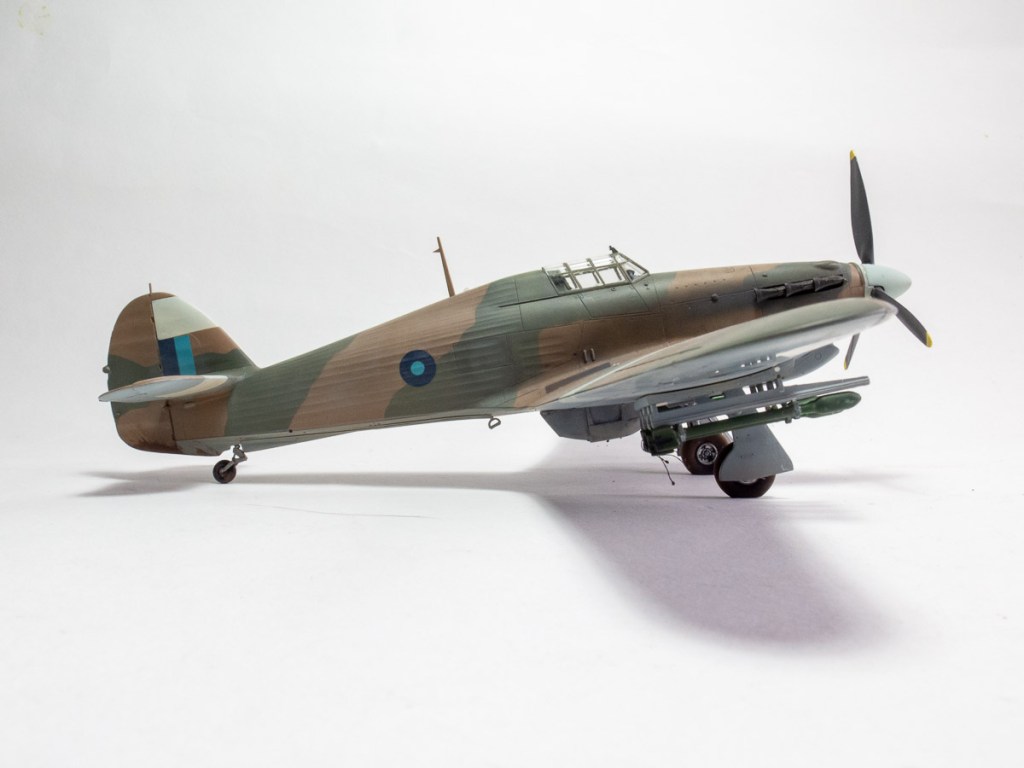
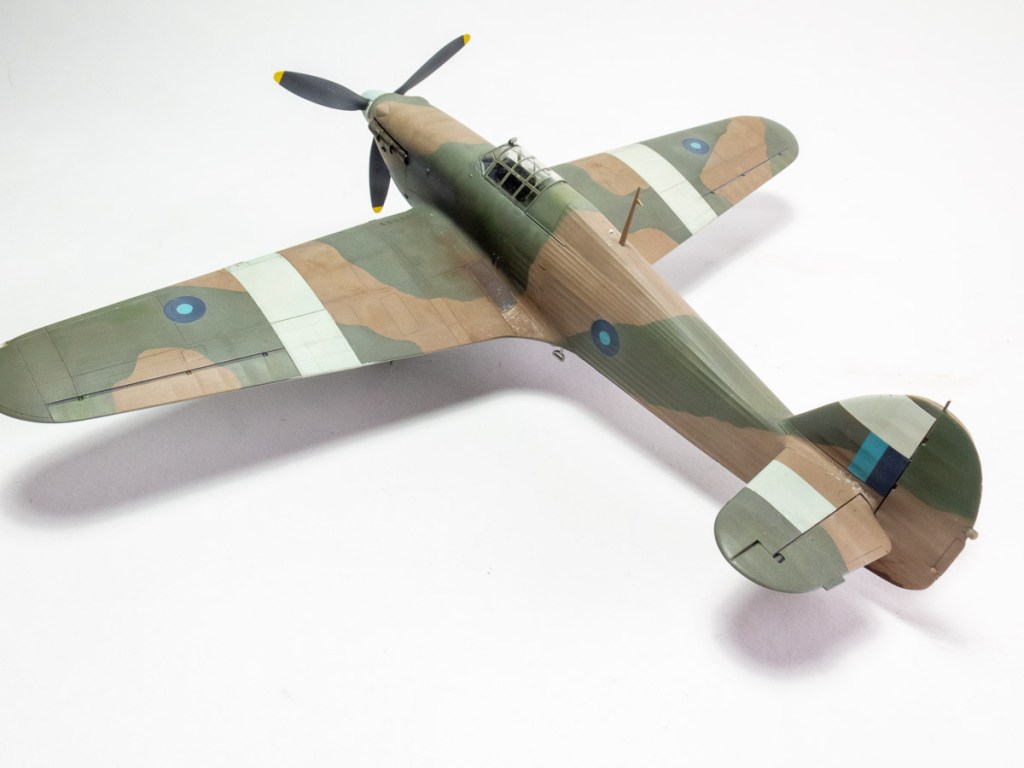
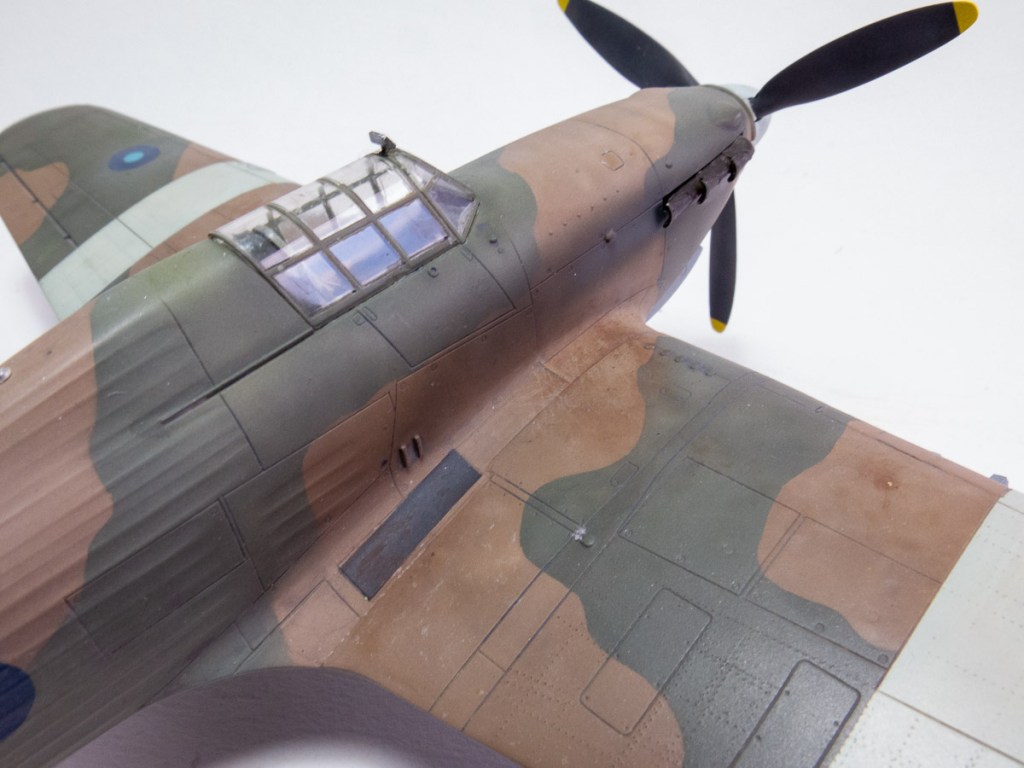
To paint it I used the then popular “black base” technique. I remember not liking it that much as I didn’t think it gave you a lot of range with the colours. The colours on this were all lightened considerably to portray a faded machine that had been operating under a blazing hot Northern Territory sun.
Extracolour paints were again used from my now diminishing supply.
I think this one turned out better than the U.S one I completed just prior.
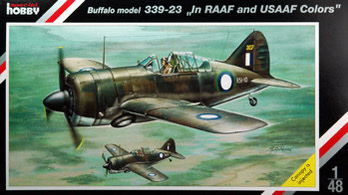
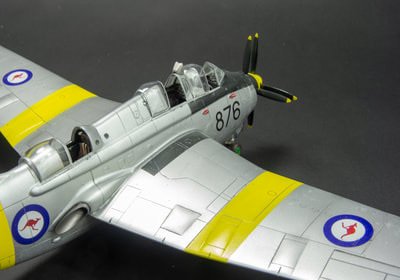
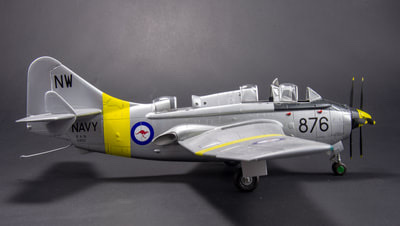
Brewster Buffalo. 1 P.R.U SQN Royal Australian Air Force. Hughes Air Base.N.T 1942
Date Completed: 2014 Aftermarket Used CMK Armament set,
Decals: Montex masks
Another double build in which was eventually a pretty productive year after a few false starts! From memory these Buffalos were lovely kits to build, being fairly straightforward, even the CMK gun bays fitted without too much scraping and grinding The completed models were painted with extra colour paints which were my preferred brand until export restrictions stopped them coming into the country. I still have several tins I am slowly using up on current projects.
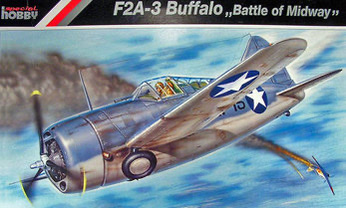
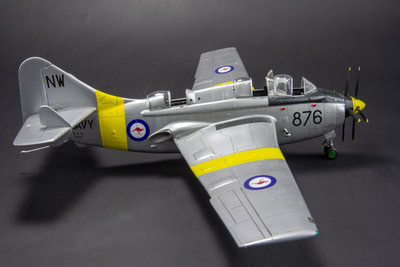
For the USN one, I could not go past those oversized early war stars, which I found on a Montex mask set. This were the second set of markings I had masked after my dakota I found the process a little more difficult lining up all the elements and there was a fait bit of touching up to do. I cannot remember what colour I used for the USN blue grey, the underside grey was Extracolour with a dark wash from Flory Models. A small piece of brass mesh was inserted behind the oil cover opening. Looking at the model now, you can see I have rushed the weathering with none on the undersides or gun bays. Despite this, it still looks nice sitting in the cabinet with those big stars.
Brewster F2A-3 Buffalo MCAS Ewa WMF-221 Hawaii. USA 1942
Date Completed: 2014 Aftermarket used: Quickboost rudder and corrected cowlings Decals Not decals at all, but masks from Mal’s Miracle Masks
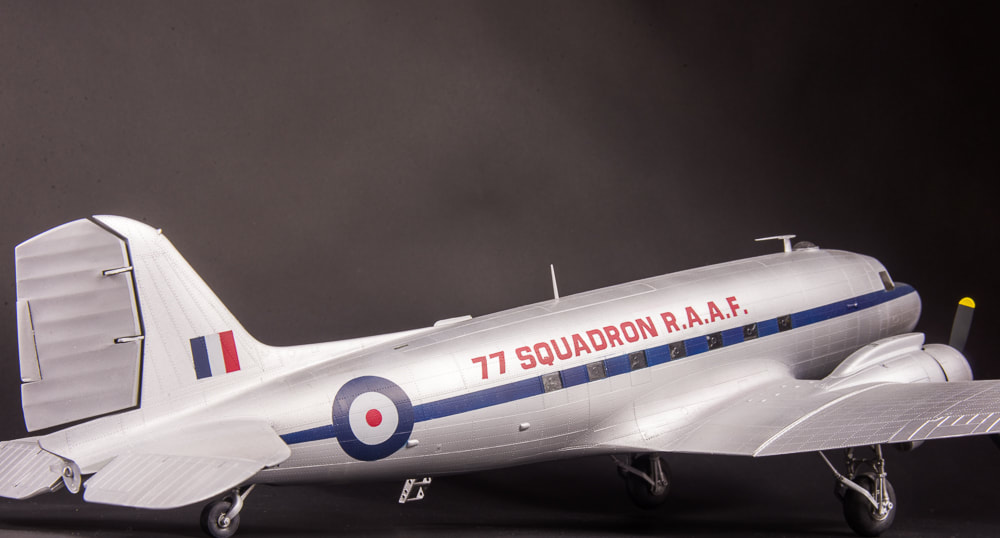
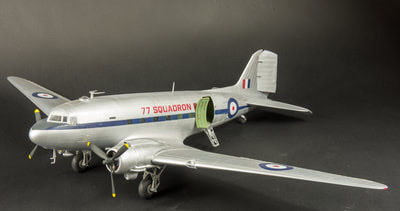
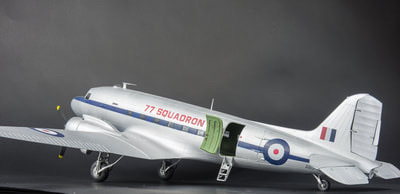
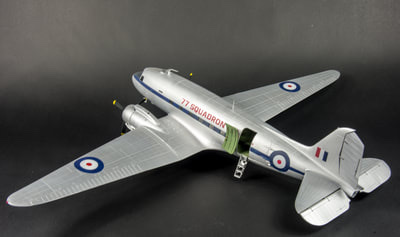
Trumpeter’s Dakota gets cast as inferior to Monogram’s ancient model in some quarters. I built the monogram one as a kid and found the Trumpeter kit light years ahead in fit, detail and engineering. Ok, there are some accuracy issues, the rudder is riveted where it should be fabric covered, the cowlings are based on the soviet copycat aircraft and the sit of the aircraft is not quite correct but these can be fixed with aftermarket items. I just love all the riveting on the kit which you really need on a kit this size. Mine was built for a Korean war GB on Britmodeller.com. Th year had started off with several failed builds, so this one reaching the finish line was very satisfying indeed I left the wings removable to ease transport, which leaves slight gaps, maybe this is why it has received no love at competitions, plus I have modelled it clean with no weathering whatsoever. I increased the height of the undercarriage by adding plastic block spacers to the locators in the cowlings so the aircraft nose points up more. The drag links were lengthened with rod. This was the first time I painted national markings on using masks. I got Mal Mayfield to cut masks from a Hawkeye decal sheet. I impressed myself with how easy painting the roundels was, and determined to go this route on all of my future larger builds. There is some conjecture over whether the cheat line was red or blue. I opted for blue after seeking answers on Aussie Modeller International on-line forum
C-47B Dakota 77 SQN Royal Australian Air Force Korea 1952
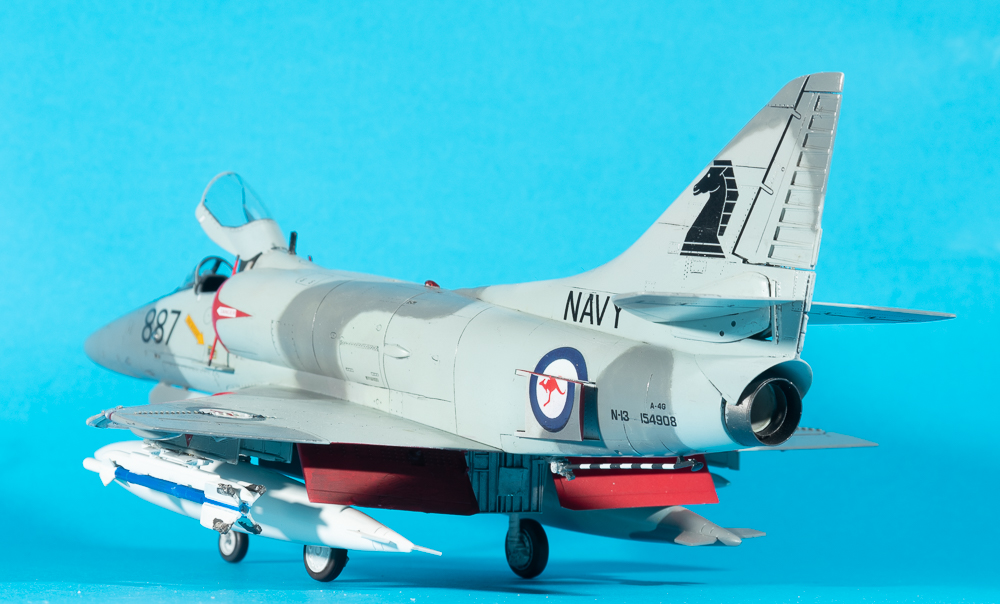
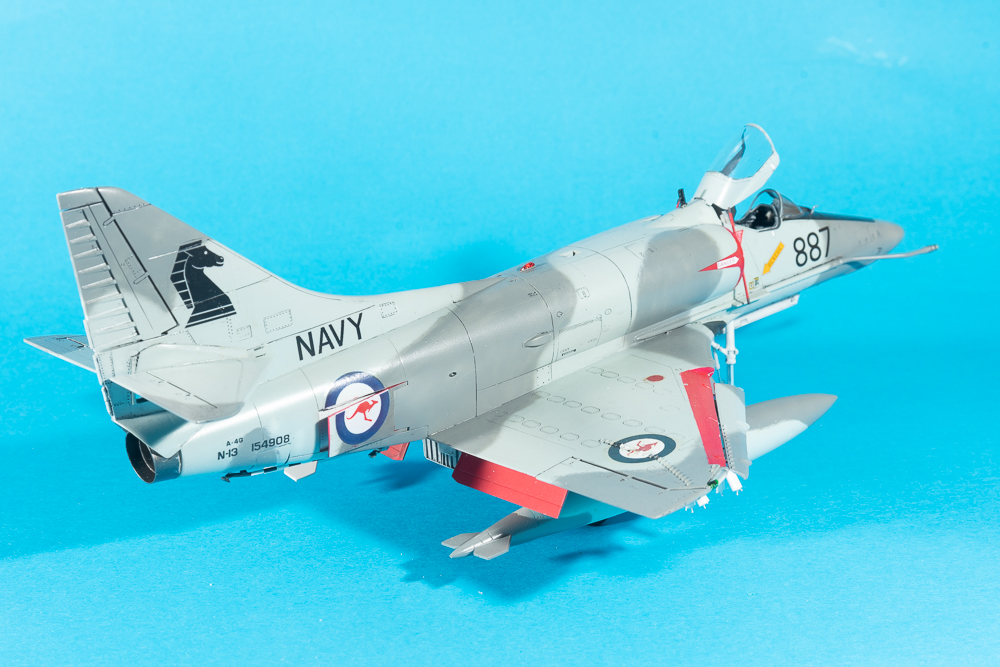
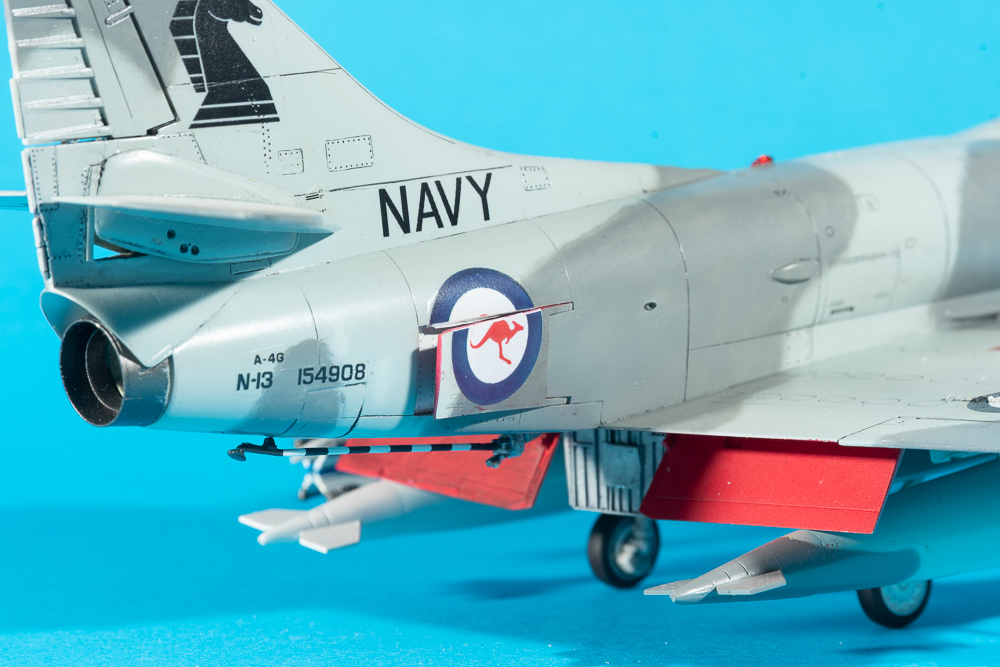
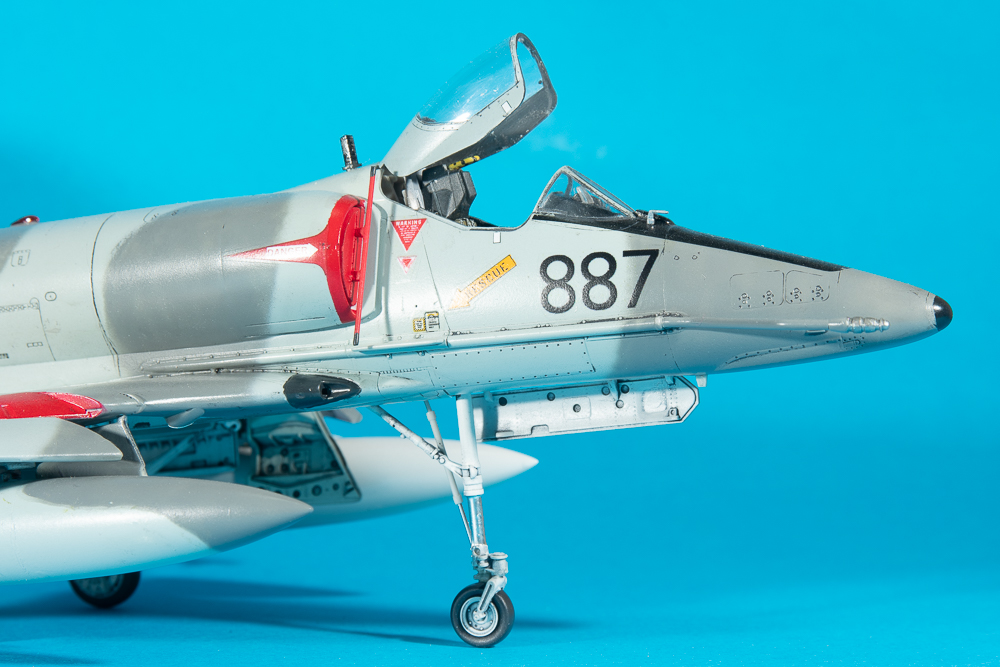
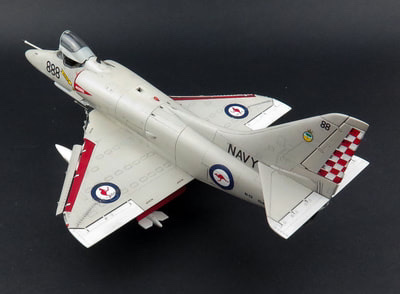
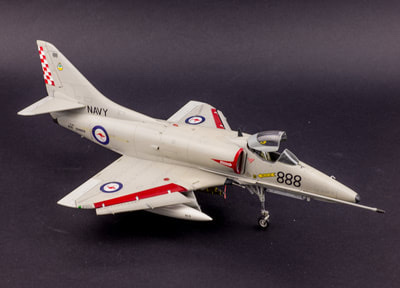
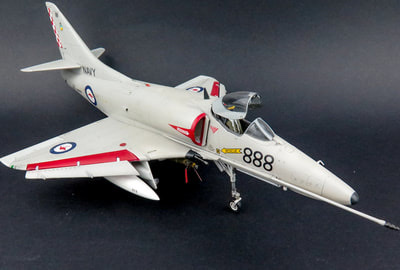
A little more effort was put into this model of the skyhawk than my last one as I wanted to display it with the tailplanes tinted up exposing the hole through the fin and the hellhole open.
Cutting off the moulded tailplane rub plates was trickier than expected, but I got there in the end using a thin razor saw. These days I would use a P.E saw.
I made up some rudimentary innards through the open hell hole door. The door itself had its interior detailed with plastic strip and some foil to replicate the small bag for the R.B.Fs. These doors were commonly seen open on the flight line.
The air superiority scheme consisted of light and dark admiralty grey. At the time of modelling, no off the shelf paints were available from any of the major manufacturers.
The paints for this came from a local company that actually made model railway colours. As far as I kno, these paints were their only foray into aircraft sets.. The practise bomb carrier seen so often on Aussie skyhawks was scratch built from plastic card and strip.
McDonald Douglas A-4G Skyhawk 805 SQN R.A.N F.A.A H.M.A.S Melbourne
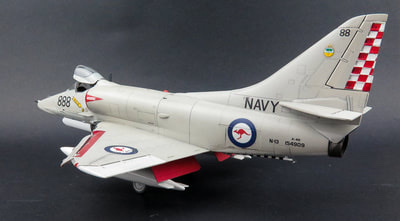
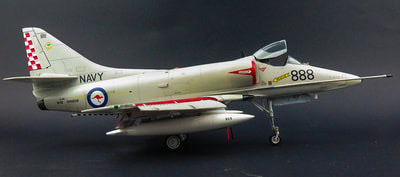
This is one of my older models. The still nice Hasegawa 1/48 Skyhawk from when Hasegawa were a big name in model kits. This one has been modified into a Royal Australian Navy A-4G which were basically E models anyway. All the parts to make a G are included in the kit. I decided to do an early Skyhawk before colourful unit markings became all the rage in the R.A.N. Mainly because I had not seen one done before. As well as completing this one, I also did one in the Air Superiority scheme as a parallel build. Decals came from a Hawkeye sheet for R.A.N Skyhawks, which was an early ALPS printed sheet. The decals were thick and the underlying white shapes for the decals that needed them were oversized. In a word they were crap, but Steve Evans is completely redoing the sheet under his Ronin Aviation Graphics label. The decals released under this label bear no resemblance to his earlier Hawkeye sheets in either printing or performance The latest sheet – when he finally gets around to releasing it – will allow you to model any skyhawk that saw service. Centre line TER came from Aerobonus and bombs came from a hasegawa weapons set. There are lots of mistakes if you look closely, but I am happy with it. It remains as a timeline marker as to how my skills are slowly improving. I remember the kit as being easy to assemble with some fit issues around intakes and the gun inserts.
A-4G Skyhawk 805 SQN. H.M.A.S Melbourne. Royal Australian Navy
Aftermarket Used: Rocket rails and radiator recast from Guideline Publications items, Ultracast wheels and exhaust
Decals: from the “decal bank”
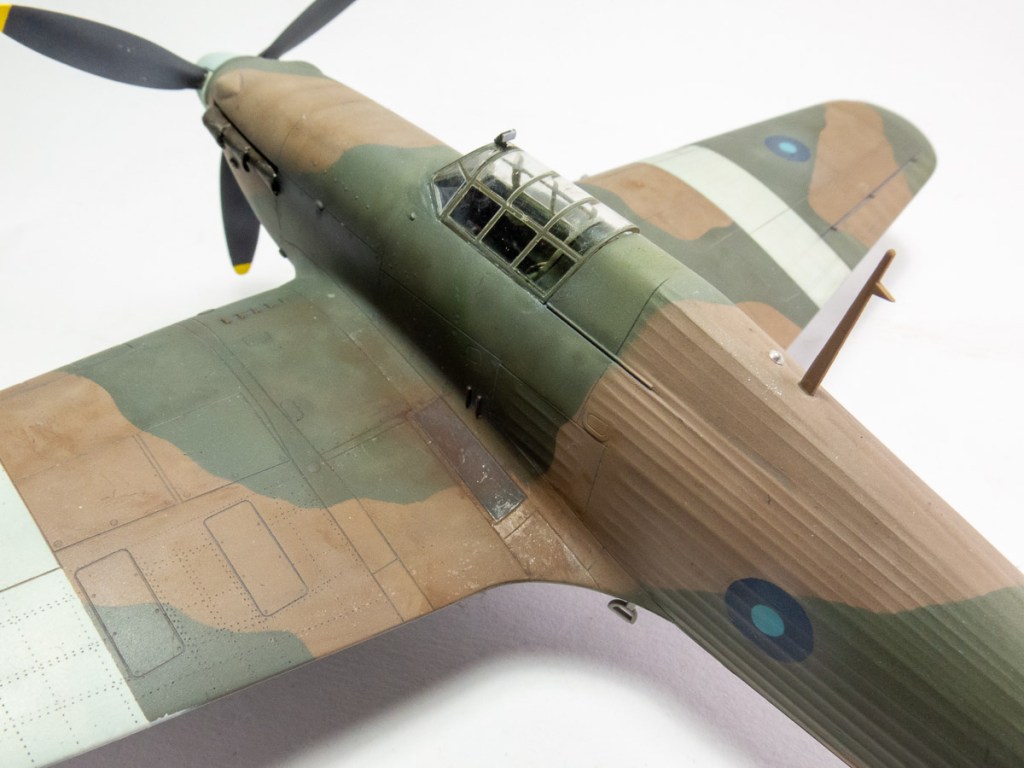
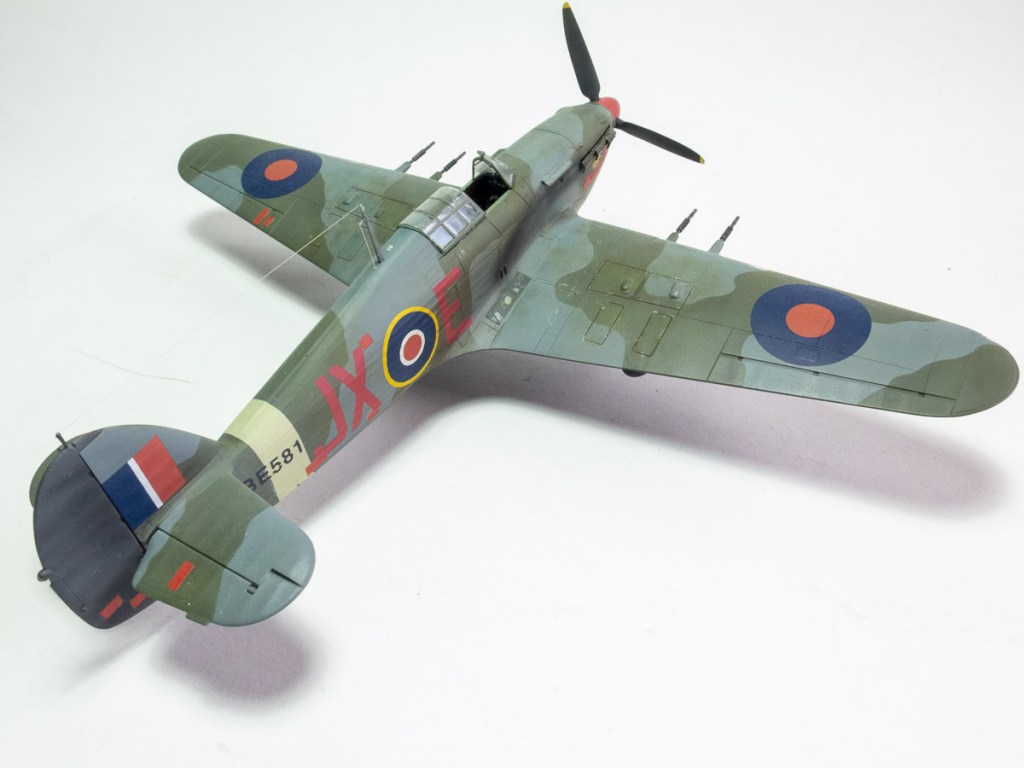
I have always loved the look of the Hurricane armed with rockets. Again it evokes memories of building the 72 Airfix kit as a child. It was another model I wanted to revisit, so my second Hasegawa Hurricane used a resin conversion set from Guideline Publications which included the armoured radiator and resin rockets and rails. The rails were rather twisted so a friend kindly recast me a new set. Searching out colour schemes was interesting as it was quite difficult locating photos of rocket armed Hurricanes. I eventually settled on this one from South East Asia Command, although you will note it has no codes or serial. Much searching and asking of questions failed to reveal an accurate combination I could use. This model was also riveted with my new Rosie the Riveter tool, although I just confined it to the wing upper surfaces
Hawker Hurricane MkIV 20 SQN Royal Air Force. Burma 1944
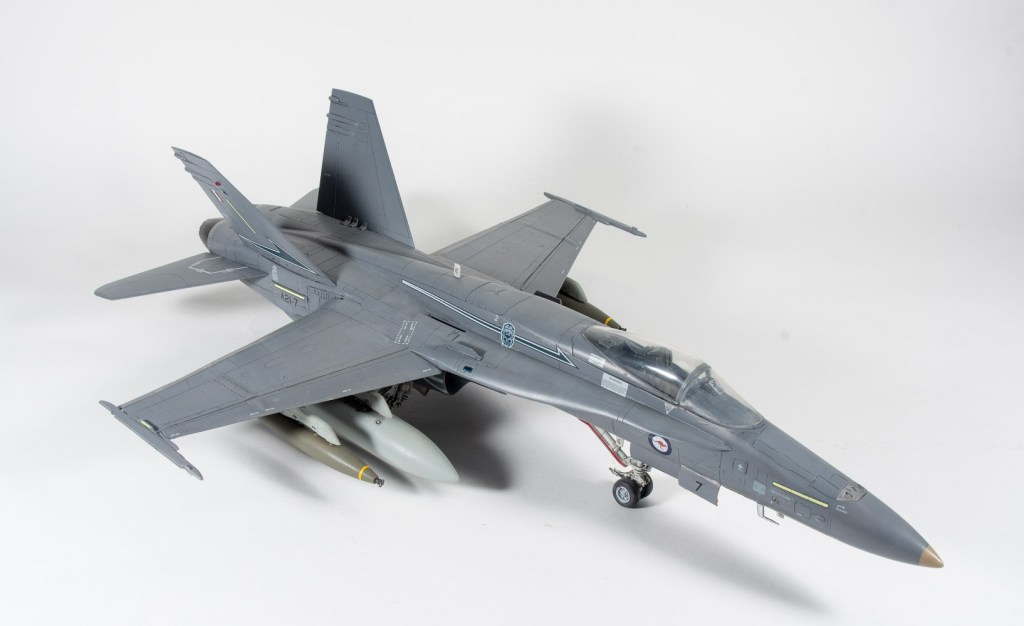
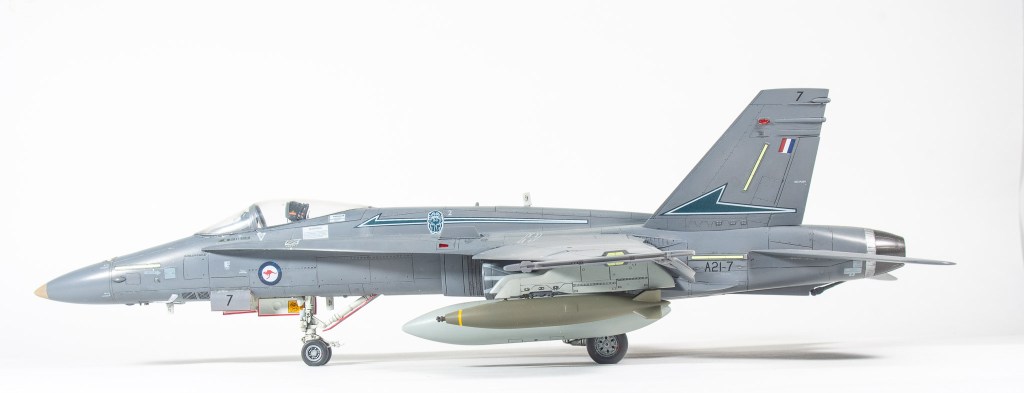
Theres not too much I can remember about this build, being as Im writing it up about ten years after completion. The gunship grey scheme the RAAF trialled appealed to me, and I thought it would make the jet stand out from all the other Aussie hornets you see.
In fact the jet standing out is why the RAAF did not go ahead with the scheme
Decals are Hawkeye decals which, although quite thick performed adequately. There are much better decals on the market now, although up to date markings for RAAF “Classic” remain rarer than hens teeth.
For some reason, even our own Australian decal manufactures can not come up with a decent decal sheet. The long OOP Afterburner sheet remaining the best out there still.
This model no longer remains ion my collection having been sold off in 2021. I will replace it with a hopefully better RAAF Classic Hornet build sometime in the future.
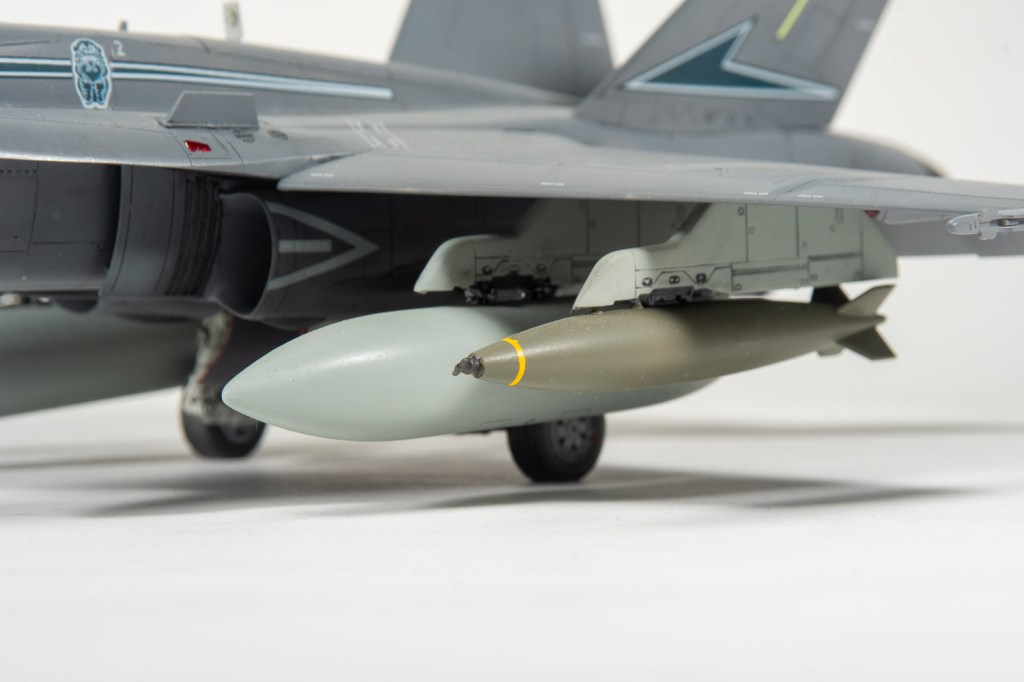
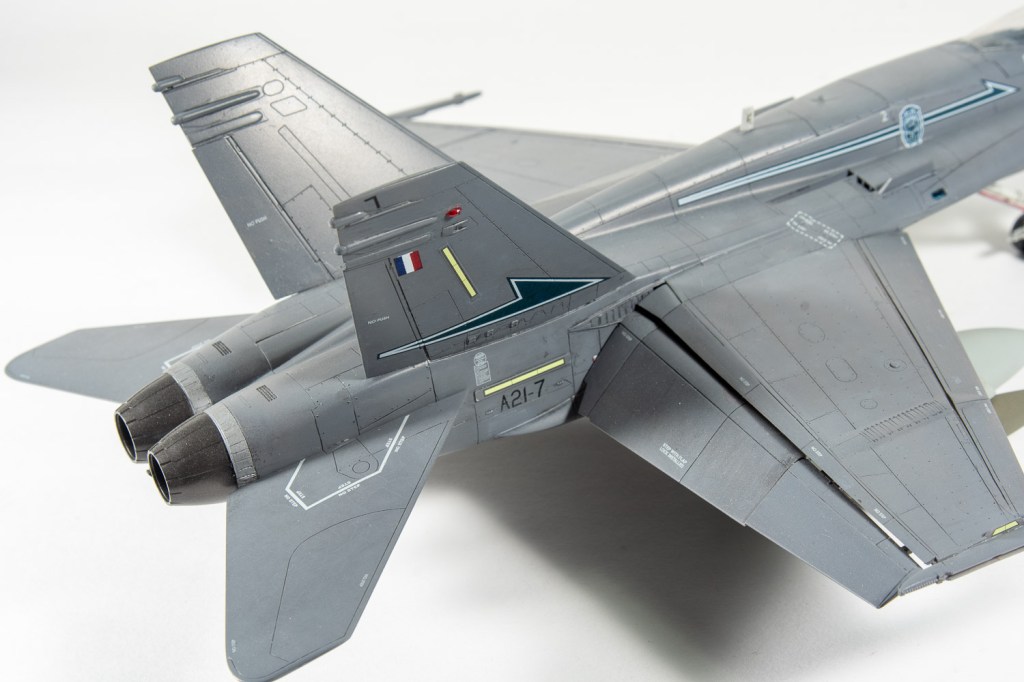
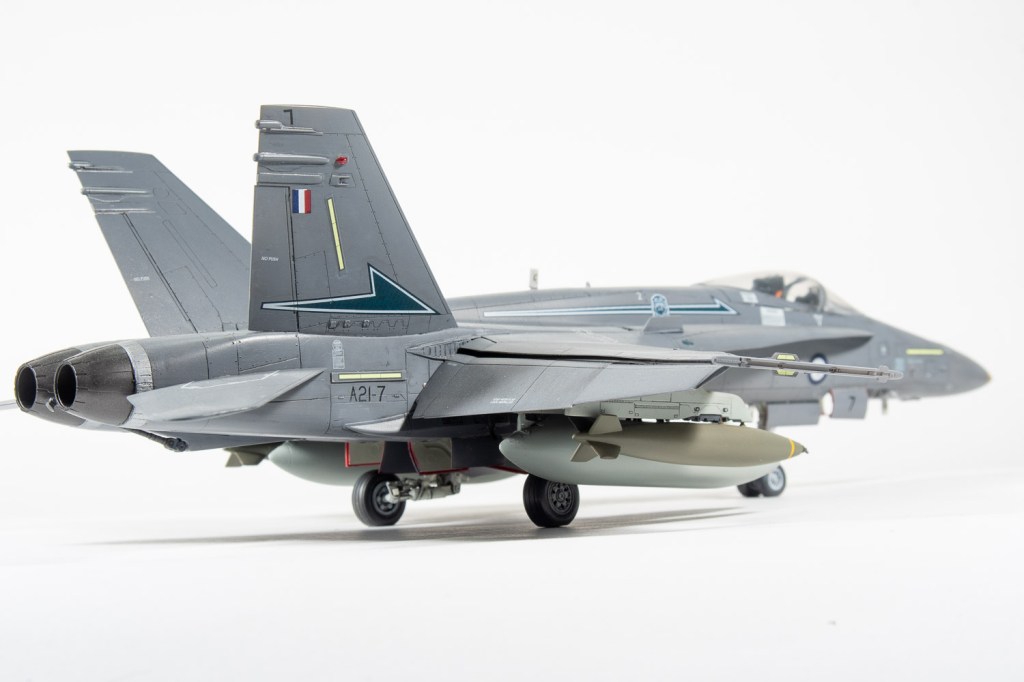
McDonnell Douglas F-18A Hornet 77SQN R.A.A.F Williamtown Australia
Decals: Combination of kit and spare to make specific airframe
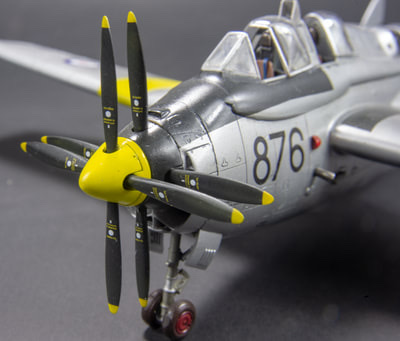
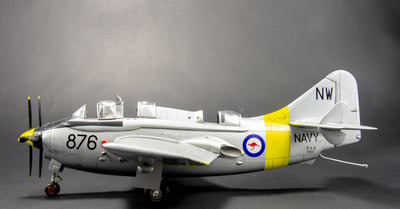
Build Notes: This was the second Classic Airframes Gannet that I built. I wanted to do a Training Machine as the colour scheme appealed to me with those bright yellow training bands. As I have noted in my previous build, I didn’t find this one of C.A’s better kits, although I love them for doing it. OOB the model can only be built into the ASW version, luckily I still had a dynavector vac form kit lying around, which you really need anyway to build the CA kit if you want to open the canopies. The beauty of the Dynavector kit is it includes the parts to make the training version. These comprise the white metal periscope for the student and the extended cable bulge. These parts can be easily incorporated into the injection moulded kit. As I lacked good reference photos for the students cockpit, I just mirrored the front cockpit with a spare control stick from the spares box. The instrument panel was the white metal item from the Dynavector kit. The assembled model was painted with xtracolour silver, the bands were xtracolour training yellow from memory
Fairey Gannet T2 725 SQN Royal Australian Navy Nowra 1960
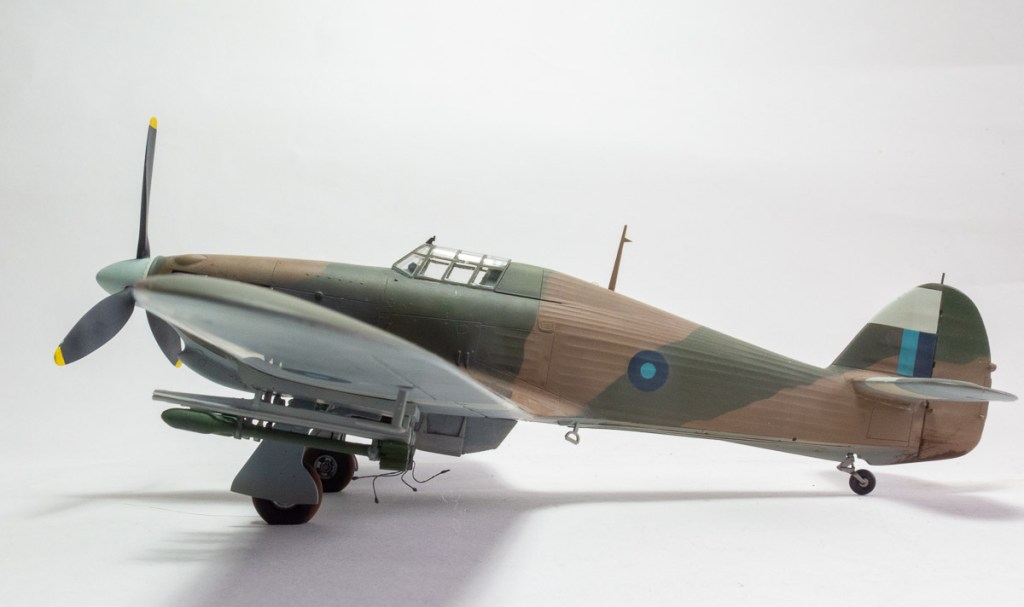
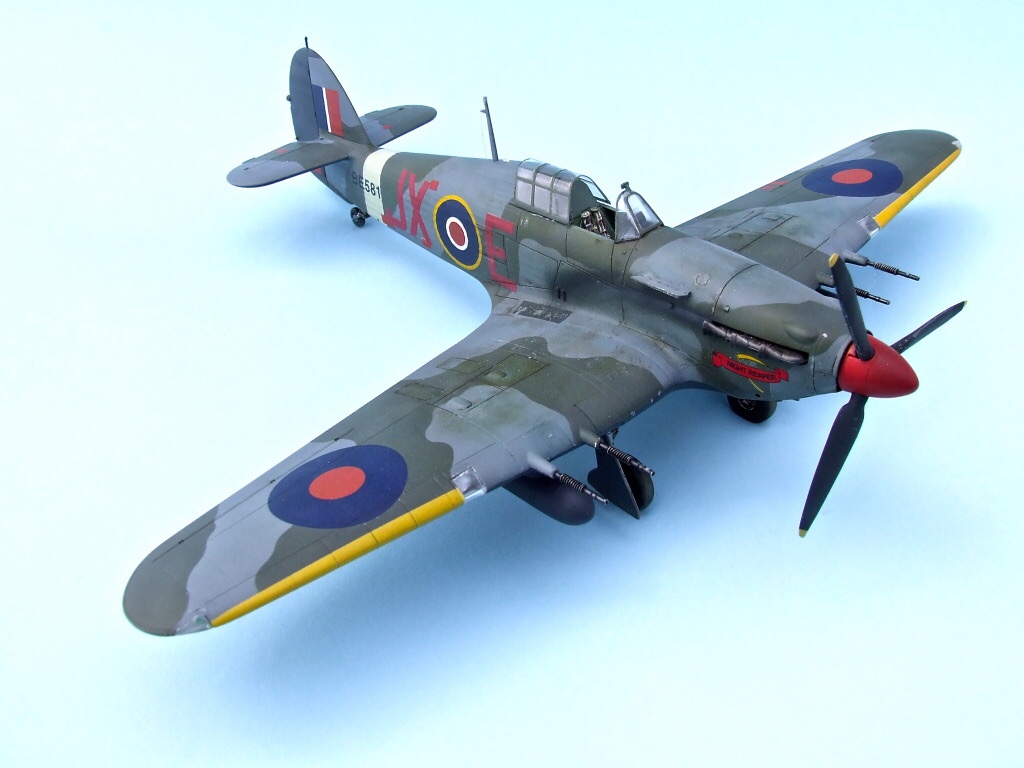
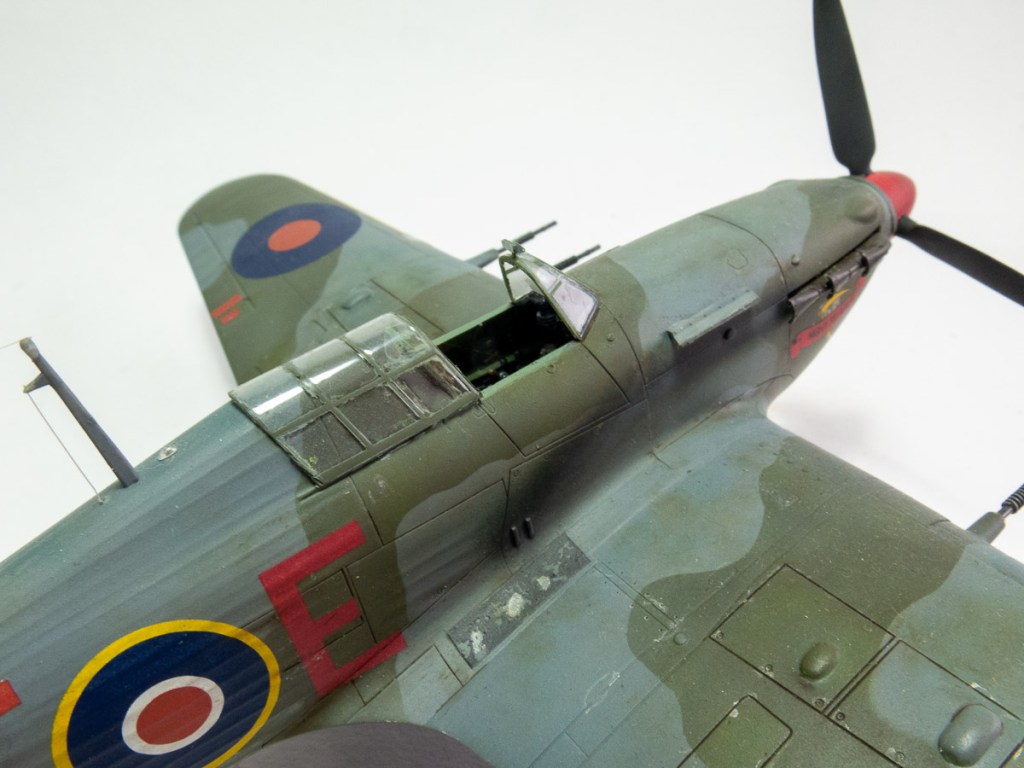
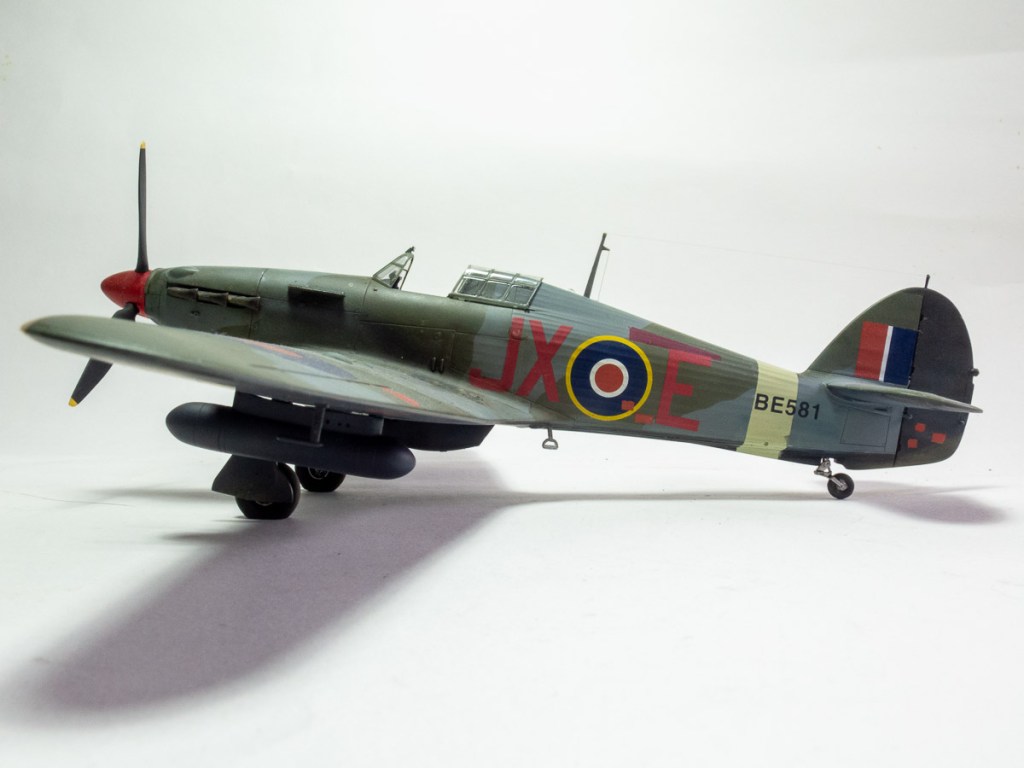
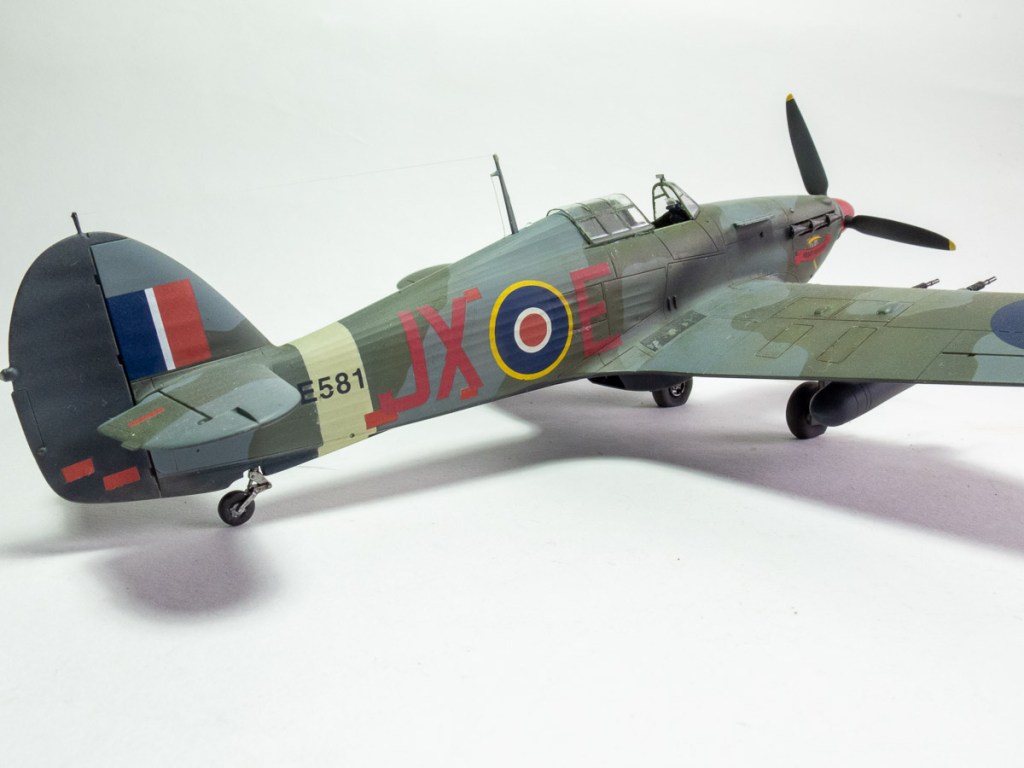
The Hurricane has to rate as one of my favourite WW2 aeroplanes. At the time it was released, hasegawa’s was probably the pick of the bunch. It did have some inaccuracies, the fabric effect was a bit too pronounced and assembly was made unnecessarily complicated by the underside, fuselage wing join being straight through the middle of the fabric detail. Totally bizarre engineering from Hasegawa. That said, its finesse and crispness of detail was light years ahead of the Monogram and Hobbycraft kits, those being the only other players on the 48 scale Hurricane field. Although the monogram kit could be built as a IID and a IV with rockets which was totally cool.
As a child I can remember building the ancient Frog kit in these markings. Who can forget that box art of Kuttlewascher blasting over the burning German hangars? So doing this kit in these markings is an ode to that original Hurricane I did long ago.
The decals came from a Sky decals sheet, with me sourcing the red dope repair patches from an old Monogram Hurricane sheet, which also came with these markings.
Paint would have been xtracolour, which was my go to paint for many years, until the Dangerous Goods Code imposed by Air carriers meant it could no longer be sourced here on shop shelves.
Hawker Hurricane Mk IIc 1 SQN Royal Air Force. Redhill. U.K 1942
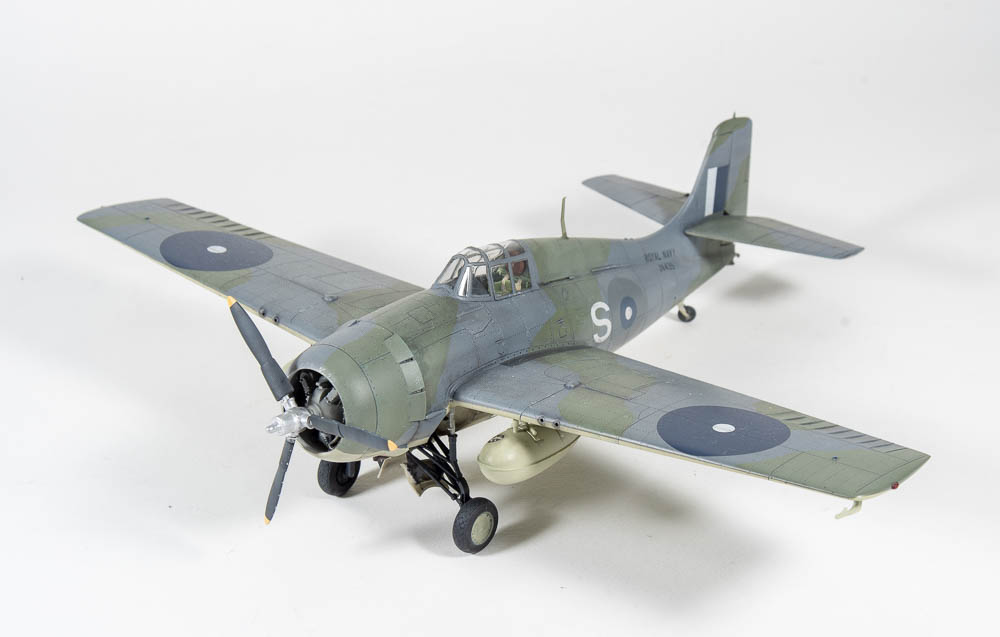
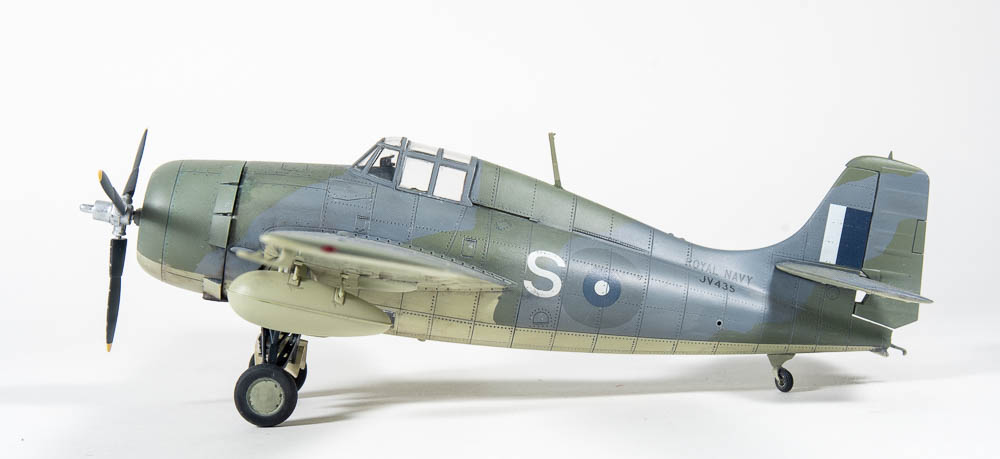
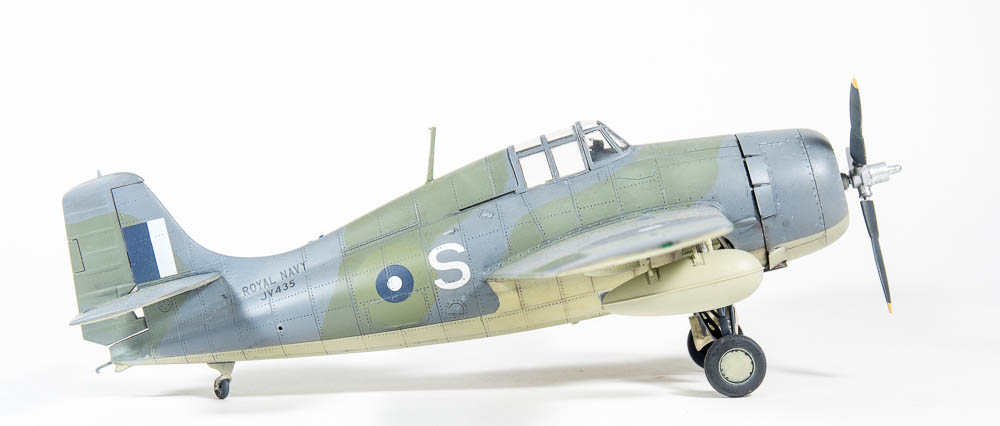
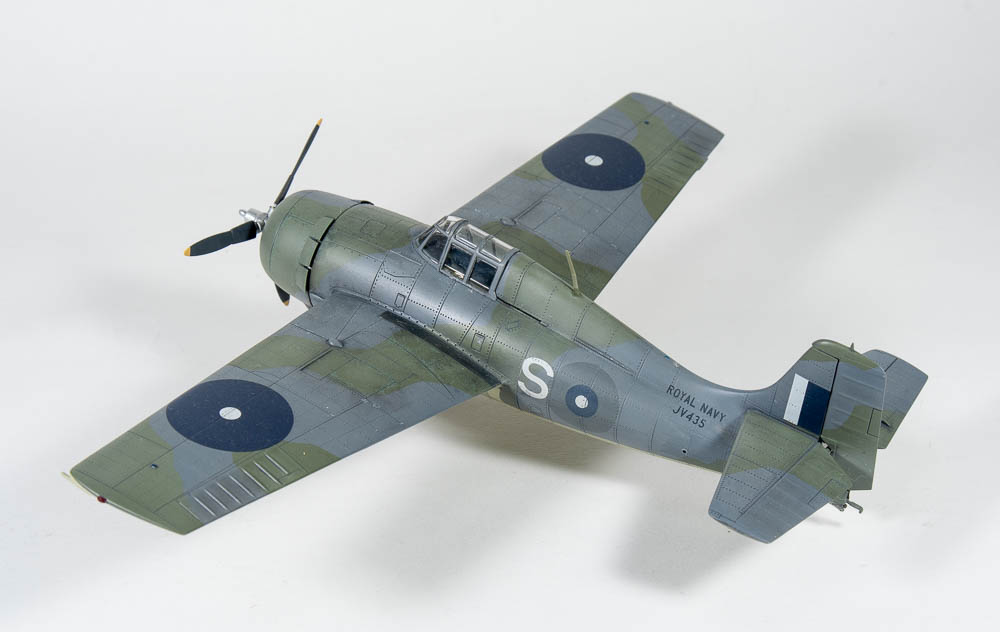
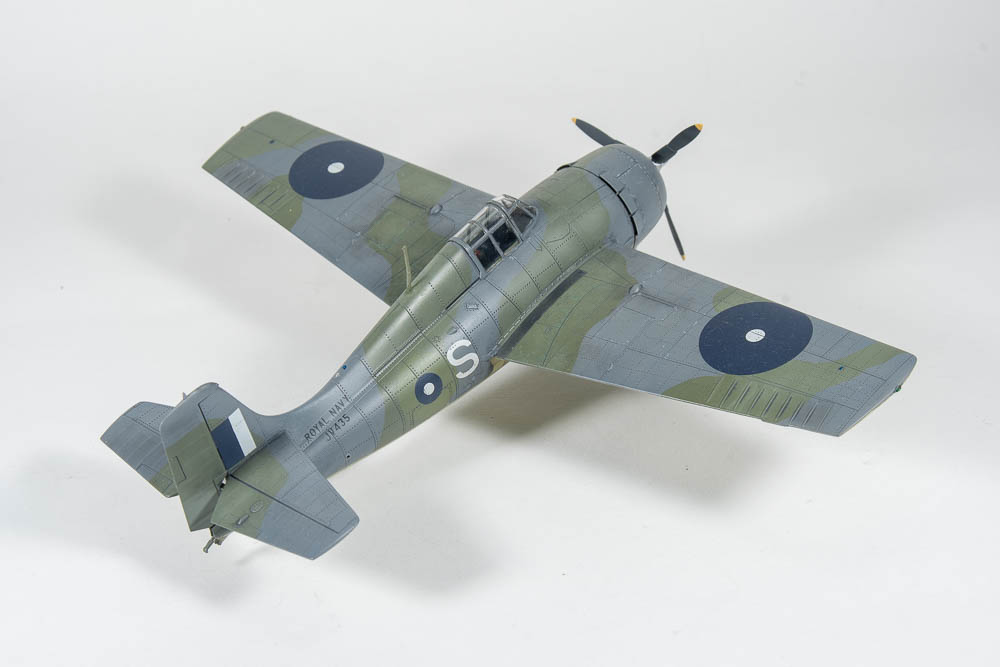
This was a lovely little kit to build, almost vice-less. As I had a F.A.A aftermarket decal sheet in the stash, I decided to build this as a British Wildcat. Working out the British equivalents to the U.S Wildcats can be a bit of a minefield, but a bit of research showed the FM-1 was called a Wildcat V by the British.
As this was built a while ago and I am writing this in 2021, I honestly can not remember too much about the build, which Im guessing means it was fairly painless. do remember it got me a first place at Queensland Model and Hobby Expo that year, which was the first time I had won a category… So there’s that!