Added to stash: 2017
Finished: 2021
Enhancements
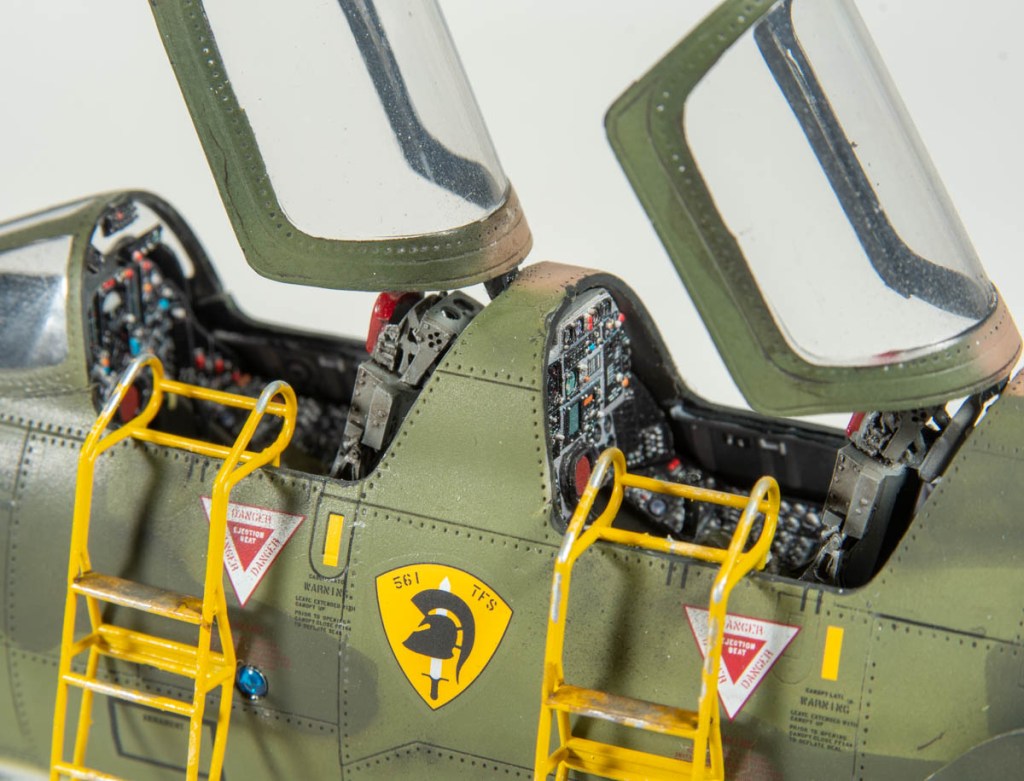
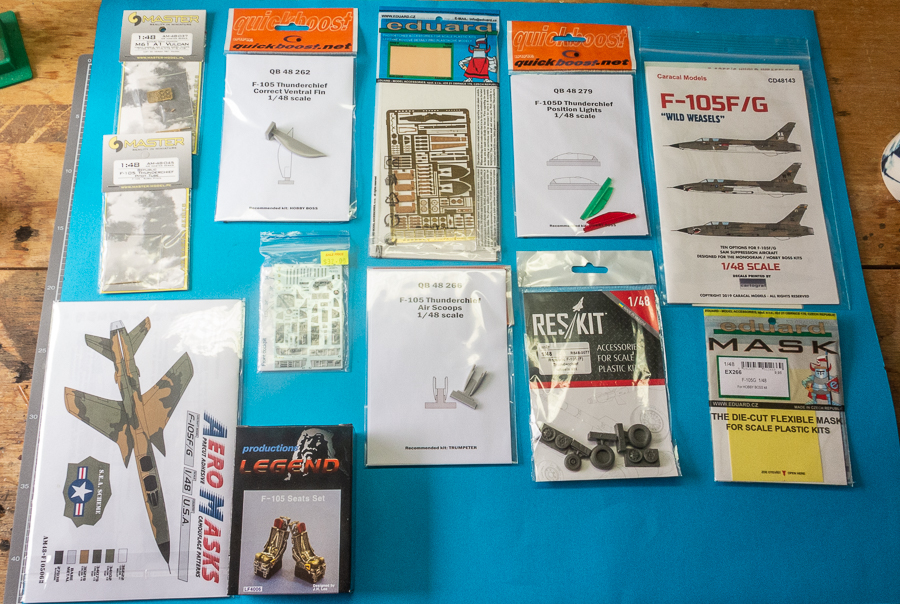
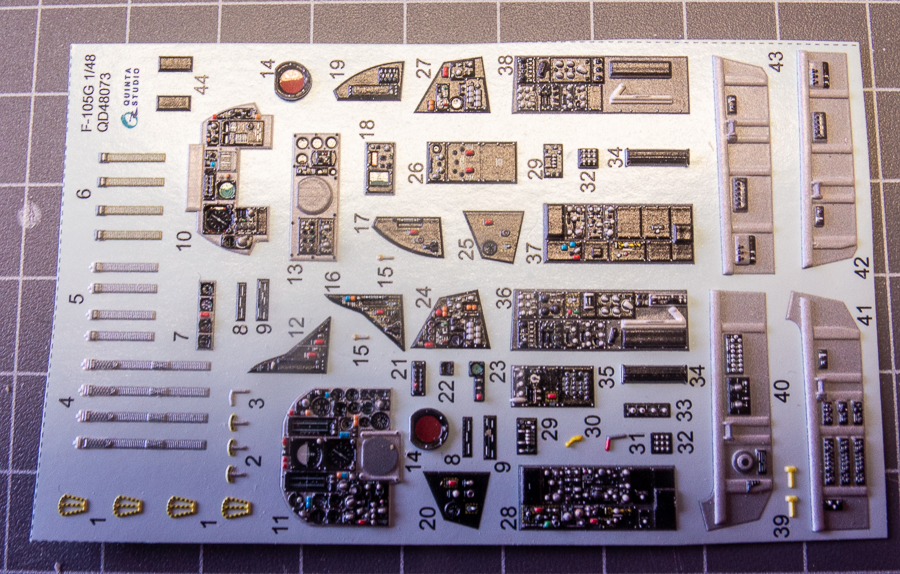
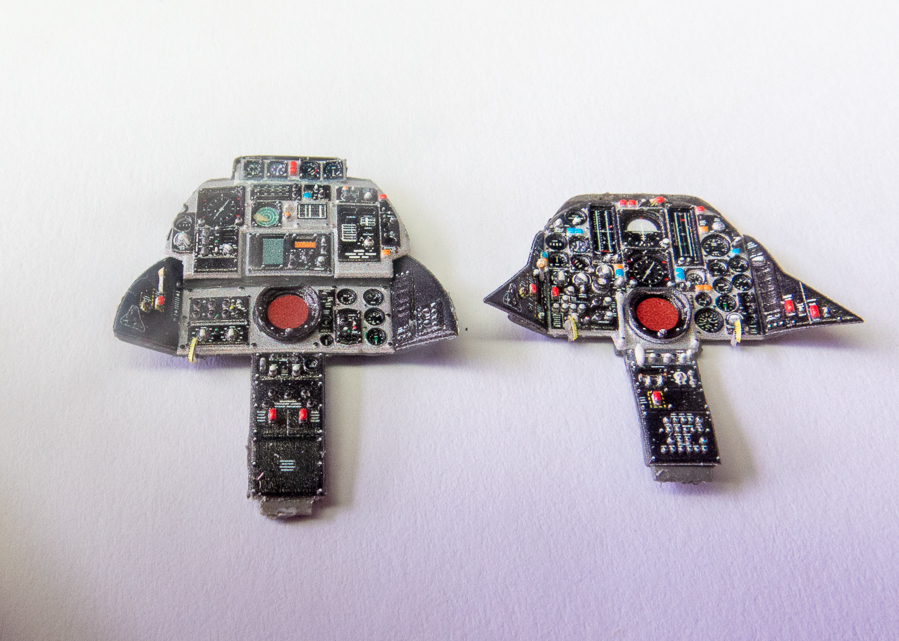
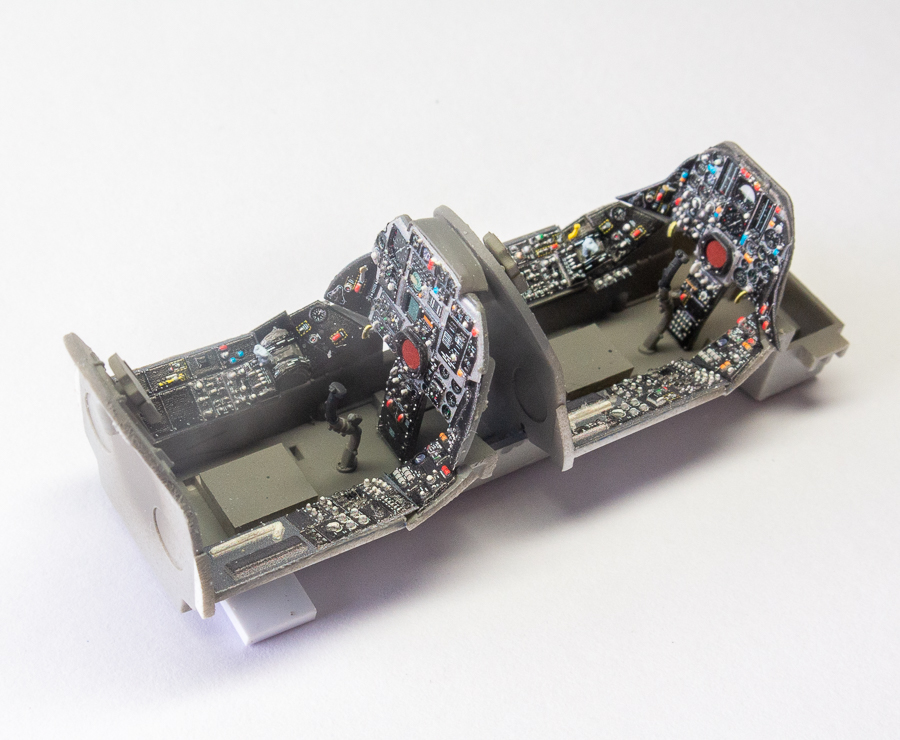
Cockpit Panels: Quinta 3D decals
Seats: Legend
Gun Barrels: Master Barrels
Pitot Tube: Master Barrels
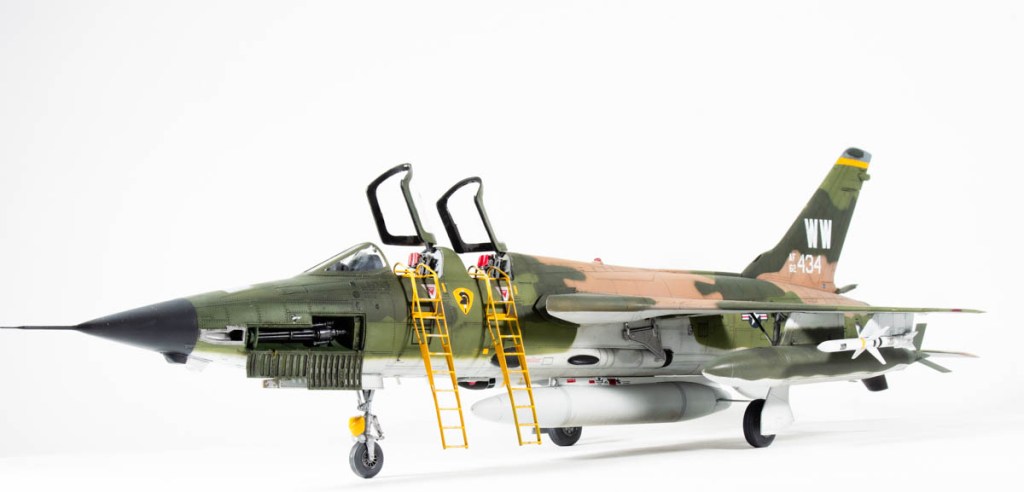
Wheels: Reskit External details: Eduard Exterior set. Quickboost vents Navigation Lights: Quickboost Decals: Caracal Boarding Ladders: LF Models


Consequently the HB two seat Thud rejoined my ever growing stash, and this year was picked out by a mate for my 2021 build schedule. I should add here, for a kit to only spend 3 years in my stash between being purchased and then built is well above the average!
As with all my builds, I started out watching related youtube videos and pulling all the reference material I had in my library. Republic’s Thunderchief had a very tumultuous start, during which the project was almost cancelled. Republic refined the original design markedly and the Thud went on to deliver sterling service during the Vietnam War before being withdrawn due to crippling losses. This was due to the jet performing a role it was never designed for. All this research helps with motivation for the build.
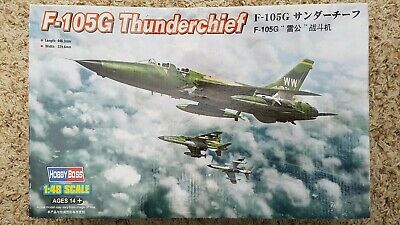
HobbyBoss’ Thud is one of their earlier releases, I believe it’s scaled down from their 32 scale kit, hence the breakdown is far more complicated than it probably needs to be with an engine, open gun bay and even parts for the nose mounted radar. That said, I do like the display options these details offer the builder.
Ive made a conscious effort lately to plan how I want my finished builds to look. This helps me with purchasing aftermarket parts that may be needed, and on the flip side, deciding what assembly steps and parts can be skipped due to closed panels etc. I’m finding planning like this leads to saved time on the build.
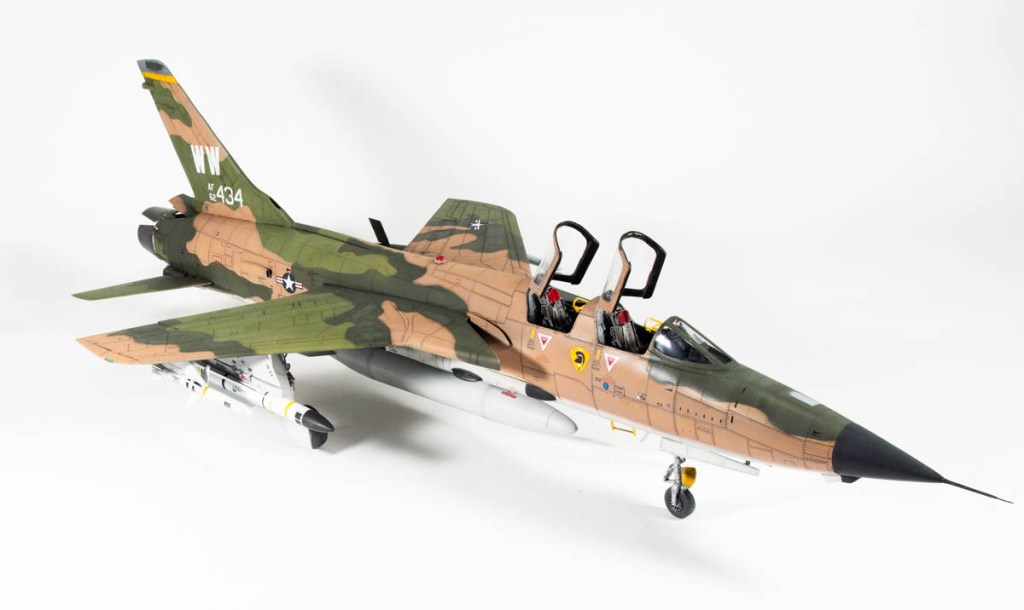
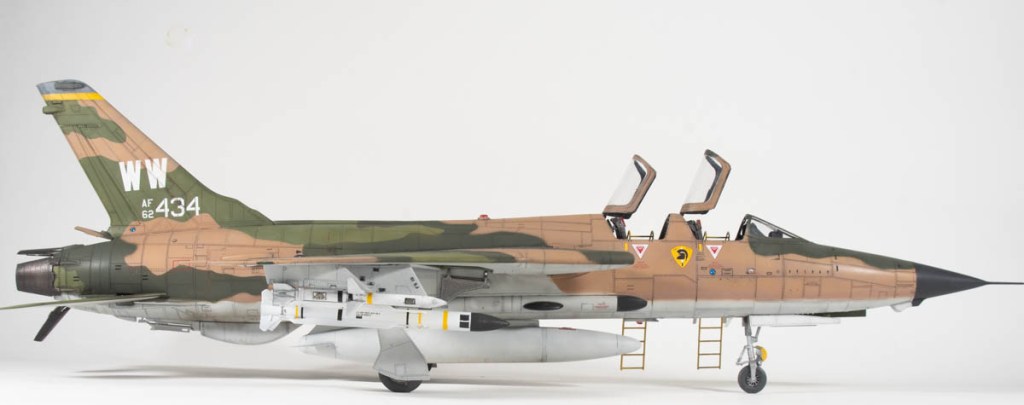
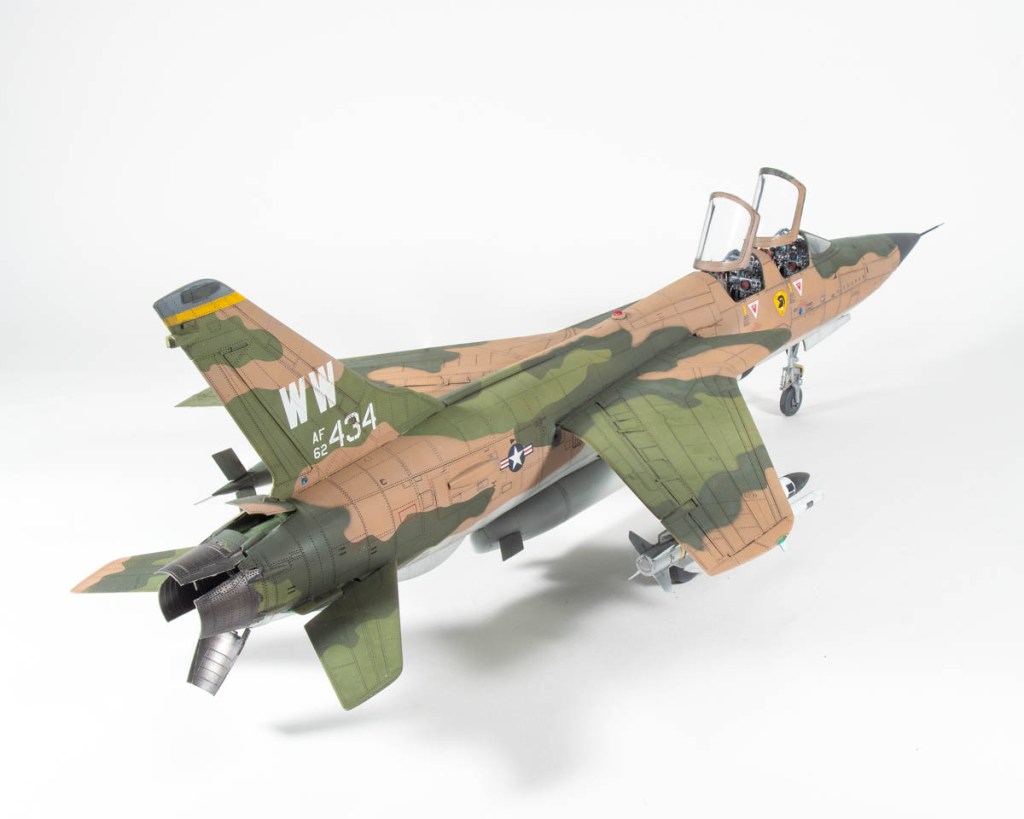
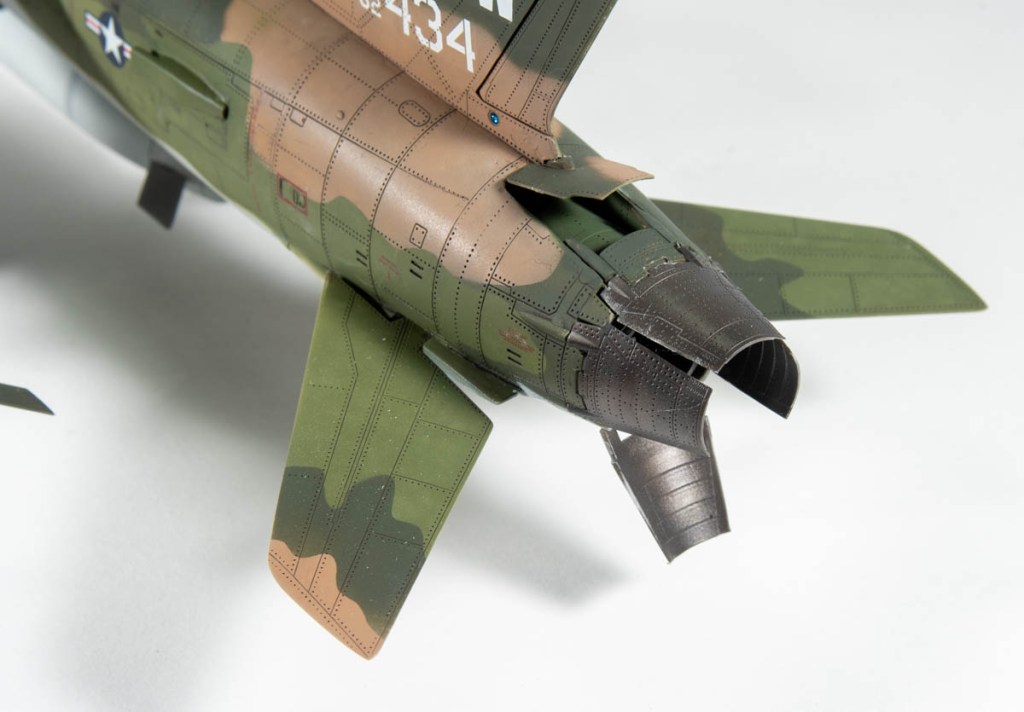
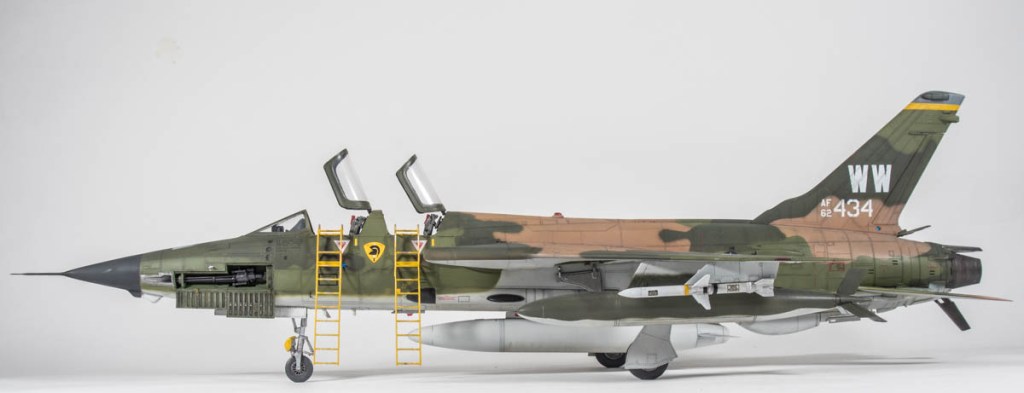
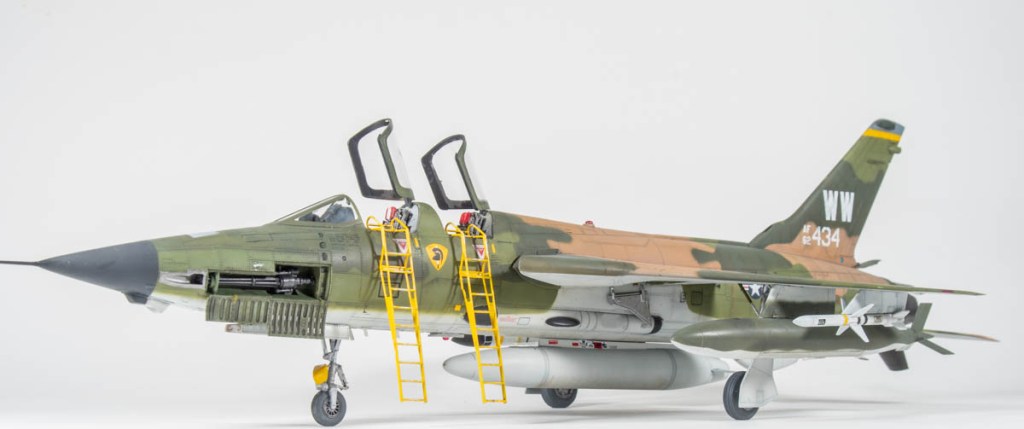
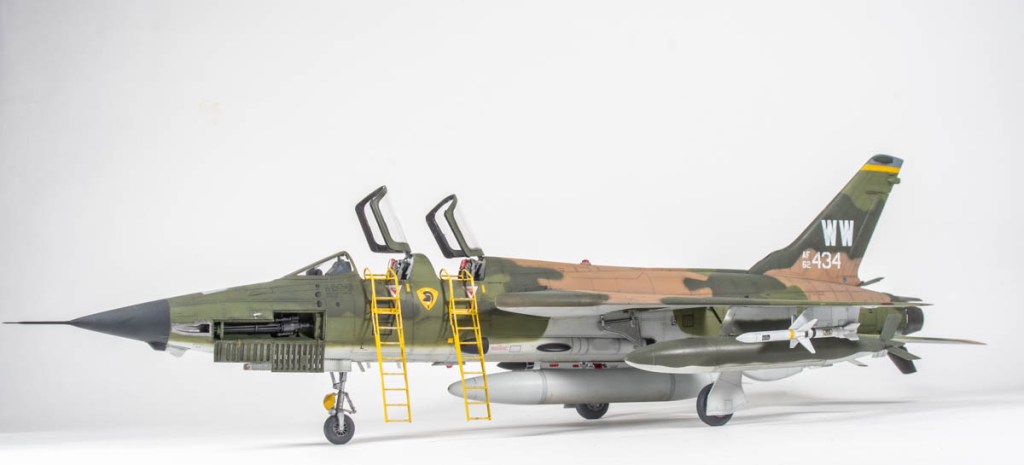
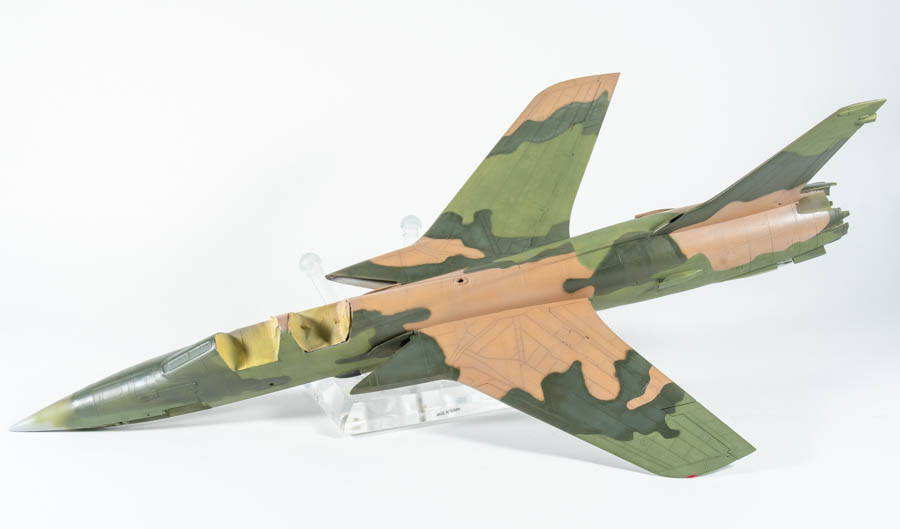
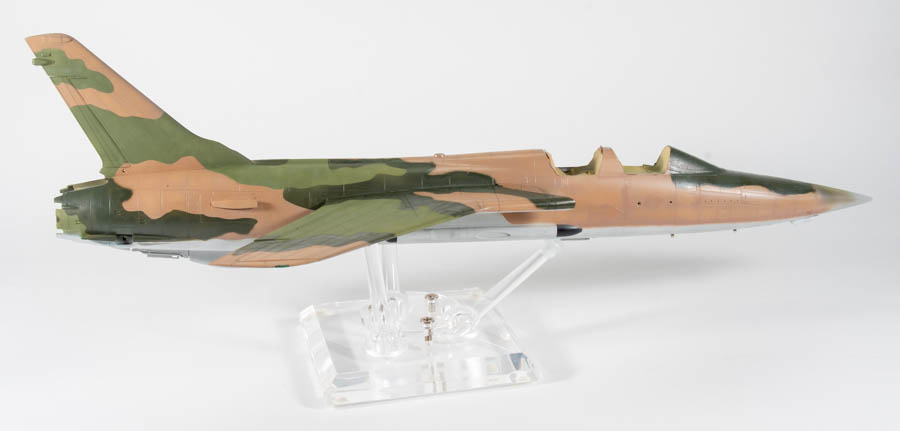
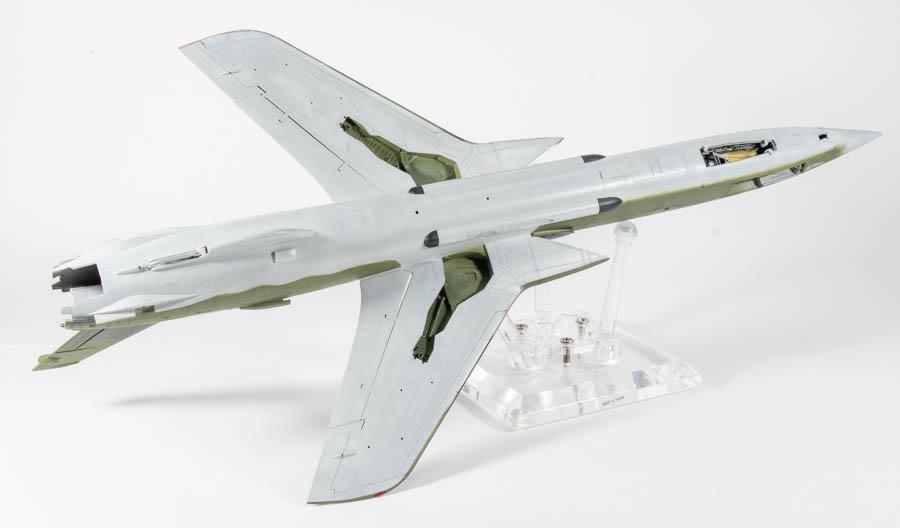
With this jet, the canopies and gun bay would be opened to show those details of the jet. The drag chute door behind the fin and the lower speed brake would also be shown open as seen in many period photos.
It would also be tooled up with a typical Wild Weasel asymmetrical load out that would have been carried during the Vietnam war. Naturally, it would need to wear the WW tail codes for Wild Weasel.
I was surprised to find I had amassed quite a bit pf AM for the Thud!
Construction Notes
I started by making up complete fuselage halves by assembling each fuselage rear to the front half. Doing it this way ensures a neat gap free join. Plastic strip was glued to the rebate where the engine bulkhead would normally be glued to provide more glueing area.


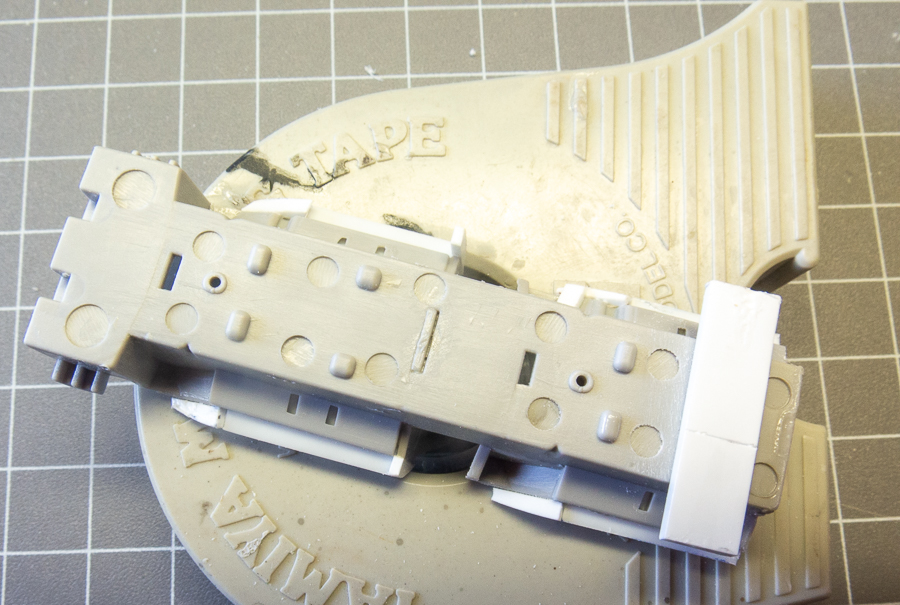
HobbyBoss really mucked up here. The kit cockpit side consoles are way too narrow and do not reach the fuselage walls. You will need to add plastic sheet to widen them. What on earth were you thinking HB?
Construction Continues
For such a complicated looking kit, it went together surprisingly quickly. The separate spoilers were individually added to the top wing before the halves were glued together. Doing it this way ensures you get the best possible flush fit as it allows access to both sides of the wing, which you wouldn’t be able to do if you added the spoilers to the assembled wing halves. I had the Quickboost navigation lights to hand so also added these. Strange decision by Quickboost to mould the complete wing tip in red and green plastic when the actual light is quite small. I can only assume they did it this way so the light is correctly faired in. Be careful to avoid a step though. I also added the completed wings to each fuselage half to better ensure a gap free join. Hobby boss’ kit has the wing strengthening plates moulded on. I could not glean a date though when these were added to the real jet, just that the constant tempo of operations in SVN had lead to fatigue issues, hence the reason they were added. Anyway, I was not going to risk destroying detail by sanding them off. The Gs were late airframes anyway so hopefully they had them fitted.
Eduard PE fascias were added to the gun bay and the plastic vulcan barrels replaced by the incredible brass turned Master Barrels ones, You will go crosseyed trying to assemble them. The Eduard gun bay door with its open gas vents is a massive improvement on the kit part. Should you be building your Thud with the gun bay open, I’d suggest the Eduard set is a must.
Painting and Decorating
Aeromasks are a manufacturer unknown to me. I stumbled across them browsing facebook. They offer a very comprehensive range of camouflage mask sets in all scales. Seeing they offered a set for the Thud, I promptly ordered one thinking it would really ease painting the S.E.A scheme.
The sets arrived pretty quickly from America and are indeed fairly comprehensive, even providing masks to paint the demarcation lines on the fuel tanks. Clear instructions leave you in no doubt how to position the masks and in what order to paint the scheme. You are well advised to follow these as the painting order is designed to ease the masking process, not necessarily the painting. Therefore you start with the medium green not the tan as you would imagine.
Being the masks are not designed to fit specific kits, you may find some trimming necessary in order to fit the kit you are using.
The masks were placed on little blobs of white tac so as to leave a soft edge. This was only marginally successful so I ended up tracing around most colours with the airbrush freehand to soften edges.
Overall, I was happy with the masks and the intricate pattern using them provided, which seemed to match photos. A lot of the jets had their camo field applied as they entered the theatre still in their silver schemes, so there would have been some minor differences from airframe to airframe.
The bloke who runs Aeromask used to paint real Thunderchiefs at Hill AFB, so has access to all the official paint schemes.
My intention was to portray a battered and faded jet, but again looking at photos revealed not a lot of faded paint on the Wild Weasles, so the faded look was held back apart from the upper surfaces.
The Caracal decals performed flawlessly as always. Prior to decalling, an oil wash was applied straight over the lacquer paint. This was then sealed with a gloss coat ready for decalling.
|
|
|
Final assembly reveals the achilles heal of the HB kit. That being the very spindly weak undercarriage legs, upon which the completed model wobbles alarmingly. Against my better judgement white metal legs were purchased, and ultimately discarded, because they were….well….crap plus the main reason the kit legs are spindly is the insubstantial socket HB have moulded for them to sit into. The metal legs weren’t going to fix this, nor could I glue in more substantial sockets. The Thud continues to wobble on its legs.

Weapons were sourced from a hasegawa weapons set. There was a difference in size between the kit missiles and the hasegawa ones . My faith went into the Japanese manufacturers product.
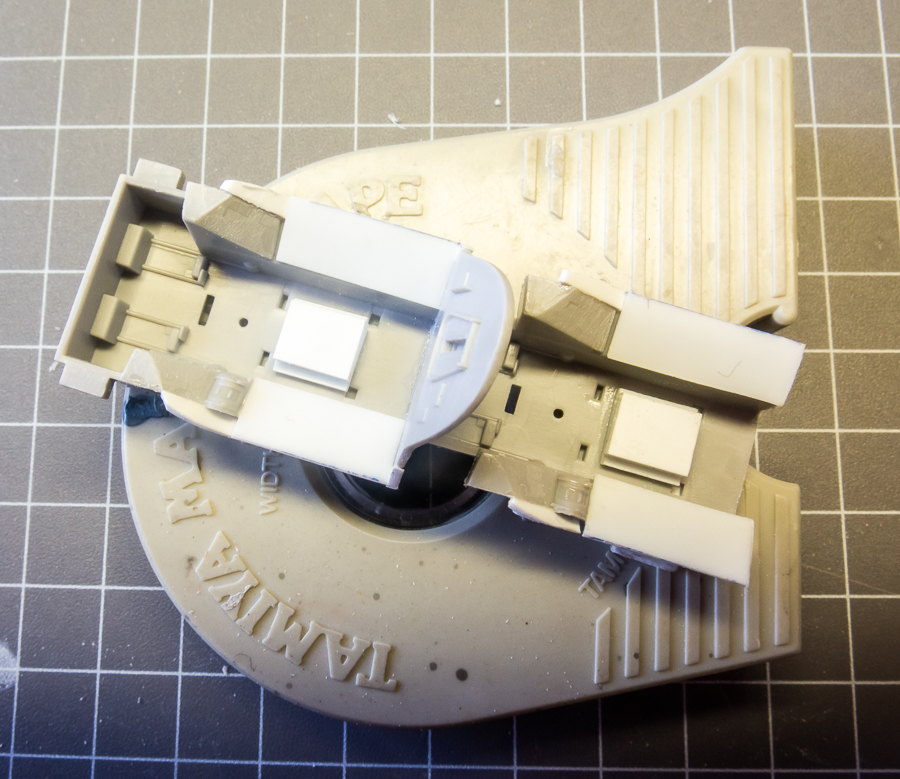
A final lack of detail that was not discovered until I went to fit the canopy was that HB had made absolutely no allowances for the modeller to pose them open. Thus actuators had to be scratch built. This was achieved with brass wire and rod
The brass pitot tube was push fit into the hole in the nose cone and this mighty Vietnam warrior was finished.
Final Thoughts
The Thunderchief makes for an imposing model in the cabinet. Its a decent size in 48 scale, and stands out amongst all those grey jets in its multi hued warpaint. The lovely LF Models ladders provide a nice splash of colour and draw your eye to the cockpits
I think the Thud is one of my best efforts yet. the trouble free construction being a bonus I had not expected when first perusing the instructions and parts. An enjoyable build, although one will do me.
Republic F-105G-1-RE Thunderchief U.S.A.F 561st TFS Korat Thailand 1972