- Purchased; 2024
- Completed; 2024
- Enhancements
- Wheels. Brassin
- Gun barrels and pitot tube Master Detail
- Landing Lights. AK lenses
- Decals; Xtradecals 23 SQN RAF 1940-1990
This model filled the need for a bit of a short sharp build interlude from my rather large ongoing 1/48 Hercules project.
This particular came into my collection earlier this year after being sourced for me by a friend, who had in turn sourced it from another modeller. It came half started but given I paid only 10 AUD for it, I was happy to take it on. the work done though wasn’t great. The wings had been glued together without first placing the landing light lenses in their holes, the nacelles had also been glued to the wings leaving a few steps, and one set of undercarriage struts had been assembled including the wheel with an untreated join. The original builder had also glued on the flame dampeners without first adding the exhausts.
Whilst these were all annoying, they were not unfixable, save the exhaust dampeners, they would just have to be left empty and see through .
Construction
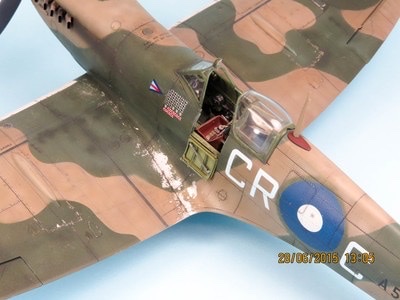
Although one of their earlier kits from the 90s, Tamiya’s Mosquito still exhibits their legendary fit and ease of assembly. The cockpit is very simplified, even by Tamiya standards, so didn’t take long to build and paint at all. As this was going to be a quick build, I was not too worried about accuracy, so did not delve into the correct radio fit, in itself a rabbit hole, for the particular machine I was doing.
With the cockpit completed, and the wings already done, assembly of the kit was achieved in no time! I deviated from the instructions in joining each nose half to its respective fuselage half before gluing the now whole fuselage halves together. Should you build the kit as per instructions though, rest assured the completed nose mates very neatly with the completed aft fuselage.
The centreline nacelles seams proved particularly stubborn to eradicate , needing several applications of CA glue and sanding. The seam on the wheel well rear bulkhead was hidden by skinning with a thin piece of plastic card. The steps the previous builder had introduced when glueing the nacelles to the wings were somewhat lessened by rehydrating the glue join with tamiya extra thin glue and then reglueing the rear of the nacelles. They still required some filling to make a gap and step free join at the rear of the wing .
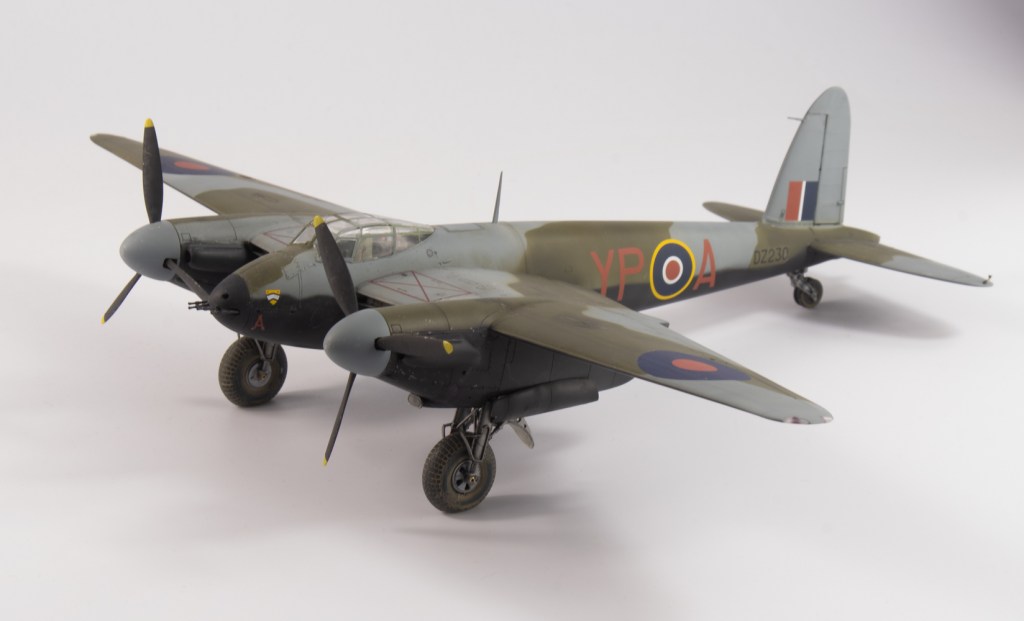
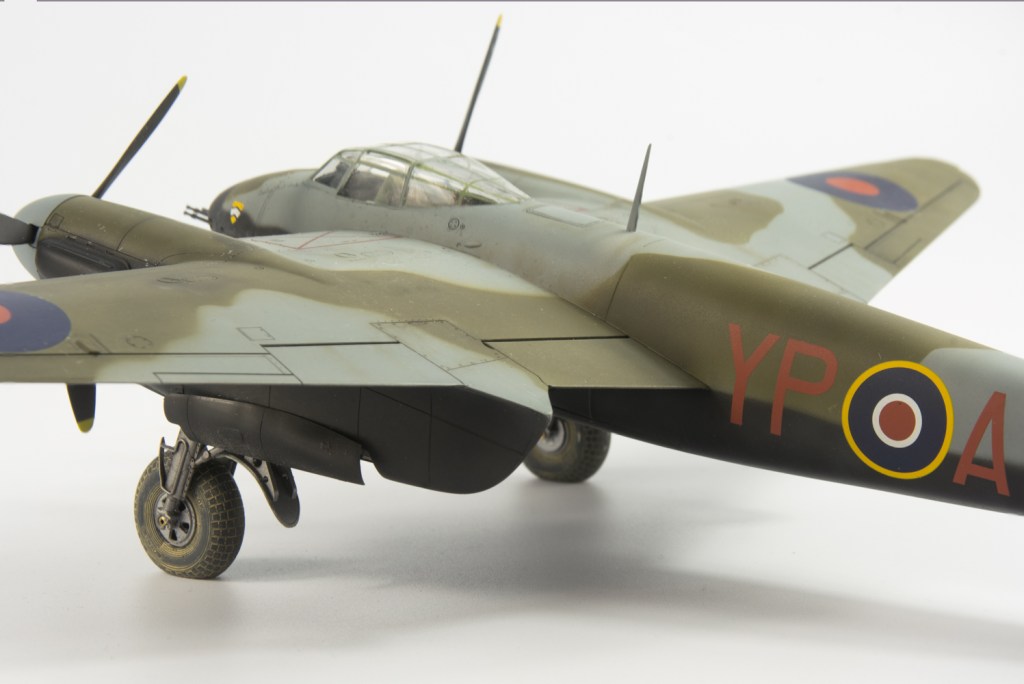
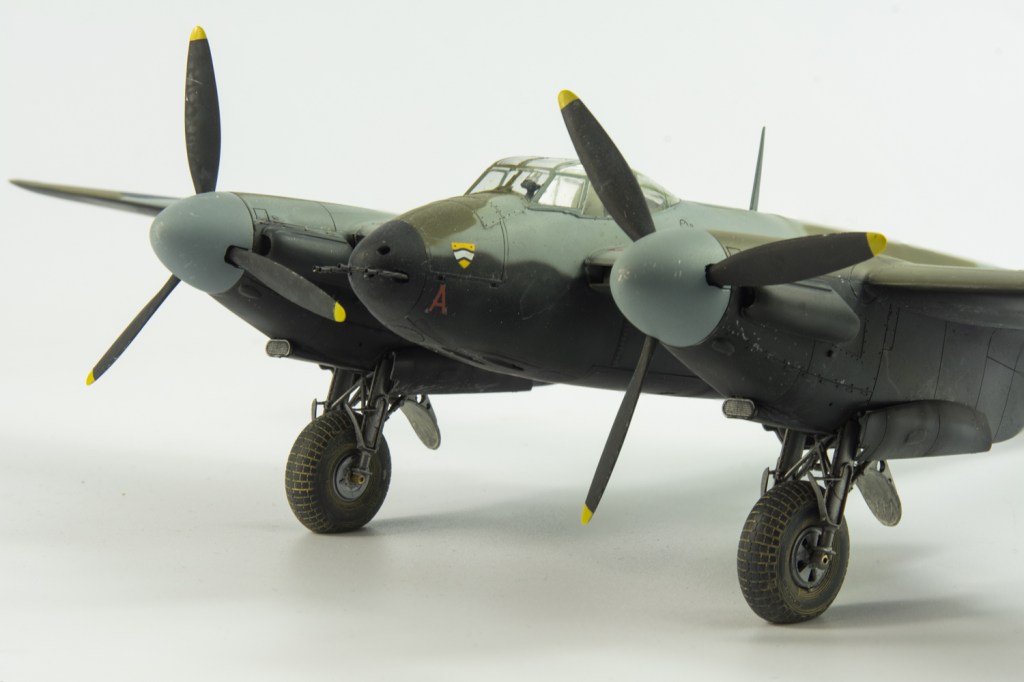
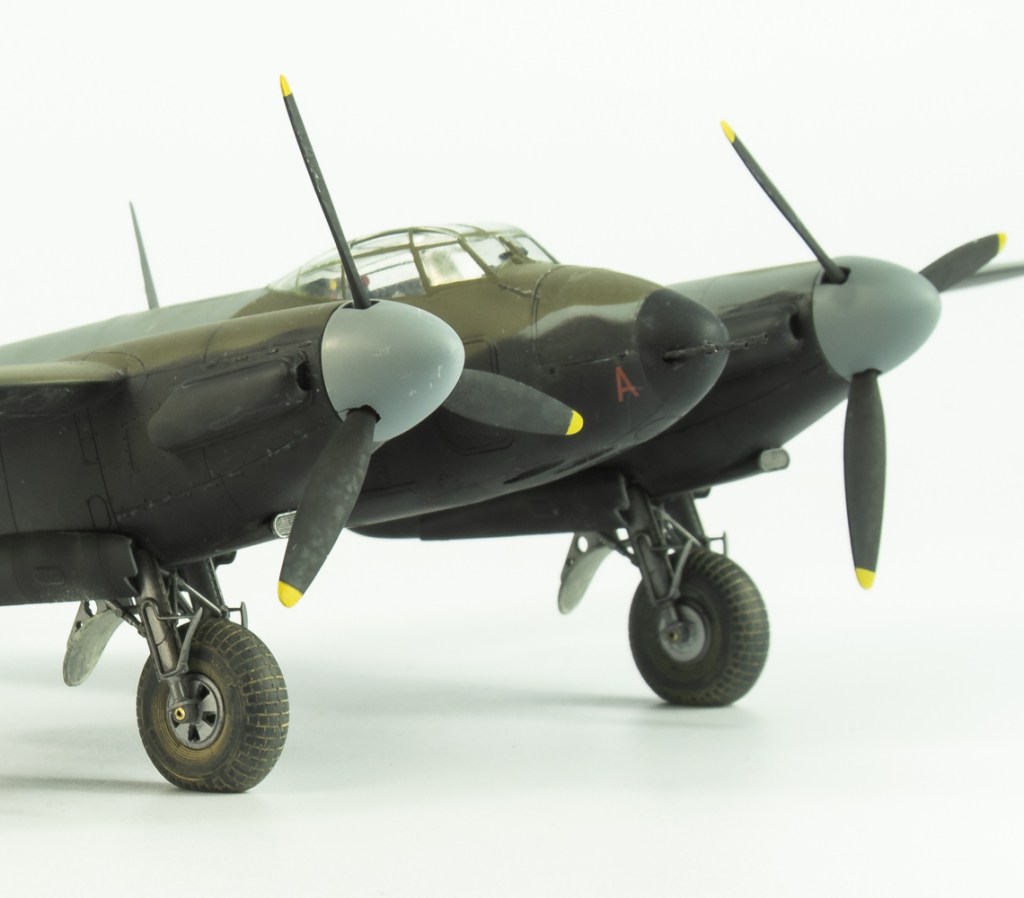
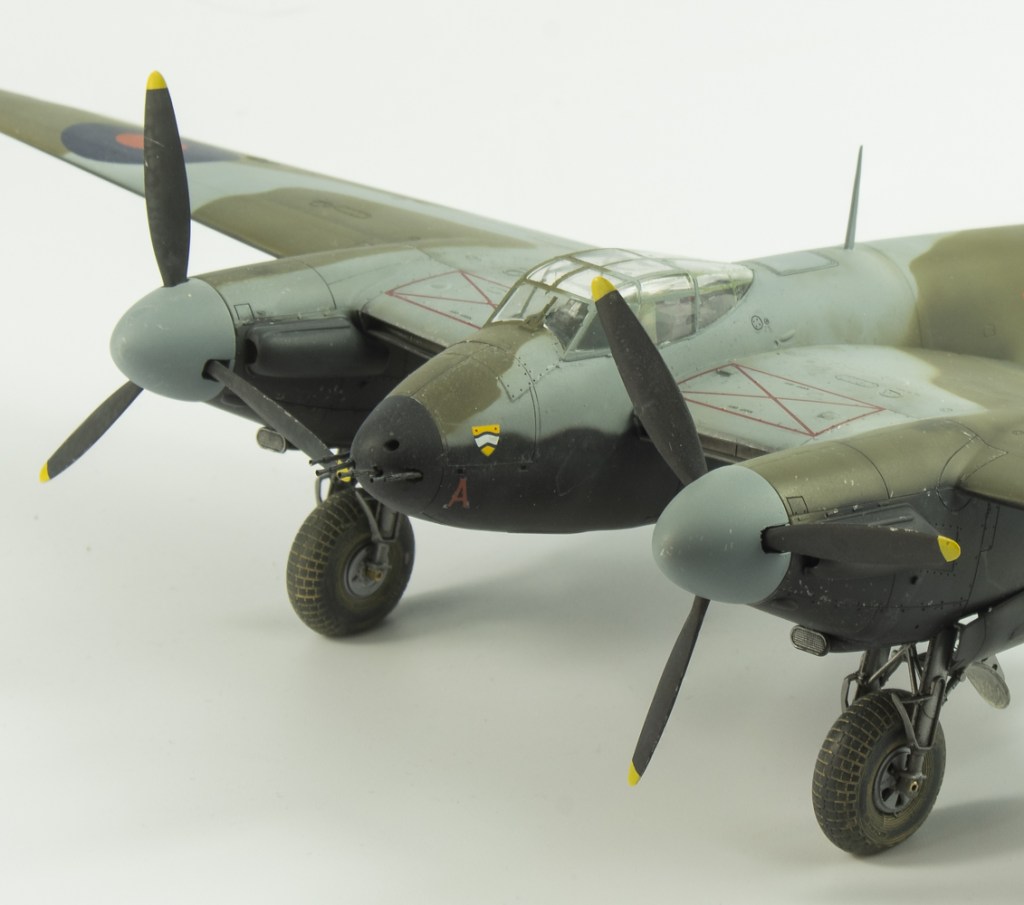
The top of the fin was reduced by 2mm by the simple expedient of tracing the outline of the one fin half onto the inside of the other fin half 2mm lower measuring from the top of the fin. The fin above this line then being cut and sanded down to this line. When the fuselage halves are joined, the other fin half is sanded down to match. The rudder hinge line will then have to be rescribed 2mm lower than the existing one. To be honest, Im really not sure it makes a very visible difference to the look of the model, this modification was called out by a thread on Britmodeller. If I build any more tamiya Mossies, it won’t be a correction that will be repeated by me. The clear under fuselage hatch will also need to be filled and its outline eradicated as it was not present on the fighter bomber version. Tamiya including it as the fuselage parts are also used in the bomber version which does have the hatch. The assembled undercarriage leg had the wheel cut away, and both legs had their axles replaced with brass tube. The holes in the lovely Brassin wheels being drilled to match. The mudguards also had the lightening holes added.
Painting and Decorating
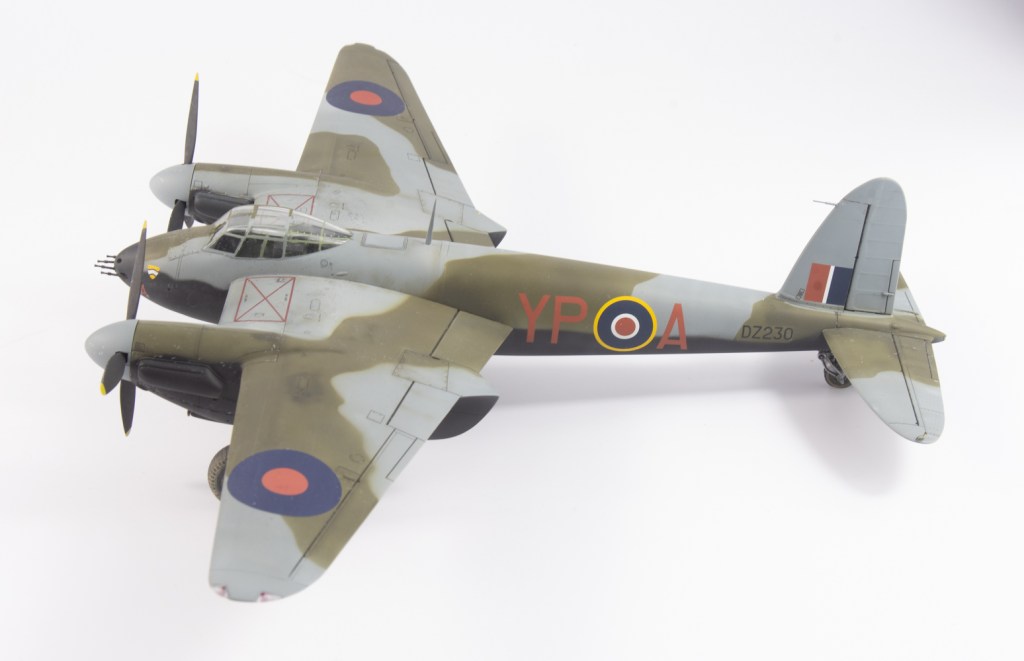
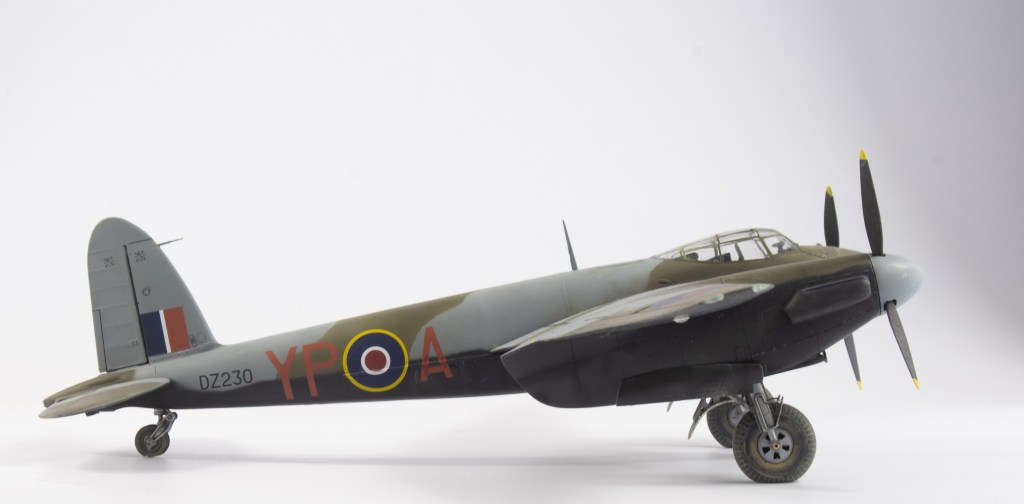
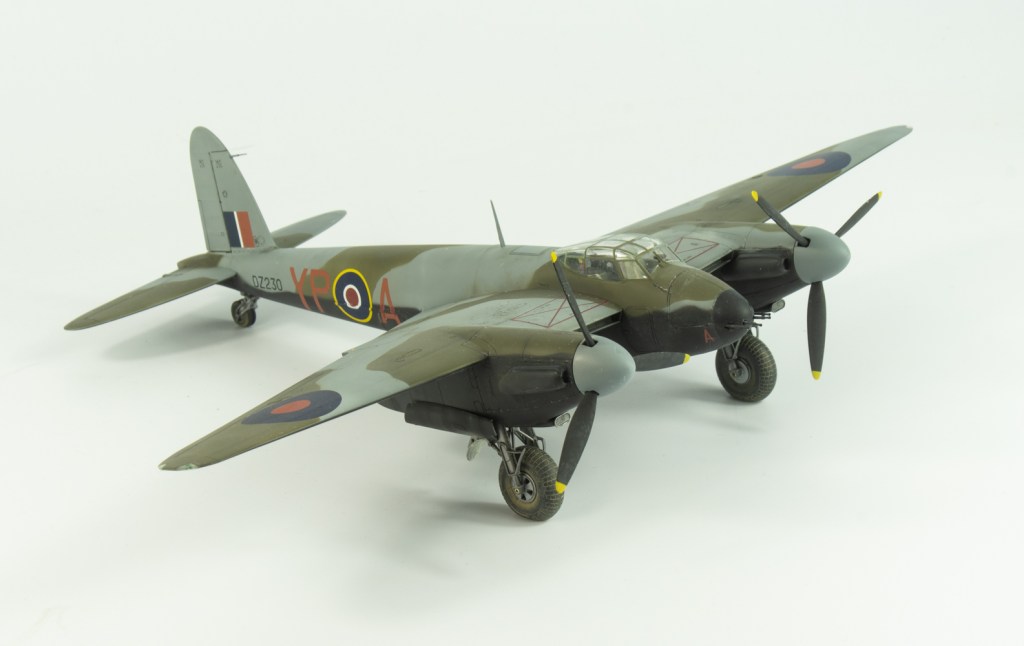
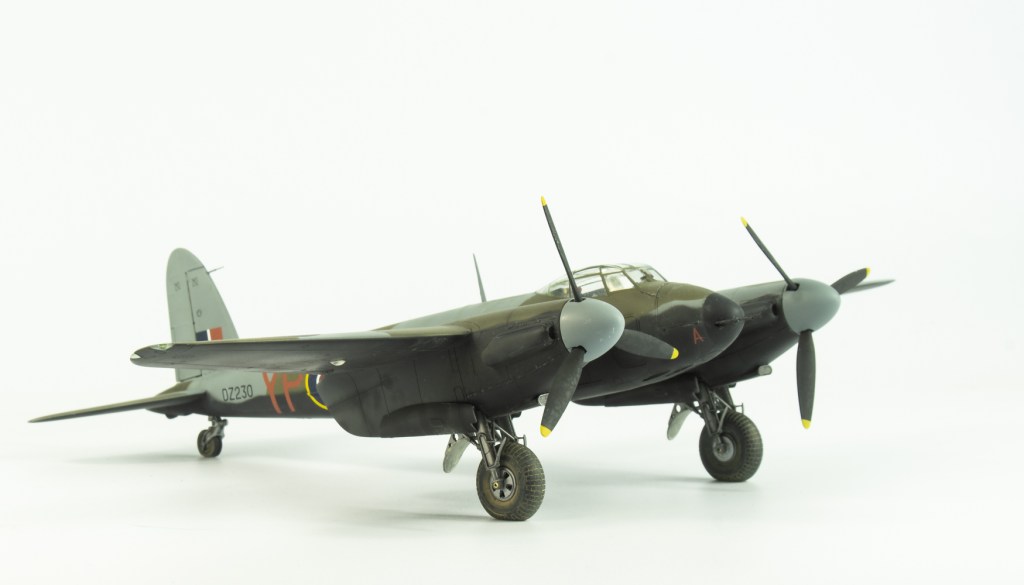
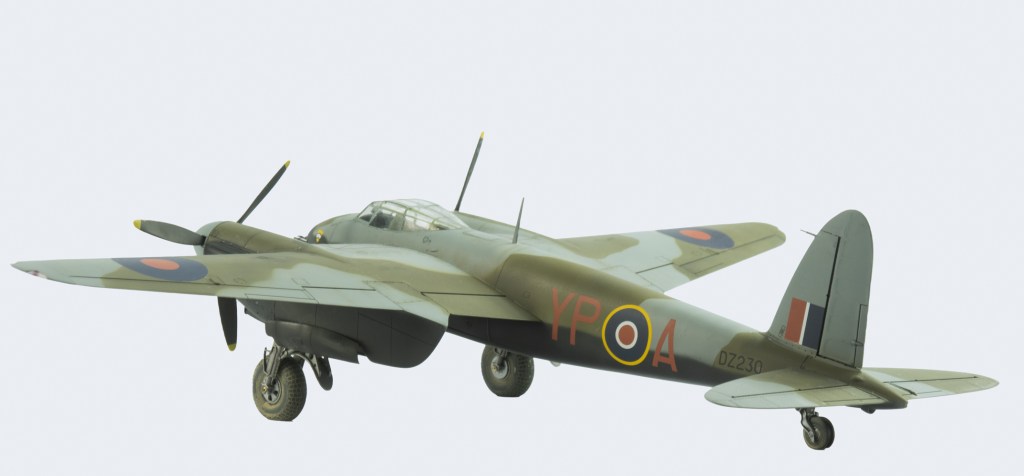
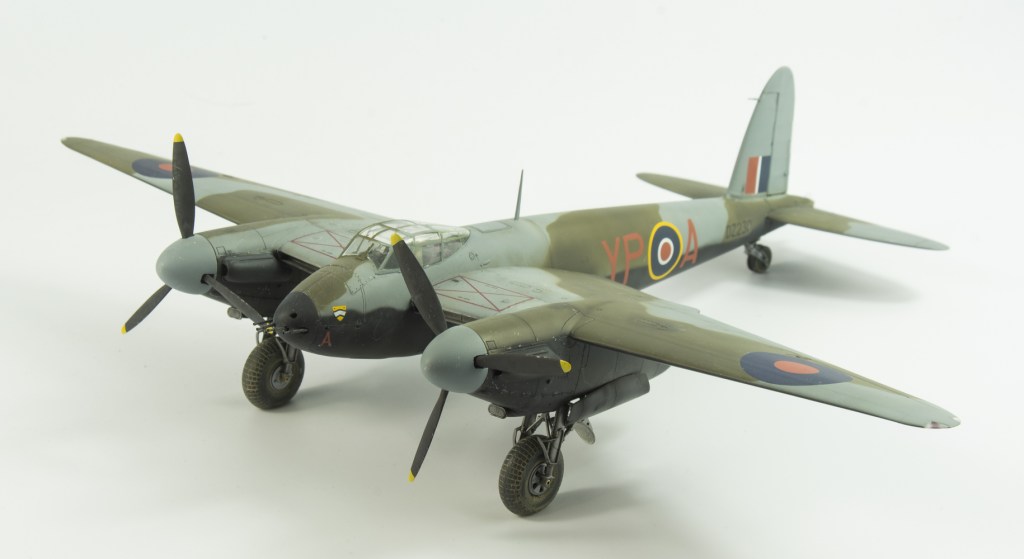
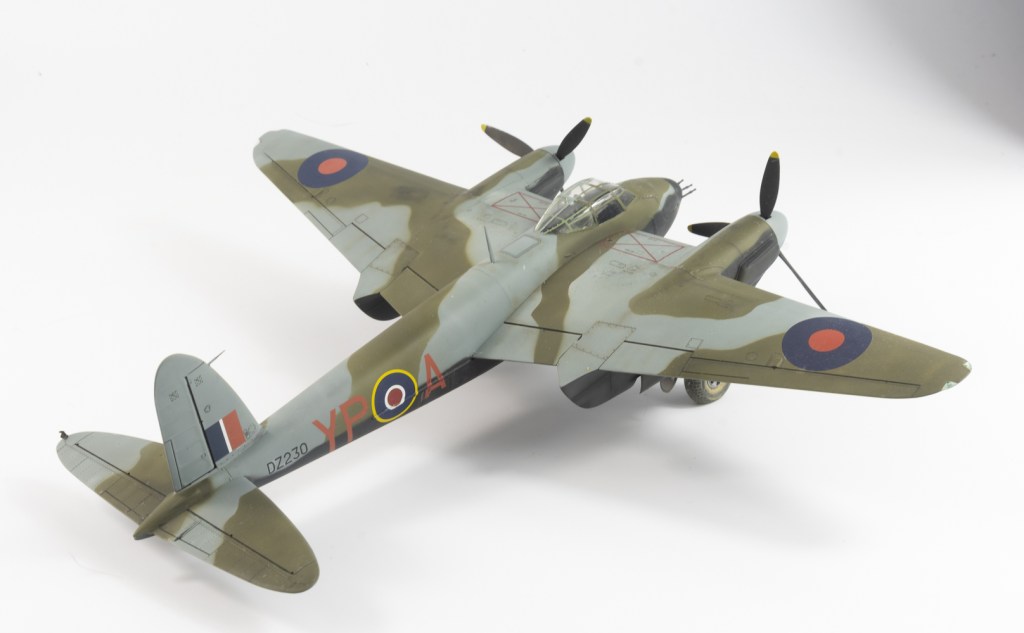
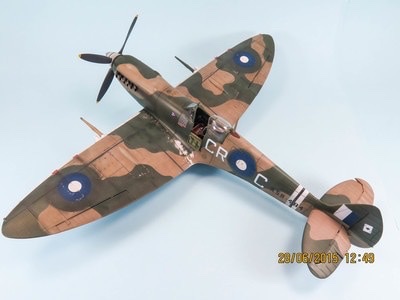
My chosen scheme was a 23 SQN Night intruder based in Malta. This decision was arrived at purely by spotting the scheme whilst going through one of my decal folders looking for something else. How many of us have done this! there is a good photo of the actual aircraft on there Imperial war Museum site that confirms Xtradecal have got the scheme correct, although the machine did not have the radar aerials as depicted on the sheet. So starting off on the top surfaces, Gunze Medium Sea Grey was airbrushed on. The helpful camouflage plan tamiya include was photocopied before the grey bits were cut out and taped to the model so the green could then be airbrushed on, in this instance Tamiya RAF Green type 2. Blu tac sausages were used to mark out the upper camouflage delineation line and the black undersurfaces sprayed with SMS German Grey and SMS CARC Black highlights. The black demarcation on this aircraft was unusually high and also formed a wavy line on the nose and nacelle sides , all of which were reproduced on the model, although I could have possibly gone higher on the nose.
The model was then gloss coated before a wash was applied to all engraved detail using tamiya panel line colours, in this case dark grey and dark brown over the MSG and DG respectively and black used along the control surface and openable hatch lines.
The upper wing roundels gave me a few problems with them refusing to settle down wrinkle free, three different roundels having to be used before I was happy. The roundel that lies over the stiffening rib also refused to mould itself to the rib, instead tearing regardless whether I left the decal alone or tried to mould it over the rib with the aid of a cotton bud. Eventually we got there after another 3 roundels. No wonder people paint on markings! The wing do not walk squares had their inside carrier film cut away to reduce the chances of silvering. I didn’t do this nearly neatly enough. You can see the ragged edges on the model, although there was no silvering.
Photos did not show the overall paint finish looking too worn, although there was a fair bit of grime around the nose and spinners. I probably didn’t add enough, jut relying on some airbrushed brown /black stains around fuel fillers and along wing roots. Piant chips were applied with a silver pencil.
This just left the final assembly and again, a bit of earlier sloppy modelling came back to haunt me when adding the machine gun barrels. I had earlier during assembly, cut the barrels away from the breeches, knowing I would be replacing them with the master brass barrels. What I didn’t do though was be precise in drilling the holes to accept the replacement barrels, consequently, I had great difficulty in. adding and aligning the barrels. The thing to do would have been to leave the nose cap off until final assembly as it was a good fit, and this would have ensured straight barrels that would have also been far easier to add to the breeches. Little lapses in planning like this and not thinking through all steps constantly let my builds down.
I really need to address it – despite saying “I will on the next model” – to lift my models.
The underwing landing lights were represented by using AK 4mm light lenses glued with white glue to a supporting plinth of blu tac.
The wheels were weathered with a wash of Mr Weathering Colors “sandy wash” with the excess being wiped off with a cloth. Finally the masking could be peeled off the canopy, and I was happy to see on this occasion nothing had leaked or marked it, despite Eduards ill fitting mask set.
Conclusion
This was a quick build done on an impulse to build a machine that I liked the look of. The opportunity was also taken to get this half built model out of the stash and provide a bit of a respite from a bigger build. Consequently, a lot of short cuts were taken with the finish. This aside, I am still quite happy with the completed model. There are two more tamiya 48 scale in the stash, a bomber and another fighter. I enjoyed the build enough to still want to build them at some stage in the future.
De Havilland Mosquito NFII. Royal Air Force. Luqa Malta 1942