- Purchased 2019
- Built 2019
- Enhancements: Seatbelts: HGW
- Paint MR Paint
- Decals Kit scheme
The inspiration for this model came from seeing a 48 scale kit completed in these markings on the Britmodeller.com forum. Instantly, I wanted to build it, however, in 32 scale, rather than 48 scale, as I feel these single engine fighters have more presence in this scale.
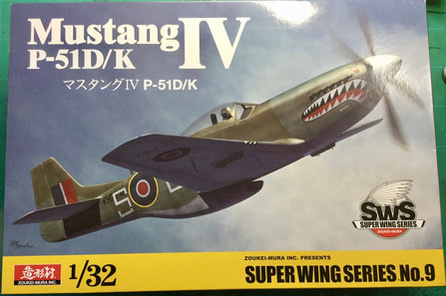
I knew Zoukei Mura had produced a boxing of their Mustang in these markings, so the kit was duly purchased, and promptly started, as BM were running a “shark mouth” theme Group build. Talk about the planets aligning
We all start our impulse purchases right after buying them, Right! Actually this would be one of the very few kits I have started straight after buying it, strangely all the previous one have been Airfix kits being the Walrus and Defiant
The build log can be viewed here although I did not finish the kit by the deadline.
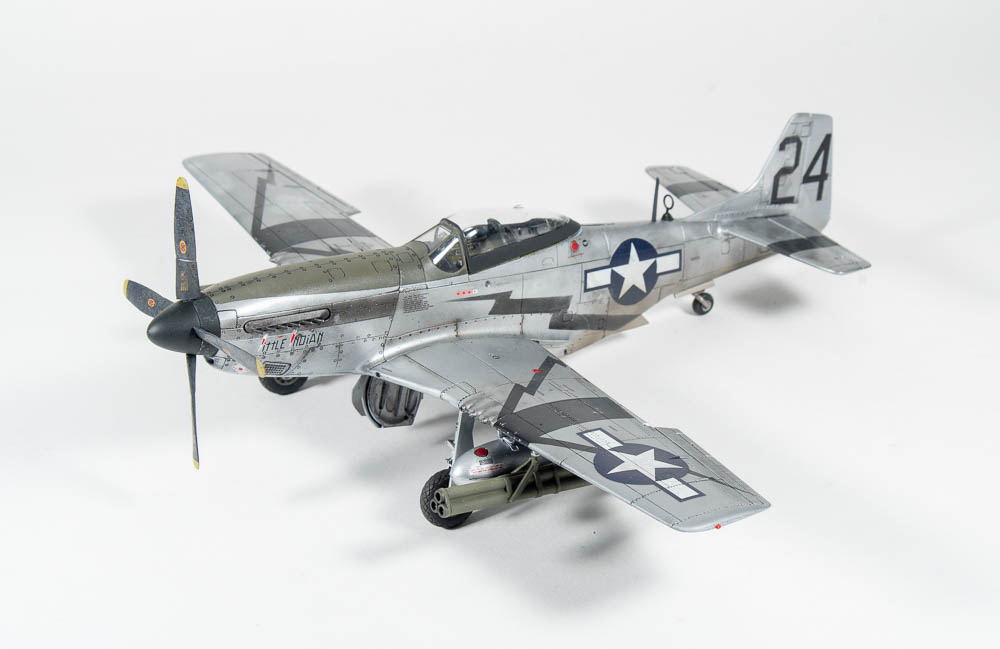
This was my first ZM kit, and I have to say, I thoroughly enjoyed it. They do not build up like your usual kit. The design philosophy being the makers want you to build the model similar to how the real aircraft was assembled. A very Japanese thing.
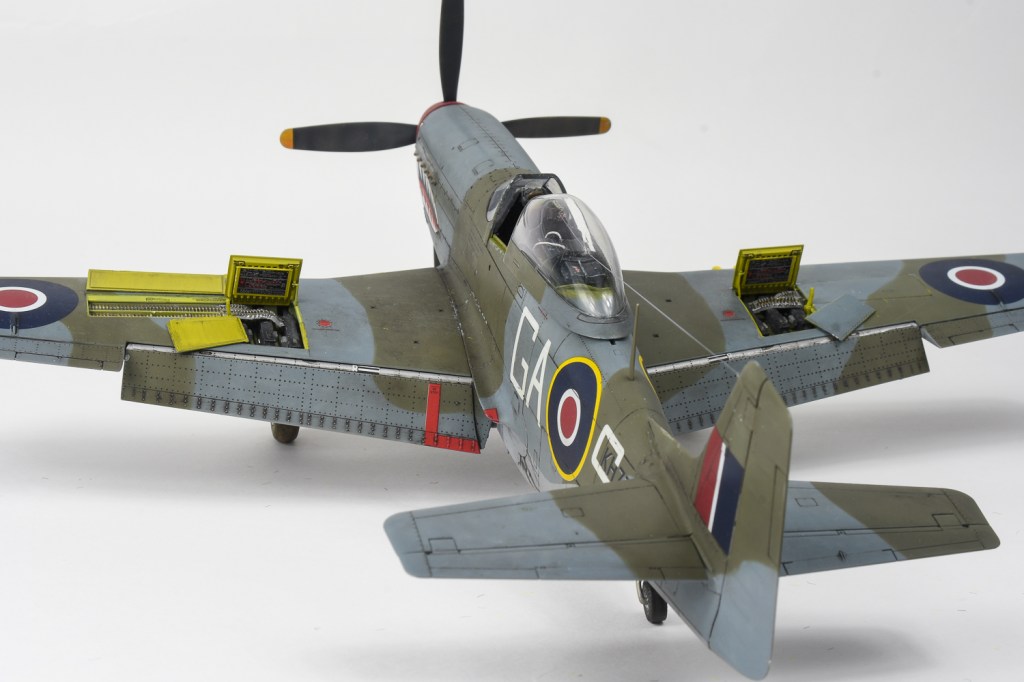
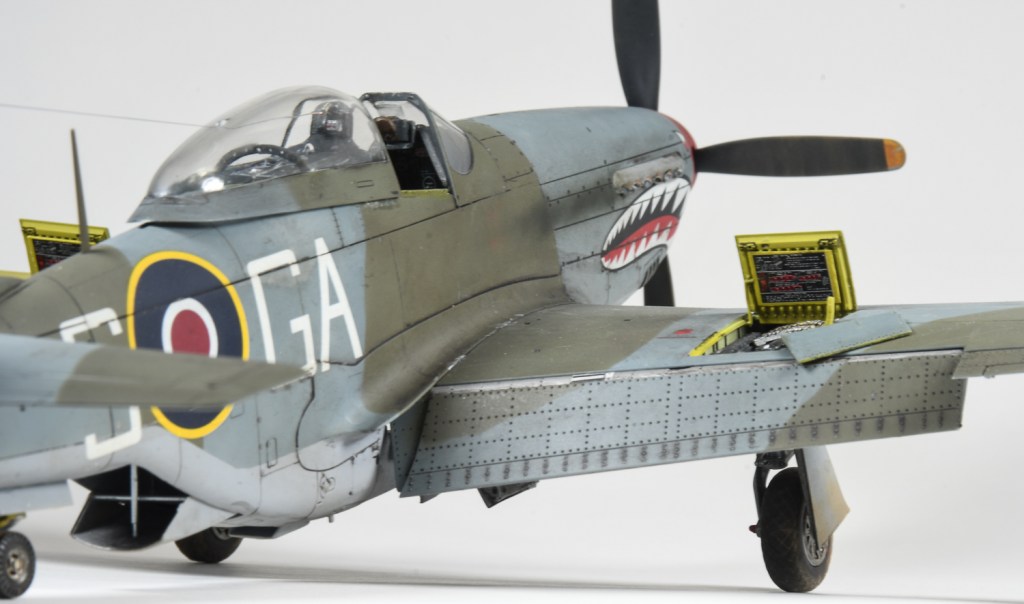
Many people dont seem to like the complexity of these kits, but like the trumpeter kits, a lot of the innards that will never be seen can be left out helping speed and uncomplicate the build. Despite the complex breakdown of the kit, it went together remarkably well, most joins falling on panel lines and being engineered to look like panel lines. Interestingly the new Eduard Mustang looks like it may have borrowed some of its breakdown from this ZM kit, the wheelwell for one being engineered the same.
I puttied the wings, a task made easier by ZM only having the panel lines present, saving you having to fill hundreds of rivets like you would have if using the tamiya kit
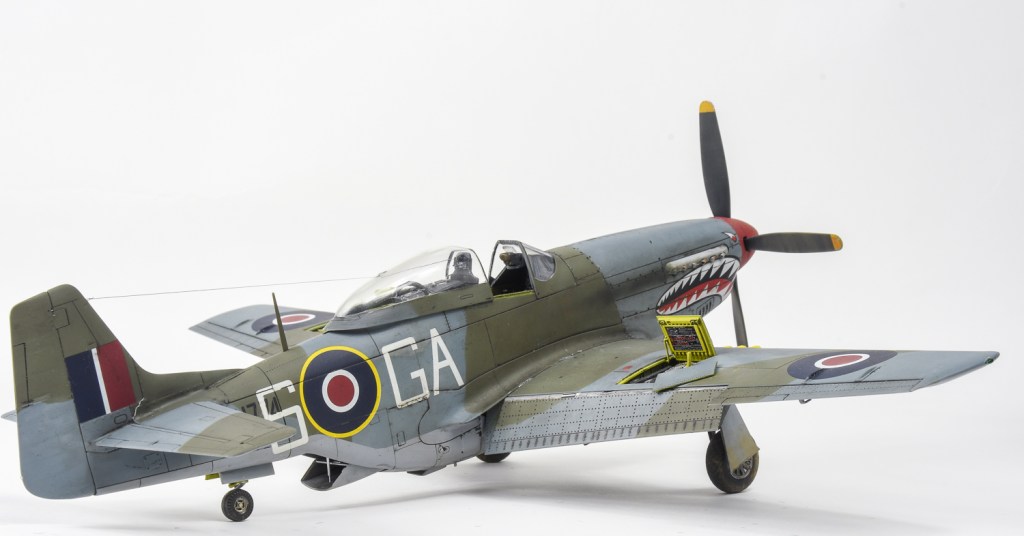
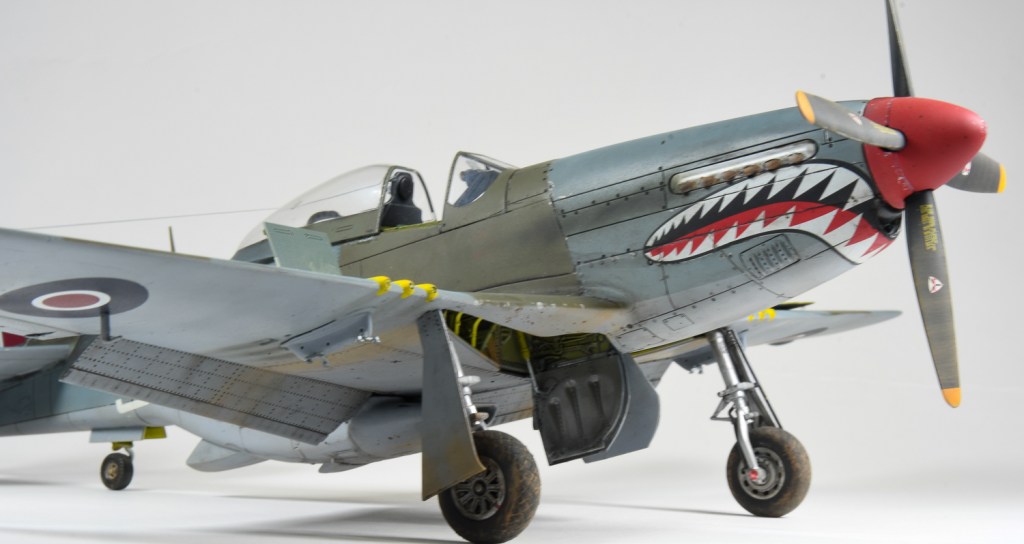
Assembly proceeded quickly as I had made the decision to have the cowlings closed in order to show off the shark mouth. Therefore I only assembled the bare bones of the engine, really just the block in actual fact.
the only fit problems encountered were a bit of a step on one side between the cowling and the fuselage and a gap around the carburettor scoop. Im guessing this was down to me. You really do need to ensure all parts are aligned, otherwise it will have a knock on effect, and I think this is where my step on the cowling crept in. On my next one (Yes, I intend to make another) I think I would save glueing the rear fuselage bulkhead until I added the empennage to further aid correct alignment
Aside from this, I managed to forget to add the landing light. Never think you can build one of these kits without always consulting the instruction sheet at each stage. Speaking of the instructions, I reckon they rival Wingnut Wings sheets for clarity and well thought out construction steps and build tips.
My only disappointment with the kit was, the flaps. Like a lot of other mustang kit, the flaps had the scalloped cutout to enable them to fit flush against the wing when added in the up position. Given the attention to detail ZM have shown in other areas of the kit, I thought they could have given you alternative flaps for the down position like tamiya did with their kit. Did I say only disappointment? Irritatingly, some of the decal designs had a registration problem, the sharkmouth, serials and walkway red L stripe all having a thin white drop shadow. I painted this out with a thin black sharpie on the mouth, but decided to live with the serials on one side after a bit of a failed attempt at correcting the other side. Subject to say, I can’t see the R.A.F calling me anytime soon for a job painting serial numbers on their aircraft! The provided wheels are not weighted, and come in halves necessitating the tread to be reinstalled after eradicating the seam. ZM do offer AM wheels, as do barracuda. ZM also offer quite a few figures and photo etch sets to complement the model, so their website is worth looking at. I will be purchasing their PE gun bay set so as to build the gun bay covers with the locking handles extended. I did purchase some 500lb bombs, so may well arm her up in future as well
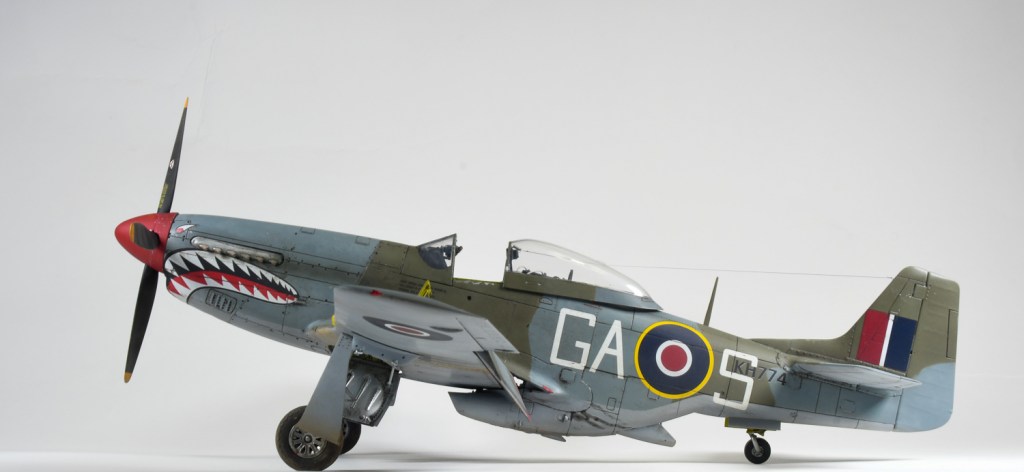
Z.M call out U.S colours for the camouflage, which many RAF mustangs were indeed painted in during manufacture, however, this particular machine was painted at an RAF Maintenance Unit. I surmised that they would have painted her in RAF colours rather than US colours, so went for the standard RAF day fighter colours instead. If you look at the build log, you can see in one of the posts a very helpful modeller posts the service history of this machine which shows it came from the factory in NMF and was camouflaged in Italy
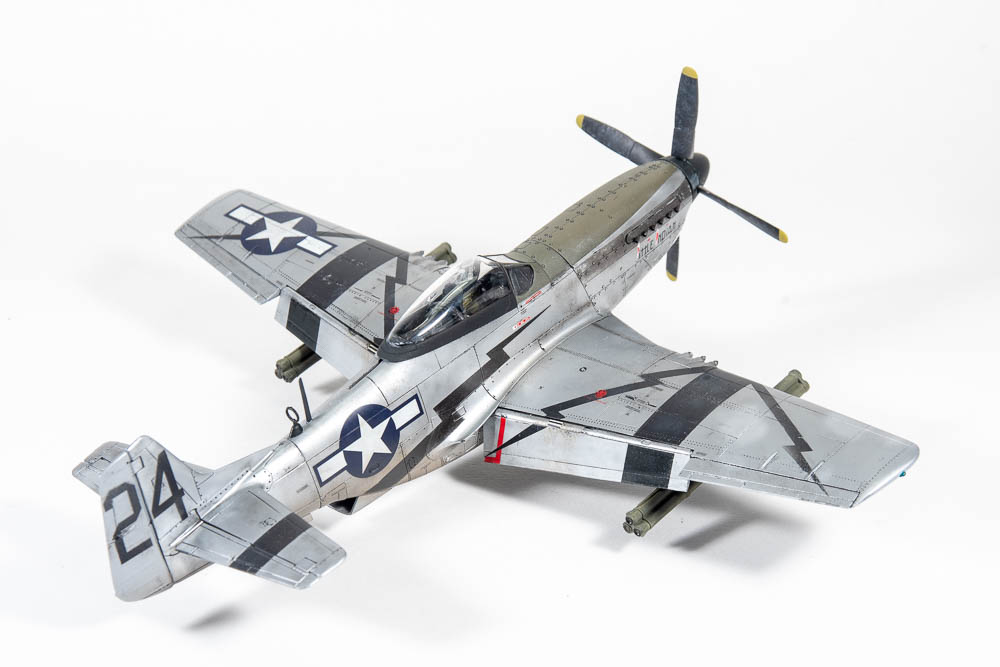
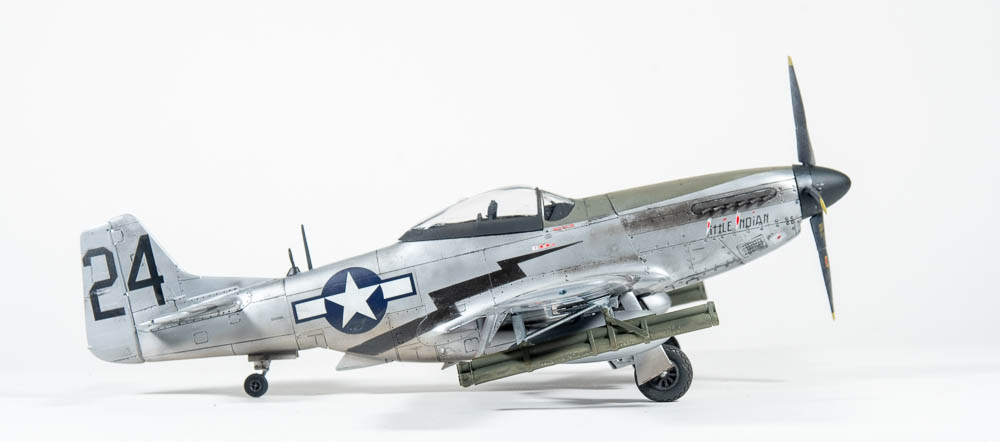
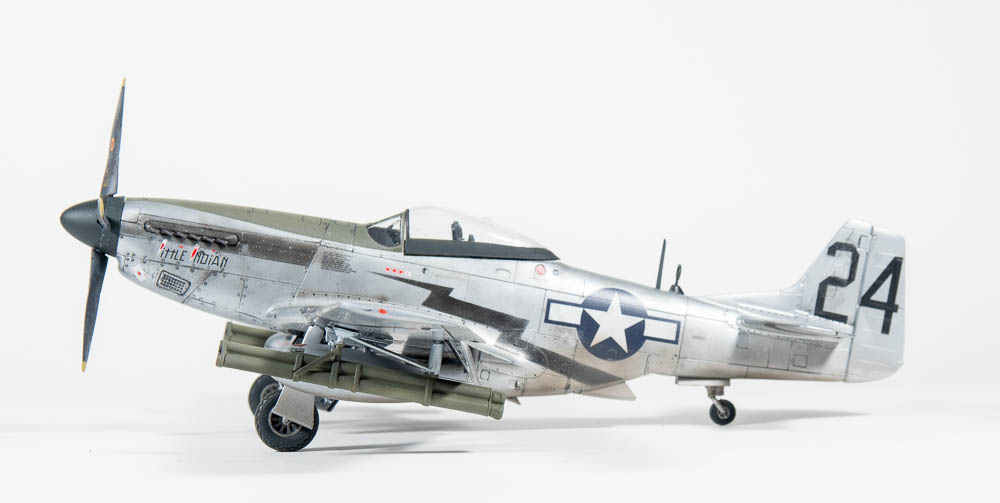
I went for a lightly weathered model, adding some light exhaust staining, oil leaks and grubbiness from foot traffic on the wings using oil paint. Vallejo silver was used for the chipping with mud splatters underneath from pigments. Testors Dullcote was used to finish off before the aerial line was added with EZ line. Talk about a frustrating hour trying to thread it through the canopy. It doesn’t bode well for that WNW Felixstowe in the stash patiently waiting its turn to be built.
Im happy with my ZM mustang. I have another in the stash to build, on which I will use all the parts, and I also have a tamiya mustang to build. It will be interesting to compare the two.
North American Mustang IVA KH774 112 SQN Royal Air Force. Italy. 1945